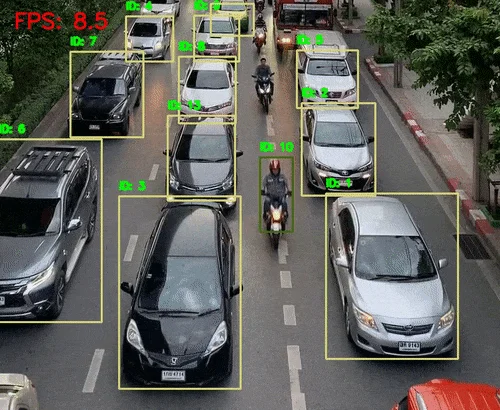
TorchVision 深度解析:从核心功能到实战应用 ------PyTorch 官方计算机视觉库的全面指南
- [1. TorchVision 项目概览](#1. TorchVision 项目概览)
- [2. 实战案例:10 大应用场景详解](#2. 实战案例:10 大应用场景详解)
-
-
- [案例 1:使用预训练 ResNet 进行图像分类](#案例 1:使用预训练 ResNet 进行图像分类)
- [案例 2:加载并可视化 CIFAR10 数据集](#案例 2:加载并可视化 CIFAR10 数据集)
- [案例 3:自定义数据增强(MixUp)](#案例 3:自定义数据增强(MixUp))
- [案例 4:目标检测(Faster R-CNN)](#案例 4:目标检测(Faster R-CNN))
- [案例 5:语义分割(DeepLabV3)](#案例 5:语义分割(DeepLabV3))
- [案例 6:生成对抗网络(DCGAN)](#案例 6:生成对抗网络(DCGAN))
- [案例 7:迁移学习(微调 ResNet)](#案例 7:迁移学习(微调 ResNet))
- [案例 8:模型量化(动态量化)](#案例 8:模型量化(动态量化))
- [案例 9:视频帧处理(抽帧与保存)](#案例 9:视频帧处理(抽帧与保存))
- [案例 10:模型可视化(特征图提取)](#案例 10:模型可视化(特征图提取))
-
- [3. 常见问题与解决方案](#3. 常见问题与解决方案)
- [4. 总结与展望](#4. 总结与展望)
1. TorchVision 项目概览
TorchVision 是 PyTorch 生态中专注于计算机视觉的核心库,提供数据集加载、预训练模型、图像转换工具及评估指标等一站式解决方案。其设计目标是简化视觉任务的开发流程,支持从学术研究到工业落地的全链条需求。
GitHub 地址 :https://github.com/pytorch/vision
官方文档:https://pytorch.org/vision/stable/index.html
核心模块
- 预训练模型:分类(ResNet、EfficientNet)、检测(Faster R-CNN、RetinaNet)、分割(DeepLabV3)。
- 数据集:CIFAR10、ImageNet、COCO、Cityscapes 等标准数据集加载接口。
- 图像变换:几何变换(旋转、裁剪)、颜色增强(亮度、对比度)、归一化。
- 工具函数:混淆矩阵、图像可视化、模型量化支持。
2. 实战案例:10 大应用场景详解
案例 1:使用预训练 ResNet 进行图像分类
代码实现
python
import torch
from torchvision import models, transforms
from PIL import Image

# 加载预训练模型
model = models.resnet50(weights=models.ResNet50_Weights.DEFAULT)
model.eval()

# 图像预处理
preprocess = transforms.Compose([
    transforms.Resize(256),
    transforms.CenterCrop(224),
    transforms.ToTensor(),
    transforms.Normalize(mean=[0.485, 0.456, 0.406], std=[0.229, 0.224, 0.225]),
])

# 加载图像并推理
img = Image.open("dog.jpg")
img_tensor = preprocess(img).unsqueeze(0)
with torch.no_grad():
    output = model(img_tensor)

# 输出类别概率
probabilities = torch.nn.functional.softmax(output[0], dim=0)
print("Top-5 预测结果:", probabilities.topk(5))
常见问题
- 报错:无法下载模型权重
- 手动下载权重文件(如从 PyTorch Hub),并通过
weights=path_to_weights加载。
- 手动下载权重文件(如从 PyTorch Hub),并通过
- 输入尺寸不匹配
- 确保预处理与模型输入一致(如 ResNet 需 224x224)。
相关论文
案例 2:加载并可视化 CIFAR10 数据集
代码实现
python
import torchvision
import matplotlib.pyplot as plt

# 加载数据集
transform = transforms.Compose([transforms.ToTensor()])
train_set = torchvision.datasets.CIFAR10(root='./data', train=True, download=True, transform=transform)
train_loader = torch.utils.data.DataLoader(train_set, batch_size=4, shuffle=True)

# 可视化批次数据
classes = ('plane', 'car', 'bird', 'cat', 'deer', 'dog', 'frog', 'horse', 'ship', 'truck')
images, labels = next(iter(train_loader))
plt.figure(figsize=(8,8))
for i in range(4):
    plt.subplot(2,2,i+1)
    plt.imshow(images[i].permute(1,2,0))
    plt.title(classes[labels[i]])
plt.show()
常见问题
- 下载速度慢
- 设置代理或使用国内镜像源(如修改
TORCH_HOME环境变量)。
- 设置代理或使用国内镜像源(如修改
案例 3:自定义数据增强(MixUp)
代码实现
python
from torchvision.transforms import functional as F

class MixUp:
    def __init__(self, alpha=0.4):
        self.alpha = alpha

    def __call__(self, img1, img2):
        lam = np.random.beta(self.alpha, self.alpha)
        mixed_img = lam * img1 + (1 - lam) * img2
        return mixed_img

# 使用示例
img1 = torch.randn(3, 224, 224)  # 假设为两张随机图像
img2 = torch.randn(3, 224, 224)
mixed = MixUp()(img1, img2)
相关论文
案例 4:目标检测(Faster R-CNN)
代码实现
python
model = models.detection.fasterrcnn_resnet50_fpn(weights=models.FasterRCNN_ResNet50_FPN_Weights.DEFAULT)
model.eval()

# 图像预处理(需转换为列表)
images = [preprocess(Image.open("image.jpg"))]

# 推理
with torch.no_grad():
    predictions = model(images)

# 解析结果(类别、边界框、置信度)
boxes = predictions[0]['boxes']
labels = predictions[0]['labels']
scores = predictions[0]['scores']
常见问题
- 报错:输入未归一化
- 确保输入图像值在 [0,1] 范围内(使用
transforms.ToTensor())。
- 确保输入图像值在 [0,1] 范围内(使用
相关论文
- Faster R-CNN :《Faster R-CNN: Towards Real-Time Object Detection》
案例 5:语义分割(DeepLabV3)
代码实现
python
model = models.segmentation.deeplabv3_resnet50(weights=models.DeepLabV3_ResNet50_Weights.DEFAULT)
model.eval()

# 预处理与推理
input_tensor = preprocess(img).unsqueeze(0)
with torch.no_grad():
    output = model(input_tensor)['out'][0]

# 生成分割掩膜
mask = output.argmax(0).byte().cpu().numpy()
相关论文
案例 6:生成对抗网络(DCGAN)
代码实现
python
from torchvision import models, datasets
from torchvision.utils import save_image

# 定义生成器与判别器(参考官方示例)
generator = models.dcgan.Generator(ngpu=1, nz=100, ngf=64, nc=3)
discriminator = models.dcgan.Discriminator(ngpu=1, nc=3, ndf=64)

# 生成示例图像
noise = torch.randn(64, 100, 1, 1)
fake_images = generator(noise)
save_image(fake_images, "fake_samples.png", normalize=True)
相关论文
- DCGAN :《Unsupervised Representation Learning with Deep Convolutional Generative Adversarial Networks》
案例 7:迁移学习(微调 ResNet)
代码实现
python
# 加载预训练模型并替换最后一层
model = models.resnet18(weights=models.ResNet18_Weights.DEFAULT)
num_features = model.fc.in_features
model.fc = torch.nn.Linear(num_features, 10)  # 假设新任务为10分类

# 训练配置(仅训练最后一层)
optimizer = torch.optim.SGD(model.fc.parameters(), lr=0.001)
常见问题
- 过拟合 :冻结部分层(
for param in model.parameters(): param.requires_grad = False)。
案例 8:模型量化(动态量化)
代码实现
python
from torch.quantization import quantize_dynamic

# 动态量化模型
quantized_model = quantize_dynamic(
    model,
    {torch.nn.Linear},
    dtype=torch.qint8
)
适用场景
- 边缘设备部署(如手机、嵌入式系统)。
案例 9:视频帧处理(抽帧与保存)
代码实现
python
from torchvision.io import read_video, write_jpeg

# 读取视频并抽帧
frames, _, _ = read_video("input.mp4", pts_unit='sec')

# 保存第10帧为图像
write_jpeg(frames[9], "frame_10.jpg")
案例 10:模型可视化(特征图提取)
代码实现
python
# 注册钩子捕获中间层输出
activation = {}
def get_activation(name):
    def hook(model, input, output):
        activation[name] = output.detach()
    return hook

model.layer4.register_forward_hook(get_activation('layer4'))

# 推理并可视化
output = model(img_tensor)
plt.imshow(activation['layer4'][0, 0].cpu().numpy(), cmap='viridis')
3. 常见问题与解决方案
-
报错:
KeyError: 'image'(数据集加载)- 检查数据集路径是否正确,或重新下载数据集(
download=True)。
- 检查数据集路径是否正确,或重新下载数据集(
-
显存不足(CUDA Out of Memory)
- 减小
batch_size,启用梯度累积或混合精度训练。
- 减小
-
预处理与模型不兼容
- 使用官方推荐的预处理参数(如
transforms.Normalize的均值和方差)。
- 使用官方推荐的预处理参数(如
4. 总结与展望
TorchVision 通过模块化设计和高性能实现,已成为计算机视觉开发者的核心工具。其与 PyTorch 生态的无缝集成(如 TorchScript、ONNX 导出)进一步推动了模型部署的标准化。未来发展方向可能包括:
- 更多 SOTA 模型集成(如 Vision Transformer、Swin Transformer)。
- 自动化数据增强策略(基于 AutoML)。
- 跨框架兼容性优化(支持 TensorFlow、JAX 模型转换)。
通过掌握上述案例,开发者可快速构建从研究到生产的视觉应用,释放深度学习在图像领域的全部潜力。