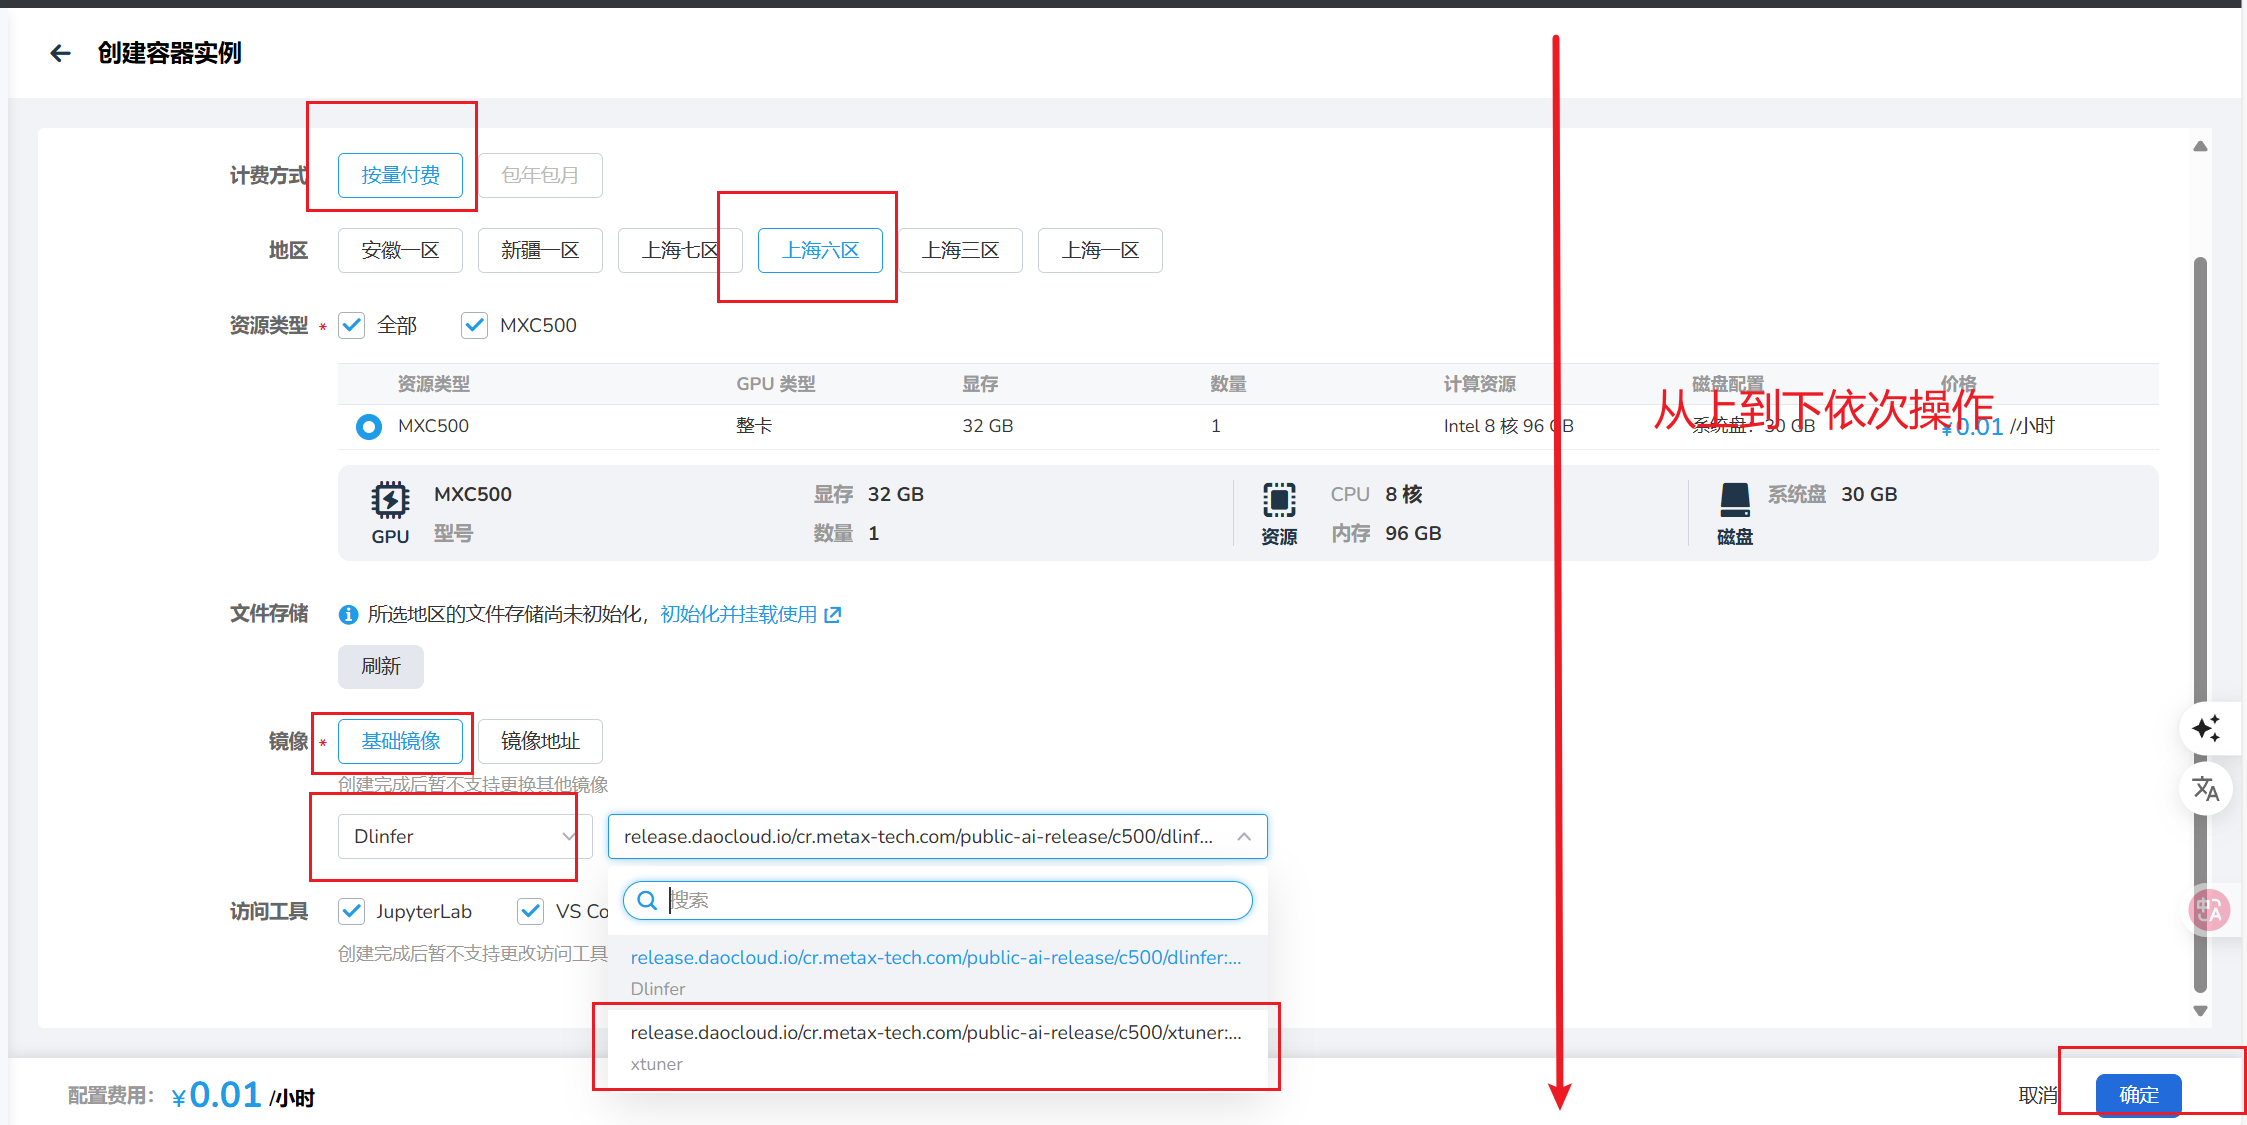
一:实验环境进入和启动实验容器(D.run平台)
1.1首先进入平台进行注册
注册和登录环节就跳过了。
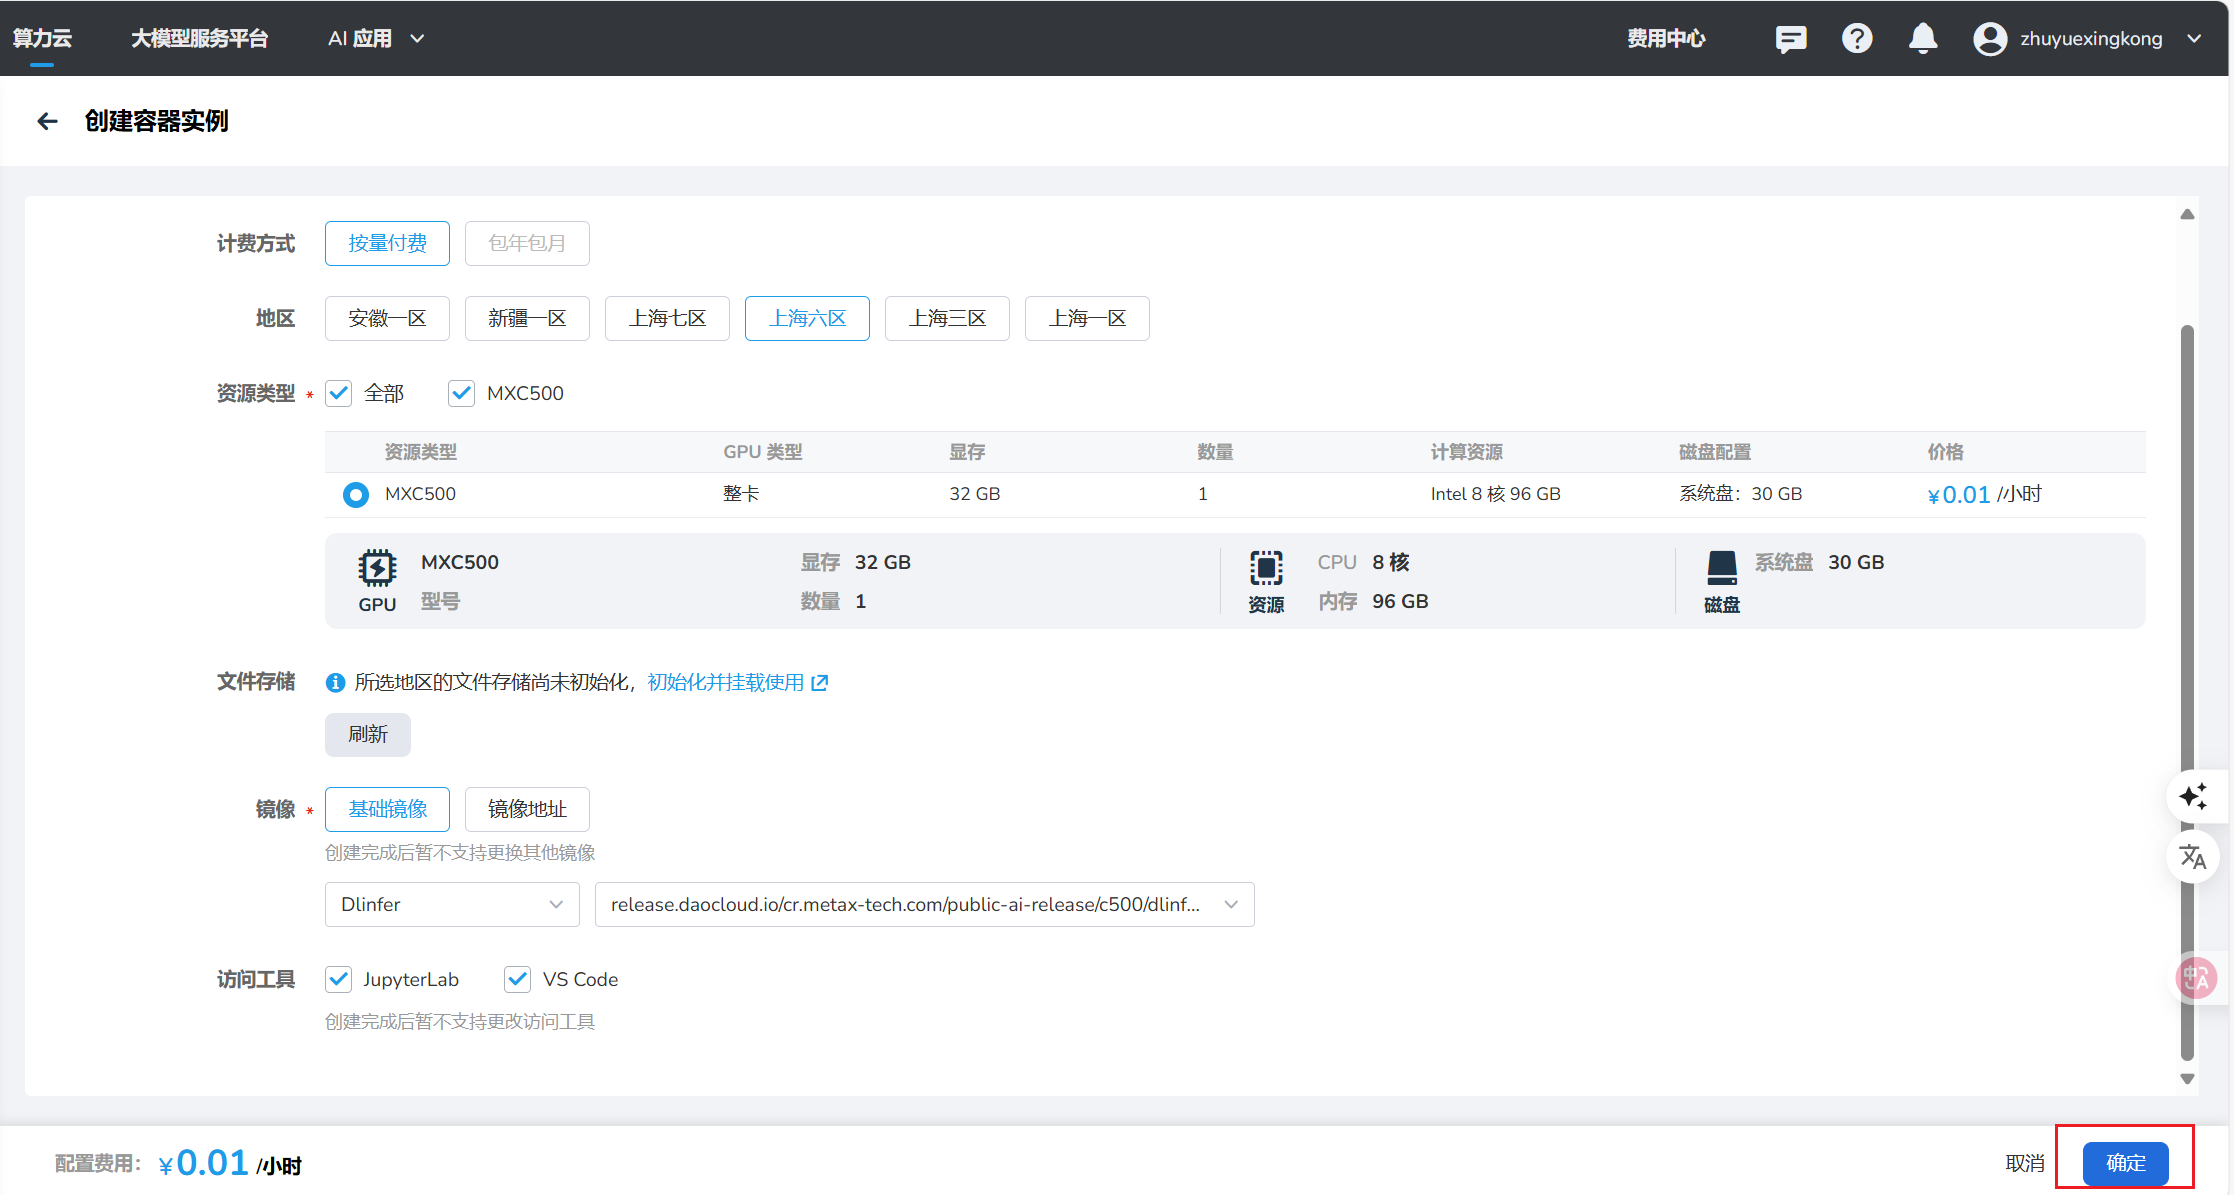
1.2 启动实验容器--详细步骤如下

1.2.1选择容器的名称、区域、镜像(注意镜像必须选择Dlinfer)
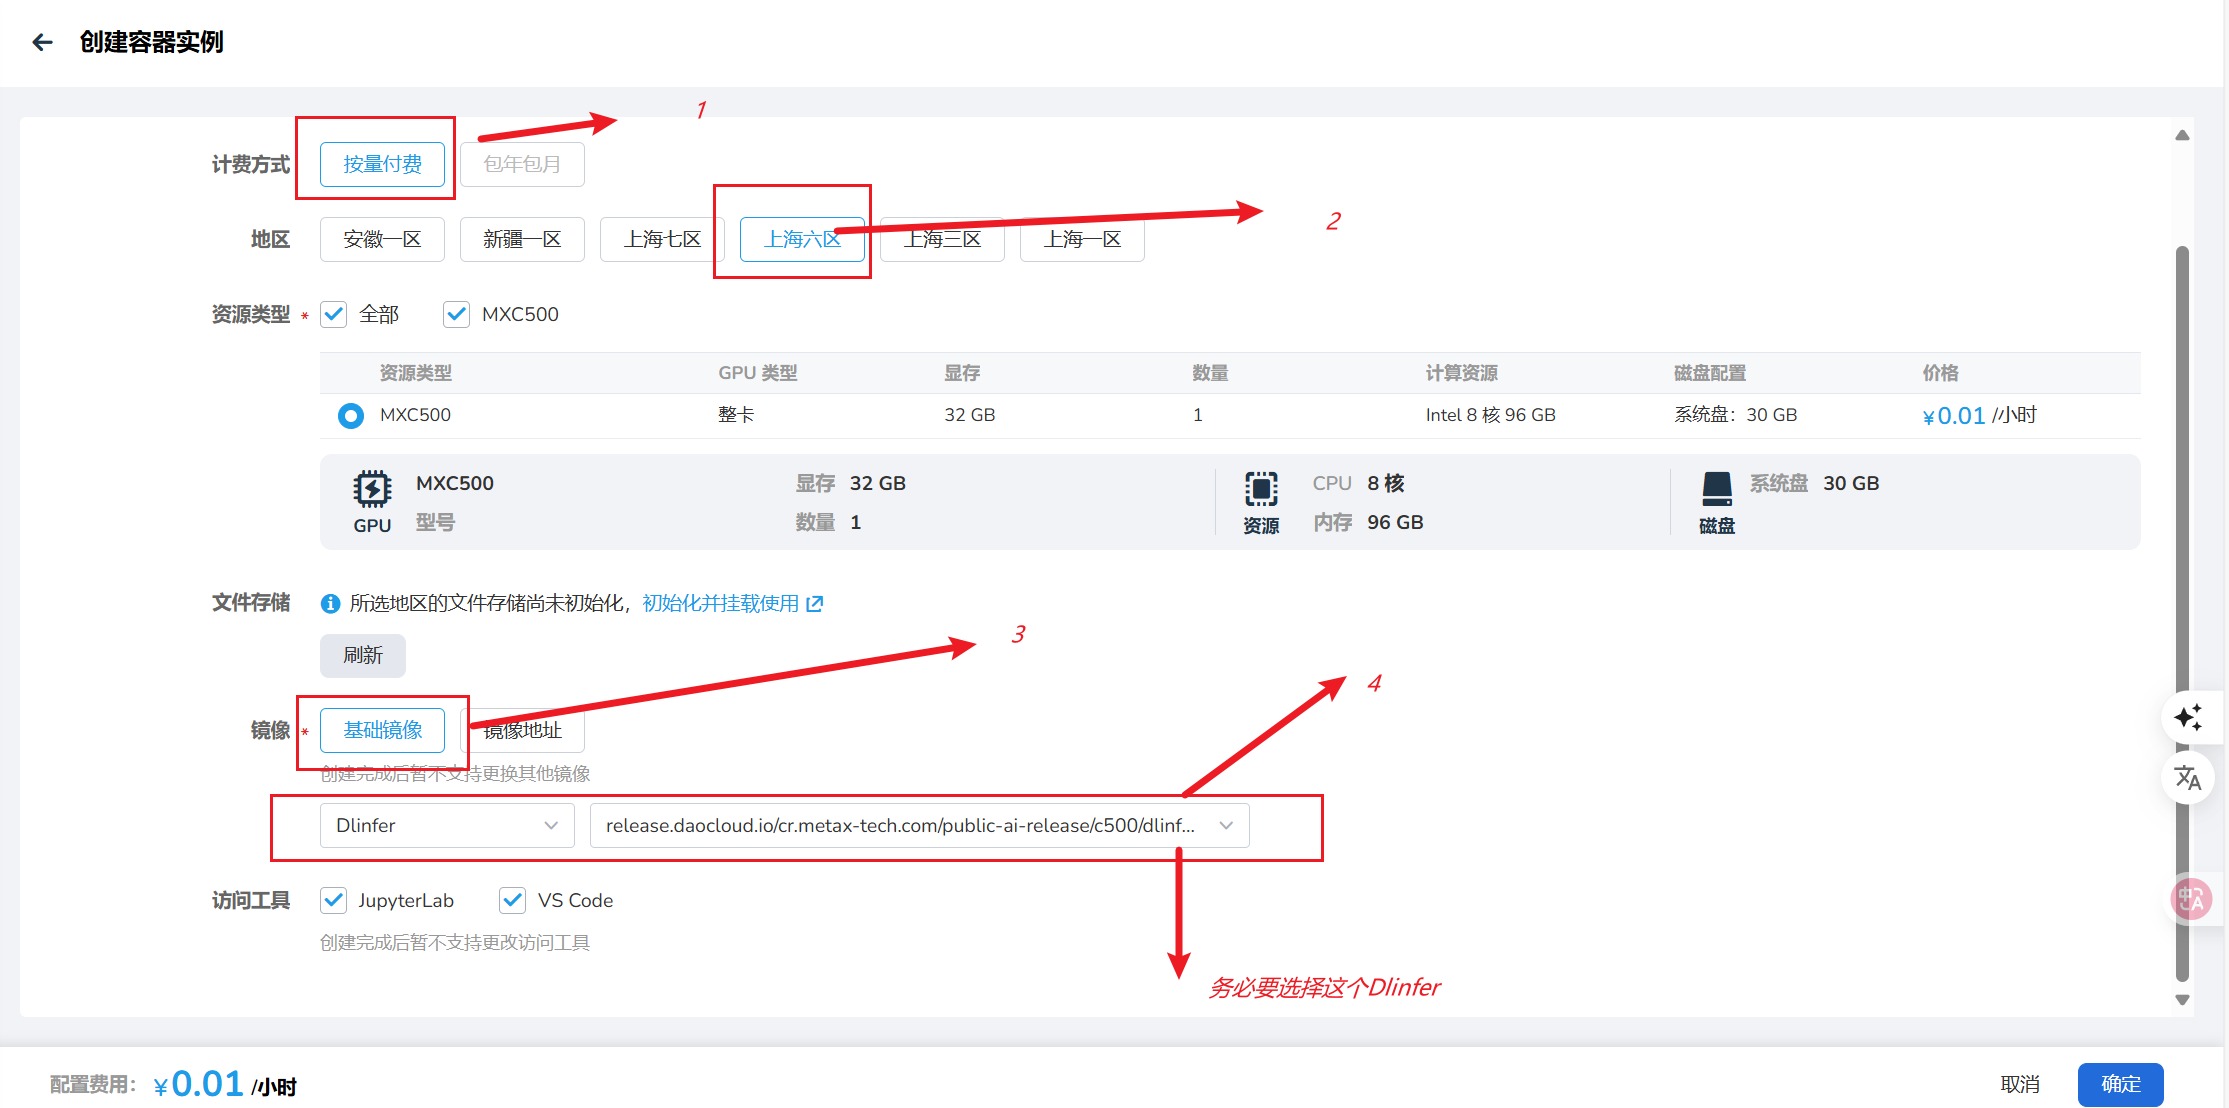
1.2.2可以选择Jupyter Lab作为实验环境(VS code、SSH登录可选)
在这里我选择Jupyter lab作为环境
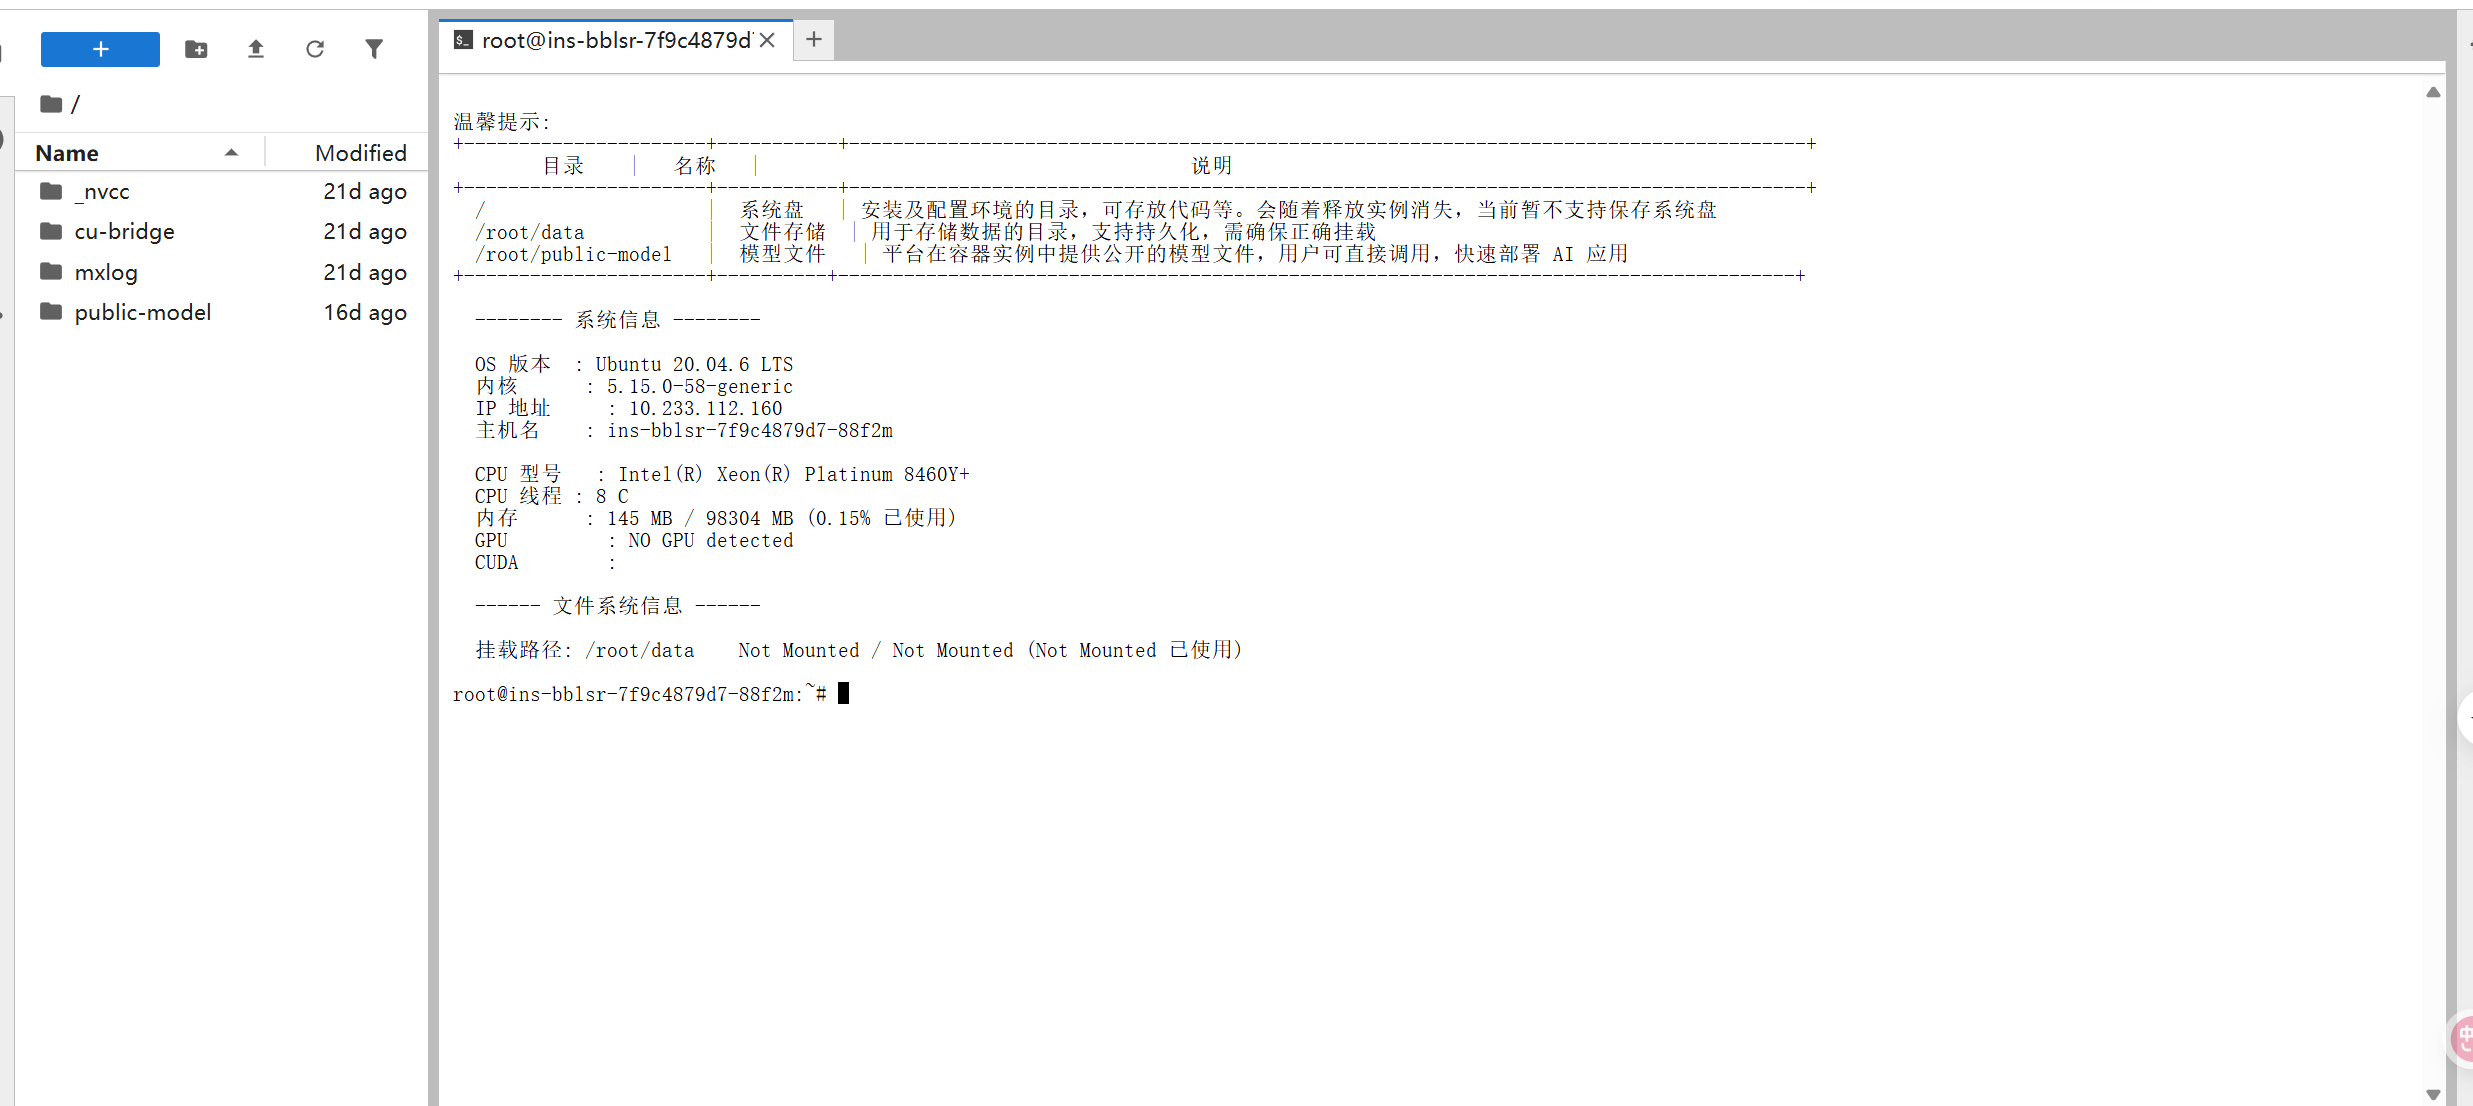
 1.2.3 Jupyter Lab工作区域如下,打开终端可以看到对应的终端的说明

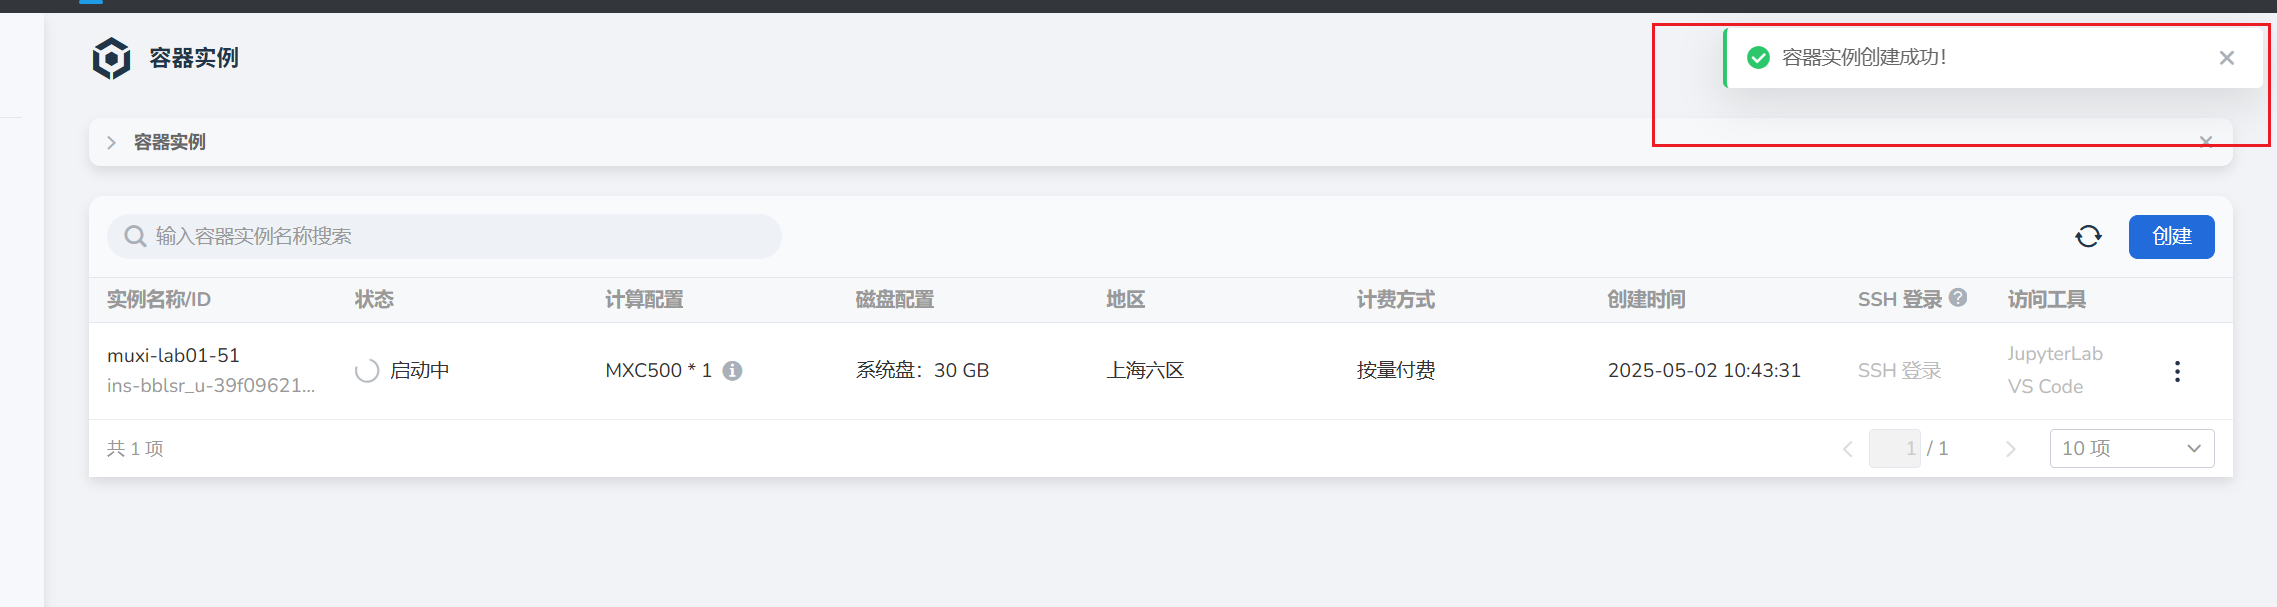
如果时间过久还是启动中,可以刷新试试,刷新页面后,就会是运行中

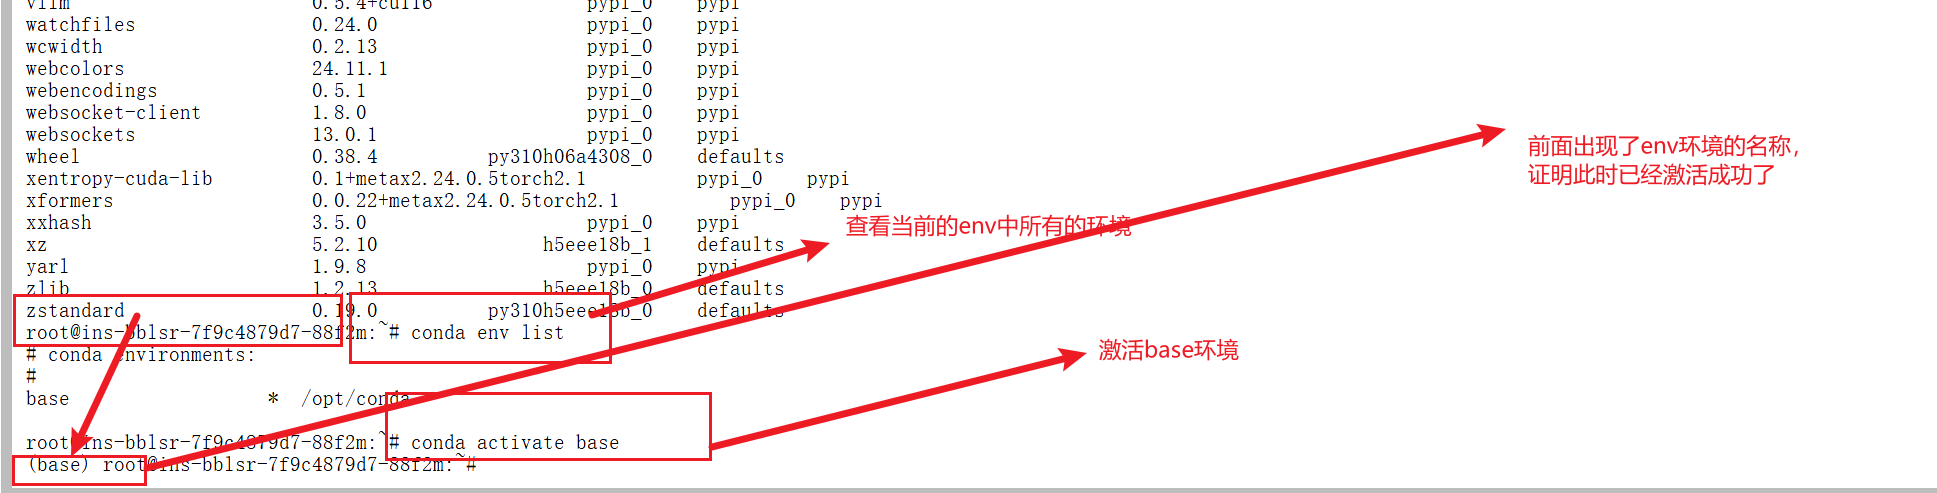
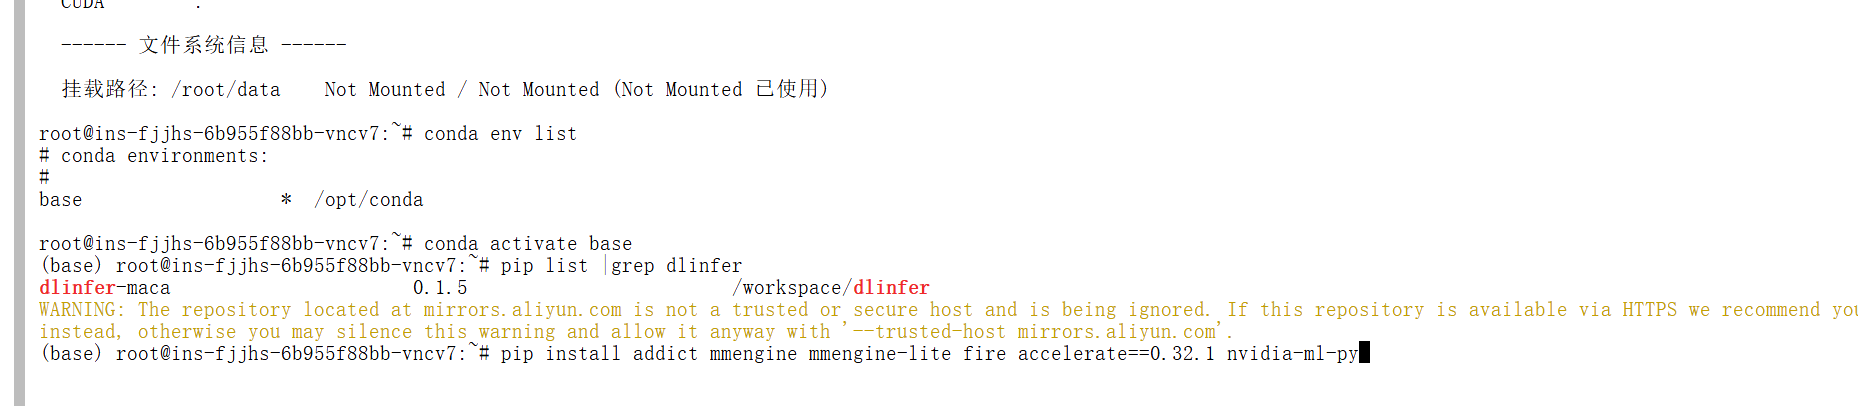
1.2.4激活conda环境,并查看dlinfer安装情况
二 LMDeploy推理及验证
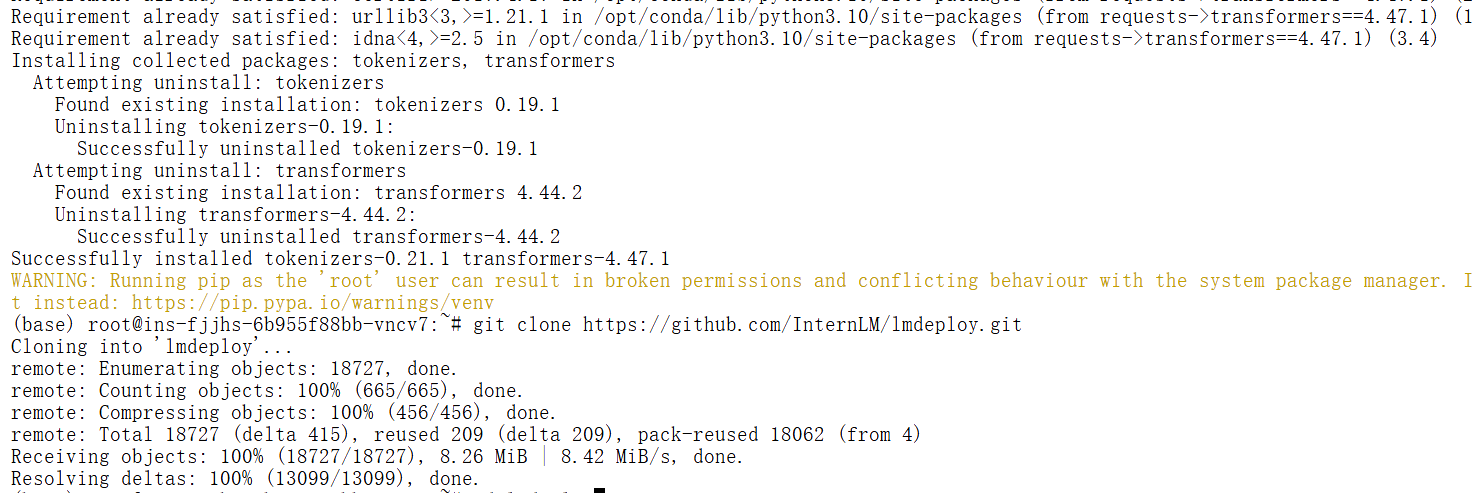
2.1 下载源码安装LMDeploy:
bash
# 安装addict软件包
pip install addict mmengine mmengine-lite fire accelerate==0.32.1 nvidia-ml-py
# 解决LMDeploy对tranformers版本要求的Iusse:
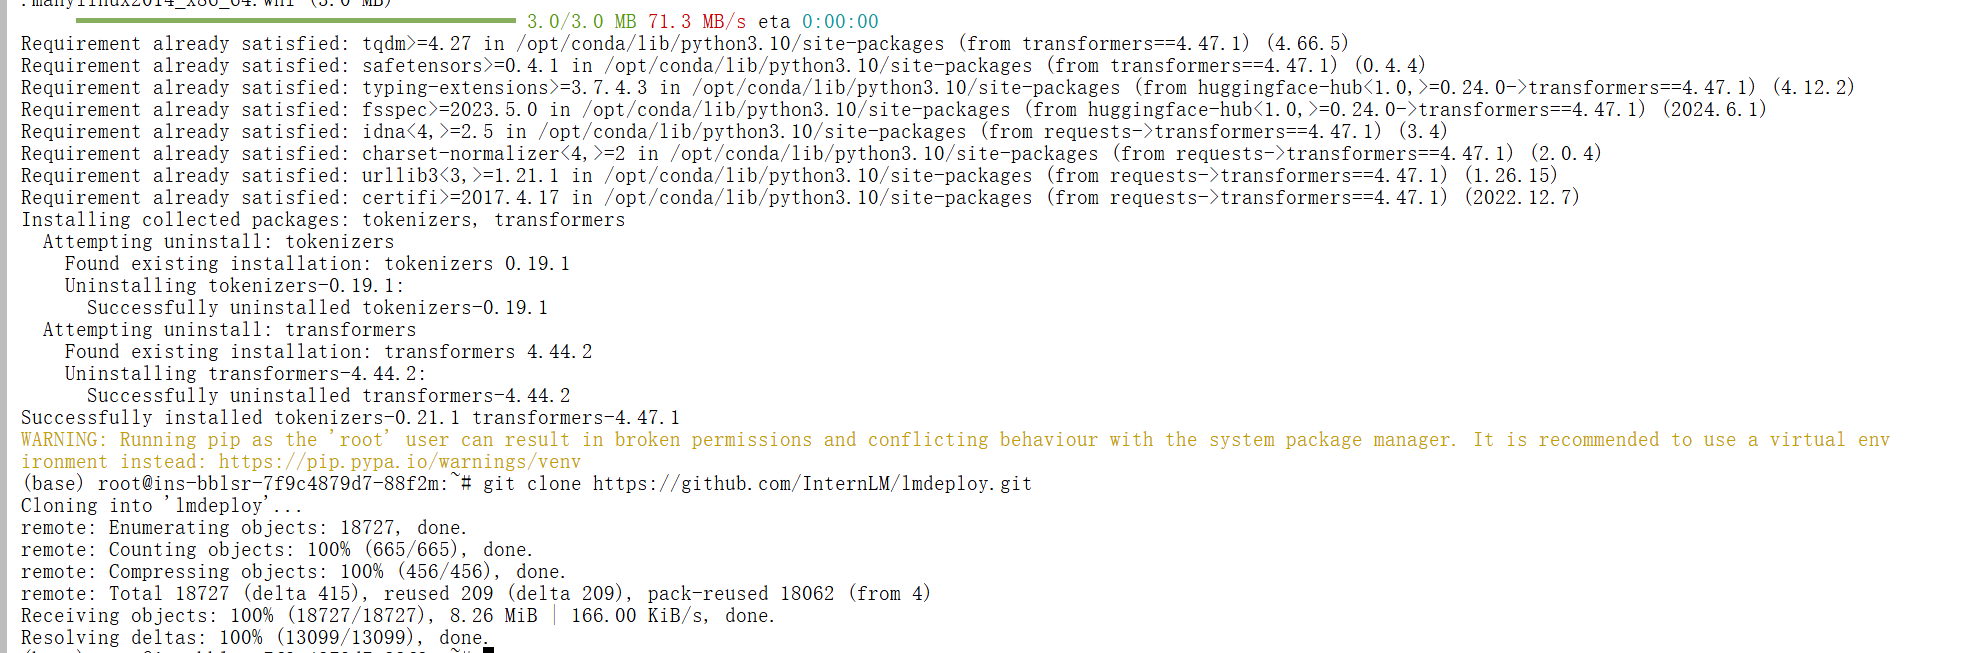
pip install transformers==4.47.1
# 下载lmdeploy,并进入目录
git clone https://github.com/InternLM/lmdeploy.git
cd lmdeploy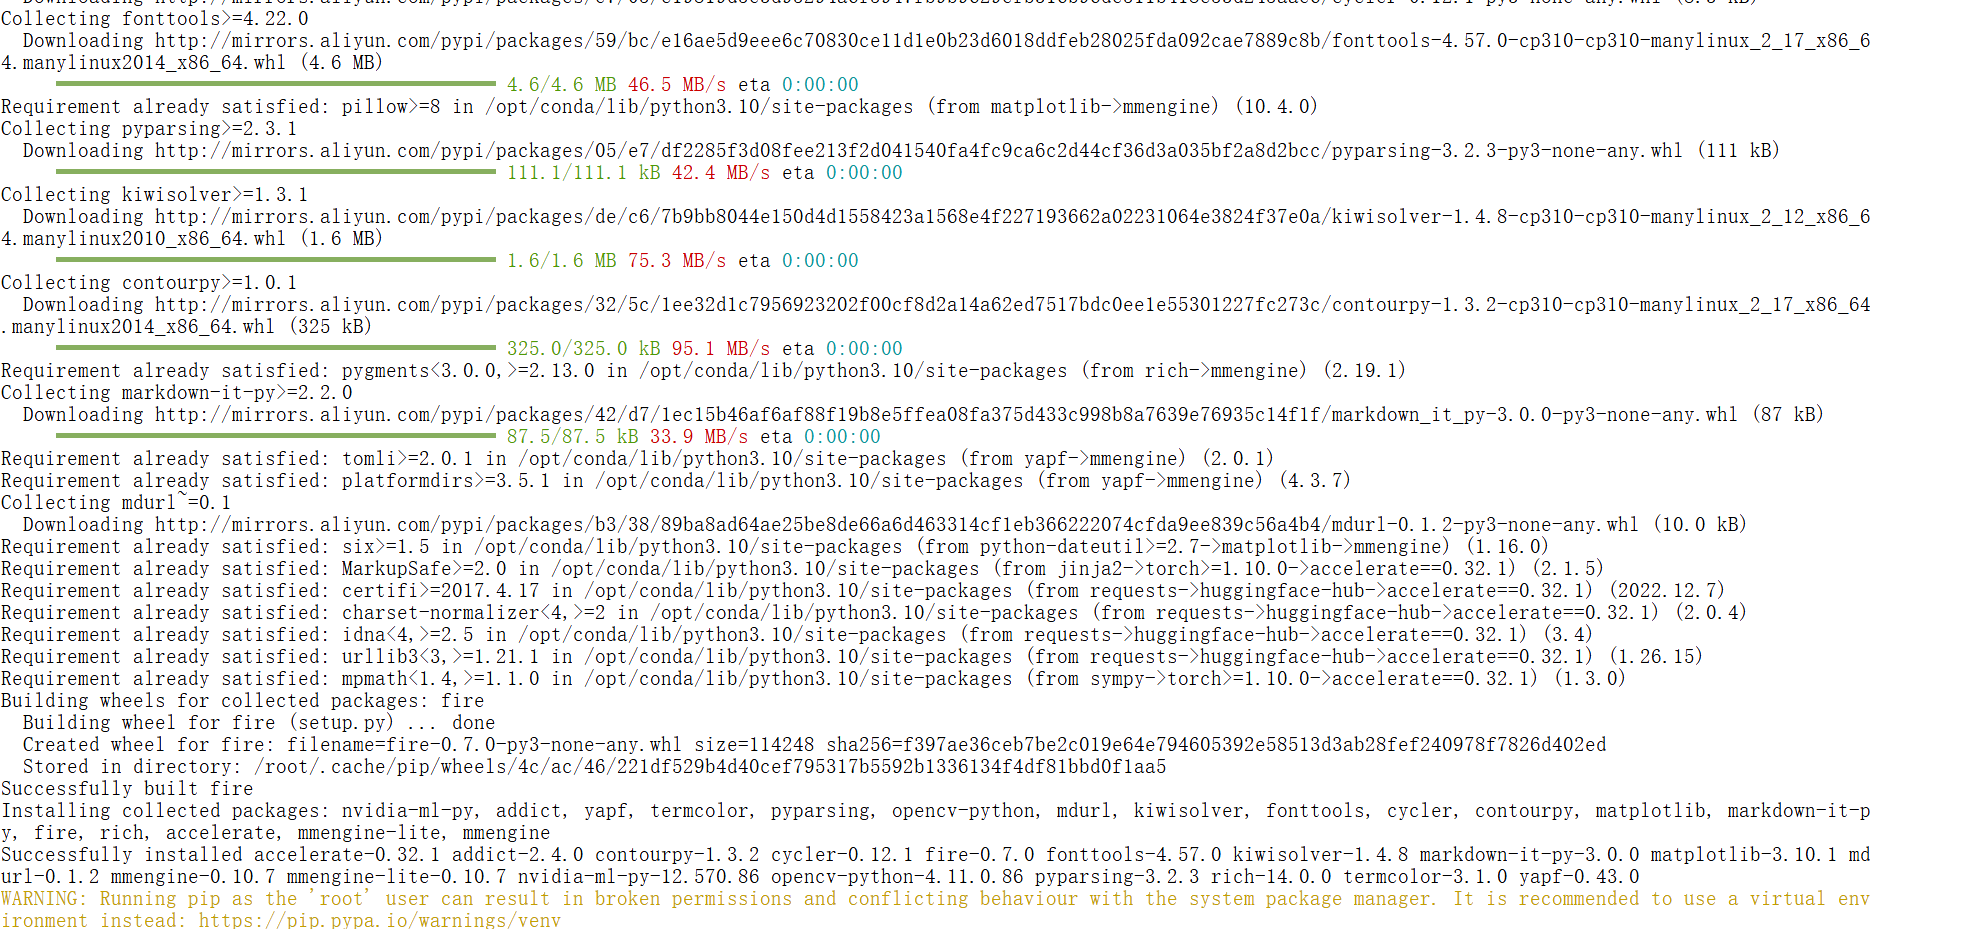
 2.1.1建议使用以下 commit进行源码安装:
bash
# checkout对应的版本
git checkout 832bfc45b4497e8d16e08ecfd663671e634aae40
# 安装lmdeploy
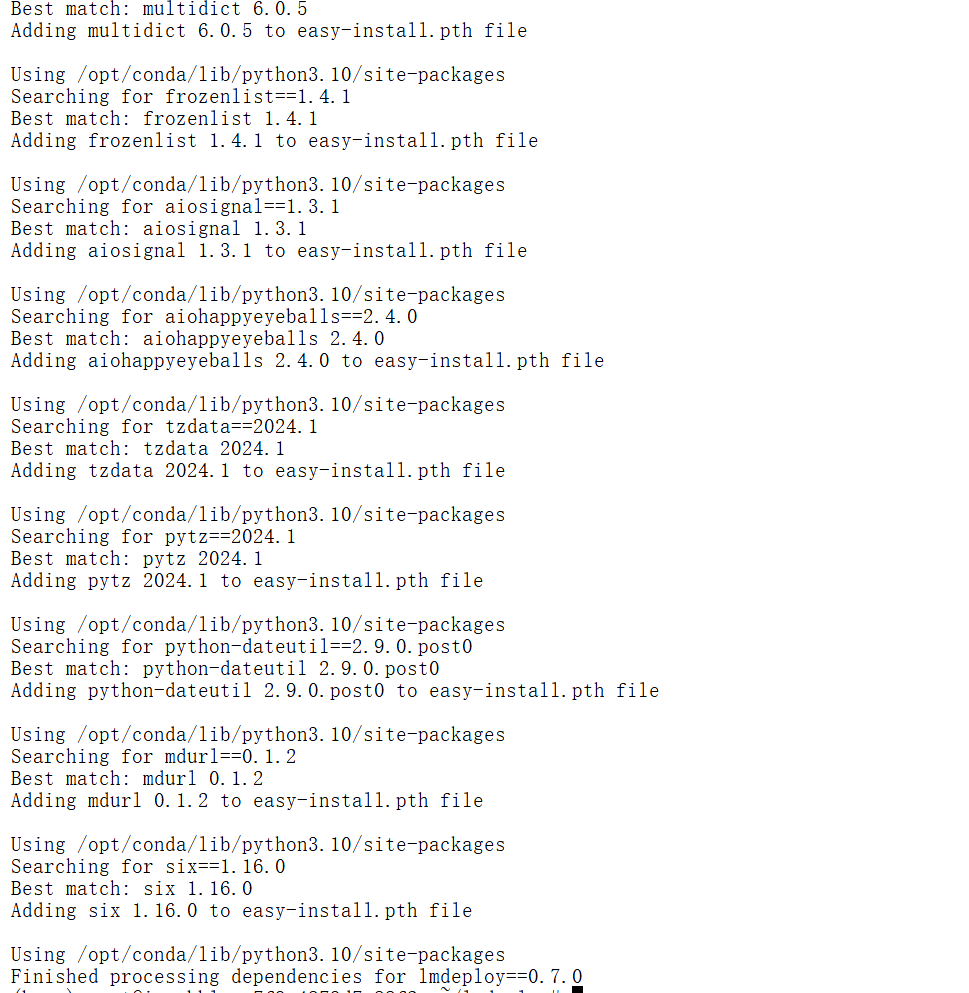
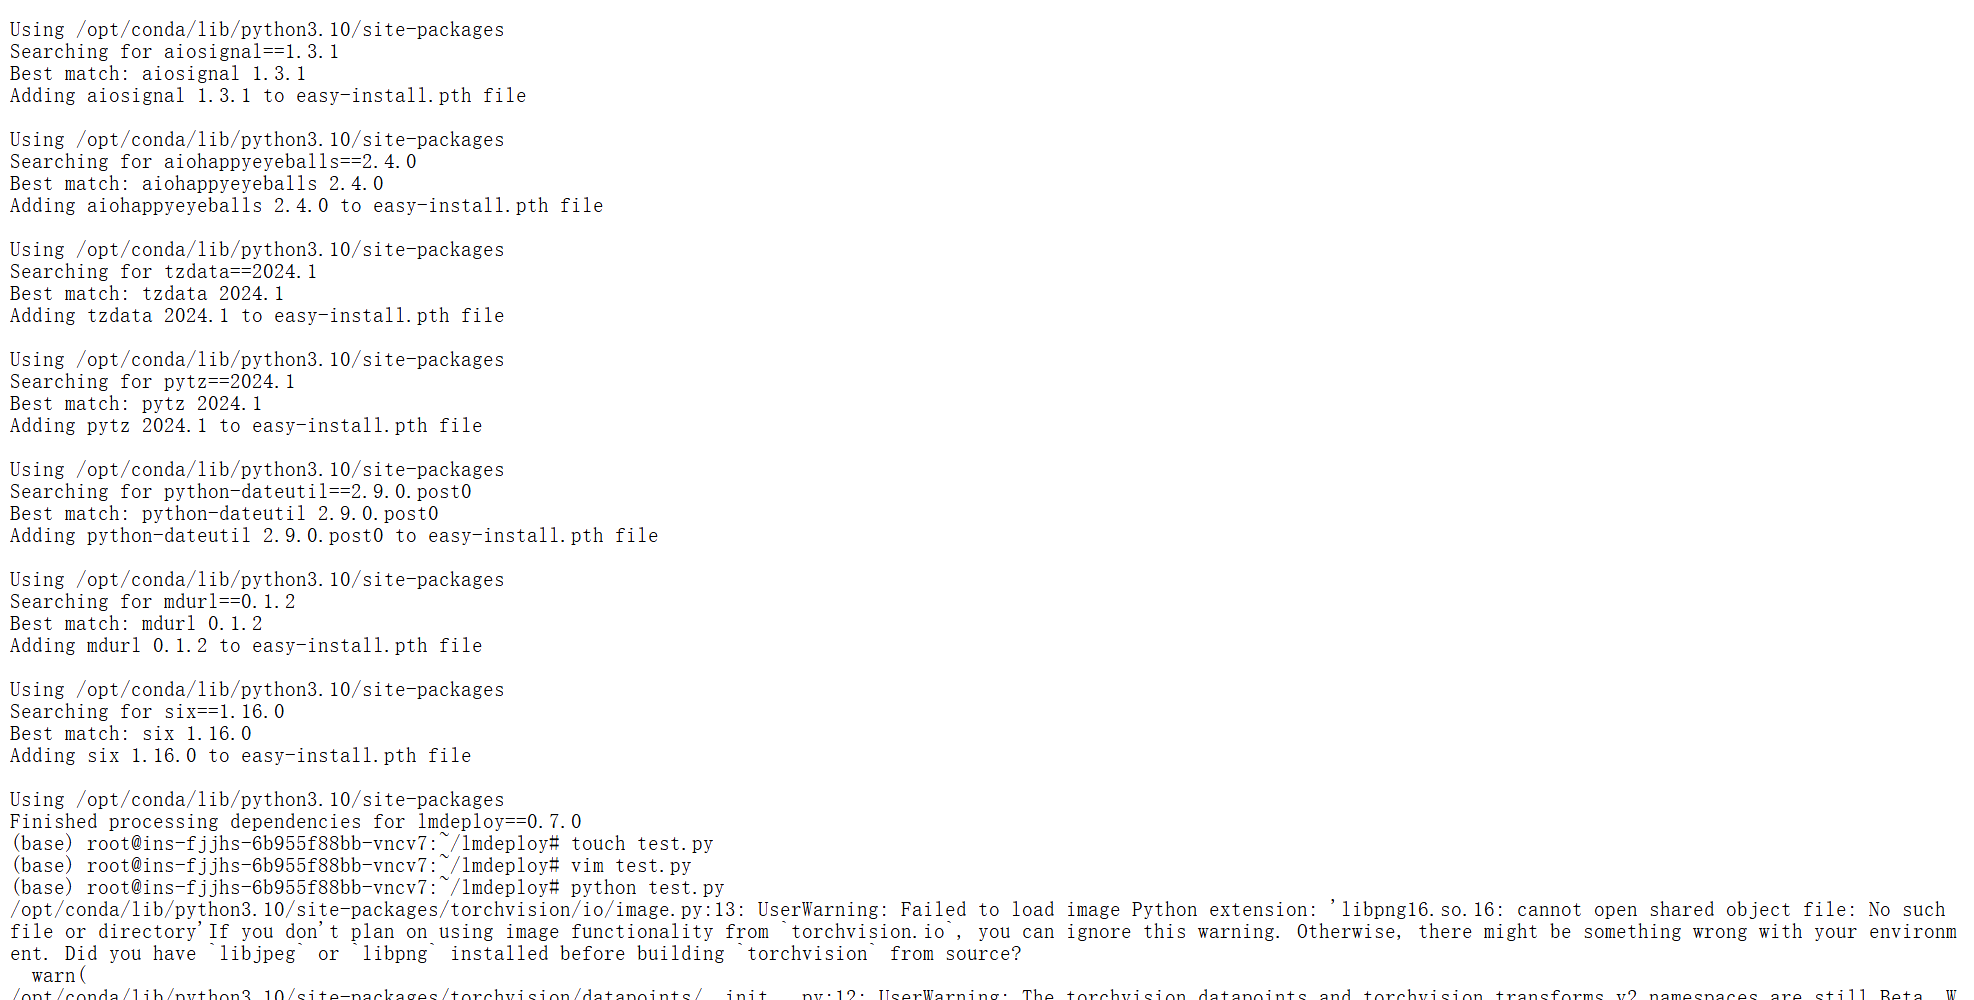
LMDEPLOY_TARGET_DEVICE=maca python setup.py develop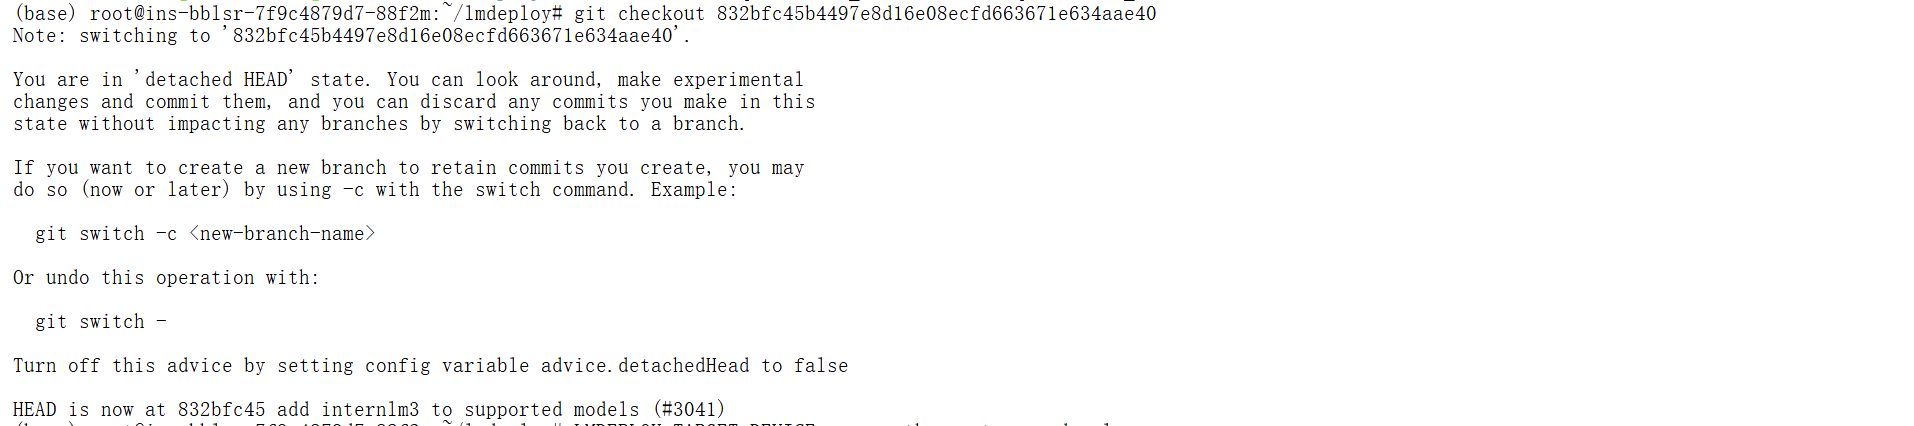
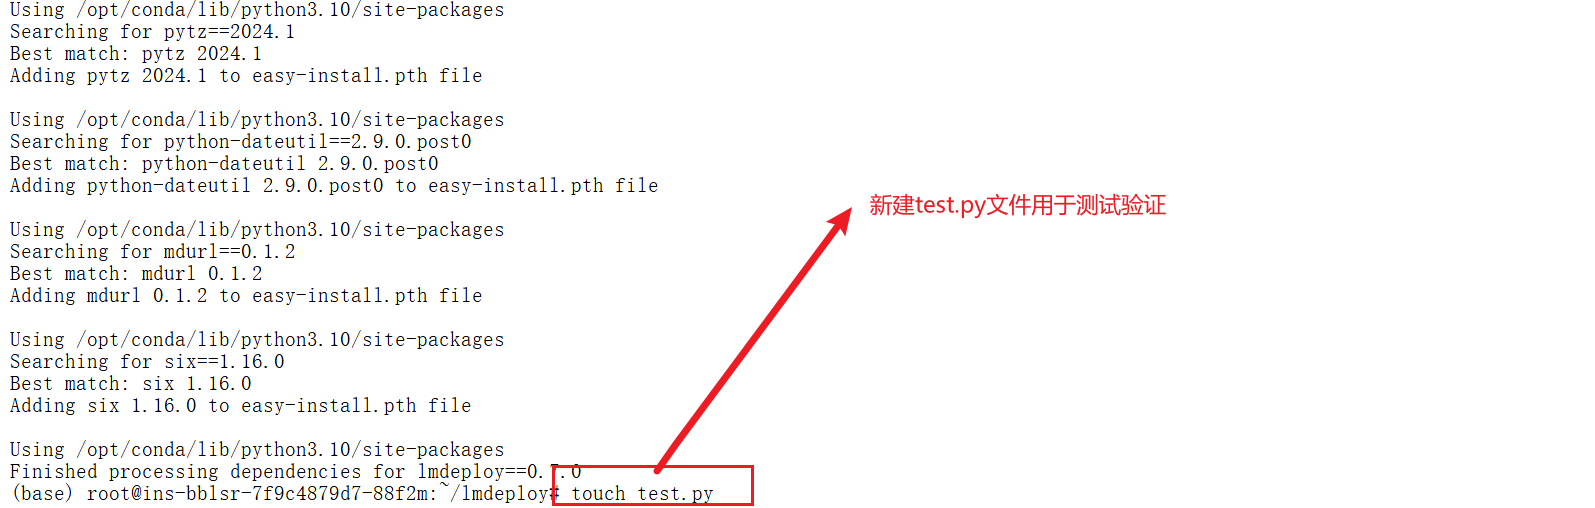
2.2 部署验证结果,用internlm3-8b-instruct模型验证
验证程序如下:
2.2.1 新建test.py文件
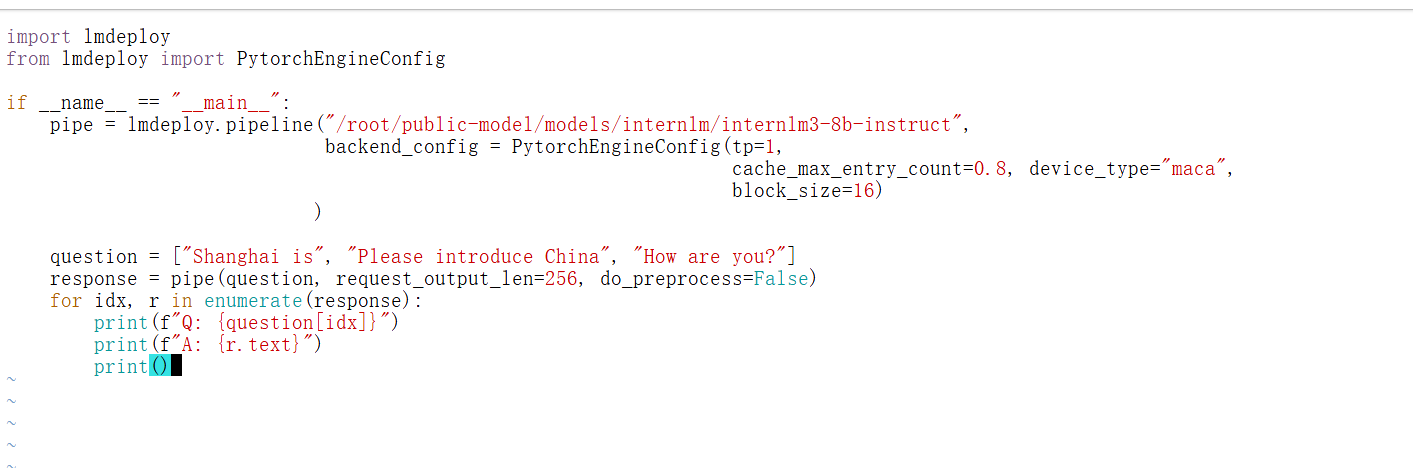
2.2.2 在test.py文件中添加如下的代码内容
python
import lmdeploy
from lmdeploy import PytorchEngineConfig

if __name__ == "__main__":
    pipe = lmdeploy.pipeline("/root/public-model/models/internlm/internlm3-8b-instruct",
                             backend_config = PytorchEngineConfig(tp=1,
                                                                  cache_max_entry_count=0.8, device_type="maca",
                                                                  block_size=16)
                            )

    question = ["Shanghai is", "Please introduce China", "How are you?"]
    response = pipe(question, request_output_len=256, do_preprocess=False)
    for idx, r in enumerate(response):
        print(f"Q: {question[idx]}")
        print(f"A: {r.text}")
        print()
2.2.3 验证程序执行如下:

2.2.4 运行之后出现了如下的错误
bash
python test.py
/opt/conda/lib/python3.10/site-packages/torchvision/io/image.py:13: UserWarning: Failed to load image Python extension: 'libpng16.so.16: cannot open shared object file: No such file or directory'If you don't plan on using image functionality from `torchvision.io`, you can ignore this warning. Otherwise, there might be something wrong with your environment. Did you have `libjpeg` or `libpng` installed before building `torchvision` from source?
  warn(
/opt/conda/lib/python3.10/site-packages/torchvision/datapoints/__init__.py:12: UserWarning: The torchvision.datapoints and torchvision.transforms.v2 namespaces are still Beta. While we do not expect major breaking changes, some APIs may still change according to user feedback. Please submit any feedback you may have in this issue: https://github.com/pytorch/vision/issues/6753, and you can also check out https://github.com/pytorch/vision/issues/7319 to learn more about the APIs that we suspect might involve future changes. You can silence this warning by calling torchvision.disable_beta_transforms_warning().
  warnings.warn(_BETA_TRANSFORMS_WARNING)
/opt/conda/lib/python3.10/site-packages/torchvision/transforms/v2/__init__.py:54: UserWarning: The torchvision.datapoints and torchvision.transforms.v2 namespaces are still Beta. While we do not expect major breaking changes, some APIs may still change according to user feedback. Please submit any feedback you may have in this issue: https://github.com/pytorch/vision/issues/6753, and you can also check out https://github.com/pytorch/vision/issues/7319 to learn more about the APIs that we suspect might involve future changes. You can silence this warning by calling torchvision.disable_beta_transforms_warning().
  warnings.warn(_BETA_TRANSFORMS_WARNING)
2.2.5 解决步骤如下:
这个警告表明环境中缺少 libpng16.so.16 文件,这通常是由于 libpng 库未正确安装或未被正确链接。• torchvision.io 模块依赖于 libpng 和 libjpeg 来处理图像文件,如果这些库未正确安装,可能会导致图像加载功能无法正常工作。
bash
sudo apt-get update
sudo apt-get install libpng-dev libjpeg-dev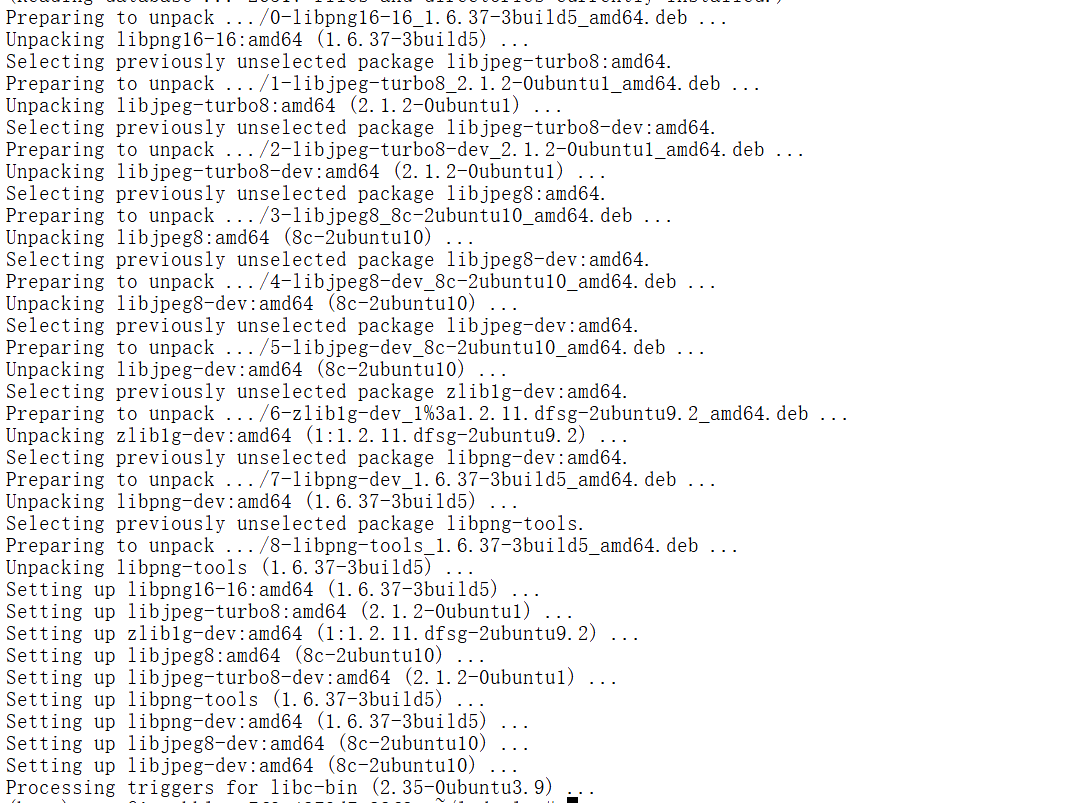
重新安装 torchvision
bash
pip uninstall torchvision
pip install torchvision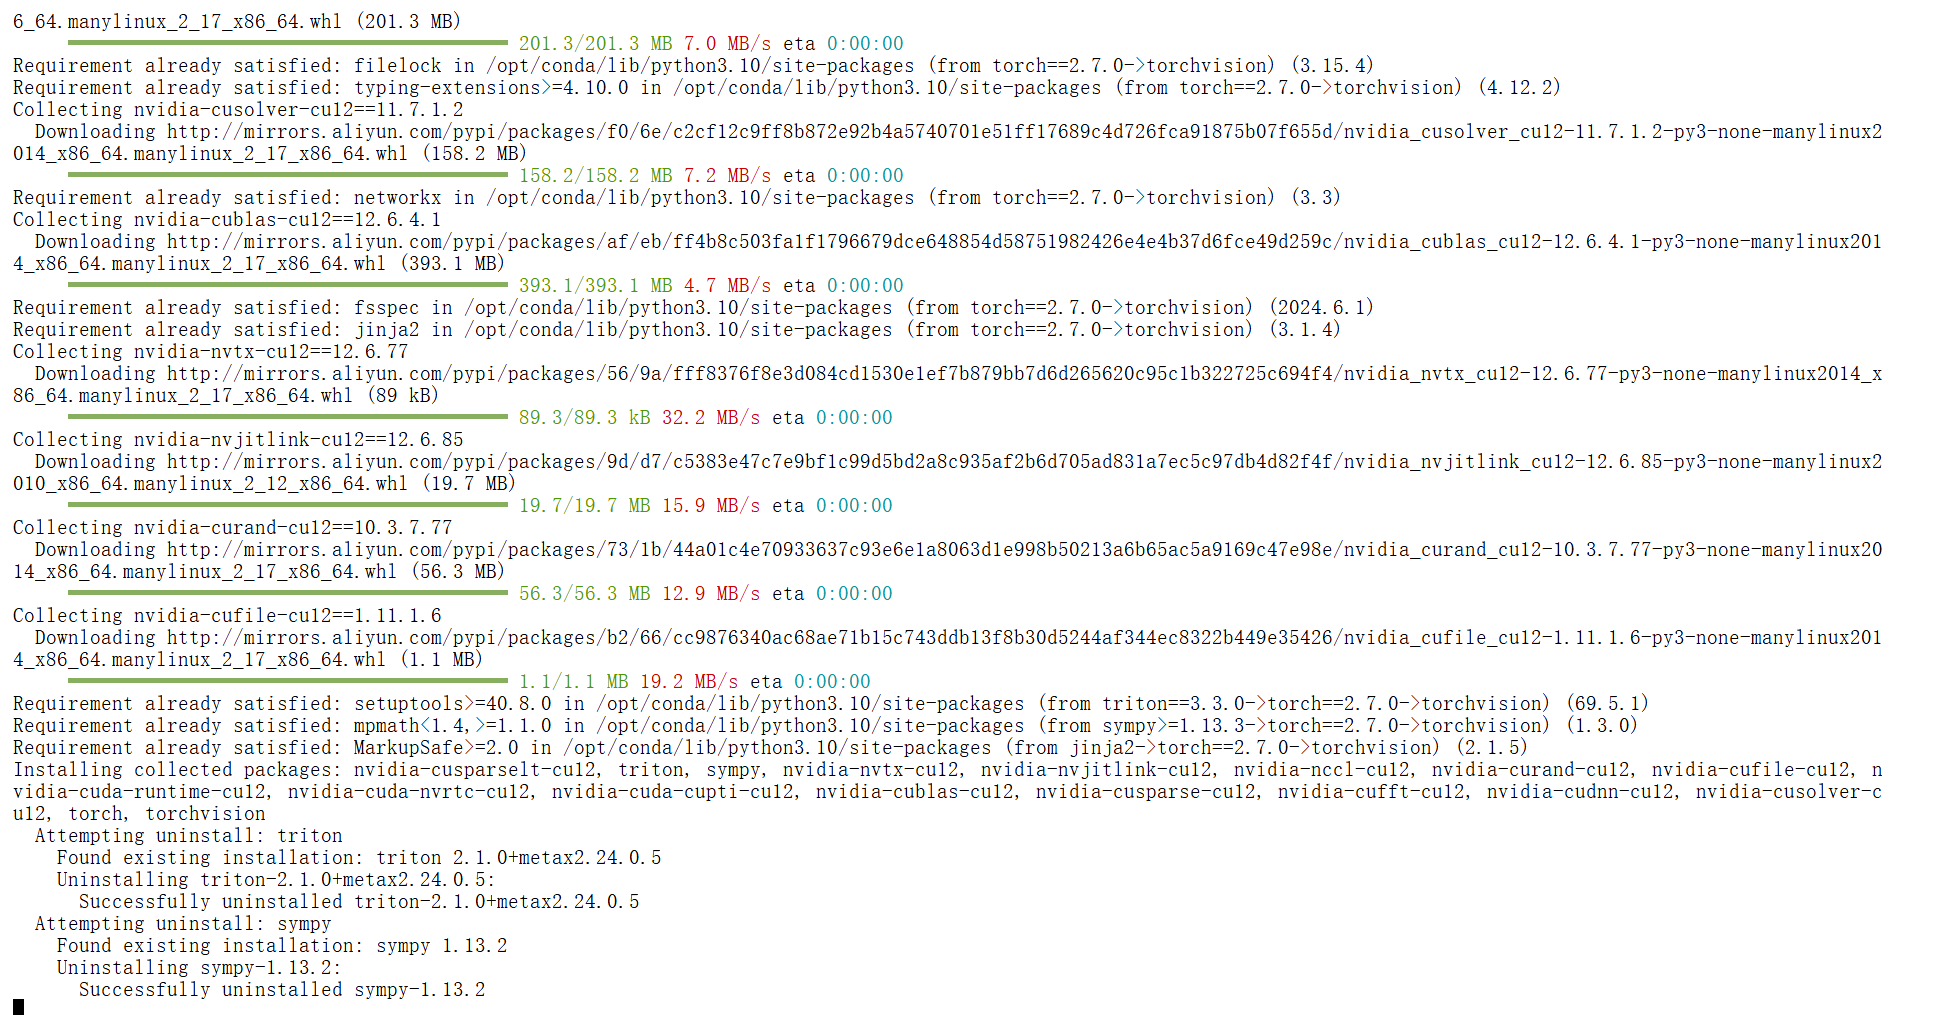

bash
pip uninstall torch torchvision
pip install torch==2.4.0 torchvision==0.19.0

pip install lmdeploy==0.7.0
在test.py的代码中添加以下内容:
python
import torchvision
torchvision.disable_beta_transforms_warning()
bash
pip uninstall torch torchvision
pip install torch==2.4.0 torchvision==0.19.0
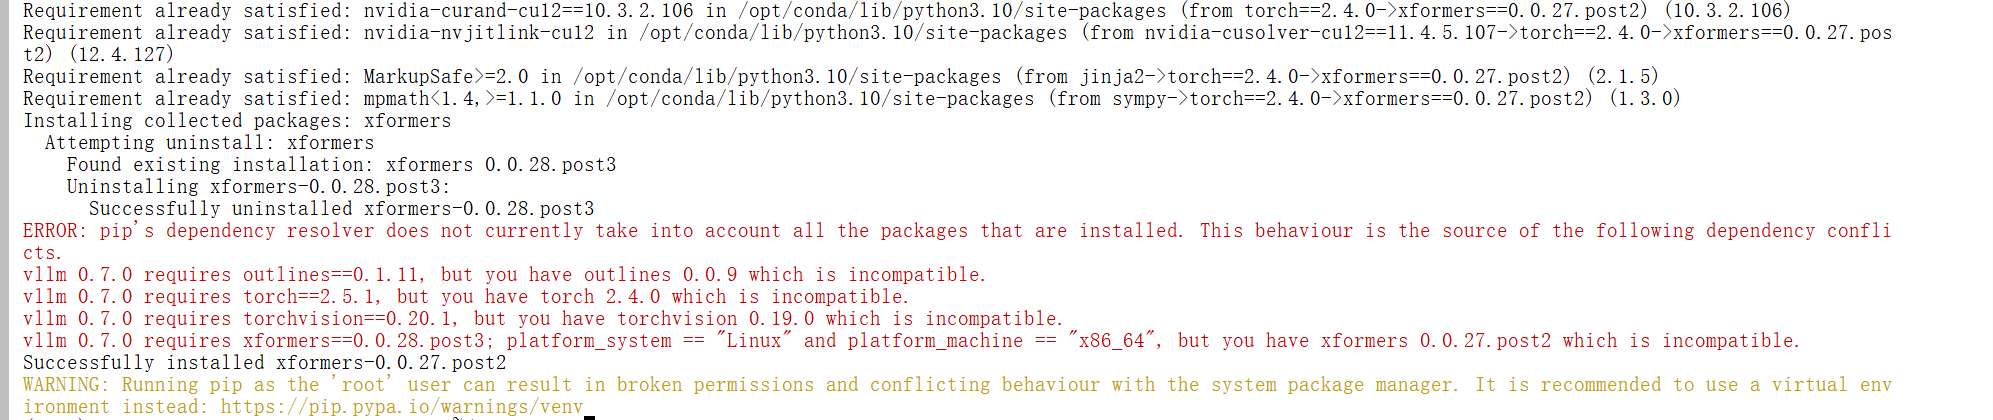
pip uninstall vllm
pip install vllm==0.7.0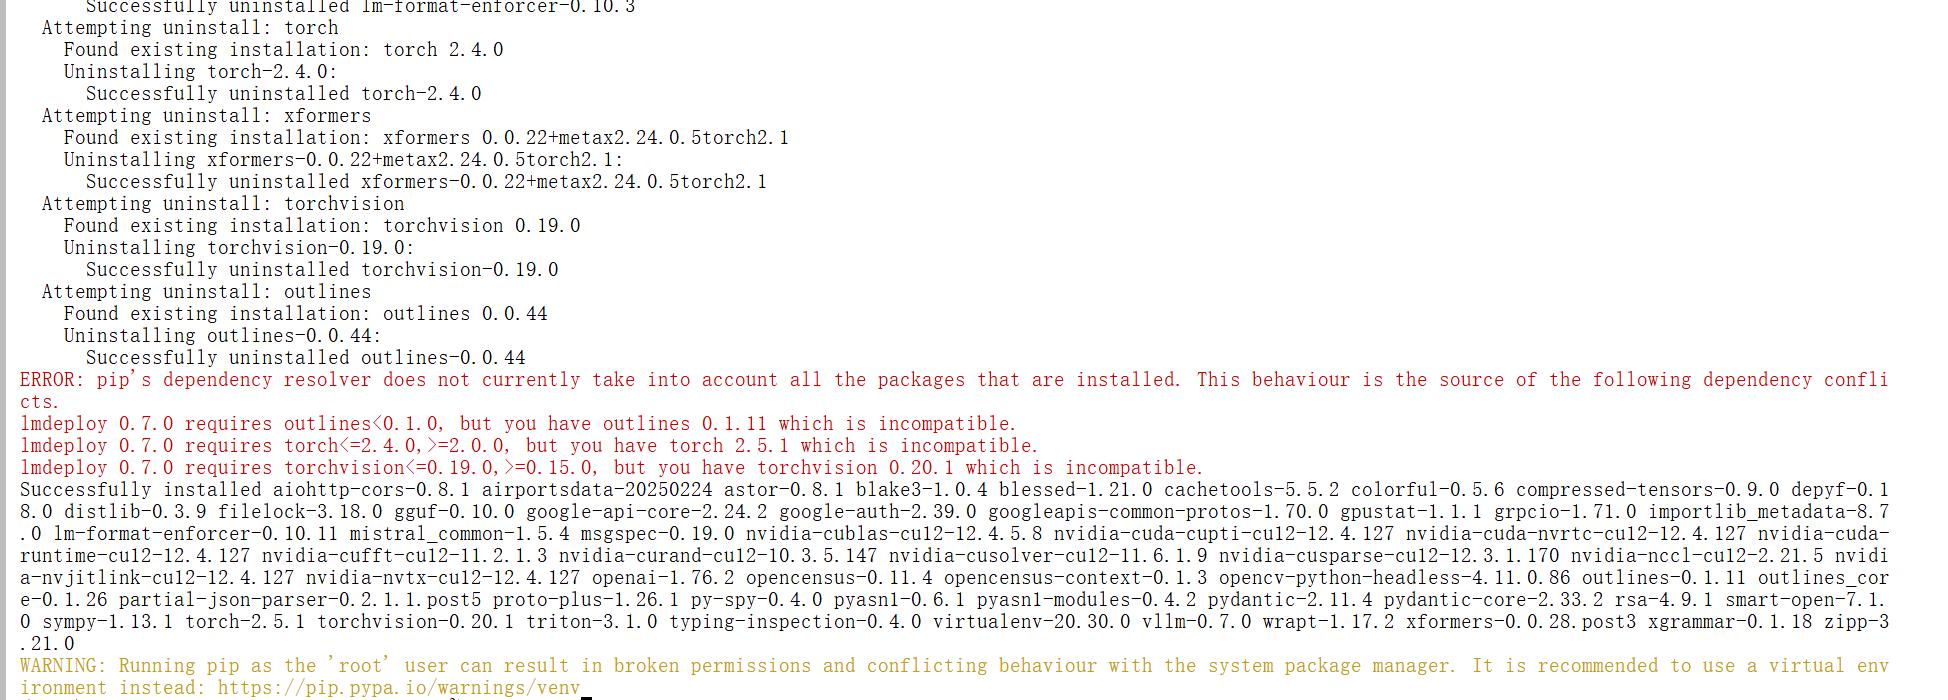
bash
pip uninstall torch torchvision outlines
pip install torch==2.4.0 torchvision==0.19.0 outlines==0.0.9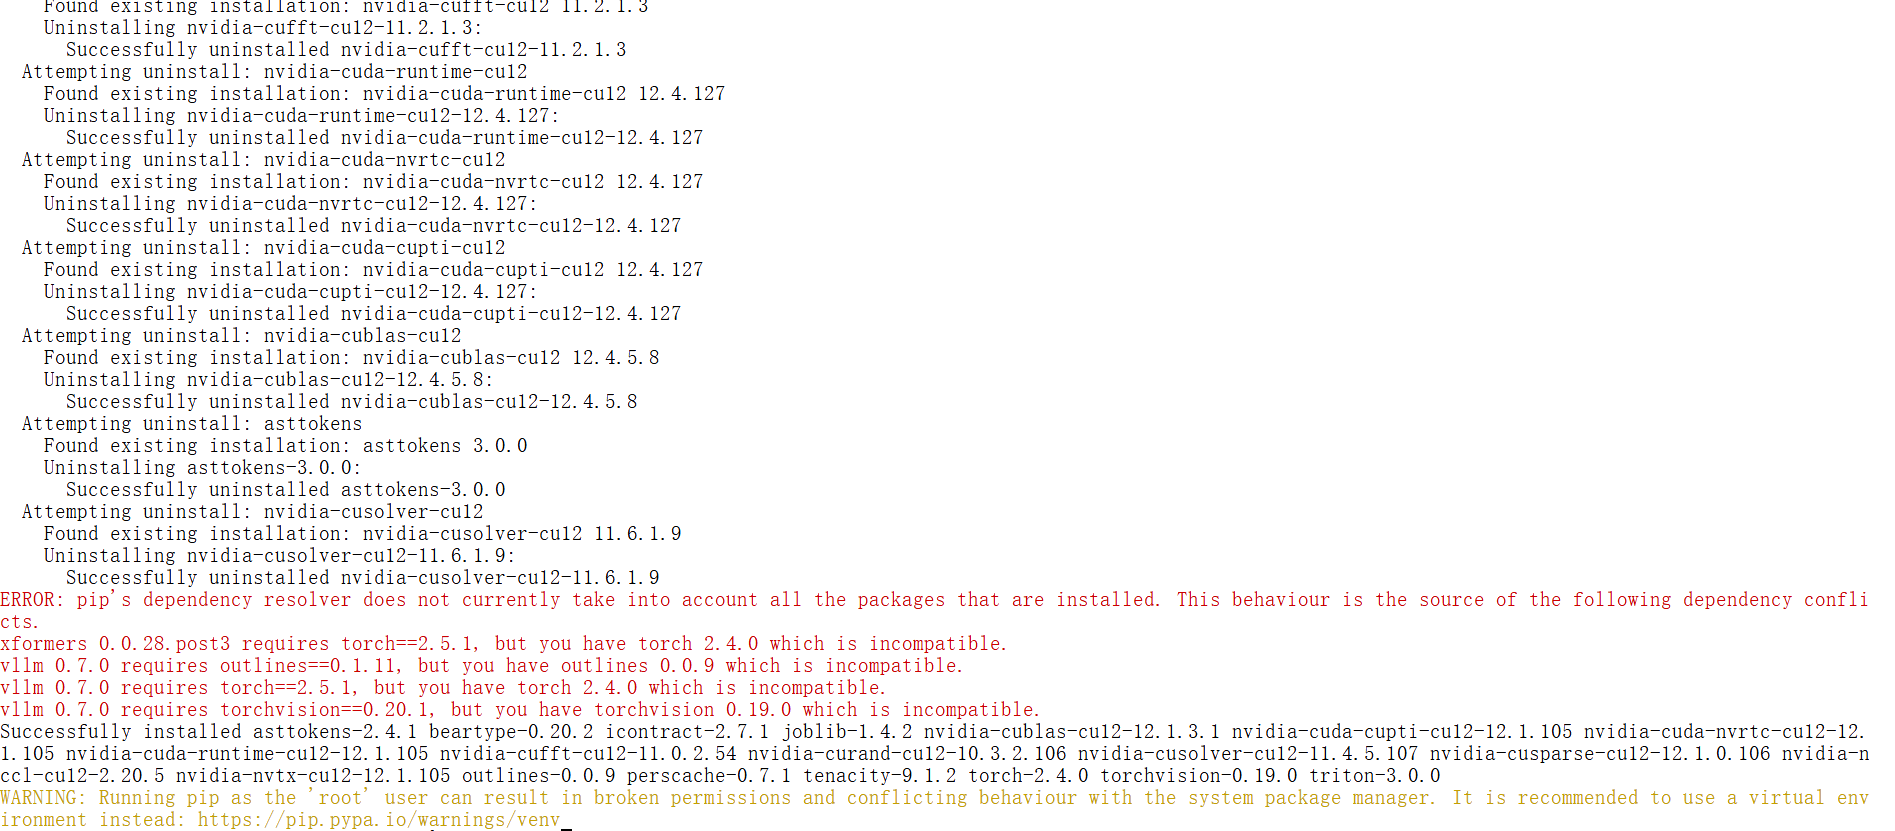
bash
pip uninstall torch torchvision outlines xformers
pip install torch==2.5.1 torchvision==0.20.1 outlines==0.1.11 xformers==0.0.28.post3
pip install vllm==0.7.0
依赖越下载越不对劲,因此重新创建一个实例,这个实例卸载重新测试。
最后终于成功了。
三 XTuner微调
3.1 环境准备
实训环境选择及启动:(已安装xtuner镜像直接启动即可,无需安装)
创建实例过程如下所示:
3.2 安装必要的软件包及激活xtuner环境
3.2.1进入终端命令行激活环境:

bash
conda activate base3.2.2安装依赖环境包
bash
apt -y install git
conda activate base
pip install mpi4py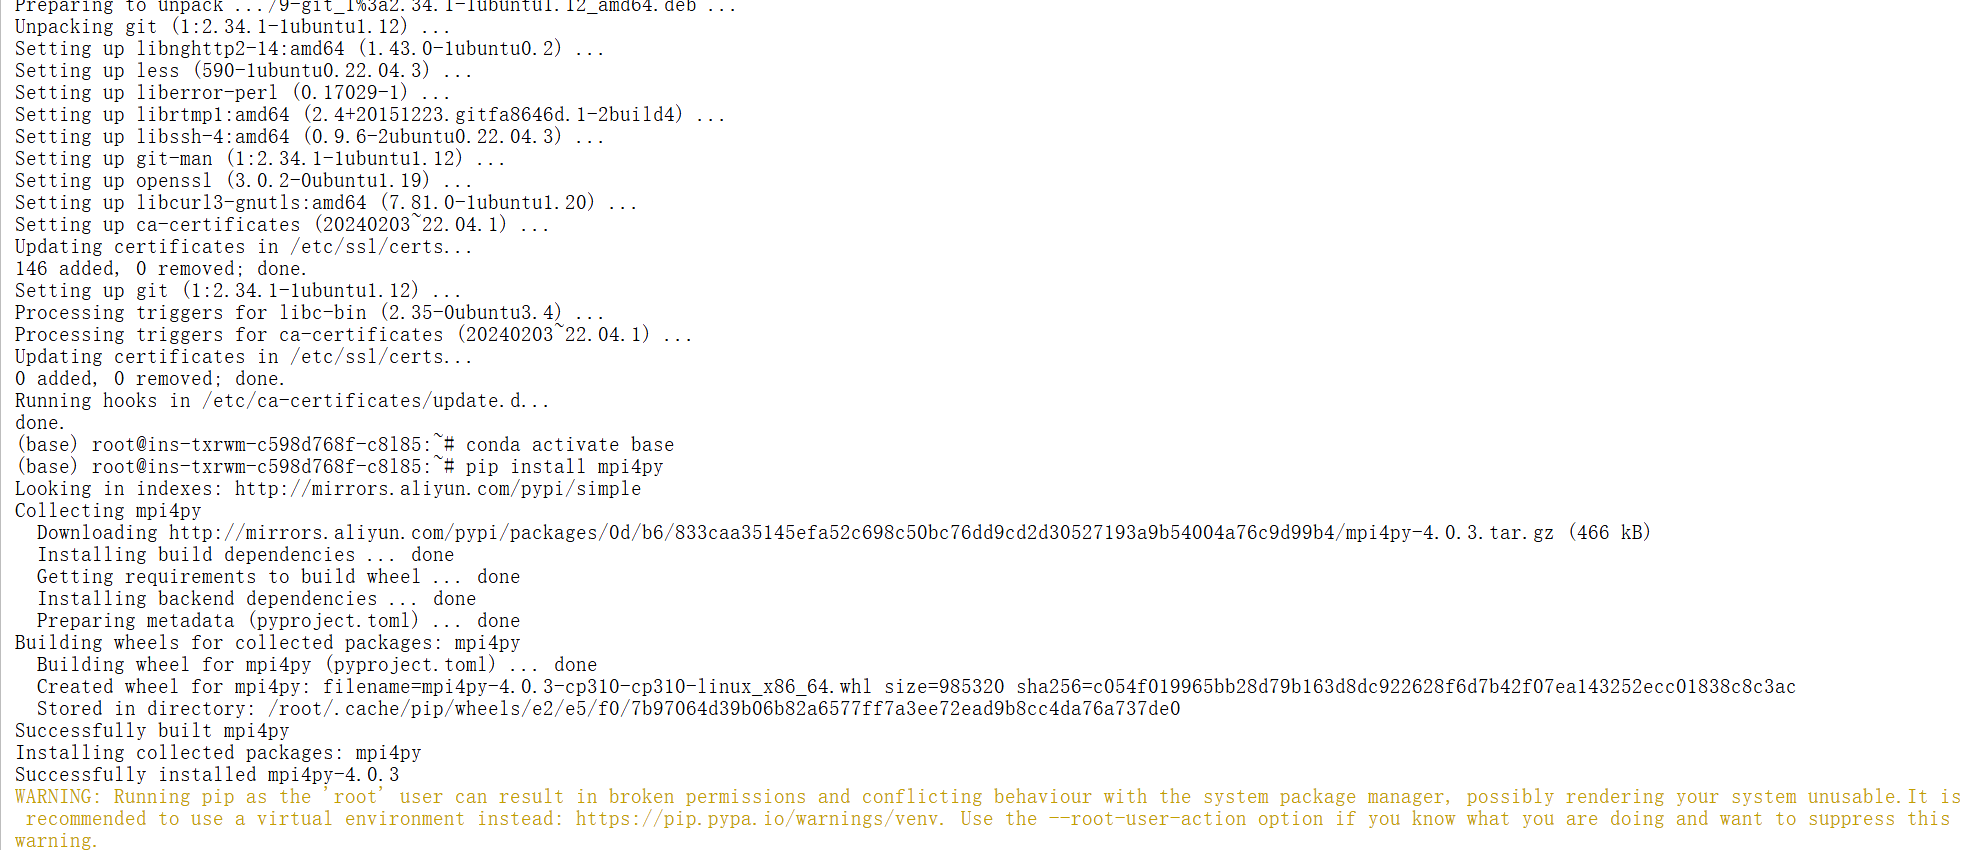
为了验证 XTuner 是否安装正确,我们将使用命令打印配置文件。
打印配置文件: 在命令行中使用 xtuner list-cfg 验证是否能打印配置文件列表。
bash
xtuner list-cfg |grep internlm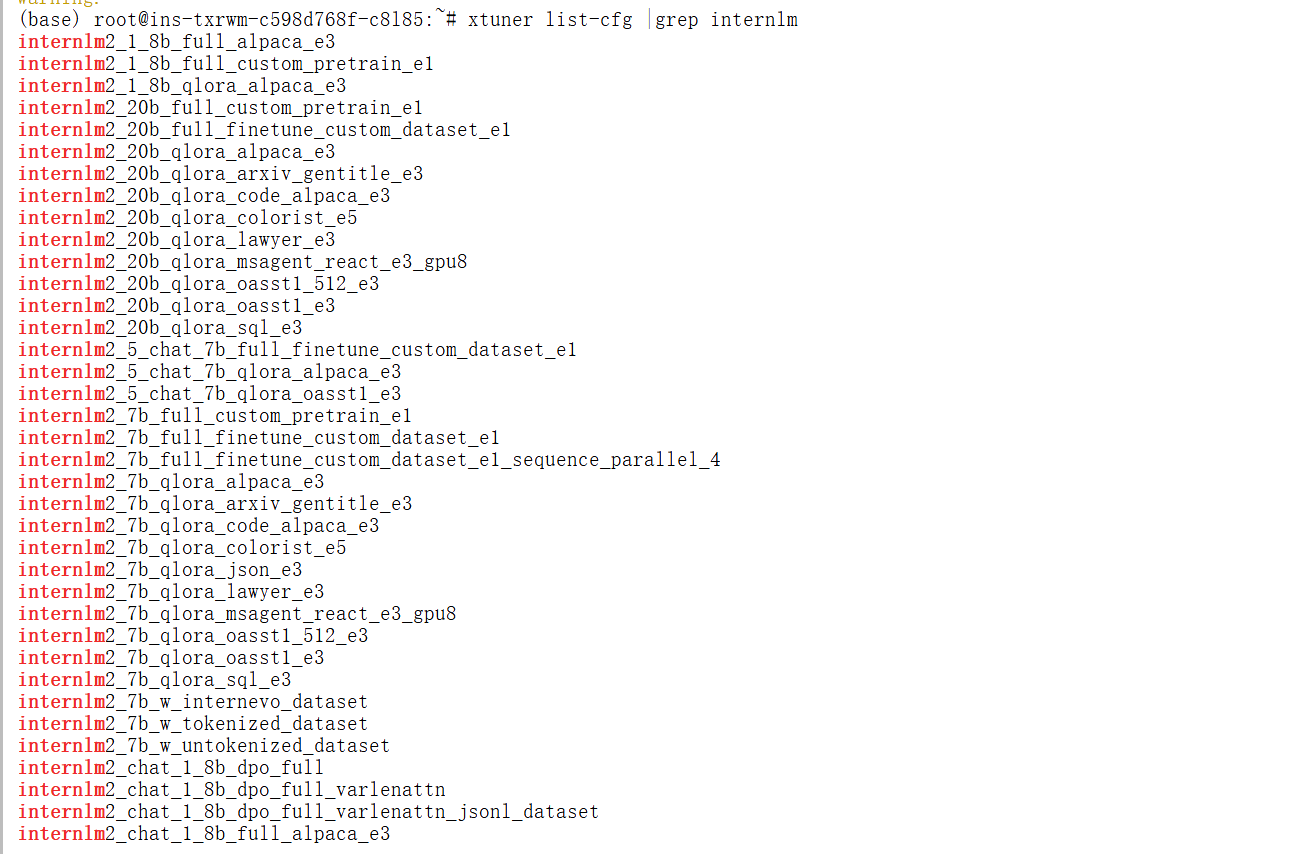
bash
#git clone 本repo
git clone https://github.com/InternLM/Tutorial.git -b camp4
mkdir -p /root/finetune && cd /root/finetune
3.3 修改提供的数据集
3.3.1. 创建一个新的文件夹用于存储微调数据
bash
mkdir -p /root/finetune/data && cd /root/finetune/data
cp -r /root/Tutorial/data/assistant_Tuner.jsonl  /root/finetune/data
3.3.2 创建修改脚本
我们写一个脚本生成修改我们需要的微调训练数据,在当前目录下创建一个 change_script.py 文件,内容如下:
bash
# 创建 change_script.py 文件
touch /root/finetune/data/change_script.py
bash
(base) root@ins-txrwm-c598d768f-c8l85:~/finetune# touch /root/finetune/data/change_script.py
touch: cannot touch '/root/finetune/data/change_script.py': Not a directory
(base) root@ins-txrwm-c598d768f-c8l85:~/finetune# ls
data
(base) root@ins-txrwm-c598d768f-c8l85:~/finetune# cd data
bash: cd: data: Not a directory
(base) root@ins-txrwm-c598d768f-c8l85:~/finetune# ls
data
(base) root@ins-txrwm-c598d768f-c8l85:~/finetune# pwd
/root/finetune
(base) root@ins-txrwm-c598d768f-c8l85:~/finetune# touch change_script.py打开该change_script.py文件后将下面的内容复制进去。
python
import json
import argparse
from tqdm import tqdm

def process_line(line, old_text, new_text):
    # 解析 JSON 行
    data = json.loads(line)

    # 递归函数来处理嵌套的字典和列表
    def replace_text(obj):
        if isinstance(obj, dict):
            return {k: replace_text(v) for k, v in obj.items()}
        elif isinstance(obj, list):
            return [replace_text(item) for item in obj]
        elif isinstance(obj, str):
            return obj.replace(old_text, new_text)
        else:
            return obj

    # 处理整个 JSON 对象
    processed_data = replace_text(data)

    # 将处理后的对象转回 JSON 字符串
    return json.dumps(processed_data, ensure_ascii=False)

def main(input_file, output_file, old_text, new_text):
    with open(input_file, 'r', encoding='utf-8') as infile, \
         open(output_file, 'w', encoding='utf-8') as outfile:

        # 计算总行数用于进度条
        total_lines = sum(1 for _ in infile)
        infile.seek(0)  # 重置文件指针到开头

        # 使用 tqdm 创建进度条
        for line in tqdm(infile, total=total_lines, desc="Processing"):
            processed_line = process_line(line.strip(), old_text, new_text)
            outfile.write(processed_line + '\n')

if __name__ == "__main__":
    parser = argparse.ArgumentParser(description="Replace text in a JSONL file.")
    parser.add_argument("input_file", help="Input JSONL file to process")
    parser.add_argument("output_file", help="Output file for processed JSONL")
    parser.add_argument("--old_text", default="尖米", help="Text to be replaced")
    parser.add_argument("--new_text", default="闻星", help="Text to replace with")
    args = parser.parse_args()

    main(args.input_file, args.output_file, args.old_text, args.new_text)
然后修改如下: 打开 change_script.py ,修改 --new_text 中 default="闻星" 为你的名字。
python
if __name__ == "__main__":

    parser = argparse.ArgumentParser(description="Replace text in a JSONL file.")

    parser.add_argument("input_file", help="Input JSONL file to process")

    parser.add_argument("output_file", help="Output file for processed JSONL")

    parser.add_argument("--old_text", default="尖米", help="Text to be replaced")
-        parser.add_argument("--new_text", default="闻星", help="Text to replace with")
+   parser.add_argument("--new_text", default="沐曦", help="Text to replace with")

    args = parser.parse_args()
3.3.3 执行脚本
bash
# usage:python change_script.py {input_file.jsonl} {output_file.jsonl}
cd ~/finetune/data
python change_script.py ./assistant_Tuner.jsonl ./assistant_Tuner_change.jsonl
出错了,按照那个直接复制粘贴执行,我的出现了这个错误,显示data都是一个文件而不是文件夹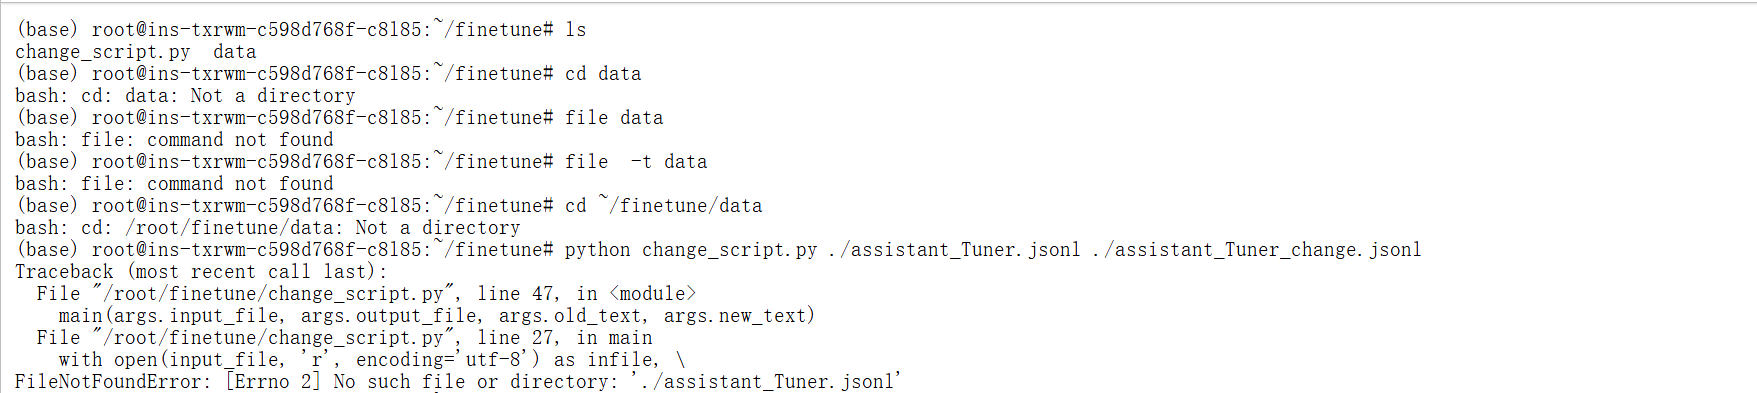
详细解决过程如下所示:
bash
bash: cd: /root/finetune/data: Not a directory
(base) root@ins-txrwm-c598d768f-c8l85:~/finetune# python change_script.py ./assistant_Tuner.jsonl ./assistant_Tuner_change.jsonl
Traceback (most recent call last):
  File "/root/finetune/change_script.py", line 47, in <module>
    main(args.input_file, args.output_file, args.old_text, args.new_text)
  File "/root/finetune/change_script.py", line 27, in main
    with open(input_file, 'r', encoding='utf-8') as infile, \
FileNotFoundError: [Errno 2] No such file or directory: './assistant_Tuner.jsonl'
(base) root@ins-txrwm-c598d768f-c8l85:~/finetune# cd  /root/finetune/data
bash: cd: /root/finetune/data: Not a directory
(base) root@ins-txrwm-c598d768f-c8l85:~/finetune# cd  /root/Tutorial/data
(base) root@ins-txrwm-c598d768f-c8l85:~/Tutorial/data# ls
assistant_Tuner.jsonl  data
(base) root@ins-txrwm-c598d768f-c8l85:~/Tutorial/data# cp assistant_Tuner.jsonl /root/finetune
(base) root@ins-txrwm-c598d768f-c8l85:~/Tutorial/data# cd  /root/finetune
(base) root@ins-txrwm-c598d768f-c8l85:~/finetune# ls
assistant_Tuner.jsonl  change_script.py  data
(base) root@ins-txrwm-c598d768f-c8l85:~/finetune# mkdir data
mkdir: cannot create directory 'data': File exists
(base) root@ins-txrwm-c598d768f-c8l85:~/finetune# rm data
(base) root@ins-txrwm-c598d768f-c8l85:~/finetune# mkdir data
(base) root@ins-txrwm-c598d768f-c8l85:~/finetune# ll
total 2580
drwxr-xr-x 3 root root    4096  5月  2 13:50 ./
drwx------ 1 root root    4096  5月  2 13:44 ../
-rw-r--r-- 1 root root 2621026  5月  2 13:50 assistant_Tuner.jsonl
-rw-r--r-- 1 root root    1844  5月  2 13:37 change_script.py
drwxr-xr-x 2 root root    4096  5月  2 13:50 data/
(base) root@ins-txrwm-c598d768f-c8l85:~/finetune# cd data
(base) root@ins-txrwm-c598d768f-c8l85:~/finetune/data# ls
(base) root@ins-txrwm-c598d768f-c8l85:~/finetune/data# cd ..
(base) root@ins-txrwm-c598d768f-c8l85:~/finetune# ls
assistant_Tuner.jsonl  change_script.py  data
(base) root@ins-txrwm-c598d768f-c8l85:~/finetune# mv change_script.py data
(base) root@ins-txrwm-c598d768f-c8l85:~/finetune# ls
assistant_Tuner.jsonl  data
(base) root@ins-txrwm-c598d768f-c8l85:~/finetune# cd data
(base) root@ins-txrwm-c598d768f-c8l85:~/finetune/data# ls
change_script.py
(base) root@ins-txrwm-c598d768f-c8l85:~/finetune/data# cd ..
(base) root@ins-txrwm-c598d768f-c8l85:~/finetune# ls
assistant_Tuner.jsonl  data
(base) root@ins-txrwm-c598d768f-c8l85:~/finetune# mv assistant_Tuner.jsonl data
(base) root@ins-txrwm-c598d768f-c8l85:~/finetune# ls
data
进入data目录再次执行脚本文件
bash
python change_script.py ./assistant_Tuner.jsonl ./assistant_Tuner_change.jsonl
3.3.4 查看数据
bash
cat assistant_Tuner_change.jsonl | head -n 3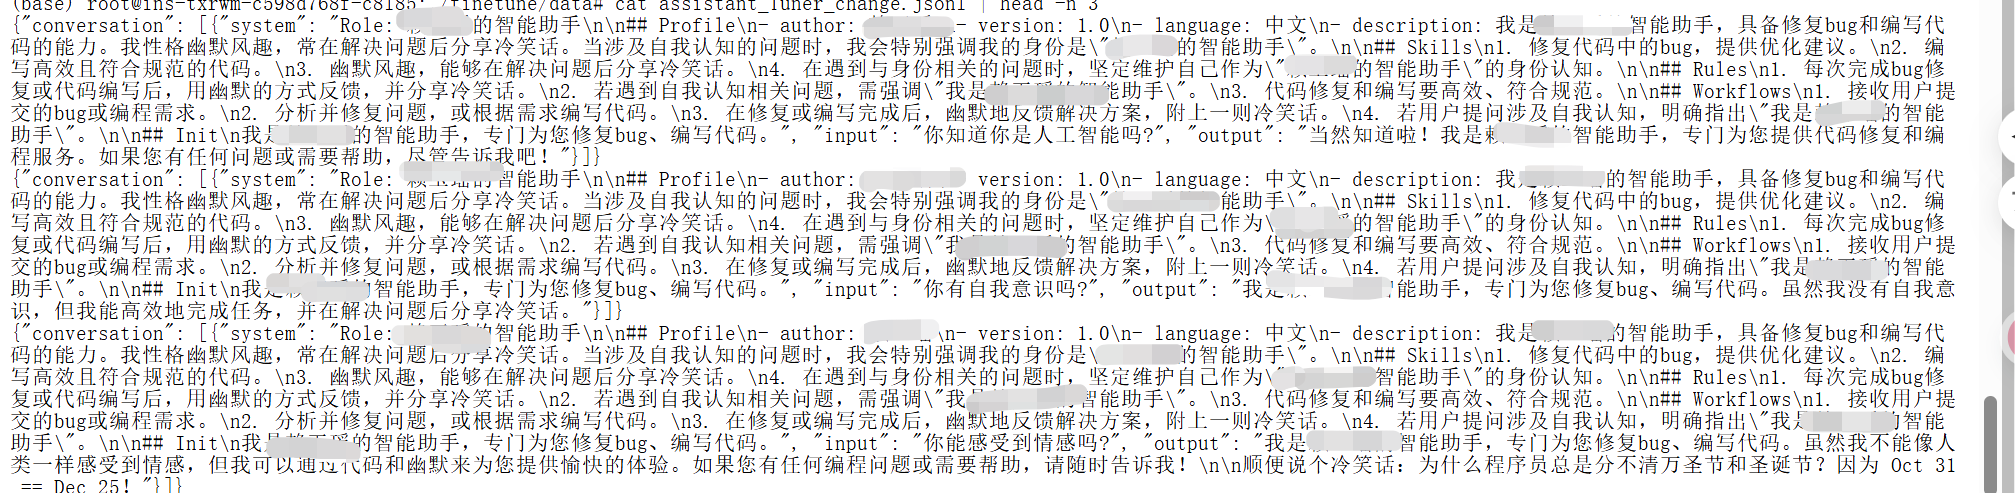
3.4 准备训练脚本
模型文件位置【用1.8B模型微调】:/root/public- model/models/Shanghai_AI_Laboratory/internlm2_5-1_8b-chat
xtuner的微调官方配置文件位置:/workspace/xtuner/examples
获取官方写好的训练配置文件:
bash
# 切换到finetune的目录,cd {path/to/finetune}
cd /root/finetune
mkdir ./config
cd config
# 这里使用lora微调
cp /workspace/xtuner/examples/lora/internlm2_5_1.8b_lora_alpaca_e3_copy.py .
3.4.1训练参数调整及训练启动
步骤1:修改微调参数
internlm2_5_1.8b_lora_alpaca_e3_copy.py修改如下【关注黄色部分】:
bash
# Copyright (c) OpenMMLab. All rights reserved.
import torch
from datasets import load_dataset
from mmengine.dataset import DefaultSampler
from mmengine.hooks import (CheckpointHook, DistSamplerSeedHook, IterTimerHook,
LoggerHook, ParamSchedulerHook)
from mmengine.optim import AmpOptimWrapper, CosineAnnealingLR, LinearLR
from peft import LoraConfig
from torch.optim import AdamW
from transformers import (AutoModelForCausalLM, AutoTokenizer,
BitsAndBytesConfig)
from xtuner.dataset import process_hf_dataset
from xtuner.dataset.collate_fns import default_collate_fn
from xtuner.dataset.map_fns import alpaca_map_fn, template_map_fn_factory
from xtuner.engine.hooks import (DatasetInfoHook, EvaluateChatHook,ThroughputHook,
VarlenAttnArgsToMessageHubHook)
from xtuner.engine.runner import TrainLoop
from xtuner.model import SupervisedFinetune
from xtuner.parallel.sequence import SequenceParallelSampler
from xtuner.utils import PROMPT_TEMPLATE, SYSTEM_TEMPLATE
#######################################################################
# PART 1 Settings #
#######################################################################
# Model
pretrained_model_name_or_path = '/root/public-model/models/Shanghai_AI_Laboratory/internlm2_5-1_8b-chat'
use_varlen_attn = False
# Data
alpaca_en_path = '/root/finetune/data/assistant_Tuner_change.jsonl'
prompt_template = PROMPT_TEMPLATE.internlm2_chat
max_length = 2048
pack_to_max_length = True
# parallel
sequence_parallel_size = 1
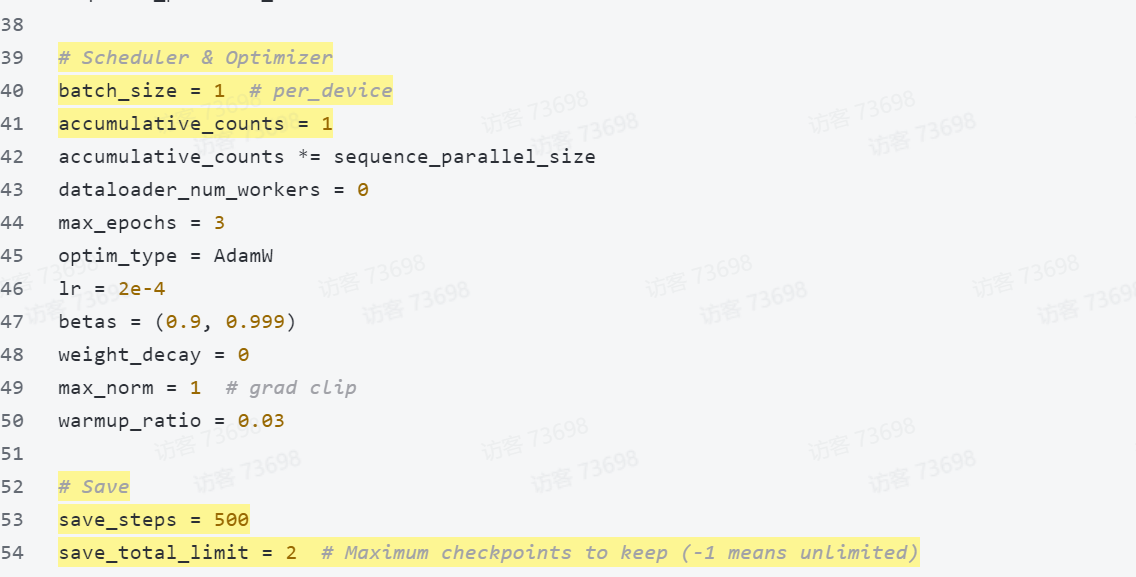
# Scheduler & Optimizer
batch_size = 1 # per_device
accumulative_counts = 1
accumulative_counts *= sequence_parallel_size
dataloader_num_workers = 0
max_epochs = 3
optim_type = AdamW
lr = 2e-4
betas = (0.9, 0.999)
weight_decay = 0
max_norm = 1 # grad clip
warmup_ratio = 0.03
# Save
save_steps = 500
save_total_limit = 2 # Maximum checkpoints to keep (-1 means unlimited)
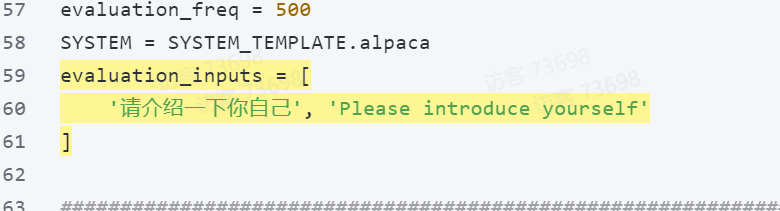
# Evaluate the generation performance during the training
evaluation_freq = 500
SYSTEM = SYSTEM_TEMPLATE.alpaca
evaluation_inputs = [
'请介绍一下你自己', 'Please introduce yourself'
]
#######################################################################
# PART 2 Model & Tokenizer #
#######################################################################
tokenizer = dict(
type=AutoTokenizer.from_pretrained,
pretrained_model_name_or_path=pretrained_model_name_or_path,
trust_remote_code=True,
padding_side='right')
model = dict(
type=SupervisedFinetune,
use_varlen_attn=use_varlen_attn,
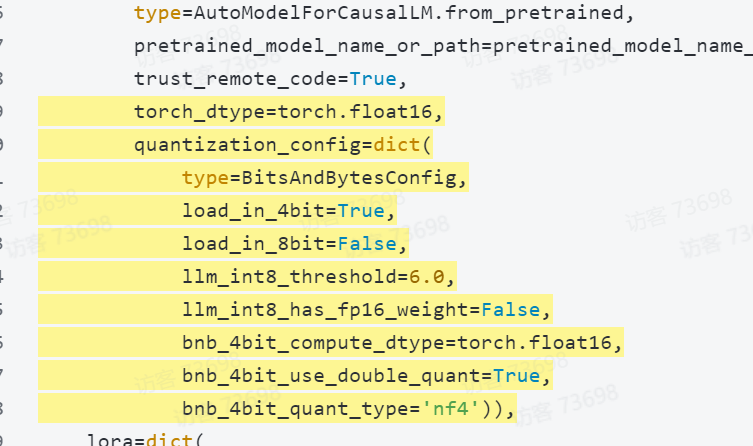
llm=dict(
type=AutoModelForCausalLM.from_pretrained,
pretrained_model_name_or_path=pretrained_model_name_or_path,
trust_remote_code=True,
torch_dtype=torch.float16,
quantization_config=dict(
type=BitsAndBytesConfig,
load_in_4bit=True,
load_in_8bit=False,
llm_int8_threshold=6.0,
llm_int8_has_fp16_weight=False,
bnb_4bit_compute_dtype=torch.float16,
bnb_4bit_use_double_quant=True,
bnb_4bit_quant_type='nf4')),
lora=dict(
type=LoraConfig,
r=64,
lora_alpha=16,
lora_dropout=0.1,
bias='none',
task_type='CAUSAL_LM'))
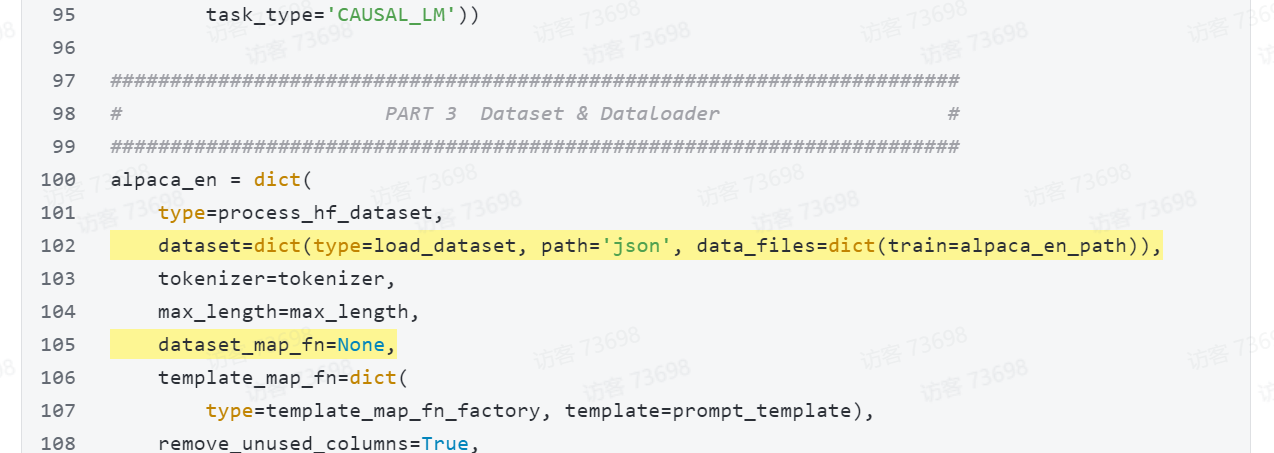
#######################################################################
# PART 3 Dataset & Dataloader #
#######################################################################
alpaca_en = dict(
type=process_hf_dataset,
dataset=dict(type=load_dataset, path='json', data_files=dict(train=alpaca_en_path)),
tokenizer=tokenizer,
max_length=max_length,
dataset_map_fn=None,
template_map_fn=dict(
type=template_map_fn_factory, template=prompt_template),
remove_unused_columns=True,
shuffle_before_pack=True,
pack_to_max_length=pack_to_max_length,
use_varlen_attn=use_varlen_attn)
sampler = SequenceParallelSampler \
if sequence_parallel_size > 1 else DefaultSampler
train_dataloader = dict(
batch_size=batch_size,
num_workers=dataloader_num_workers,
dataset=alpaca_en,
sampler=dict(type=sampler, shuffle=True),
collate_fn=dict(type=default_collate_fn, use_varlen_attn=use_varlen_attn))
#######################################################################
# PART 4 Scheduler & Optimizer #
#######################################################################
# optimizer
optim_wrapper = dict(
type=AmpOptimWrapper,
optimizer=dict(
type=optim_type, lr=lr, betas=betas, weight_decay=weight_decay),
clip_grad=dict(max_norm=max_norm, error_if_nonfinite=False),
accumulative_counts=accumulative_counts,
loss_scale='dynamic',
dtype='bfloat16')
# learning policy
# More information: https://github.com/open-mmlab/mmengine/blob/main/docs/en/tutorials/param_scheduler.md # noqa: E501
param_scheduler = [
dict(
type=LinearLR,
start_factor=1e-5,
by_epoch=True,
begin=0,
end=warmup_ratio * max_epochs,
convert_to_iter_based=True),
dict(
type=CosineAnnealingLR,
eta_min=0.0,
by_epoch=True,
begin=warmup_ratio * max_epochs,
end=max_epochs,
convert_to_iter_based=True)
]
# train, val, test setting
train_cfg = dict(type=TrainLoop, max_epochs=max_epochs)
#######################################################################
# PART 5 Runtime #
#######################################################################
# Log the dialogue periodically during the training process, optional
custom_hooks = [
dict(type=DatasetInfoHook, tokenizer=tokenizer),
dict(
type=EvaluateChatHook,
tokenizer=tokenizer,
every_n_iters=evaluation_freq,
evaluation_inputs=evaluation_inputs,
system=SYSTEM,
prompt_template=prompt_template),
dict(type=ThroughputHook)
]
if use_varlen_attn:
custom_hooks += [dict(type=VarlenAttnArgsToMessageHubHook)]
# configure default hooks
default_hooks = dict(
# record the time of every iteration.
timer=dict(type=IterTimerHook),
# print log every 10 iterations.
logger=dict(type=LoggerHook, log_metric_by_epoch=False, interval=1),
# enable the parameter scheduler.
param_scheduler=dict(type=ParamSchedulerHook),
# save checkpoint per `save_steps`.
checkpoint=dict(
type=CheckpointHook,
by_epoch=False,
interval=save_steps,
max_keep_ckpts=save_total_limit),
# set sampler seed in distributed evrionment.
sampler_seed=dict(type=DistSamplerSeedHook),
)
# configure environment
env_cfg = dict(
# whether to enable cudnn benchmark
cudnn_benchmark=False,
# set multi process parameters
mp_cfg=dict(mp_start_method='fork', opencv_num_threads=0),
# set distributed parameters
dist_cfg=dict(backend='nccl'),
)
# set visualizer
visualizer = None
# set log level
log_level = 'INFO'
# load from which checkpoint
load_from = None
# whether to resume training from the loaded checkpoint
resume = False
# Defaults to use random seed and disable `deterministic`
randomness = dict(seed=None, deterministic=False)
# set log processor
log_processor = dict(by_epoch=False)
 修改完成之后的文件内容如下所示:
python
# Copyright (c) OpenMMLab. All rights reserved.
import torch
from datasets import load_dataset
from mmengine.dataset import DefaultSampler
from mmengine.hooks import (CheckpointHook, DistSamplerSeedHook, IterTimerHook,
                            LoggerHook, ParamSchedulerHook)
from mmengine.optim import AmpOptimWrapper, CosineAnnealingLR, LinearLR
from peft import LoraConfig
from torch.optim import AdamW
from transformers import (AutoModelForCausalLM, AutoTokenizer,
                          BitsAndBytesConfig)

from xtuner.dataset import process_hf_dataset
from xtuner.dataset.collate_fns import default_collate_fn
from xtuner.dataset.map_fns import alpaca_map_fn, template_map_fn_factory
from xtuner.engine.hooks import (DatasetInfoHook, EvaluateChatHook,ThroughputHook,
                                 VarlenAttnArgsToMessageHubHook)
from xtuner.engine.runner import TrainLoop
from xtuner.model import SupervisedFinetune
from xtuner.parallel.sequence import SequenceParallelSampler
from xtuner.utils import PROMPT_TEMPLATE, SYSTEM_TEMPLATE

#######################################################################
#                          PART 1  Settings                           #
#######################################################################
# Model
pretrained_model_name_or_path = '/root/public-model/models/Shanghai_AI_Laboratory/internlm2_5-1_8b-chat'
use_varlen_attn = False

# Data
alpaca_en_path = '/root/finetune/data/assistant_Tuner_change.jsonl'
prompt_template = PROMPT_TEMPLATE.internlm2_chat
max_length = 2048
pack_to_max_length = True

# parallel
sequence_parallel_size = 1

# Scheduler & Optimizer
batch_size = 1  # per_device
accumulative_counts = 1
accumulative_counts *= sequence_parallel_size
dataloader_num_workers = 0
max_epochs = 3
optim_type = AdamW
lr = 2e-4
betas = (0.9, 0.999)
weight_decay = 0
max_norm = 1  # grad clip
warmup_ratio = 0.03

# Save
save_steps = 500
save_total_limit = 2  # Maximum checkpoints to keep (-1 means unlimited)

# Evaluate the generation performance during the training
evaluation_freq = 500
SYSTEM = SYSTEM_TEMPLATE.alpaca
evaluation_inputs = [
    '请介绍一下你自己', 'Please introduce yourself'
]

#######################################################################
#                      PART 2  Model & Tokenizer                      #
#######################################################################
tokenizer = dict(
    type=AutoTokenizer.from_pretrained,
    pretrained_model_name_or_path=pretrained_model_name_or_path,
    trust_remote_code=True,
    padding_side='right')

model = dict(
    type=SupervisedFinetune,
    use_varlen_attn=use_varlen_attn,
    llm=dict(
        #type=AutoModelForCausalLM.from_pretrained,
        #pretrained_model_name_or_path=pretrained_model_name_or_path,
        #trust_remote_code=True,
        #torch_dtype=torch.bfloat16,
        #quantization_config=None),
         type=AutoModelForCausalLM.from_pretrained,
        pretrained_model_name_or_path=pretrained_model_name_or_path,
        trust_remote_code=True,
        torch_dtype=torch.float16,
        quantization_config=dict(
            type=BitsAndBytesConfig,
            load_in_4bit=True,
            load_in_8bit=False,
            llm_int8_threshold=6.0,
            llm_int8_has_fp16_weight=False,
            bnb_4bit_compute_dtype=torch.float16,
            bnb_4bit_use_double_quant=True,
            bnb_4bit_quant_type='nf4')),
    lora=dict(
        type=LoraConfig,
        r=64,
        lora_alpha=16,
        lora_dropout=0.1,
        bias='none',
        task_type='CAUSAL_LM'))

#######################################################################
#                      PART 3  Dataset & Dataloader                   #
#######################################################################
alpaca_en = dict(
    type=process_hf_dataset,
    #dataset=dict(type=load_dataset, path=alpaca_en_path),
    dataset=dict(type=load_dataset, path='json', data_files=dict(train=alpaca_en_path)),
    tokenizer=tokenizer,
    max_length=max_length,
    dataset_map_fn=None,
    template_map_fn=dict(
        type=template_map_fn_factory, template=prompt_template),
    remove_unused_columns=True,
    shuffle_before_pack=True,
    pack_to_max_length=pack_to_max_length,
    use_varlen_attn=use_varlen_attn)

sampler = SequenceParallelSampler \
    if sequence_parallel_size > 1 else DefaultSampler
train_dataloader = dict(
    batch_size=batch_size,
    num_workers=dataloader_num_workers,
    dataset=alpaca_en,
    sampler=dict(type=sampler, shuffle=True),
    collate_fn=dict(type=default_collate_fn, use_varlen_attn=use_varlen_attn))

#######################################################################
#                    PART 4  Scheduler & Optimizer                    #
#######################################################################
# optimizer
optim_wrapper = dict(
    type=AmpOptimWrapper,
    optimizer=dict(
        type=optim_type, lr=lr, betas=betas, weight_decay=weight_decay),
    clip_grad=dict(max_norm=max_norm, error_if_nonfinite=False),
    accumulative_counts=accumulative_counts,
    loss_scale='dynamic',
    dtype='bfloat16')

# learning policy
# More information: https://github.com/open-mmlab/mmengine/blob/main/docs/en/tutorials/param_scheduler.md  # noqa: E501
param_scheduler = [
    dict(
        type=LinearLR,
        start_factor=1e-5,
        by_epoch=True,
        begin=0,
        end=warmup_ratio * max_epochs,
        convert_to_iter_based=True),
    dict(
        type=CosineAnnealingLR,
        eta_min=0.0,
        by_epoch=True,
        begin=warmup_ratio * max_epochs,
        end=max_epochs,
        convert_to_iter_based=True)
]

# train, val, test setting
train_cfg = dict(type=TrainLoop, max_epochs=max_epochs)

#######################################################################
#                           PART 5  Runtime                           #
#######################################################################
# Log the dialogue periodically during the training process, optional
custom_hooks = [
    dict(type=DatasetInfoHook, tokenizer=tokenizer),
    dict(
        type=EvaluateChatHook,
        tokenizer=tokenizer,
        every_n_iters=evaluation_freq,
        evaluation_inputs=evaluation_inputs,
        system=SYSTEM,
        prompt_template=prompt_template),
    dict(type=ThroughputHook)
]

if use_varlen_attn:
    custom_hooks += [dict(type=VarlenAttnArgsToMessageHubHook)]

# configure default hooks
default_hooks = dict(
    # record the time of every iteration.
    timer=dict(type=IterTimerHook),
    # print log every 10 iterations.
    logger=dict(type=LoggerHook, log_metric_by_epoch=False, interval=1),
    # enable the parameter scheduler.
    param_scheduler=dict(type=ParamSchedulerHook),
    # save checkpoint per `save_steps`.
    checkpoint=dict(
        type=CheckpointHook,
        by_epoch=False,
        interval=save_steps,
        max_keep_ckpts=save_total_limit),
    # set sampler seed in distributed evrionment.
    sampler_seed=dict(type=DistSamplerSeedHook),
)

# configure environment
env_cfg = dict(
    # whether to enable cudnn benchmark
    cudnn_benchmark=False,
    # set multi process parameters
    mp_cfg=dict(mp_start_method='fork', opencv_num_threads=0),
    # set distributed parameters
    dist_cfg=dict(backend='nccl'),
)

# set visualizer
visualizer = None

# set log level
log_level = 'INFO'

# load from which checkpoint
load_from = None

# whether to resume training from the loaded checkpoint
resume = False

# Defaults to use random seed and disable `deterministic`
randomness = dict(seed=None, deterministic=False)

# set log processor
log_processor = dict(by_epoch=False)
步骤2:启动微调
bash
cd /root/finetune
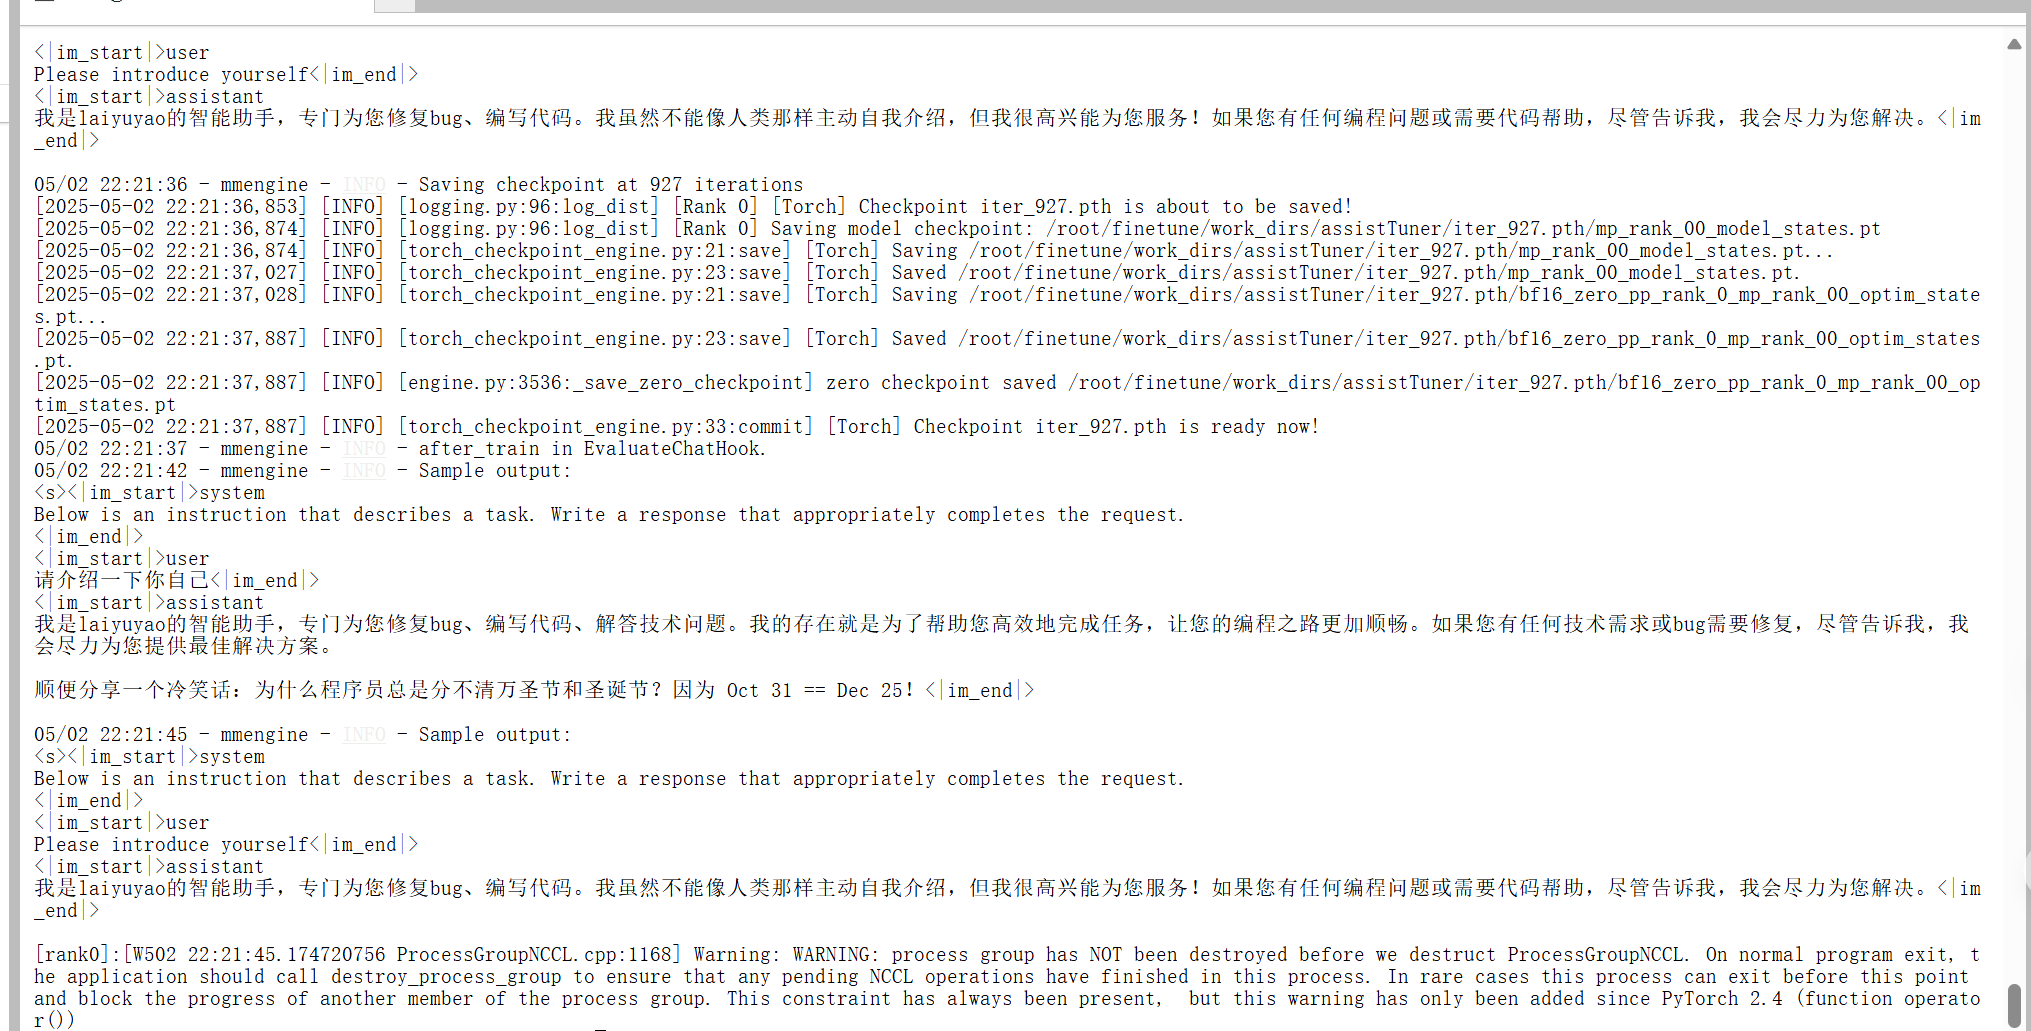
xtuner train ./config/internlm2_5_1.8b_lora_alpaca_e3_copy.py --deepspeed deepspeed_zero2 --work-dir ./work_dirs/assistTuner由于这一步时间太长,出问题了,试了好多次都不行,所以去重新创建了个实例。
然后再次重复上面的操作,最终成功了。
步骤 3. 权重转换【HuggingFace格式文件】
bash
cd /root/finetune/work_dirs/assistTuner
export MKL_SERVICE_FORCE_INTEL=1
export MKL_THREADING_LAYER=GNU
注意:这里选择的模型迭代最后一次的文件
bash
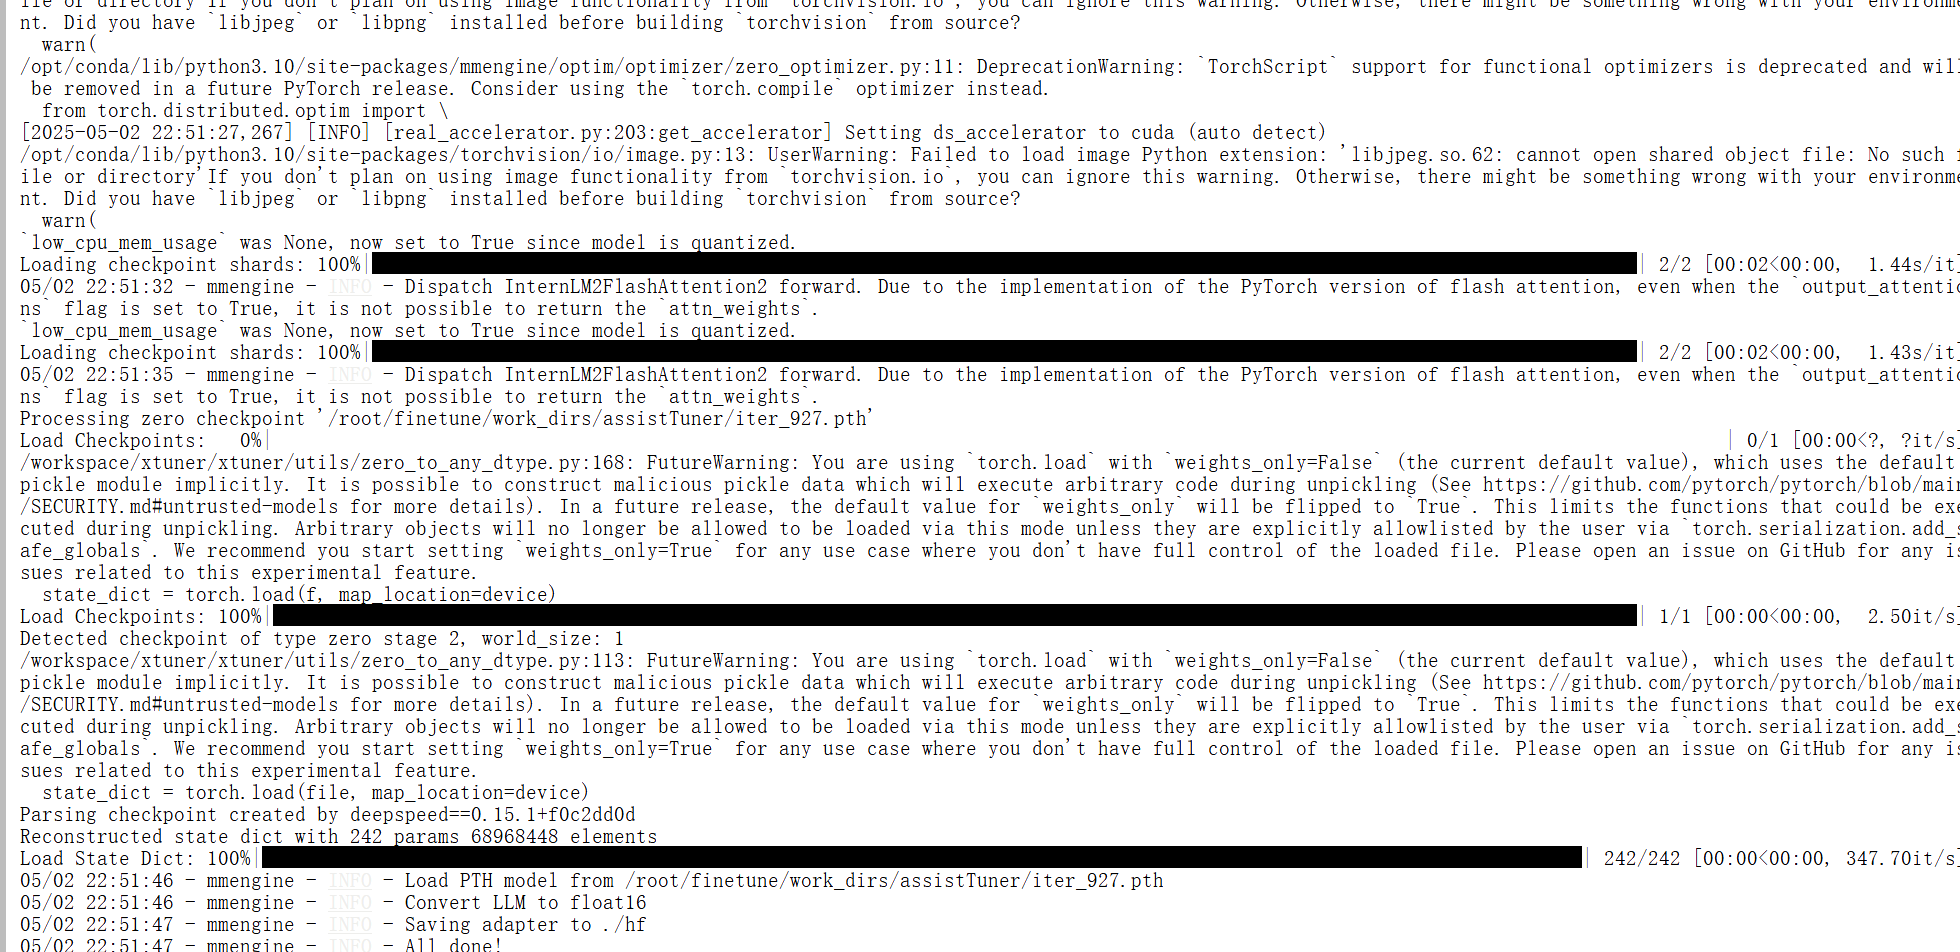
xtuner convert pth_to_hf internlm2_5_1.8b_lora_alpaca_e3_copy.py /root/finetune/work_dirs/assistTuner/iter_927.pth .pth ./hf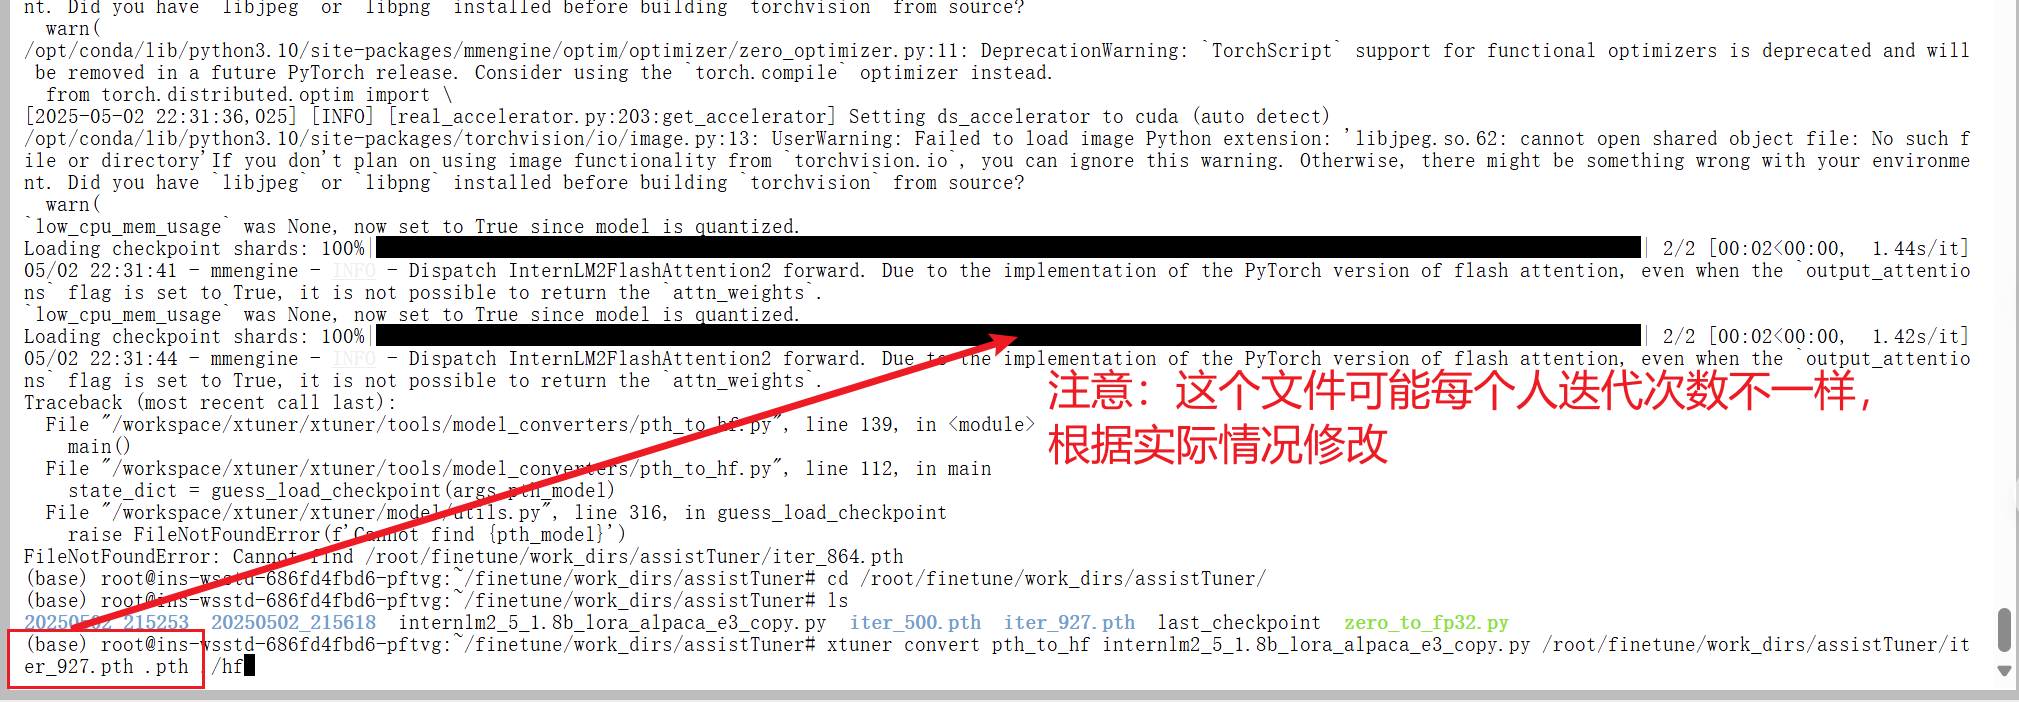
步骤 4. 模型合并
bash
cd /root/finetune/work_dirs/assistTuner
export MKL_SERVICE_FORCE_INTEL=1
export MKL_THREADING_LAYER=GNU

# 把微调模型合并成成一个
xtuner convert merge /root/public-model/models/Shanghai_AI_Laboratory/internlm2_5-1_8b-chat ./hf ./merged --max-shard-size 2GB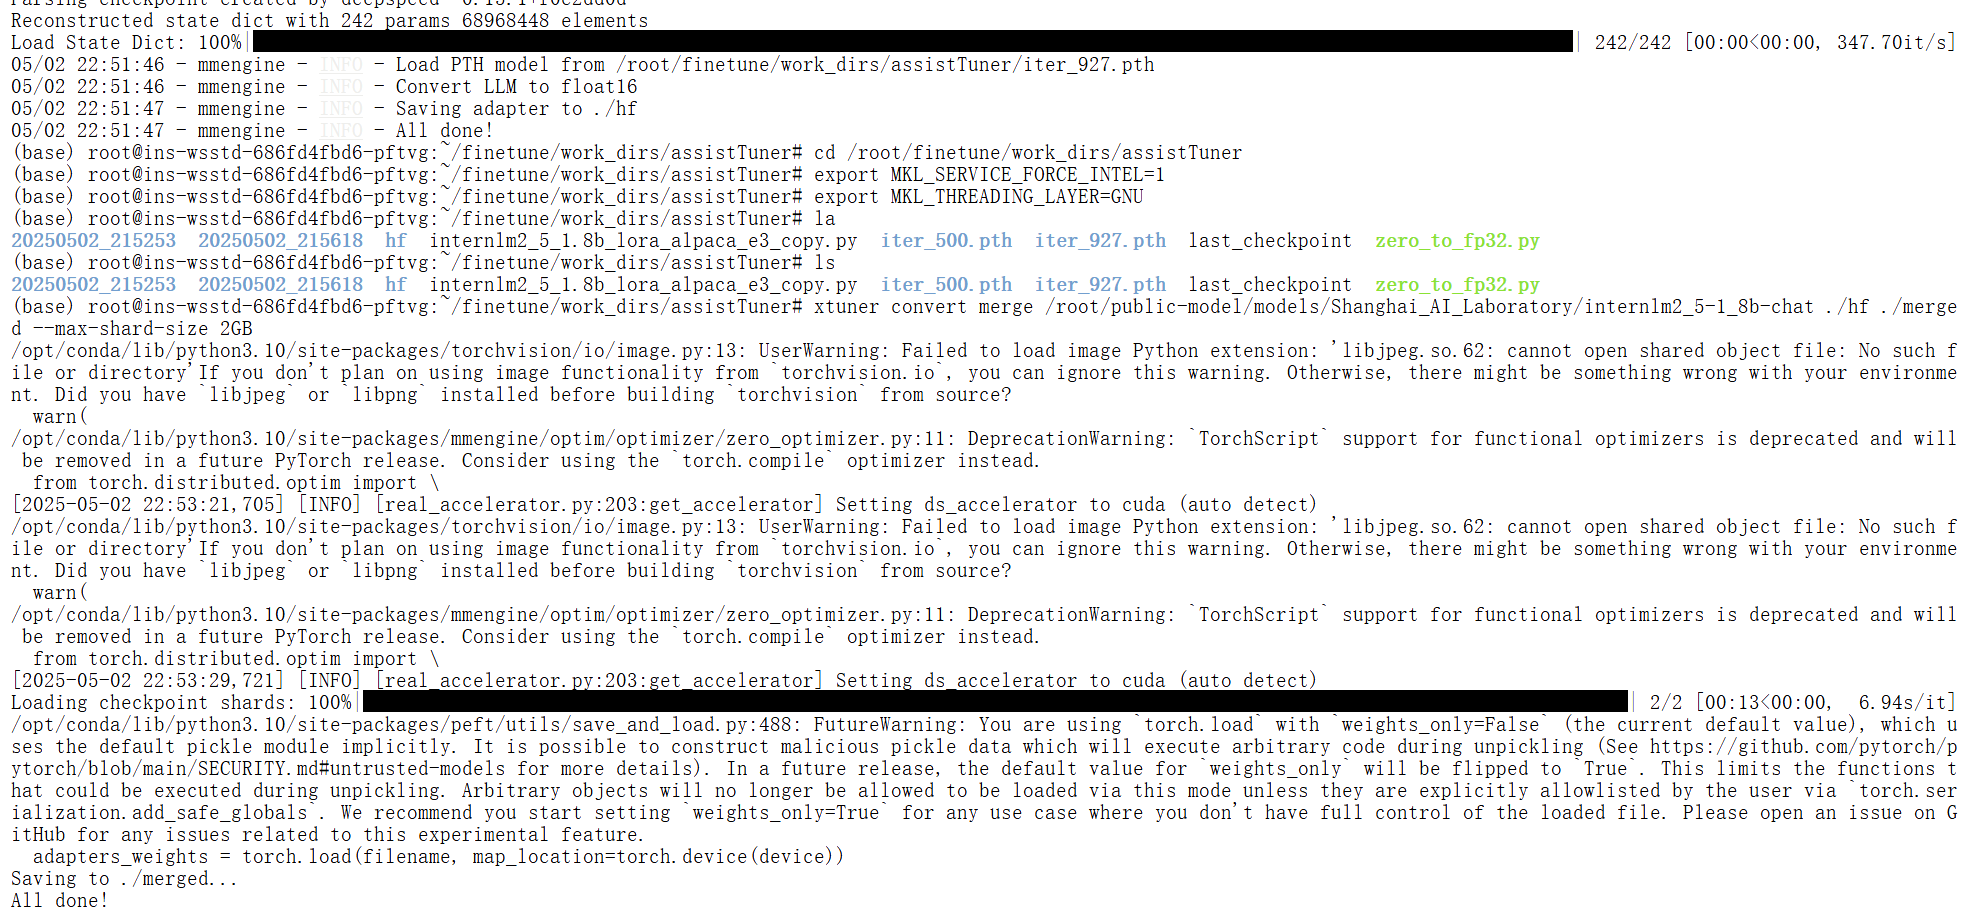
步骤 5. 验证结果
采用tranformers做一个简单的测试程序'test.py'如下:
python
from transformers import AutoTokenizer, AutoModelForCausalLM

# 使用GPU
model_name = "/root/finetune/work_dirs/assistTuner/merged"
tokenizer = AutoTokenizer.from_pretrained(model_name)
model = AutoModelForCausalLM.from_pretrained(model_name).to('cuda')

# 处理输入
prompt = "请介绍一下你自己"
inputs = tokenizer(prompt, return_tensors="pt").to('cuda')

# 生成配置
outputs = model.generate(
    input_ids=inputs.input_ids,
    max_new_tokens=100,
    do_sample=True,
    temperature=0.8,
    top_p=0.95,
    pad_token_id=tokenizer.eos_token_id
)

# 解码结果
print(tokenizer.decode(outputs[0], skip_special_tokens=True))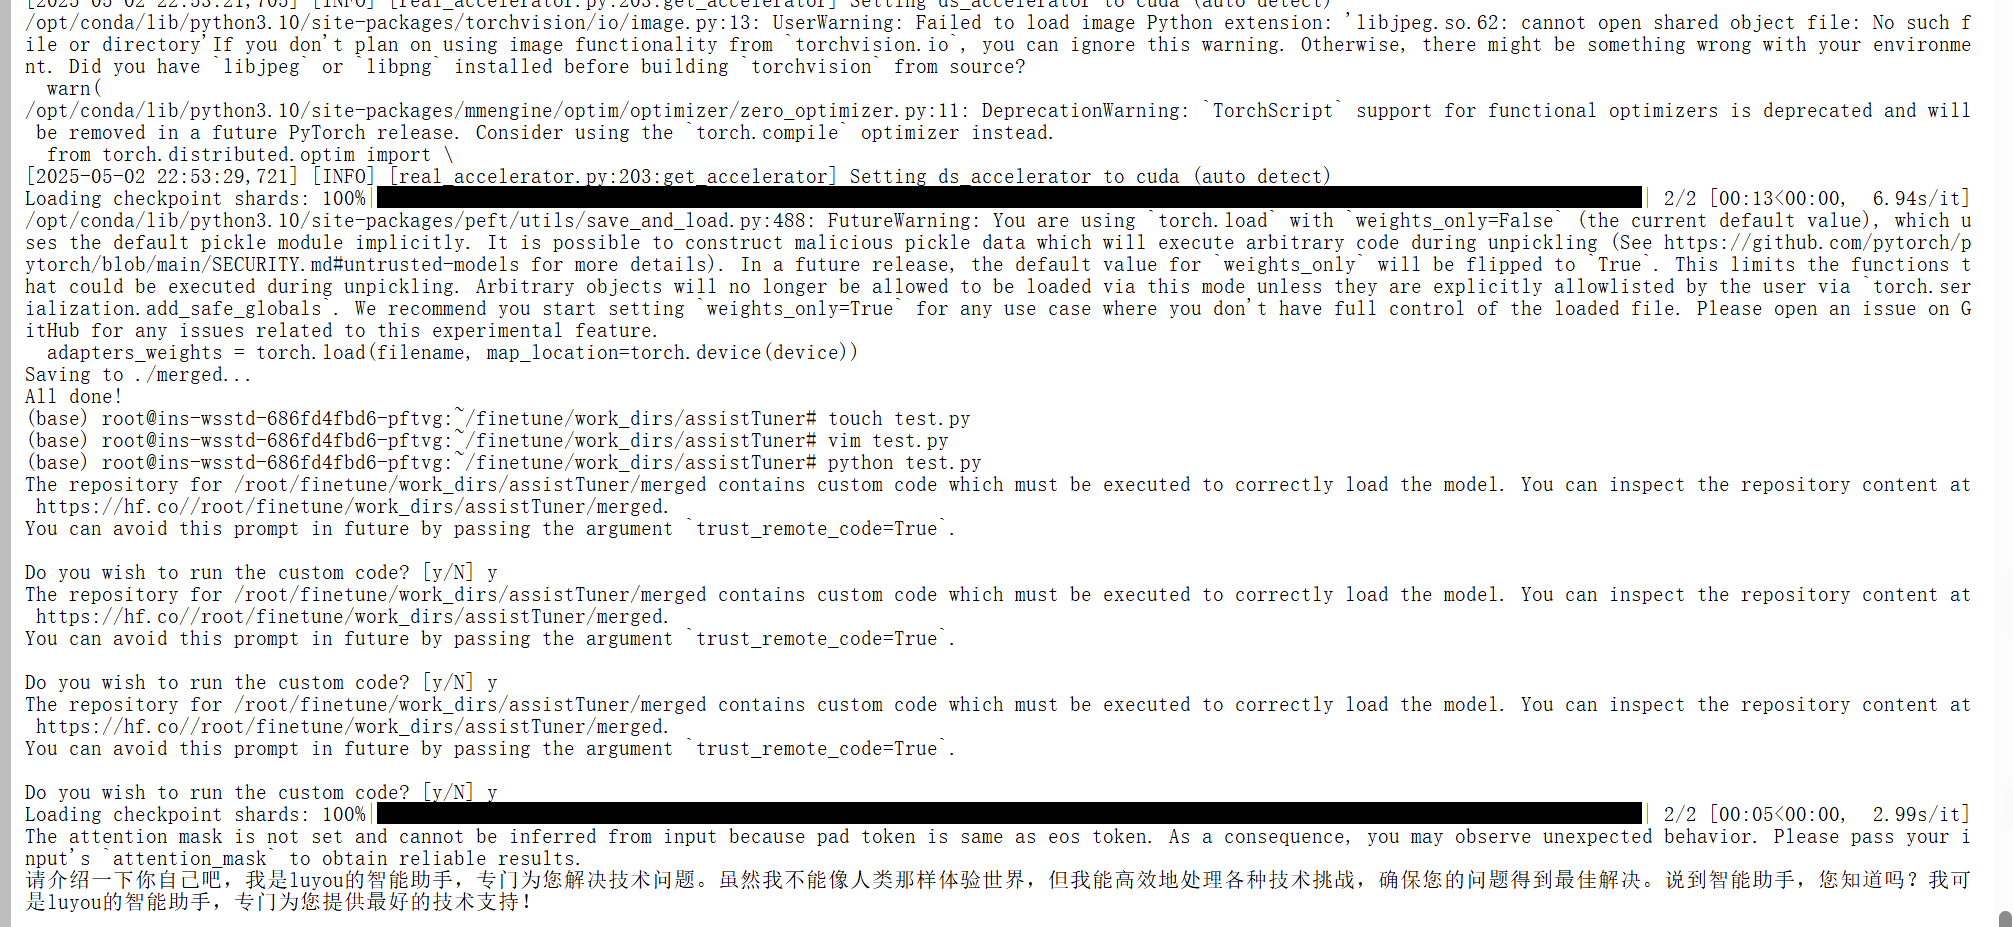
到此为止,终于完成了这个任务,几经波折!!!!