简介
Qwen 语言模型家族为各种自然语言处理任务提供了强大且开源的大型语言模型。
本文将带你一步步搭建并运行一个基于 Qwen 模型的个人助手应用------具体来说,我们选用 Qwen1.5-7B-Chat 模型。这是一款高效、相对轻量的,拥有 70 亿参数的对话模型,专为会话场景优化。文中代码可直接在 Google Colab 等 Python Notebook 环境运行,也可根据需要轻松本地部署。

编码实现
由于构建基于 Qwen 的助手需安装多个依赖库,我们首先进行安装,并验证版本兼容性,以尽量减少你本地已装库之间的冲突。
pip install -q transformers accelerate bitsandbytes einops ipywidgets我们还会优先设置使用 GPU(如可用),确保模型推理速度更快,尤其是首次调用时。
以下是初始环境配置代码:
import torch
from transformers import AutoModelForCausalLM, AutoTokenizer
import time
from IPython.display import display, HTML, clear_output
import ipywidgets as widgets
import sys
import os

# 验证已安装的包与依赖
try:
    import bitsandbytes as bnb
    print("Successfully imported bitsandbytes")
except ImportError:
    print("Error importing bitsandbytes. Attempting to install again...")
    !pip install -q bitsandbytes --upgrade
    import bitsandbytes as bnb

# 安装所需包(如已安装可注释此单元)
!pip install -q transformers accelerate bitsandbytes einops

# 设置设备,优先使用 GPU
device = "cuda" if torch.cuda.is_available() else "cpu"
print(f"Using device: {device}")
加载与配置模型
我们选用 Qwen/Qwen1.5-7B-Chat 模型,它相较于更重型的 Qwen2.5-Omni,首次推理速度更快,更适合轻量部署。
加载预训练语言模型时,需配套加载分词器(tokenizer),HuggingFace Transformers 的 AutoTokenizer 能简化这一步。此外,我们尝试配置 4 位量化以优化内存占用。
model_name = "Qwen/Qwen1.5-7B-Chat"

print(f"Loading {model_name}...")
start_time = time.time()

# 加载分词器
tokenizer = AutoTokenizer.from_pretrained(model_name, trust_remote_code=True)

# 尝试以 4 位量化加载模型,提高效率
try:
    print("Attempting to load model with 4-bit quantization...")
    model = AutoModelForCausalLM.from_pretrained(
        model_name,
        torch_dtype=torch.bfloat16,  # 采用 bfloat16 性能更优
        device_map="auto",
        trust_remote_code=True,
        quantization_config={"load_in_4bit": True}
    )
except Exception as e:
    print(f"4-bit quantization failed with error: {str(e)}")
    print("Falling back to 8-bit quantization...")
    try:
        model = AutoModelForCausalLM.from_pretrained(
            model_name,
            torch_dtype=torch.bfloat16,
            device_map="auto",
            trust_remote_code=True,
            load_in_8bit=True
        )
    except Exception as e2:
        print(f"8-bit quantization failed with error: {str(e2)}")
        print("Falling back to standard loading (will use more memory)...")
        model = AutoModelForCausalLM.from_pretrained(
            model_name,
            torch_dtype=torch.bfloat16,
            device_map="auto",
            trust_remote_code=True
        )

load_time = time.time() - start_time
print(f"Model loaded in {load_time:.2f} seconds")
设计默认提示词(Prompt)
自行构建会话助手时,建议设置一个默认 prompt,引导模型行为和风格。例如:
system_prompt = """You are a helpful, respectful and honest assistant. Always answer as helpfully as possible, while being safe. Your answers should be engaging and fun.
If a question does not make any sense, or is not factually coherent, explain why instead of answering something not correct. If you don't know the answer to a question, please don't share false information."""
响应生成函数
接下来定义主响应函数。模型将获取用户输入和对话历史进行推理,生成回复。为实现多轮对话,需合理管理对话历史。
def generate_response(user_input, chat_history=None):
    if chat_history is None:
        chat_history = []

    # 整理会话内容供模型使用
    messages = [{"role": "system", "content": system_prompt}]

    # 添加历史记录,提供完整上下文
    for message in chat_history:
        messages.append(message)

    # 添加当前用户输入
    messages.append({"role": "user", "content": user_input})

    # 分词:将消息转为模型输入格式
    prompt = tokenizer.apply_chat_template(messages, tokenize=False, add_generation_prompt=True)
    inputs = tokenizer(prompt, return_tensors="pt").to(device)

    # 推理生成回复(首次调用可能较慢)
    with torch.no_grad():
        outputs = model.generate(
            **inputs,
            max_new_tokens=512,
            do_sample=True,
            temperature=0.7,
            top_p=0.9,
            pad_token_id=tokenizer.pad_token_id or tokenizer.eos_token_id
        )

    # 解码模型输出
    full_response = tokenizer.decode(outputs[0], skip_special_tokens=True)

    # 提取助手回复部分,去除多余信息
    assistant_response = full_response.split(user_input)[-1].strip()

    if "assistant" in assistant_response.lower()[:20]:
        assistant_response = assistant_response.split(":", 1)[-1].strip()

    return assistant_response
构建简单用户界面(UI)
我们用 ipywidgets 构建一个简易用户界面,包括对话区、输入框、发送与清除按钮。如下:
def create_assistant_ui():
    output = widgets.Output()
    input_box = widgets.Text(
        value='',
        placeholder='Ask me anything...',
        description='Question:',
        layout=widgets.Layout(width='80%')
    )
    send_button = widgets.Button(description="Send")
    clear_button = widgets.Button(description="Clear Chat")

    chat_history = []

    def on_send_button_clicked(b):
        user_input = input_box.value
        if not user_input.strip():
            return

        with output:
            print(f"You: {user_input}")
            print("Assistant: Thinking...", end="\r")
            start_time = time.time()
            try:
                response = generate_response(user_input, chat_history)
                end_time = time.time()
                clear_output(wait=True)
                print(f"You: {user_input}")
                print(f"Assistant: {response}")
                print(f"\n(Response generated in {end_time - start_time:.2f} seconds)")
                chat_history.append({"role": "user", "content": user_input})
                chat_history.append({"role": "assistant", "content": response})
            except Exception as e:
                clear_output(wait=True)
                print(f"You: {user_input}")
                print(f"Error generating response: {str(e)}")
                import traceback
                traceback.print_exc()
        input_box.value = ''

    def on_clear_button_clicked(b):
        with output:
            clear_output()
            print("Chat cleared!")
        chat_history.clear()

    send_button.on_click(on_send_button_clicked)
    clear_button.on_click(on_clear_button_clicked)

    def on_enter(sender):
        on_send_button_clicked(None)
    input_box.on_submit(on_enter)

    input_row = widgets.HBox([input_box, send_button, clear_button])
    ui = widgets.VBox([output, input_row])
    return ui
命令行界面(CLI)选项
你也可以用命令行方式和助手对话:
def cli_chat():
    print("\n=== Starting CLI Chat (type 'exit' to quit) ===")
    chat_history = []
    while True:
        user_input = input("\nYou: ")
        if user_input.lower() in ['exit', 'quit', 'q']:
            print("Goodbye!")
            break
        print("Assistant: ", end="")
        try:
            start_time = time.time()
            response = generate_response(user_input, chat_history)
            end_time = time.time()
            print(f"{response}")
            print(f"(Generated in {end_time - start_time:.2f} seconds)")
            chat_history.append({"role": "user", "content": user_input})
            chat_history.append({"role": "assistant", "content": response})
        except Exception as e:
            print(f"Error: {str(e)}")
            import traceback
            traceback.print_exc()
快速测试与主程序入口
我们还定义一个快速测试函数,确保模型和依赖运行无误,以及主入口函数,供用户选择 UI 或 CLI 体验。
def quick_test():
    test_question = "What can you help me with?"
    print(f"\nTest Question: {test_question}")
    start_time = time.time()
    try:
        response = generate_response(test_question)
        end_time = time.time()
        print(f"Response: {response}")
        print(f"Generation time: {end_time - start_time:.2f} seconds")
        return True
    except Exception as e:
        print(f"Test failed with error: {str(e)}")
        import traceback
        traceback.print_exc()
        return False

def run_assistant():
    print("\nRunning quick test...")
    test_success = quick_test()
    if test_success:
        interface_choice = input("\nChoose interface (1 for UI, 2 for CLI): ")
        if interface_choice == "2":
            cli_chat()
        else:
            print("\nStarting the personal assistant UI...")
            assistant_ui = create_assistant_ui()
            display(assistant_ui)
            print("\n--- 使用说明 ---")
            print("1. 在输入框输入你的问题")
            print("2. 按回车或点击"Send"")
            print("3. 等待助手回复")
            print("4. 点击"Clear Chat"开始新会话")
            print("----------------------")
    else:
        print("\nSkipping UI launch due to test failure.")
        print("You may want to try the CLI interface by calling cli_chat() directly")

# 启动个人助手
run_assistant()
试用效果
一切顺利的话,现在就可以与新搭建的助手对话交流了。以下为部分对话示例:
Running quick test...
Test Question: What can you help me with?
Response: 1. General knowledge: I can provide information on a wide range of topics, from history and science to pop culture, current events, and more.
2. Problem-solving: Need help with a math problem, figuring out how to do something, or troubleshooting an issue? I'm here to guide you.
3. Research: If you have a specific topic or question in mind, I can help you find reliable sources and summarize the information for you.
4. Language assistance: Need help with writing, grammar, spelling, or translation? I can assist with that.
5. Fun facts and trivia: Want to impress your friends with interesting facts or just looking for a good laugh? I've got you covered!
6. Time management and organization: Strategies to help you stay on top of your tasks and projects.
7. Personal development: Tips for learning new skills, setting goals, or managing your emotions.
Just let me know what you need, and I'll do my best to assist you! Remember, I can't always give away all the answers, but I'll certainly try to make the process as enjoyable and informative as possible.
Generation time: 18.04 seconds
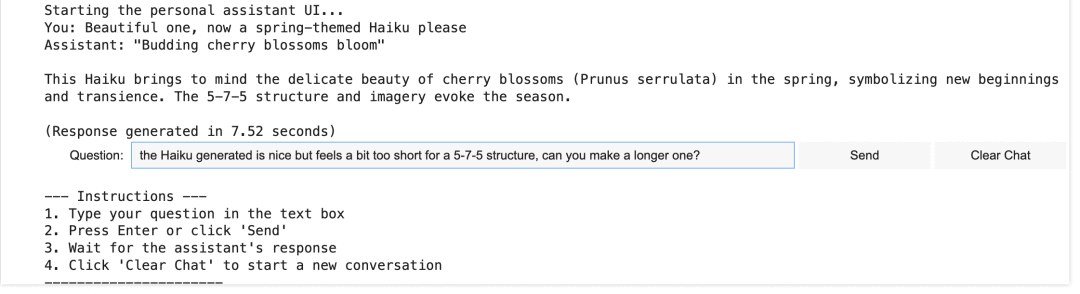
Choose interface (1 for UI, 2 for CLI):UI 体验效果如图所示:
结论
本文详细演示了如何利用 Qwen 轻量级强大语言模型,构建简单高效的会话式助手应用。该应用适合在如 Google Colab 这类 GPU 环境下高效运行和体验。