查看配置:
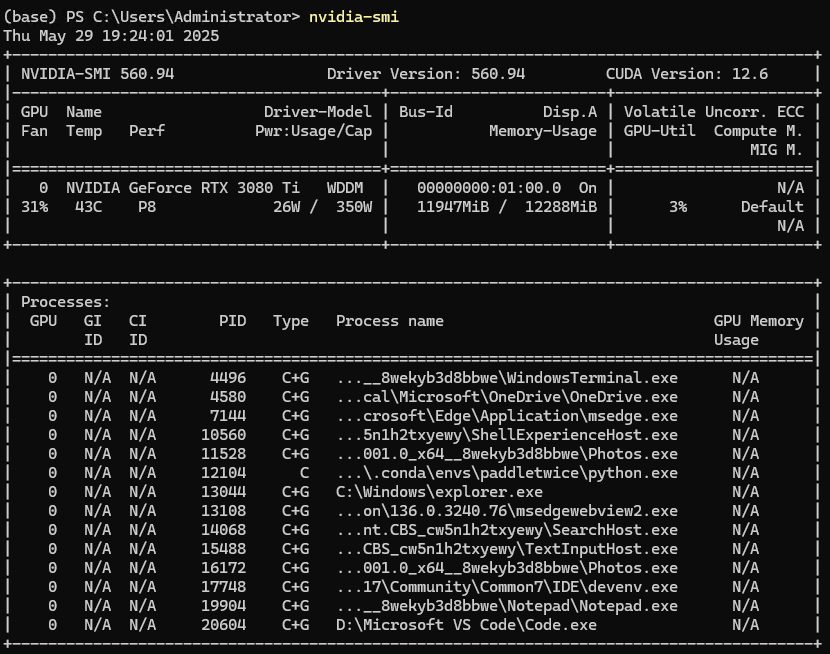
win10系统+Python 3.9.13 + NVIDIA GeForce RTX 3080 Ti
安装环境:
1)下载 CUDA Toolkit 12.6
2)安装 CUDA Toolkit
查看是否安装成功
powershell
nvcc --version3)安装 PaddlePaddle GPU 版本(配合 CUDA 12.6)
查看 PaddlePaddle 版本:
powershell
import paddle
print(paddle.__version__)
4)安装paddleocr
虚拟环境安装:
powershell
# 创建并激活虚拟环境
python -m venv venv
venv\Scripts\activate

# 安装 paddleocr 到当前虚拟环境中
pip install paddleocr

# 或者指定国内镜像
pip install paddleocr -i https://pypi.tuna.tsinghua.edu.cn/simple
查看paddleocr版本:
powershell
import paddleocr
print(paddleocr.__version__)
版本错误可安装指定版本:
powershell
pip install paddleocr==2.10.0目录
powershell
TestPaddle/
├── ocr_server.py
├── ch_PP-OCRv4_det_server_infer
|	├── inference.pdiparams
|	├── inference.pdiparams.info
|	└── inference.pdmodel
├── ch_PP-OCRv4_rec_server_infer
|	├── inference.pdiparams
|	├── inference.pdiparams.info
|	└── inference.pdmodel
└── cls
|	├── inference.pdiparams
|	├── inference.pdiparams.info
|	└── inference.pdmodel
└── 001.jpg
ocr_server.py:
python
from flask import Flask, request, jsonify
from paddleocr import PaddleOCR
import cv2
import os
import time
import numpy as np
import json
from datetime import datetime
import requests
import urllib.parse
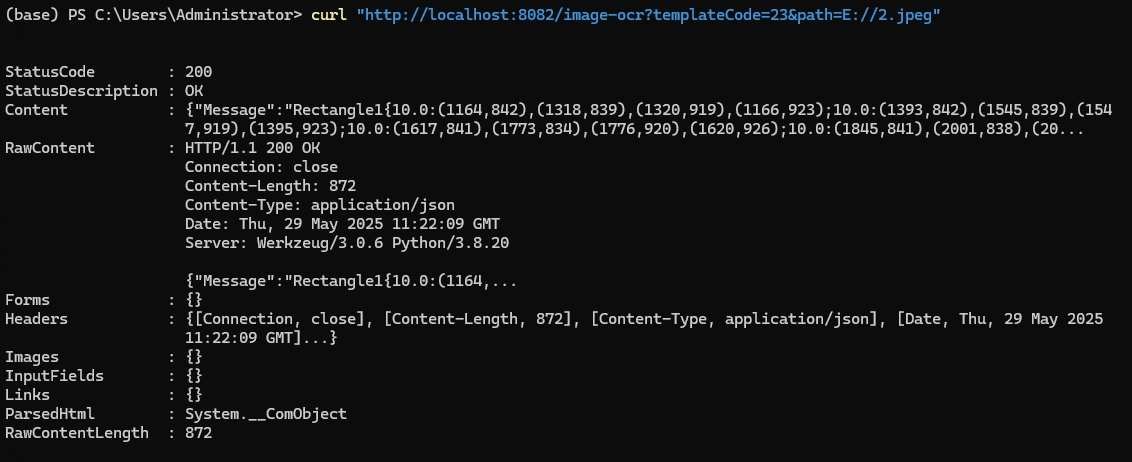
# 测试命令:curl "http://localhost:8082/image-ocr?templateCode=23&path=001.jpg"
# 现场 虚拟环境激活 py38\Scripts\activate
app = Flask(__name__)
# # 获取当前脚本所在目录作为基础路径
BASE_DIR = os.path.dirname(os.path.abspath(__file__))
# 初始化 OCR 引擎(使用本地模型路径)
ocr_engine = PaddleOCR(
use_angle_cls=False,
lang="ch",
det_model_dir=os.path.join(BASE_DIR, 'ch_PP-OCRv4_det_server_infer'),
rec_model_dir=os.path.join(BASE_DIR, 'ch_PP-OCRv4_rec_server_infer'),
cls_model_dir=os.path.join(BASE_DIR, 'cls'),
use_gpu=True,
use_pdserving=False,
det_limit_side_len=3264,
det_db_thresh=0.8,
det_db_box_thresh=0.6,
det_db_unclip_ratio=3,
rec_image_shape="3, 48, 64",
e2e_limit_side_len=3264,
e2e_pgnet_score_thresh=0.0001,
download_model=False
)
@app.route('/image-ocr', methods=['GET'])
def image_ocr():
try:
# 获取查询参数
template_code = request.args.get('templateCode')
image_path = request.args.get('path')
# 检查参数是否为空
if not image_path:
return jsonify({
'Status': 'Error',
'Message': 'Missing required parameter: path',
'ReceivedAt': get_current_time_with_ms()
}), 400
# 可选:打印 templateCode(但不参与 OCR 处理)
print(f"Template Code: {template_code}")
# # 检查图像是否存在
# if not os.path.exists(image_path):
# return jsonify({
# 'Status': 'Error',
# 'Message': f'Image file does not exist: {image_path}',
# 'ReceivedAt': get_current_time_with_ms()
# }), 400
# 读取图像
# img = cv2.imread(image_path)
img = read_image(image_path)
if img is None:
return jsonify({
'Status': 'Error',
'Message': 'Failed to load image.',
'ReceivedAt': get_current_time_with_ms()
}), 400
# 设置边缘裁剪距离
gap = 10
closingPix = 5
gray_image = cv2.cvtColor(img, cv2.COLOR_BGR2GRAY)
height, width = gray_image.shape[:2]
# 设置边缘10个像素为255
height, width = gray_image.shape[:2]
gray_image[:, :gap] = 255
gray_image[:, width - 10:] = 255
gray_image[:gap, :] = 255
gray_image[height - gap:, :] = 255
# 二值化处理
_, binary = cv2.threshold(gray_image, 254, 255, cv2.THRESH_BINARY_INV)
# 先膨胀5次,再腐蚀5次
kernel = cv2.getStructuringElement(cv2.MORPH_RECT, (5, 5))
morphed = cv2.dilate(binary, kernel, iterations=closingPix)
morphed = cv2.erode(morphed, kernel, iterations=closingPix)
# 寻找连通域
num_labels, labels, stats, centroids = cv2.connectedComponentsWithStats(morphed, connectivity=8)
# 收集所有灰度为 0 的区域对应的矩形(排除背景)
rectangles = []
for i in range(1, num_labels): # 从1开始跳过背景
x, y, w, h, _ = stats[i]
rectangles.append((x, y, w, h))
# print("Rectangle", i)
# 按照先 y(行),再 x(列)排序
merged_rects_sorted = sorted(rectangles, key=lambda r: (r[1], r[0]))
sum_message = ""
final_message_parts = []
for idx, rect in enumerate(merged_rects_sorted, start=1):
x, y, w, h = rect
# 创建一个全白的图像(与原图大小一致)
mask = np.ones_like(img) * 255 # 灰度图为 255 的白色背景图像
# 将 rect 区域替换为原图中的内容
mask[y:y + h, x:x + w] = img[y:y + h, x:x + w]
# img = mask
# cv2.imwrite("test Rectangle"+str(idx)+".jpeg", mask)
print(f"Rectangle {idx}: x={x}, y={y}, w={w}, h={h}")
# 执行 OCR
result = ocr_engine.ocr(mask, cls=False)
# 格式化结果
message_lines = []
for line in result:
if line is not None:
for word_info in line:
text = word_info[1][0]
coords = word_info[0]
coord_str = ",".join([f"({int(x)},{int(y)})" for x, y in coords])
message_lines.append(f"{text}:{coord_str}")
message = "Rectangle"+str(idx)+"{" + ";".join(message_lines) + "}"
sum_message = sum_message + message
return jsonify({
'Status': 'Success',
'Message': sum_message,
'ReceivedAt': get_current_time_with_ms()
})
except Exception as e:
return jsonify({
'Status': 'Error',
'Message': str(e),
'ReceivedAt': get_current_time_with_ms()
}), 500
def get_current_time_with_ms():
"""返回当前系统时间,格式为 YYYY-MM-DD HH:MM:SS.sss"""
return time.strftime('%Y-%m-%d %H:%M:%S.') + f"{int(time.time() * 1000) % 1000:03d}"
def read_image(image_source):
"""
读取图像,支持 HTTP URL 和本地路径
:param image_source: 图像地址,可以是 URL 或本地路径
:return: OpenCV 图像对象,失败返回 None
"""
if urllib.parse.urlparse(image_source).scheme in ('http', 'https'):
# 是网络URL,使用 requests 下载
try:
response = requests.get(image_source, timeout=10)
response.raise_for_status()
image_array = np.frombuffer(response.content, dtype=np.uint8)
image = cv2.imdecode(image_array, cv2.IMREAD_COLOR)
except Exception as e:
print(f"读取网络图像失败: {e}")
return None
else:
# 当作本地路径处理
if os.path.exists(image_source):
image = cv2.imread(image_source)
else:
print(f"本地路径不存在: {image_source}")
return None
return image
if __name__ == '__main__':
app.run(host='0.0.0.0', port=8082, threaded=True)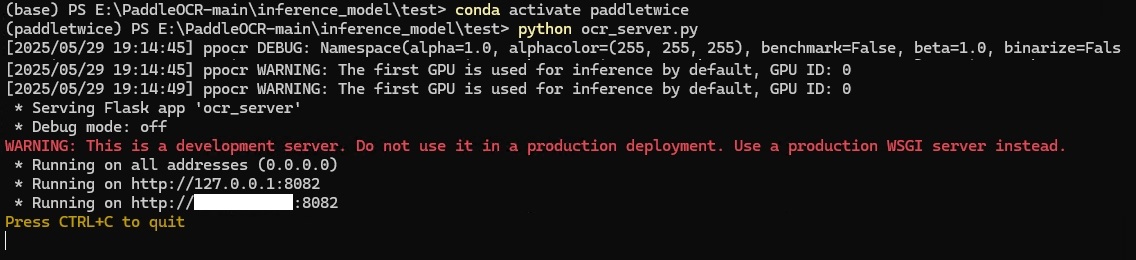
测试: