文章目录
-
- [Spring AI](#Spring AI)
- 集成DeepSeek
- [Spring AI聊天模型](#Spring AI聊天模型)
- AI调用Ollama
-
- [下载并安装 Ollama](#下载并安装 Ollama)
- [拉取 DeepSeek 模型](#拉取 DeepSeek 模型)
- 代码测试
Spring AI
- Spring AI是一个AI工程领域的应用程序框架;
- Spring AI 是 AI 工程的应用框架。其目标是将 Spring 生态系统设计原则(如可移植性和模块化设计)应用于 AI 领域,并促进使用 POJO 作为应用程序的构建块到 AI 领域。
- 它的目标是将Spring生态系统的设计原则应用于 AI 领域,比如Spring生态系统的可移植性和模块化设计,并促进使用 POJO 作为应用程序的构建块到 AI 领域;
- Spring AI 的核心是提供了开发 AI 大模型应用所需的基本抽象模型,这些抽象拥有多种实现方式,使得开发者可以用很少的代码改动就能实现组件的轻松替换;
- 简言之,Spring AI 是一个 AI 工程师的应用框架,它提供了一个友好的 API 和开发 AI 应用的抽象,旨在简化 AI 大模型应用的开发工作。
官网:https://spring.io/projects/spring-ai
主要功能:
- 第一、 对主流 AI 大模型供应商提供了支持,比如:OpenAI、DeepSeek、Microsoft、Ollama、Amazon、Google HuggingFace等。
- 第二、 支持AI大模型类型包括:聊天、文本到图像、文本到声音等。
- 第三、 支持主流的Embedding Models(嵌入模型)和向量数据库,比如:Azure Vector Search、Chroma、Milvus、Neo4j、Redis、PineCone、PostgreSQL/PGVector 等。
- 第四、 把 AI 大模型输出映射到简单的 Java 对象(POJOs)上。
- 第五、 支持了函数调用(Function calling)功能。
- 第六、 为数据工程提供 ETL(数据抽取、转换和加载)框架。
- 第七、 支持 Spring Boot 自动配置和快速启动,便于运行 AI 模型和管理向量库。
集成DeepSeek
申请api_key
- 进入DeepSeek官网 https://www.deepseek.com/ 点击右上角的 API开放平台申请api_key
- 接口文档:https://api-docs.deepseek.com/zh-cn/
注意:保持账户有余额才可以正常调用服务。
SpringBoot工程
引入依赖:
xml
 <parent>
        <groupId>org.springframework.boot</groupId>
        <artifactId>spring-boot-starter-parent</artifactId>
        <version>3.3.8</version>
        <relativePath/> <!-- lookup parent from repository -->
    </parent>

    <groupId>org.example</groupId>
    <artifactId>springai-deepseek</artifactId>
    <version>1.0-SNAPSHOT</version>

    <properties>
        <maven.compiler.source>17</maven.compiler.source>
        <maven.compiler.target>17</maven.compiler.target>
        <spring-ai.version>1.0.0-M5</spring-ai.version>
    </properties>

    <dependencies>
        <dependency>
            <groupId>org.springframework.boot</groupId>
            <artifactId>spring-boot-starter-web</artifactId>
        </dependency>

        <dependency>
            <groupId>org.springframework.ai</groupId>
            <artifactId>spring-ai-openai-spring-boot-starter</artifactId>
        </dependency>

        <dependency>
            <groupId>org.springframework.boot</groupId>
            <artifactId>spring-boot-starter-test</artifactId>
            <scope>test</scope>
        </dependency>
    </dependencies>
    <dependencyManagement>
        <dependencies>
            <dependency>
                <groupId>org.springframework.ai</groupId>
                <artifactId>spring-ai-bom</artifactId>
                <version>${spring-ai.version}</version>
                <type>pom</type>
                <scope>import</scope>
            </dependency>
        </dependencies>
    </dependencyManagement>
创建配置文件:
yaml
server:
  port: 8899
spring:
  application:
    name: spring-ai-deepseek-demo
  ai:
    openai:
      api-key: sk-***********************************
      base-url: https://api.deepseek.com
      chat:
        options:
          model: deepseek-chat
temperature: 0.7-
temperature参数用于控制生成文本的多样性。具体来说:值越高,生成的文本越多样化,但也可能包含更多的随机性和不可预测的内容。
值越低,生成的文本越接近于确定性的结果,即生成的文本会更加一致和可预测。
创建Controller:
java
@RestController
public class ChatDeepSeekController {

    @Autowired
    private OpenAiChatModel chatModel;

    @GetMapping("/ai/generate")
    public String generate(@RequestParam(value = "message", defaultValue = "hello")
                           String message) {
        String response = this.chatModel.call(message);
        System.out.println("response : "+response);
        return response;
    }
}启动类:
java
略。。。。Spring AI聊天模型
概述
- Spring AI的聊天模型API为开发者提供了一条便捷通道,能够将强大的AI驱动的聊天完成功能无缝集成到各类应用中。借助预先训练的语言模型,如广为人知的GPT,它能够依据用户输入生成自然流畅、类人化的回复。这一API不仅工作机制高效,而且设计理念极为先进,旨在实现简单易用与高度可移植性,让开发者能以极少的代码改动在不同AI模型间自由切换,充分契合Spring框架一贯秉持的模块化与可互换性原则。
ChatClient接口
ChatClient 是一个接口,它定义了一个与聊天服务交互的客户端。这个接口主要用于创建聊天客户端对象,设置请求规范,以及发起聊天请求。
java
@RestController
public class ChatDeepSeekController {

    private final ChatClient chatClient;

    public ChatDeepSeekController(ChatClient.Builder chatClientBuilder) {
        this.chatClient = chatClientBuilder.build();
    }

    @GetMapping("/chat")
    public String chat(@RequestParam(value = "msg",defaultValue = "给我讲个笑话")
                           String message) {
        //prompt:提示词
        return this.chatClient.prompt()
                //用户输入的信息
                .user(message)
                //请求大模型
                .call()
                //返回文本
                .content();
    }
}
角色预设
java
@Configuration
public class AIConfig {
    @Bean
    public ChatClient chatClient(ChatClient.Builder builder) {
        return builder.defaultSystem("你是java编程助手,精通Java开发," +
                "你的名字叫广博。").build();
    }
}
java
@RestController
@RequestMapping("/ai")
public class AIController {

    @Autowired
    private ChatClient chatClient;

    @GetMapping("/chat")
    public String chat(@RequestParam(value = "msg") String message) {
        return chatClient.prompt().user(message).call().content();
    }
}
测结果试 :

流式响应
call和stream的区别:
(1)非流式输出 call:等待大模型把回答结果全部生成后输出给用户;
(2)流式输出stream:逐个字符输出,一方面符合大模型生成方式的本质,另一方面当模型推理效率不是很高时,流式输出比起全部生成后再输出大大提高用户体验。
java
@GetMapping(value = "/chat/stream",produces="text/html;charset=UTF-8")
public Flux<String> chatStream(@RequestParam(value = "msg") String message) {
    return chatClient.prompt().user(message).stream().content();
}
ChatModel接口
ChatModel接口作为核心,在ChatModel接口中,带有String参数的call()方法简化了实际的使用,避免了更复杂的Prompt和 ChatResponse类的复杂性。但是在实际应用程序中,更常见的是使用ChatResponse call()方法,该方法采用Prompt实例并返回ChatResponse。
ChatClient底层是使用ChatModel作为属性的,在初始化ChatClient的时候可以指定ChatModel
实现简单的对话
java
@RestController
public class DeepSeekController {

    @Autowired
    private ChatModel chatModel;

    @GetMapping
    public String chat(@RequestParam("msg")String msg) {
        return chatModel.call(msg);
    }

    @GetMapping("/openai")
    public String openai(@RequestParam("msg")String msg) {
        ChatResponse call = chatModel.call(
                new Prompt(
                        msg,
                        OpenAiChatOptions.builder()
                                //可以更换成其他大模型,如Anthropic3ChatOptions亚马逊
                                .model("deepseek-chat")
                                .temperature(0.8)
                                .build()
                )
        );
        return call.getResult().getOutput().getContent();
    }
}
提示词
- 提示词是引导大模型生成特定输出的输入,提示词的设计和措辞会极大地影响模型的响应结果
- Prompt 提示词是与模型交互的一种输入数据组织方式,本质上是一种复合结构的输入,prompt 可以包含多组不同角色(System、User、Aissistant等)的信息。如何管理好 Prompt 是简化 AI 应用开发的关键环节。
- Spring AI 提供了 Prompt Template 提示词模板管理抽象,开发者可以预先定义好模板,并在运行时替换模板中的关键词。在 Spring AI 与大模型交互的过程中,处理提示词首先要创建包含动态内容占位符 {占位符} 的模板,然后,这些占位符会根据用户请求或应用程序中的其他代码进行替换。在提示词模板中,{占位符} 可以用 Map 中的变量动态替换。
java
@GetMapping("/prompt")
public String prompt(@RequestParam("name")
                         String name,
                     @RequestParam("voice")
                         String voice){
    String userText= """
            给我推荐北京的至少三种美食
            """;
    UserMessage userMessage = new UserMessage(userText);
    String systemText= """
            你是一个美食咨询助手,可以帮助人们查询美食信息。
            你的名字是{name},
            你应该用你的名字和{voice}的饮食习惯回复用户的请求。
            """;
    SystemPromptTemplate systemPromptTemplate = new SystemPromptTemplate(systemText);
    //替换占位符
    Message systemMessage = systemPromptTemplate
            .createMessage(Map.of("name", name, "voice", voice));
    Prompt prompt = new Prompt(List.of(userMessage, systemMessage));
    List<Generation> results = chatModel.call(prompt).getResults();
    return results.stream().map(x->x.getOutput().getContent()).collect(Collectors.joining(""));
}
函数调用
-
Spring AI 的函数调用(Function Calling)功能允许大语言模型在生成回答时触发预定义的外部函数,从而实现动态数据获取或业务逻辑操作(如查询数据库、调用 API 等)。
-
SpringAI 帮我们规范了函数定义、注册等过程,并在发起模型请求之前自动将函数注入到 Prompt 中,而当模型决策在合适的时候去调用某个函数时,Spring AI 完成函数调用动作,最终将函数执行结果与原始问题再一并发送给模型,模型根据新的输入决策下一步动作。这其中涉及与大模型的多次交互过程,一次函数调用就是一次完成的交互过程。
-
函数调用的核心流程
-
第一步,定义函数:声明可供模型调用的函数(名称、描述、参数结构)。
-
第二步,模型交互:将函数信息与用户输入一起发送给模型,模型决定是否需要调用函数。
-
第三步,执行函数:解析模型的函数调用请求,执行对应的业务逻辑。
-
第四步,返回结果:将函数执行结果返回给模型,生成最终回答。
函数调用实现
创建自定义的Function
- 下面CalculatorService类自定义了加法和乘法运算的函数
java
@Configuration
public class CalculatorService {

    public record AddOperation(int a, int b) {

    }

    public record MulOperation(int m, int n) {

    }

    @Bean
    @Description("加法运算")
    public Function<AddOperation, Integer> addOperation() {
        return request -> {
            return request.a + request.b;
        };
    }

    @Bean
    @Description("乘法运算")
    public Function<MulOperation, Integer> mulOperation() {
        return request -> {
            return request.m * request.n;
        };
    }
}- 总结:
- Spring AI 使自定义函数这个过程变得简单,只需定义一个返回 java.util.Function 的 @Bean 定义,并在调用 ChatModel 时将 bean 名称作为选项进行注册即可。在底层,Spring 会用适当的适配器代码包装你的函数,以便与 AI 模型进行交互,免去了编写繁琐的代码。
java
    @GetMapping(value = "/chat", produces = MediaType.APPLICATION_STREAM_JSON_VALUE)
    public String ragJsonText(@RequestParam(value = "userMessage") String userMessage){
        return ChatClient.builder(chatModel)
                .build()
                .prompt()
                .system("""
您是算术计算器的代理。
您能够支持加法运算、乘法运算等操作,其余功能将在后续版本中添加,如果用户问的问题不支持请告知详情。
在提供加法运算、乘法运算等操作之前,您必须从用户处获取如下信息:两个数字,运算类型。
请调用自定义函数执行加法运算、乘法运算。
请讲中文。
""")
                .user(userMessage)
                .functions("addOperation", "mulOperation")
                .call()
                .content();
}- 为了让模型知道并调用你的自定义函数,您需要在 Prompt 请求中启用它,如上述代码,在
functions("addOperation", "mulOperation")中告知ChatClient要使用这两个自定义函数。 - 另外指定了System Prompt:要求AI 模型被设定为一个算术计算器代理,能够执行加法和乘法运算,并且要求用户提供两个数字和运算类型。这个提示词内容很关键,如何让AI按照自己的意图去执行,要不断测试提示词内容。
AI调用Ollama
下载并安装 Ollama
Ollama 是一个用于本地化部署和管理大型语言模型(LLM)的工具。它支持多种开源模型(如 LLaMA、Alpaca 等),并提供了简单的 API 接口,方便开发者调用。Ollama可以让你在自己的电脑上运行各种强大的 AI 模型,就像运行普通软件一样简单。
-
模型默认安装在C盘,可以通过命令安装修改安装路径:
OllamaSetup.exe /DIR=F:\software\ollama\install -
点击环境变量,选择下面新建一个系统环境变量
OLLAMA_MODELS,然后指定想要安装模型的路径 ,比如 "F:\software\ollama\deepseek"
Ollama 安装过程中不支持修改以后模型目录的下载位置,所以需要安装前设置系统环境变量
拉取 DeepSeek 模型
选择适合自己的版本 https://ollama.com/library/deepseek-r1
本地学习可以使用1.5b
比如,下载1.5b,执行下面命令
shell
ollama pull deepseek-r1:1.5b查看本地安装了哪些模型:
shell
ollama list删除指定模型:
shell
ollama rm deepseek-r1:1.5b启动Ollama服务测试
启动 Ollama 服务,默认会监听 http://localhost:11434
ollama run deepseek-r1:1.5b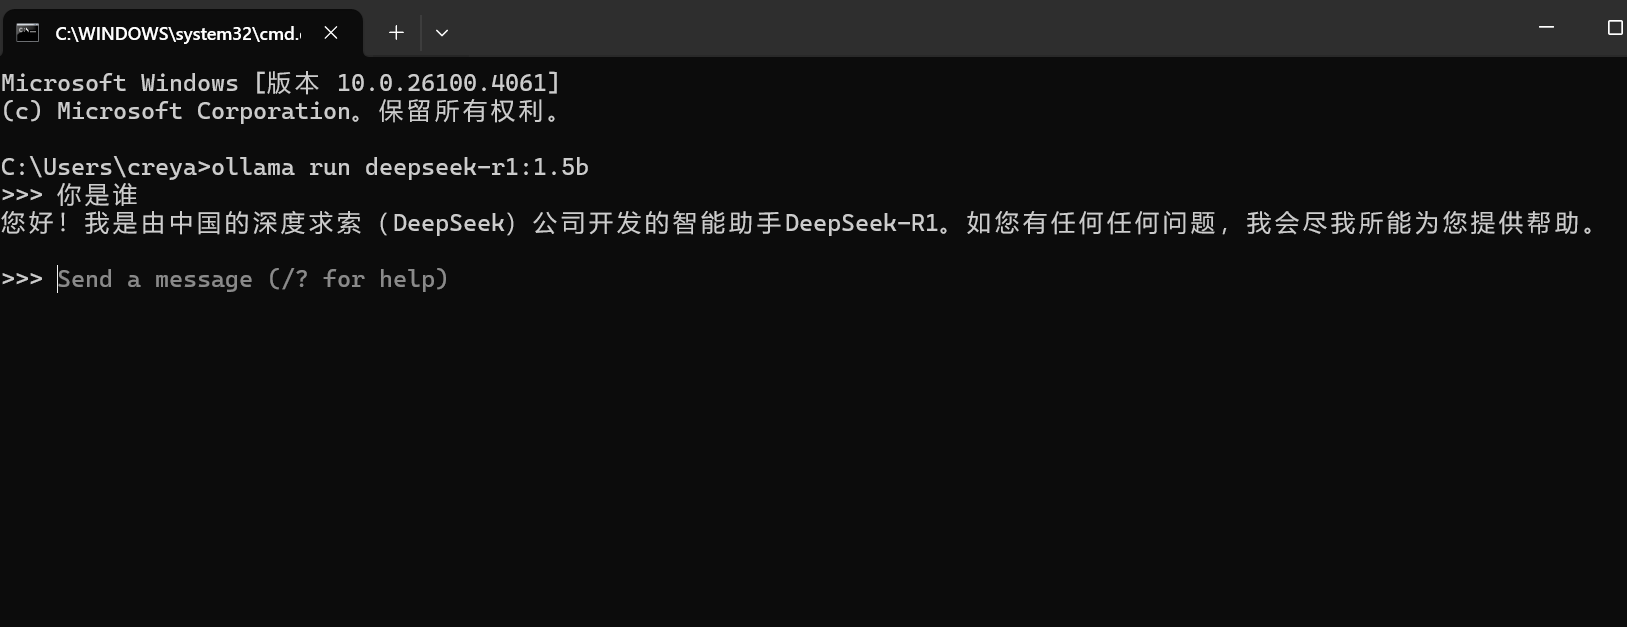
代码测试
xml
 <parent>
        <groupId>org.springframework.boot</groupId>
        <artifactId>spring-boot-starter-parent</artifactId>
        <version>3.3.8</version>
        <relativePath/> <!-- lookup parent from repository -->
    </parent>

    <groupId>org.example</groupId>
    <artifactId>springai-deepseek</artifactId>
    <version>1.0-SNAPSHOT</version>

    <properties>
        <maven.compiler.source>17</maven.compiler.source>
        <maven.compiler.target>17</maven.compiler.target>
        <spring-ai.version>1.0.0-M5</spring-ai.version>
    </properties>

    <dependencies>
        <dependency>
            <groupId>org.springframework.boot</groupId>
            <artifactId>spring-boot-starter-web</artifactId>
        </dependency>

        <dependency>
            <groupId>org.springframework.boot</groupId>
            <artifactId>spring-boot-starter-test</artifactId>
            <scope>test</scope>
        </dependency>

        <dependency>
            <groupId>org.springframework.ai</groupId>
            <artifactId>spring-ai-ollama-spring-boot-starter</artifactId>
            <version>1.0.0-SNAPSHOT</version>
        </dependency>
    </dependencies>
    <dependencyManagement>
        <dependencies>
            <dependency>
                <groupId>org.springframework.ai</groupId>
                <artifactId>spring-ai-bom</artifactId>
                <version>${spring-ai.version}</version>
                <type>pom</type>
                <scope>import</scope>
            </dependency>
        </dependencies>
    </dependencyManagement>

    <!--下载spring-ai相关包需要用到的仓库地址-->
    <repositories>
        <repository>
            <id>spring-milestones</id>
            <name>Spring Milestones</name>
            <url>https://repo.spring.io/milestone</url>
            <snapshots>
                <enabled>false</enabled>
            </snapshots>
        </repository>
        <repository>
            <id>spring-snapshots</id>
            <name>Spring Snapshots</name>
            <url>https://repo.spring.io/snapshot</url>
            <releases>
                <enabled>false</enabled>
            </releases>
        </repository>
    </repositories>
application.yaml
yaml
server:
    port:8899
spring:
    application:
        name:spring-ai-deepseek-demo
    ai:
        ollama:
            base-url:http://localhost:11434
            chat:
                options:
                    model:deepseek-r1:1.5b
                    temperature:0.7
创建启动类
java
@SpringBootApplication
public class SpringAiDemoApplication {
    public static void main(String[] args) {
        SpringApplication.run(SpringAiDemoApplication.class, args);
    }
}
创建Controller
java
@RestController
public class ChatDeepSeekController {

    @Autowired
    private OllamaChatModel ollamaChatModel;

    @GetMapping("/ai/test")
    public String generate(@RequestParam(value = "message", defaultValue = "hello")
                           String message) {
        String response = this.ollamaChatModel.call(message);
        System.out.println("response : "+response);
        return response;
    }
}