目录
1--安装
2--pytest书写规则
3--[为pycharm设置 以 pytest的方式运行](#为pycharm设置 以 pytest的方式运行)
基本使用
#### 安装
1. pytest文档地址
1. [pytest documentation](https://docs.pytest.org/en/stable/ "pytest documentation")
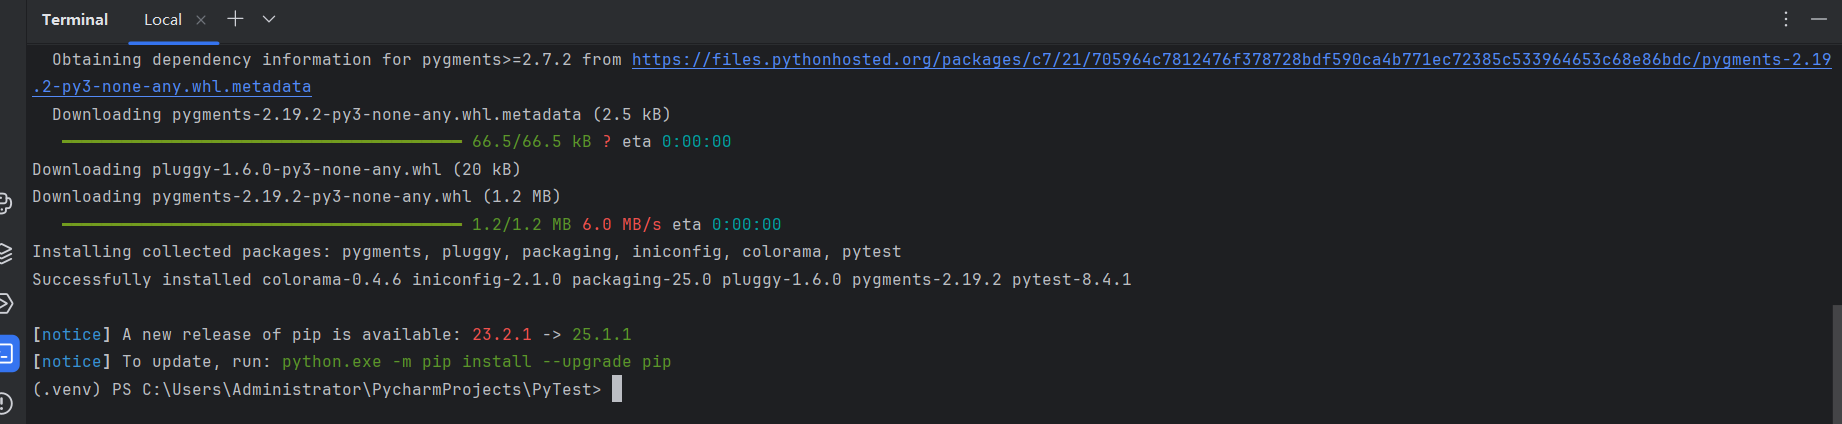
2. pip install pytest
3. 点击pycharm左边的控制台按钮
1. 输入pip install pytest
4. 
5. 出现下面的情况就算成功了
1.  #### pytest书写规则
1. 测试的文件名必须以test开头,或者结尾
1. test_12312_demo.py
2. asd_112_demo_test.pyy
2. 测试类必须以Test开头
1. TestLoginApi #### 为pycharm设置 以 pytest的方式运行
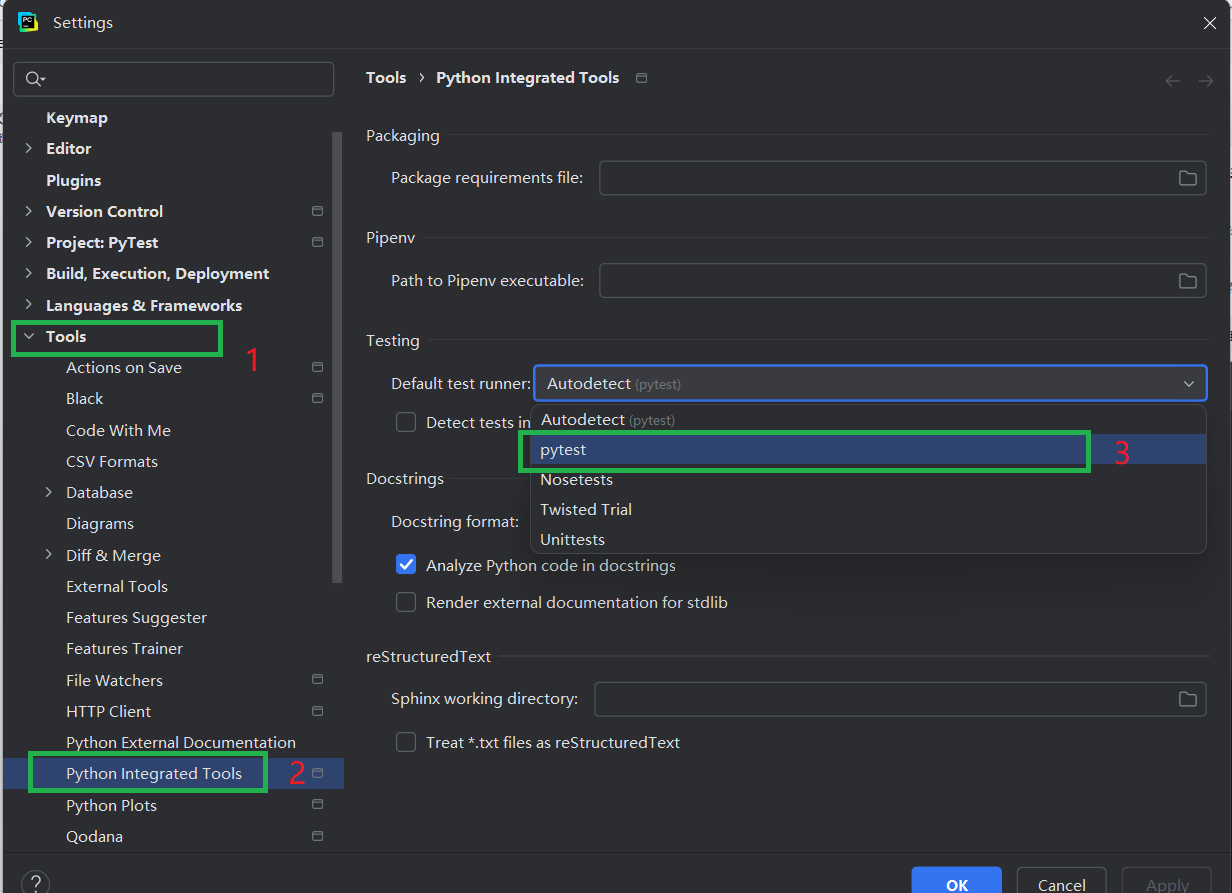
1. 使用快捷键 ctrl + alt +s 呼出pycharm设置面板
1. 找tools
1. python integrated tools
1. 找到Default test Runner
1. 设置pytest
1. 最后点击ok按钮
2. - 编写一个简单的例子
1.class TestDemo: # 定义一个测试用例 def test_demo_001(self): print("这是一个测试test_demo_001") def test_demo_002(self): print("test_demo_002")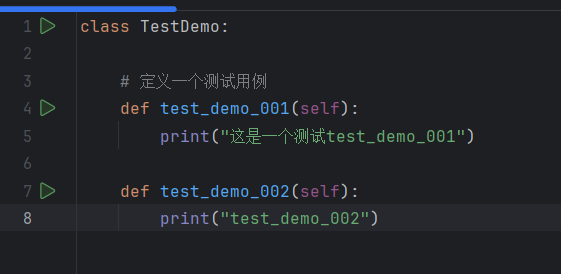
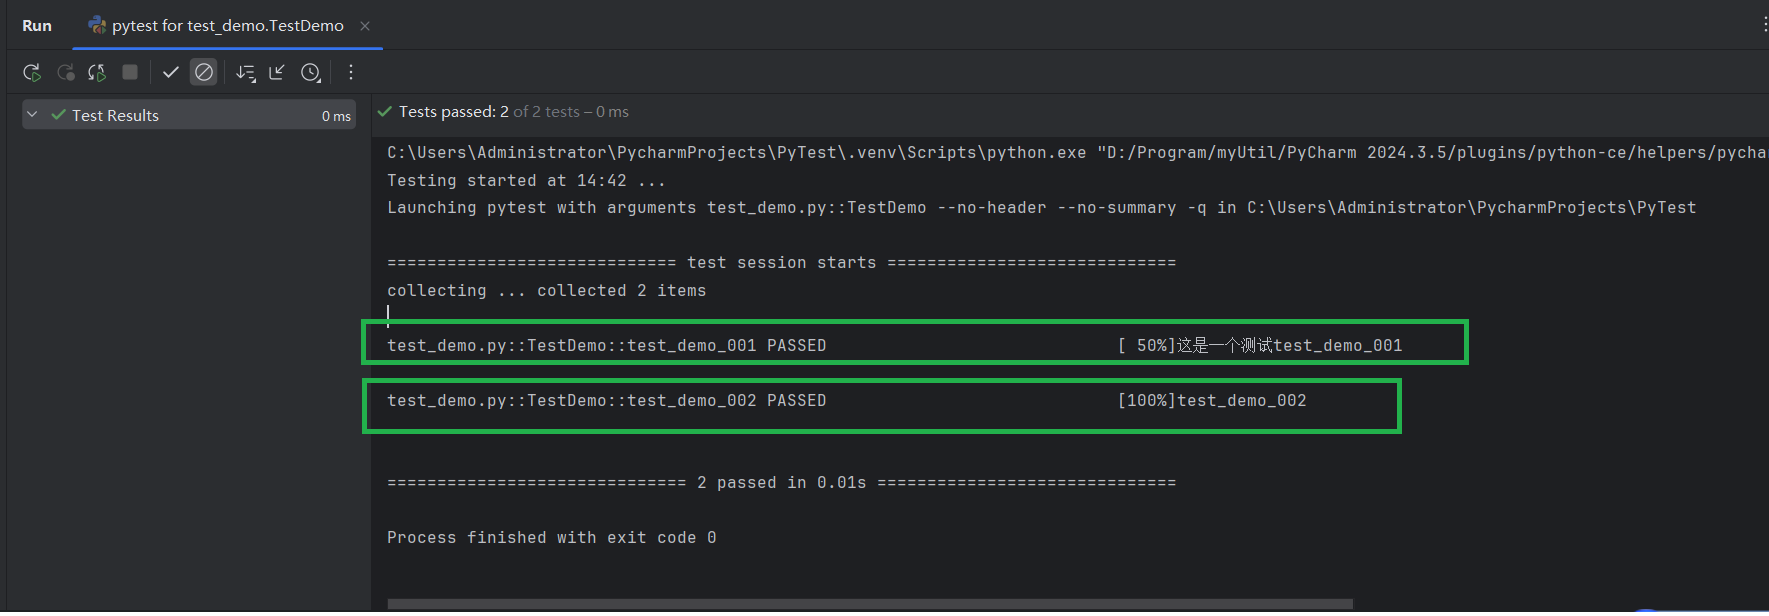
- 测试结果如下
- 命令行执行
- pytest -s .\test_demo.py
- pytest -s .\test_demo.py

#### setup和teardown
1.
```
def setup(self):
print("前置处理")
```
2.
```
def teardown(self):
print("后置处理")
```
3. 在执行的过程中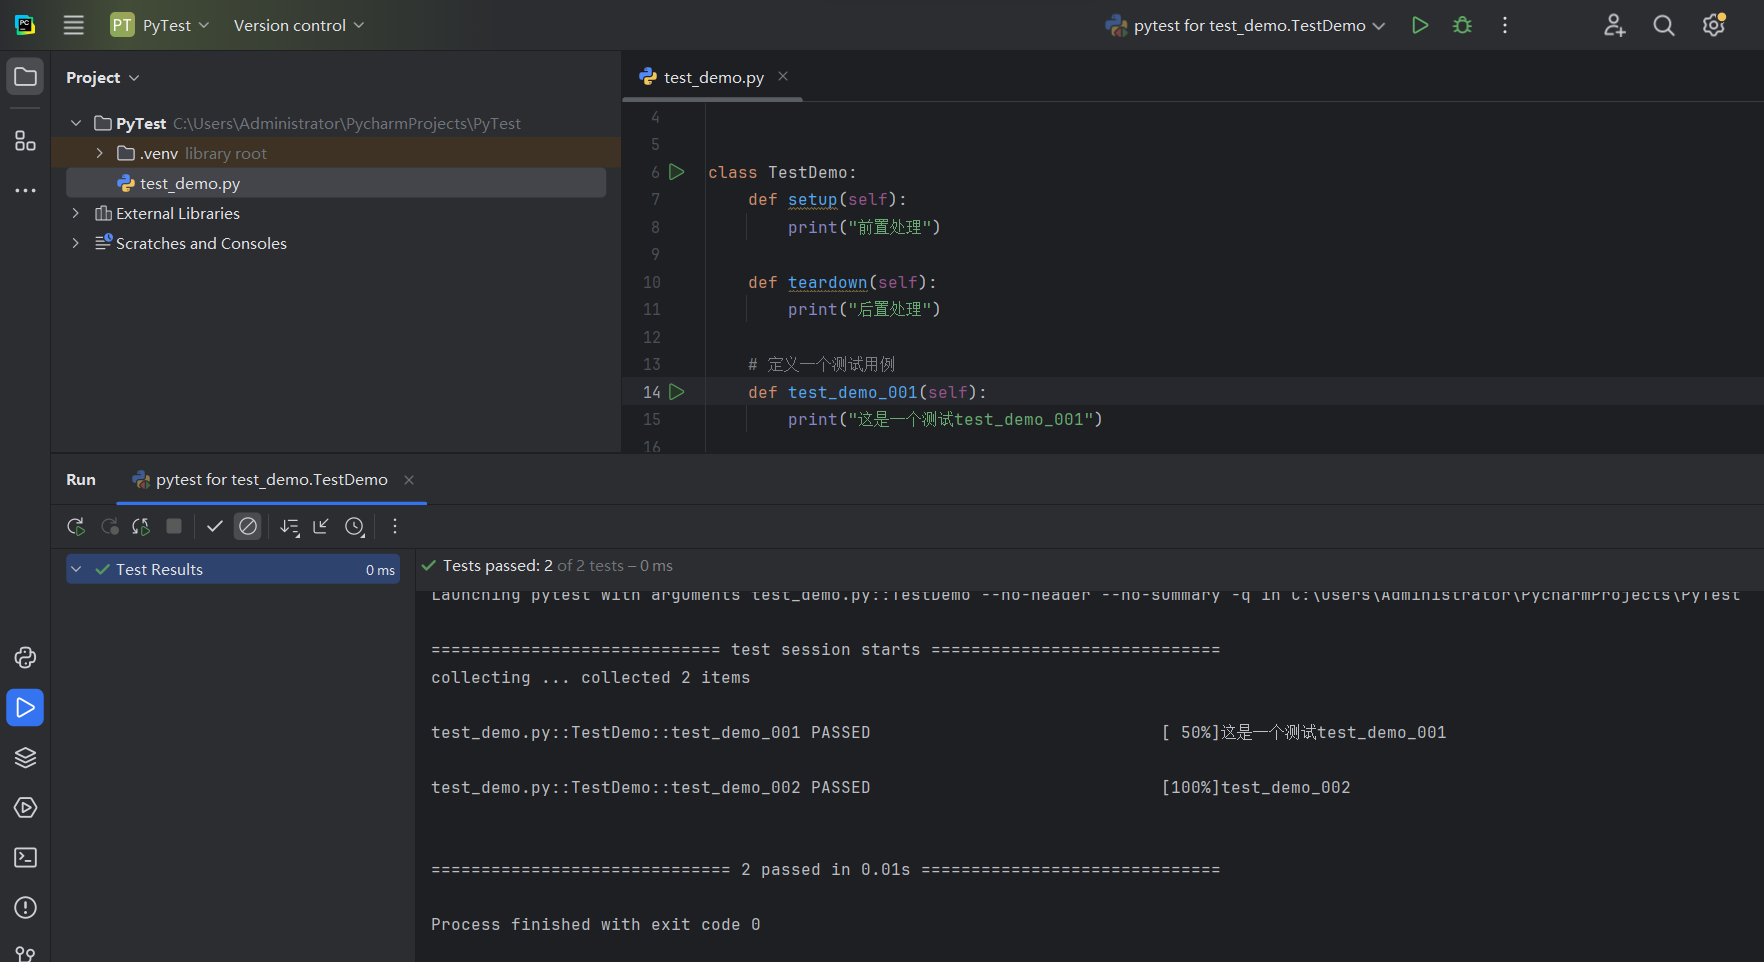
4. 发现这些函数并没有执行
1. 这个的原因是因为setup 和 teardown在pytest 8.0 以后的版本已经废弃了
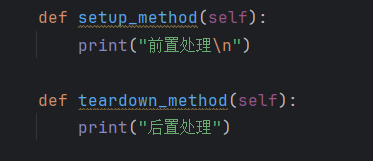
2. 可以使用setup_method和 teardown_method
1.
```
def setup_method(self):
print("前置处理\n")
def teardown_method(self):
print("后置处理")
```
2. 
3. 运行结果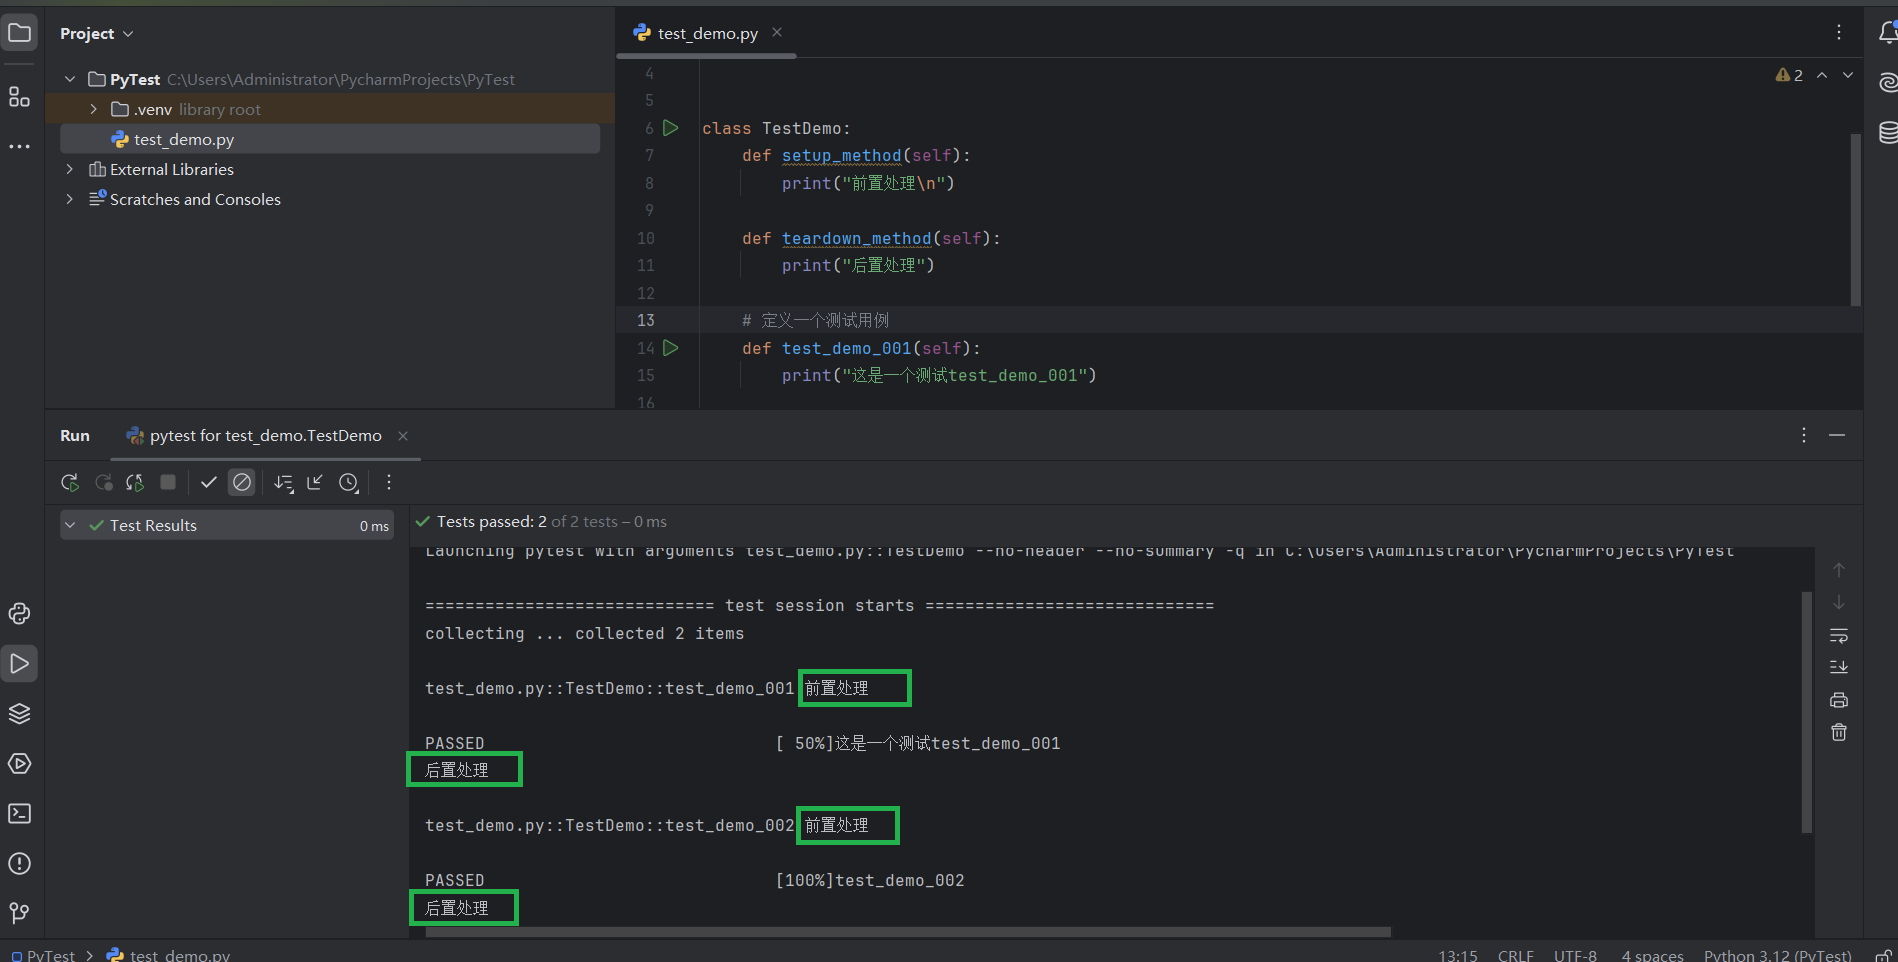
4. 可以看到在每个方法执行前后都会执行
5. pytest8.0以前的版本使用setup和teardown。pytest8.0以后的版本使用setup_method和teardown_method #### setup_class和teardown
1.
>
> ```
> def setup_class(self):
> print("--------类级别的前置处理器---------")
>
> def teardown_class(self):
> print("--------类级别的后置处理器---------")
> ```
2. 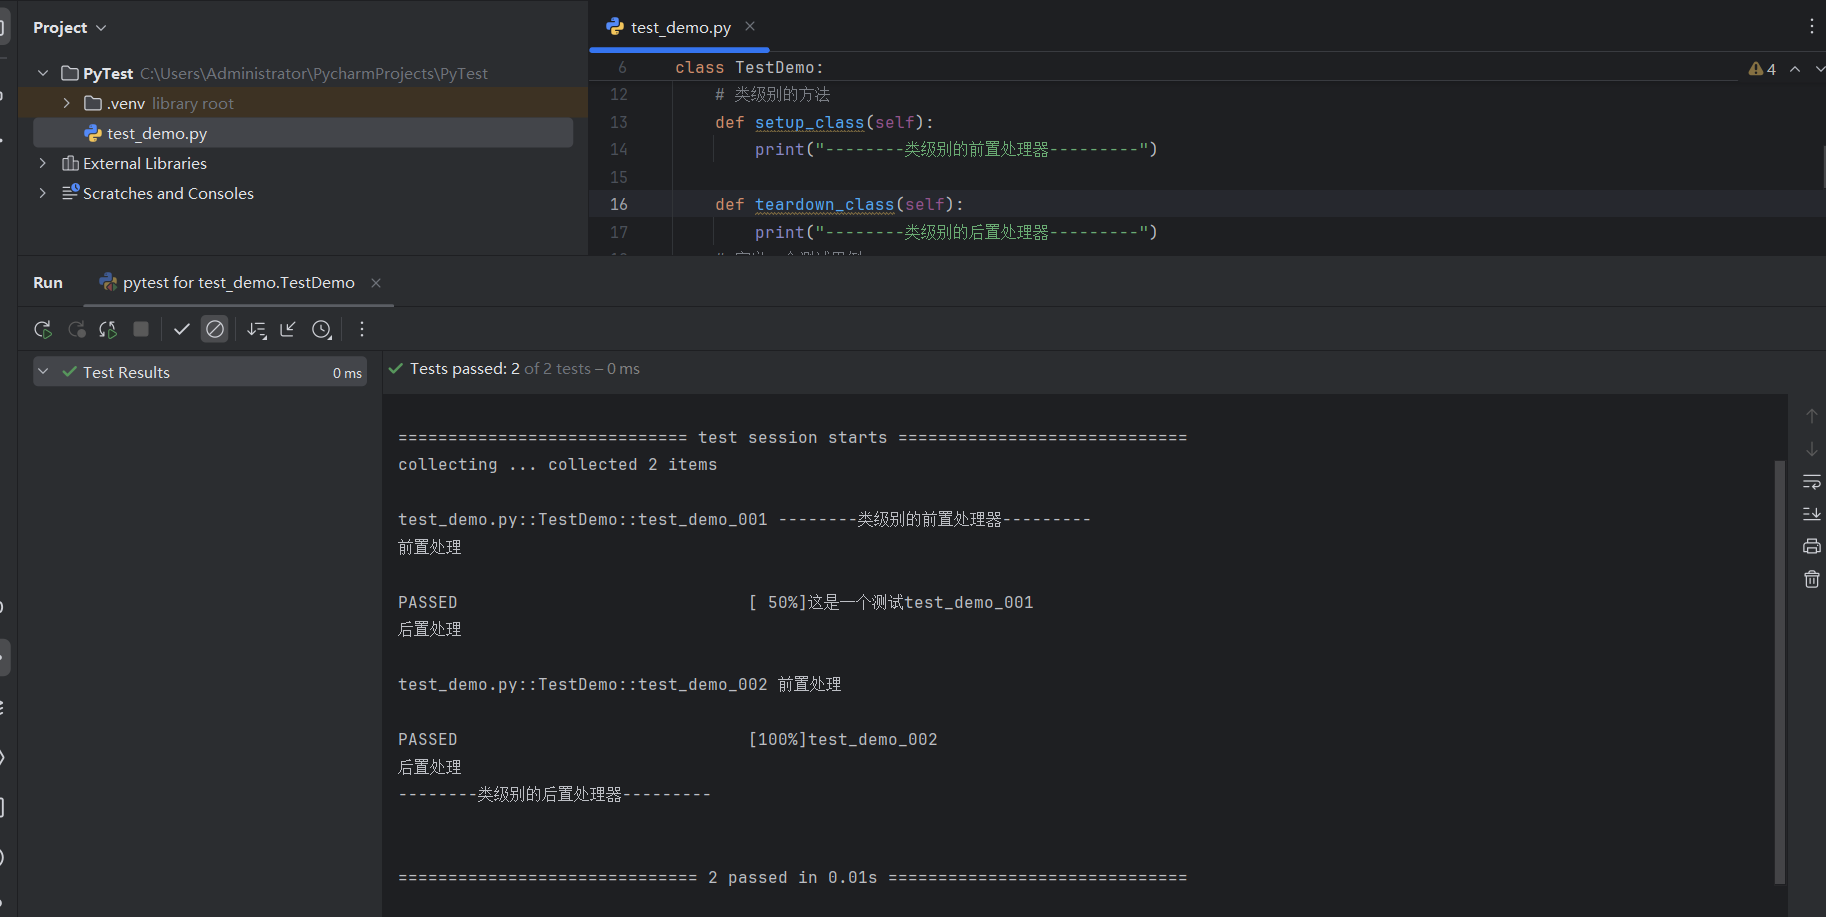
3. 可以看到只会运行一次pytest生成测试报告
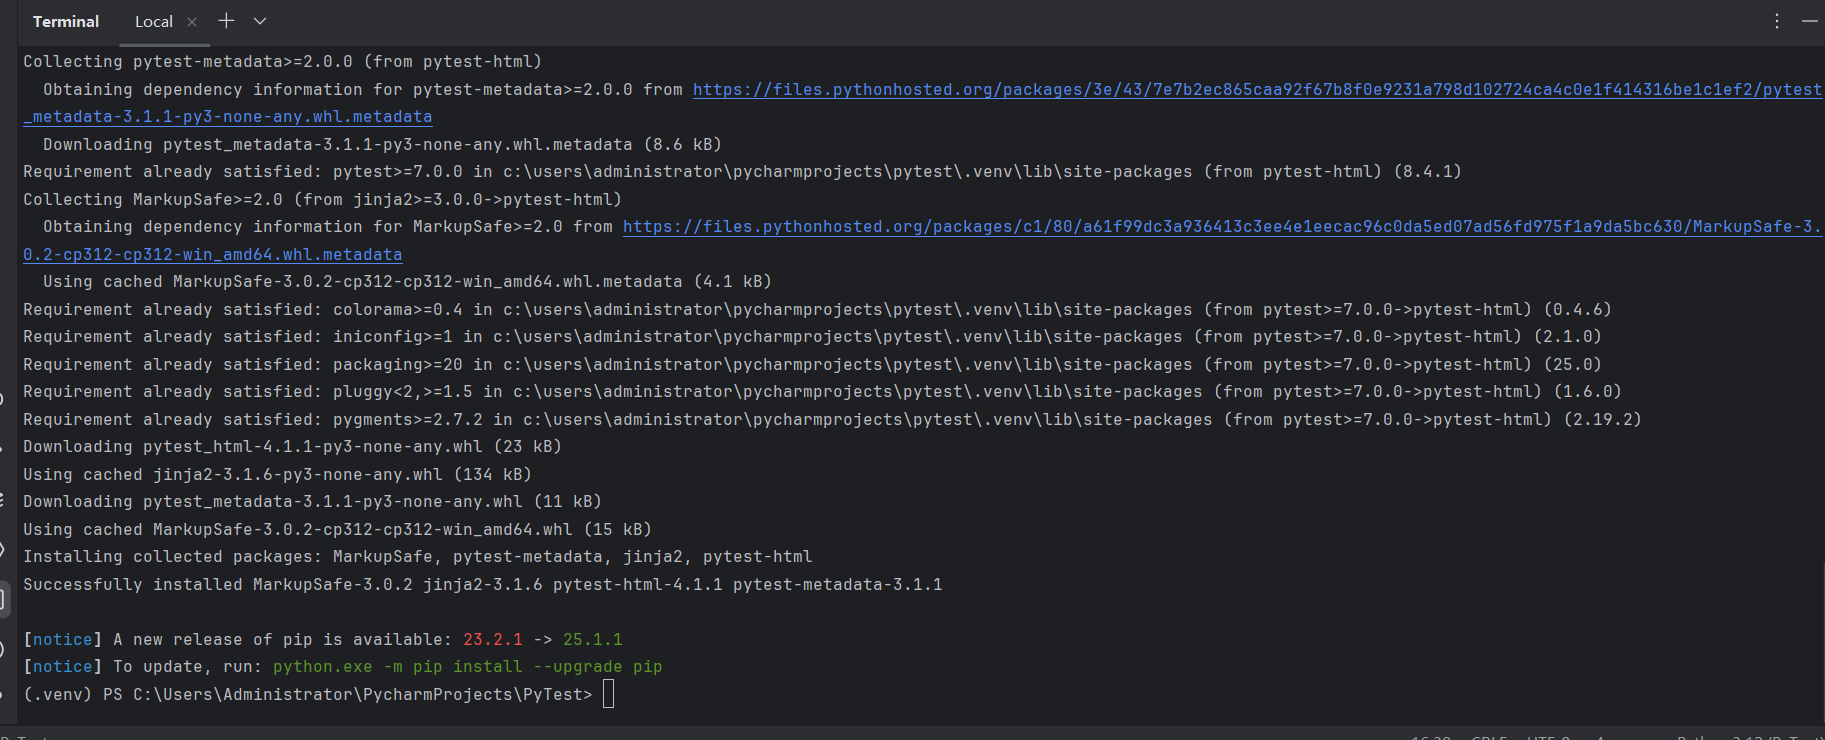
- 安装测试报告插件
- pip install pytest-html

- 出现下面的情况就算安装完成了
- 使用指令生成测试报告
- pytest --html=.\reports.html .\test_demo.py
- pytest --html=生成报告的路径 执行测试用例的路径
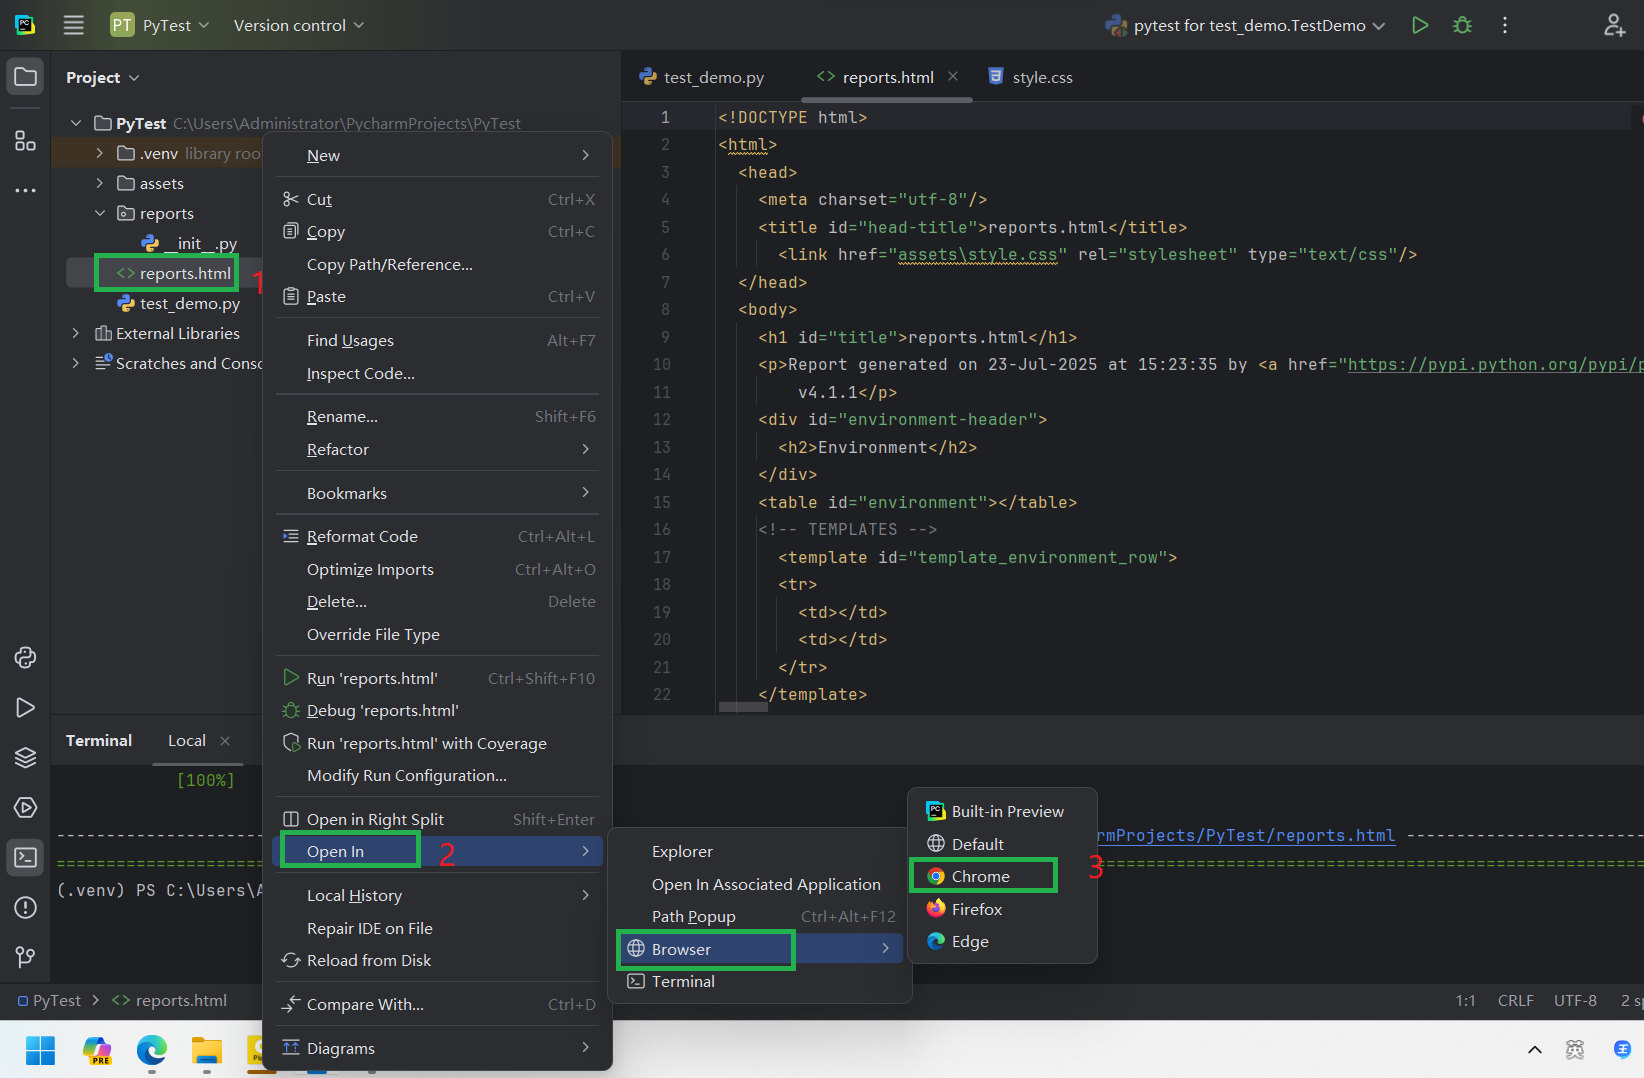
- 打开测试报告
- 找到reports.html文件
- 鼠标右键
- Open in
- Brower
- Chrome
- 这里可以选择你安装的浏览器去打开
- 我这里安装了Chrome,就选择了Chrome
- Brower
- Open in
- 鼠标右键
- 找到reports.html文件
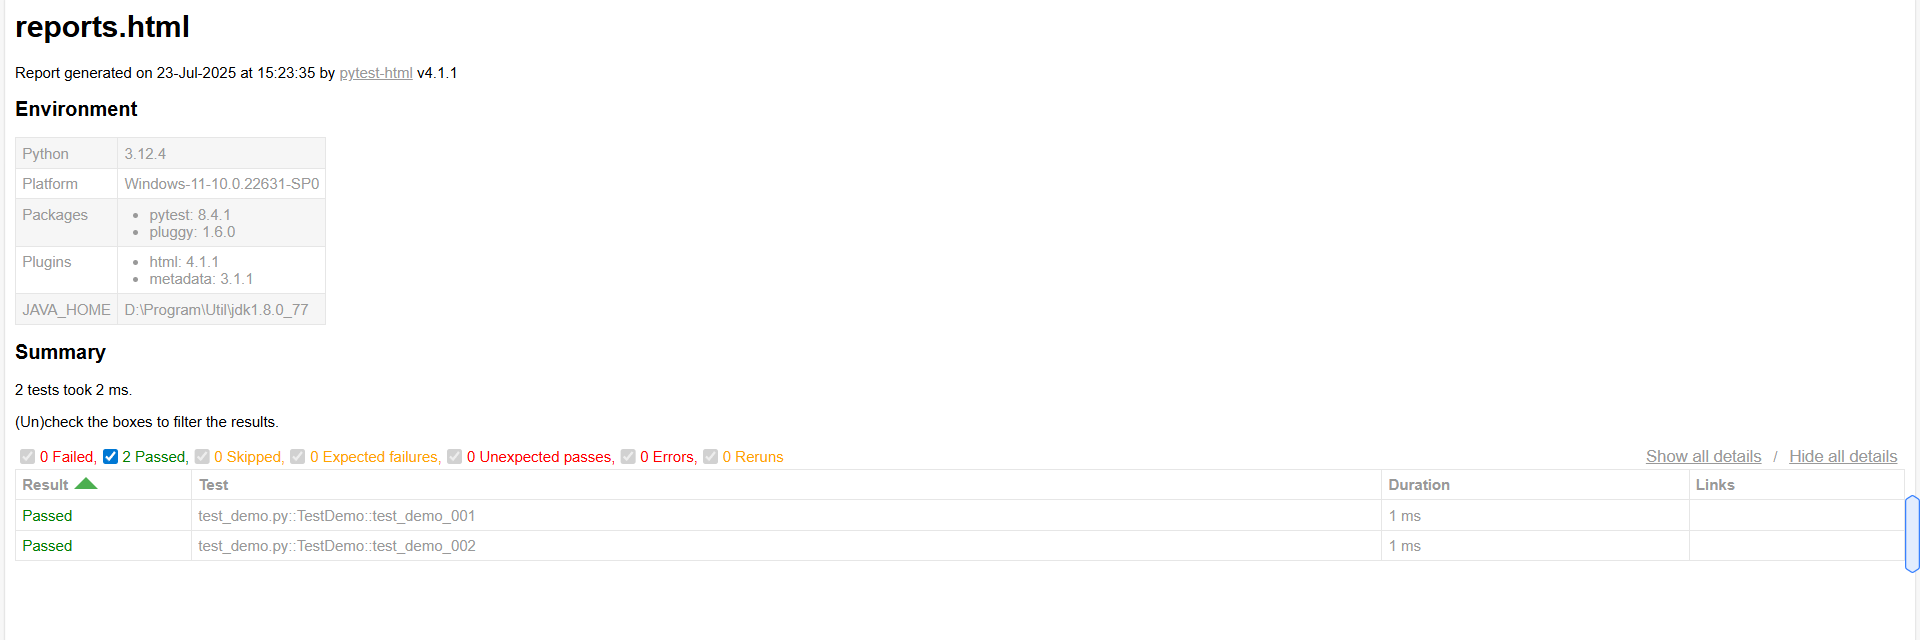
- 可以看到生成的测试报告
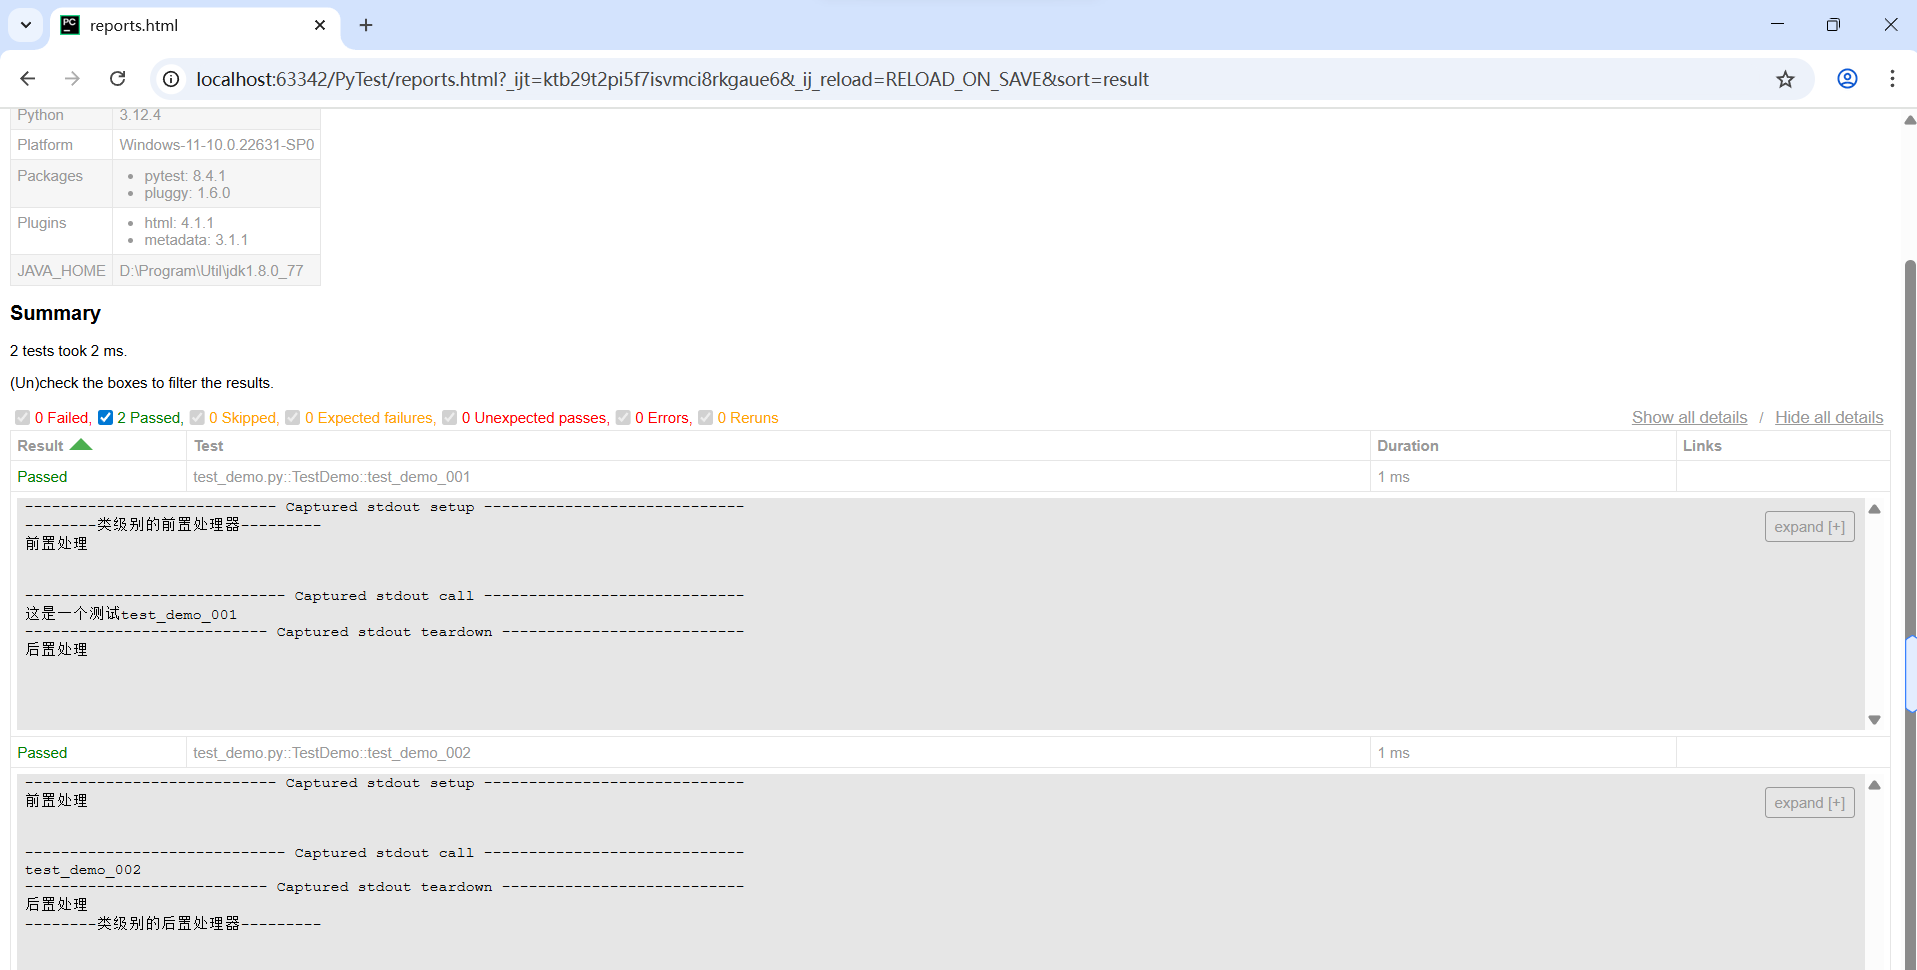
- 可以看到这些结果展示还是很直观 的