一、本机环境
jetson nano ubuntu20.04
python 3.12
pip install opencv-python paho-mqtt安装并启动mqtt broker
# 安装 Mosquitto
sudo apt update
sudo apt install mosquitto mosquitto-clients -y

# 启动并设置开机自启
sudo systemctl enable mosquitto
sudo systemctl start mosquitto

# 验证是否运行
sudo systemctl status mosquitto
二、制作方法
mqtt broker启动成功后,执行这个python脚本
# script.py
import cv2
import paho.mqtt.client as mqtt
import base64
import time
# MQTT 配置
MQTT_BROKER = "localhost"
MQTT_PORT = 1883
MQTT_TOPIC = "camera/image"
# 打开摄像头
cap = cv2.VideoCapture(0)
if not cap.isOpened():
print("无法打开摄像头")
exit()
# 指定 callback_api_version
client = mqtt.Client(callback_api_version=mqtt.CallbackAPIVersion.VERSION2)
# 连接 MQTT
try:
client.connect(MQTT_BROKER, MQTT_PORT, 60)
client.loop_start() # 启动后台线程处理网络通信
except Exception as e:
print(f"MQTT 连接失败: {e}")
exit()
print("摄像头启动,开始发布图像...")
try:
while True:
ret, frame = cap.read()
if not ret:
print("摄像头读取失败")
break
# 缩放图像(减小带宽)
frame = cv2.resize(frame, (640, 480))
# 编码为 JPEG
_, buffer = cv2.imencode('.jpg', frame, [cv2.IMWRITE_JPEG_QUALITY, 80])
# 转为 Base64 字符串
jpg_as_text = base64.b64encode(buffer).decode('utf-8')
# 发布到 MQTT
result = client.publish(MQTT_TOPIC, jpg_as_text, qos=0)
# 可选:检查是否发布成功
# if result.rc != mqtt.MQTT_ERR_SUCCESS:
# print("发布失败")
time.sleep(0.1) # 控制帧率(约10fps)
except KeyboardInterrupt:
print("\n停止发布")
finally:
cap.release()
client.loop_stop() # 停止后台线程
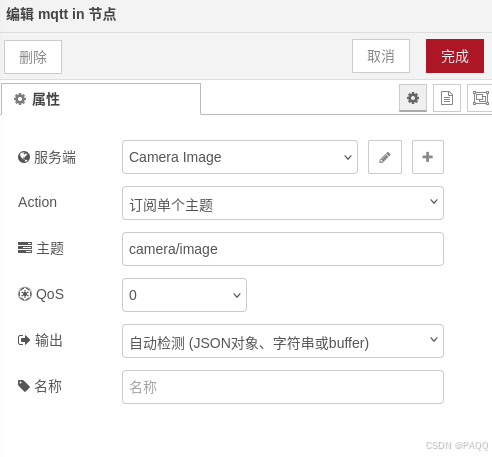
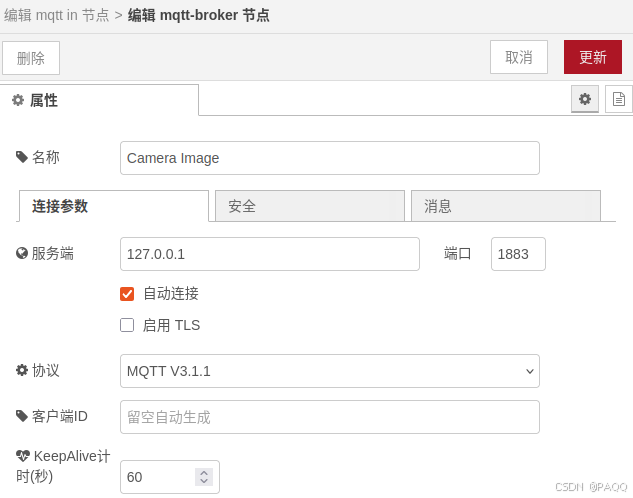
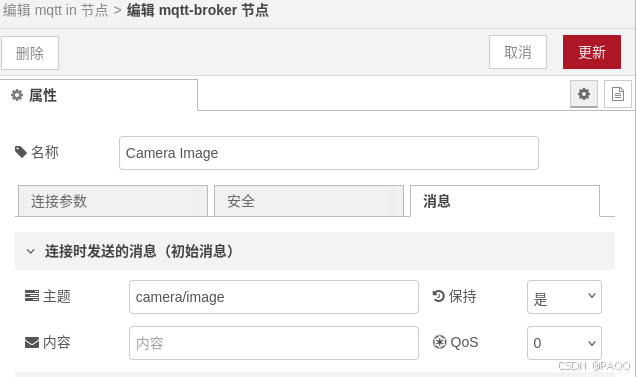
client.disconnect()在node-red端则需要两个节点,一个是mqtt_in 和 ui_template节点,mqtt_in节点需要配置与python端一致的话题和端口
ui_template 则需要输入以下代码:
<div style="text-align: center;">
<img ng-src="data:image/jpeg;base64,{{msg.payload}}"
style="max-width: 100%; height: auto; border: 1px solid #ccc; border-radius: 8px;"
alt="Camera Stream">
<p style="font-size: 12px; color: #666;">Last update: {{ $flow.lastUpdate }}</p>
</div>
<script>
// 更新时间戳
(function(scope) {
scope.$watch('msg', function(msg) {
if (msg) {
scope.$flow.lastUpdate = new Date().toLocaleTimeString();
}
});
})(scope);
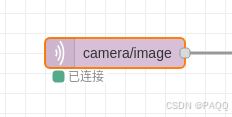
</script>部署后,mqtt_in连接上服务器就对了
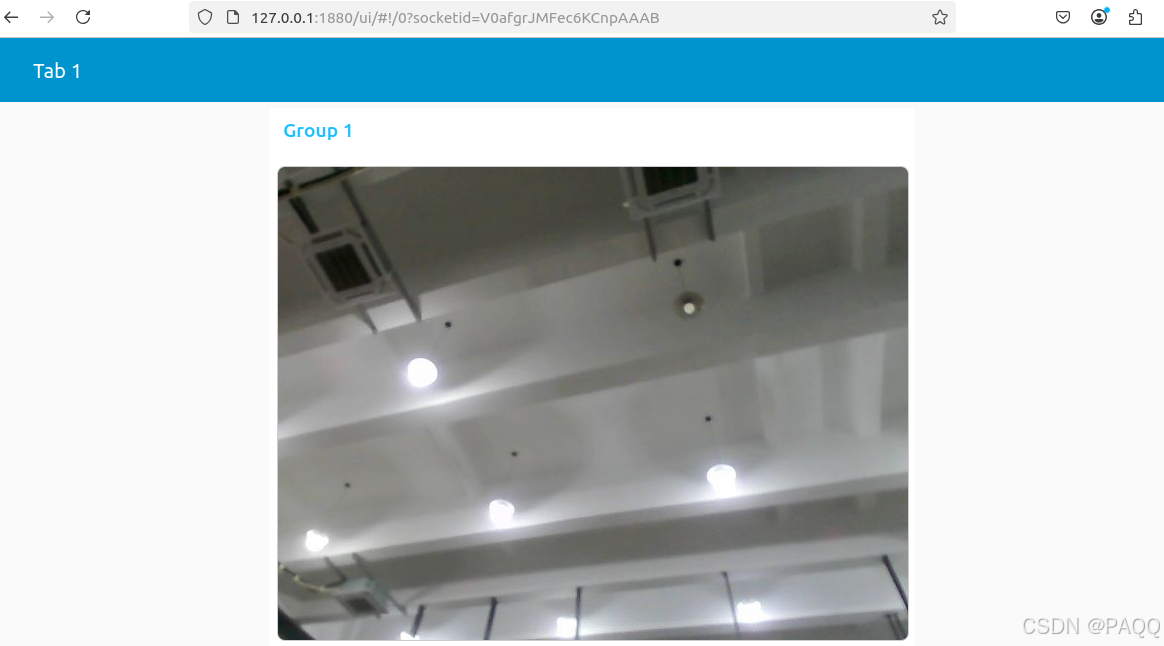
然后输入 127.0.0.1:1880/ui 进入ui界面,即可查看相机图像,也可通过远程ip访问查看
可以调整python端控制帧率的time.sleep函数,达到实时传输