ansible中的角色(roles)
一、自定义角色
1、将自定义的角色安装到对应的文件中(/home/student/ansible/roles/apache)
powershell
[student@master ansible]$ ls
ansible.cfg  collections  inventory  roles
[student@master ansible]$ cd roles/
[student@master roles]$ ls
[student@master roles]$ ansible-galaxy init apache
- Role apache was created successfully
[student@master roles]$ ls
apache
[student@master roles]$ cd apache/
[student@master apache]$ pwd
/home/student/ansible/roles/apache
[student@master apache]$ ls
defaults  files  handlers  meta  README.md  tasks  templates  tests  vars
2、检查ansible角色结构
defaults :此目录中的main.yml 文件包含角色变量的默认值,使用角色时可以覆盖这些默认值。这些变量的优先 级较低,应该在play中更改和自定义(存放变量)
files:此目录包含由角色任务引用的静态文件(本地文件,不能调用变量)
handlers :此目录中的main.yml文件包含角色的处理程序 定义,也就是触发器的内容。
meta :此目录中的main.yml文件包含与角色相关的信息,如作者、许可证、平台和可选的角色的依赖项
README.md:帮助文档
tasks : 此目录中的mian.yml文件包含角色的任务定义(只写任务,不用指定主机)
template: 此目录包含由角色任务引用的jinja2模板(j2模板,并且可以调用变量)
tests :此目录可以包含清单和test.yml剧本,可用于测试角色
vars : 此目录的main.yml 文件定义角色的变量值,这些变量通常用于角色内部用途,这些变量的优先级较高,在playbook中使用时不应更改(存放变量)
3、案例
根据下列要求,在/home/student/ansible/roles 中创建名为 apache 的角色
(1)安装 httpd 软件,并能够开机自动运行
(2)开启防火墙,并允许 httpd 通过
(3)使用模板 index.html.j2,用来创建/var/www/html/index.html 网页,
内容如下(HOSTNAME 是受管理节点的完全合格域名,IPADDRESS 是 IP 地址)
Welcome to HOSTNAME on IPADDRESS
然后创建剧本 /home/student/ansible/myrole.yml,为 webtest 主机组启用 httpd 角色
(1)先对主机清单进行分组
powershell
[student@master ansible]$ ls
ansible.cfg  collections  inventory  roles
[student@master ansible]$ vim inventory
[student@master ansible]$ cat inventory
node1
node2
node3
node4
node5

[test01]
node1

[test02]
node2

[web]
node3
node4

[webtest:children]
web
(2)编写index.html.j2模版文件
powershell
[student@master ansible]$ cd roles/
[student@master roles]$ ls
apache
[student@master roles]$ cd apache/
[student@master apache]$ ls
defaults  files  handlers  meta  README.md  tasks  templates  tests  vars
[student@master apache]$ cd templates/
[student@master templates]$ ls
[student@master templates]$ vim index.html.j2
[student@master templates]$ cat index.html.j2
Welcome to {{ ansible_fqdn }} on {{ ansible_default_ipv4.address }}
(3)编写任务(已经对所有主机配置完yum仓库)
powershell
[student@master apache]$ ls
defaults  files  handlers  meta  README.md  tasks  templates  tests  vars
[student@master apache]$ cd tasks/
[student@master tasks]$ ls
main.yml
[student@master tasks]$ vim main.yml
powershell
---
# tasks file for apache
- name: install httpd
  yum:
    name:
      - httpd
      - firewalld
    state: present

- name: cp html
  template:
    src: index.html.j2
    dest: /var/www/html/index.html

- name: restarted httpd firewalld
  service:
    name: "{{ item }}"
    state: restarted
    enabled: yes
  loop:
    - httpd
    - firewalld

- name: set firewalld for http
  firewalld:
    service: http
    permanent: yes
    state: enabled
    immediate: yes
(4)编写剧本/home/student/ansible/myrole.yml
powershell
[student@master ansible]$ ls
ansible.cfg  collections  inventory  myrole.yml  repo.yml  roles
[student@master ansible]$ vim myrole.yml
powershell
---
- name: use apache role
  hosts: webtest
  roles:
    - apache
(5)运行myrole.yml,并测试
powershell
[student@master ansible]$ ansible-playbook myrole.yml

PLAY [use apache role] *****************************************************************

TASK [Gathering Facts] *****************************************************************
ok: [node4]
ok: [node3]

TASK [apache : install httpd] **********************************************************
changed: [node3]
changed: [node4]

TASK [apache : cp html] ****************************************************************
changed: [node3]
changed: [node4]

TASK [apache : restarted httpd firewalld] **********************************************
changed: [node4] => (item=httpd)
changed: [node3] => (item=httpd)
changed: [node4] => (item=firewalld)
changed: [node3] => (item=firewalld)

TASK [apache : set firewalld for http] *************************************************
changed: [node3]
changed: [node4]

PLAY RECAP *****************************************************************************
node3                      : ok=5    changed=4    unreachable=0    failed=0    skipped=0    rescued=0    ignored=0
node4                      : ok=5    changed=4    unreachable=0    failed=0    skipped=0    rescued=0    ignored=0
[student@master ansible]$ curl http://node3
Welcome to node3.example.com on 192.168.122.30
[student@master ansible]$ curl http://node4
Welcome to node4.example.com on 192.168.122.40
注意:任务中定义的变量大于角色中vars和defaults的优先级
4、剧本中调用roles和普通任务(tasks)的执行顺序
(1)pre_tasks:角色之前执行
(2)roles
(3)post_tasks:角色之后执行
(4)tasks
(5)handlers :最后执行
二、系统角色
1、安装软件包 rhel-system-roles
powershell
[student@master ansible]$ sudo yum -y install rhel-system-roles2、查看系统角色(cd /usr/share/ansible/roles/)
powershell
[student@master ansible]$ cd /usr/share/ansible/roles/
[student@master roles]$ ls
linux-system-roles.certificate      rhel-system-roles.certificate
linux-system-roles.cockpit          rhel-system-roles.cockpit
linux-system-roles.crypto_policies  rhel-system-roles.crypto_policies
linux-system-roles.firewall         rhel-system-roles.firewall
linux-system-roles.ha_cluster       rhel-system-roles.ha_cluster
linux-system-roles.kdump            rhel-system-roles.kdump
linux-system-roles.kernel_settings  rhel-system-roles.kernel_settings
linux-system-roles.logging          rhel-system-roles.logging
linux-system-roles.metrics          rhel-system-roles.metrics
linux-system-roles.nbde_client      rhel-system-roles.nbde_client
linux-system-roles.nbde_server      rhel-system-roles.nbde_server
linux-system-roles.network          rhel-system-roles.network
linux-system-roles.postfix          rhel-system-roles.postfix
linux-system-roles.selinux          rhel-system-roles.selinux
linux-system-roles.ssh              rhel-system-roles.ssh
linux-system-roles.sshd             rhel-system-roles.sshd
linux-system-roles.storage          rhel-system-roles.storage
linux-system-roles.timesync         rhel-system-roles.timesync
linux-system-roles.tlog             rhel-system-roles.tlog
linux-system-roles.vpn              rhel-system-roles.vpn
案例1:时钟同步ansible的主机
(1)将时钟同步的角色复制到roles下面
powershell
[student@master roles]$ cp -r rhel-system-roles.timesync/ /home/student/ansible/roles/timesync
[student@master roles]$ cd /home/student/ansible/
[student@master ansible]$ ls
ansible.cfg  collections  inventory  myrole.yml  repo.yml  roles
[student@master ansible]$ cd roles/
[student@master roles]$ ls
apache  timesync
[student@master roles]$ cd timesync/
[student@master timesync]$ ls
ansible_pytest_extra_requirements.txt  meta                             tasks
CHANGELOG.md                           molecule_extra_requirements.txt  templates
COPYING                                pylint_extra_requirements.txt    tests
custom_requirements.txt                pylintrc                         tox.ini
defaults                               pytest_extra_requirements.txt    vars
handlers                               README.html
library                                README.md
(2)将ansible主机的时钟同步服务器开启
powershell
[root@ansible ~]# vim /etc/chrony.conf
[root@ansible ~]# systemctl restart chronyd
[root@ansible ~]# systemctl enable chronyd
Created symlink /etc/systemd/system/multi-user.target.wants/chronyd.service → /usr/lib/systemd/system/chronyd.service.
[root@ansible ~]# hwclock -w
[root@ansible ~]# firewall-cmd --list-all
FirewallD is not running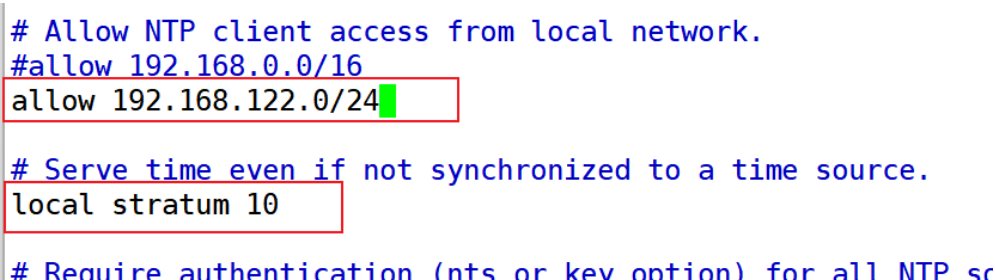
(3)编写timesync.yml剧本,运行并测试
powershell
[student@master ansible]$ vim timesync.yml
[student@master ansible]$ ansible-playbook timesync.yml
[student@master ansible]$ ansible node1 -m shell -a 'chronyc sources'
node1 | CHANGED | rc=0 >>
MS Name/IP address         Stratum Poll Reach LastRx Last sample
===============================================================================
^* ansible.example.com           3   6    17     2   -556us[ -761us] +/-   34ms
powershell
---
- name: time chronyd
  hosts: all
  vars:
    timesync_ntp_servers:
      - hostname: ansible
        iburst: yes
  roles:
    - timesync
案例二:selinux
(1)将selinux的角色复制到roles下面
powershell
[student@master ansible]$ cp -r /usr/share/ansible/roles/rhel-system-roles.selinux/ roles/selinux
[student@master ansible]$ cd roles/
[student@master roles]$ ls
apache  selinux  timesync
(2)编写selinux.yml剧本并运行
powershell
[student@master ansible]$ vim selinux.yml
[student@master ansible]$ ansible-playbook selinux.yml
powershell
---
- name: set selinux
  hosts: all
  vars:
    selinux_policy: targeted
    selinux_state: enforcing
  roles:
    - role: selinux
      become: true
三、第三方来源下载安装角色
案例:
创建剧本/home/student/ansible/roles/down.yml,用来从以下 URL 下载角色
并安装到/home/student/ansible/roles 目录下:
http://ansible.example.com/roles/haproxy.tar 此角色名为 haproxy
http://ansible.example.com/roles/myphp.tar 此角色名为 myphp
powershell
[student@master ansible]$ cd roles/
[student@master roles]$ vim down.yml
[student@master roles]$ cd ..
[student@master ansible]$ ansible-galaxy install -r roles/down.yml -p roles/
Starting galaxy role install process
- downloading role from http://ansible.example.com/roles/haproxy.tar
- extracting haproxy to /home/student/ansible/roles/haproxy
- haproxy was installed successfully
- downloading role from http://ansible.example.com/roles/myphp.tar
- extracting myphp to /home/student/ansible/roles/myphp
- myphp was installed successfully
[student@master ansible]$ ls roles/
apache  down.yml  haproxy  myphp  selinux  timesync
down.yml:
powershell
---
- name: haproxy
  src: http://ansible.example.com/roles/haproxy.tar

- name: myphp
  src: http://ansible.example.com/roles/myphp.tar
四、删除角色(ansible-galaxy remove 角色名称)
powershell
[student@master roles]$ ls
apache  down.yml  haproxy  myphp  selinux  timesync
[student@master ansible]$ ls
ansible.cfg  inventory   repo.yml  selinux.yml
collections  myrole.yml  roles     timesync.yml
[student@master ansible]$ ansible-galaxy remove myphp
- successfully removed myphp
[student@master ansible]$ ls roles/
apache  down.yml  haproxy  selinux  timesync
五、列出角色(ansible-galaxy list)
powershell
[student@master ansible]$ ansible-galaxy list
# /home/student/ansible/roles
- apache, (unknown version)
- timesync, (unknown version)
- selinux, (unknown version)
- haproxy, (unknown version)