文章目录
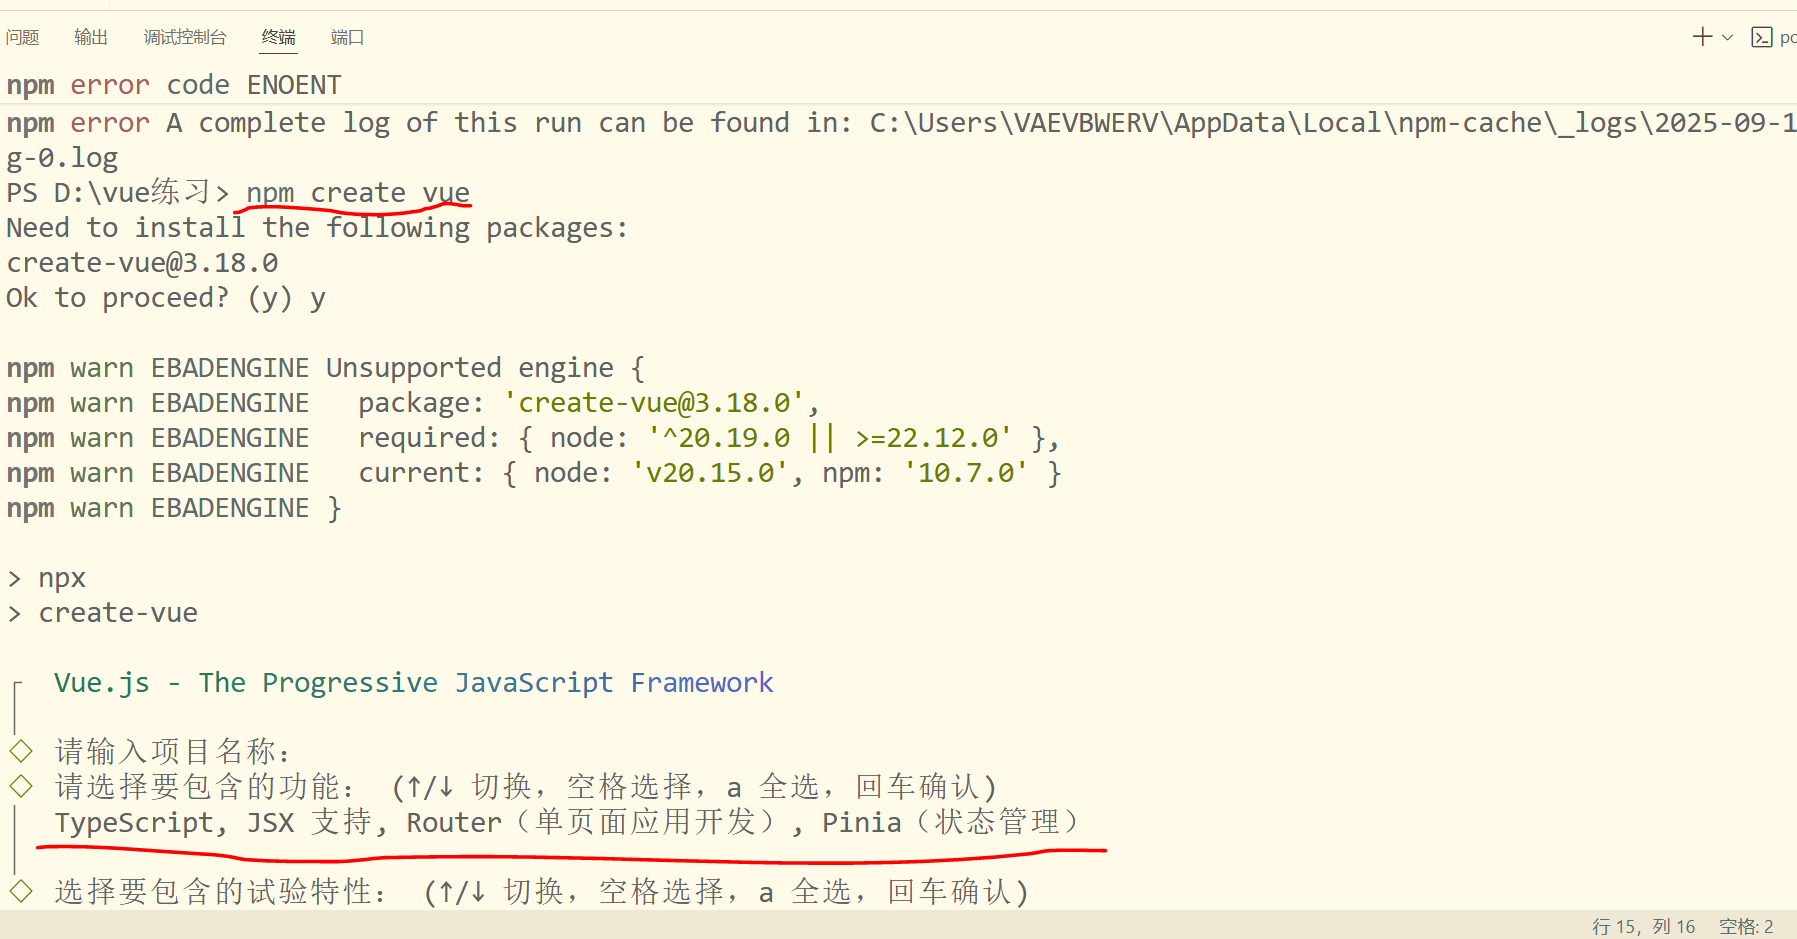
通过脚手架安装,然后选中这几个选项
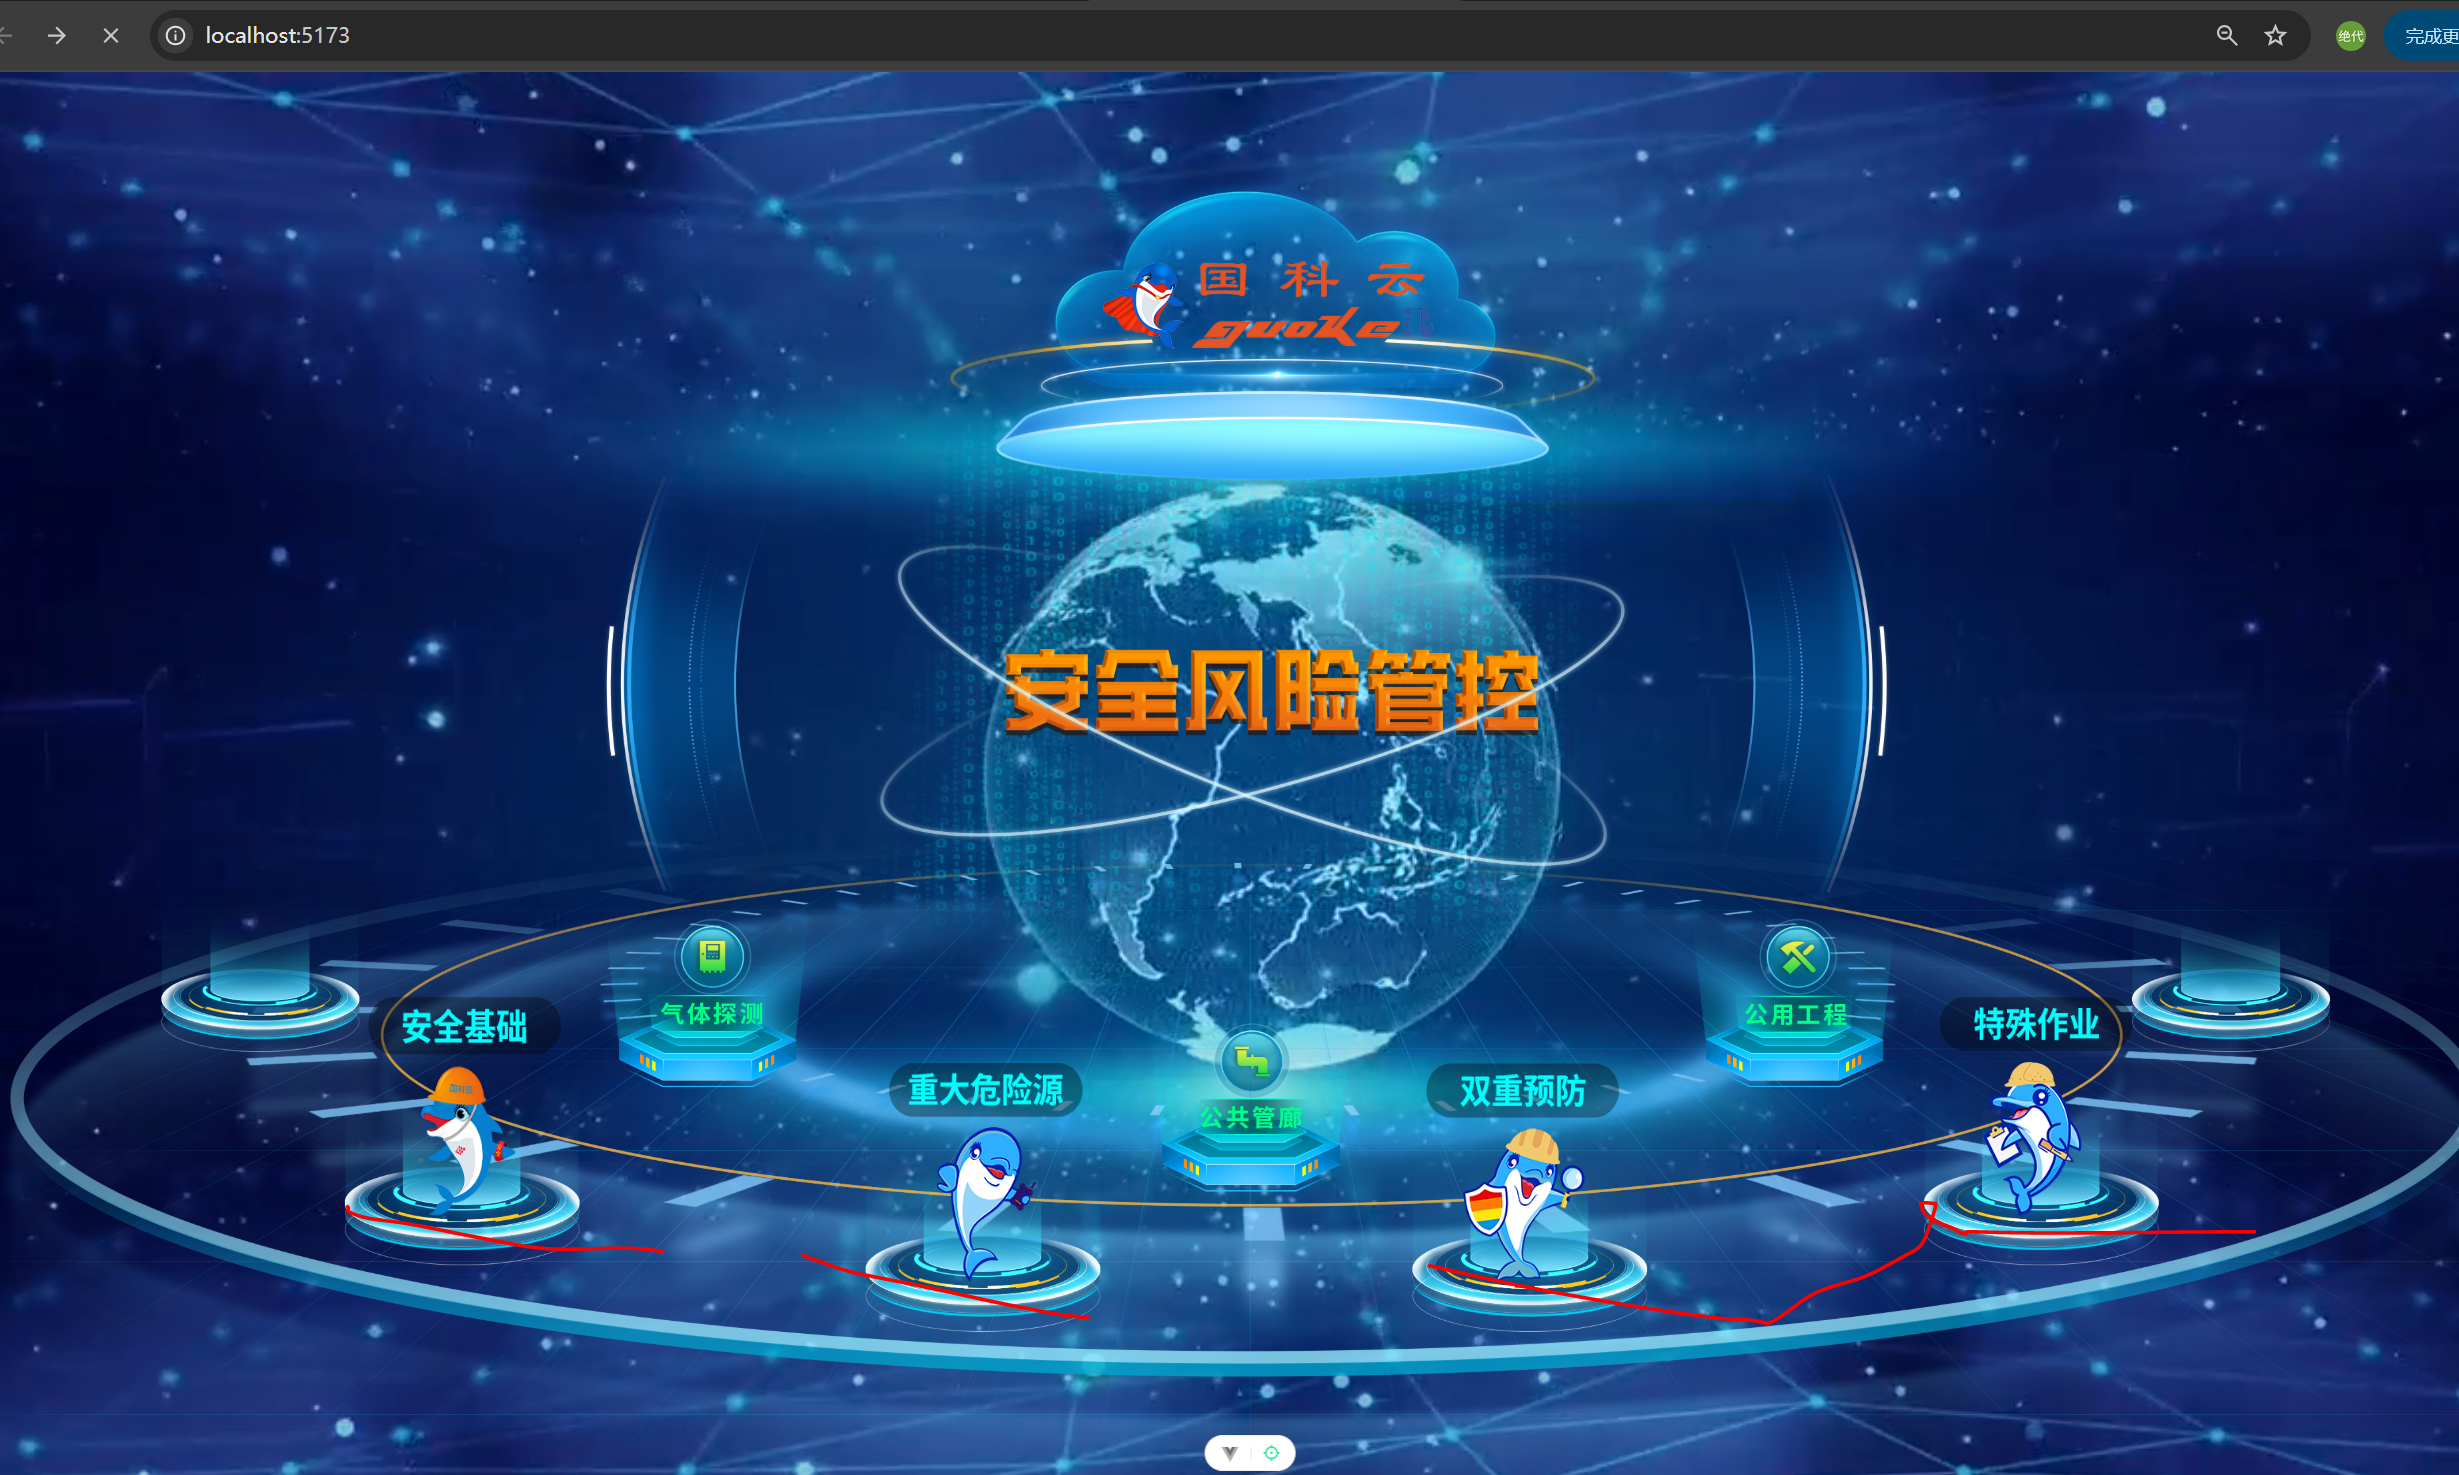
首页布局
c
//demo\src\views\app-index.vue
<template>
  <div class="box">
    <video style="width: 100%;height: 100%;" muted loop autoplay>
      <source src="../assets/dv-index-main.mp4">
    </video>
    <div class="dv-index-main"></div>
  </div>
</template>

<style scoped lang="scss">
.box{
  position: relative;
  width: 100%;
  height: 100%;
}
.dv-index-main{
  position: absolute;
  left:0px;
  top:0px;
  width: 100%;
  height: 100%;
  background: url('../assets/images/大屏首页.png') no-repeat;
  background-size:100% 100%;
}
</style>
安装sass-embedded,lang="scss"。编译 Sass 代码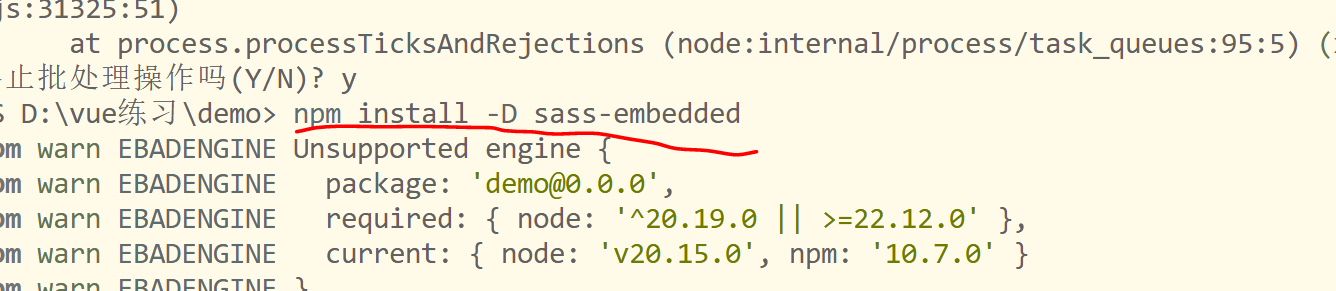
其实就是视频上面加个背景图
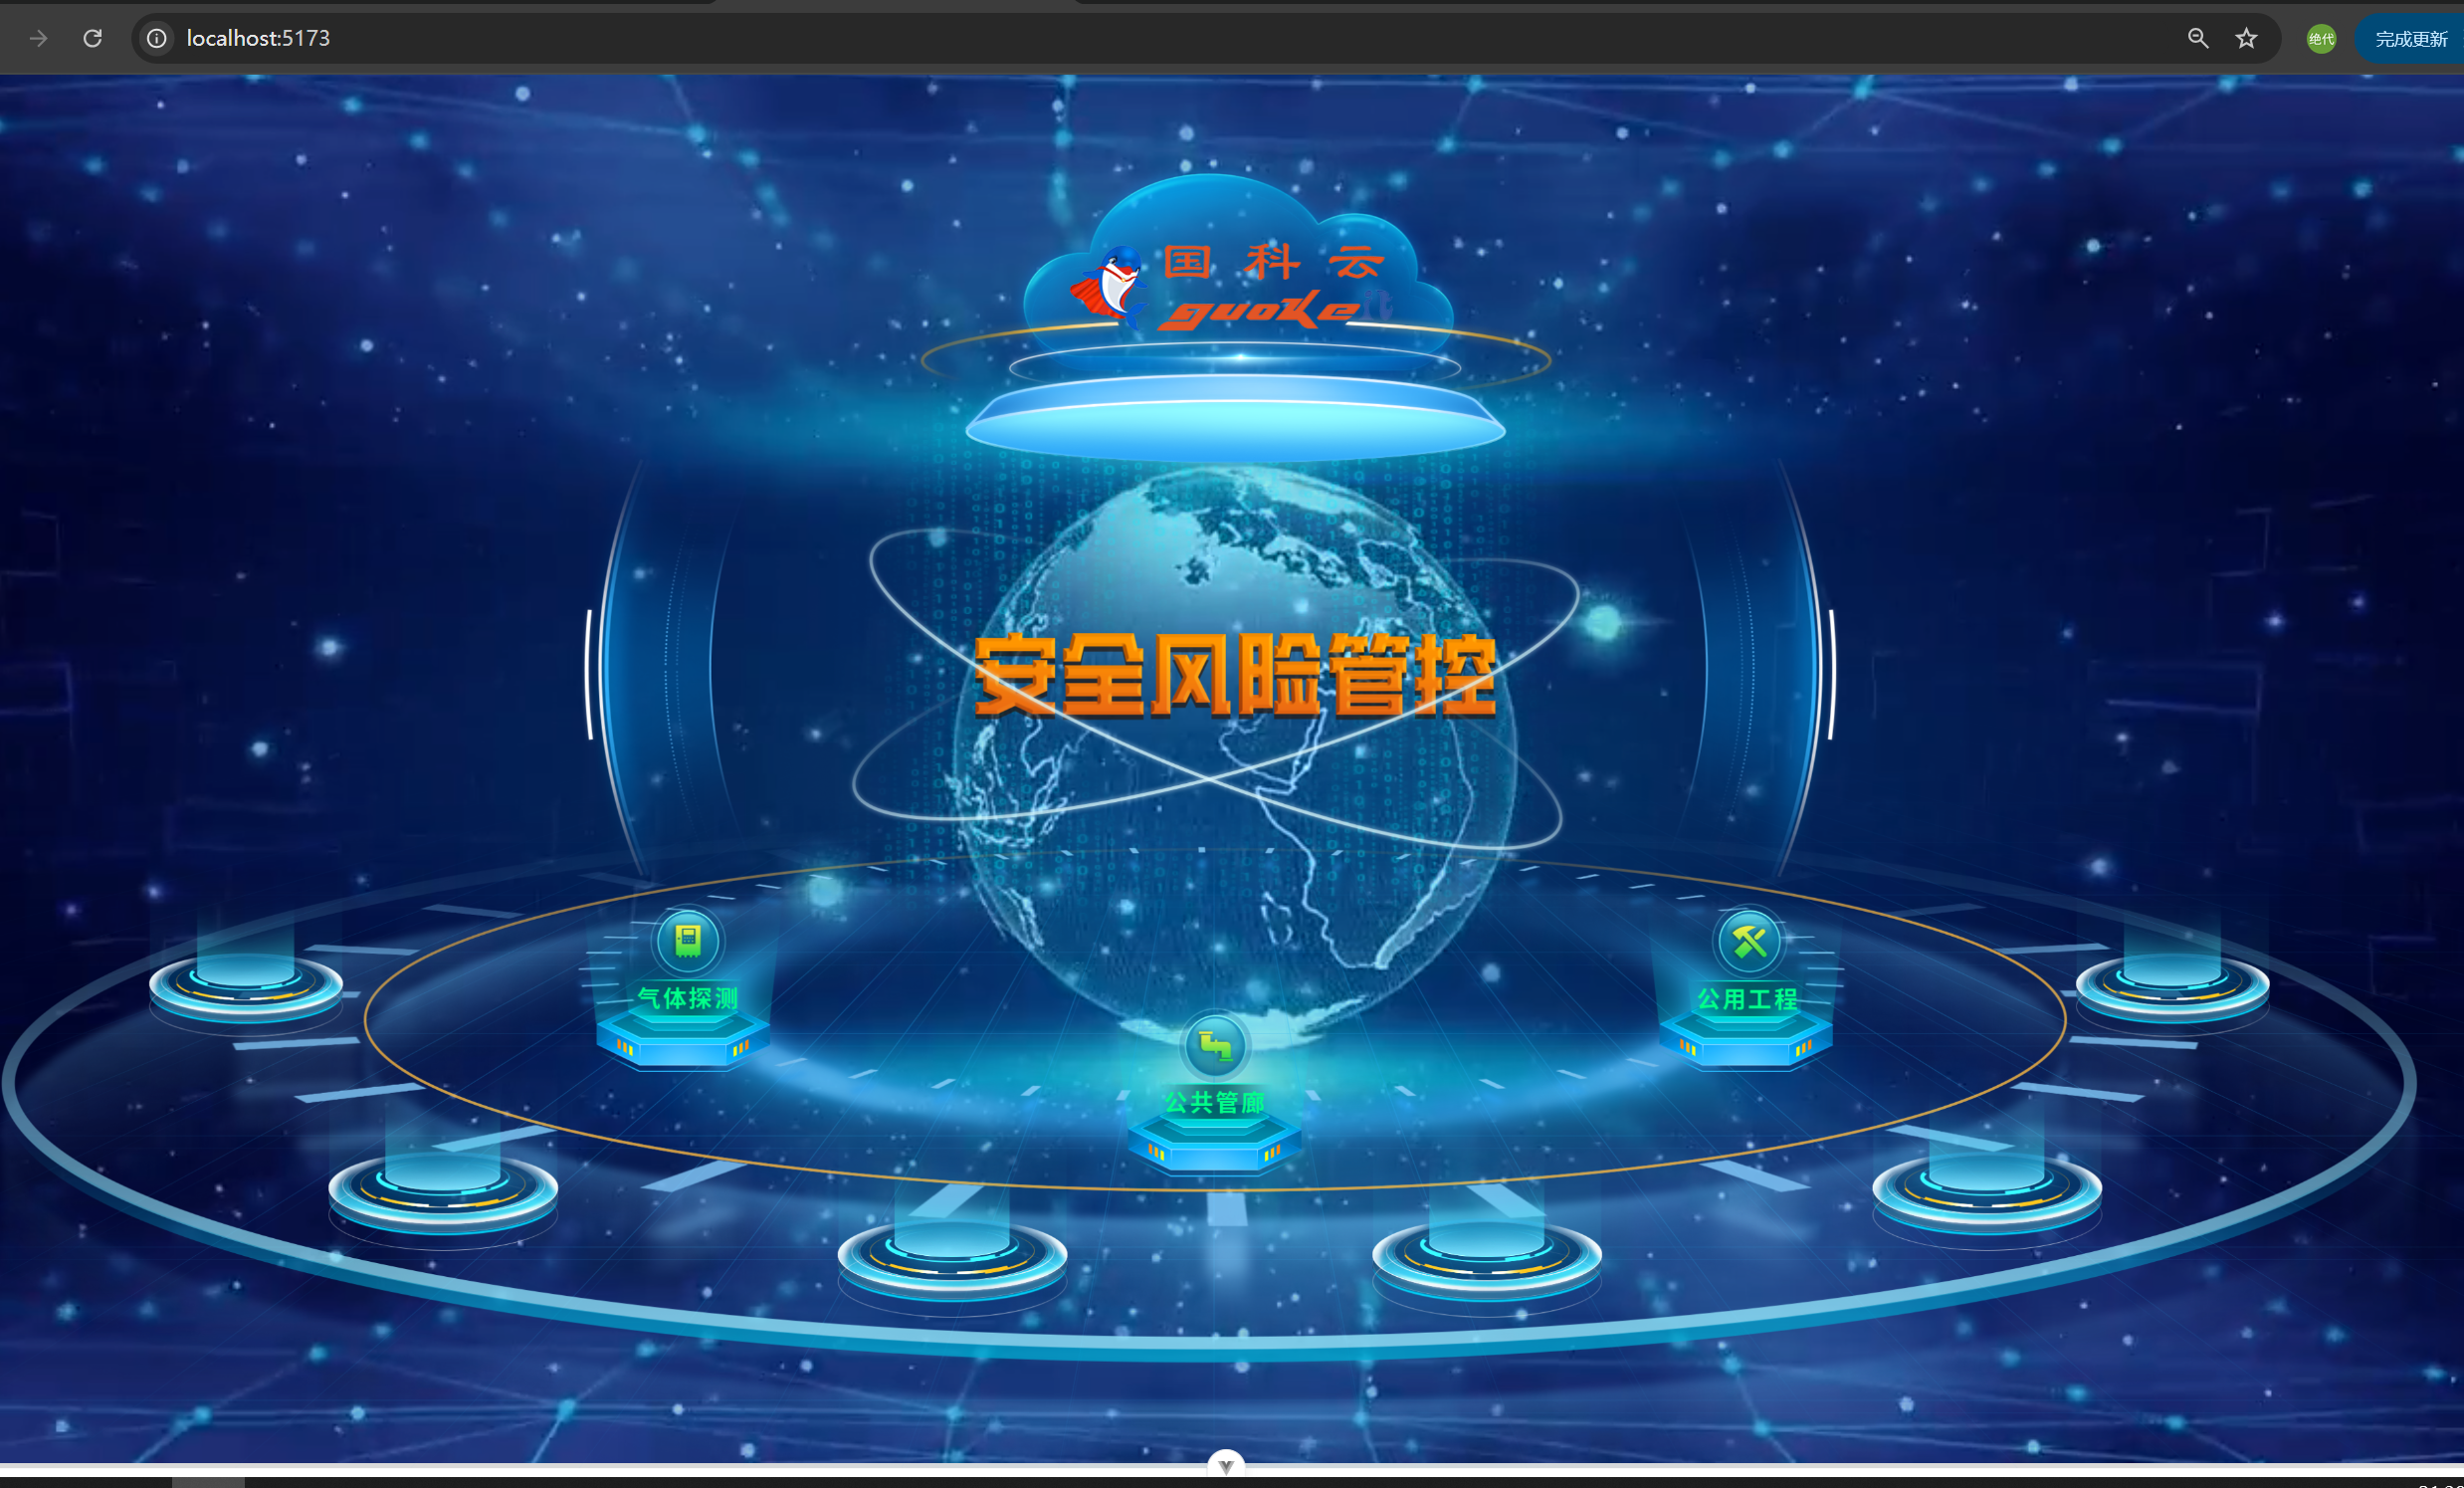
大屏适配
安装插件:大屏适配插件
npm install v-scale-screen@2.0.0导入进来使用
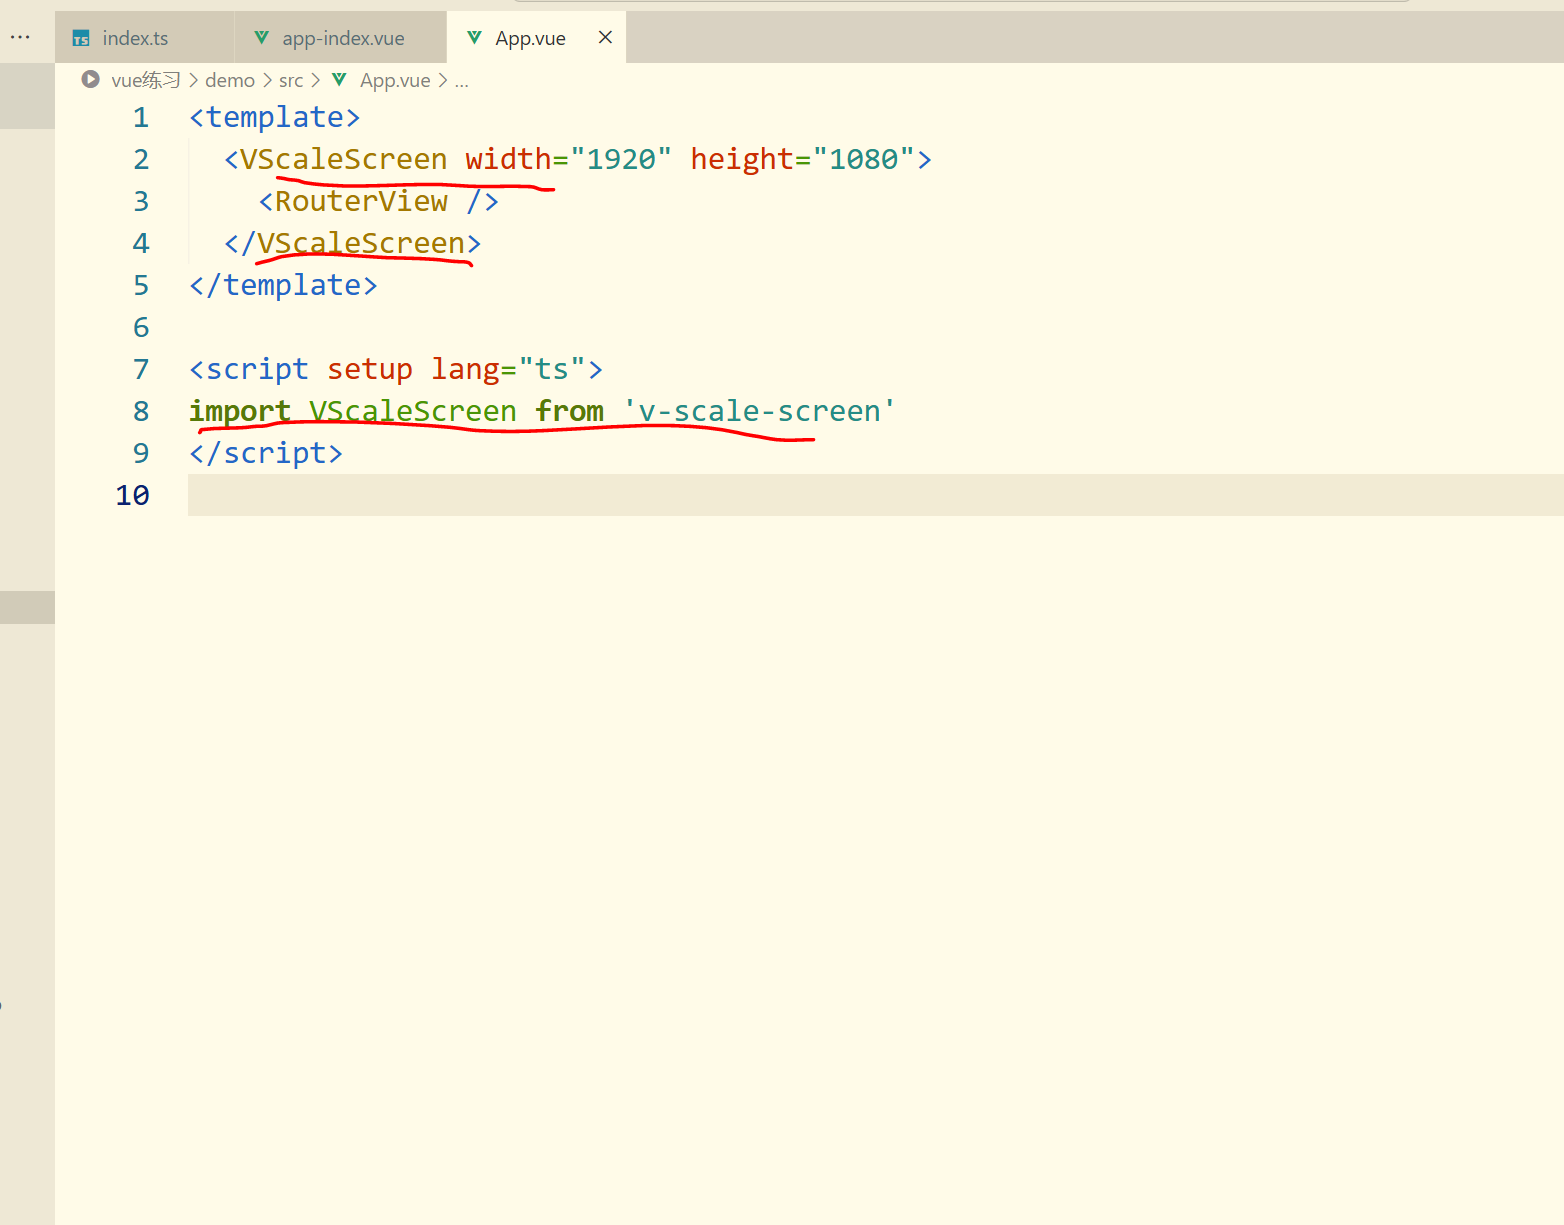
c
<template>
  <div class="box">
    <video style="width: 100%;height: 100%;" muted loop autoplay>
      <source src="../assets/dv-index-main.mp4">
    </video>
    <div class="dv-index-main">
      <div class="dv-btn-group">
        <div
          v-for="(item,index) in btnArr"
          :key="index"
          class="btn-item"
          :class="[btnClassHandle(item.num)]"
        >
          <img :src="getImageUrl(item.url)" alt="">
        </div>
      </div>
    </div>
  </div>
</template>

<script setup lang="ts">
import { ref } from 'vue'

const btnArr = ref<any>([
  {
    num:'one',
    url:'安全基础.png'
  },
  {
    num:'two',
    url:'重大危险源.png'
  },
  {
    num:'three',
    url:'双重预防.png'
  },
  {
    num:'four',
    url:'特殊作业.png'
  }
]);
//接收循环的图片名称,然后然后添加路径
const getImageUrl = ( url:string )=>{
  // 作用是动态生成图片资源的完整URL路径
  return new URL(`../assets/images/${url}`,import.meta.url).href;
}
// 接收一个字符串参数 key 并返回一个拼接后的类名字符串
const btnClassHandle = ( key:string  )=>{
  return `btn-item-${key}`;
}
</script>

<style scoped lang="scss">
.box{
  position: relative;
  width: 100%;
  height: 100%;
}
.dv-index-main{
  position: absolute;
  left:0px;
  top:0px;
  width: 100%;
  height: 100%;
  background: url('../assets/images/大屏首页.png') no-repeat;
  background-size:100% 100%;
  .dv-btn-group{
    position: absolute;
    left:0;
    bottom:145px;
    width:100%;
    height: 370px;
    z-index: 10;
    .btn-item{
      position: absolute;
      width: 145px;
      height: 168px;
      transition: transform .3s;
      cursor: pointer;
      img{
        width:100%;
        height: 100%;
      }
    }
    .btn-item-one{
      top: 143px;
      left: 298px;
    }
    .btn-item-two{
      top: 194px;
      left: 689px;
    }
    .btn-item-three{
      top: 194px;
      right: 683px;
    }
    .btn-item-four{
      top: 143px;
      right: 298px;
    }
  }
}
.btn-item:hover{
  transform: scale(1.2);
}
</style>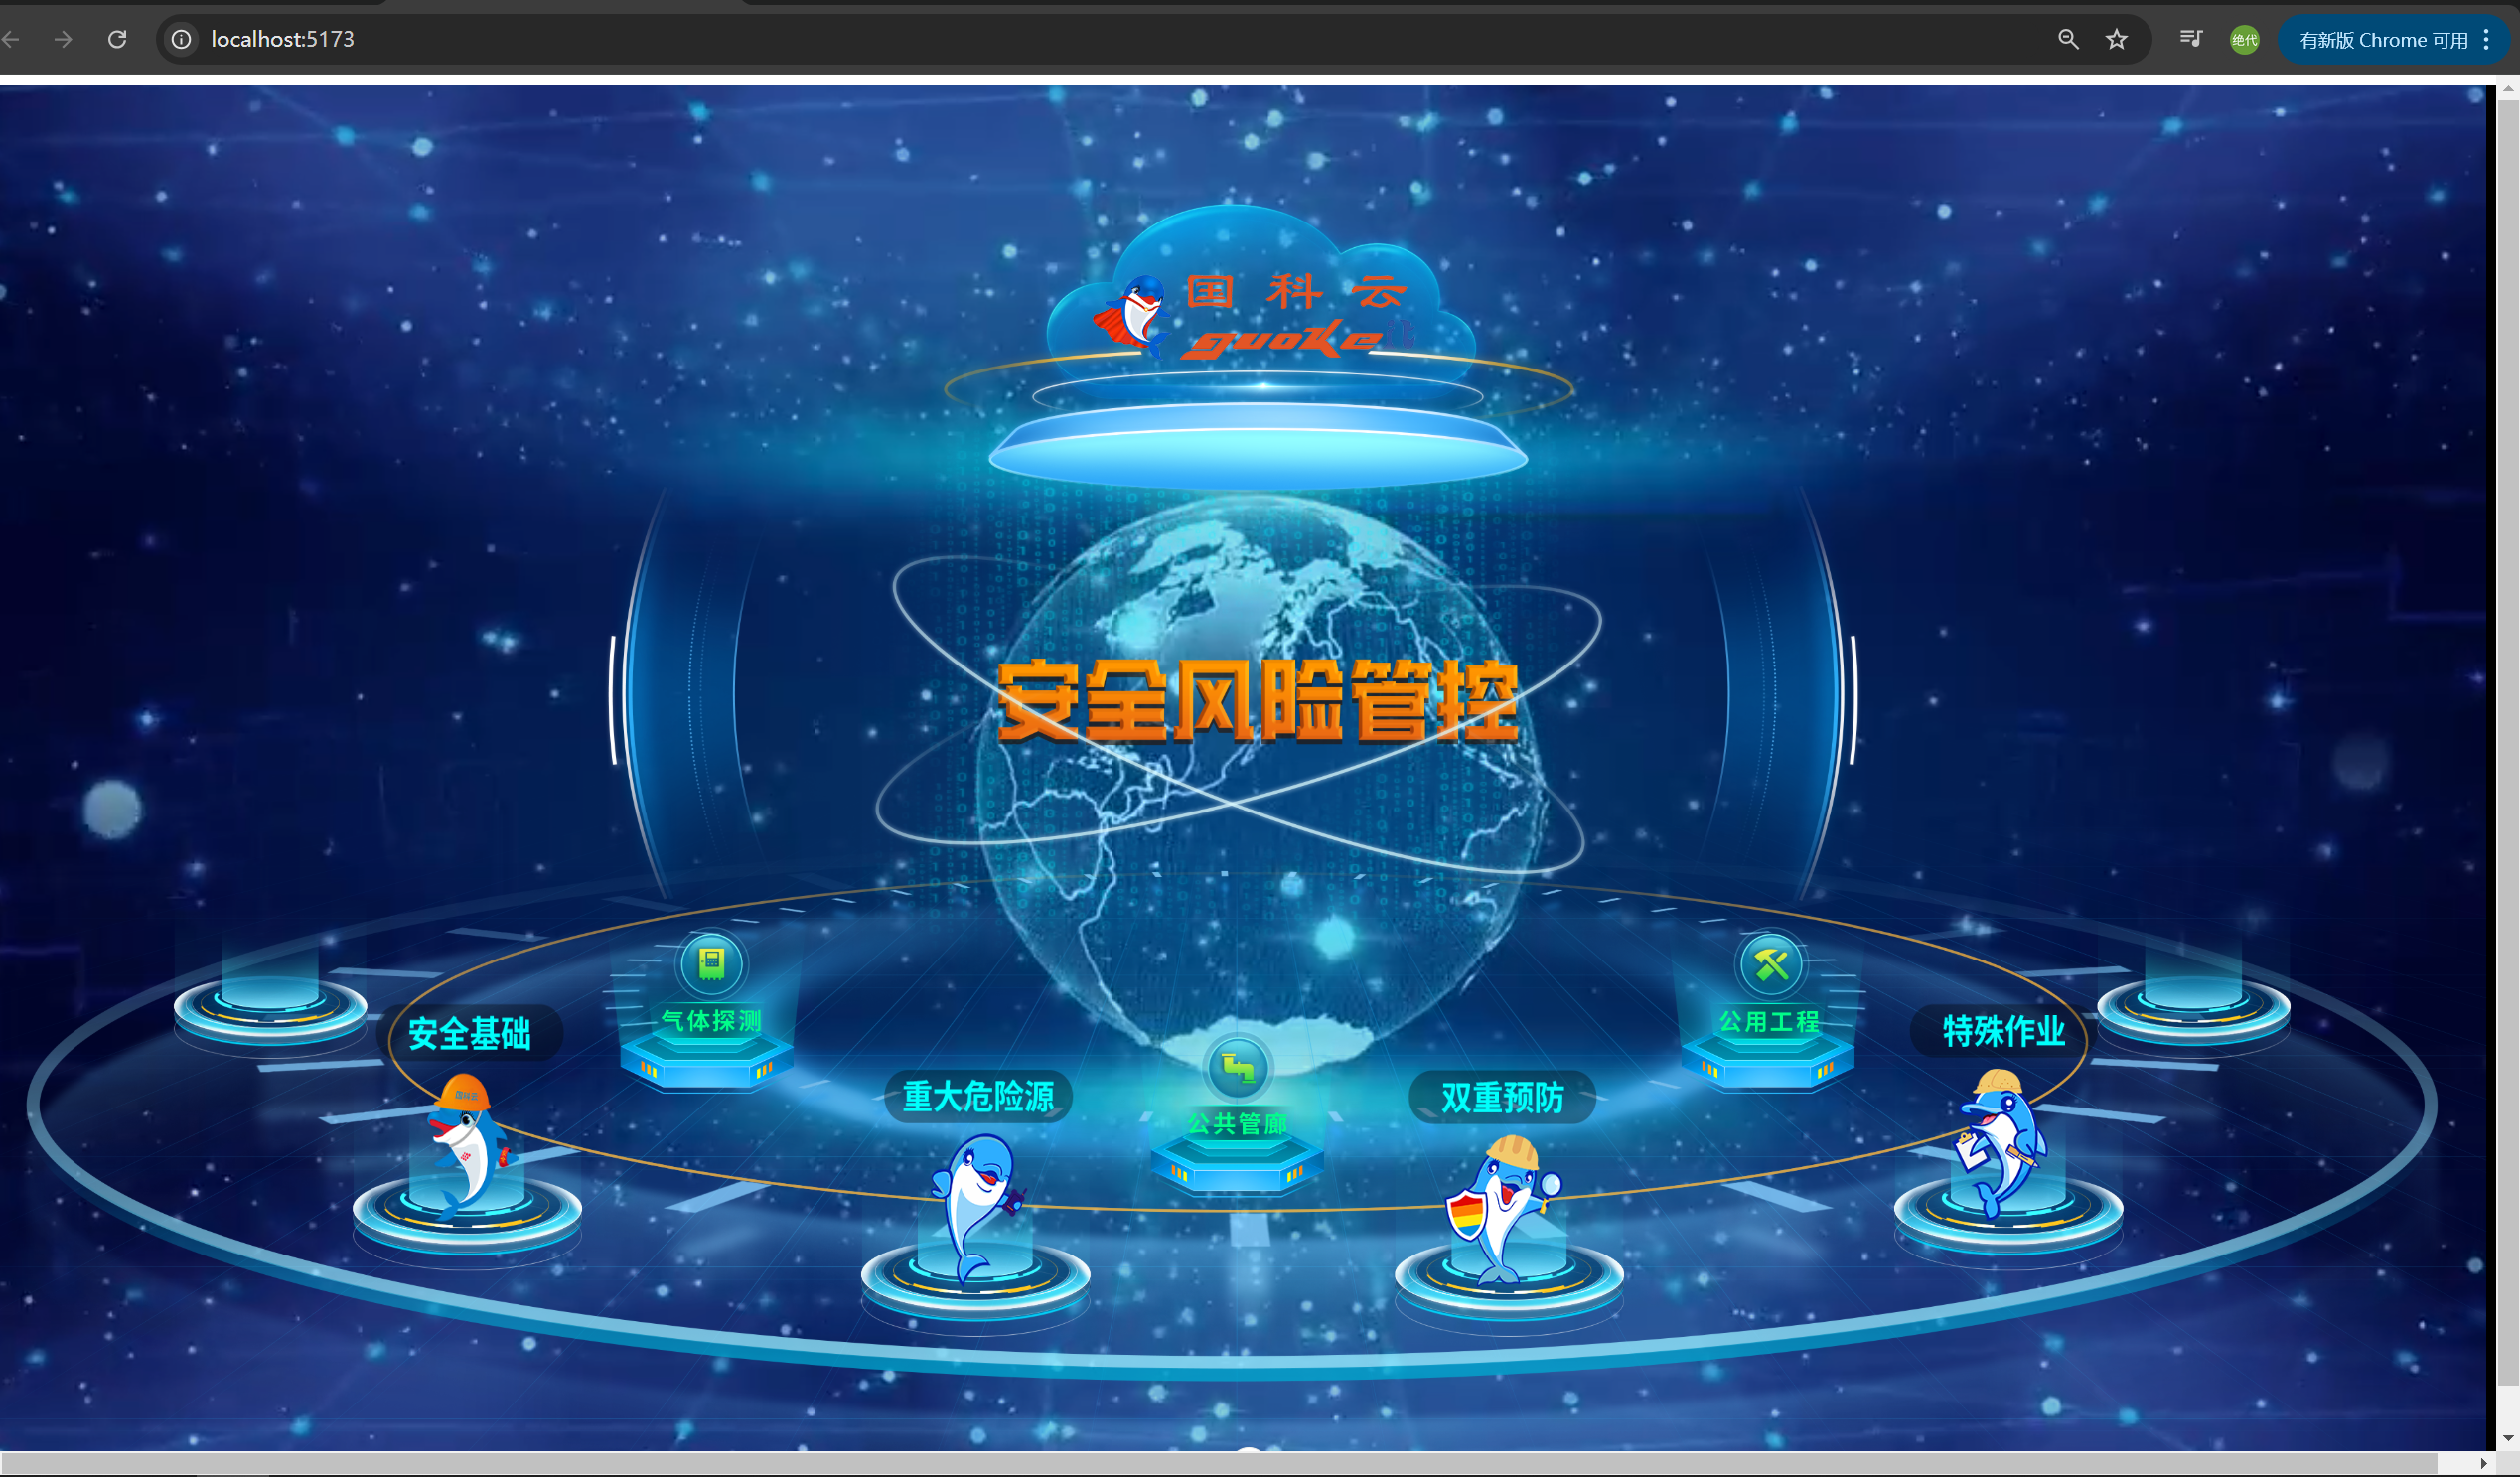
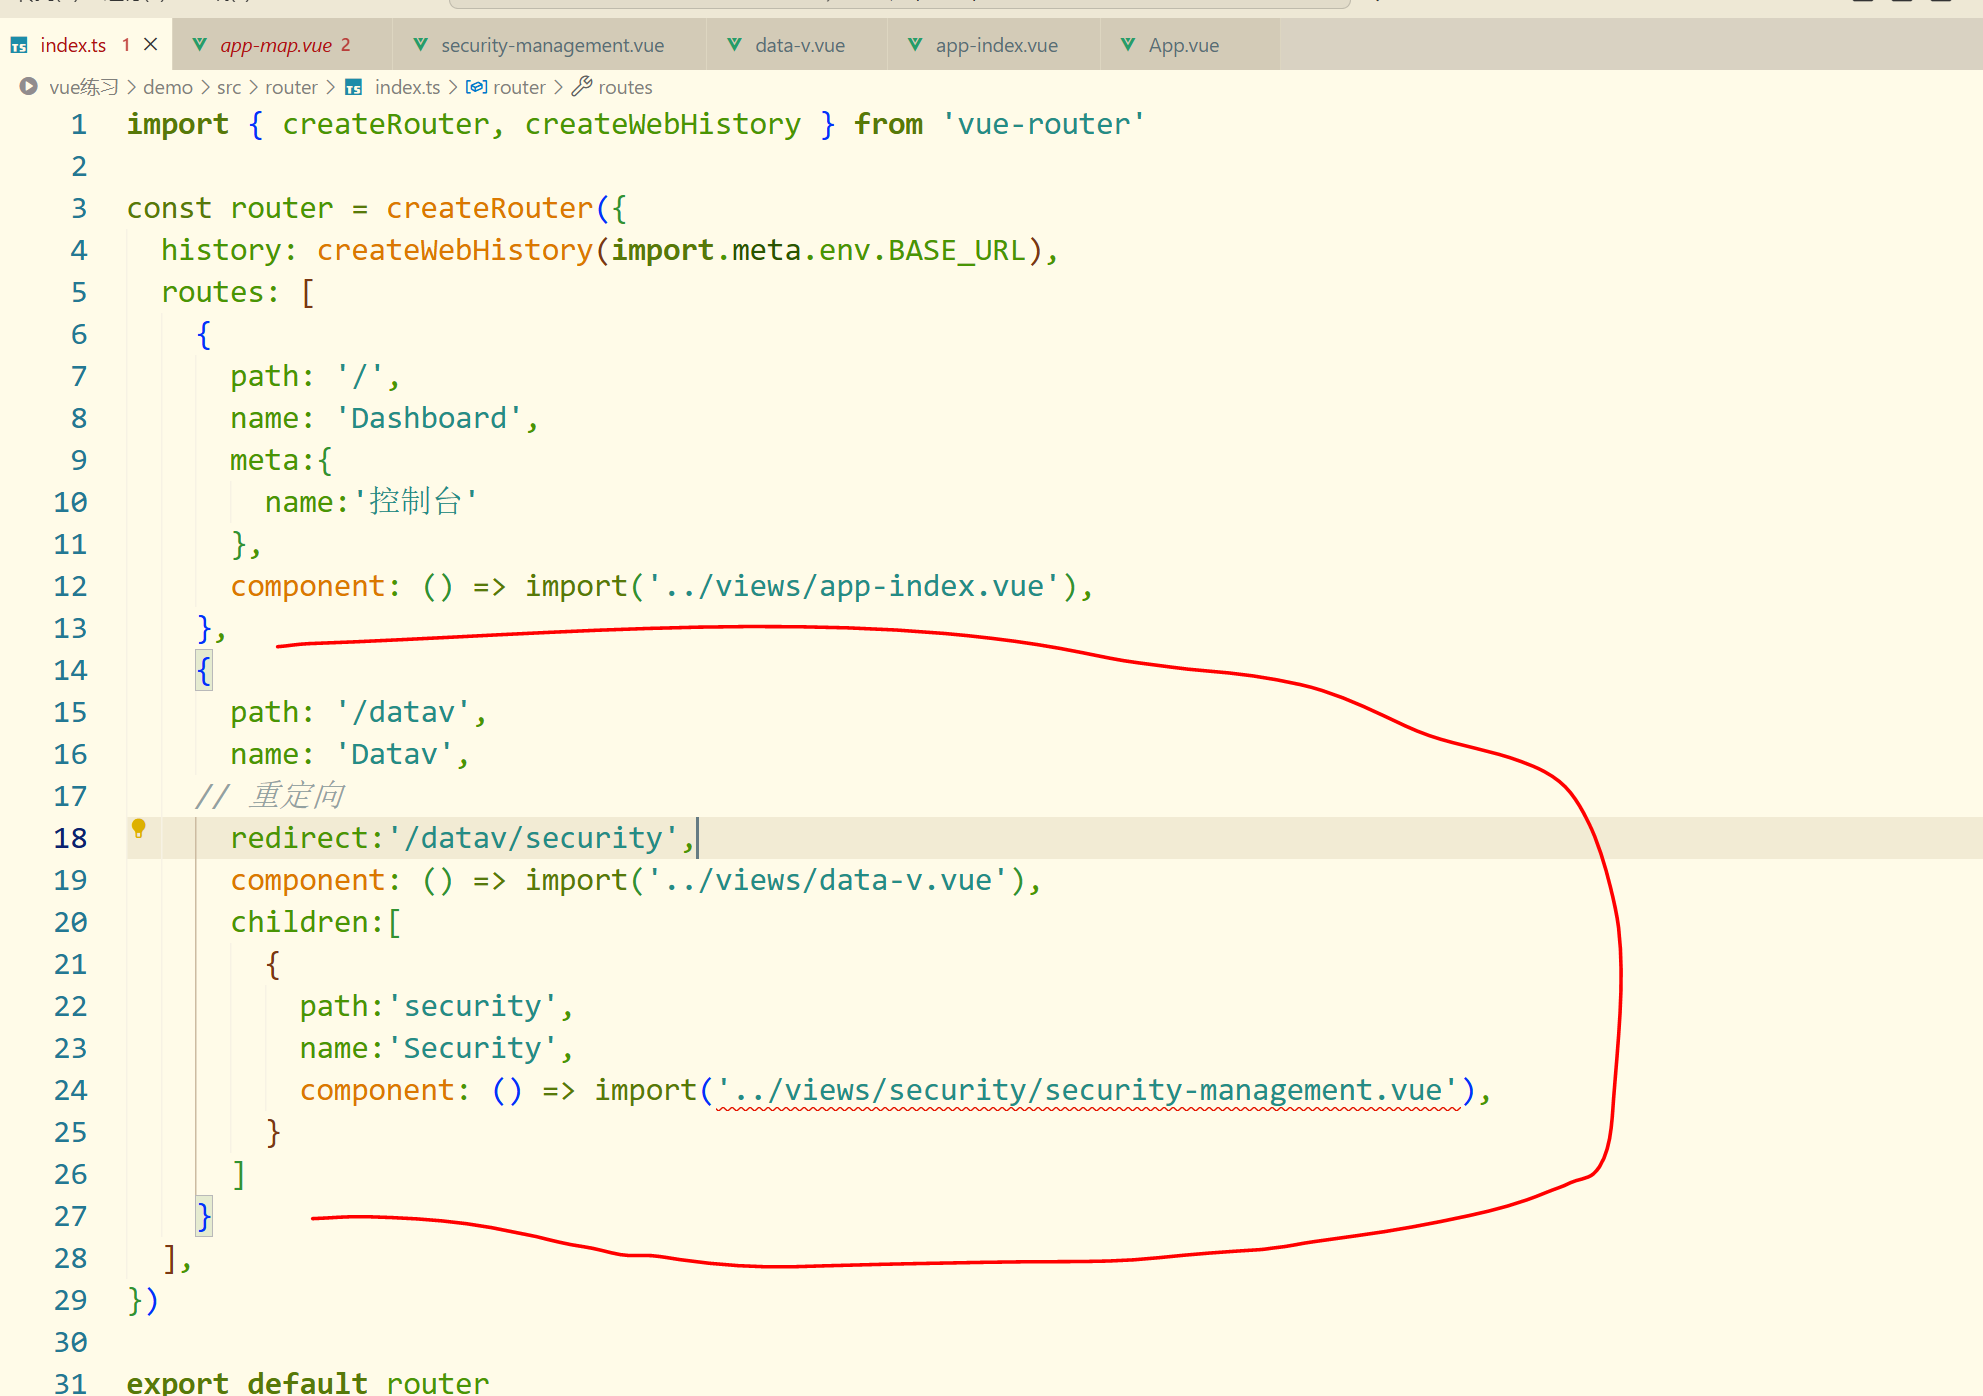
引入地图
添加点击事件和路由的数据

引入路由和对路由进行拼接
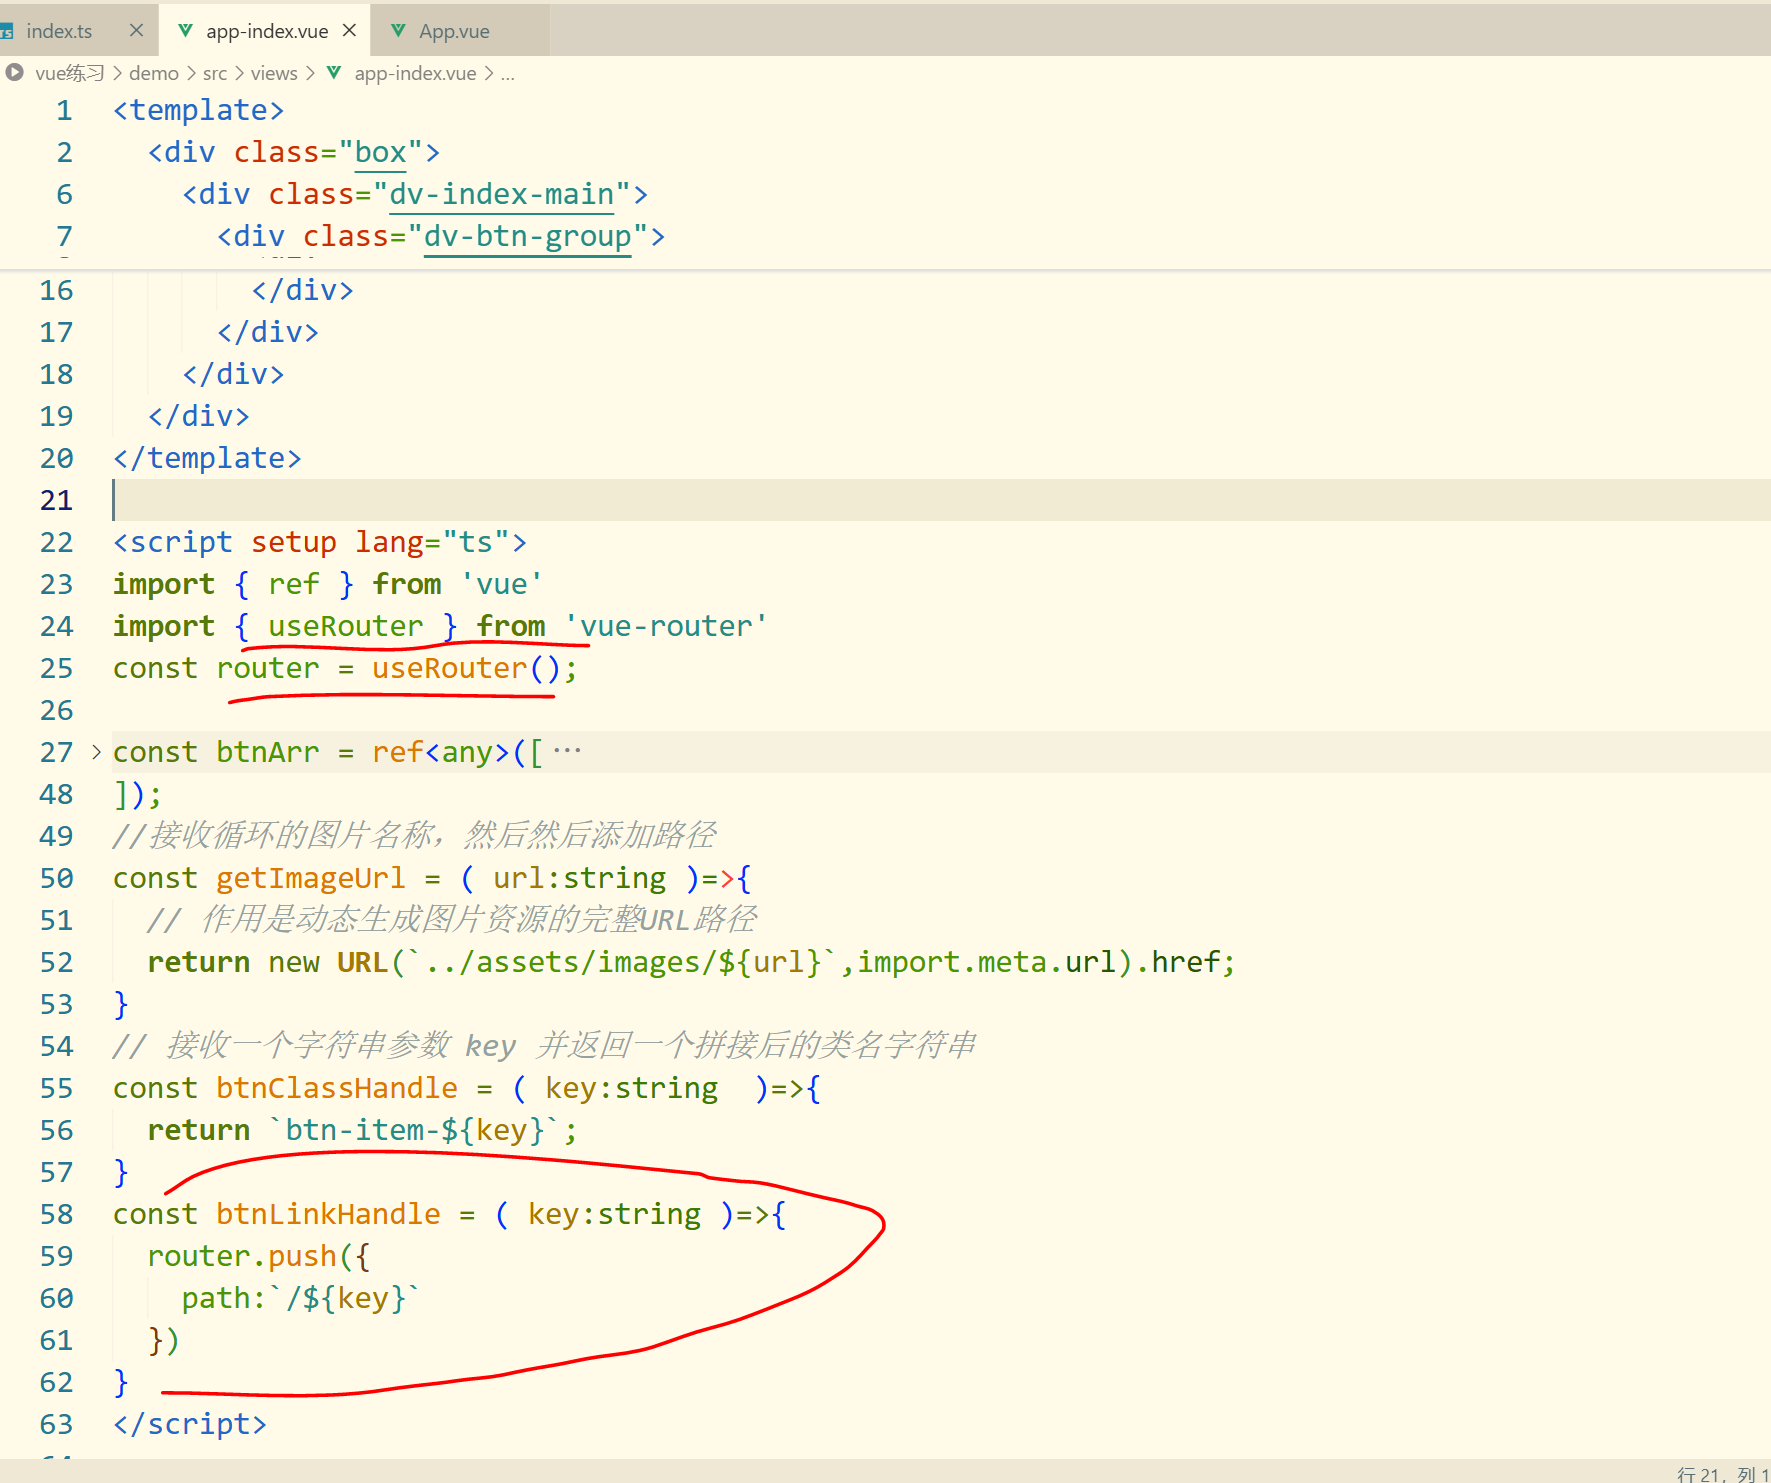
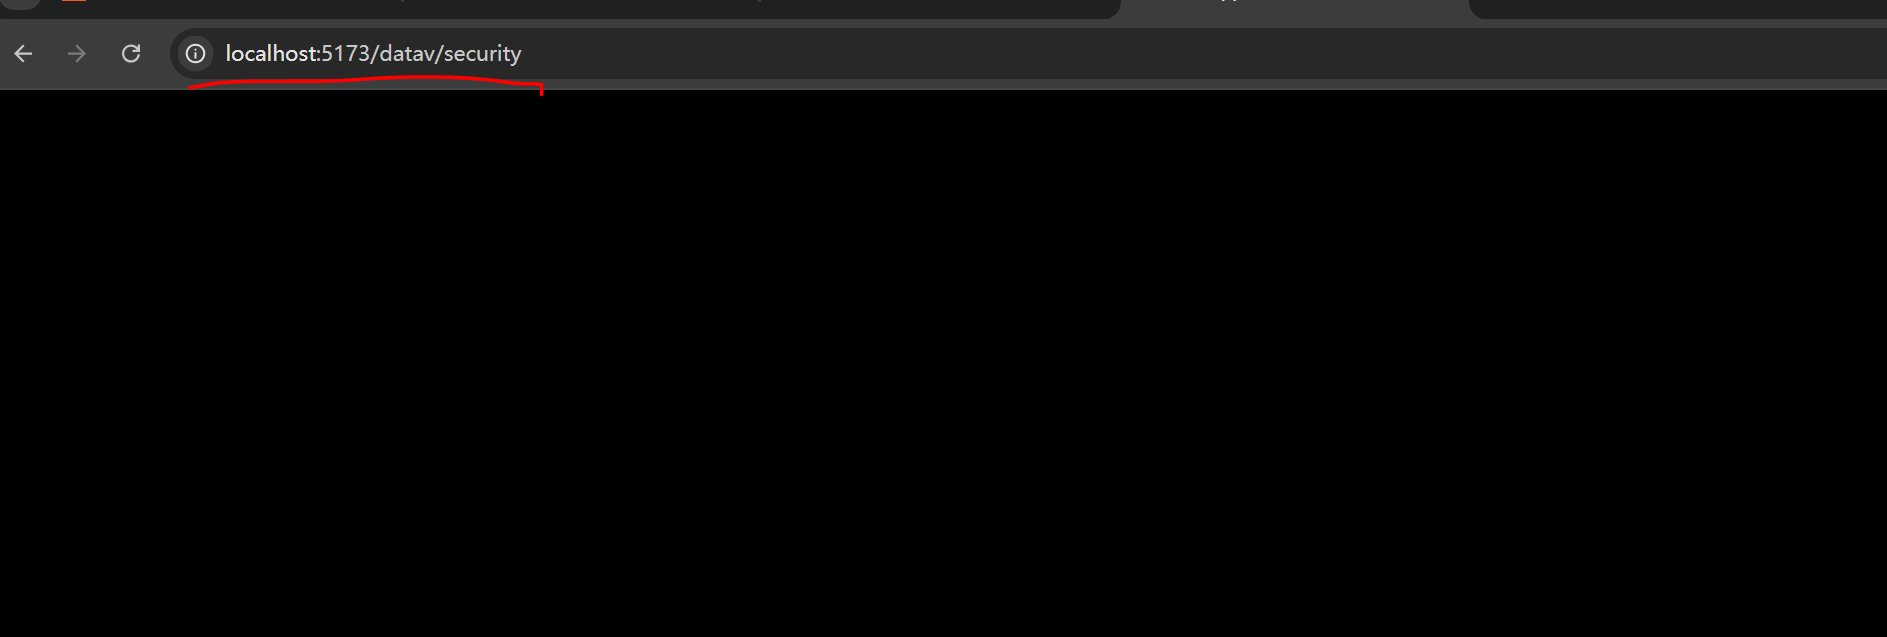
点击后进入

动态创建地图地址,路由,和class
javascript
<template>
<div class="box">
<video style="width: 100%;height: 100%;" muted loop autoplay>
<source src="../assets/dv-index-main.mp4">
</video>
<div class="dv-index-main">
<div class="dv-btn-group">
<div
v-for="(item,index) in btnArr"
:key="index"
class="btn-item"
:class="[btnClassHandle(item.num)]"
@click="btnLinkHandle(item.urlKey)"
>
<img :src="getImageUrl(item.url)" alt="">
</div>
</div>
</div>
</div>
</template>
<script setup lang="ts">
import { ref } from 'vue'
import { useRouter } from 'vue-router'
const router = useRouter();
const btnArr = ref<any>([
{
num:'one',
url:'安全基础.png',
urlKey:'datav/security'
},
{
num:'two',
url:'重大危险源.png',
urlKey:'datav/major-hazard'
},
{
num:'three',
url:'双重预防.png',
urlKey:'datav/double-prevention-mechanism'
},
{
num:'four',
url:'特殊作业.png',
urlKey:'datav/double-prevention-mechanism'
}
]);
//接收循环的图片名称,然后然后添加路径,url是自定义,用来接收值
const getImageUrl = ( url:string )=>{
// 作用是动态生成图片资源的完整URL路径
return new URL(`../assets/images/${url}`,import.meta.url).href;
}
//添加动态class, 接收一个字符串参数 key 并返回一个拼接后的类名字符串
const btnClassHandle = ( key:string )=>{
return `btn-item-${key}`;
}
// 添加动态路由
const btnLinkHandle = ( key:string )=>{
router.push({
path:`/${key}`
})
}
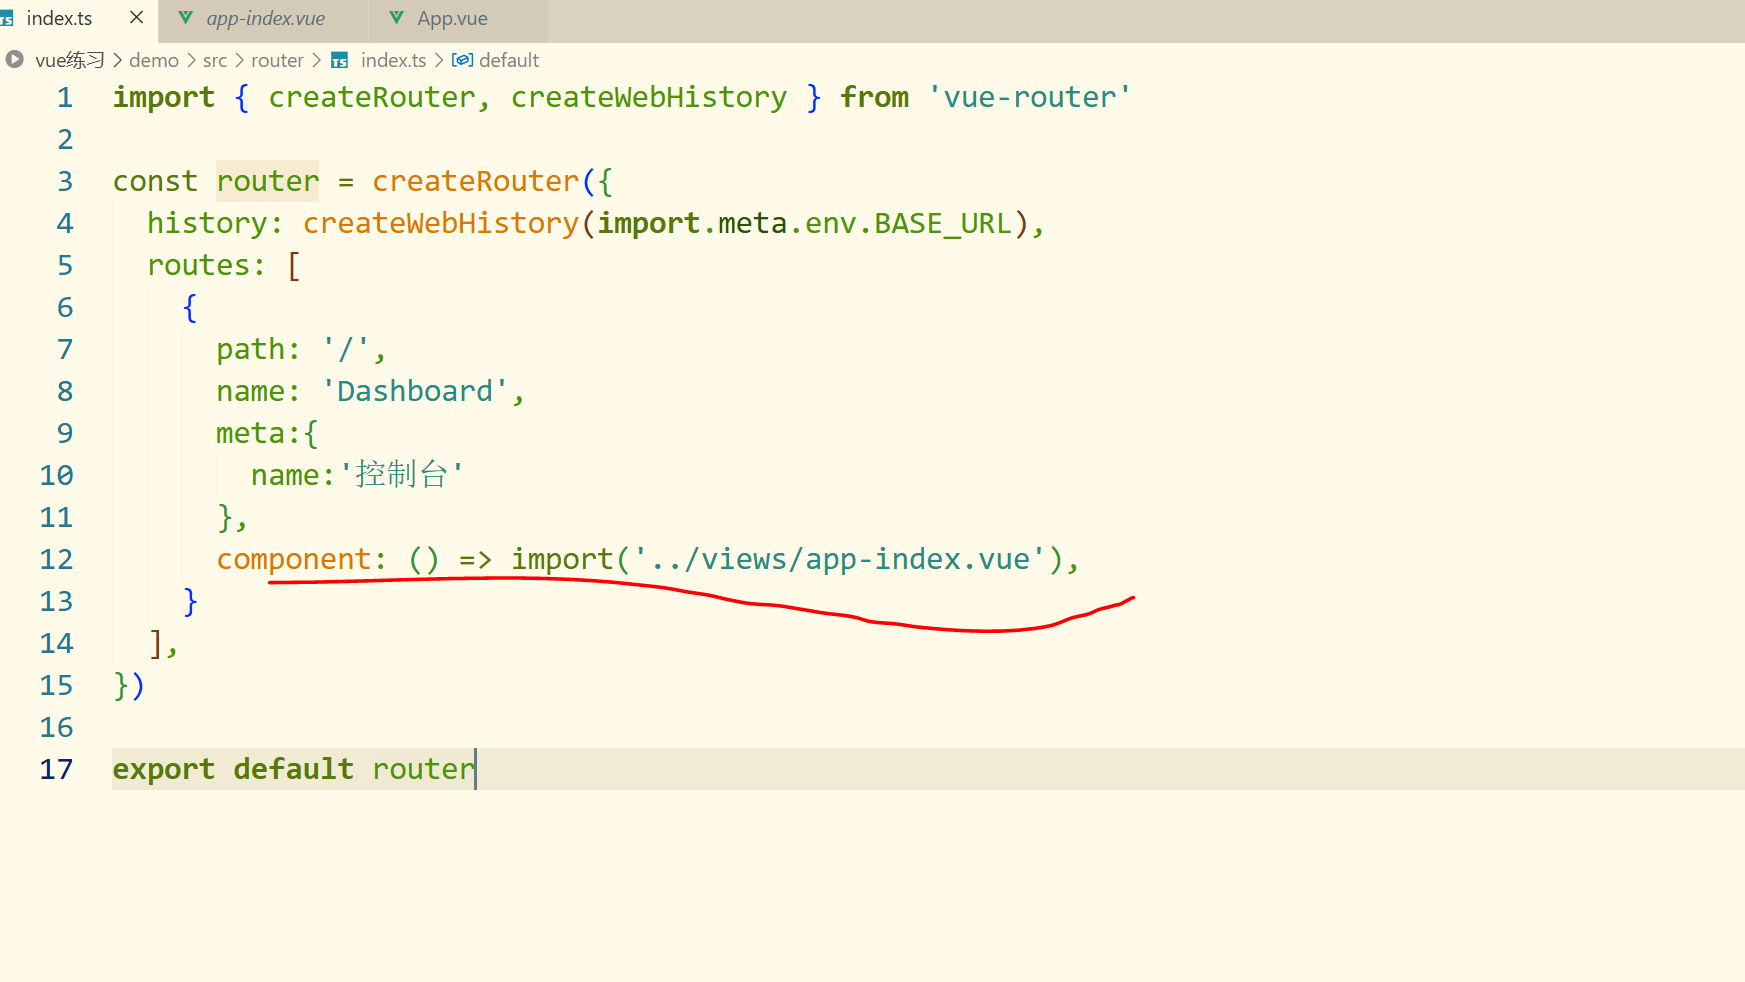
</script>新建子路由
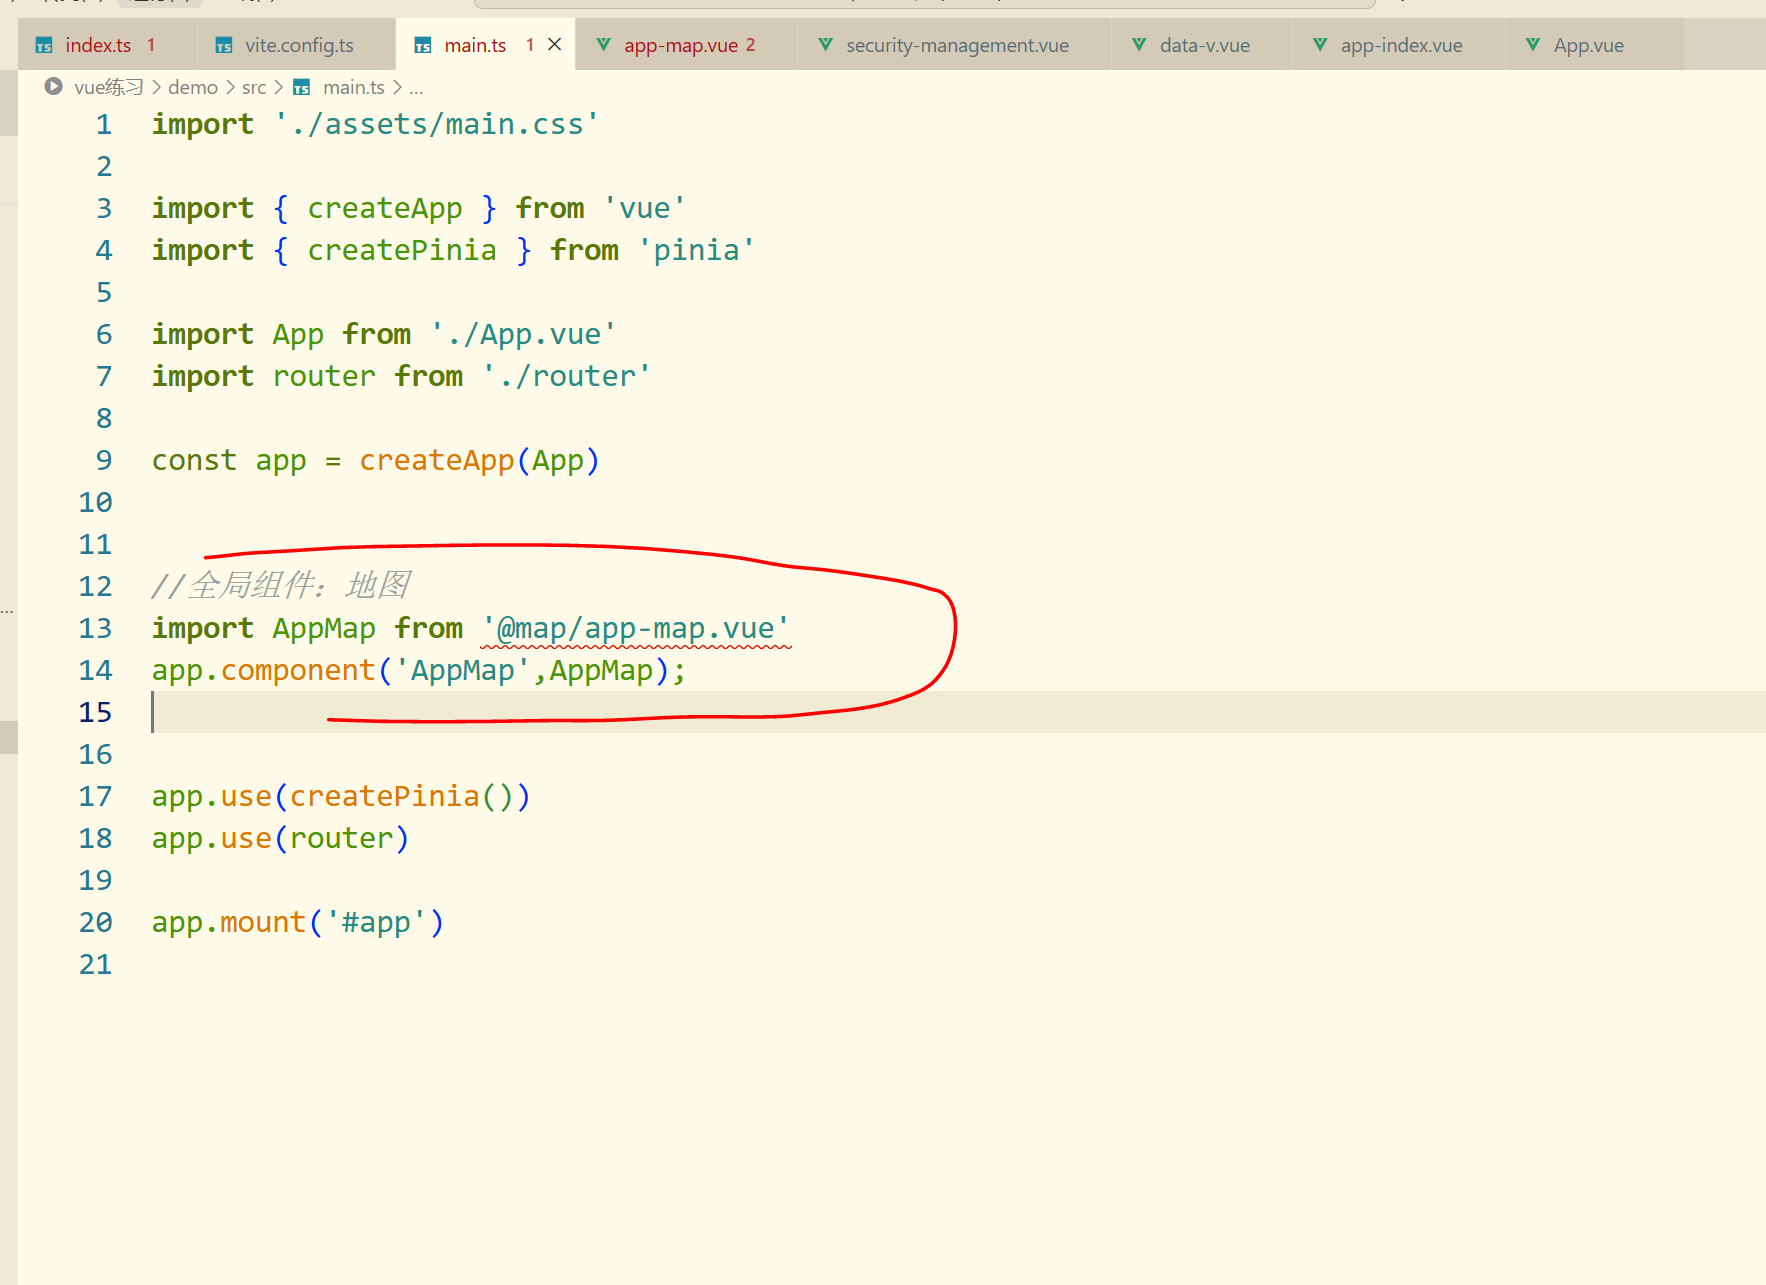
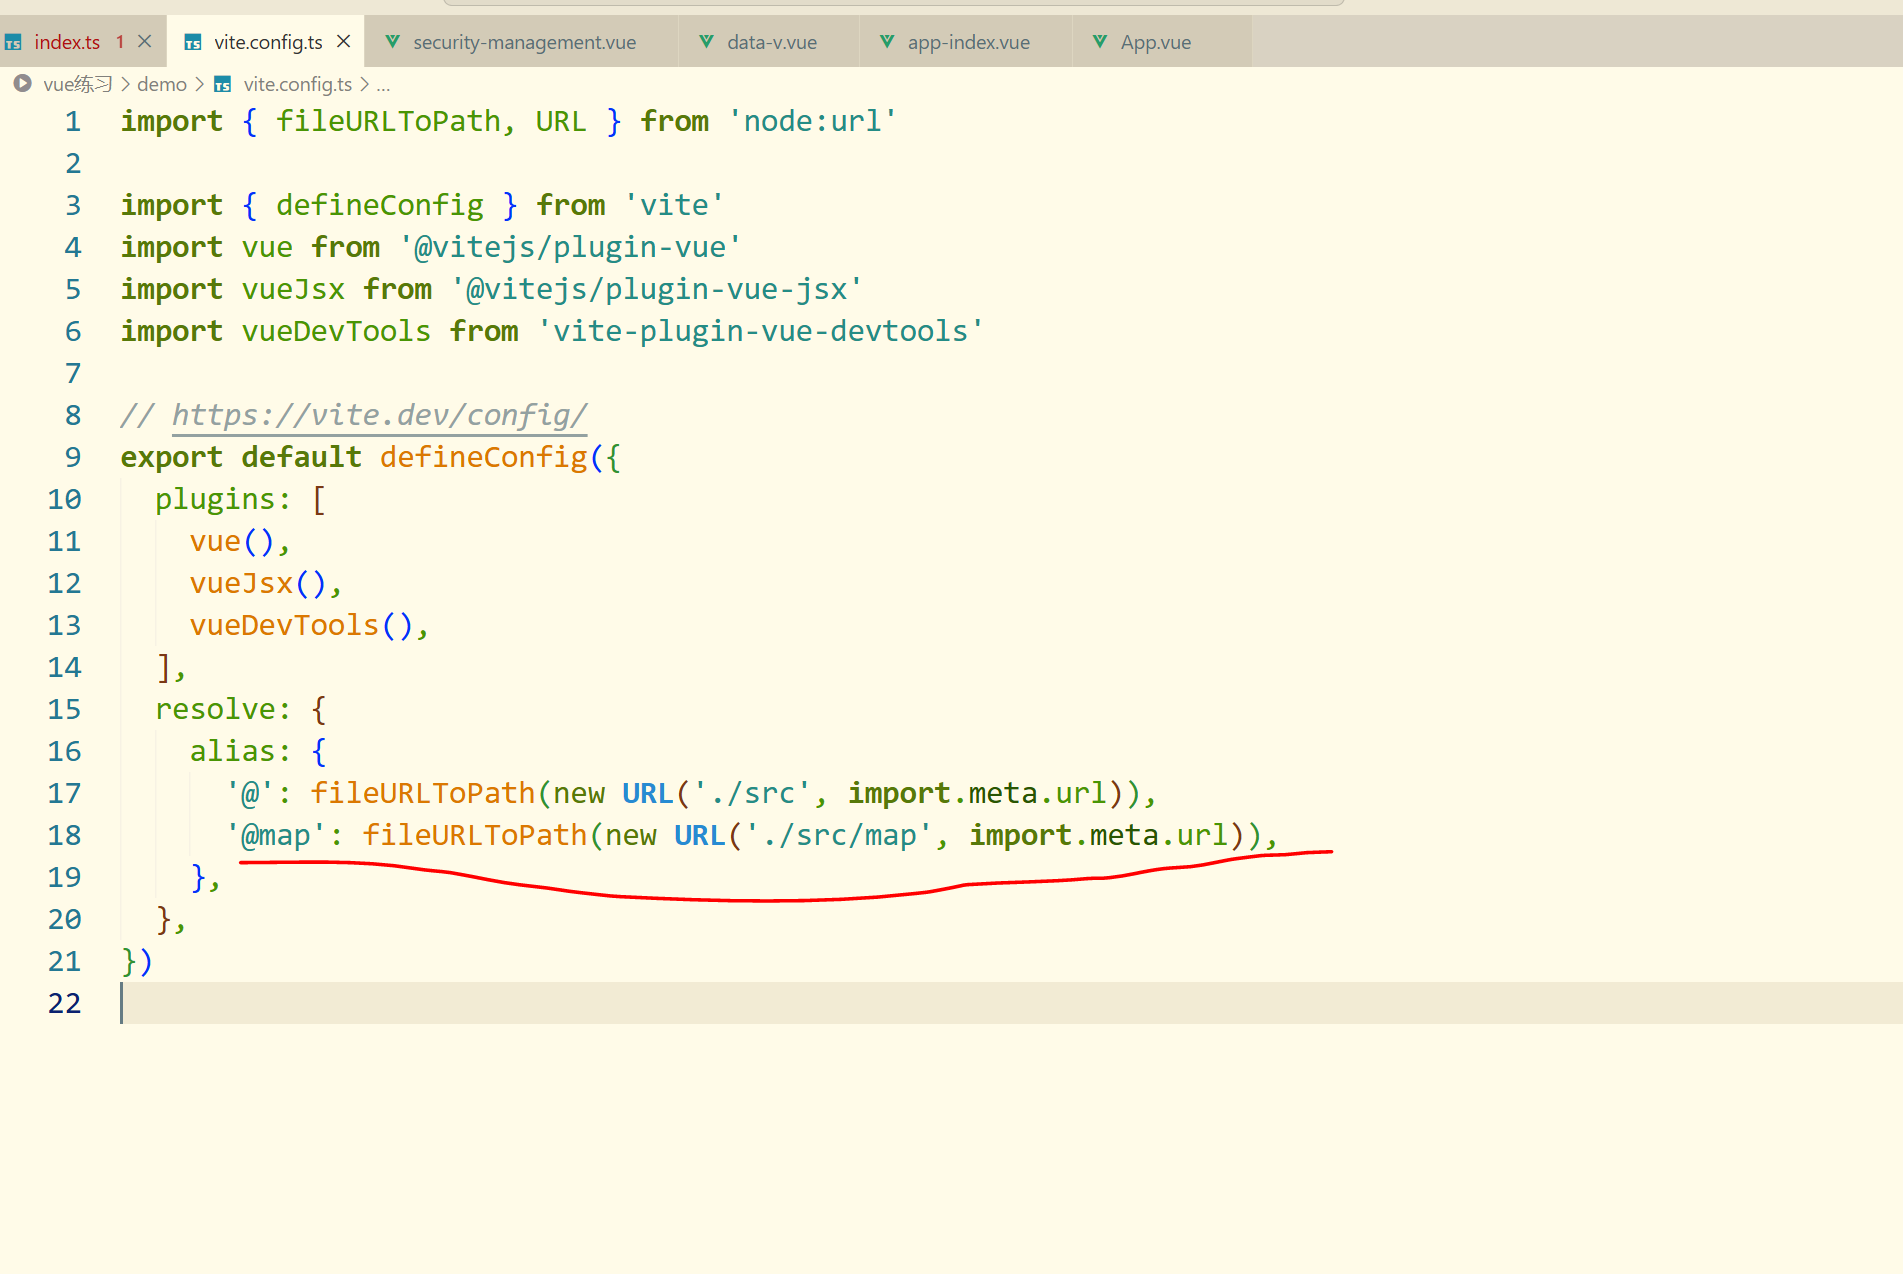
设置地图全局组件
使用:天地图
网址:http://lbs.tianditu.gov.cn/api/js4.0/guide.html
c
<template>
    <div>
        <div id="tian-map"></div>
    </div>
</template>

<script setup lang="ts">
import { onMounted } from 'vue';


//地图初始化
function initMap(){
    let T = window.T;
    //实例化
    let tmap = new T.Map('tian-map');
    //初始化地图的位置,经度,维度,大小
    tmap.centerAndZoom(new T.LngLat(116.40769, 39.89945), 18);
    //启用地图拖拽
    tmap.enableDrag();
    //设置地图类型
    tmap.setMapType( window.TMAP_SATELLITE_MAP );
}
onMounted(()=>{
    //1. 创建script标签
    const script = document.createElement('script');
    script.src = 'https://api.tianditu.gov.cn/api?v=4.0&tk=2d58761eb6bbdac6095476b73d4d1a82';
    //2. script标签加载完毕:初始化地图
    script.onload = initMap;
    //3. 把script添加到body中
    document.body.appendChild( script );
})
</script>

<style scoped>
#tian-map{
    width: 1920px;
    height: 1080px;
}
</style>
当你点击四个组件就能进去地图的全局组件了

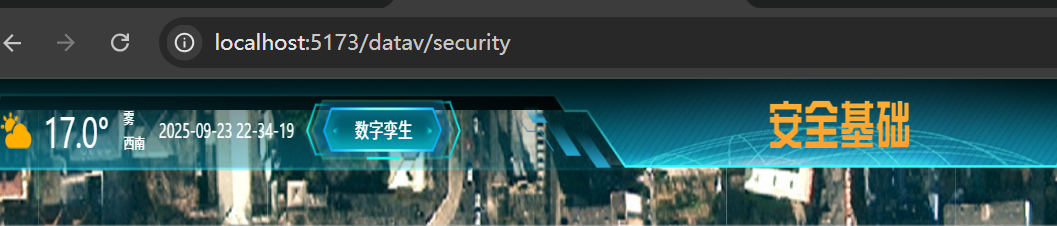
顶部布局
c
//demo\src\map\app-map.vue
<template>
    <div class="app-header">
        <div class="app-header-left">
            <div class="weather">
                <div class="tep">10°</div>
                <div class="weater-desc">
                    <p>晴</p>
                    <p>西</p>
                </div>
                <div class="text-base">2024-11-20 14:28:12</div>
            </div>
            <a class="nav-button">数字孪生</a>
        </div>
        <div class="app-header-center">安全基础</div>
        <div class="app-header-right">
            <div class="nav-button">
                <span class="back-btn">返回</span>
            </div>
        </div>
    </div>
</template>

<style scoped lang="scss">
.app-header{
    display: flex;
    justify-content: space-between;
    align-items: center;
    position: fixed;
    width: 100%;
    height: var(--app-header-height);
    left: 0;
    top: 0;
    color: #ffb432;
    background-image:
        url(../assets/images/顶部导航背景.png),
        linear-gradient(to bottom, rgba(0, 0, 0, .1), rgba(0, 0, 0, .01));
    background-repeat: no-repeat;
    background-position: center 0;
    background-size: auto 100%;
    z-index: 1000;
}
.app-header-left{
    width: 28%;
    height: 68px;
    margin-top: 8px;
    display: flex;
    justify-content: space-between;
    align-items: center;
    color: #fff;
    .weather{
        display: flex;
        align-items: center;
        justify-content: space-around;;
        .tep{
            font-size: 33px;
            padding-left: 72px;
            background-image: url(../assets/images/duoyun.png);
            background-repeat: no-repeat;
            background-position: 24px center;
        }
        .weater-desc{
            font-size: 12px;
            padding-left: 1rem;
            padding-right: 1rem;
        }
        .text-base{
            font-size: 1rem;
            line-height: 1.5rem;
        }
    }
}
.nav-button{
    width: 173px;
    height: 46px;
    line-height: 46px;
    font-size: 16px;
    text-align: center;
    color: #fff;
    background-image: url(../assets/images/导航按钮.png);
    background-position: center;
    background-repeat: no-repeat;
    cursor: pointer;
}
.app-header-center{
    line-height: 72px;
    font-size: 40px;
    background-image: linear-gradient(to bottom, #ffb432, #ff9b2f);
    background-clip: text;
    color: transparent;
    font-family: c-huakang;
}
.app-header-right{
    width: 28%;
    height: 68px;
    margin-top: 8px;
    display: flex;
    justify-content: space-between;
    align-items: center;
    .back-btn{
        padding-left: 24px;
        background-image: url(../assets/images/返回.png);
        background-repeat: no-repeat;
        background-position: 0 center;
    }
}
</style>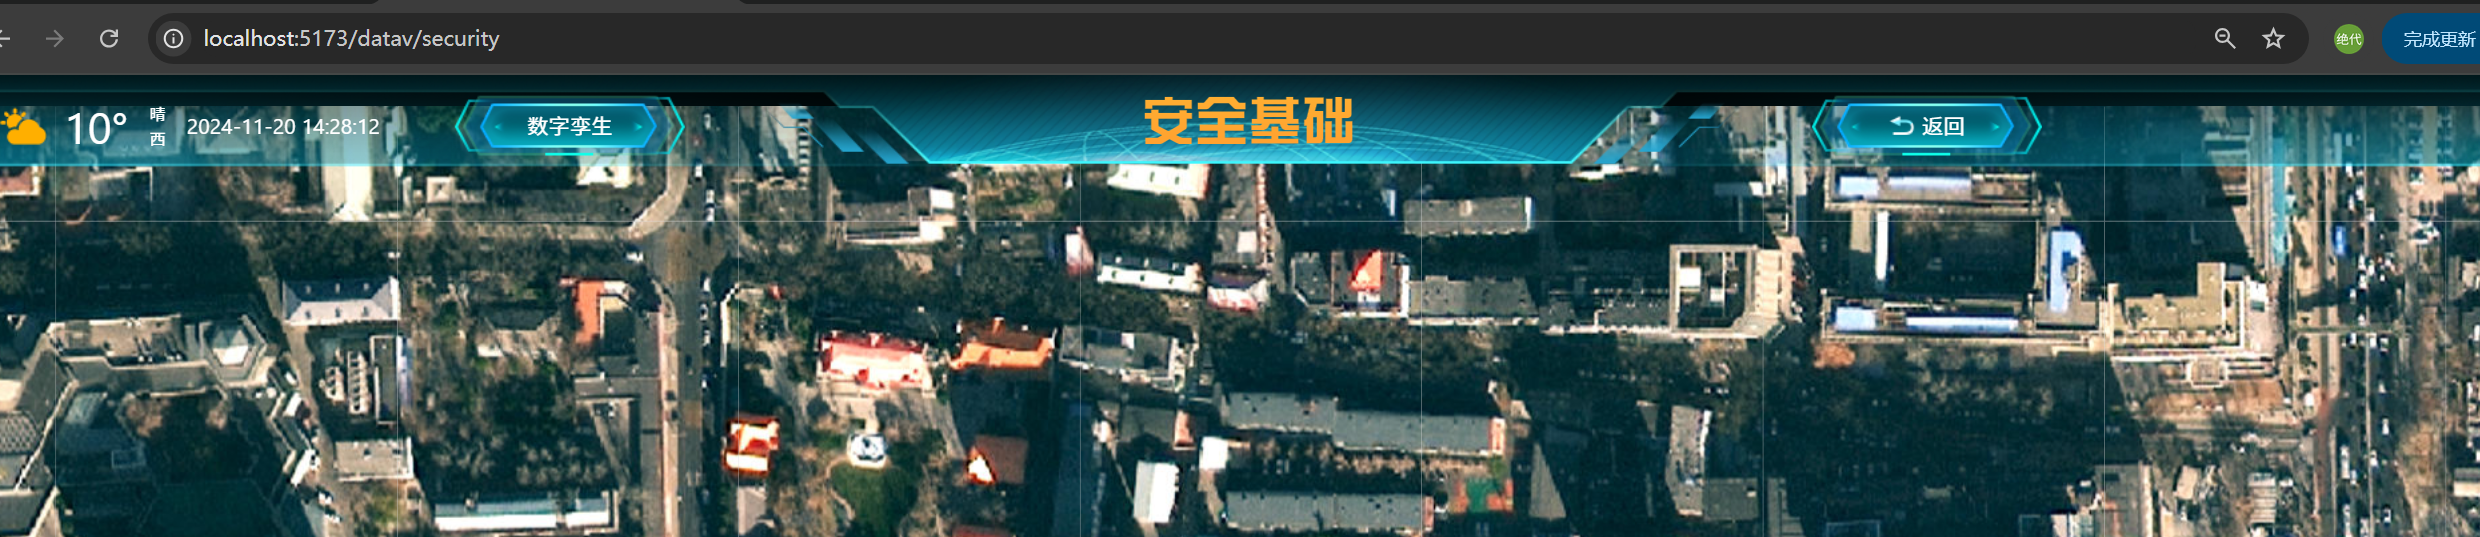
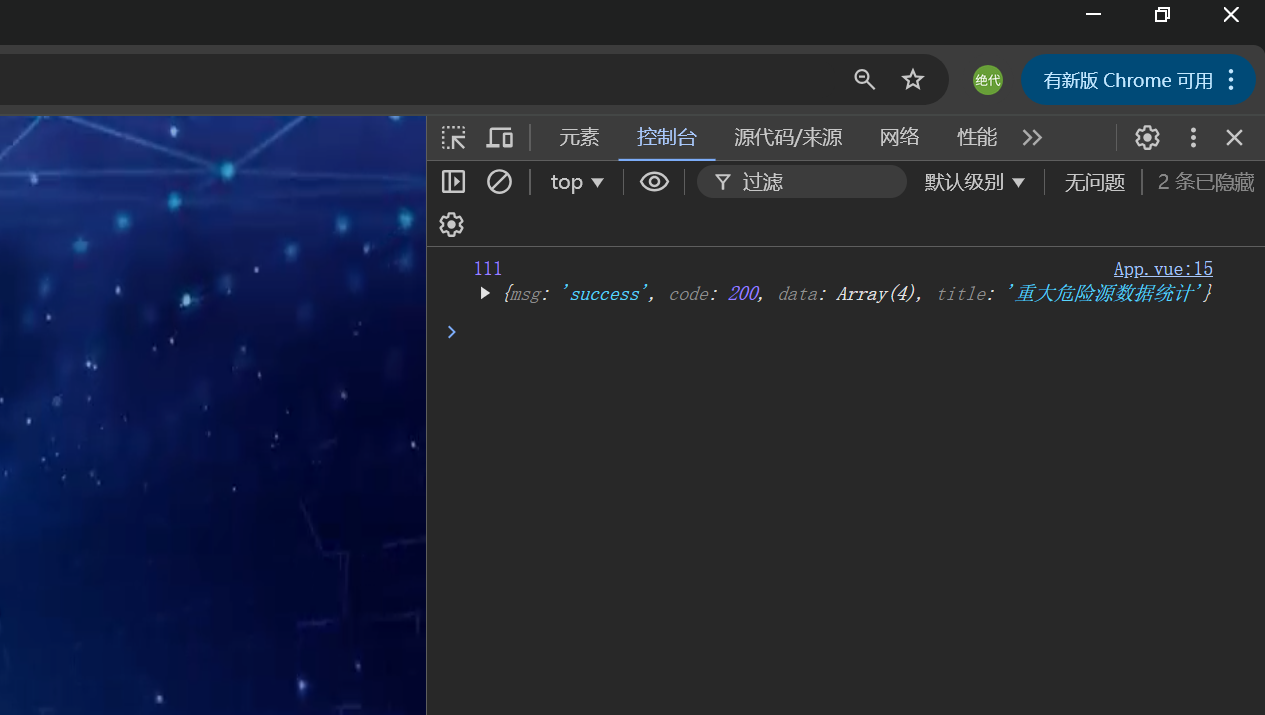
axios二次封装
安装
c
//demo\src\App.vue
 npm i axios
App.vue → 调用 → safe.ts 中的 getHazard() → 调用 → request.ts 中的 http.get()
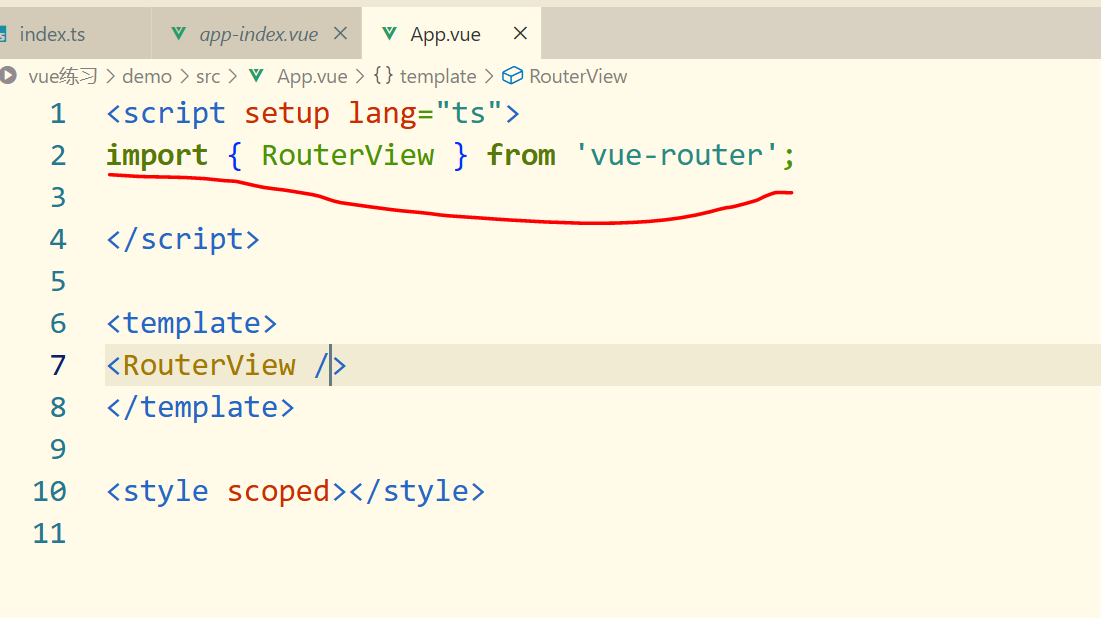
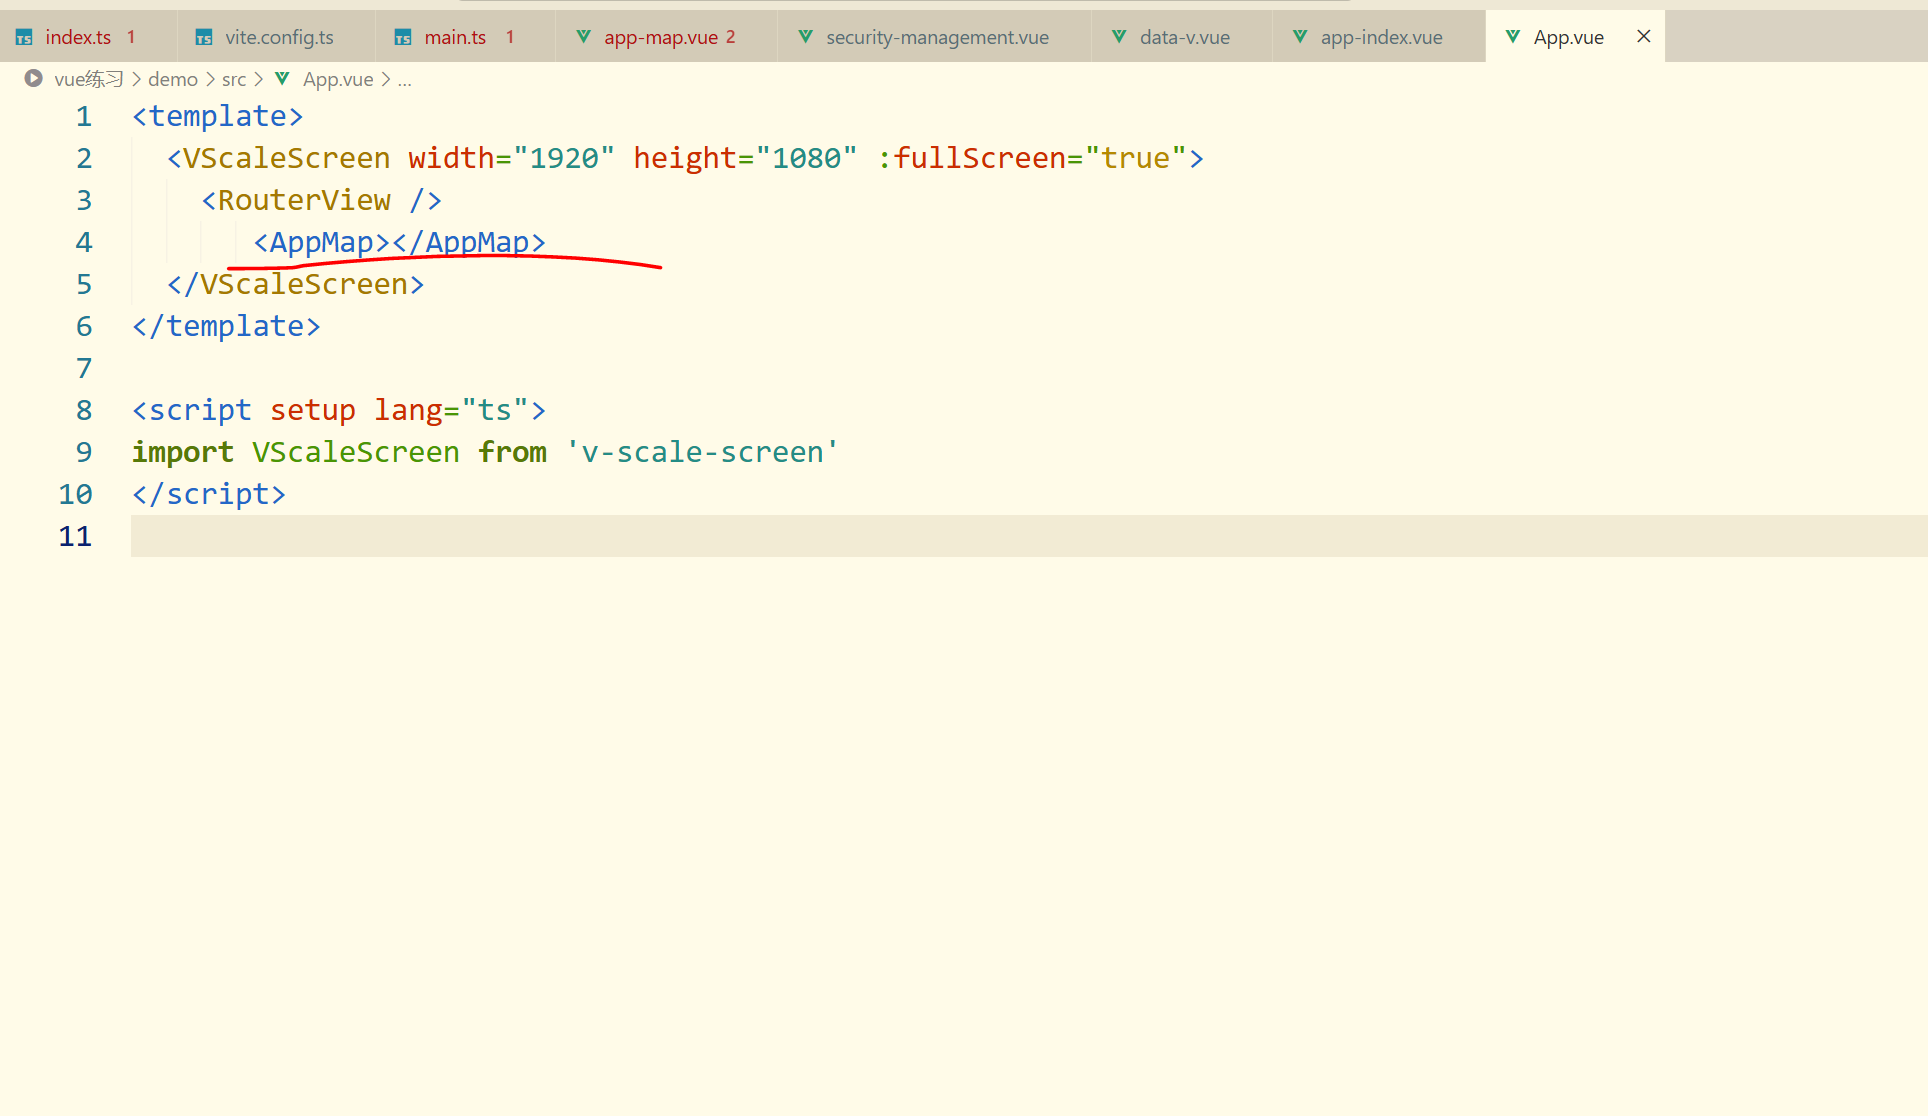
App.vue
c
<template>
  <VScaleScreen width="1920" height="1080" :fullScreen="true">
    <RouterView />
       <AppMap></AppMap>
  </VScaleScreen>
</template>

<script setup lang="ts">
import VScaleScreen from 'v-scale-screen'
import { getHazard } from '@/api/safe'

getHazard({
  companyId:0
}).then(res=>{
  console.log( 111,res )
})

</script>
safe.ts
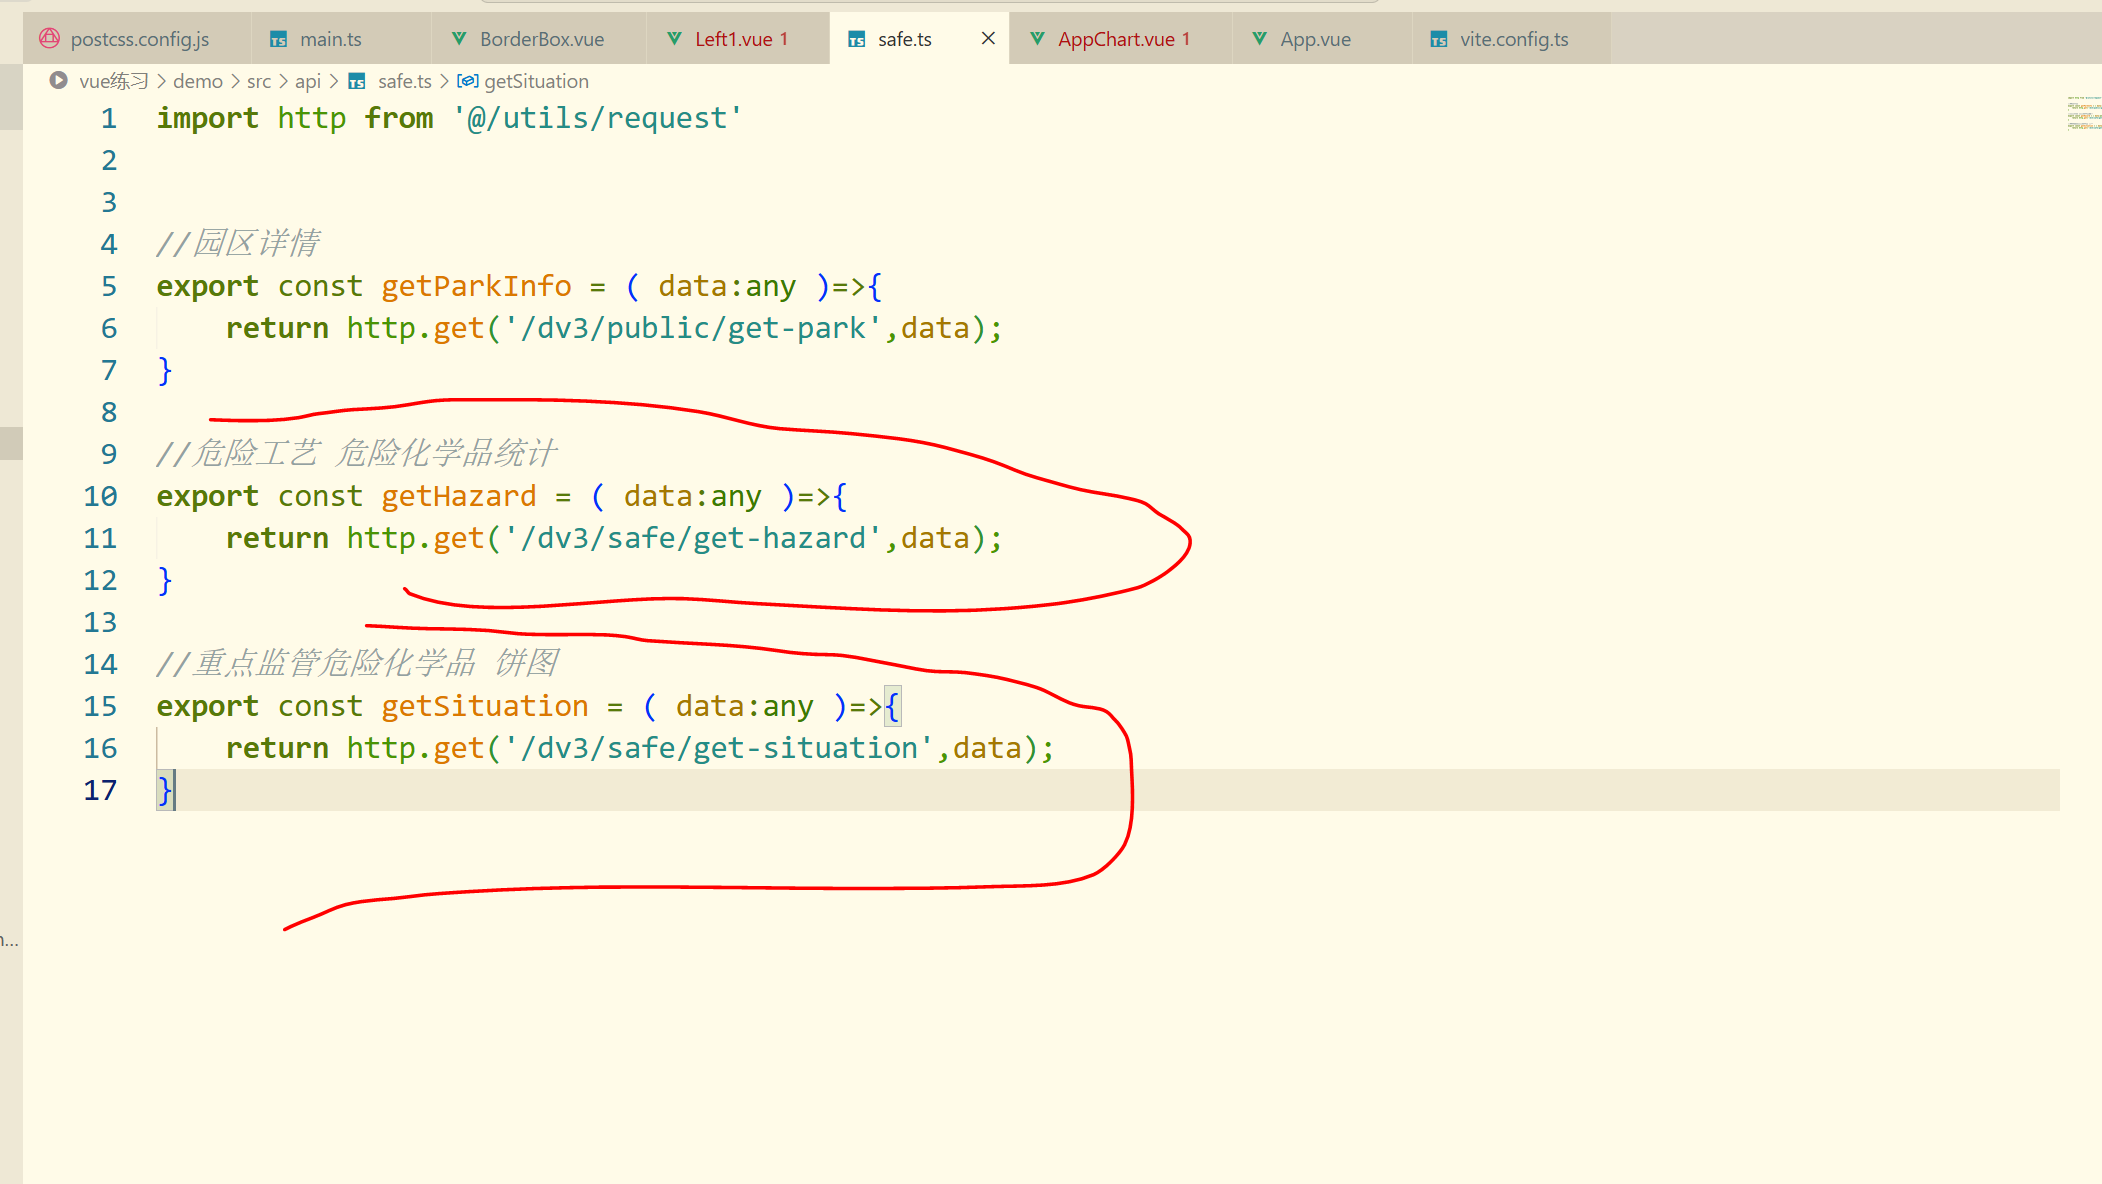
c
//demo\src\api\safe.ts
import http from '@/utils/request'

export const getHazard = ( data:any )=>{
    return http.get('dv3/safe/get-hazard',data);
}
request.ts
c
//demo\src\utils\request.ts
import axios from 'axios'

// 请求数据的地址
const request = axios.create({
    baseURL: 'http://39.100.95.39:8089/',
    timeout: 5000
});

// 添加请求拦截器
request.interceptors.request.use(function (config) {
    // 在发送请求之前做些什么
    return config;
}, function (error) {
    // 对请求错误做些什么
    return Promise.reject(error);
});

// 添加响应拦截器
request.interceptors.response.use(function (response) {
    // 2xx 范围内的状态码都会触发该函数。
    // 对响应数据做点什么
    return response.data;
}, function (error) {
    // 超出 2xx 范围的状态码都会触发该函数。
    // 对响应错误做点什么
    return Promise.reject(error);
});

// 封装get和post两个方法,方便灵活应用
const http ={
    get( url:string , data:any ){
        return new Promise((resolve,reject)=>{
            request.get(url,{params:data})
            .then((res)=>{
                resolve(res)
            })
            .catch((error)=>{
                reject(error);
            })
        })
    },
    post( url:string , data:any ){
        return new Promise((resolve,reject)=>{
            request.post(url, data)
            .then((res)=>{
                resolve(res)
            })
            .catch((error)=>{
                reject(error);
            })
        })
    }
}
// 暴露出去
export default http;
得到接口数据
通过接口渲染天气和时间
使用请求回来的数据,进行渲染
c
//demo\src\components\AppHeader.vue
<template>
    <div class="app-header">
        <div class="app-header-left">
            <div class="weather">
                <div class="tep">{{ state.weather.temperature_float }}°</div>
                <div class="weater-desc">
                    <p>{{ state.weather.weather }}</p>
                    <p>{{ state.weather.winddirection }}</p>
                </div>
                <div class="text-base">{{ state.currentTime }}</div>
            </div>
            <a class="nav-button">数字孪生</a>
        </div>
        <div class="app-header-center">安全基础</div>
        <div class="app-header-right">
            <div class="nav-button">
                <span class="back-btn">返回</span>
            </div>
        </div>
    </div>
</template>


<script setup lang="ts">
import { onMounted  } from 'vue';
// 引用useFunction.ts的getApiAxios();updateTime();,再触发这个函数
import { useFunction } from '@/hooks/useFunction'
let { state , updateTime , getApiAxios } = useFunction();
onMounted(()=>{
    getApiAxios();
    updateTime();
    setInterval(updateTime,1000);
})
</script>

<style scoped lang="scss">
.app-header{
    display: flex;
    justify-content: space-between;
    align-items: center;
    position: fixed;
    width: 100%;
    height: var(--app-header-height);
    left: 0;
    top: 0;
    color: #ffb432;
    background-image:
        url(../assets/images/顶部导航背景.png),
        linear-gradient(to bottom, rgba(0, 0, 0, .1), rgba(0, 0, 0, .01));
    background-repeat: no-repeat;
    background-position: center 0;
    background-size: auto 100%;
    z-index: 1000;
}
.app-header-left{
    width: 28%;
    height: 68px;
    margin-top: 8px;
    display: flex;
    justify-content: space-between;
    align-items: center;
    color: #fff;
    .weather{
        display: flex;
        align-items: center;
        justify-content: space-around;;
        .tep{
            font-size: 33px;
            padding-left: 72px;
            background-image: url(../assets/images/duoyun.png);
            background-repeat: no-repeat;
            background-position: 24px center;
        }
        .weater-desc{
            font-size: 12px;
            padding-left: 1rem;
            padding-right: 1rem;
        }
        .text-base{
            font-size: 1rem;
            line-height: 1.5rem;
        }
    }
}
.nav-button{
    width: 173px;
    height: 46px;
    line-height: 46px;
    font-size: 16px;
    text-align: center;
    color: #fff;
    background-image: url(../assets/images/导航按钮.png);
    background-position: center;
    background-repeat: no-repeat;
    cursor: pointer;
}
.app-header-center{
    line-height: 72px;
    font-size: 40px;
    background-image: linear-gradient(to bottom, #ffb432, #ff9b2f);
    background-clip: text;
    color: transparent;
    font-family: c-huakang;
}
.app-header-right{
    width: 28%;
    height: 68px;
    margin-top: 8px;
    display: flex;
    justify-content: space-between;
    align-items: center;
    .back-btn{
        padding-left: 24px;
        background-image: url(../assets/images/返回.png);
        background-repeat: no-repeat;
        background-position: 0 center;
    }
}
</style>
通过默认get请求,获取接口数据
c
//demo\src\hooks\useFunction.ts
import { reactive } from "vue"
import axios from 'axios'
export function useFunction(){


    const getApiAxios = ()=>{
        try {
            axios({
                url:'https://restapi.amap.com/v3/weather/weatherInfo',
                params:{
                    key:'a5613e113fa97e8f6b9903990b124f71',
                    city:'110000'
                }
            }).then(res=>{
                let { data } = res;
                state.weather = data.lives[0];
                console.log( state.weather )
            })
        } catch (error) {
            console.log( error );
        }
    }

    //获取时间,时间没有使用接口数据
    function getCurrentDateTime(){
        const now = new Date();
        const year = now.getFullYear();
        const month = String( now.getMonth() + 1 ).padStart(2,'0');
        const day = String(now.getDate()).padStart(2,'0');
        const hours = String(now.getHours()).padStart(2,'0');
        const minutes = String(now.getMinutes()).padStart(2,'0');
        const seconds = String(now.getSeconds()).padStart(2,'0');

        const formattedDate = `${year}-${month}-${day}`;
        const formattedTime = `${hours}-${minutes}-${seconds}`;
        return `${formattedDate} ${formattedTime}`;
    }

    function updateTime(){
        state.currentTime = getCurrentDateTime();
    }

    const state = reactive({
        weather:{},
        currentTime:''
    });

    return {
        state,
        updateTime,
        getApiAxios,
        getCurrentDateTime
    }
}
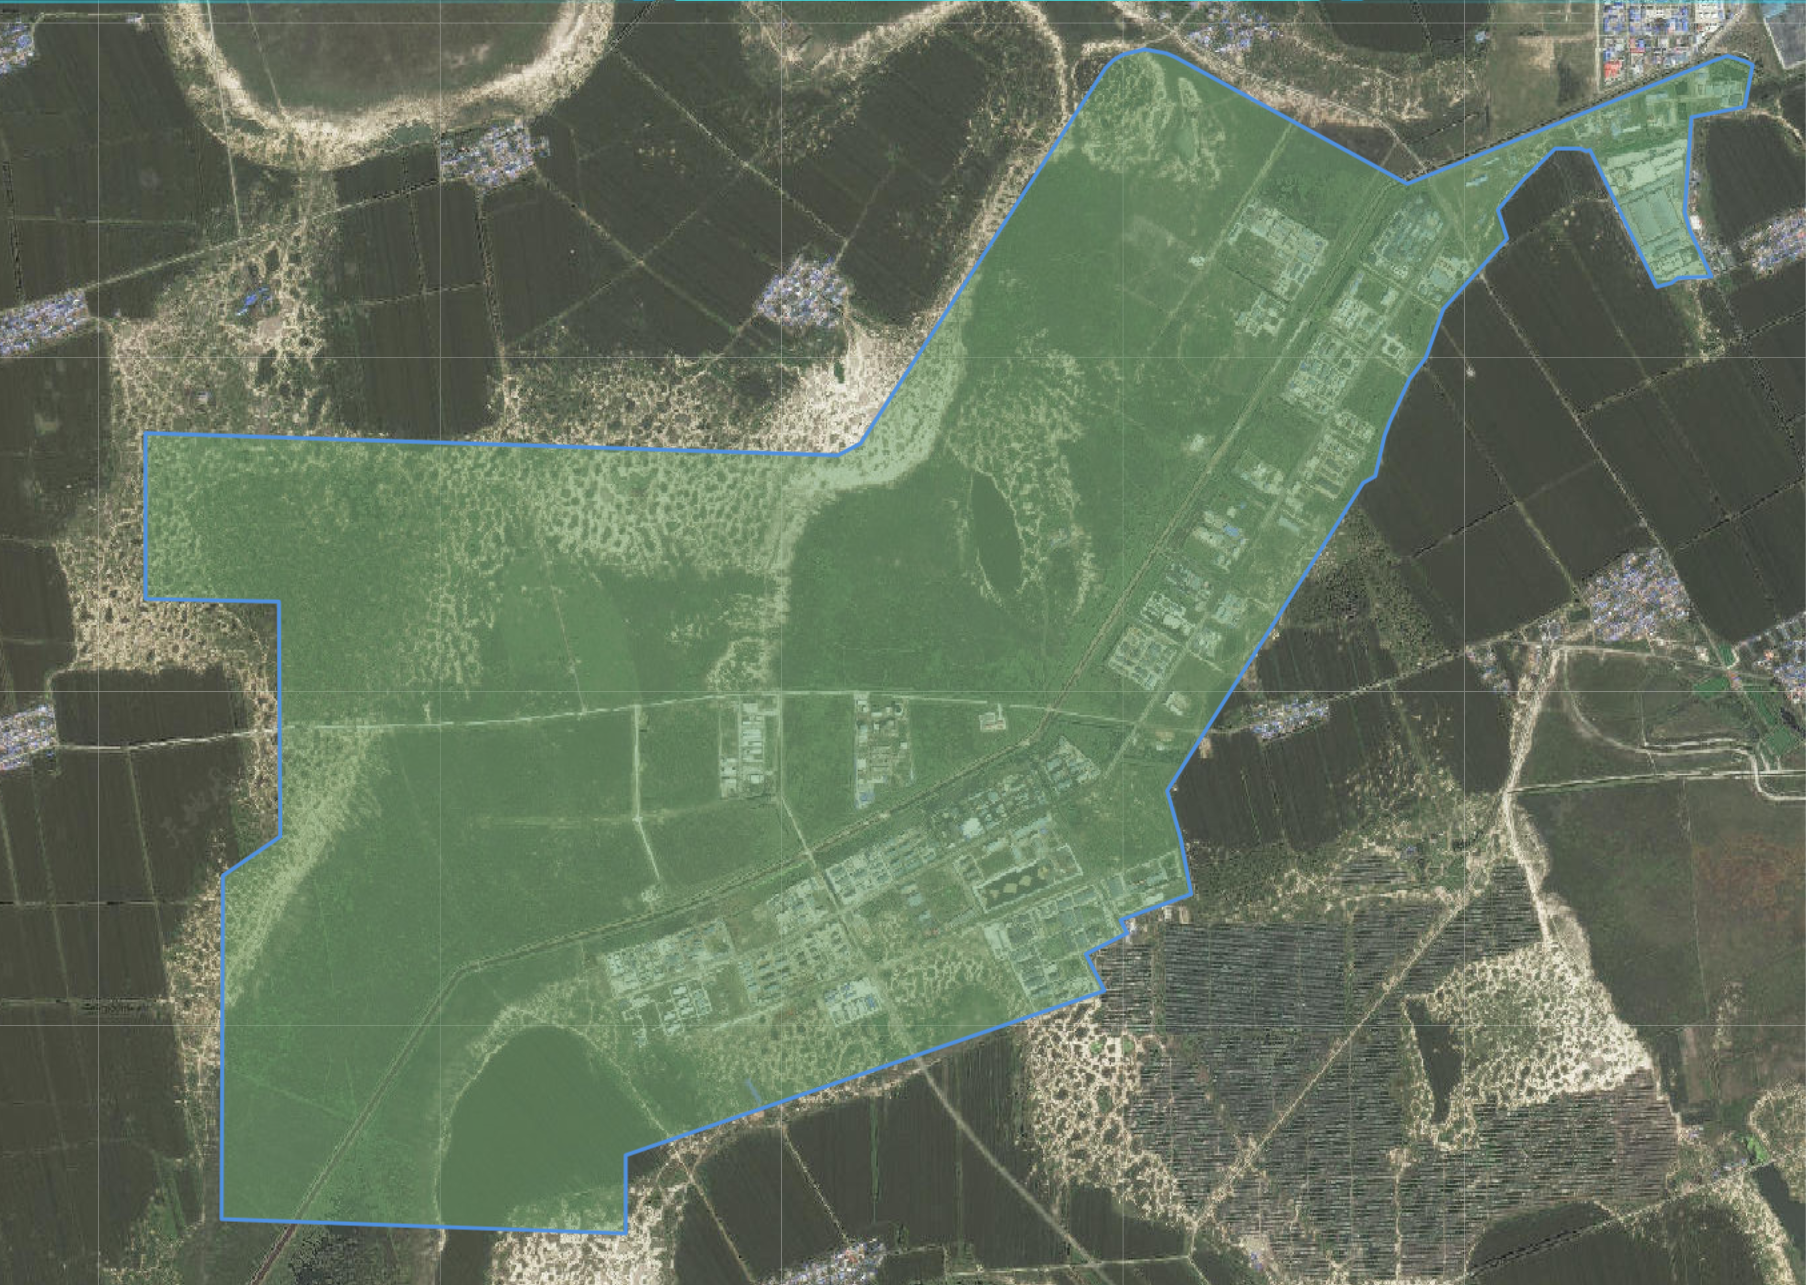
修改地图位置和添加覆盖物
    //获取园区详情数据,useMapConfig是store 实例,挂载触发
await useMapConfig().getPark();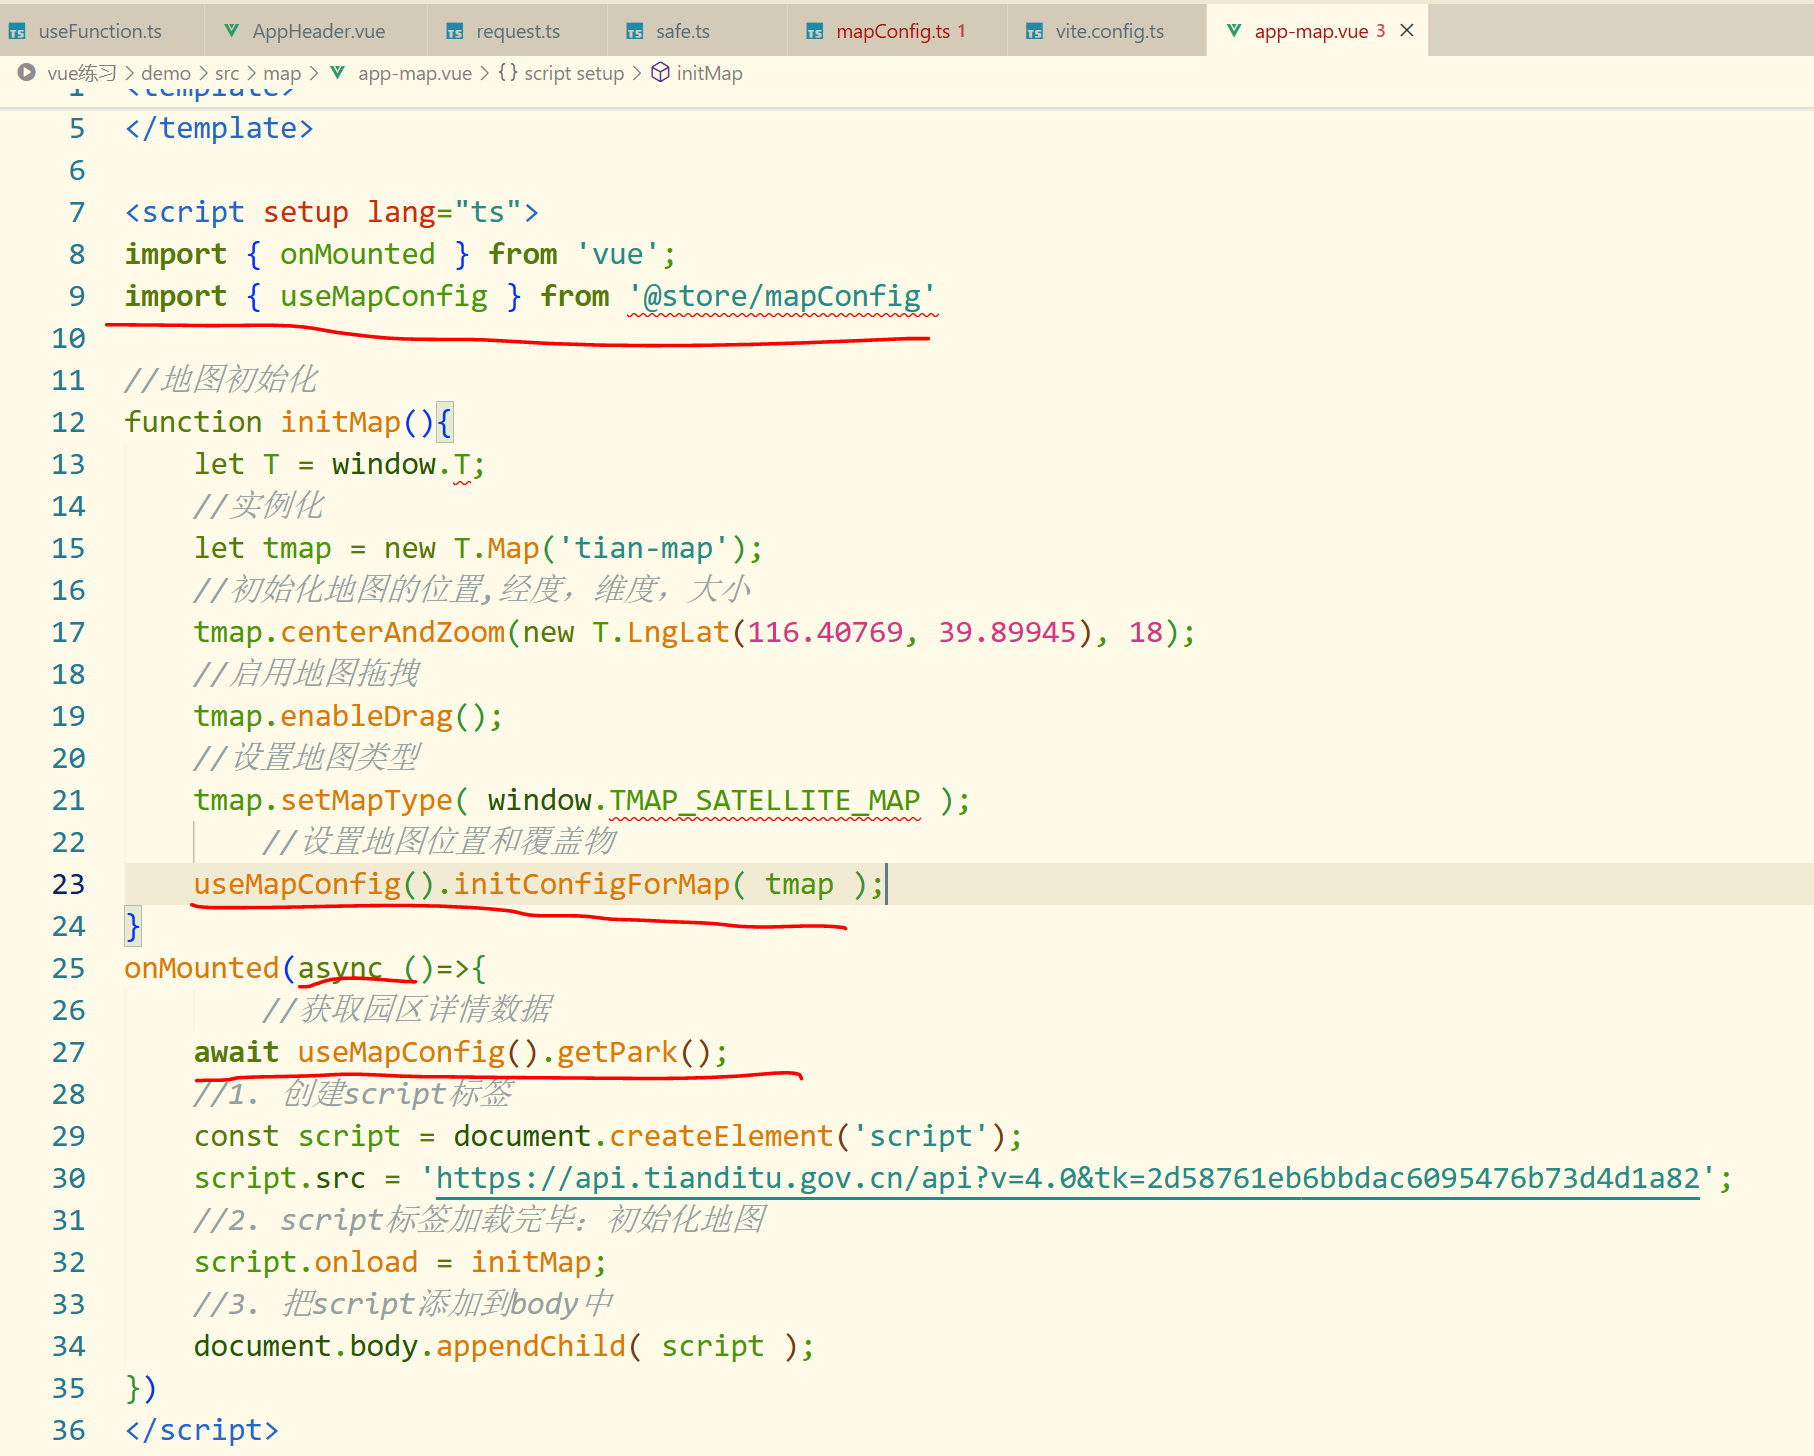
步骤
1,获取园区信息,经纬度等等。
2,覆盖物重构
3,设置多边形覆盖物的位置
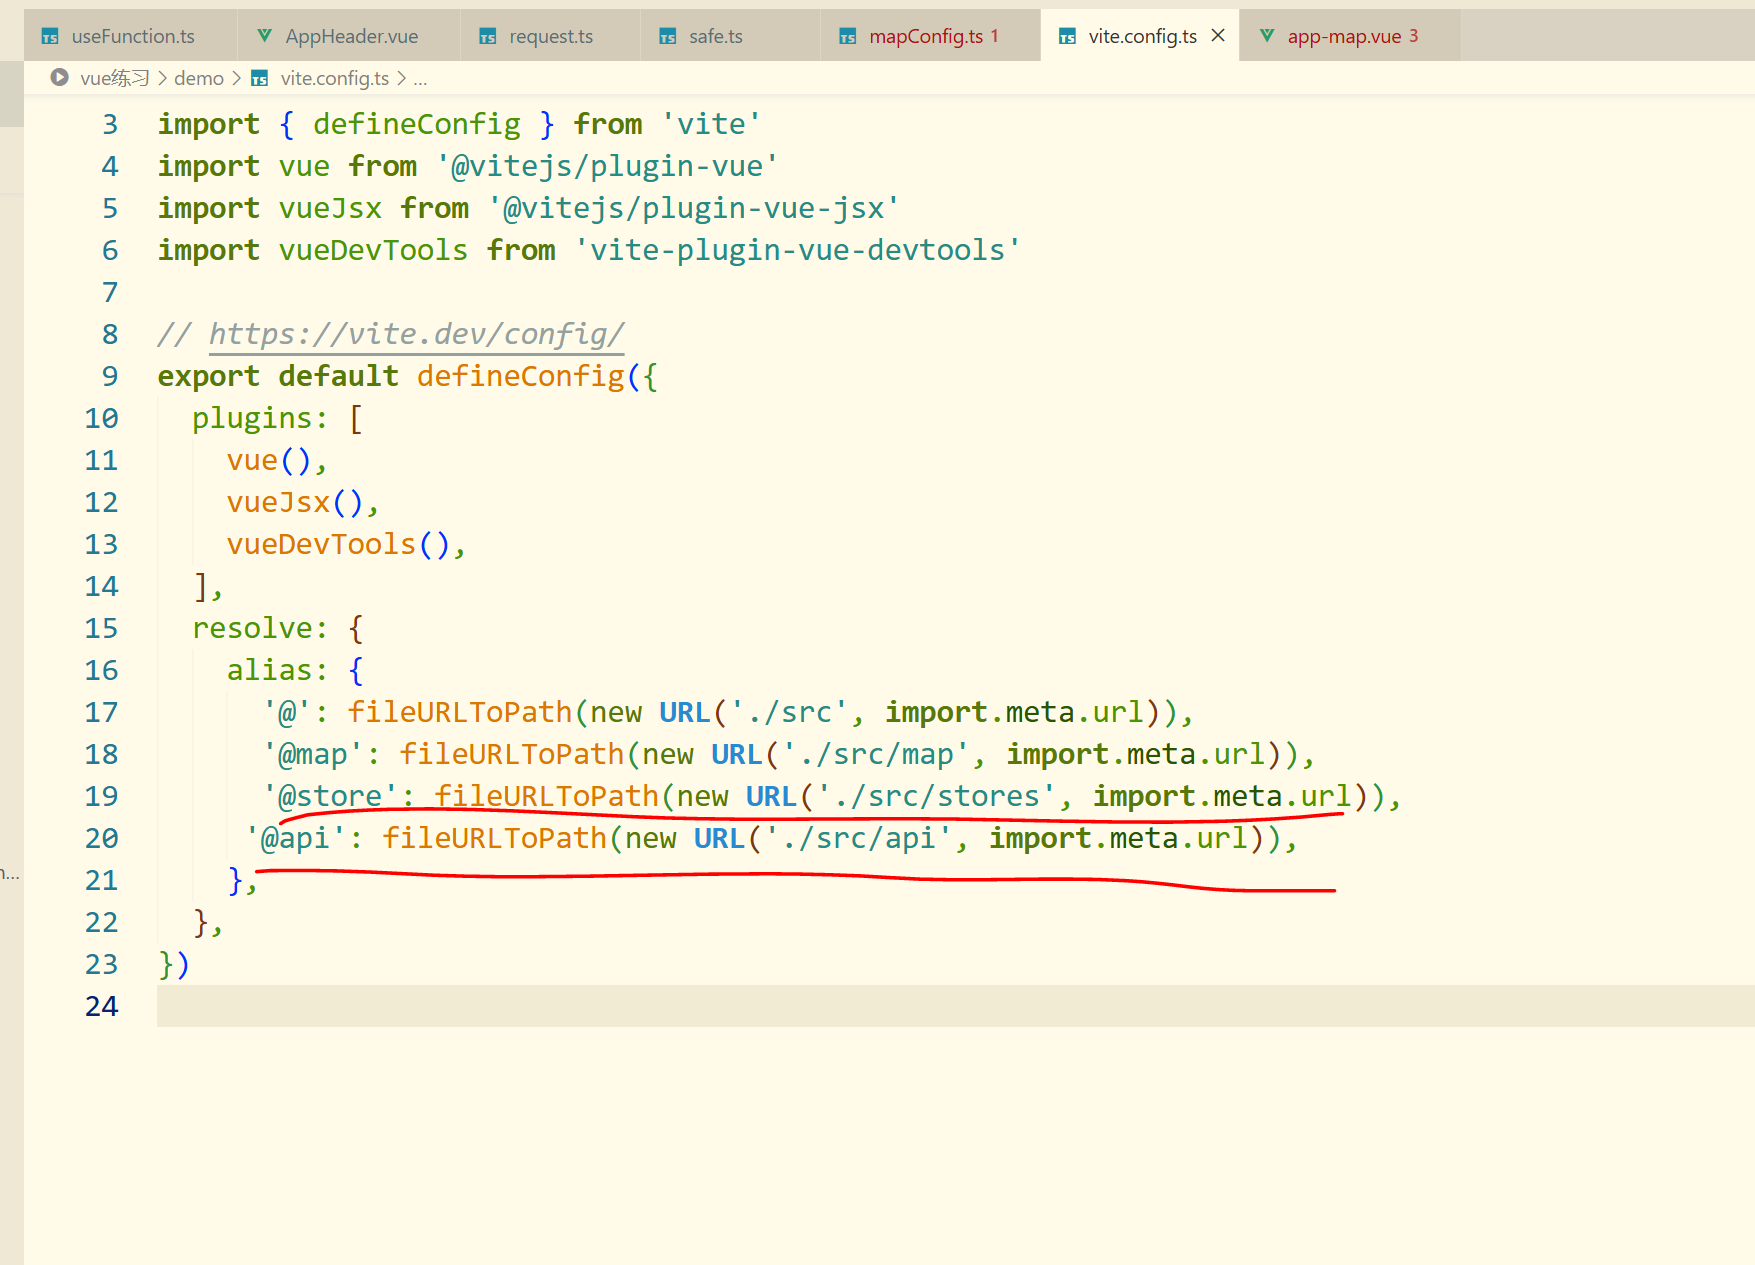
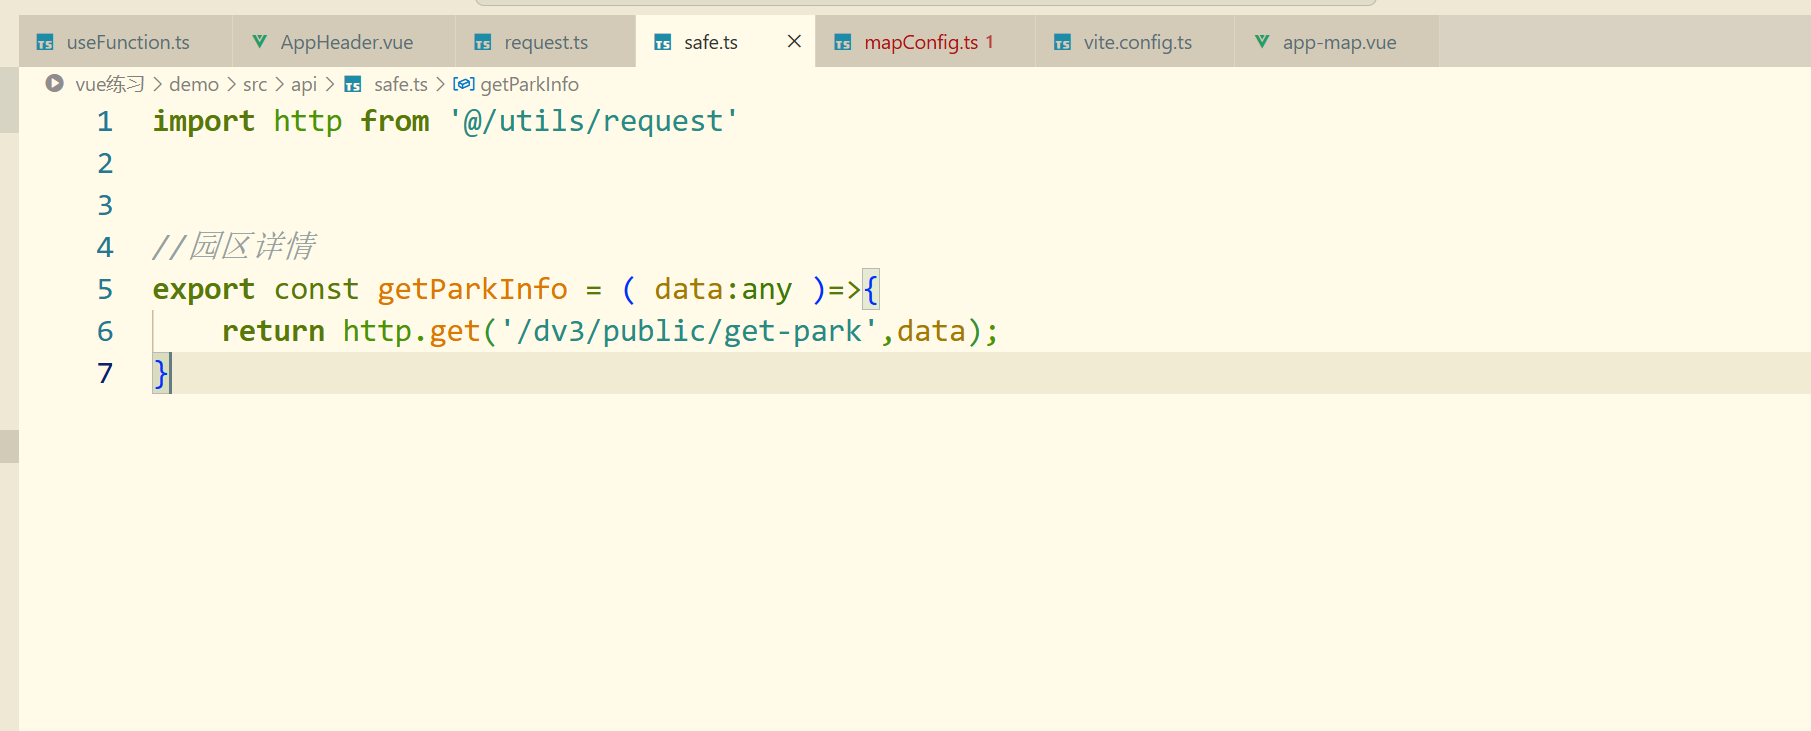
4,添加到地图上app-map.vue
c
//demo\src\stores\mapConfig.ts
import { defineStore } from 'pinia'
import { ref } from 'vue'
import { getParkInfo } from '@api/safe'
// 创建一个新的 store 实例
export const useMapConfig = defineStore('mapConfig',()=>{

    //园区信息
    const parkInfo = ref();
    async function getPark(){
        let res = await getParkInfo({
            // 支持未来多园区切换
            companyId:0
        })
        parkInfo.value = res.data;
        console.log( parkInfo.value  )
    }

    //园区中心
    let parkCenter = ref<any>();
    //园区边界
    let parkPolygonPath = ref<any>();
    //园区图形
    let parkPolygon = ref<any>();

    function initConfigForMap( map:any ){
        // 园区中心点
        parkCenter.value = new T.LngLat( parkInfo.value?.longitude , parkInfo.value?.latitude );
        //覆盖物数据重构,使数据格式适合使用。
        // 第一次分割:分号分隔多个坐标点
        // 第二次分割:逗号分隔经纬度
        // 坐标对象创建,map((p) => new T.LngLat(...p))
        // 原始数据: "116.1,39.1;116.2,39.2;116.3,39.3"
            // → split(';'): ["116.1,39.1", "116.2,39.2", "116.3,39.3"]
            // → map(split(',')): [["116.1","39.1"], ["116.2","39.2"], ["116.3","39.3"]]
            // → map(T.LngLat): [T.LngLat(116.1,39.1), T.LngLat(116.2,39.2), T.LngLat(116.3,39.3)]
        parkPolygonPath.value = parkInfo.value.boundaries[0].value
            .split(';')
            .map((p) => p.split(','))
            .map((p) => new T.LngLat(...p))
        //多边形覆盖物
        parkPolygon.value = new T.Polygon( parkPolygonPath.value ,{
            weight: 3,
            color: parkInfo.value?.boundaries[0].options.sideFillColor,
            opacity: 1,
            fillColor: parkInfo.value?.boundaries[0].options.topFillColor || '#6d9f6a',
            fillOpacity: 0.5
        })
        addParkForMap( map );
    }

    //地图添加园区
    function addParkForMap( map:any ){
      	// 地图中心定位,?. 操作符防止未加载数据时的错误
        map.panTo( new T.LngLat( parkInfo.value?.longitude , parkInfo.value?.latitude ) );
         // 调整地图视野
        map.setViewport( parkPolygonPath.value );
        //将覆盖物添加到地图中
        map.addOverLay( parkPolygon.value );
    }
    return {
        getPark,
        initConfigForMap
    }
})
数据栏布局
建立全局组件
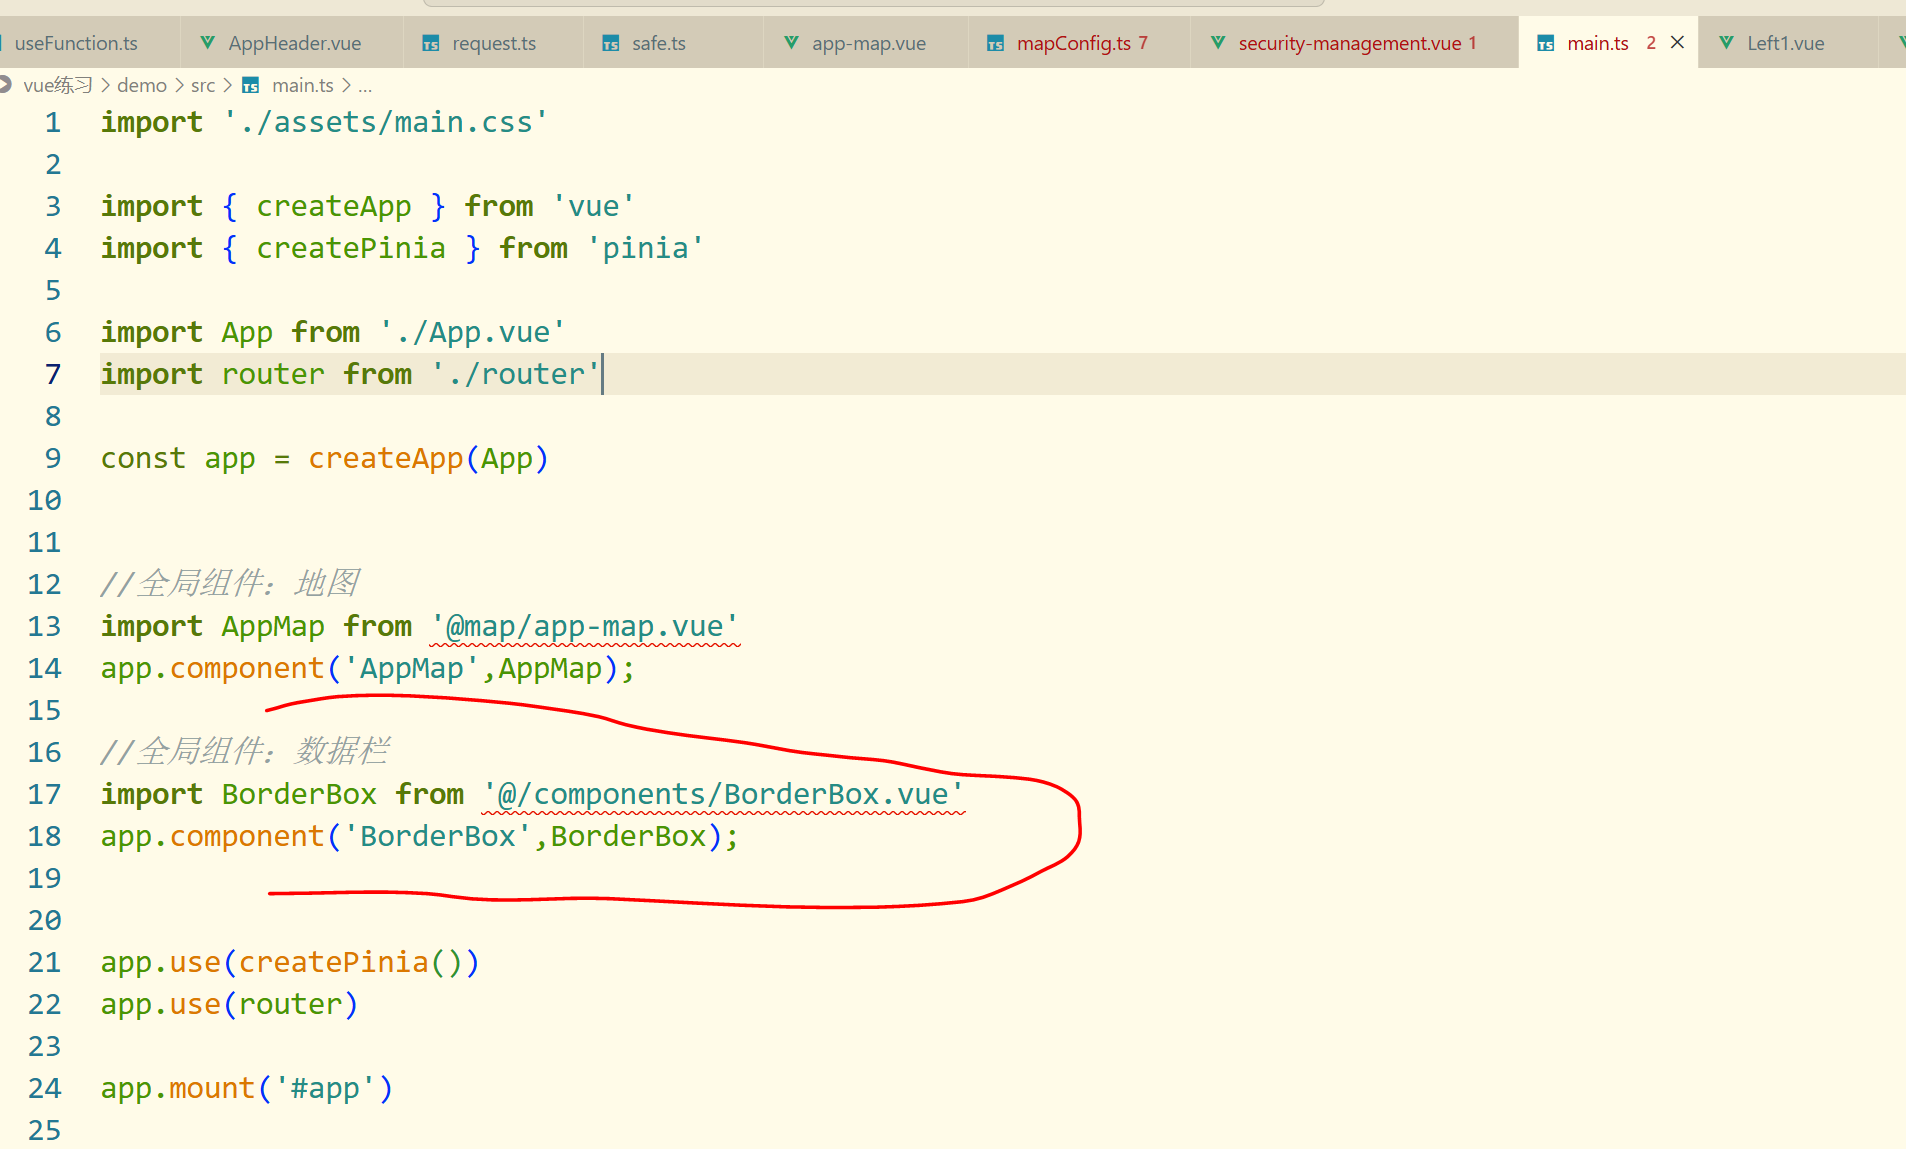
c
<template>
    <div class="border-box">
        <div class="border-box-title font-ssr" v-text="title"></div>
        <slot></slot>
    </div>
</template>

<script setup lang="ts">
defineProps<{title:string}>()
</script>

<style scoped lang="scss">
.border-box{
    position: relative;
    width:424px;
    min-height: 160px;
    background-image:
        url(@/assets/border-box-1/border-title.png),
        url(@/assets/border-box-1/border-bottom.png);
    background-position: 0 0,0 bottom;
    background-repeat: no-repeat;
    background-color: rgba(0,42,64,.4);
    .border-box-title{
        height: 36px;
        line-height: 36px;
        padding-left: 24px;
        color:#fff;
        font-size:16px;
    }
}
</style>
left1.vue
javascript
<template>
<div>
这是第一个图表
</div>
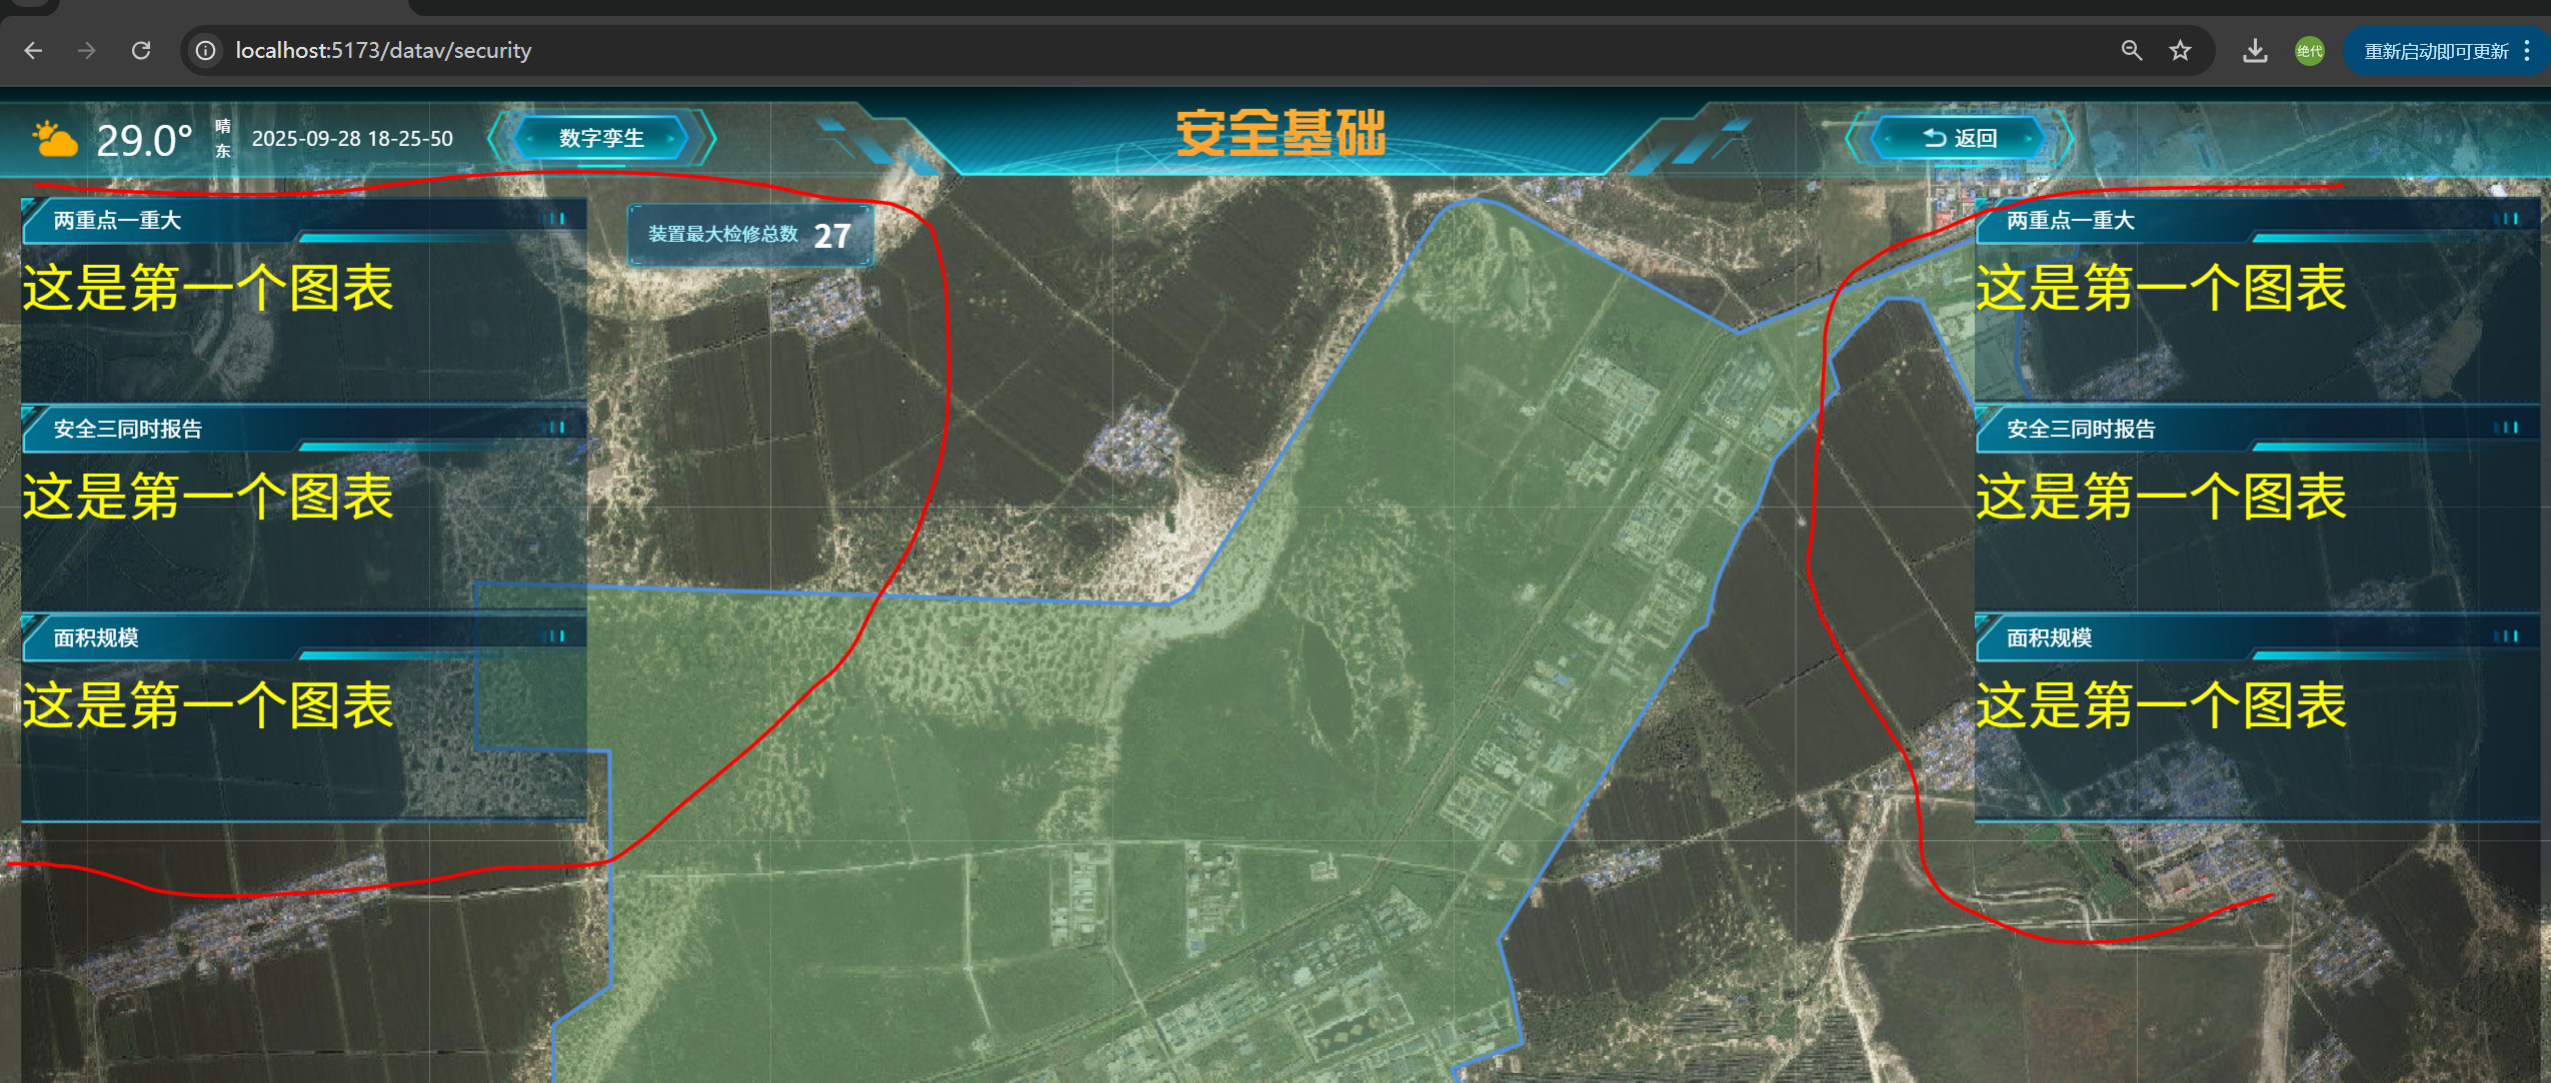
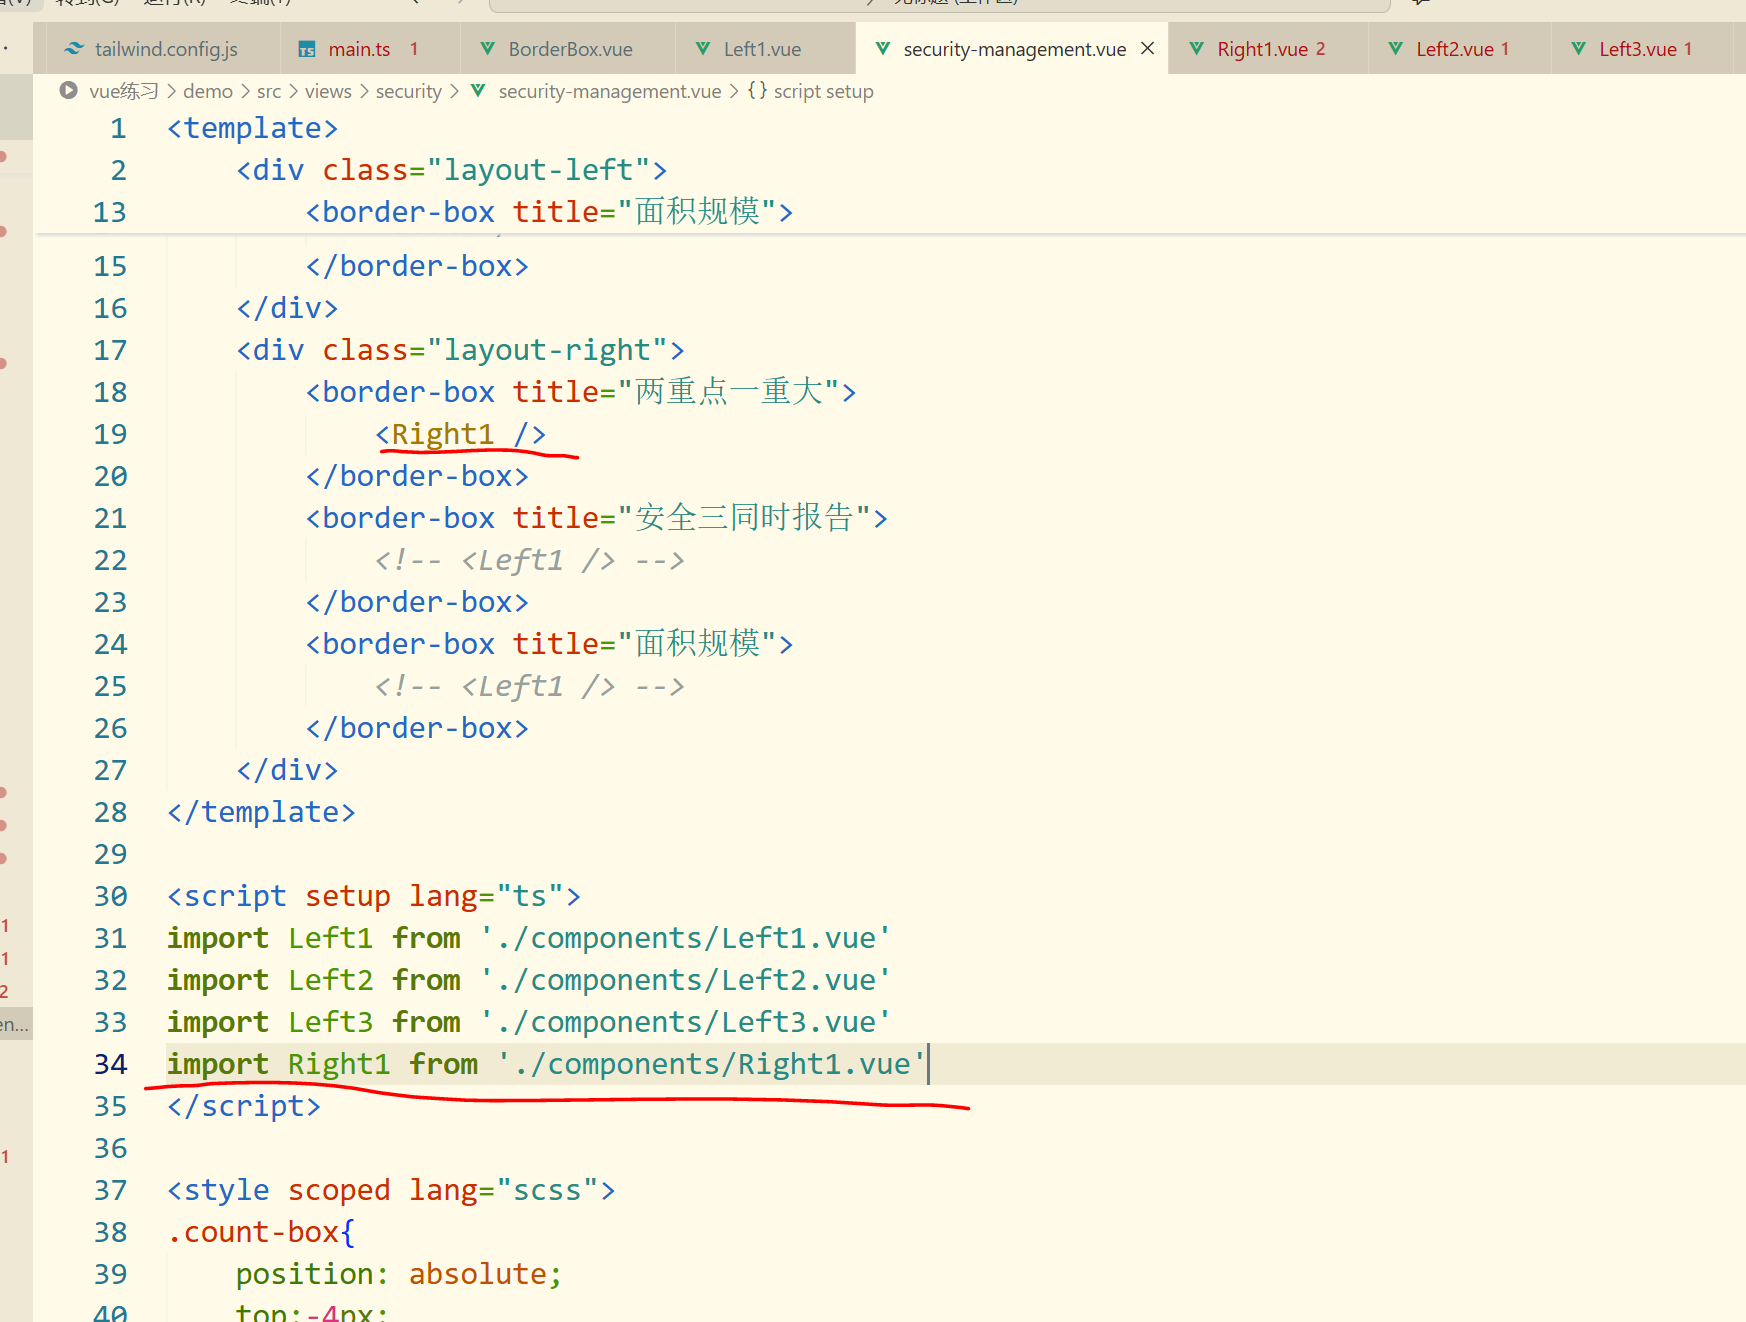
</template>security-management.vue
javascript
demo\src\views\security\security-management.vue
<template>
    <div class="layout-left">
        <div class="count-box">
            <span class="font-ssr">装置最大检修总数</span>
            <span class="font-ssb text-white">27</span>
        </div>
        <border-box title="两重点一重大">
            <Left1 />
        </border-box>
        <border-box title="安全三同时报告">
            <Left1 />
        </border-box>
        <border-box title="面积规模">
            <Left1 />
        </border-box>
    </div>
    <div class="layout-right">
        <border-box title="两重点一重大">
            <Left1 />
        </border-box>
        <border-box title="安全三同时报告">
            <Left1 />
        </border-box>
        <border-box title="面积规模">
            <Left1 />
        </border-box>
    </div>
</template>

<script setup lang="ts">
import Left1 from './components/Left1.vue'
</script>

<style scoped lang="scss">
.count-box{
    position: absolute;
    top:-4px;
    left:calc(100% + 14px);
    padding: 14px 32px;
    display: flex;
    align-items: center;
    background-image: url('@/assets/images/总数统计背景.png');
    background-repeat: no-repeat;
    background-position: center;
    background-size: 100% 100%;
    white-space: nowrap;
    .font-ssr{
        font-size:14px;
        color: #a2f4fe;
    }
    .font-ssb{
        padding-left: 12px;
        font-size: 24px;
        color: #fff;
    }

}
</style>
效果
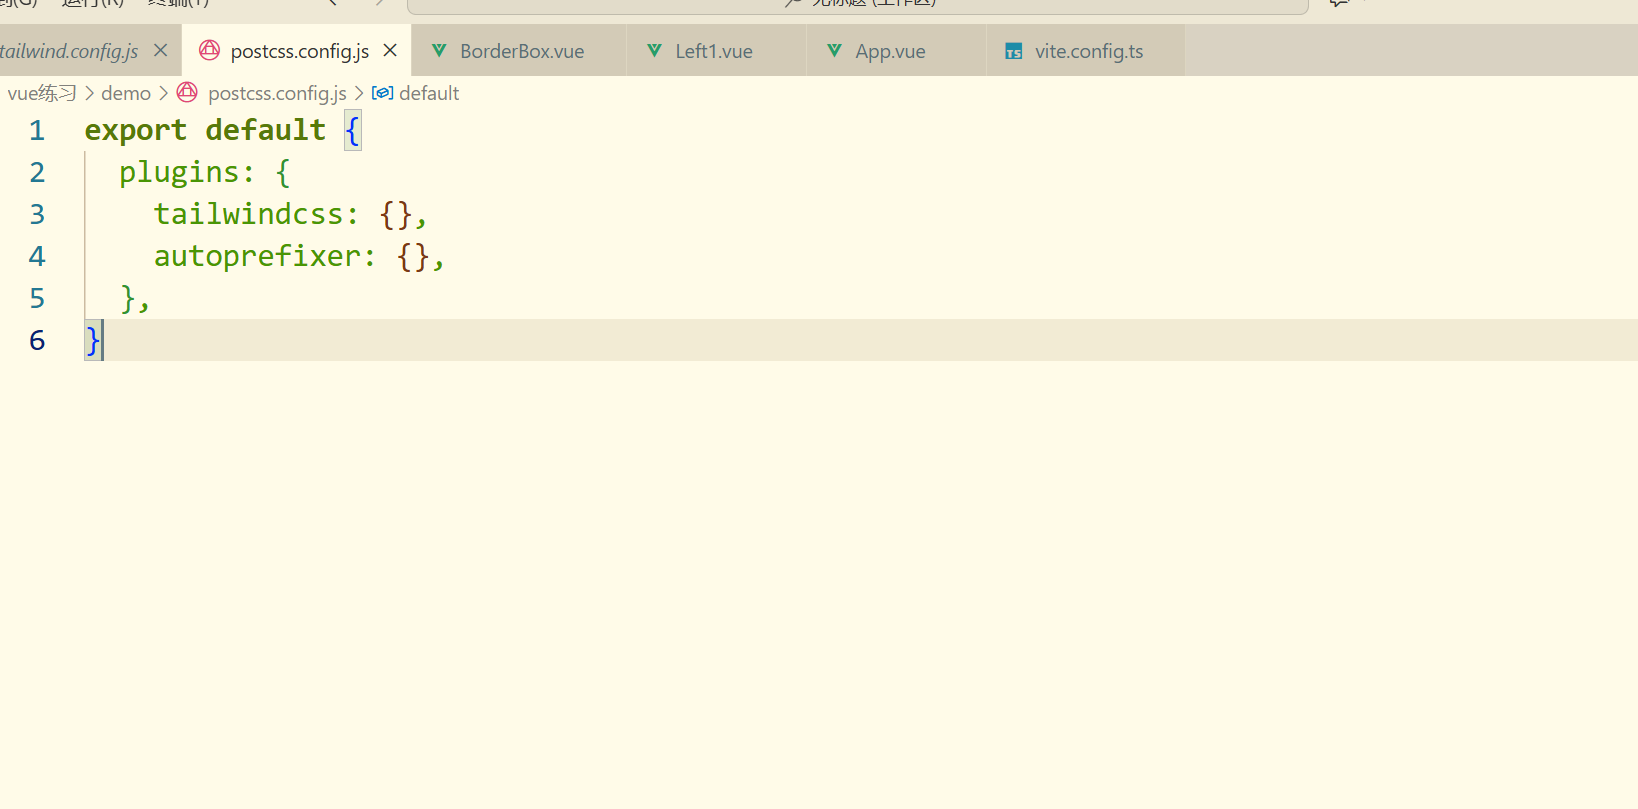
TailwindCSS
Tailwind CSS 是一个功能优先的、低级别的 CSS 框架,它让你能够通过直接在 HTML 中编写预定义的类来快速构建自定义的用户界面。
把它想象成一个巨大的、可复用的 CSS 工具包,而不是预先制作好的组件(如 Bootstrap 的按钮、导航栏)。
安装
npm install -D tailwindcss postcss autoprefixer
npx tailwindcss init
在 v4 版本中,tailwindcss init 命令已经被移除了,所以要安装版本v3
npm install -D tailwindcss@^3.4.0 postcss autoprefixer安装后会出现一个文件
javascript
//demo\tailwind.config.js
/** @type {import('tailwindcss').Config} */
export default {
  content: [],
  theme: {
    extend: {},
  },
  plugins: [],
}
添加
javascript
/** @type {import('tailwindcss').Config} */
export default {
	// 扫描 index.html 文件
	// 扫描 src 目录下所有的 Vue/JS/TS/JSX/TSX 文件
  content: ['./index.html', './src/**/*.{vue,js,ts,jsx,tsx}'],
  theme: {
    extend: {}
  },
  plugins: []
}
新建一个文件,这是官网上的代码
引入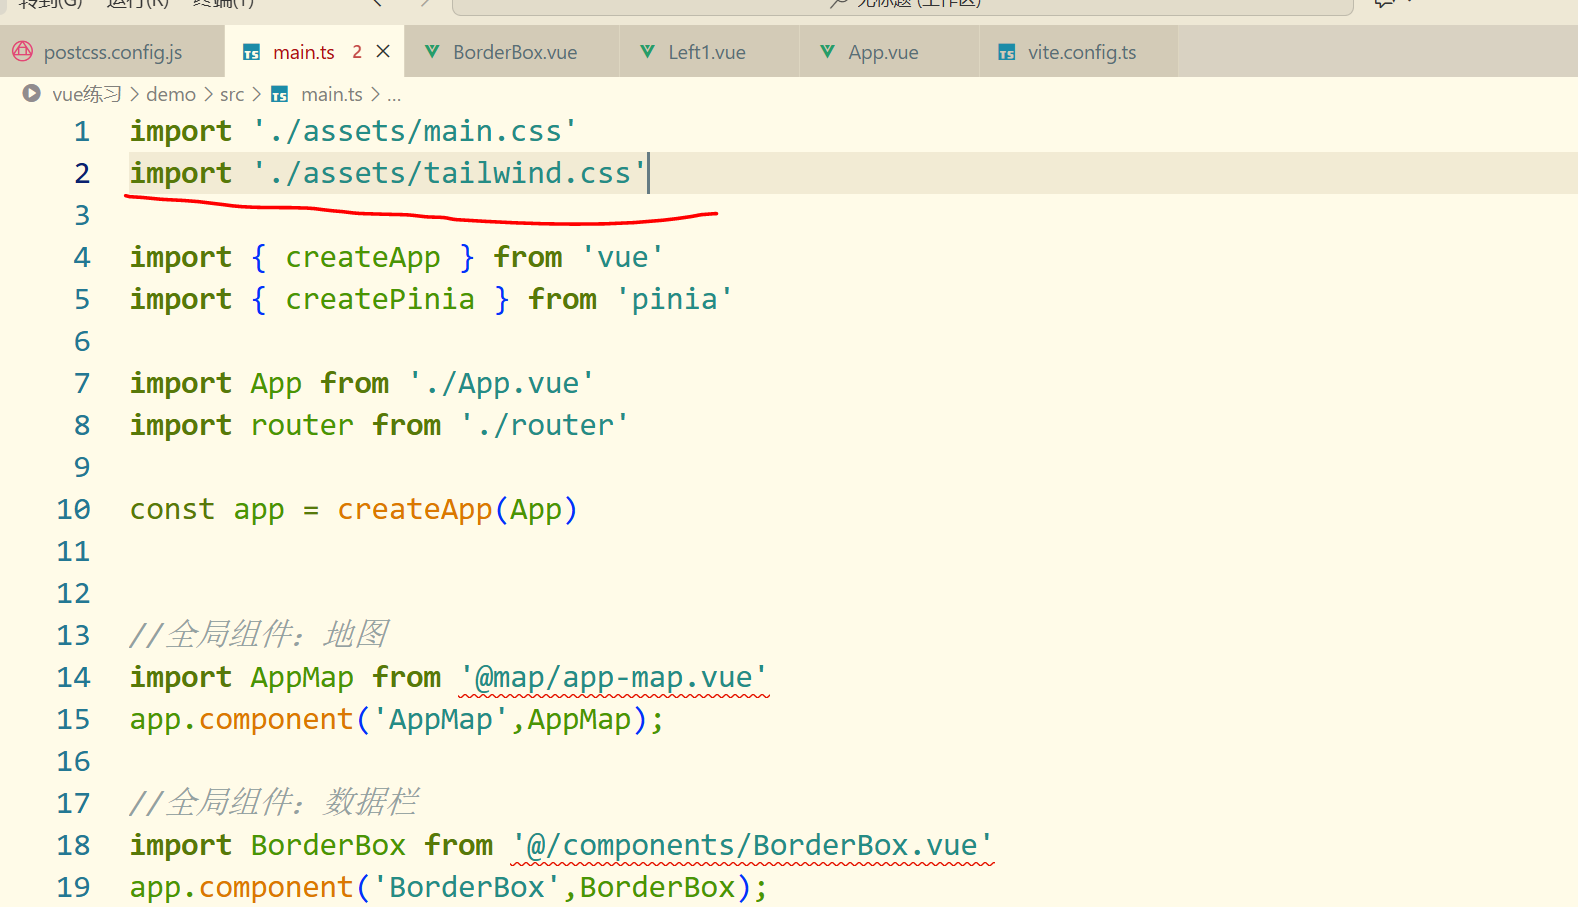
加上组件的间距
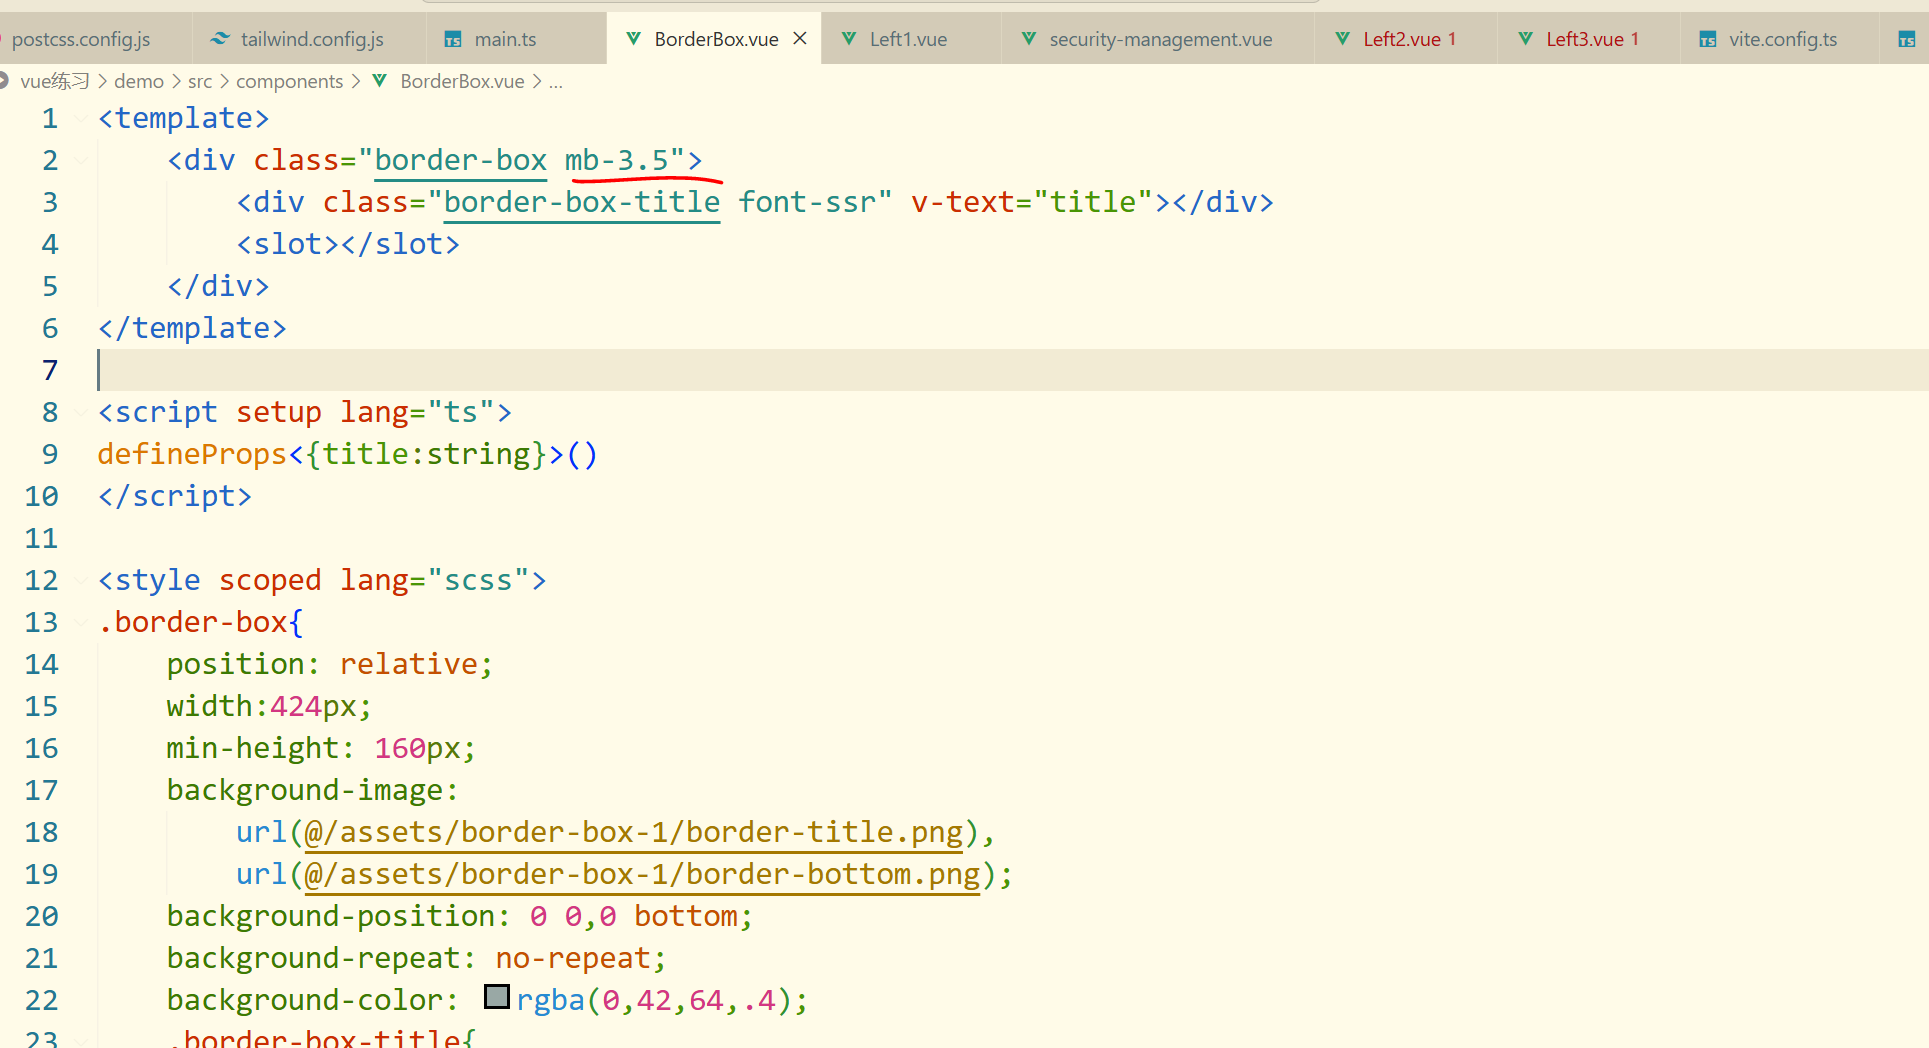
这样就有间距了

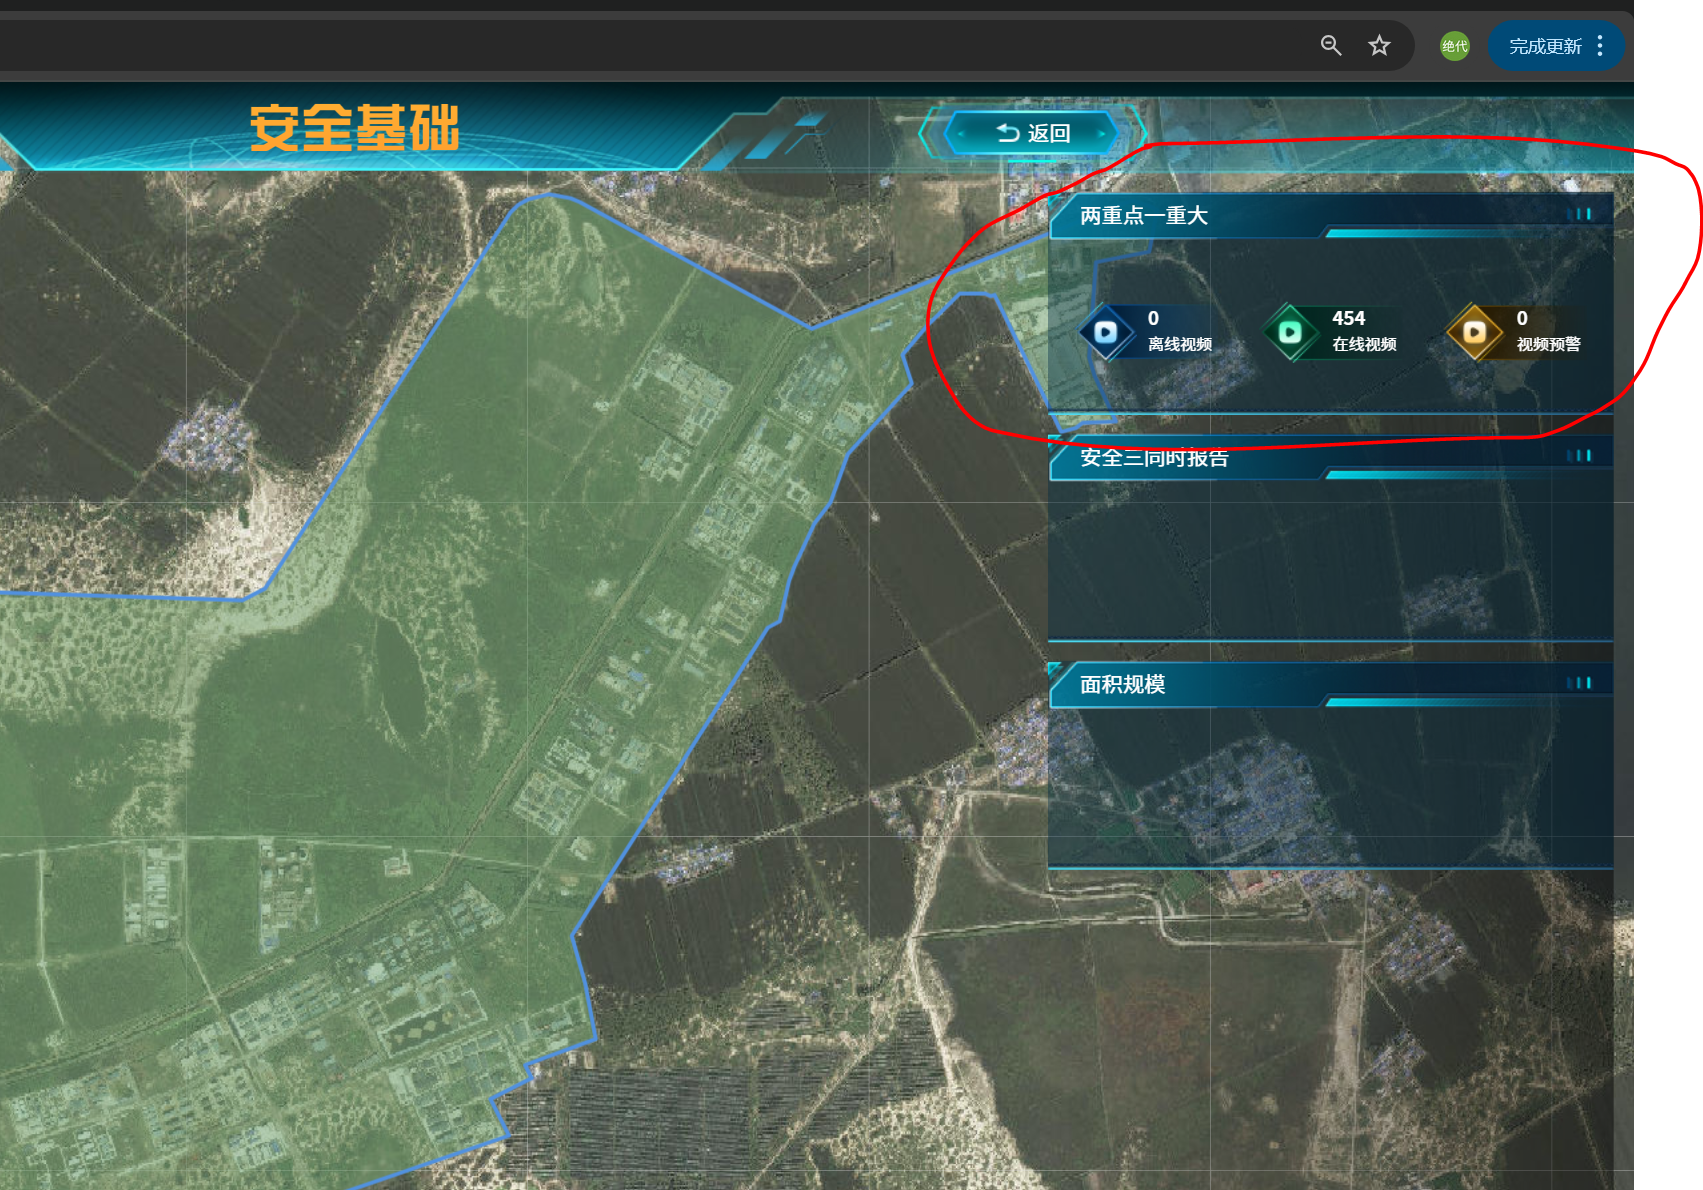
两重点一重大的内容添加
添加请求获取数据
下载引入
	npm install echarts
	import * as echarts from 'echarts'
安全三同时报告的内容添加
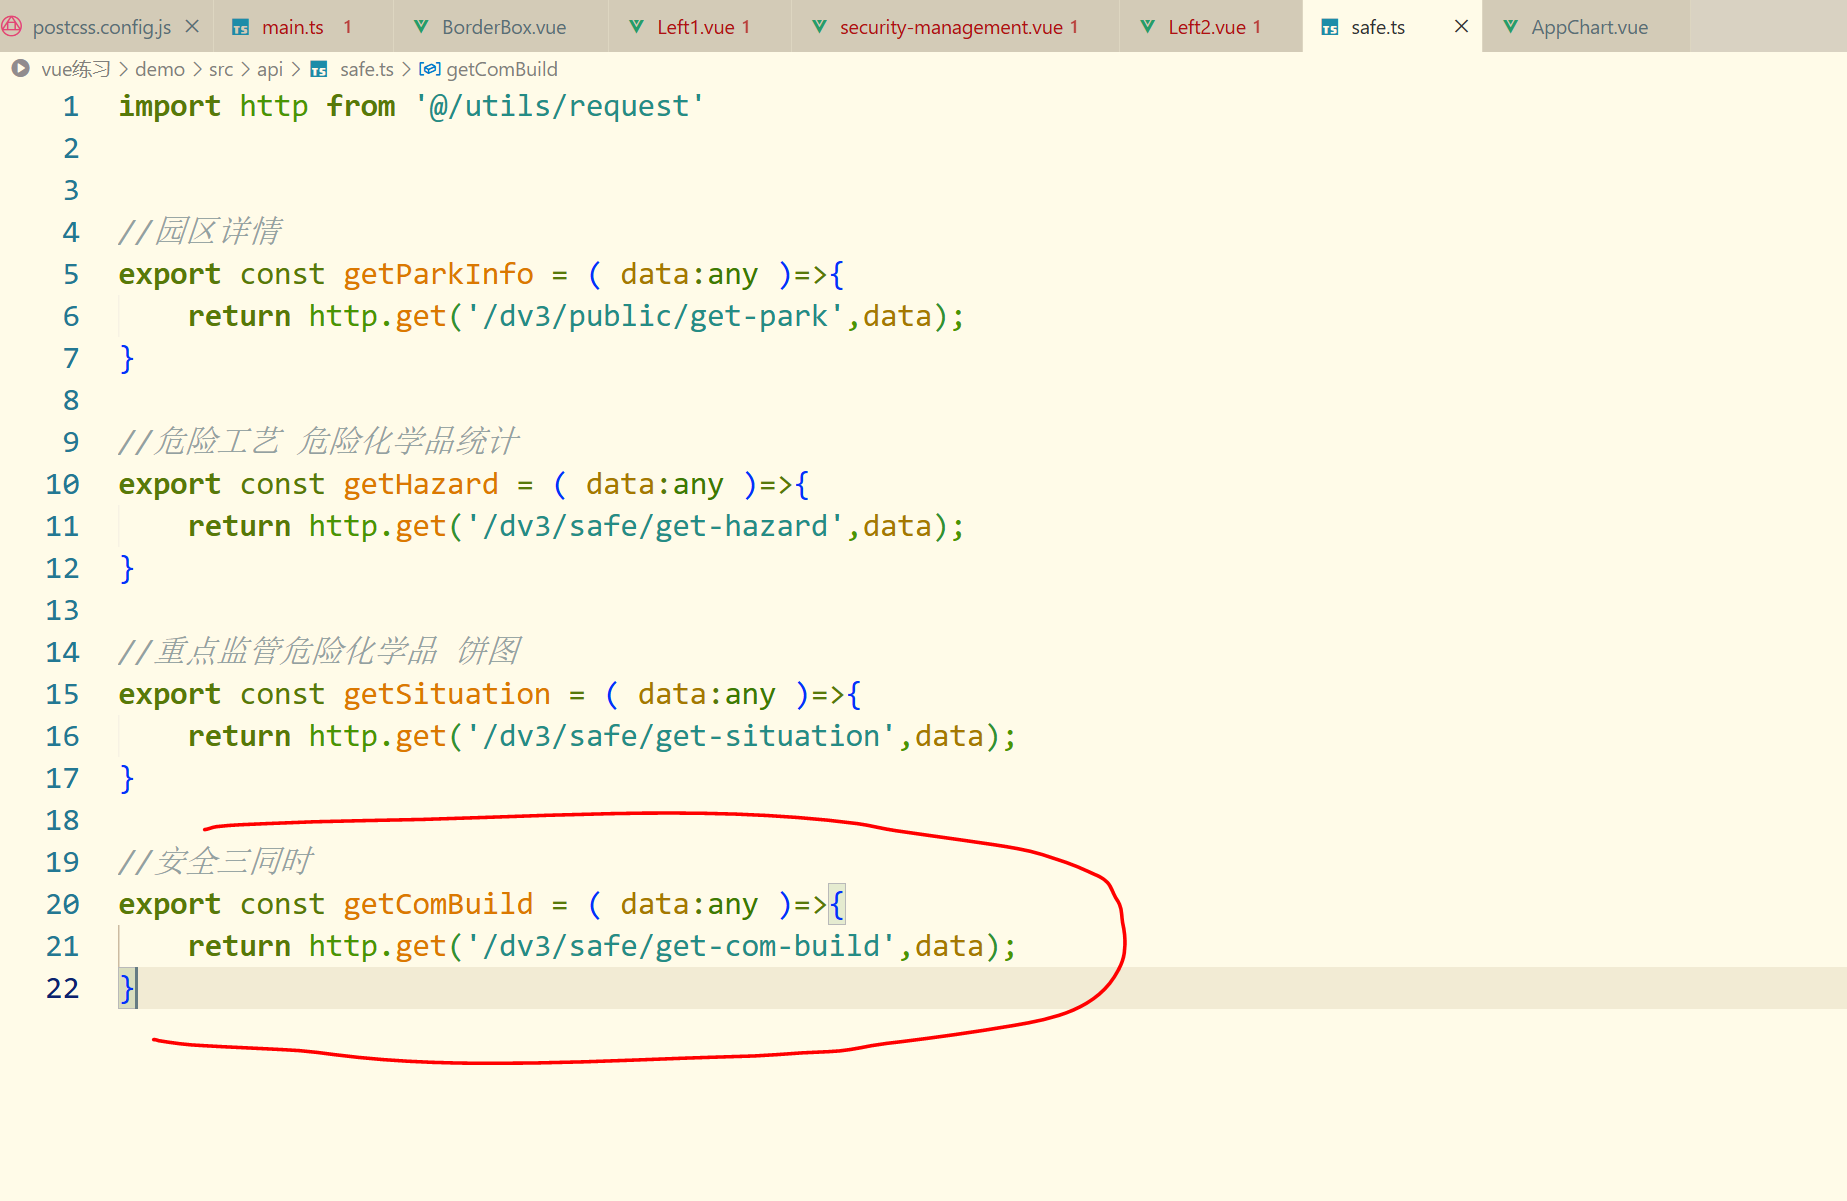
javascript
<template>
    <div class="pt-5 px-8 pb-3">
      <app-chart :option="option" height="200px" />
    </div>
</template>

<script setup lang="ts">
import { ref , computed } from 'vue';
import { getComBuild } from '@api/safe'
let data = ref();
const getDatas = async ()=>{
    let res = await getComBuild({
        companyId:0
    })
    data.value = res.data;
}
getDatas()
const option = computed(() => {
    return {
        grid: {
            top: '30px',
            left: '0%',
            right: '0%',
            bottom: '0%',
            containLabel: true
        },
        xAxis: {
            data: ['项目资料', '安全三同时', '验收信息'],
            axisLabel: {
            textStyle: {
                color: 'rgba(197,250,255,0.7)', // 这里设置你想要的颜色
                fontSize: '10px',
                fontFamily: 'c-ssr'
            }
            }
        },
        yAxis: {
            name: '总数',
            nameTextStyle: {
                color: 'rgba(197,250,255,0.7)',
                fontSize: 10
            },
            axisLabel: {
                textStyle: {
                    color: 'rgba(197,250,255,0.7)', // 这里设置你想要的颜色
                    fontSize: '10px',
                    fontFamily: 'c-ssr'
                }
            }
        },
        series: [{
            z: 1,
            type: 'bar',
            barWidth: 34,
            barGap: '-100%',
            itemStyle: {
                normal: {
                color: {
                    type: 'linear',
                    x: 0,
                    y: 0,
                    x2: 0,
                    y2: 1,
                    colorStops: [
                    {
                        offset: 0,
                        color: 'rgb(251,184,1)'
                    },
                    {
                        offset: 1,
                        color: 'rgba(31,31,31,1)'
                    }
                    ],
                    global: false
                }
                }
            },
            data: data.value
            },
            {
                z: 2,
                type: 'pictorialBar',
                symbolPosition: 'end',
                data: data.value,
                symbol: 'diamond',
                symbolOffset: [0, '-70%'],
                symbolSize: [34, 17],
                itemStyle: {
                    normal: {
                    color: 'rgb(251,184,1)',
                    borderColor: 'rgba(31,31,31,1)',
                    borderWidth: 10
                    }
                }
            },
            {
                z: 0,
                legendHoverLink: false,
                hoverAnimation: false,
                type: 'pictorialBar',
                data: [0, 0, 0],
                symbol: 'diamond',
                symbolOffset: [0, '50%'],
                symbolSize: [34, 17],
                itemStyle: {
                    normal: {
                        color: 'rgba(31,31,31,1)'
                    }
                }
            }
        ]
    }
})
</script>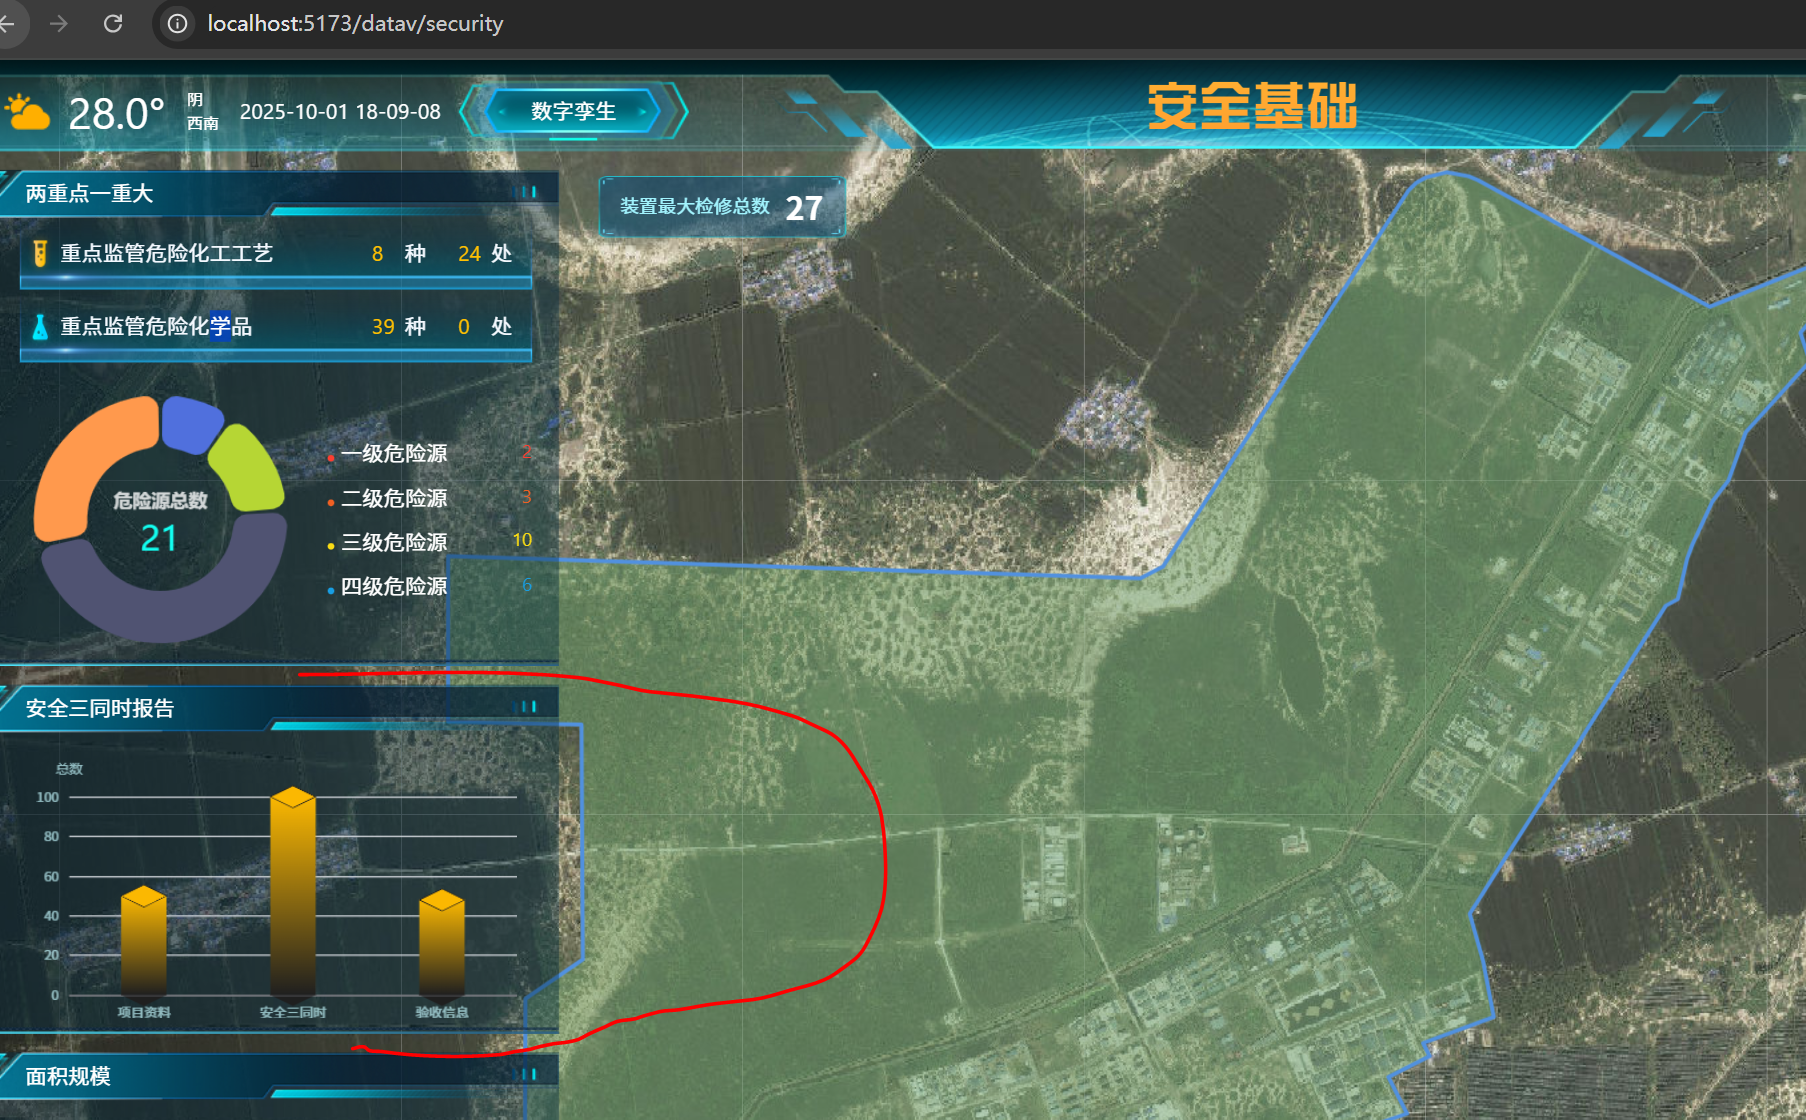
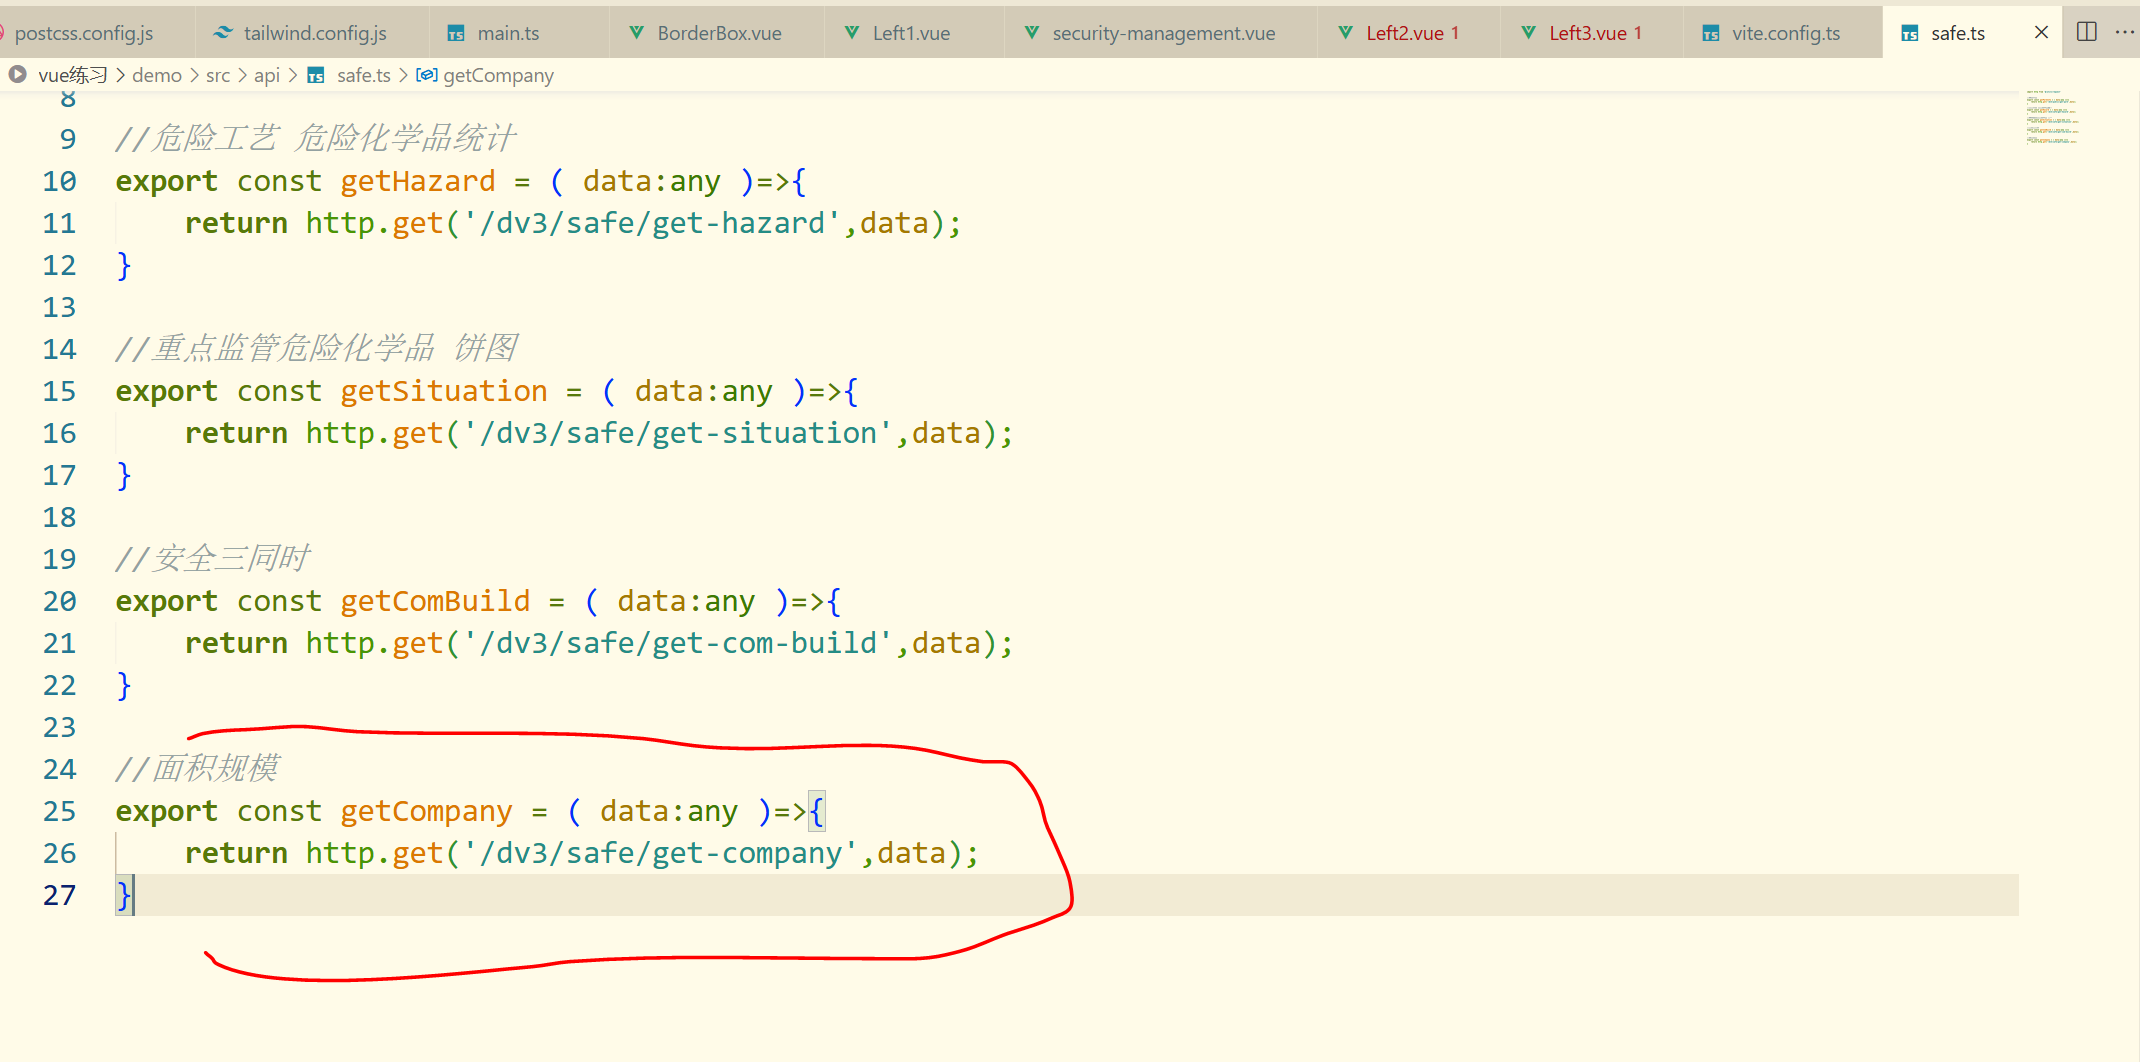
面积规模
添加短路径
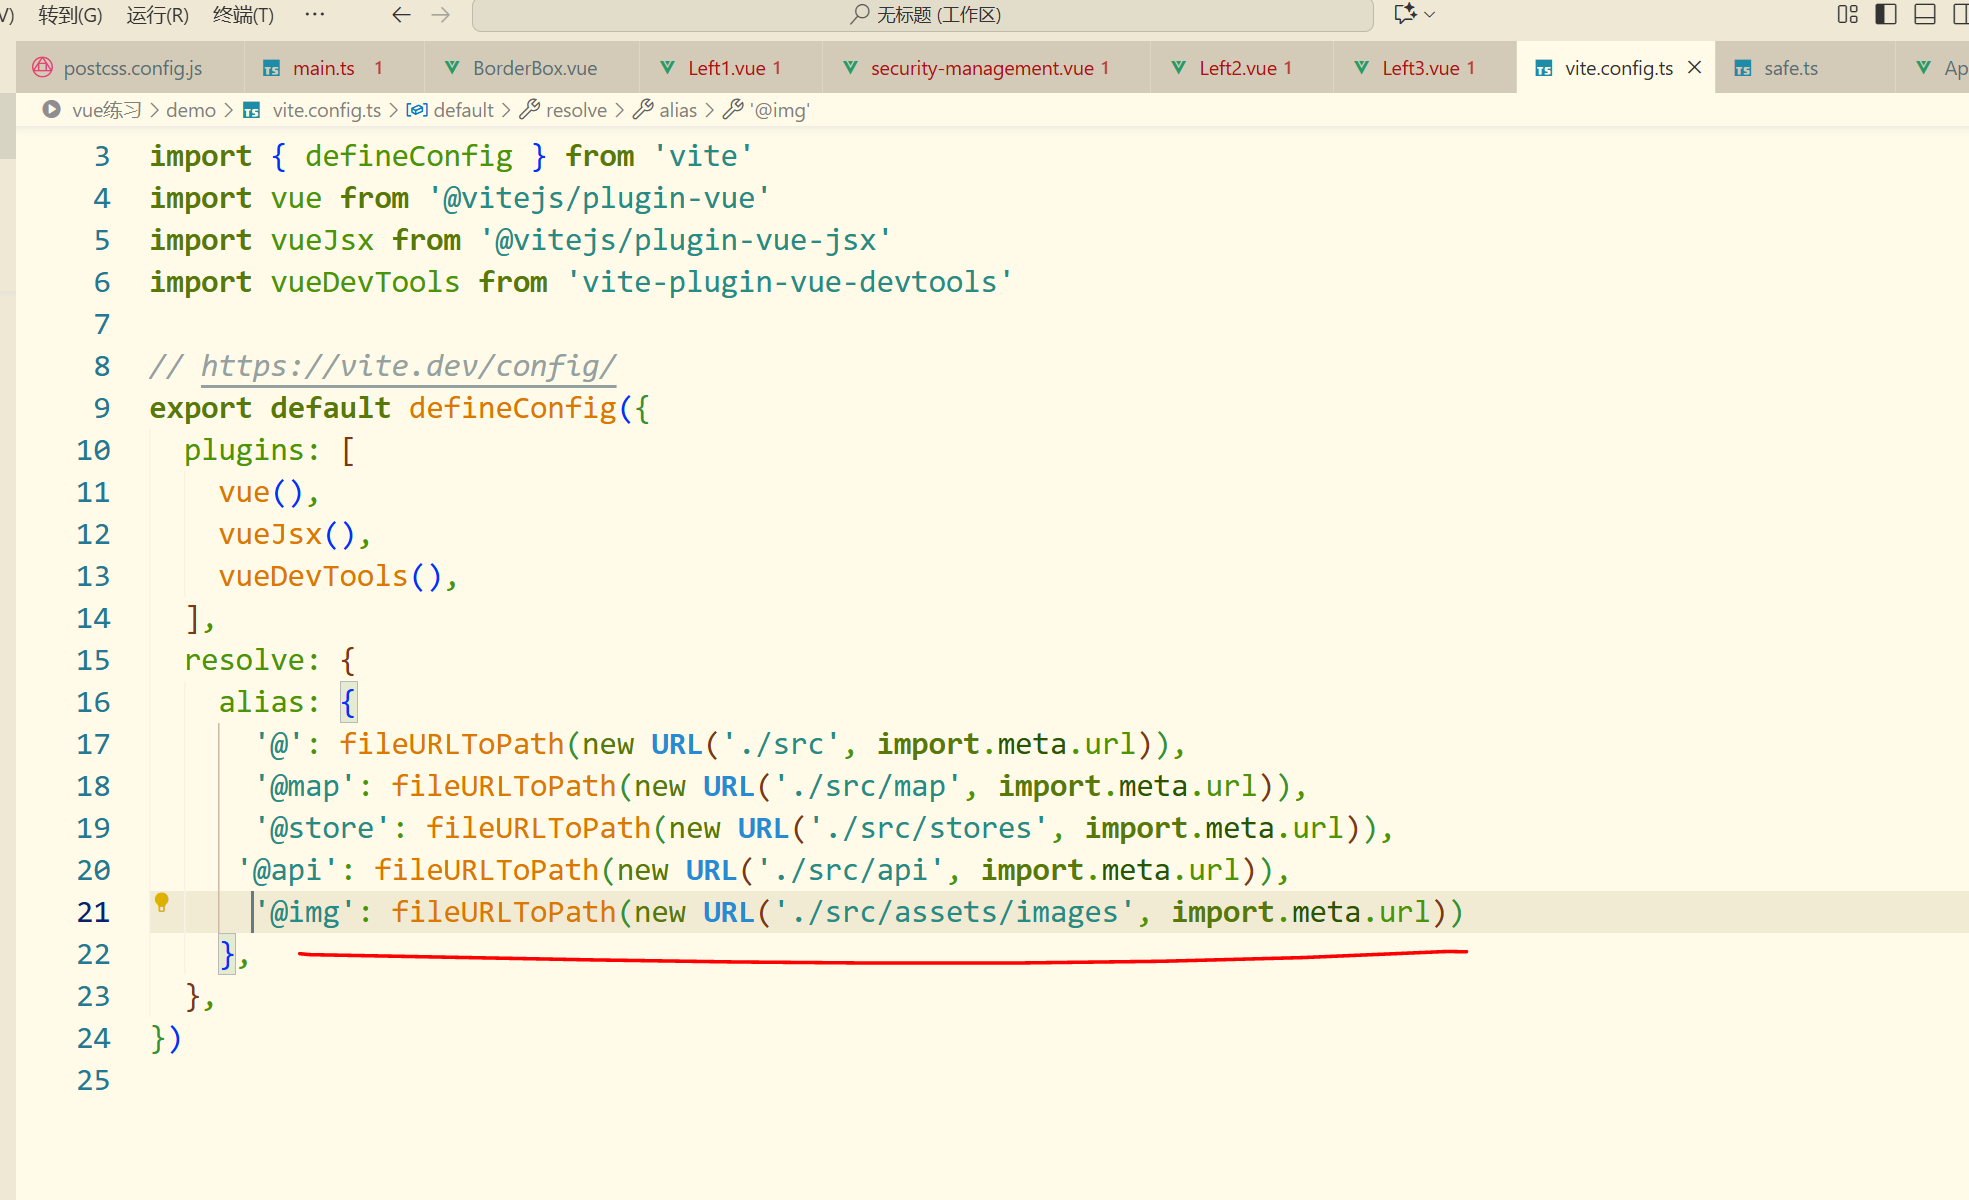
javascript
<template>
    <div class="mjgm-box py-10">
      <div class="mjgm mb-6 basis-4/7 justify-center">
        <img class="left-icon" src="@img/园区总面积.png" alt="" />
        <div class="info left-info">
          <div class="label">园区总面积</div>
          <div>
            <span class="num">{{ yqzmj }}</span
            >平方公里
          </div>
        </div>
      </div>
      <div class="mjgm mb-6 basis-3/7 justify-center">
        <img class="left-icon" src="@img/规上企业.png" alt="" />
        <div class="info">
          <div class="label">规上企业</div>
          <div>
            <span class="num">{{ gsqy }}</span
            >家
          </div>
        </div>
      </div>
      <div class="mjgm basis-4/7 justify-center">
        <img class="left-icon" src="@img/投产面积.png" alt="" />
        <div class="info left-info">
          <div class="label">投产面积</div>
          <div>
            <span class="num">{{ tcmj }}</span
            >平方公里
          </div>
        </div>
      </div>
      <div class="mjgm basis-3/7 justify-center">
        <img class="left-icon" src="@img/化工企业.png" alt="" />
        <div class="info">
          <div class="label">化工企业</div>
          <div>
            <span class="num">{{ hgqy }}</span
            >家
          </div>
        </div>
      </div>
    </div>
</template>

<script setup lang="ts">
import { ref } from 'vue'
import { getCompany } from '@api/safe'

const yqzmj = ref('0')
const gsqy = ref('0')
const tcmj = ref('0')
const hgqy = ref('0')
const getDatas = async ()=>{
    let { data } = await getCompany({
        companyId:0
    })
    yqzmj.value = data[0].value;
    gsqy.value = data[1].value;
    tcmj.value = data[2].value;
    hgqy.value = data[3].value;
    console.log( data );
}
getDatas();
</script>
<style scoped lang="scss">
.mjgm-box {
    display: flex;
    flex-wrap: wrap;
    justify-content: space-evenly;
    .left-icon {
      margin-right: 16px;
    }
    .mjgm {
      display: flex;
      .info {
        font-family: c-ssm;
        font-size: 12px;
        color: #7a9496;
        &.left-info {
          width: 140px;
        }
        .label {
          font-size: 14px;
          color: #c5faff;
        }
        .num {
          font-family: c-ssb;
          font-size: 24px;
          color: #c4faff;
          margin-right: 5px;
        }
      }
    }
}
</style>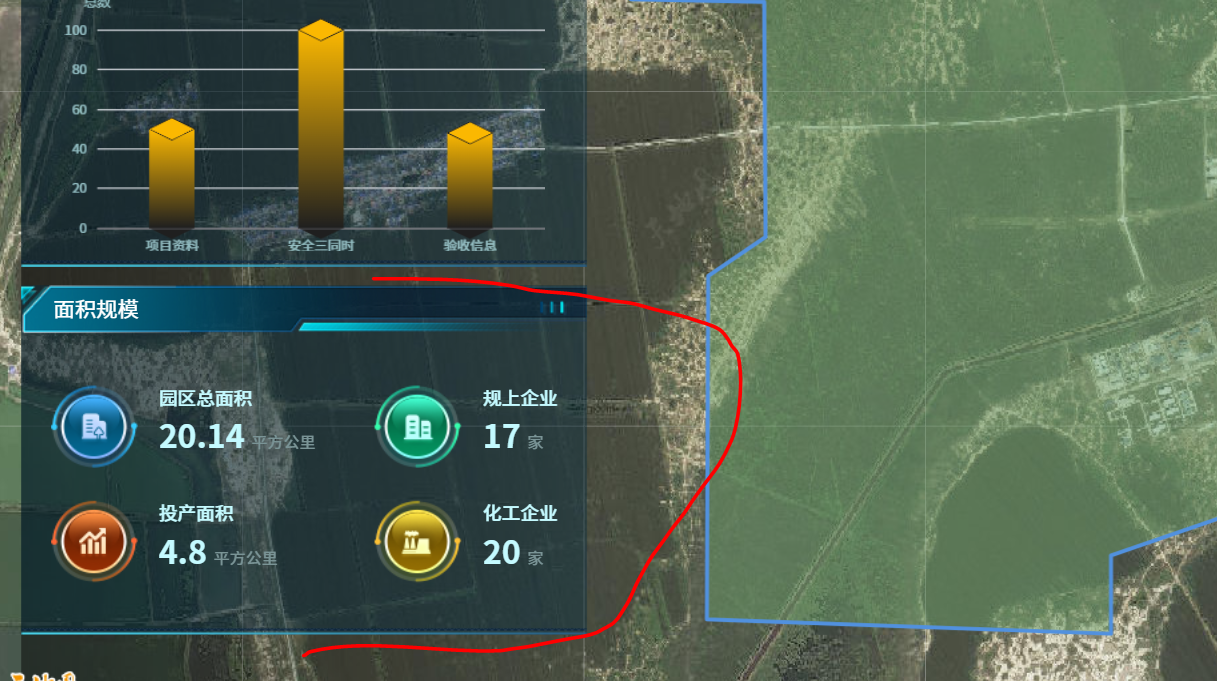
轮班值守的内容添加
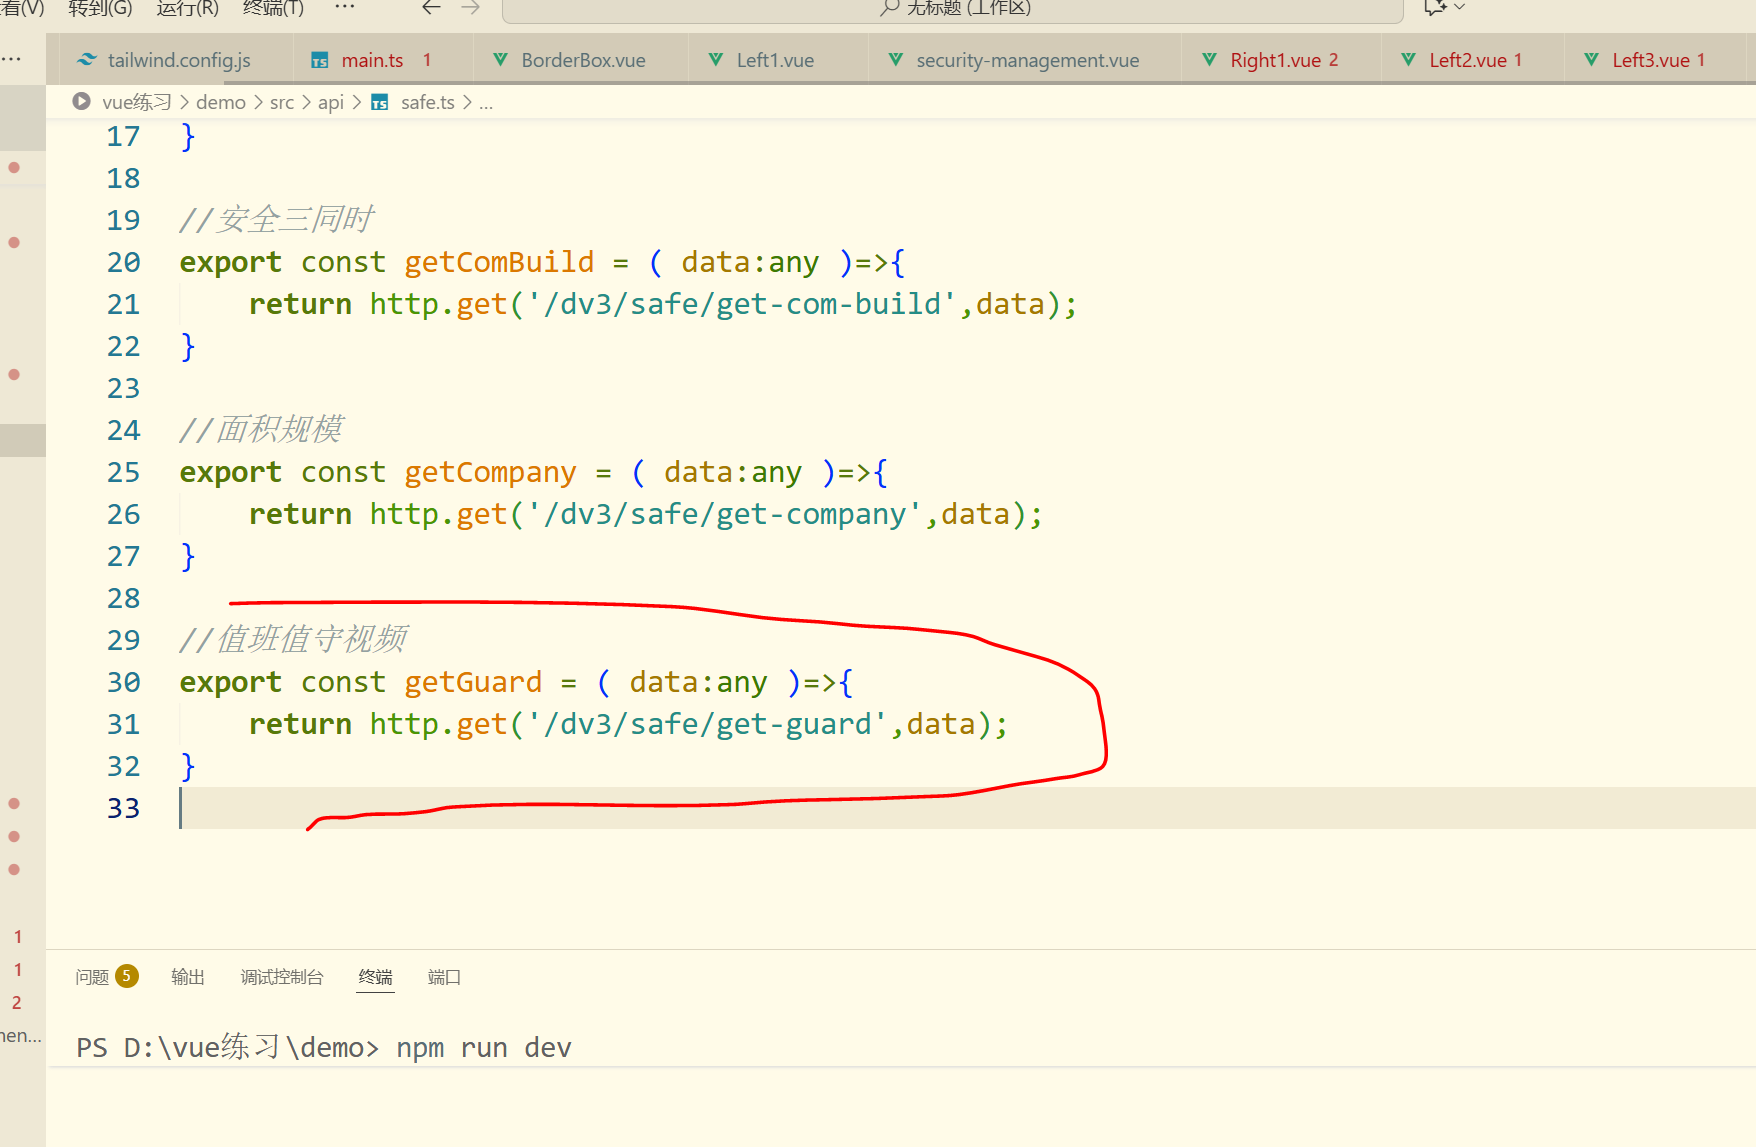
javascript
<template>
    <div class="zbks-root px-5">
      <div class="py-5 mb-2">
        <ViewerButton />
      </div>
      <div class="zbks-box pb-10">
        <div class="zbks lxsp">
          <div class="num">{{ lxsp }}</div>
          <div class="label">离线视频</div>
        </div>
        <div class="zbks zxsp">
          <div class="num">{{ zxsp }}</div>
          <div class="label">在线视频</div>
        </div>
        <div class="zbks spyj">
          <div class="num">{{ spyj }}</div>
          <div class="label">视频预警</div>
        </div>
      </div>
    </div>
</template>

<script setup lang="ts">
import { ref } from 'vue'
import { getGuard } from '@api/safe'
const lxsp = ref(0);
const zxsp = ref(0);
const spyj = ref(0);
const getDatas = async ()=>{
    let res = await getGuard({
        companyId:0
    })
    res.data.forEach((item) => {
        switch (item.key) {
            case '离线视频':
                lxsp.value = item.value;
            break
            case '在线视频':
                zxsp.value = item.value;
            break
            case '视频预警':
                spyj.value = item.value;
            break
            default:
            break
        }
    })
}
getDatas();
</script>

<style scoped>
.zbks-box {
    display: flex;
    justify-content: space-between;
    .zbks {
      width: 28%;
      color: #ffffff;
      padding-left: 55px;
      background-size: cover;
      background-repeat: no-repeat;
      height: 47px;
      padding-top: 2px;
      .num {
        font-family: c-ssb;
        font-size: 14px;
      }
      .label {
        font-family: c-ssr;
        font-size: 12px;
      }
      &.lxsp {
        background-image: url(@img/离线视频.png);
      }
      &.zxsp {
        background-image: url(@img/在线视频.png);
      }
      &.spyj {
        background-image: url(@img/视频预警.png);
      }
    }
}
</style>