前言
在现代Web应用中,邮件功能是必不可少的一部分------用户注册验证、密码重置、消息通知等场景都需要发送邮件。本文将介绍如何在Spring Boot项目中整合JavaMailSender和FreeMarker模板引擎,实现一个优雅的邮件发送系统。✉️
技术栈
- Spring Boot 3.x + Spring Mail + FreeMarker + Jakarta Mail
项目结构
mail-demo/
├── src/main/java/com/example/maildemo/
│   ├── MailDemoApplication.java
│   ├── MailController.java
│   └── MailService.java
├── src/main/resources/
│   ├── templates/
│   │   └── welcome.ftl
│   └── application.yml
一、添加依赖
首先在pom.xml中添加必要的依赖:
<dependency>
    <groupId>org.springframework.boot</groupId>
    <artifactId>spring-boot-starter-mail</artifactId>
</dependency>
<dependency>
    <groupId>org.springframework.boot</groupId>
    <artifactId>spring-boot-starter-freemarker</artifactId>
</dependency>
二、配置邮件服务器
在application.yml中配置SMTP服务器信息:
小提醒:SMTP服务器地址我使用了微信企业邮箱,qq邮箱使用:smtp.qq.com
server:
  port: 8080

spring:
  mail:
    host: smtp.exmail.qq.com  # SMTP服务器地址
    port: 465                  # SSL端口
    username: your-email@domain.com  # 发件人邮箱
    password: your-app-password      # 授权码(非邮箱密码)
    protocol: smtps
    properties:
      mail:
        smtp:
          auth: true
          starttls:
            enable: true
          ssl:
            enable: true
        debug: true  # 开发时可开启,生产环境建议关闭
  freemarker:
    charset: UTF-8
    template-loader-path: classpath:/templates/
    prefer-file-system-access: false
⚠️ 安全提示
-
切勿将真实的邮箱密码硬编码在配置文件中
-
使用环境变量或配置中心管理敏感信息
-
如果使用Git,记得将
application.yml添加到.gitignore,或使用application-prod.yml分离生产配置
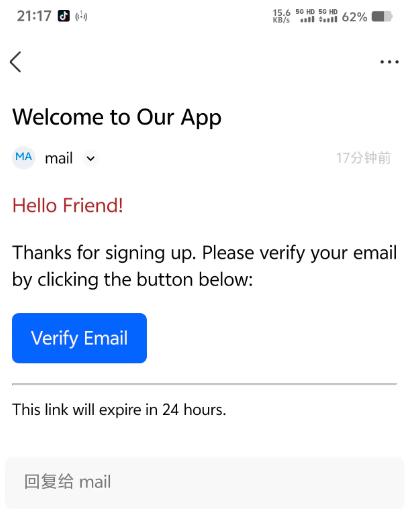
三、创建邮件模板
在src/main/resources/templates/目录下创建welcome.ftl:
<!DOCTYPE html>
<html>
  <head>
    <meta charset="UTF-8">
    <title>Welcome</title>
  </head>
  <body style="font-family: Arial, sans-serif;">
    <h1 style="color: brown">Hello ${userName}!</h1>
    <p>Thanks for signing up. Please verify your email by clicking the button below:</p>
    <p>
      <a href="${actionUrl}"
         style="display:inline-block;
                padding:10px 16px;
                text-decoration:none;
                border-radius:6px;
                background:#2962FF;
                color:#fff;">
        Verify Email
      </a>
    </p>
    <hr>
    <small>This link will expire in 24 hours.</small>
  </body>
</html>
FreeMarker 语法说明
-
${userName}: 变量占位符,会被实际数据替换 -
${actionUrl}: 验证链接地址 -
支持条件判断、循环等复杂逻辑(可根据需求扩展)
四、实现邮件服务
4.1 MailService 核心服务
@Service
public class MailService {
@Autowired
private JavaMailSender mailSender;
@Autowired
private Configuration freemarkerCfg;
@Value("${spring.mail.username}")
private String fromAddress;
public void sendWelcome(String to, Map<String, Object> model) throws Exception {
// 1. 加载FreeMarker模板
Template tpl = freemarkerCfg.getTemplate("welcome.ftl", "UTF-8");
// 2. 生成HTML内容
String html = FreeMarkerTemplateUtils.processTemplateIntoString(tpl, model);
// 3. 创建MimeMessage
MimeMessage message = mailSender.createMimeMessage();
MimeMessageHelper helper = new MimeMessageHelper(message, true, "UTF-8");
// 4. 设置邮件信息
helper.setFrom(fromAddress);
helper.setTo(to);
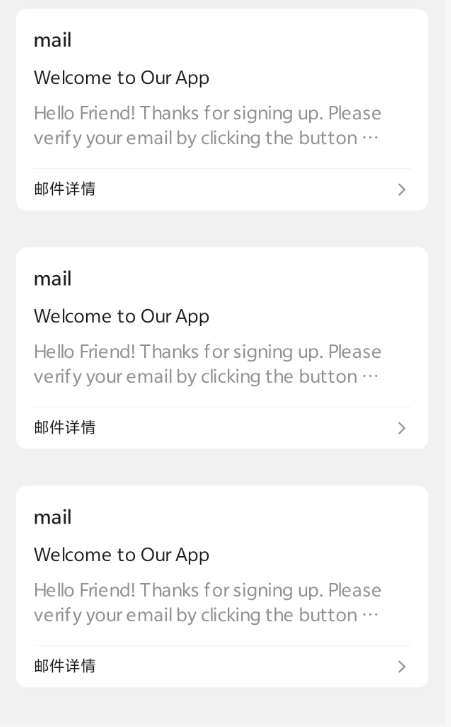
helper.setSubject("Welcome to Our App");
helper.setText(html, true); // true表示发送HTML邮件
// 5. 发送邮件
mailSender.send(message);
}
}4.2 MailController 控制器
@RestController
public class MailController {

    @Autowired
    private MailService mailService;

    @GetMapping("/api/send-test")
    public String sendTest(@RequestParam String to,
                           @RequestParam(defaultValue = "Friend") String name,
                           @RequestParam(defaultValue = "https://example.com/verify?token=abc") String actionUrl) throws Exception {
        Map<String, Object> model = new HashMap<>();
        model.put("userName", name);
        model.put("actionUrl", actionUrl);

        mailService.sendWelcome(to, model);

        return "邮件发送成功!✅";
    }
}
五、测试邮件发送
启动应用后,访问以下URL进行测试:
http://localhost:8080/api/send-test?to=recipient@example.com&name=张三&actionUrl=https://yoursite.com/verify?token=xyz123备注:此时邮箱已经可以成功发送了
六、进阶优化建议 🚀
6.1 异步发送
邮件发送是IO密集型操作,建议使用异步处理:
@Async
public CompletableFuture<Void> sendWelcomeAsync(String to, Map<String, Object> model) {
    // ... 发送逻辑
    return CompletableFuture.completedFuture(null);
}
6.2 异常处理
try {
    mailService.sendWelcome(to, model);
    return ResponseEntity.ok("发送成功");
} catch (Exception e) {
    log.error("邮件发送失败", e);
    return ResponseEntity.status(500).body("发送失败");
}
6.3 邮件队列
对于大批量邮件发送,建议使用消息队列(RabbitMQ/Kafka)来削峰填谷。
6.4 模板管理
可以将多个模板抽象为枚举或配置:
public enum MailTemplate {
    WELCOME("welcome.ftl", "欢迎注册"),
    RESET_PASSWORD("reset-password.ftl", "密码重置"),
    NOTIFICATION("notification.ftl", "系统通知");
    // ...
}
七、常见问题排查 🔍
-
535 Authentication failed: 检查用户名和授权码是否正确
-
Connection timeout: 检查防火墙和端口配置
-
中文乱码: 确保所有地方都设置了UTF-8编码
-
模板找不到 : 检查
template-loader-path配置和文件路径
总结
通过Spring Boot整合JavaMailSender和FreeMarker,我们实现了一个功能完整且易于维护的邮件发送系统。模板化的设计使得邮件内容可以灵活定制,而Spring的自动配置极大简化了开发流程。
希望这篇文章对你有帮助!如果有任何问题,欢迎在评论区交流~