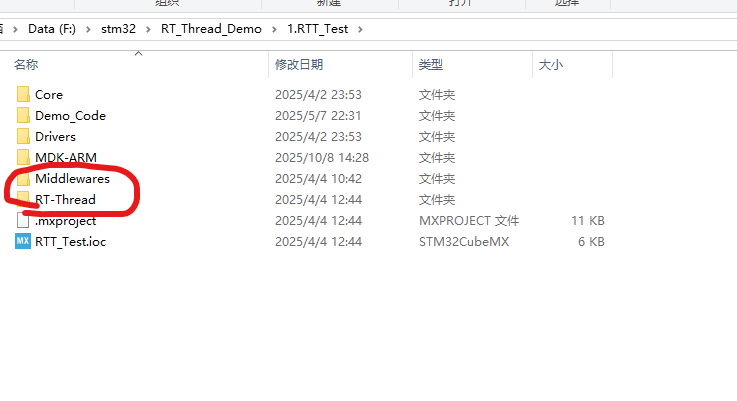
下载源码,精简文件
官网下载RT-Thread_Nano版源码,同时精简文件。
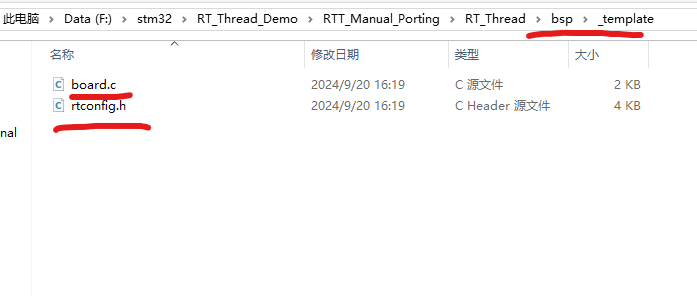
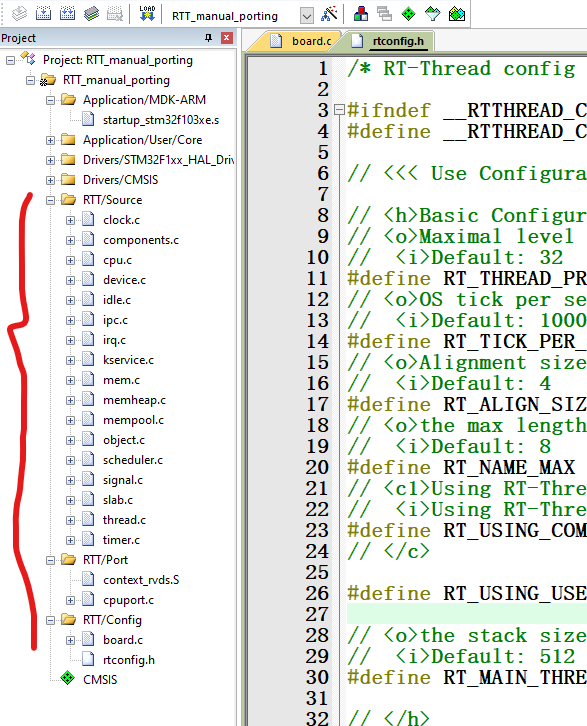
bsp目录下只留下board.c和rtconfig.h
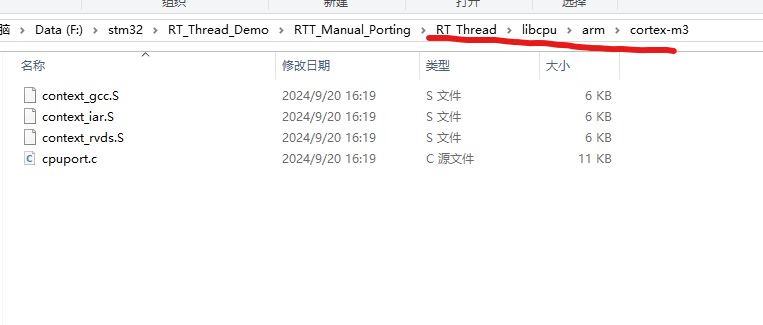
libcpu文件夹只保留移植板子需要文件。这里板子是stm32F103ZET6,为m3架构,所以除m3架构外,其他文件全部删除。
CubeMX配置
虽然CubeMX有一键配置FreeRTOS的功能,但是由于产品选型不一定选择STM芯片,因此这里选择自己移植RT-Thread。
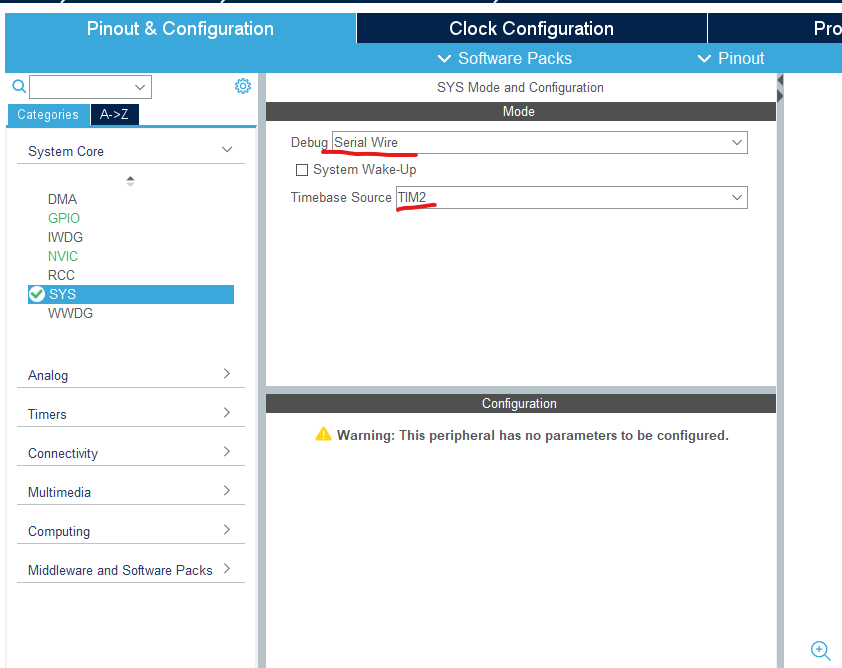
Sys配置
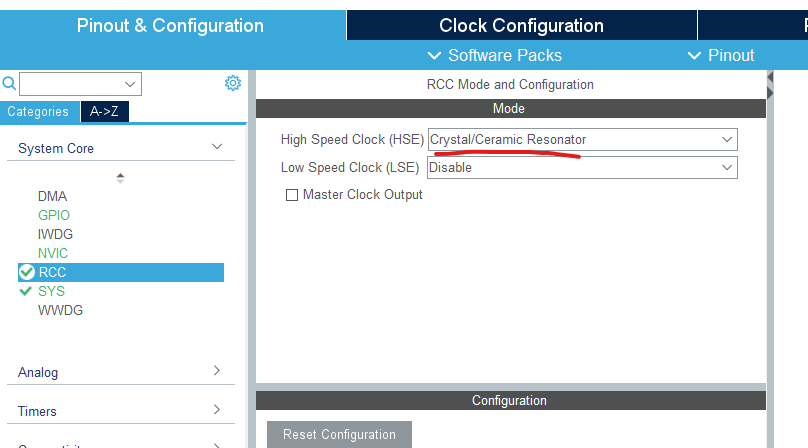
RCC配置
串口设置
设置一个串口,用作调试。
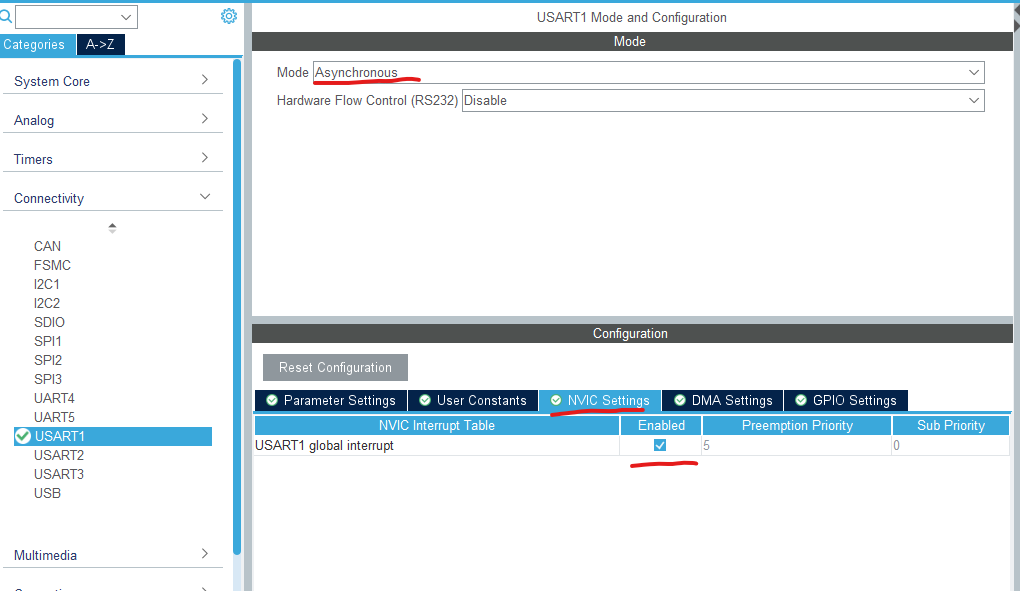
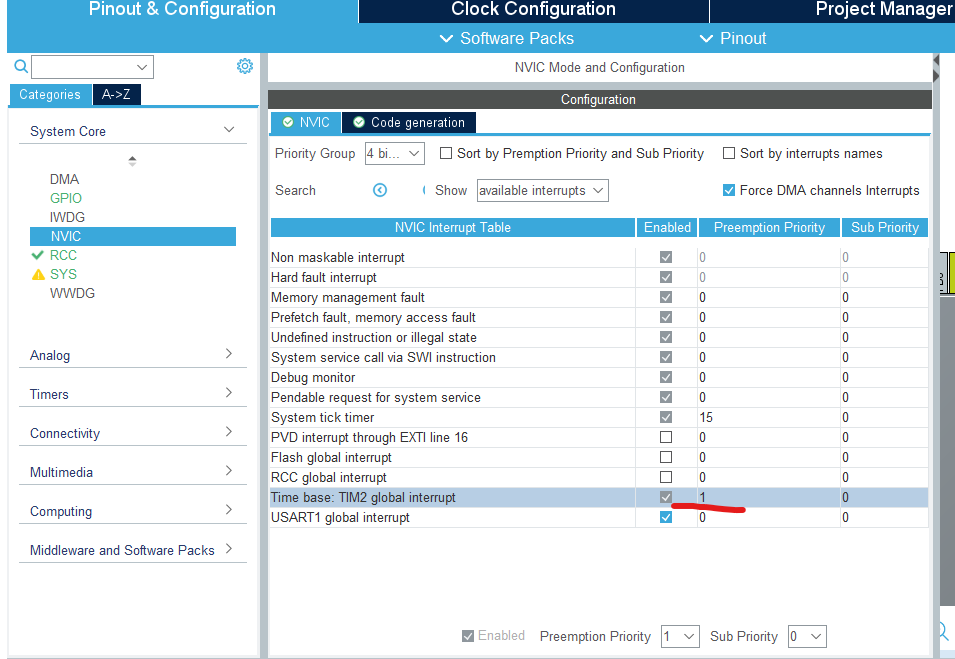
NVIC配置
屏蔽几个中断:SysTick中断,SVC中断,PendSV中断。
取消生成部分IRQ_handle。因为这一部分已经由FreeRTOS替我们实现

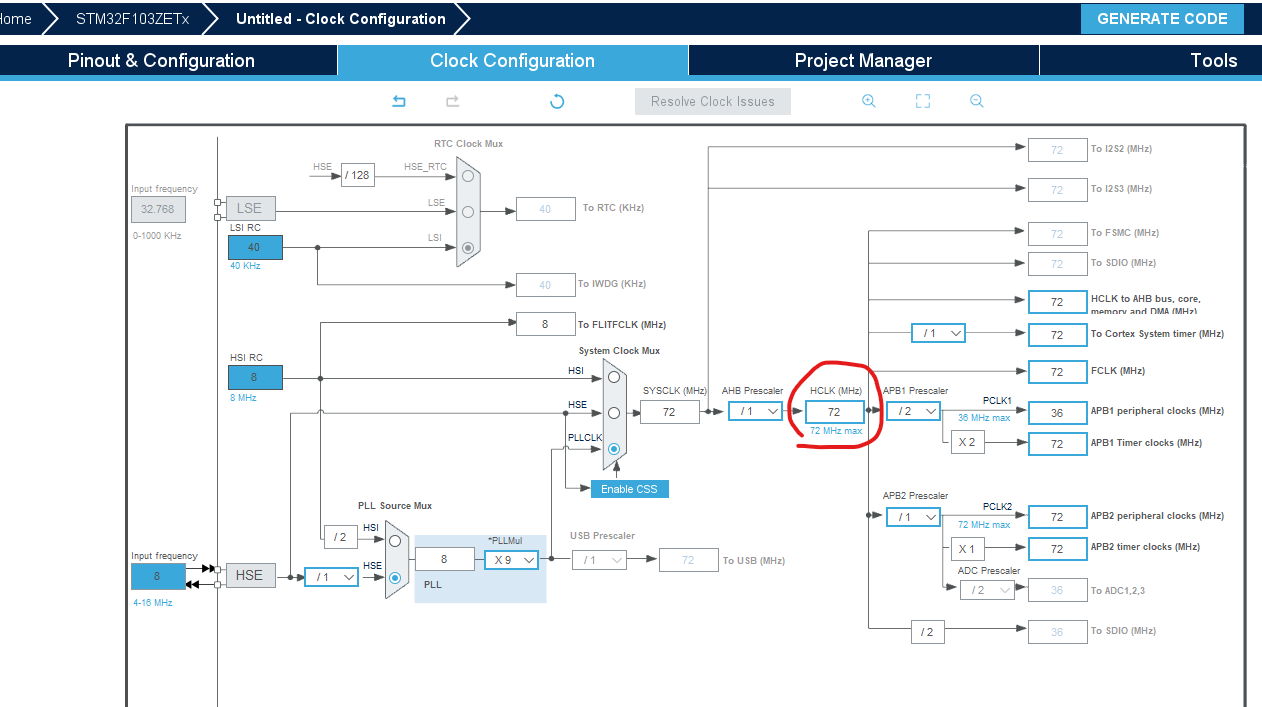
主频配置
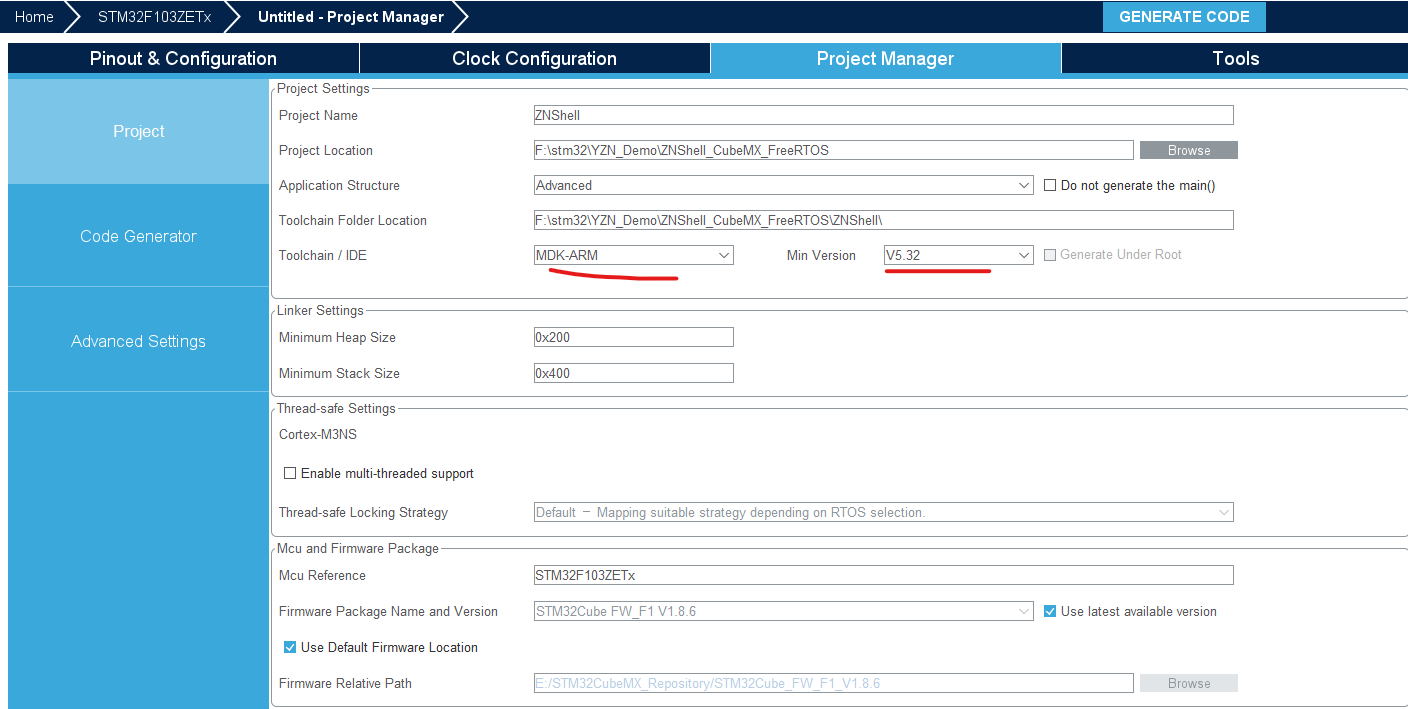
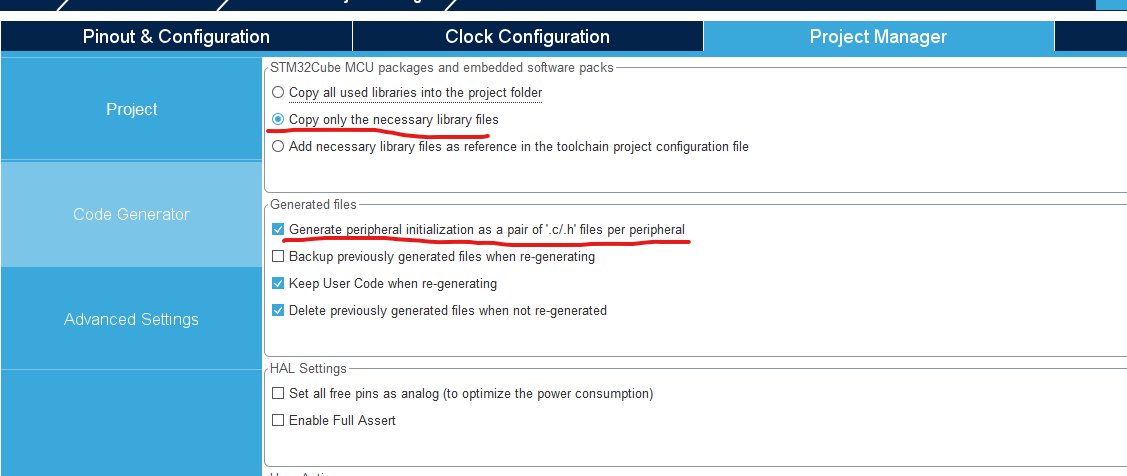
生成配置设置
添加配置和修改部分.c/.h
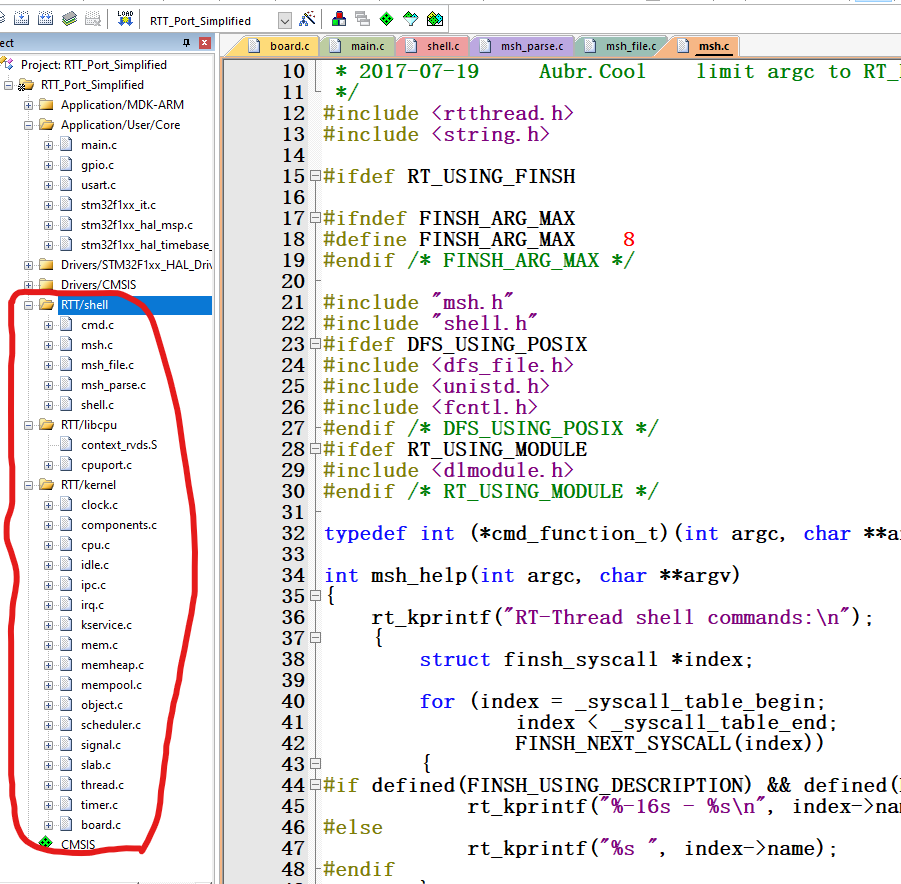
配置keil工程文件
添加源码到工程组
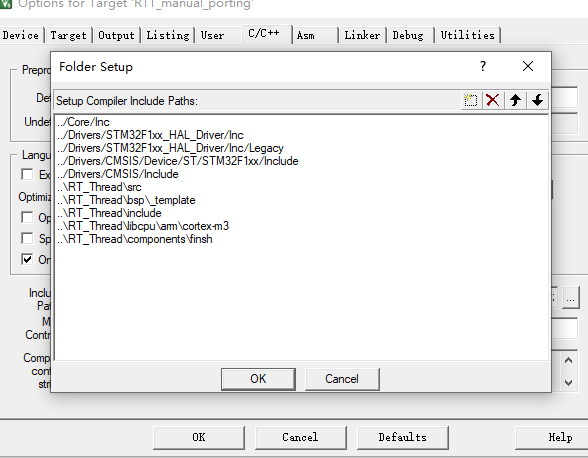
添加头文件
rtthread.h添加头文件
cpp
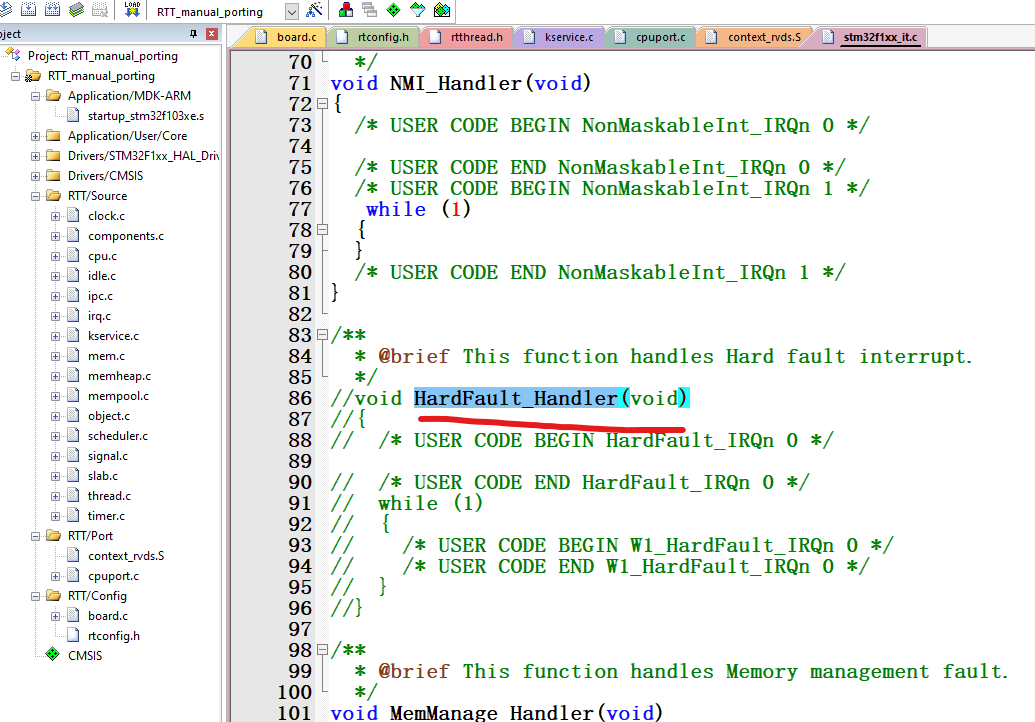
#include <stdarg.h>把HardFault_Handler也注释掉,因为RT-Thread已经为我们实现好了
修改部分.c/.h代码
rt_os_tick_callback换成
cpp
void SysTick_Handler(void)
{
    rt_interrupt_enter();

    rt_tick_increase();

    rt_interrupt_leave();
}
然后把rt_hw_console_output、rt_hw_board_init里的#error "TODO 1: OS Tick Configuration."之类的注释掉
rt_hw_board_init里增加HAL库的硬件初始化
cpp
extern void SystemClock_Config(void);
extern UART_HandleTypeDef huart1;
extern void MX_USART1_UART_Init(void);
/**
 * This function will initial your board.
 */
void rt_hw_board_init(void)
{
    // #error "TODO 1: OS Tick Configuration."
    /*
     * TODO 1: OS Tick Configuration
     * Enable the hardware timer and call the rt_os_tick_callback function
     * periodically with the frequency RT_TICK_PER_SECOND.
     */

     // 1. 初始化HAL库(CubeMX生成)
    HAL_Init();
    // 2. 配置系统时钟(CubeMX生成的时钟函数)
    SystemClock_Config();
    SystemCoreClockUpdate();

    // 3. 初始化SysTick作为RT-Thread的时基
    HAL_SYSTICK_Config(HAL_RCC_GetHCLKFreq() / RT_TICK_PER_SECOND);

    /* Call components board initial (use INIT_BOARD_EXPORT()) */
#ifdef RT_USING_COMPONENTS_INIT
    rt_components_board_init();
#endif

#if defined(RT_USING_USER_MAIN) && defined(RT_USING_HEAP)
    rt_system_heap_init(rt_heap_begin_get(), rt_heap_end_get());
#endif
}
rtconfig.h
如果没有该宏定义,一定要自己添加。
cpp
defined(RT_USING_SMALL_MEM_AS_HEAP)main.c示例代码
cpp
#include "main.h"
#include "usart.h"
#include "gpio.h"

/* Private includes ----------------------------------------------------------*/
/* USER CODE BEGIN Includes */
#include <rthw.h>
#include "rtthread.h"
#include <stdio.h>
/* USER CODE END Includes */

/* Private typedef -----------------------------------------------------------*/
/* USER CODE BEGIN PTD */

/* USER CODE END PTD */

/* Private define ------------------------------------------------------------*/
/* USER CODE BEGIN PD */

/* USER CODE END PD */

/* Private macro -------------------------------------------------------------*/
/* USER CODE BEGIN PM */

/* USER CODE END PM */

/* Private variables ---------------------------------------------------------*/

/* USER CODE BEGIN PV */
/* 定义线程控制块 */
static rt_thread_t led1_thread = RT_NULL;

static void led1_thread_entry(void *parameter)
{
  while (1)
  {
    HAL_GPIO_TogglePin(GPIOB, GPIO_PIN_5);
    rt_thread_delay(500); /* 延时500个tick */
//    printf("hello \r\n");
  }
}

/* USER CODE END PV */

/* Private function prototypes -----------------------------------------------*/
void SystemClock_Config(void);
/* USER CODE BEGIN PFP */

/* USER CODE END PFP */

/* Private user code ---------------------------------------------------------*/
/* USER CODE BEGIN 0 */

/* USER CODE END 0 */

/**
 * @brief  The application entry point.
 * @retval int
 */
int main(void)
{

  /* USER CODE BEGIN 1 */

  /* USER CODE END 1 */

  /* MCU Configuration--------------------------------------------------------*/

  /* Reset of all peripherals, Initializes the Flash interface and the Systick. */
  HAL_Init();

  /* USER CODE BEGIN Init */

  /* USER CODE END Init */

  /* Configure the system clock */
  SystemClock_Config();

  /* USER CODE BEGIN SysInit */

  /* USER CODE END SysInit */

  /* Initialize all configured peripherals */
  MX_GPIO_Init();
  MX_USART1_UART_Init();
  /* USER CODE BEGIN 2 */
  led1_thread =                           /* 线程控制块指针 */
      rt_thread_create("led1",            /* 线程名字 */
                       led1_thread_entry, /* 线程入口函数 */
                       RT_NULL,           /* 线程入口函数参数 */
                       128,               /* 线程栈大小 */
                       20,                /* 线程的优先级 */
                       20);               /* 线程时间片 */

  /* 启动线程,开启调度 */
  rt_thread_startup(led1_thread);

  /* USER CODE END 2 */

  /* Infinite loop */
  /* USER CODE BEGIN WHILE */
  while (1)
  {
    /* USER CODE END WHILE */

    /* USER CODE BEGIN 3 */
    rt_thread_delay(1000);
  }
  /* USER CODE END 3 */
}
最后执行效果为led任务按照预期执行。
极简版移植
把CubeMX生成的RT-Thread第三方代码全部拷贝出来。
添加到需要自己的工程文件夹内,
对于不同系列或者架构的芯片,需要修改board.c和在RTT找到对应架构cpuport.c和对应的.S汇编文件。