参考的是大疆tello edu的官方支持库链接
需要git把其扒下来:
bash
git clone https://github.com/dji-sdk/Tello-Python环境配置:
在win11 x64系统上进行开发。基于python2.7搭建环境,由于python2.7是很老的python版本,故按照其下载文件夹中的.bat文件执行。下载后的python路径在C:\Python27\python.exe,在运行命令的时候需要加入前面的路径来执行。
其中有numpy,opencv,libh264decoder无法下载.
解决办法为:经过测试有效的,下载opencv for python2.7
bash
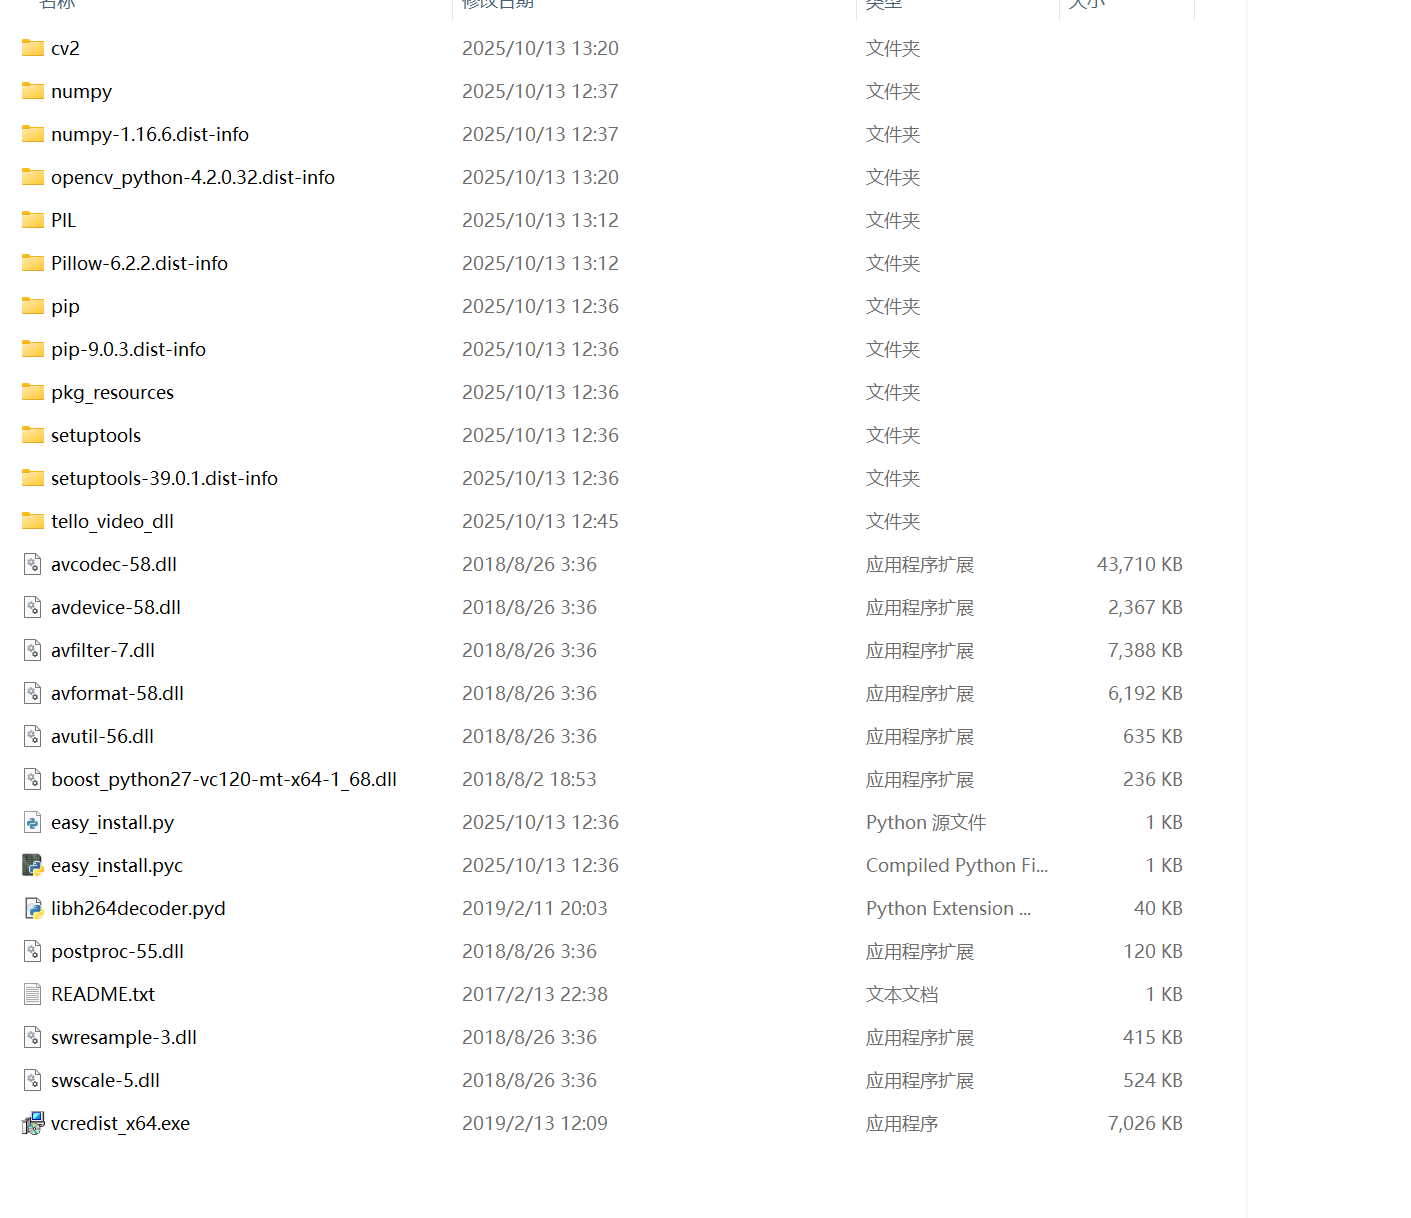
C:\Python27\python.exe -m pip install opencv-python==4.2.0.32此外关于libh264decoder解决办法是把官方链接中的tello_video_dll(For win64).zip中的全部文件都挨个放在文件夹C:\Python27\lib\site-packages文件夹下面,如下图所示:
而不是仅仅把libh264decoder.pyd文件放在该文件夹下,.pyd文件就相当于一个动态链接库.so文件,还需要dll文件来支持。
下载pose模型
OpenPose人体姿态识别项目是美国卡耐基梅隆大学(CMU)基于卷积神经网络和监督学习并以caffe为框架开发的开源库。可以实现人体动作、面部表情、手指运动等姿态估计。适用于单人和多人,具有极好的鲁棒性。是世界上首个基于深度学习的实时多人二维姿态估计应用,基于它的实例如雨后春笋般涌现。人体姿态估计技术在体育健身、动作采集、3D试衣、舆情监测等领域具有广阔的应用前景,人们更加熟悉的应用就是抖音尬舞机。
这里应当注意的是openpose实际上对于tello python要求下载的那个模型已经在官网上不保留了,需要自己去找资源。
在上面的链接中有下载资源。下载好后把pose_iter_160000放在model/pose/mpi中即可。
在原本的代码中要求同时读入proto file(规定了输入的神经网络的层数和每层的特点),还有读入caffemodel参数权重文件。
python
        # read the path of the trained model of the neural network for pose recognition
        self.protoFile = "model/pose/mpi/pose_deploy_linevec_faster_4_stages.prototxt"
        self.weightsFile = "model/pose/mpi/pose_iter_160000.caffemodel"

        # total number of the skeleton nodes
        self.nPoints = 15

        # read the neural network of the pose recognition
        self.net = cv2.dnn.readNetFromCaffe(self.protoFile, self.weightsFile)
搭载yolo3
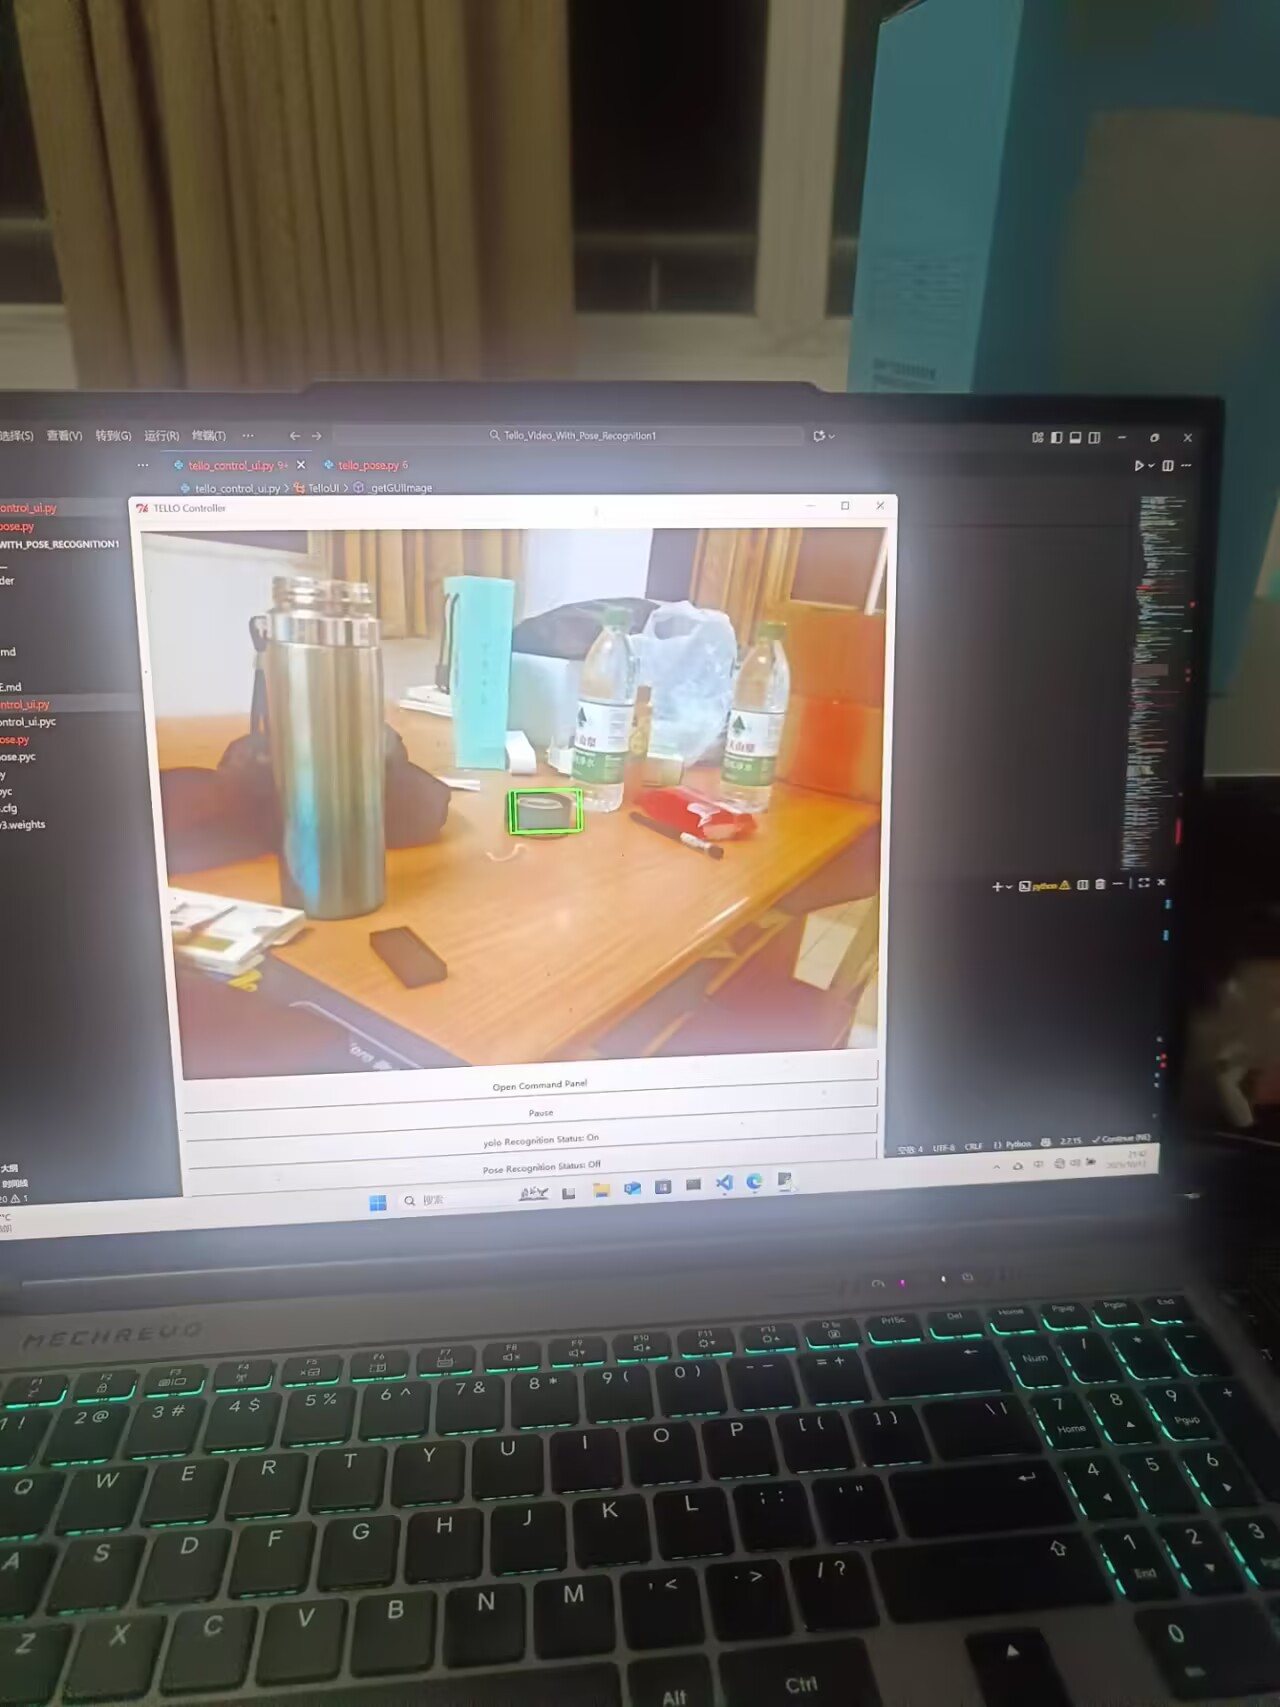
把简单版本的Yolo3搭载在py2.7环境中捕获输入视频中的物体并圈出来。整体流程是点击yolo按钮后开始识别,然后处理返回的x,y,h,w在图中画出来。
详细代码过程如下。首先是加载yolo3低版本模型的代码:
这里的逻辑是当用户按下tkinter的按钮后yolo_mode设置为True,随后加载yolo3模型的.cfg和.weights文件再获得detections.这里还隐藏了一个保存的功能,去掉taskSnapshot1的注释后可以进行保存。
python
                if self.yolo_mode:
                    image = self.frame
                    model = cv2.dnn.readNetFromDarknet('yolo3.cfg', 'yolov3.weights')
                    blob = cv2.dnn.blobFromImage(image, 1/255.0, (416, 416), (0, 0, 0), swapRB=True, crop=False)
                    model.setInput(blob)
                    detections = model.forward()
                    #print(type(detections))
                    for detection in detections:
                        x, y, w, h, confidence = detection[0:5]
                        if confidence > 0.05:
                            height,width=image.shape[:2]
                            height=int(height)
                            width=int(width)
                            print("width=",width)
                            print("height=",height)
                            cv2.rectangle(image, (int(width * (x - w/2)), int(height * (y - h/2))), (int(width * (x + w/2)), int(height * (y + h/2))), (0, 255, 0), 2)
                            #takeSnapshot1(image)
                            					           print("x=",x,"y=",y,"w=",w,"h=",h,"confidence=",confidence)
                    self.detections=detections
下面是得到yolo返回的检测结果包含框的中心坐标x,y和宽度w,高度h,随后在打开的frame中用cv2.rectangle在图中画出框。此处应该注意返回的x,y,w,h都是归一化后的,应当乘以图像的w和h去反向归一化。
python
            if self.yolo_mode:
                height,width=frame.shape[:2]
                height=int(height)
                width=int(width)

                for detection in self.detections:
                    x, y, w, h, confidence = detection[0:5]
                    #print("confidence=",confidence)
                    if confidence > 0.05:
                        cv2.rectangle(frame, (int(width * (x - w/2)), int(height * (y - h/2))), (int(width * (x + w/2)), int(height * (y + h/2))), (0, 255, 0), 2)
                        #print("x=",x,"y=",y,"w=",w,"h=",h)
                        #print("height=",height,"width=",width)
备注:下载Yolo3模型权重链接为:
YOLOv3模型文件下载:YOLOv3 模型文件下载本仓库提供了YOLOv3模型的核心文件,包括`coco.names`、`yolov3.cfg`和`yolov3.weights` - GitCode
完整代码工程文件在github:
nanfangxiansheng/tello_edu_add_test: 在大疆原有的tello edu库基础上配置环境并适当改进使其支持在py2.7下用opencv加载Yolov3模型进行目标检测