| 系统 | shell |
|---|---|
| windows | cmd、PowerShell 、gitbash |
| mac&linux | Bourne Shell(sh)、Bourne Again Shell(bash)、C Shell(csh)、Z Shell(zsh)... |
cmd 、PowerShell、Terminal 区别
| 类型 | 说明 |
|---|---|
| cmd | 命令执行窗口 |
| PowerShell | 微软公司开发的任务自动化和配置管理框架。可以理解为 cmd 的升级版,或者说是其超集,类似 Linux 系统的 bash 一样,都是基于壳程序 shell |
| Terminal | 面向Windows10的新命令行程序,Terminal 集成了 Windows 上的 PowerShell、cmd、Windows Linux子系统(WSL)三大环境 |
bash
#查看默认shell   环境变量 { $SHELL: /bin/bash }
echo $SHELL
# 查看所有shell
cat /etc/shells
# 切换shell (bash)
$SHELL # or /bin/bash
#------------------------
# 切换 zsh
/bin/zsh
ubuntu
bash
# 使用ifconfig
sudo apt install net-tools

# 更新软件源
sudo apt update && sudo apt upgrade -y
# 安装 zsh git curl
sudo apt install zsh git curl -y
# 安装python3
sudo apt install python3
# 查看python3 版本
python3 -V
# 安装python3-pip
sudo apt install python3-pip
# 查看pip3 版本
pip3 -V
配置国内镜像源
tsinghua
bash
# 切换根目录并查看目录
cd / && ll
# 找到mnt(你windows上的磁盘磁盘位置),切换到d盘
cd /mnt/d
# 创建目录
mkdir python-test
scrapy
scrapy开源网络爬虫框架(快速、简单且可扩展)
简单来说:数据、网页爬取

配置环境变量
bash
# /home/janis/.local/bin
# ubuntu 永久配置 【执行执行过chsh -s /bin/zsh,记得切换bash,命令行输入bash即可】
vim ~/.bashrc
# 最后一行输入 export PATH=$PATH:/home/janis/.local/bin
# 文件生效
source ~/.bashrc
# 验证 scrapy 命令是否可用
which scrapy
# 临时变量,命令行运行
export PATH=$PATH:/home/janis/.local/bin
google browser插件
XPath Helper
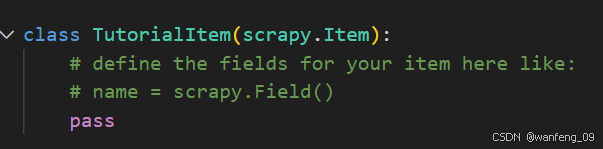
items.py
数据建模,提前规定好需要爬取的数据字段
示例
pipelines.py
不同的管道可以处理不同的爬虫数据,同一个管道也可以处理不同的爬虫数据,通过spider.name属性来区分。
-
使用管道需要在settings.py中配置
-
权重值小的优先执行,数值不建议大于1000
-
process_item方法是必须存在,且需要return出去
-
爬虫和数据库交互常用的方法:open_spider(spider)、close_spider(spider)
在爬虫开启的时候建立与数据库的连接,关闭时断开和数据库的连接
open_spider(spider):爬虫开启执行一次
close_spider(spider):爬虫关闭执行一次

中间件(middlewares.py)
下载中间件:header/cookie/代理ip(请求定制化) (长写,集成Selenium)
爬虫中间件
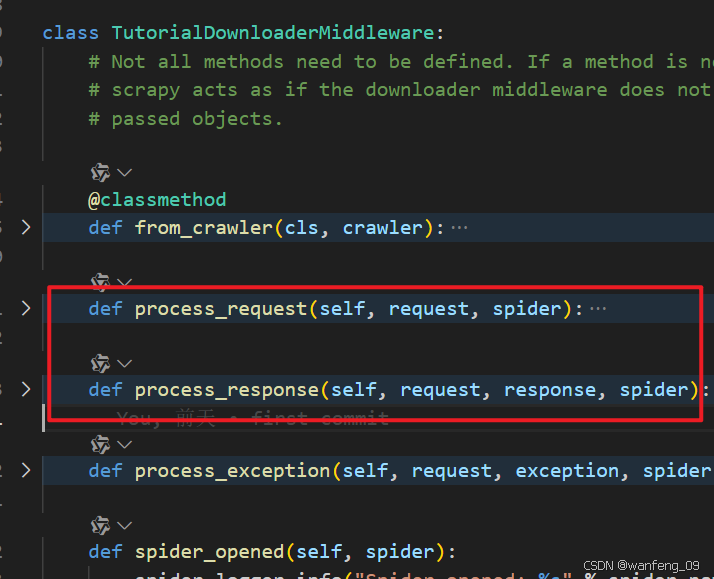
下载中间件
重写处理请求或响应方法
一般重写process_request 、process_response
process_request
 - 返回数据类型必须是None、request、response
- 当每个request通过下载中间件时,该方法被调用| 返回值 | 说明 |
|---|---|
| None | 无return,默认,该request对象传递给下载器,或通过引擎传递给其他权重低的process_request 方法 |
| request | 把 request对象通过引擎交给调度器,不再通过其他权重低的 process_request 方法 |
| response | 不在请求,把 response 返回给引擎 |
process_response
-
返回数据类型必须是request、response
-
当下载器完成http请求,传递响应给引擎的时候调用
| 返回值 | 说明 |
|---|---|
| request | 通过引擎交给调度器继续请求,不再通过其他权重低的 process_request 方法 |
| response | 通过引擎传递给其他权重低的process_response方法 |
示例代码
settings.py
开启中间件/管道、redis配置、自定义配置(PROXY_LIST、USER_AGENT_LIST)等
常见问题
爬取请求报403报错:一般配置user-agent即可解决,难一点的可能需要配置cookie/代理ip地址。
Selenium
Selenium网页自动化执行
scrapy搭配使用:针对js动态加载数据展示页面进行数据爬取
一般源代码都有所需数据,能不集成就不集成,毕竟Selenium会耗费爬虫时间
bash
pip3 install -U seleniumubuntu
bash
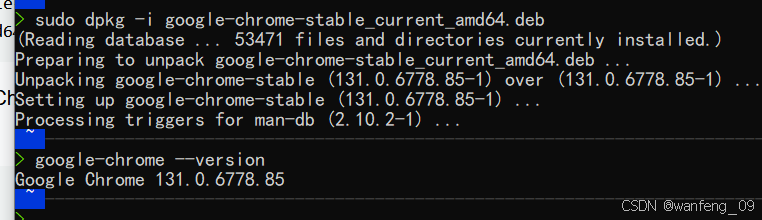
wget https://dl.google.com/linux/direct/google-chrome-stable_current_amd64.deb
sudo dpkg -i google-chrome-stable_current_amd64.deb # 报错,提示缺少依赖

# 报错,提示缺少依赖(执行以下命令)
sudo apt install libvulkan1
sudo apt --fix-broken install
sudo dpkg -i google-chrome-stable_current_amd64.deb
安装成功
bash
# 安装 ChromeDriver
sudo -E pip3 install webdriver-manager
Logging
配置日志
_get_handler()方法
py
import scrapy
import logging
logger = logging.getLogger(__name__) # 自定义记录器,__name__ 当前爬虫路径(myTestLog.spiders.mydomain2)
if os.path.exists("example2.log"): os.remove("example2.log") # 解决mode='w'无法实现问题
handler = logging.FileHandler('example2.log',mode='a',encoding='utf-8') # 输出到文件(只输出手动输入的日志)
handler.setLevel(logging.WARNING)
logger.addHandler(handler)

class Mydomain2Spider(scrapy.Spider):
    name = "mydomain2"
    allowed_domains = ["docs.scrapy.org"]
    start_urls = ["https://docs.scrapy.org/"]

    def parse(self, response):
        logger.info(logger.level)
        logger.debug('This message should go to the log file---2')
        logger.info('So should this---2')
        logger.warning('And this, too---2')
        logger.error('And non-ASCII stuff, too, like Øresund and Malmö---2')