gitlab部署
在部署之前要确保环境为纯洁环境,内存尽量给多一些,需要满足cpu:2核 内存:8g (最低配置)
一、确保关闭防火墙selinux
powershell
[root@stw ~]# systemctl status firewalld.service
● firewalld.service - firewalld - dynamic firewall daemon
   Loaded: loaded (/usr/lib/systemd/system/firewalld.service; disabled; vendor preset: enabled)
   Active: inactive (dead)
     Docs: man:firewalld(1)
[root@stw ~]# getenforce
Disabled
二、安装网络源
powershell
[root@stw ~]# cd /etc/yum.repos.d/
[root@stw yum.repos.d]# ls
CentOS-Base.repo  CentOS-Debuginfo.repo  CentOS-Media.repo    CentOS-Vault.repo
CentOS-CR.repo    CentOS-fasttrack.repo  CentOS-Sources.repo
[root@stw yum.repos.d]# rm -rf *
[root@stw yum.repos.d]# ls
[root@stw yum.repos.d]# wget -O /etc/yum.repos.d/CentOS-Base.repo https://mirrors.aliyun.com/repo/Centos-7.repo
--2025-10-20 11:23:14--  https://mirrors.aliyun.com/repo/Centos-7.repo
Resolving mirrors.aliyun.com (mirrors.aliyun.com)... 117.92.155.20, 117.92.155.18, 175.4.63.211
Connecting to mirrors.aliyun.com (mirrors.aliyun.com)|117.92.155.20|:443... connected.
HTTP request sent, awaiting response... 200 OK
Length: 2523 (2.5K) [application/octet-stream]
Saving to: '/etc/yum.repos.d/CentOS-Base.repo'

100%[===============================================>] 2,523       --.-K/s   in 0s

2025-10-20 11:23:14 (1.58 GB/s) - '/etc/yum.repos.d/CentOS-Base.repo' saved [2523/2523]

[root@stw yum.repos.d]# ls
CentOS-Base.repo
[root@stw yum.repos.d]# yum -y install epel-release
三、安装git
powershell
[root@stw yum.repos.d]# yum -y install git四、安装依赖包
powershell
[root@stw ~]# yum -y install curl openssh-server openssh-clients postfix cronie perl五、启动postfix服务并设置开机自启
powershell
[root@stw ~]# systemctl restart postfix
[root@stw ~]# systemctl enable postfix
六、下载gitlab的rpm包
powershell
[root@stw ~]# cd /usr/src
[root@stw src]# ls
debug  kernels
[root@stw src]# rz -E
rz waiting to receive.
[root@stw src]# ls
debug  gitlab-ce-15.3.3-ce.0.el7.x86_64.rpm  kernels
七、安装gitlab,此时安装会发现需要一个依赖包 policycoreutils-python,确认此包存在(centos7可直接安装gitlab)
powershell
[root@stw src]# rpm -qa | grep policy
policycoreutils-2.5-29.el7.x86_64
checkpolicy-2.5-8.el7.x86_64
selinux-policy-targeted-3.13.1-229.el7.noarch
selinux-policy-3.13.1-229.el7.noarch
policycoreutils-python-2.5-29.el7.x86_64
[root@stw src]# rpm -ivh gitlab-ce-15.3.3-ce.0.el7.x86_64.rpm
warning: gitlab-ce-15.3.3-ce.0.el7.x86_64.rpm: Header V4 RSA/SHA1 Signature, key ID f27eab47: NOKEY
Preparing...                          ################################# [100%]
Updating / installing...
   1:gitlab-ce-15.3.3-ce.0.el7        ################################# [100%]
It looks like GitLab has not been configured yet; skipping the upgrade script.

       *.                  *.
      ***                 ***
     *****               *****
    .******             *******
    ********            ********
   ,,,,,,,,,***********,,,,,,,,,
  ,,,,,,,,,,,*********,,,,,,,,,,,
  .,,,,,,,,,,,*******,,,,,,,,,,,,
      ,,,,,,,,,*****,,,,,,,,,.
         ,,,,,,,****,,,,,,
            .,,,***,,,,
                ,*,.


     _______ __  __          __
    / ____(_) /_/ /   ____ _/ /_
   / / __/ / __/ /   / __ `/ __ \
  / /_/ / / /_/ /___/ /_/ / /_/ /
  \____/_/\__/_____/\__,_/_.___/


Thank you for installing GitLab!
GitLab was unable to detect a valid hostname for your instance.
Please configure a URL for your GitLab instance by setting `external_url`
configuration in /etc/gitlab/gitlab.rb file.
Then, you can start your GitLab instance by running the following command:
  sudo gitlab-ctl reconfigure

For a comprehensive list of configuration options please see the Omnibus GitLab readme
https://gitlab.com/gitlab-org/omnibus-gitlab/blob/master/README.md

Help us improve the installation experience, let us know how we did with a 1 minute survey:
https://gitlab.fra1.qualtrics.com/jfe/form/SV_6kVqZANThUQ1bZb?installation=omnibus&release=15-3
八、修改配置文件
powershell
[root@stw ~]# vim /etc/gitlab/gitlab.rb
......
external_url 'http://192.168.100.10'  //将此处设为gitlab的服务器ip地址
......
九、重载配置文件并重启gitlab
powershell
[root@stw ~]# gitlab-ctl reconfigure
[root@stw ~]# gitlab-ctl restart
ok: run: alertmanager: (pid 13622) 0s
ok: run: gitaly: (pid 13635) 0s
ok: run: gitlab-exporter: (pid 13656) 0s
ok: run: gitlab-kas: (pid 13658) 0s
ok: run: gitlab-workhorse: (pid 13668) 0s
ok: run: logrotate: (pid 13679) 1s
ok: run: nginx: (pid 13685) 0s
ok: run: node-exporter: (pid 13693) 1s
ok: run: postgres-exporter: (pid 13700) 0s
ok: run: postgresql: (pid 13713) 1s
ok: run: prometheus: (pid 13722) 0s
ok: run: puma: (pid 13734) 0s
ok: run: redis: (pid 13739) 0s
ok: run: redis-exporter: (pid 13745) 1s
ok: run: sidekiq: (pid 13759) 0s
十、查看当前的gitlab版本
powershell
[root@stw ~]# head -1 /opt/gitlab/version-manifest.txt
gitlab-ce 15.3.3
十一、破解管理员密码(redhat123!)
powershell
[root@stw ~]# gitlab-rails console -e production
--------------------------------------------------------------------------------
 Ruby:         ruby 2.7.5p203 (2021-11-24 revision f69aeb8314) [x86_64-linux]
 GitLab:       15.3.3 (c629a47f87f) FOSS
 GitLab Shell: 14.10.0
 PostgreSQL:   13.6
------------------------------------------------------------[ booted in 53.13s ]
Loading production environment (Rails 6.1.6.1)
irb(main):001:0> user = User.where(id:1).first
=> #<User id:1 @root>
irb(main):002:0> user.password = 'redhat123!'
=> "redhat123!"
irb(main):003:0> user.password_confirmation = 'redhat123!'
=> "redhat123!"
irb(main):004:0> user.save!
=> true
irb(main):005:0> exit
十二、gitlab管理
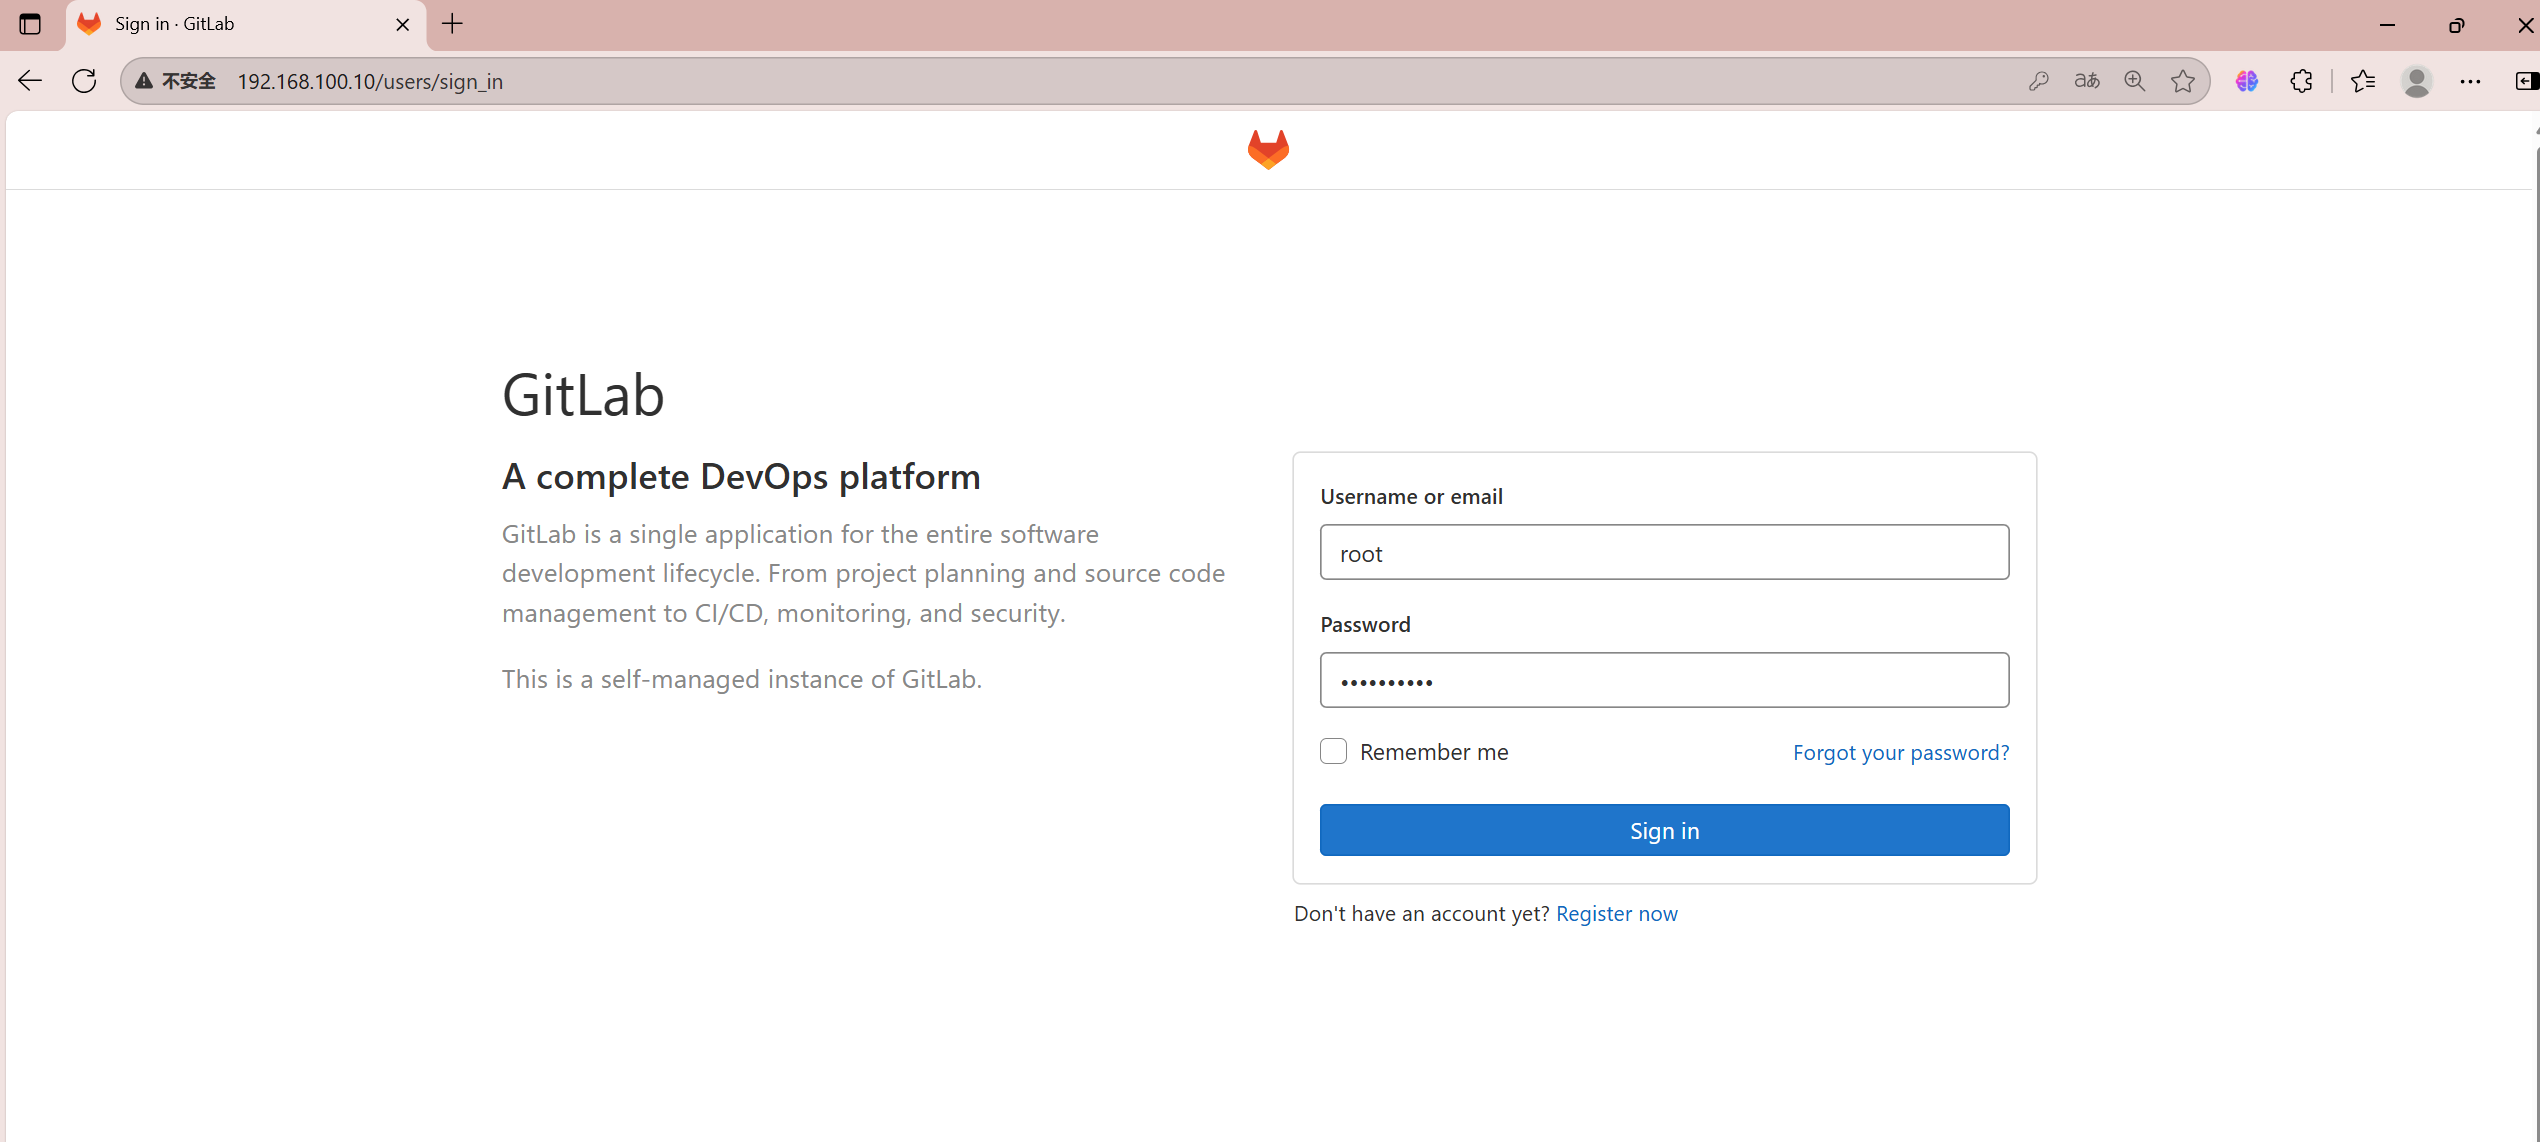
在浏览器中使用gitlab服务器的IP访问,192.168.100.10
用户名为root,默认管理员为root,刚刚设置的密码" redhat123! "
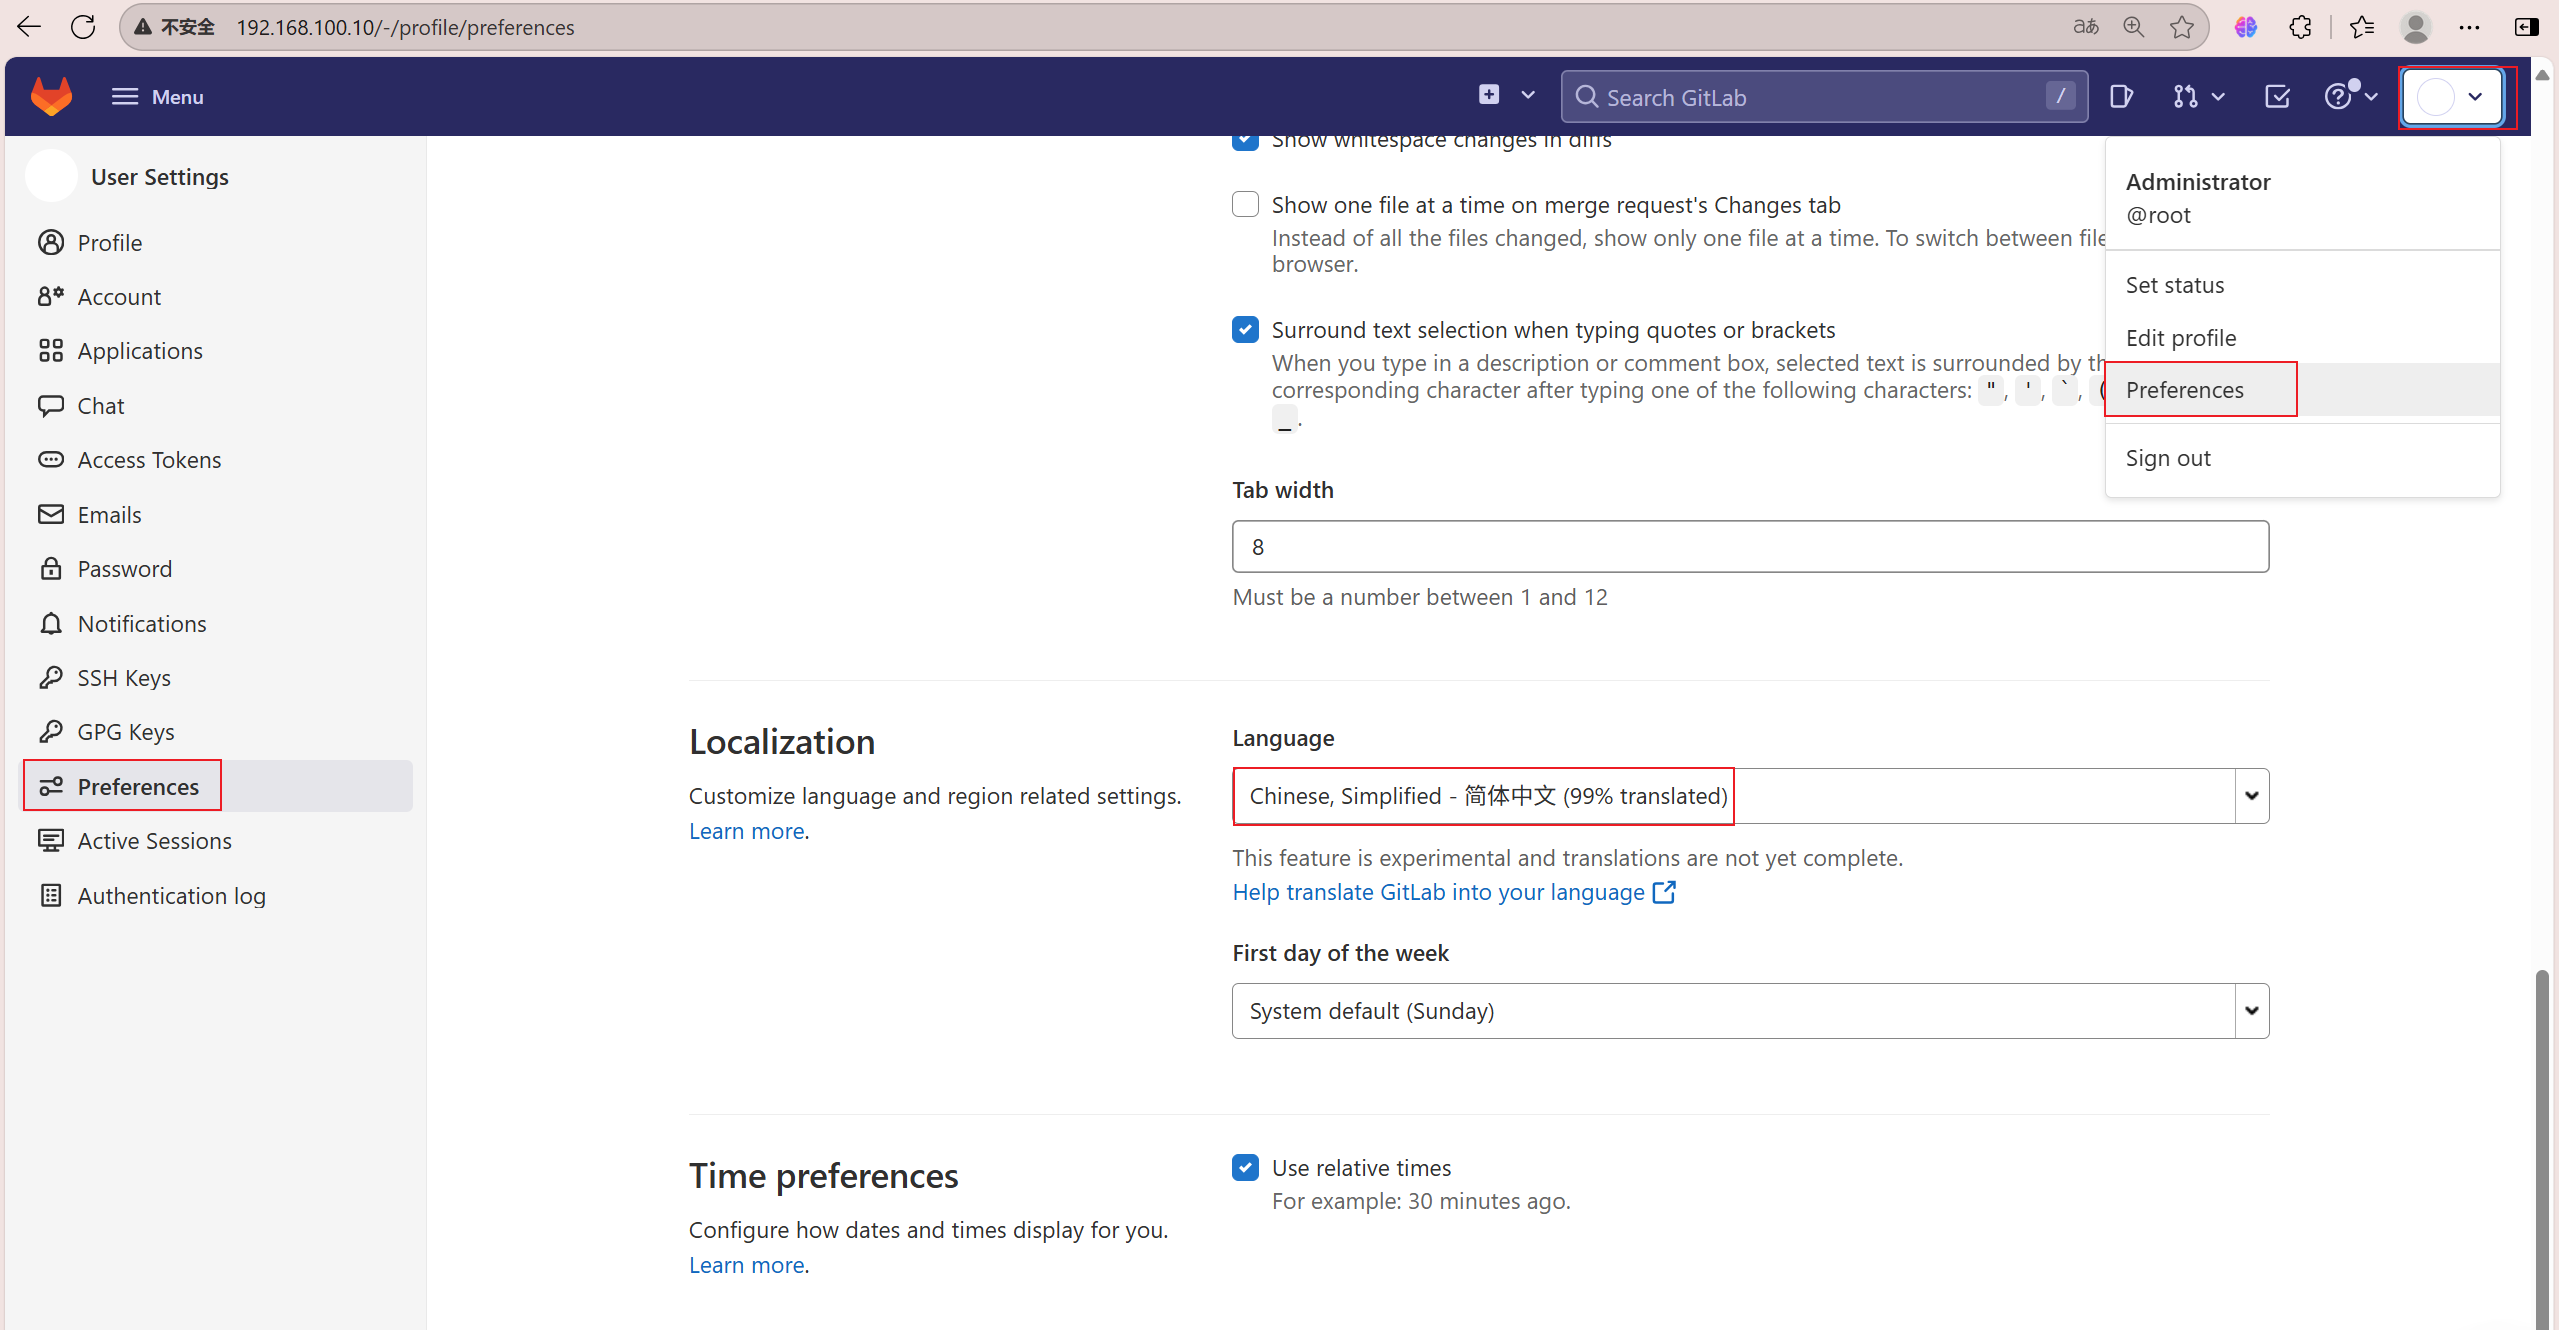
十三、汉化
用户旁边下拉箭头---preferences---localization---language--选择简体中文--保存更改
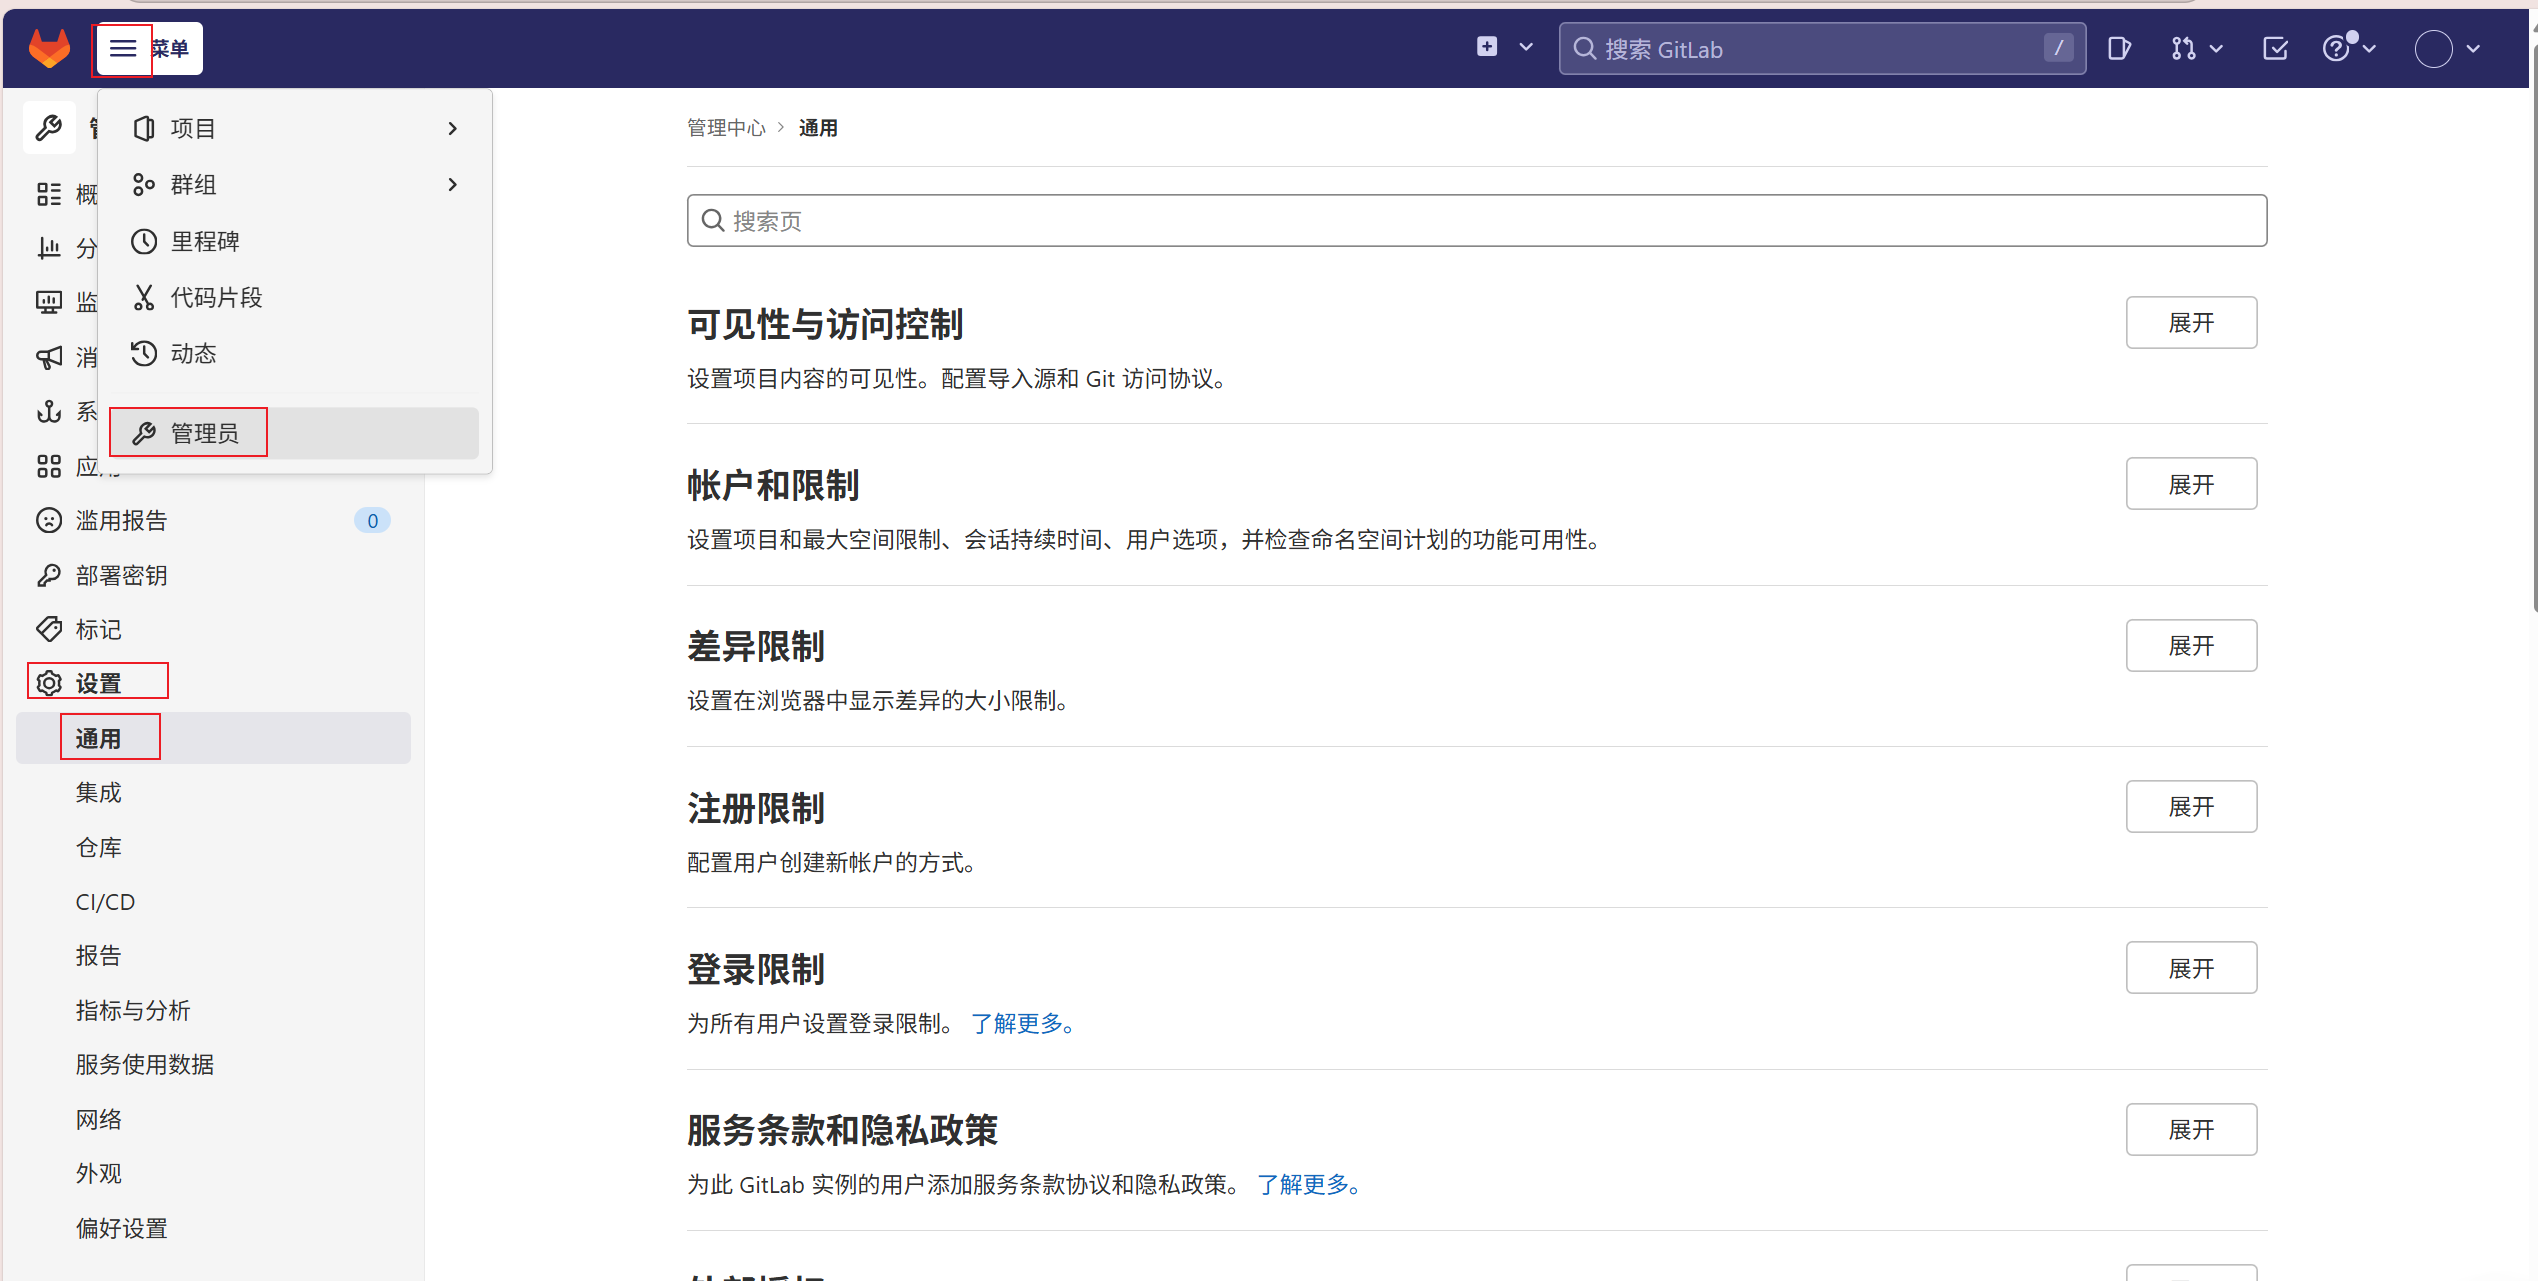
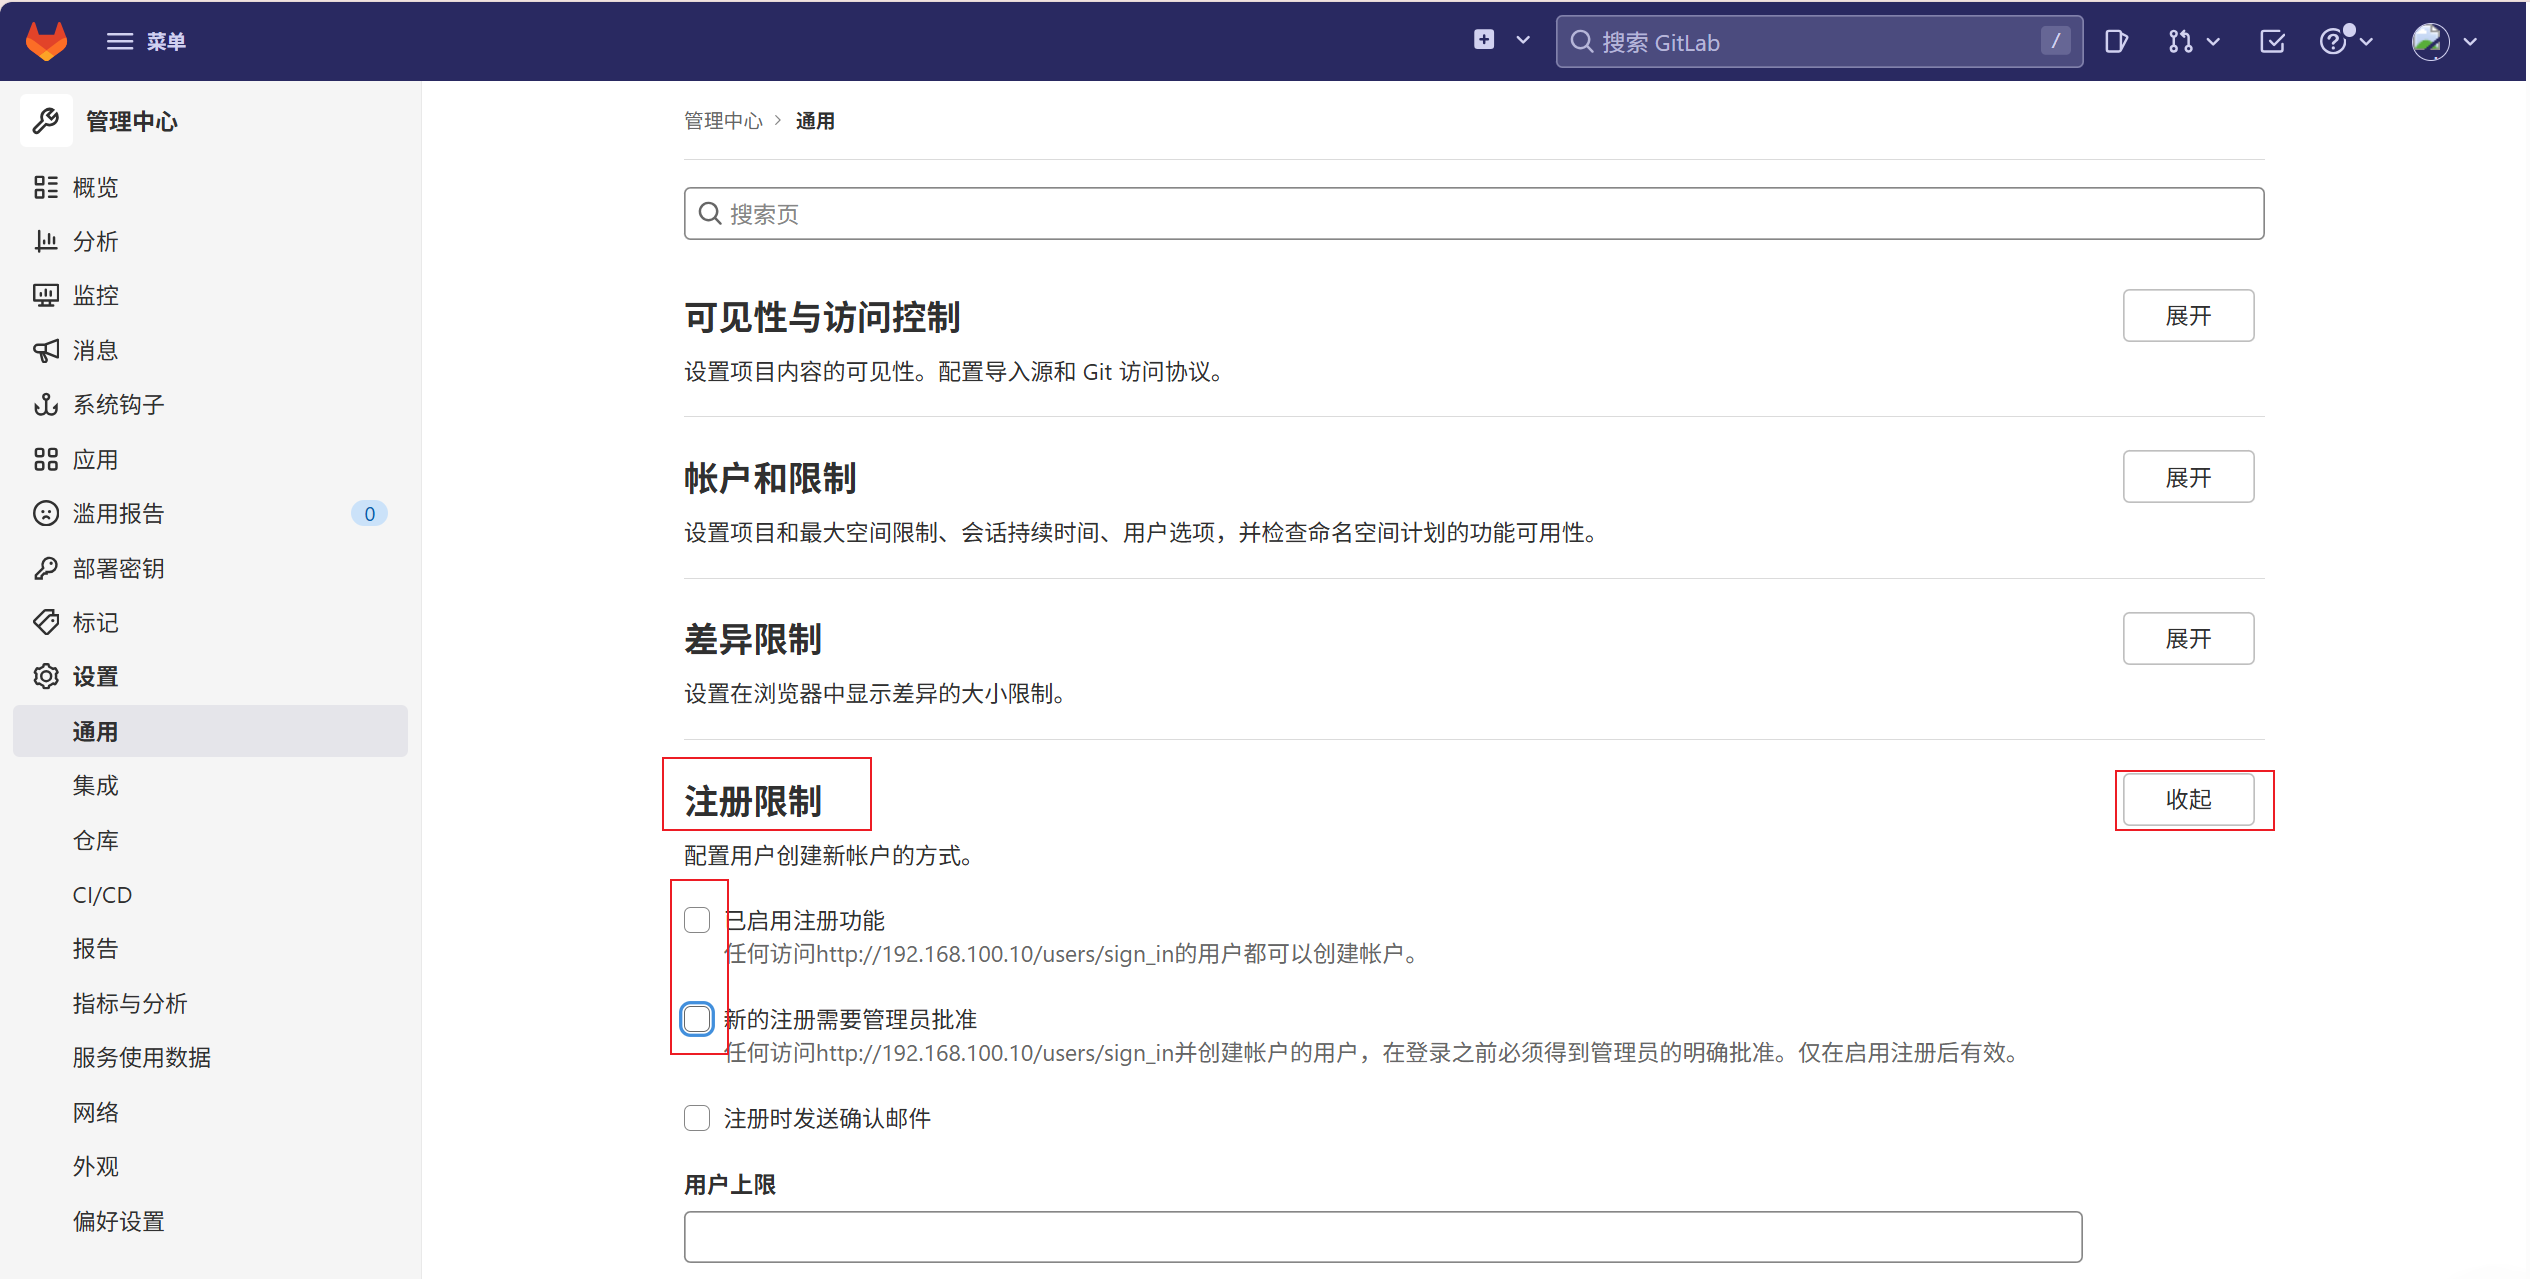
十四、关闭注册功能
由于我们gitlab是私有仓库,一般用户都是由管理员创建和分派的,所以我们需要关闭注册管理员---设置--通用--注册限制---把已启用注册功能的勾去掉--保存更改
十五、gitlab常用管理操作
项目管理(通常只是创建新项目)
创建成员组(针对某个项目创建一个成员组)
用户管理(此用户乃gitlab用户而非系统用户)
来了新员工,为其添加gitlab用户
员工离职,将其gitlab用户禁用或者删除
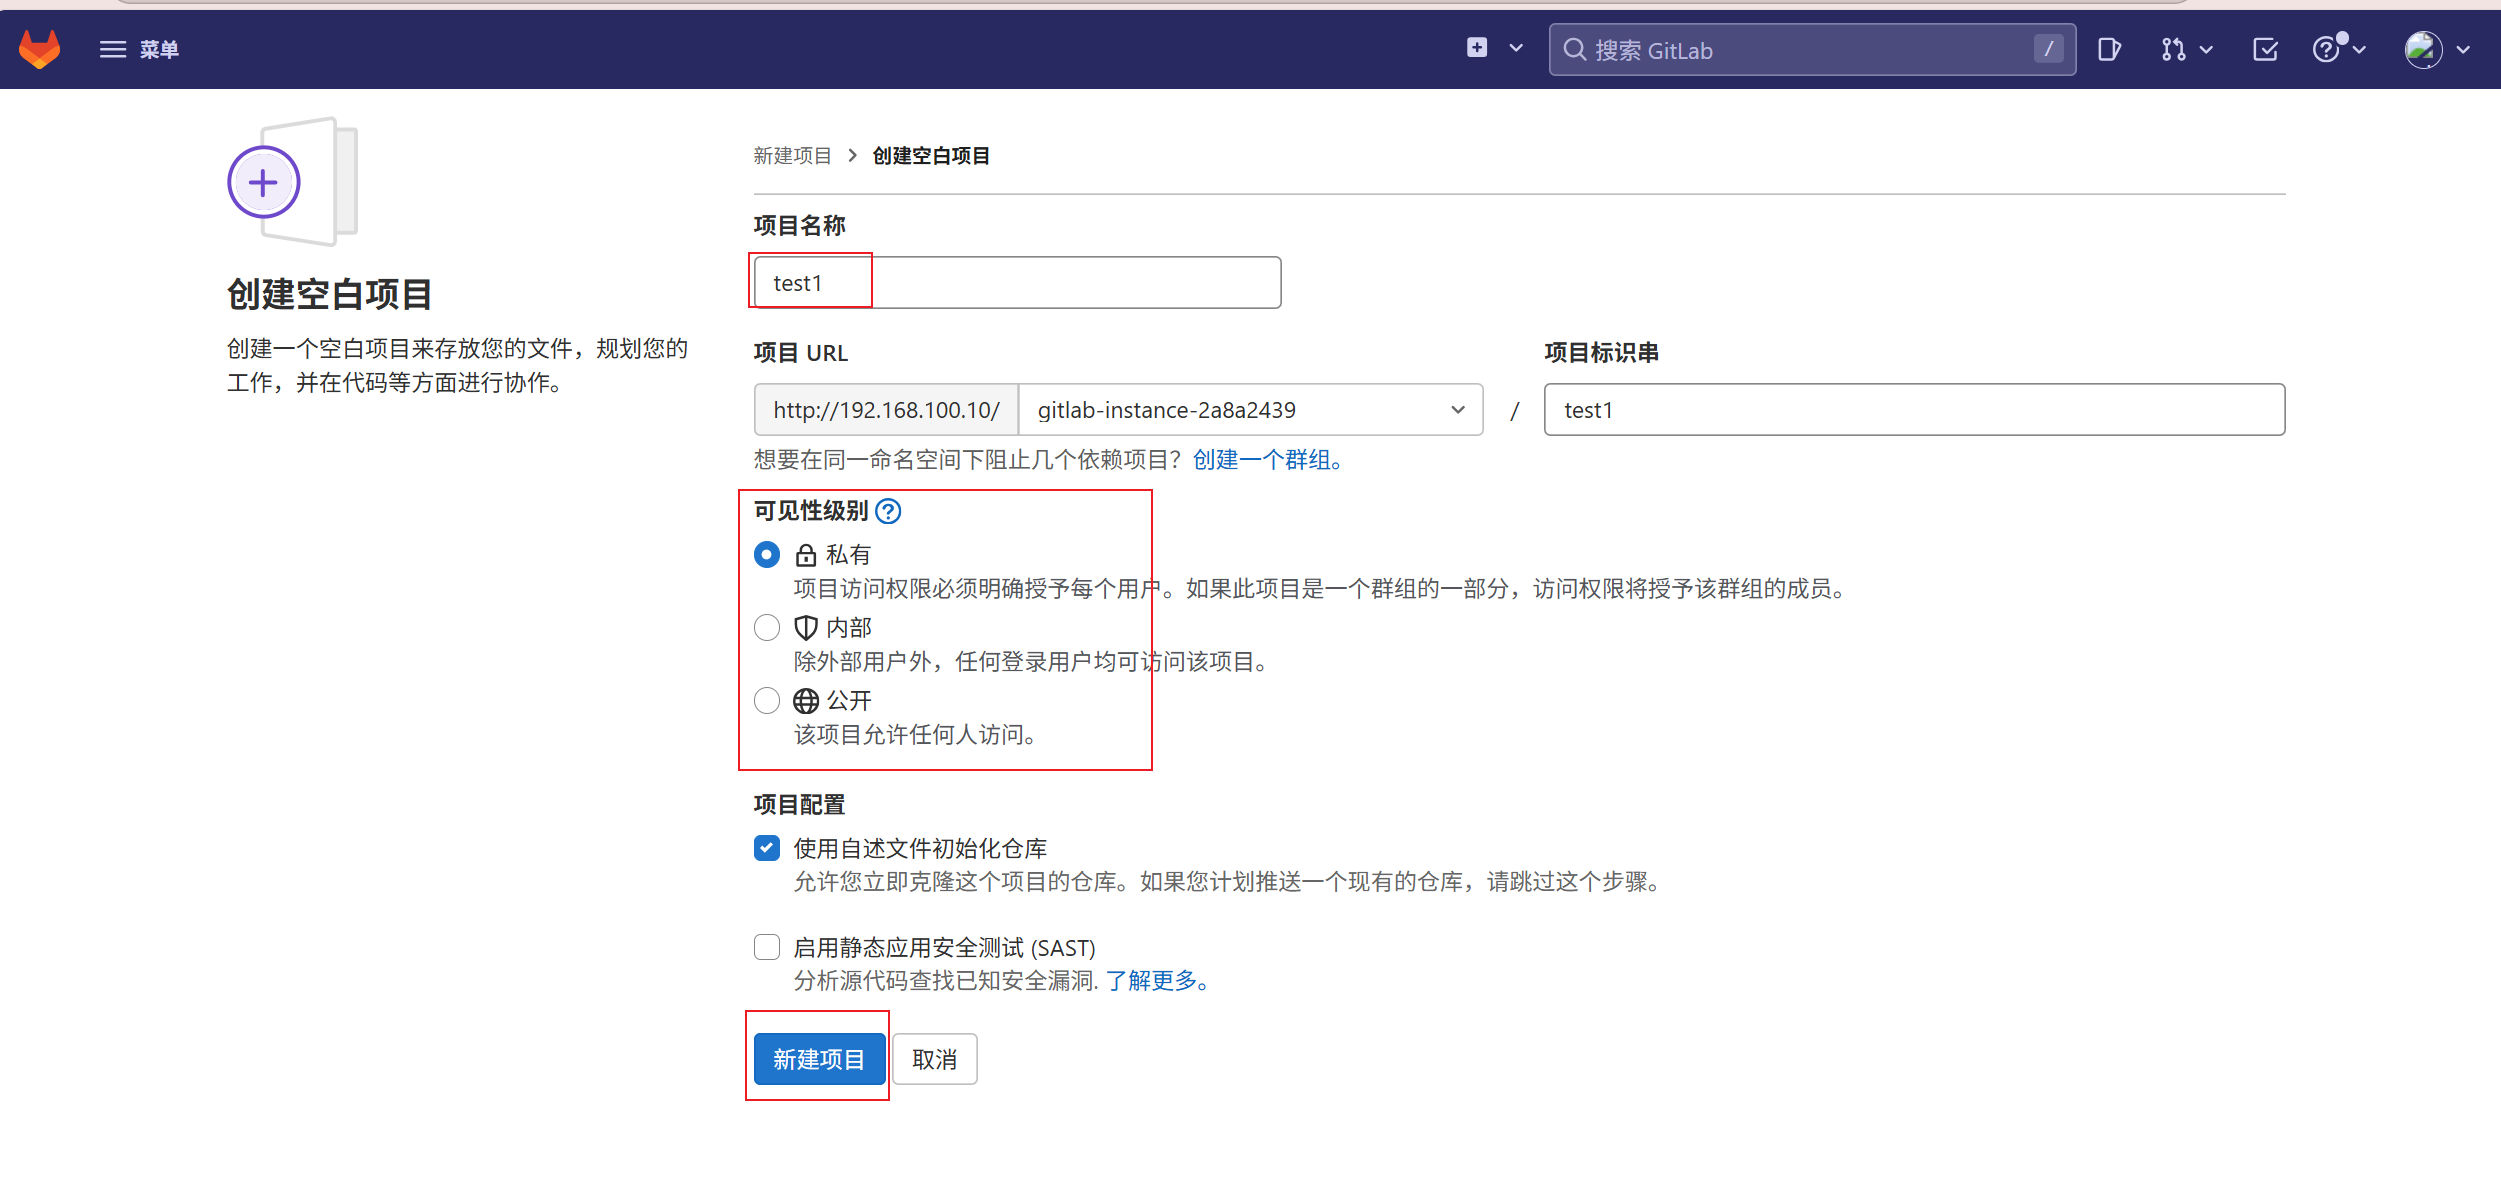
1、创建项目
管理员------>仪表板------>新建项目------>创建空白项目
添加ssh密钥信息(使克隆时不需要验证)
powershell
[root@stw ~]# ssh-keygen
Generating public/private rsa key pair.
Enter file in which to save the key (/root/.ssh/id_rsa):
Created directory '/root/.ssh'.
Enter passphrase (empty for no passphrase):
Enter same passphrase again:
Your identification has been saved in /root/.ssh/id_rsa.
Your public key has been saved in /root/.ssh/id_rsa.pub.
The key fingerprint is:
SHA256:4LyUpRmh9M14fAzzyhYIR6gH4l6hQBIoo6AF4s3Fs7Q root@stw.example.com
The key's randomart image is:
+---[RSA 2048]----+
|B+  +++ o        |
|@ =ooO B =       |
|B=.=+ X B +      |
|oo...E X +       |
|. ..  B S        |
| .   . o         |
|      .          |
|                 |
|                 |
+----[SHA256]-----+
[root@stw ~]# cd ~/.ssh
[root@stw .ssh]# ls
id_rsa  id_rsa.pub
[root@stw .ssh]# cat id_rsa.pub
ssh-rsa AAAAB3NzaC1yc2EAAAADAQABAAABAQCs2jRflt58ykbJA6mz4OcZVk+uDpf7QON93Ogm0IPx9jL24WMdHmw0eVG80AvQz6zhjmtrqHlr2Dc/0XPudiMvJK75u+jiyEF3A67JgXzE3Sb2E+pJrLWCc8/GJDLE0eo8d7R6Lb6Gt9vIfXr6XM95NqwYGIdJXtW2aGh2sGEPF93hWsij3bIHaj0q/Ne/L3FfwhppXRzEkPmYZxi06+tQY0g/RyPtVR2eC6RiWU9K0m8K5r6tgGxFoQ+291gtqaHBMegLUx0O+RoIXNP9d6MfNrvDwrNbJdDH+pm130m/8xMYuGHWXXZdvhNY363Xfd2yTQzlvAGnk826g1EZM5WJ root@stw.example.com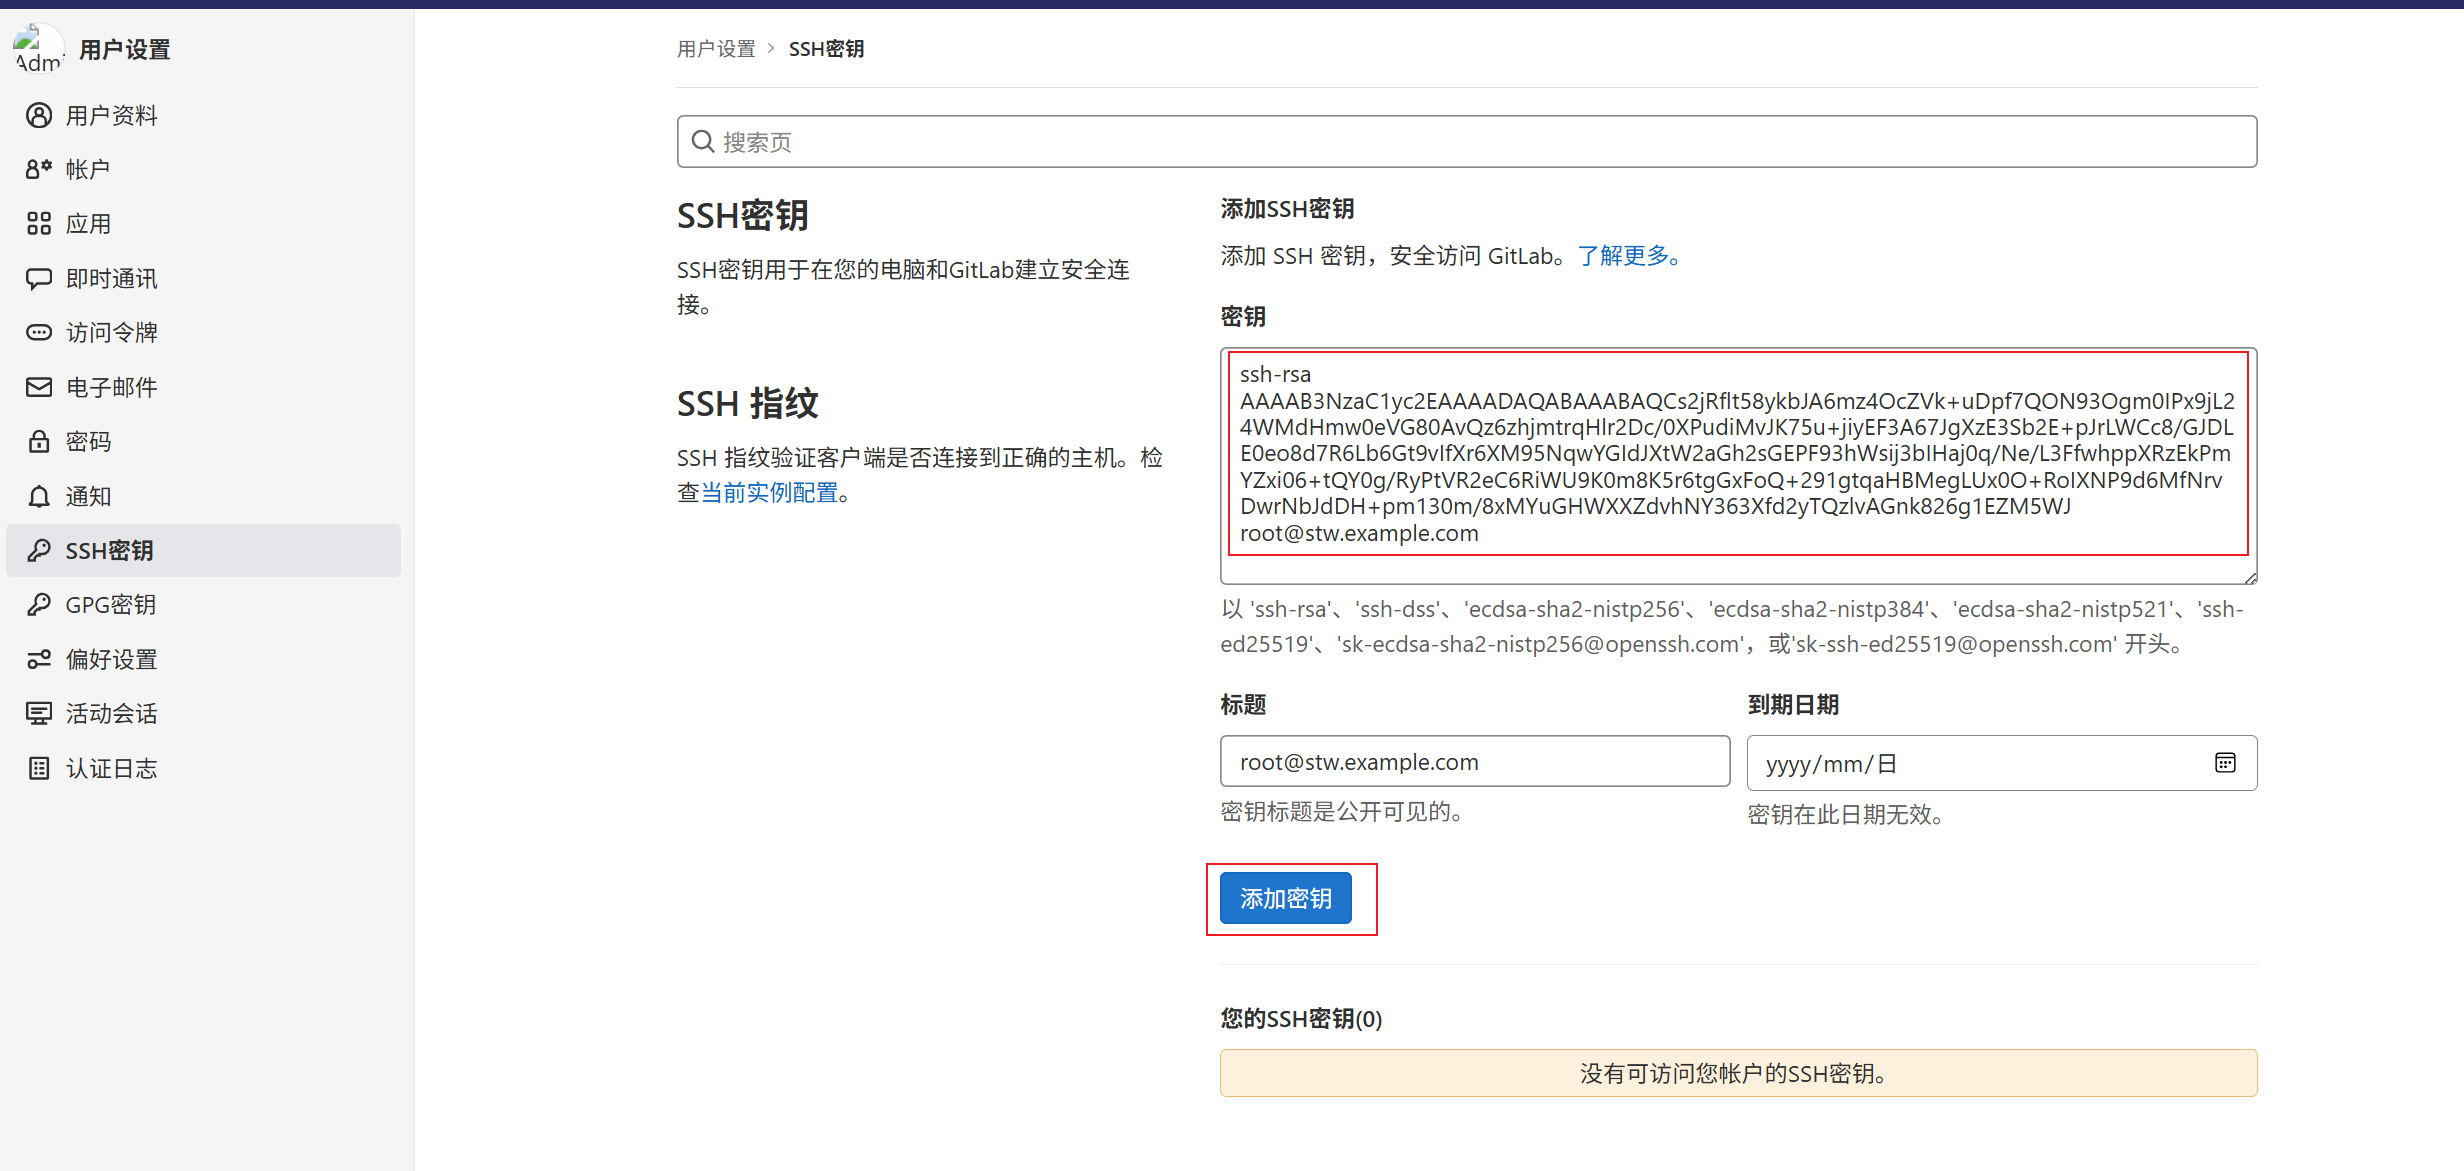
2、在Linux中使用git clone git@192.168.100.10:gitlab-instance-5dba1a04/linux.git 克隆到本地
回到刚刚创建的项目进行克隆(这里选择了ssh进行克隆)
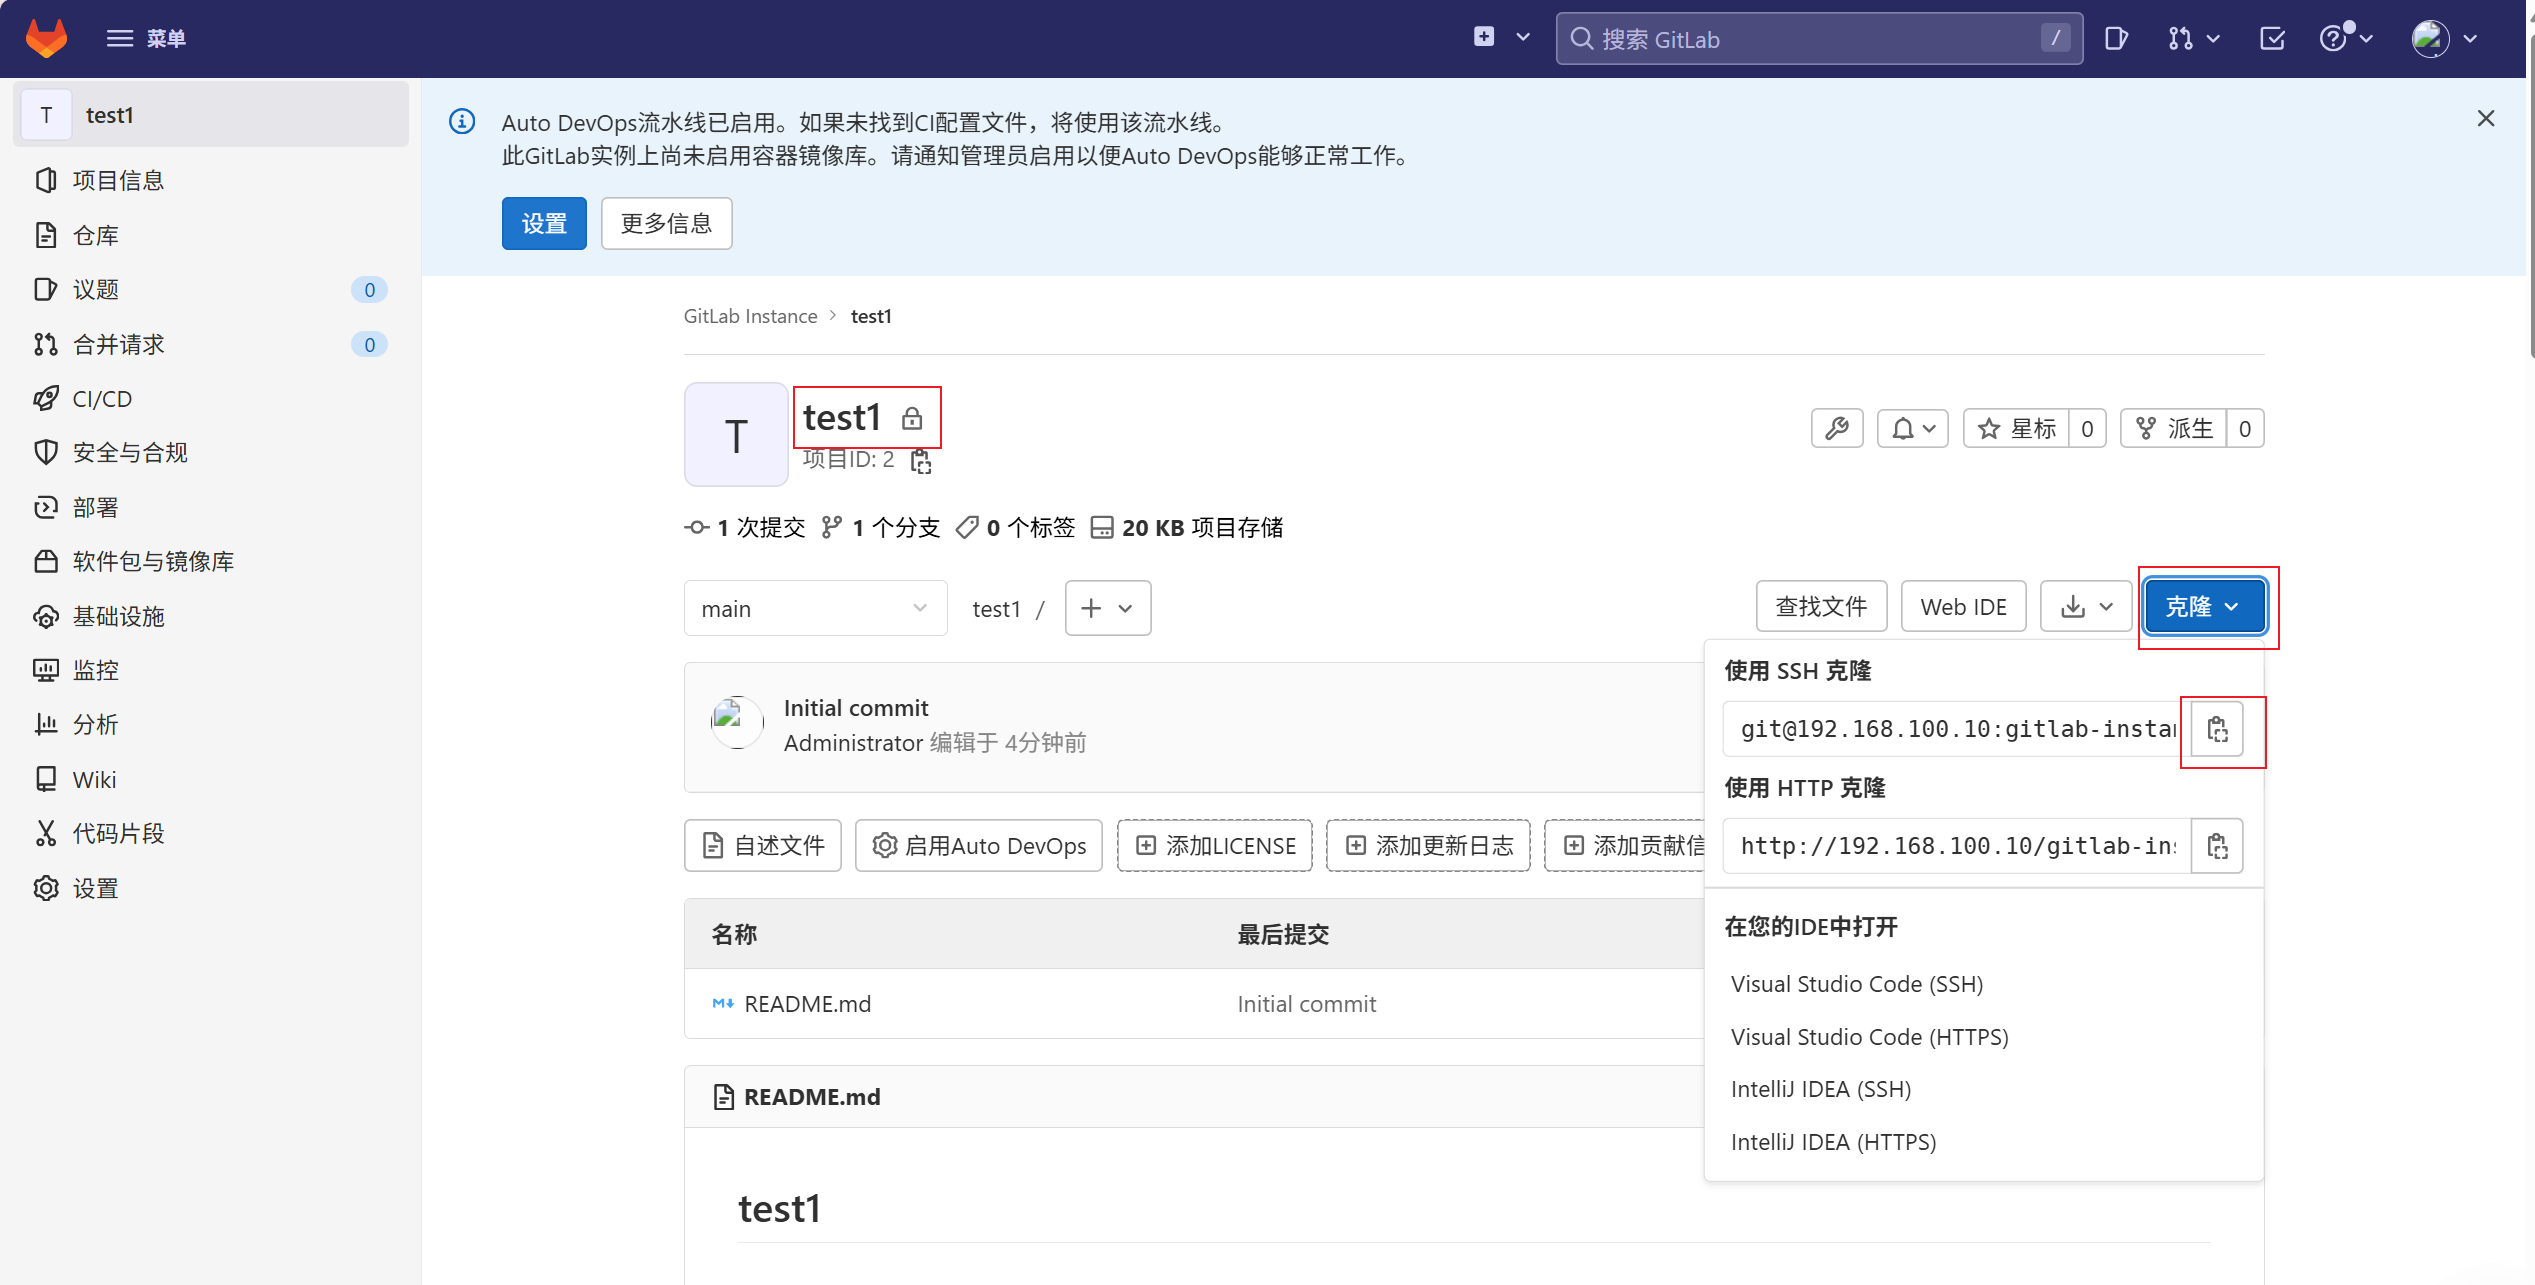
将项目添加到本地(服务器虚拟机)
powershell
[root@stw ~]# git clone git@192.168.100.10:gitlab-instance-2a8a2439/test1.git
Cloning into 'test1'...
The authenticity of host '192.168.100.10 (192.168.100.10)' can't be established.
ECDSA key fingerprint is SHA256:R7/1dpul7cu8SnefsN2wQw5hKDL+xekk0ffasLS6OGI.
ECDSA key fingerprint is MD5:81:88:a1:16:52:83:c0:d5:59:ad:2b:3a:d5:52:02:bc.
Are you sure you want to continue connecting (yes/no)? yes
Warning: Permanently added '192.168.100.10' (ECDSA) to the list of known hosts.
remote: Enumerating objects: 3, done.
remote: Counting objects: 100% (3/3), done.
remote: Compressing objects: 100% (2/2), done.
remote: Total 3 (delta 0), reused 0 (delta 0), pack-reused 0
Receiving objects: 100% (3/3), done.
[root@stw ~]# ls
anaconda-ks.cfg  Documents  initial-setup-ks.cfg  Pictures  Templates  Videos
Desktop          Downloads  Music                 Public    test1
3、配置邮件账户和账户
powershell
[root@stw test1]# git config --global user.email "root@example.com"
[root@stw test1]# git config --global user.name "root"
4、测试验证
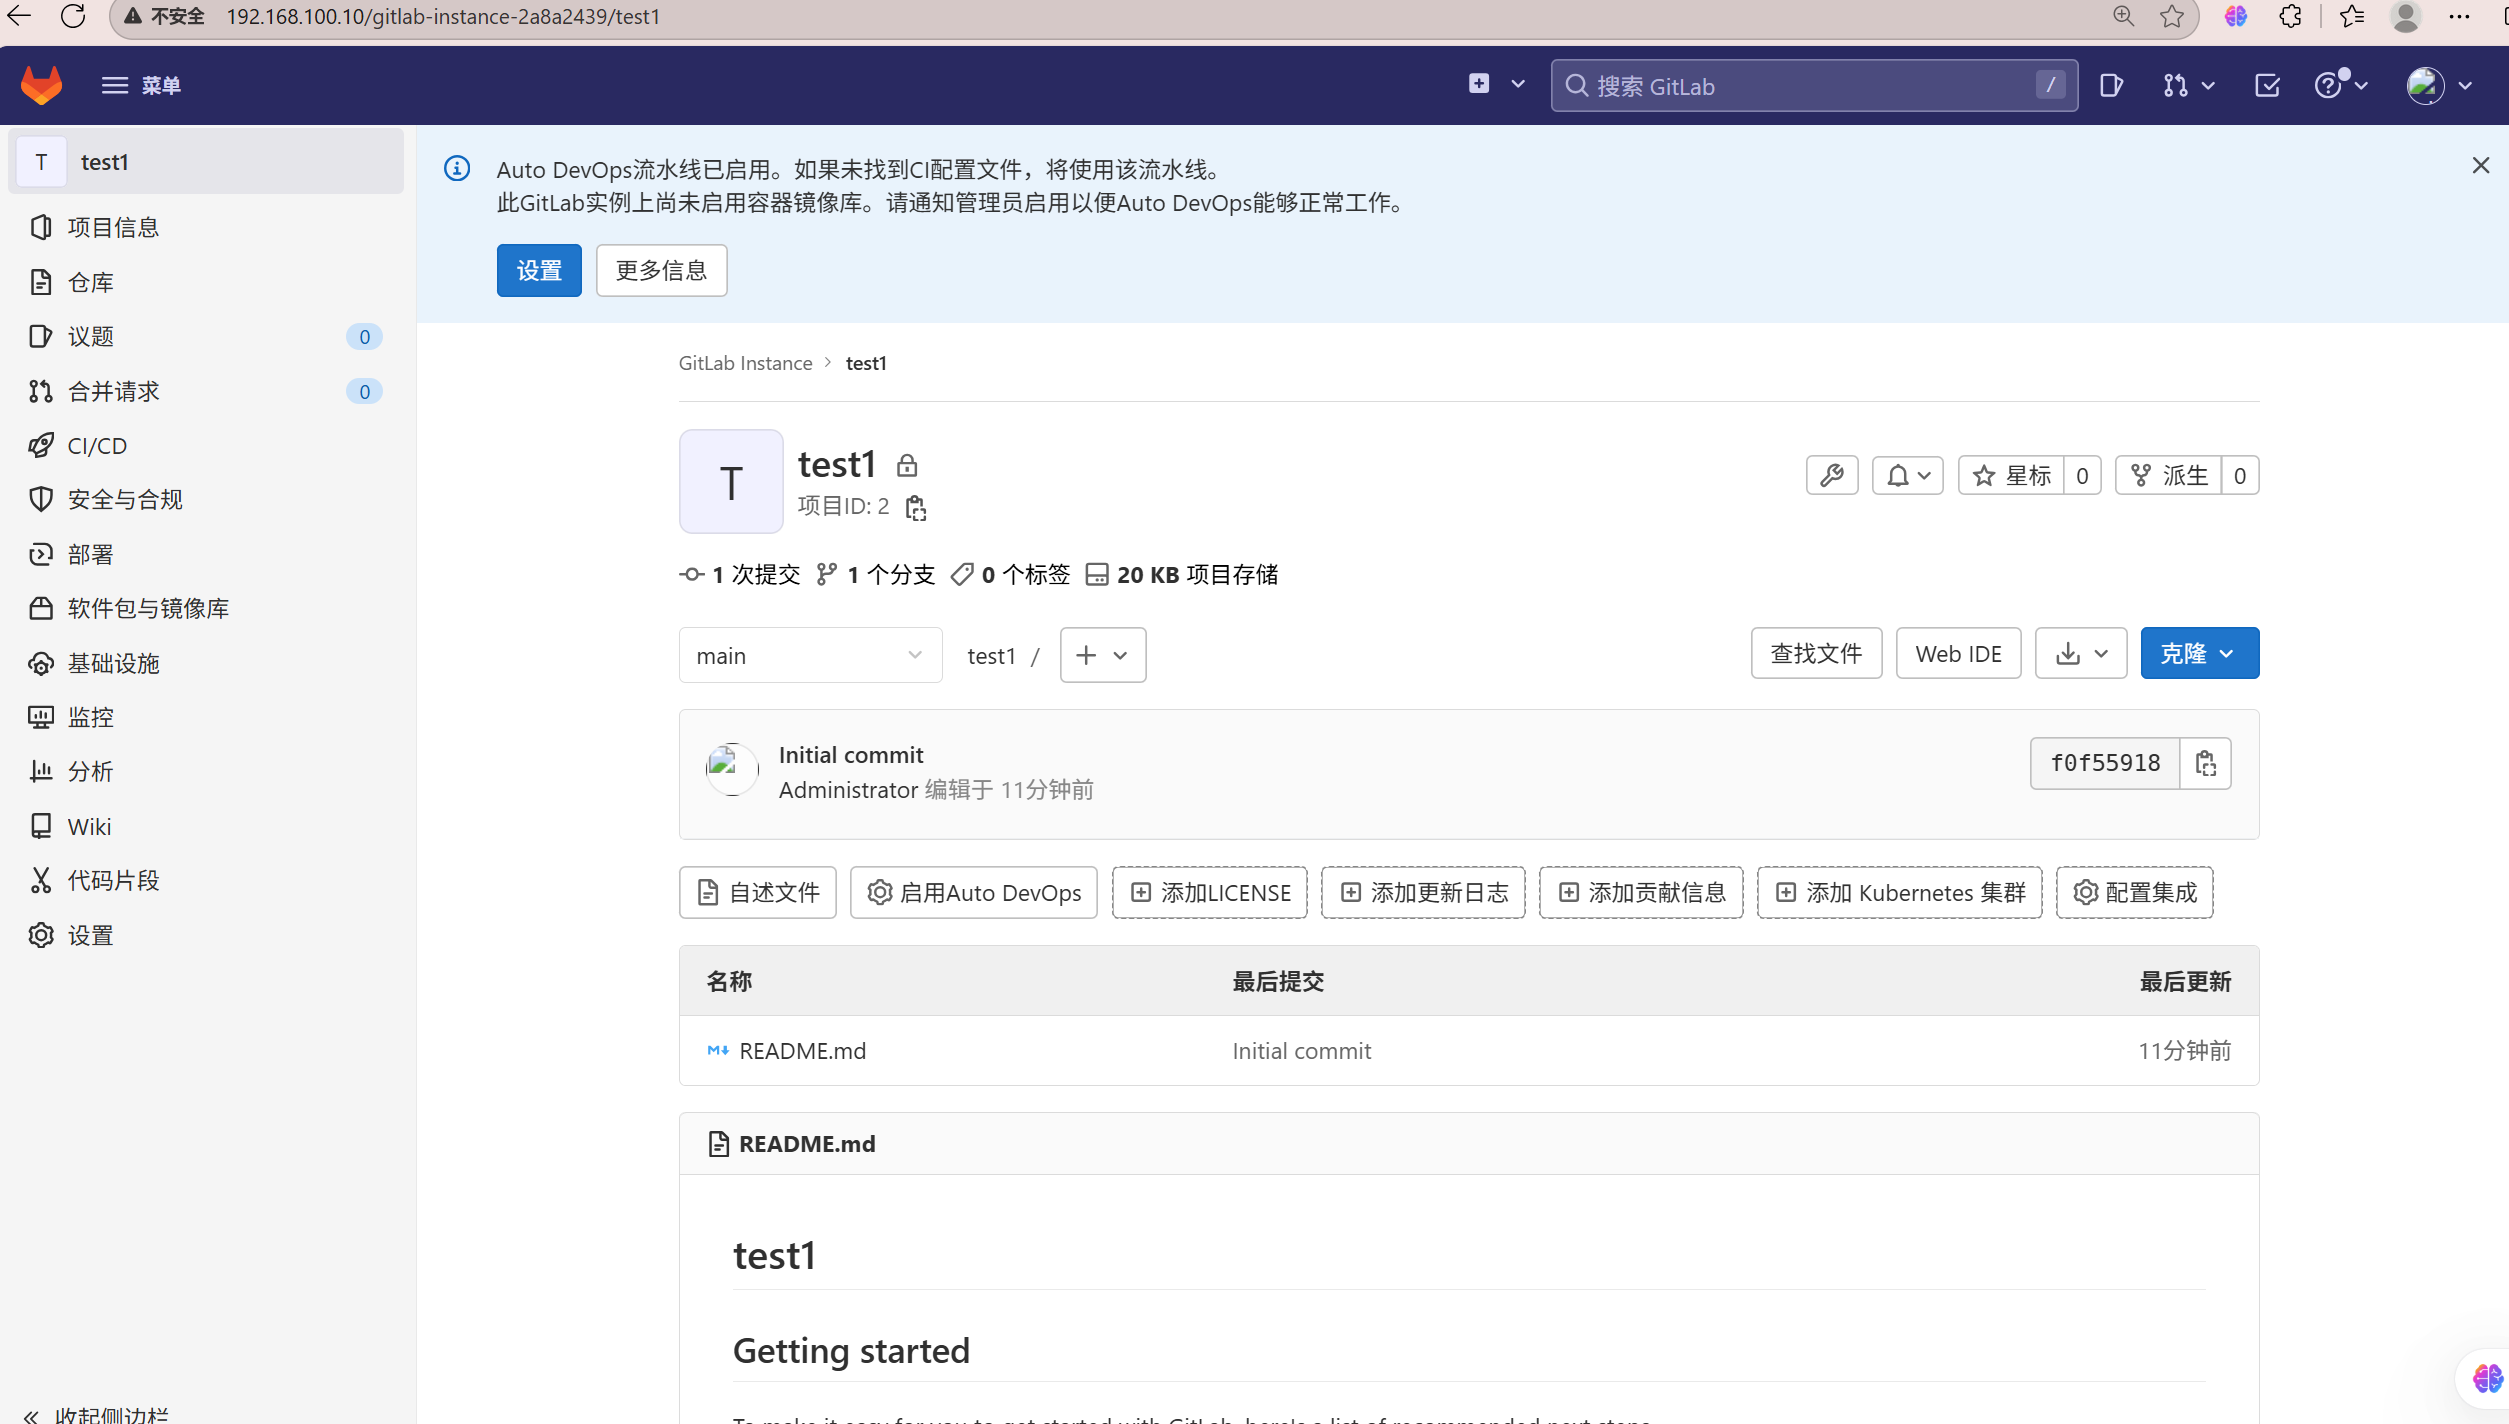
(1)在本地touch一个文件,web界面看不到此文件
powershell
[root@stw test1]# touch file1
[root@stw test1]# ls
file1  README.md
刷新查看没有file1文件
powershell
[root@stw test1]# git add file1
[root@stw test1]# git commit -m "add file1"
[main f0bcd8a] add file1
 1 file changed, 0 insertions(+), 0 deletions(-)
 create mode 100644 file1
[root@stw test1]# git push
warning: push.default is unset; its implicit value is changing in
Git 2.0 from 'matching' to 'simple'. To squelch this message
and maintain the current behavior after the default changes, use:

  git config --global push.default matching

To squelch this message and adopt the new behavior now, use:

  git config --global push.default simple

See 'git help config' and search for 'push.default' for further information.
(the 'simple' mode was introduced in Git 1.7.11. Use the similar mode
'current' instead of 'simple' if you sometimes use older versions of Git)

Counting objects: 4, done.
Delta compression using up to 4 threads.
Compressing objects: 100% (2/2), done.
Writing objects: 100% (3/3), 262 bytes | 0 bytes/s, done.
Total 3 (delta 0), reused 0 (delta 0)
To git@192.168.100.10:gitlab-instance-2a8a2439/test1.git
   f0f5591..f0bcd8a  main -> main
//这里默认上传到main分支中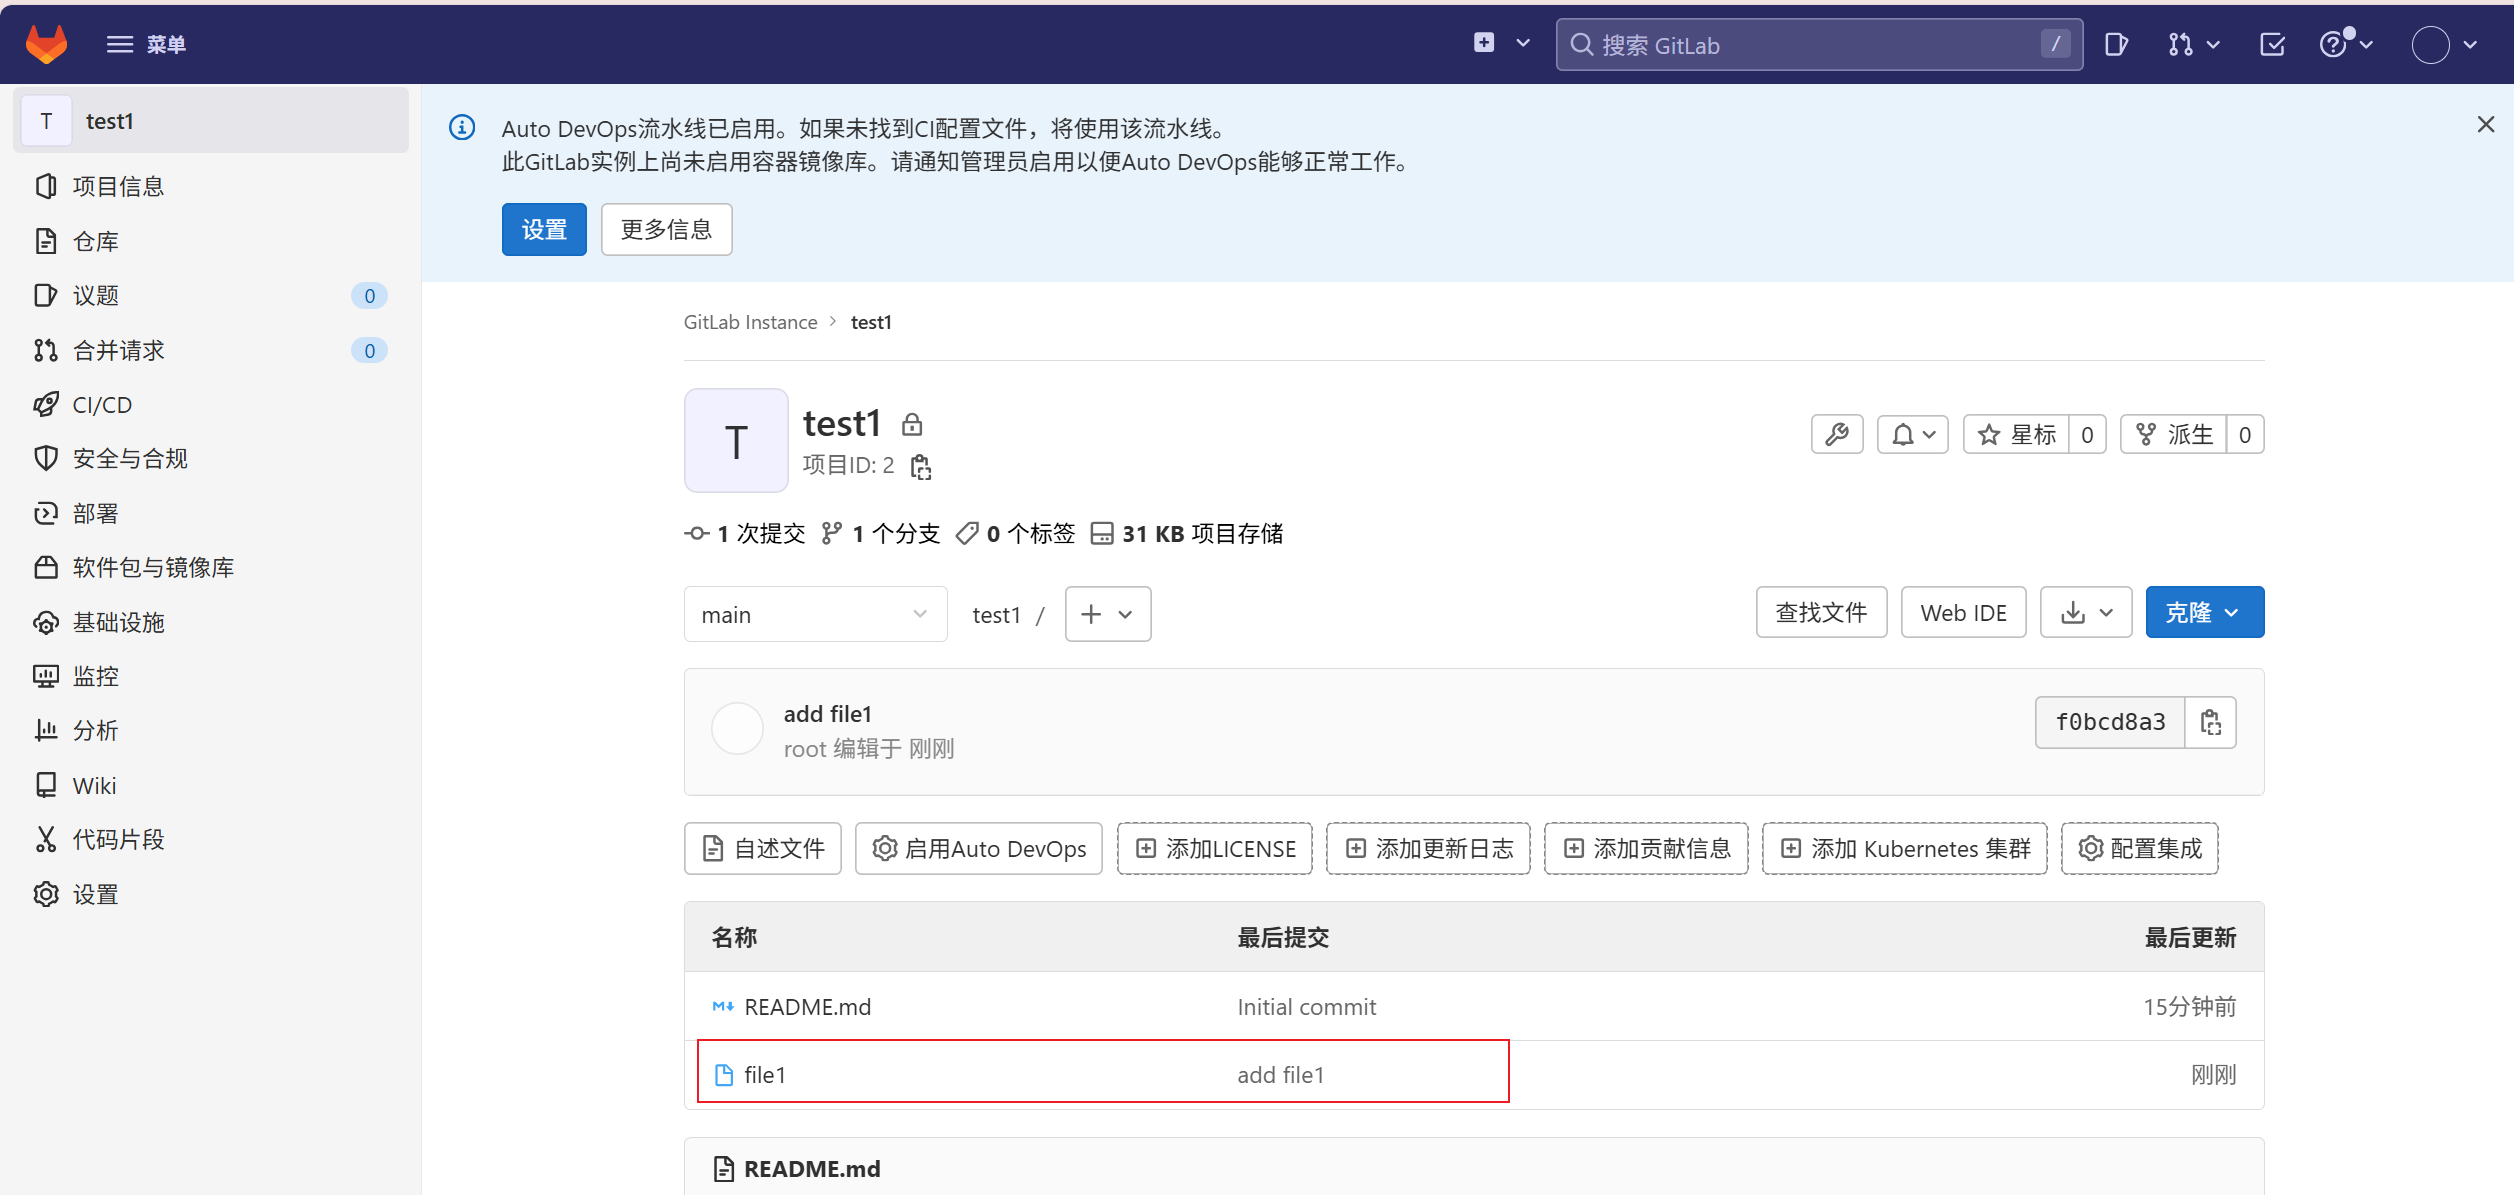
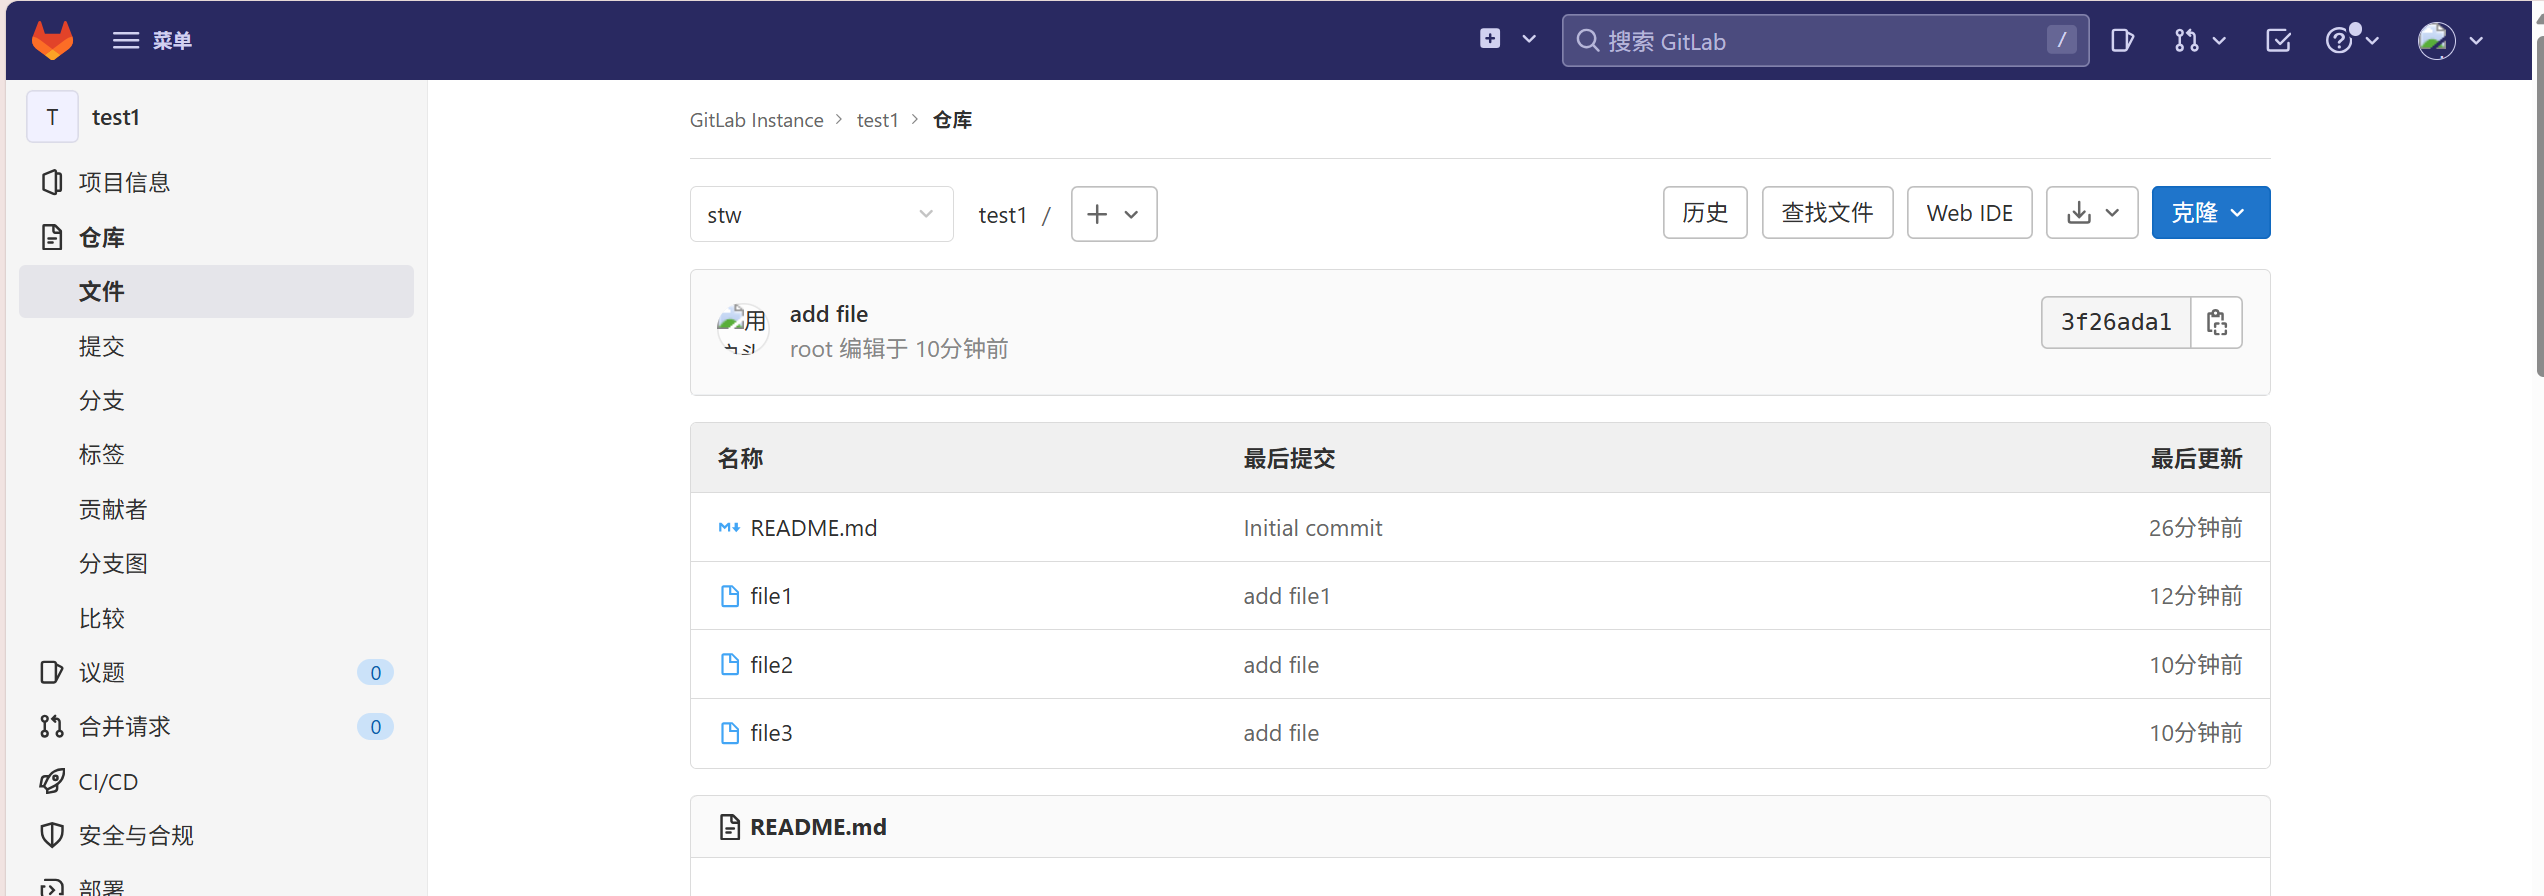
上传多个文件
powershell
[root@stw test1]# touch file2 file3
[root@stw test1]# ls
file1  file2  file3  README.md
[root@stw test1]# git add .        //.代表所有文件
[root@stw test1]# git commit -m "add file"
[main 3f26ada] add file
 2 files changed, 0 insertions(+), 0 deletions(-)
 create mode 100644 file2
 create mode 100644 file3
[root@stw test1]# git push
warning: push.default is unset; its implicit value is changing in
Git 2.0 from 'matching' to 'simple'. To squelch this message
and maintain the current behavior after the default changes, use:

  git config --global push.default matching

To squelch this message and adopt the new behavior now, use:

  git config --global push.default simple

See 'git help config' and search for 'push.default' for further information.
(the 'simple' mode was introduced in Git 1.7.11. Use the similar mode
'current' instead of 'simple' if you sometimes use older versions of Git)

Counting objects: 3, done.
Delta compression using up to 4 threads.
Compressing objects: 100% (2/2), done.
Writing objects: 100% (2/2), 260 bytes | 0 bytes/s, done.
Total 2 (delta 0), reused 0 (delta 0)
To git@192.168.100.10:gitlab-instance-2a8a2439/test1.git
   f0bcd8a..3f26ada  main -> main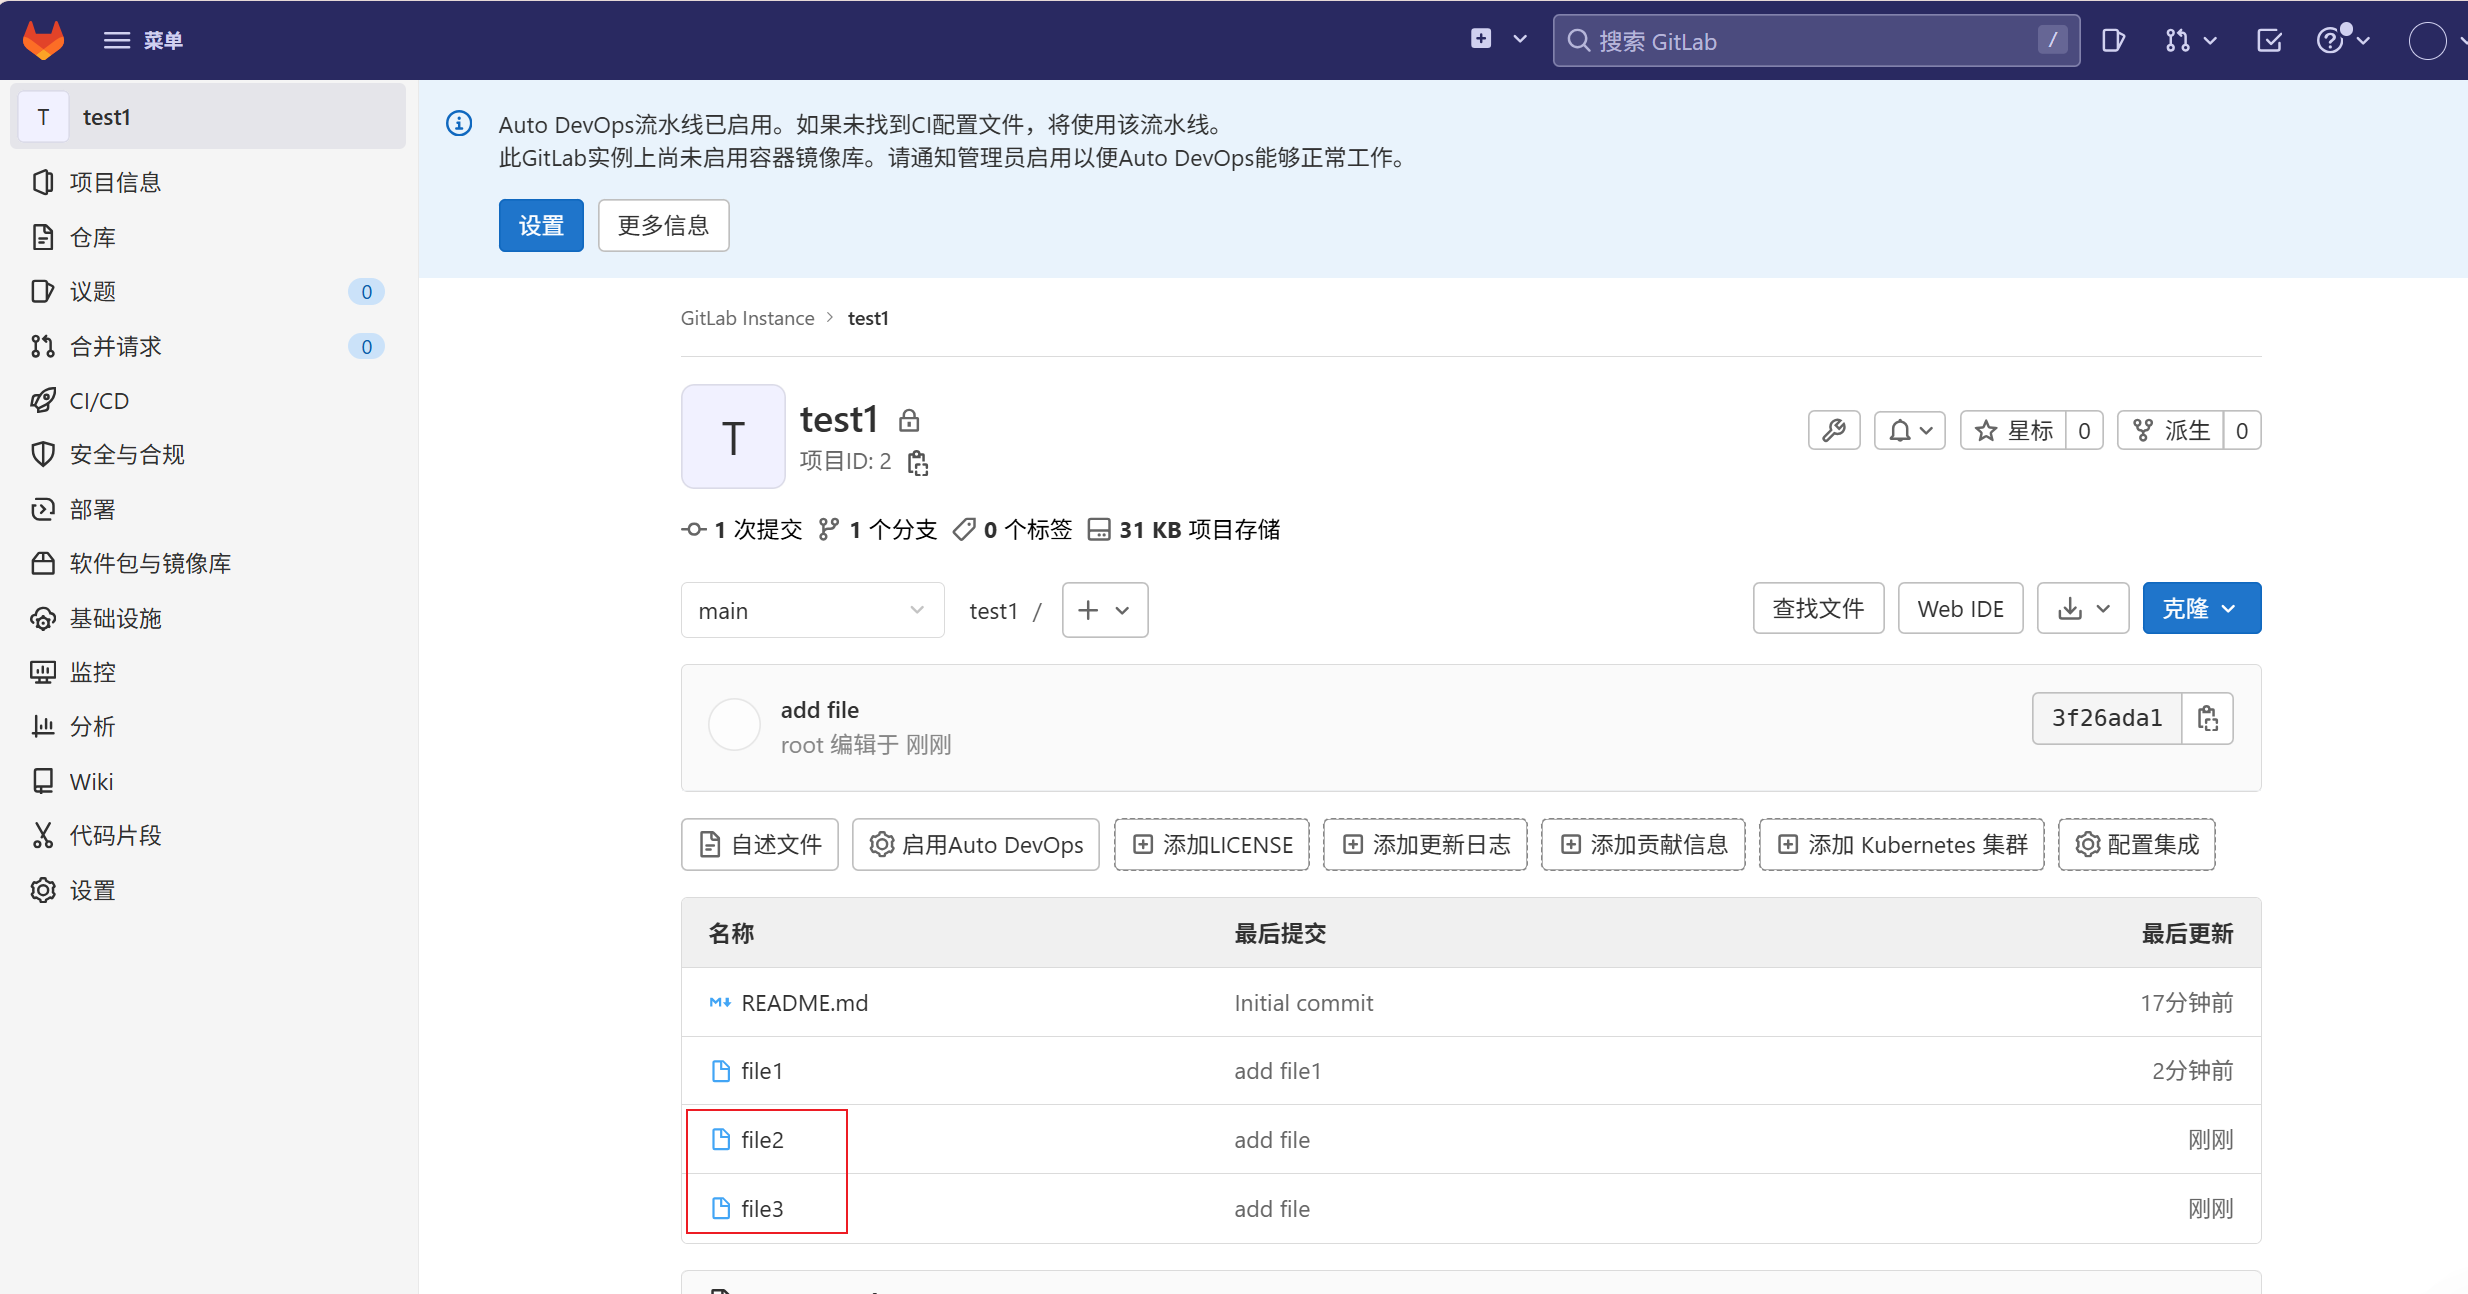
5、创建分支
powershell
[root@stw ~]# cd test1/
[root@stw test1]# ls
file1  file2  file3  README.md
[root@stw test1]# git branch stw       //创建分支
[root@stw test1]# git push origin stw      //将分支提交到线上
Total 0 (delta 0), reused 0 (delta 0)
remote:
remote: To create a merge request for stw, visit:
remote:   http://192.168.100.10/gitlab-instance-2a8a2439/test1/-/merge_requests/new?merge_request%5Bsource_branch%5D=stw
remote:
To git@192.168.100.10:gitlab-instance-2a8a2439/test1.git
 * [new branch]      stw -> stw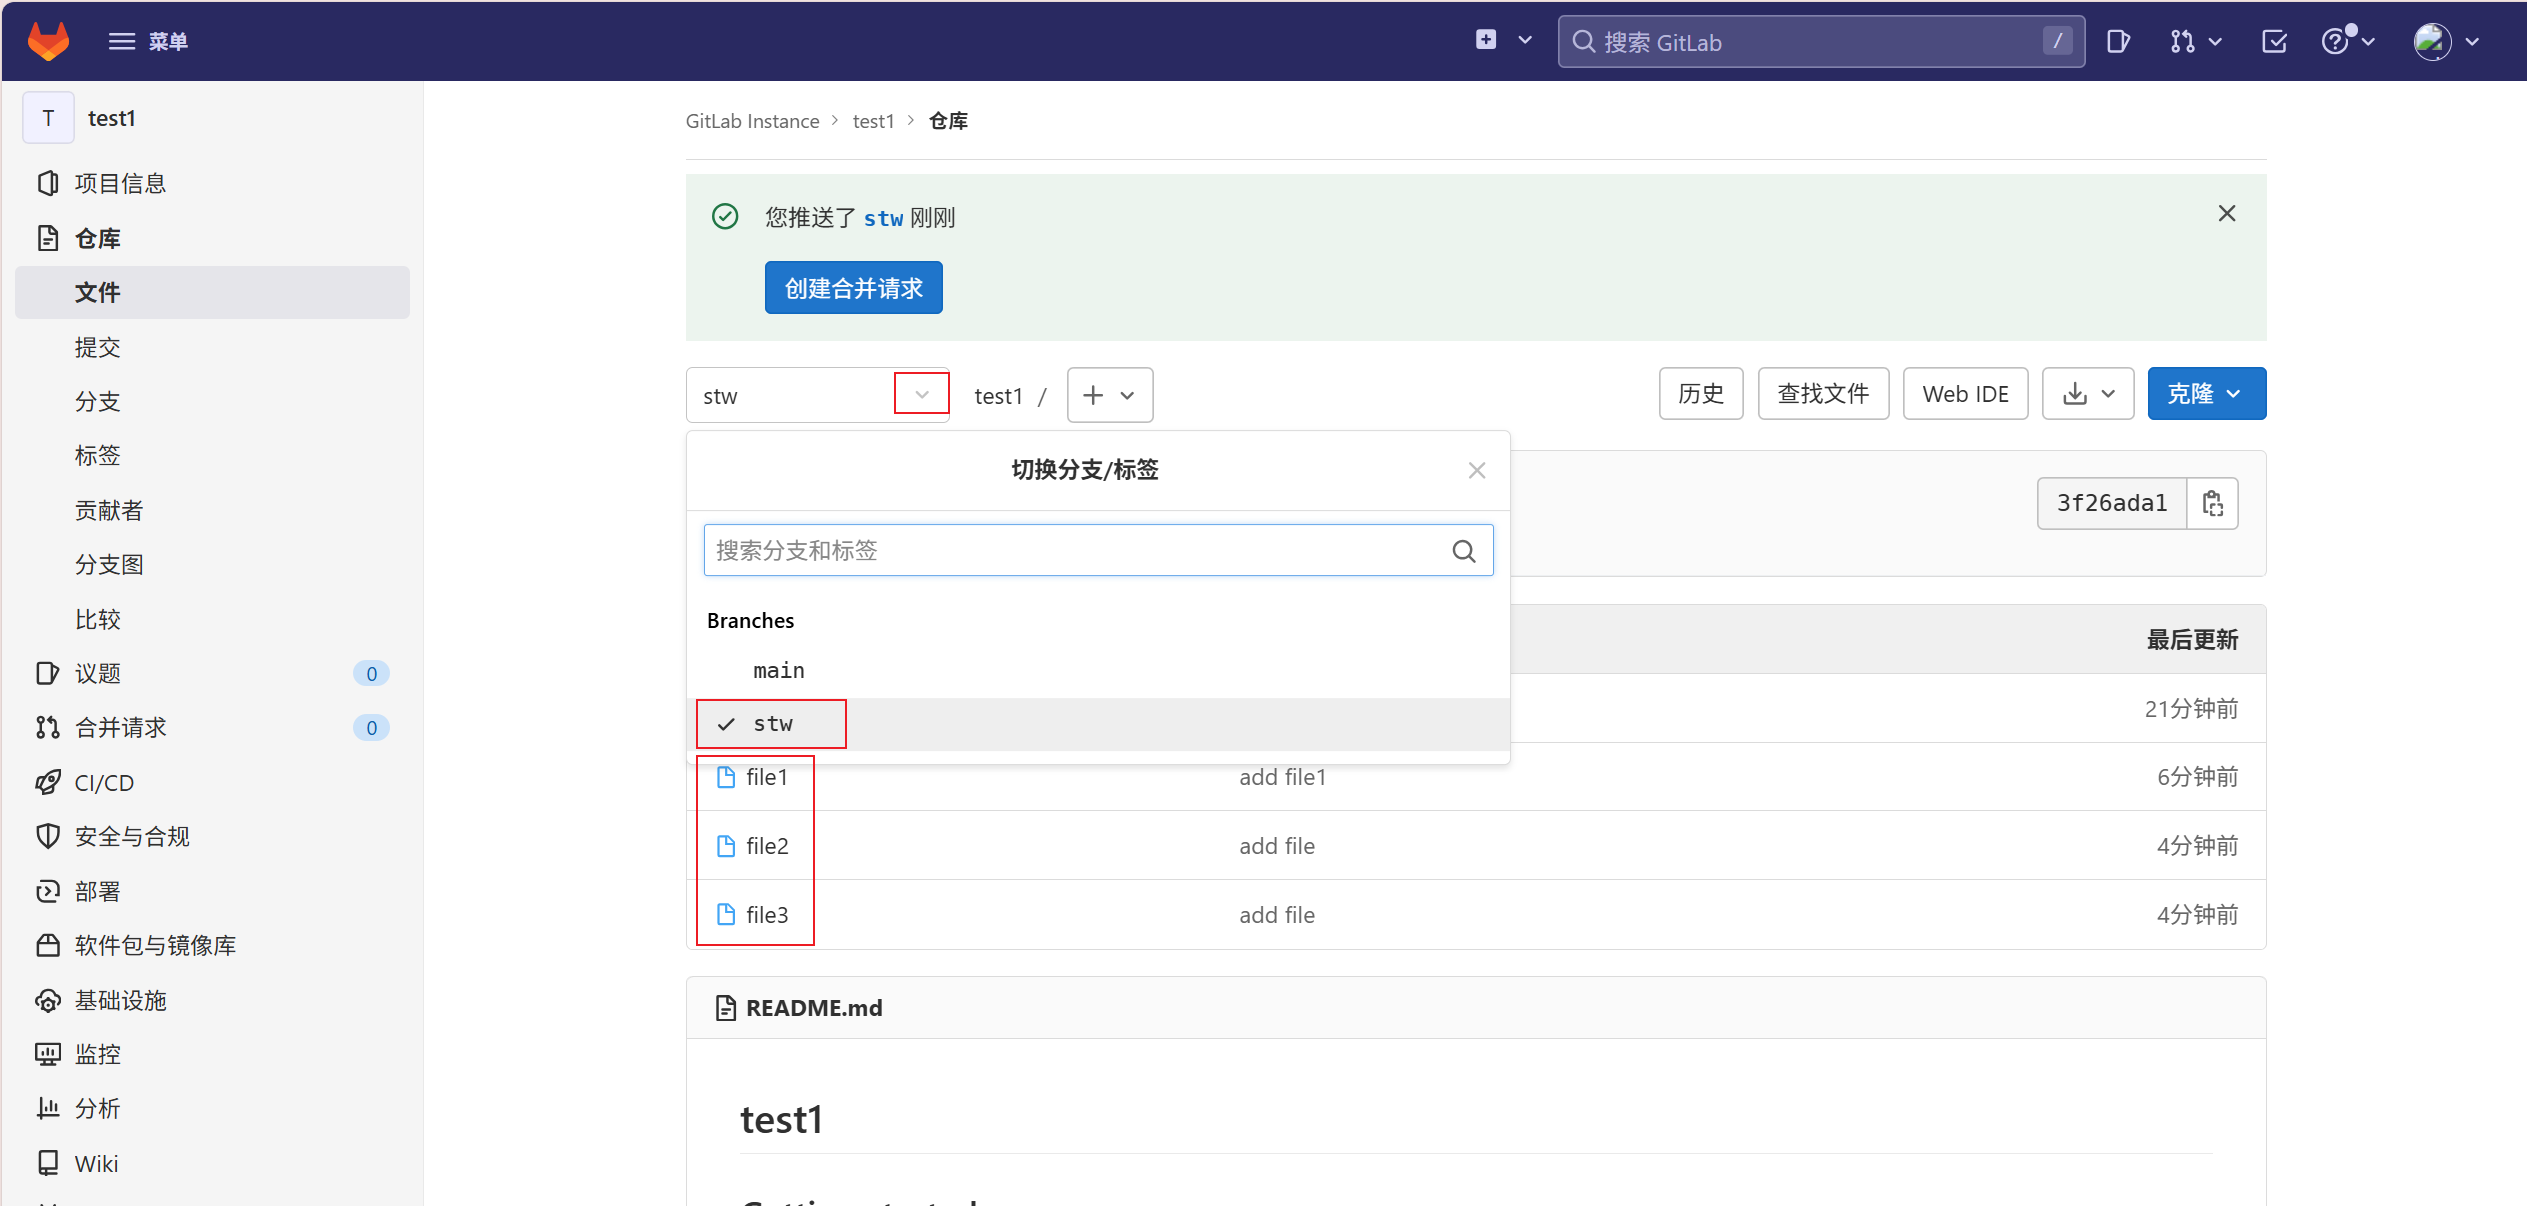
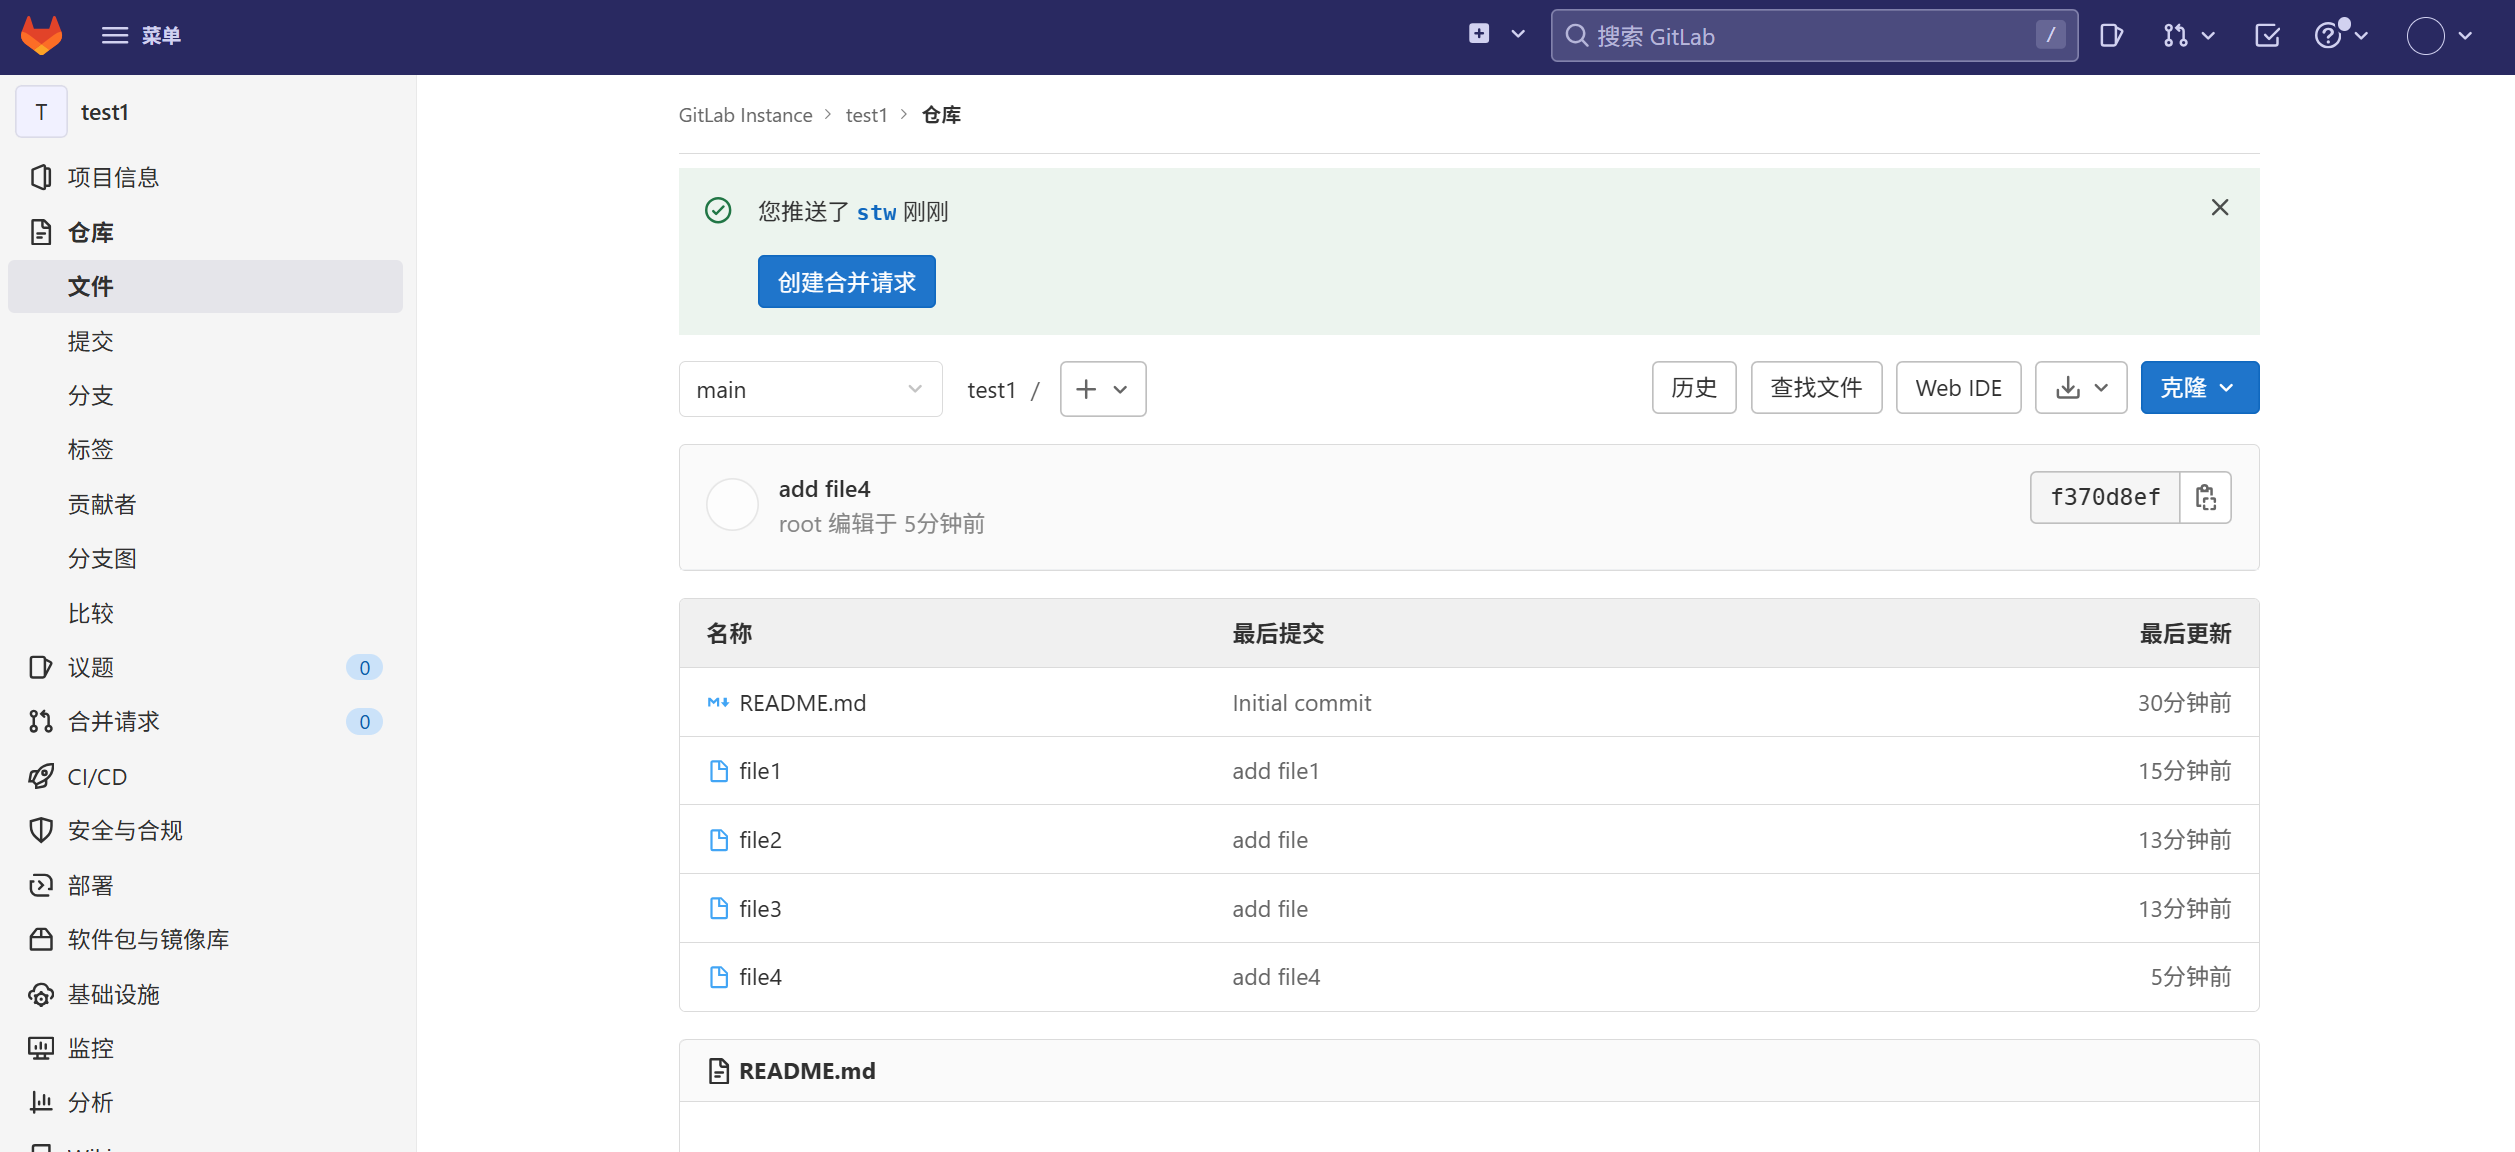
对应的main分支中的文件也会出现在新创建的分支里,但是新创建文件只会出现在main分支中,不会再同步到stw分支中
powershell
[root@stw test1]# touch file4
[root@stw test1]# git add file4
[root@stw test1]# git commit -m "add file4"
[main f370d8e] add file4
 1 file changed, 0 insertions(+), 0 deletions(-)
 create mode 100644 file4
[root@stw test1]# git push
warning: push.default is unset; its implicit value is changing in
Git 2.0 from 'matching' to 'simple'. To squelch this message
and maintain the current behavior after the default changes, use:

  git config --global push.default matching

To squelch this message and adopt the new behavior now, use:

  git config --global push.default simple

See 'git help config' and search for 'push.default' for further information.
(the 'simple' mode was introduced in Git 1.7.11. Use the similar mode
'current' instead of 'simple' if you sometimes use older versions of Git)

Counting objects: 3, done.
Delta compression using up to 4 threads.
Compressing objects: 100% (2/2), done.
Writing objects: 100% (2/2), 227 bytes | 0 bytes/s, done.
Total 2 (delta 1), reused 0 (delta 0)
To git@192.168.100.10:gitlab-instance-2a8a2439/test1.git
   3f26ada..f370d8e  main -> main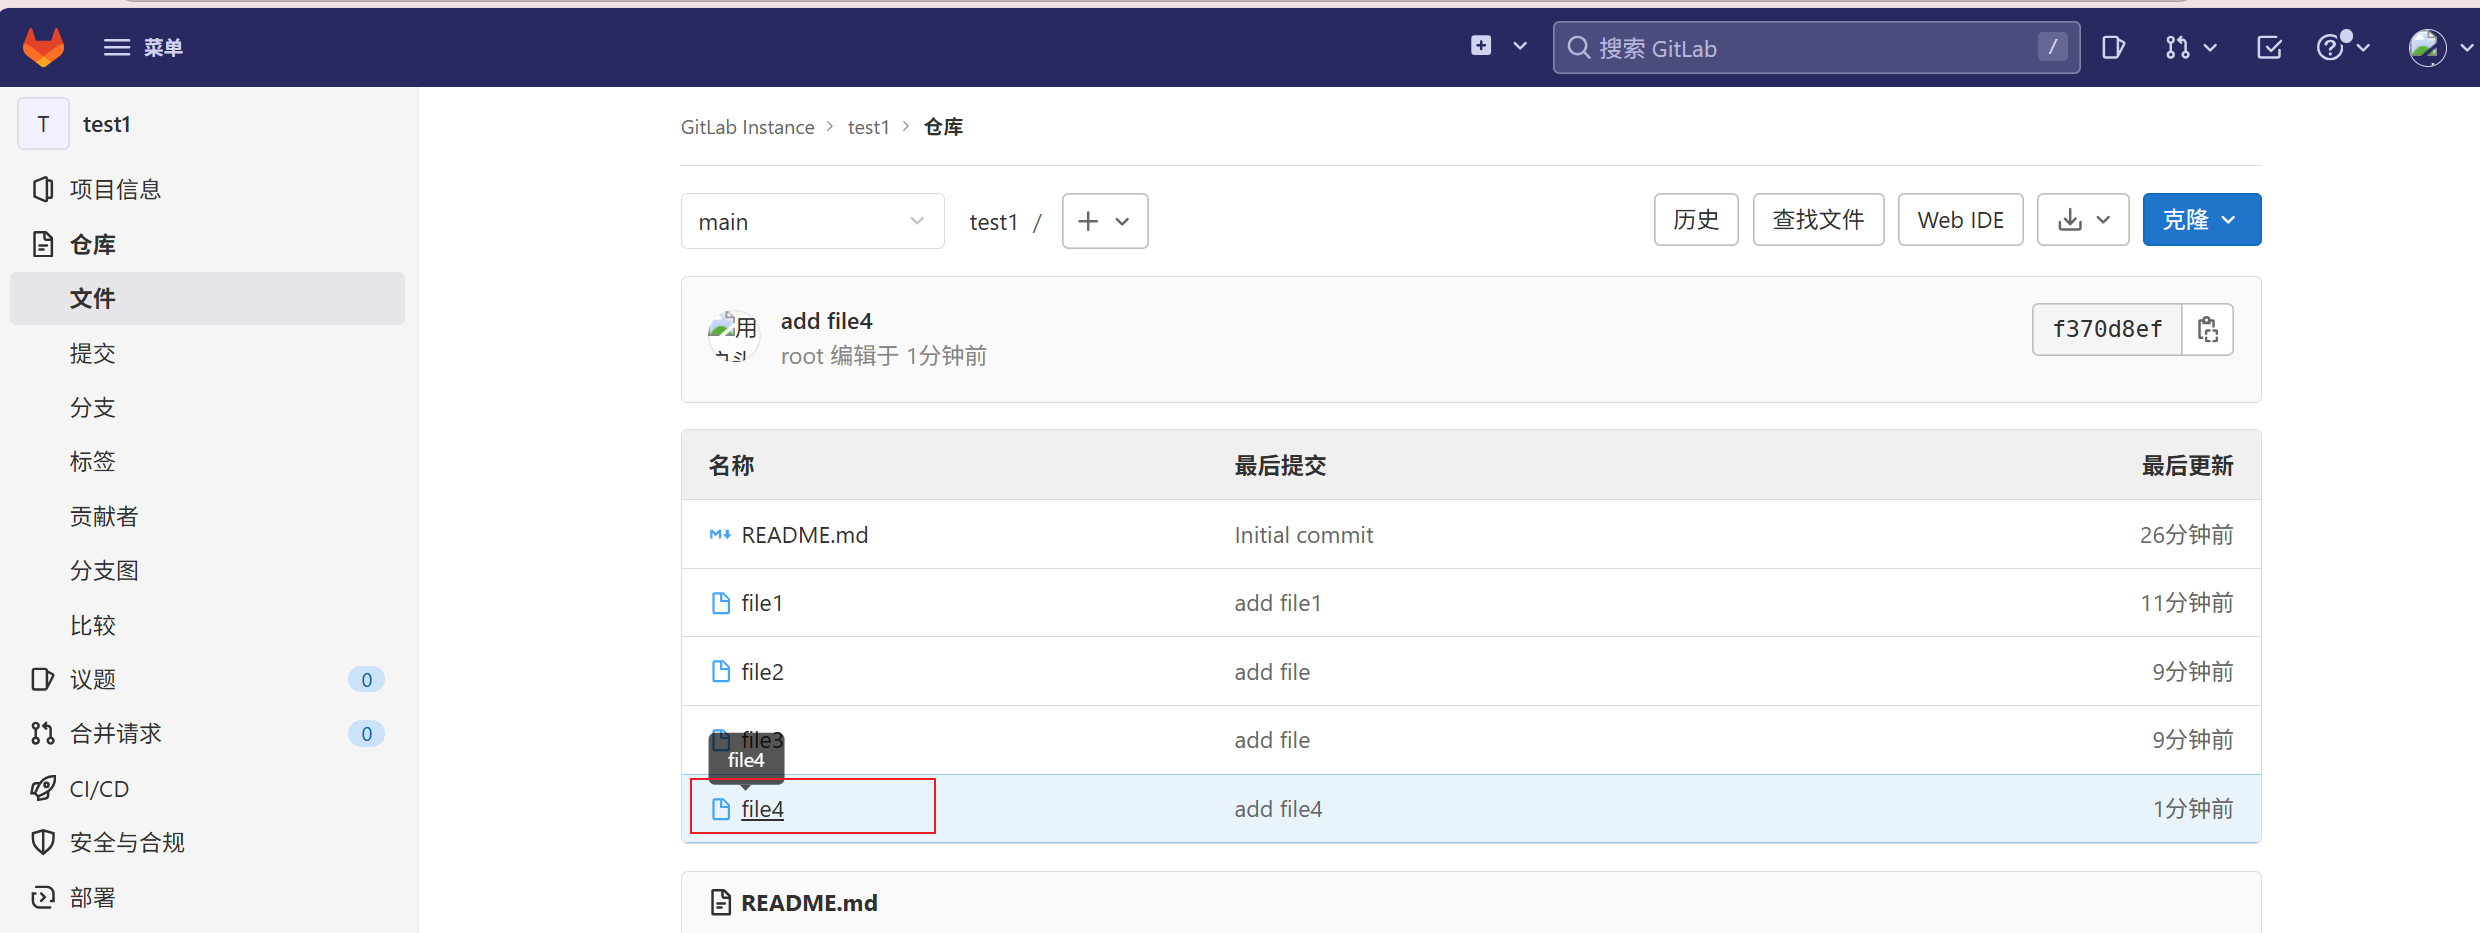
可以切换到stw分支中创建文件
powershell
[root@stw test1]# touch file5
[root@stw test1]# ls
file1  file2  file3  file5  README.md
[root@stw test1]# git add file5
[root@stw test1]# git commit -m "add file5"
[stw 870df4d] add file5
 1 file changed, 0 insertions(+), 0 deletions(-)
 create mode 100644 file5
[root@stw test1]# git push
warning: push.default is unset; its implicit value is changing in
Git 2.0 from 'matching' to 'simple'. To squelch this message
and maintain the current behavior after the default changes, use:

  git config --global push.default matching

To squelch this message and adopt the new behavior now, use:

  git config --global push.default simple

See 'git help config' and search for 'push.default' for further information.
(the 'simple' mode was introduced in Git 1.7.11. Use the similar mode
'current' instead of 'simple' if you sometimes use older versions of Git)

Counting objects: 3, done.
Delta compression using up to 4 threads.
Compressing objects: 100% (2/2), done.
Writing objects: 100% (2/2), 227 bytes | 0 bytes/s, done.
Total 2 (delta 1), reused 0 (delta 0)
remote:
remote: To create a merge request for stw, visit:
remote:   http://192.168.100.10/gitlab-instance-2a8a2439/test1/-/merge_requests/new?merge_request%5Bsource_branch%5D=stw
remote:
To git@192.168.100.10:gitlab-instance-2a8a2439/test1.git
   3f26ada..870df4d  stw -> stw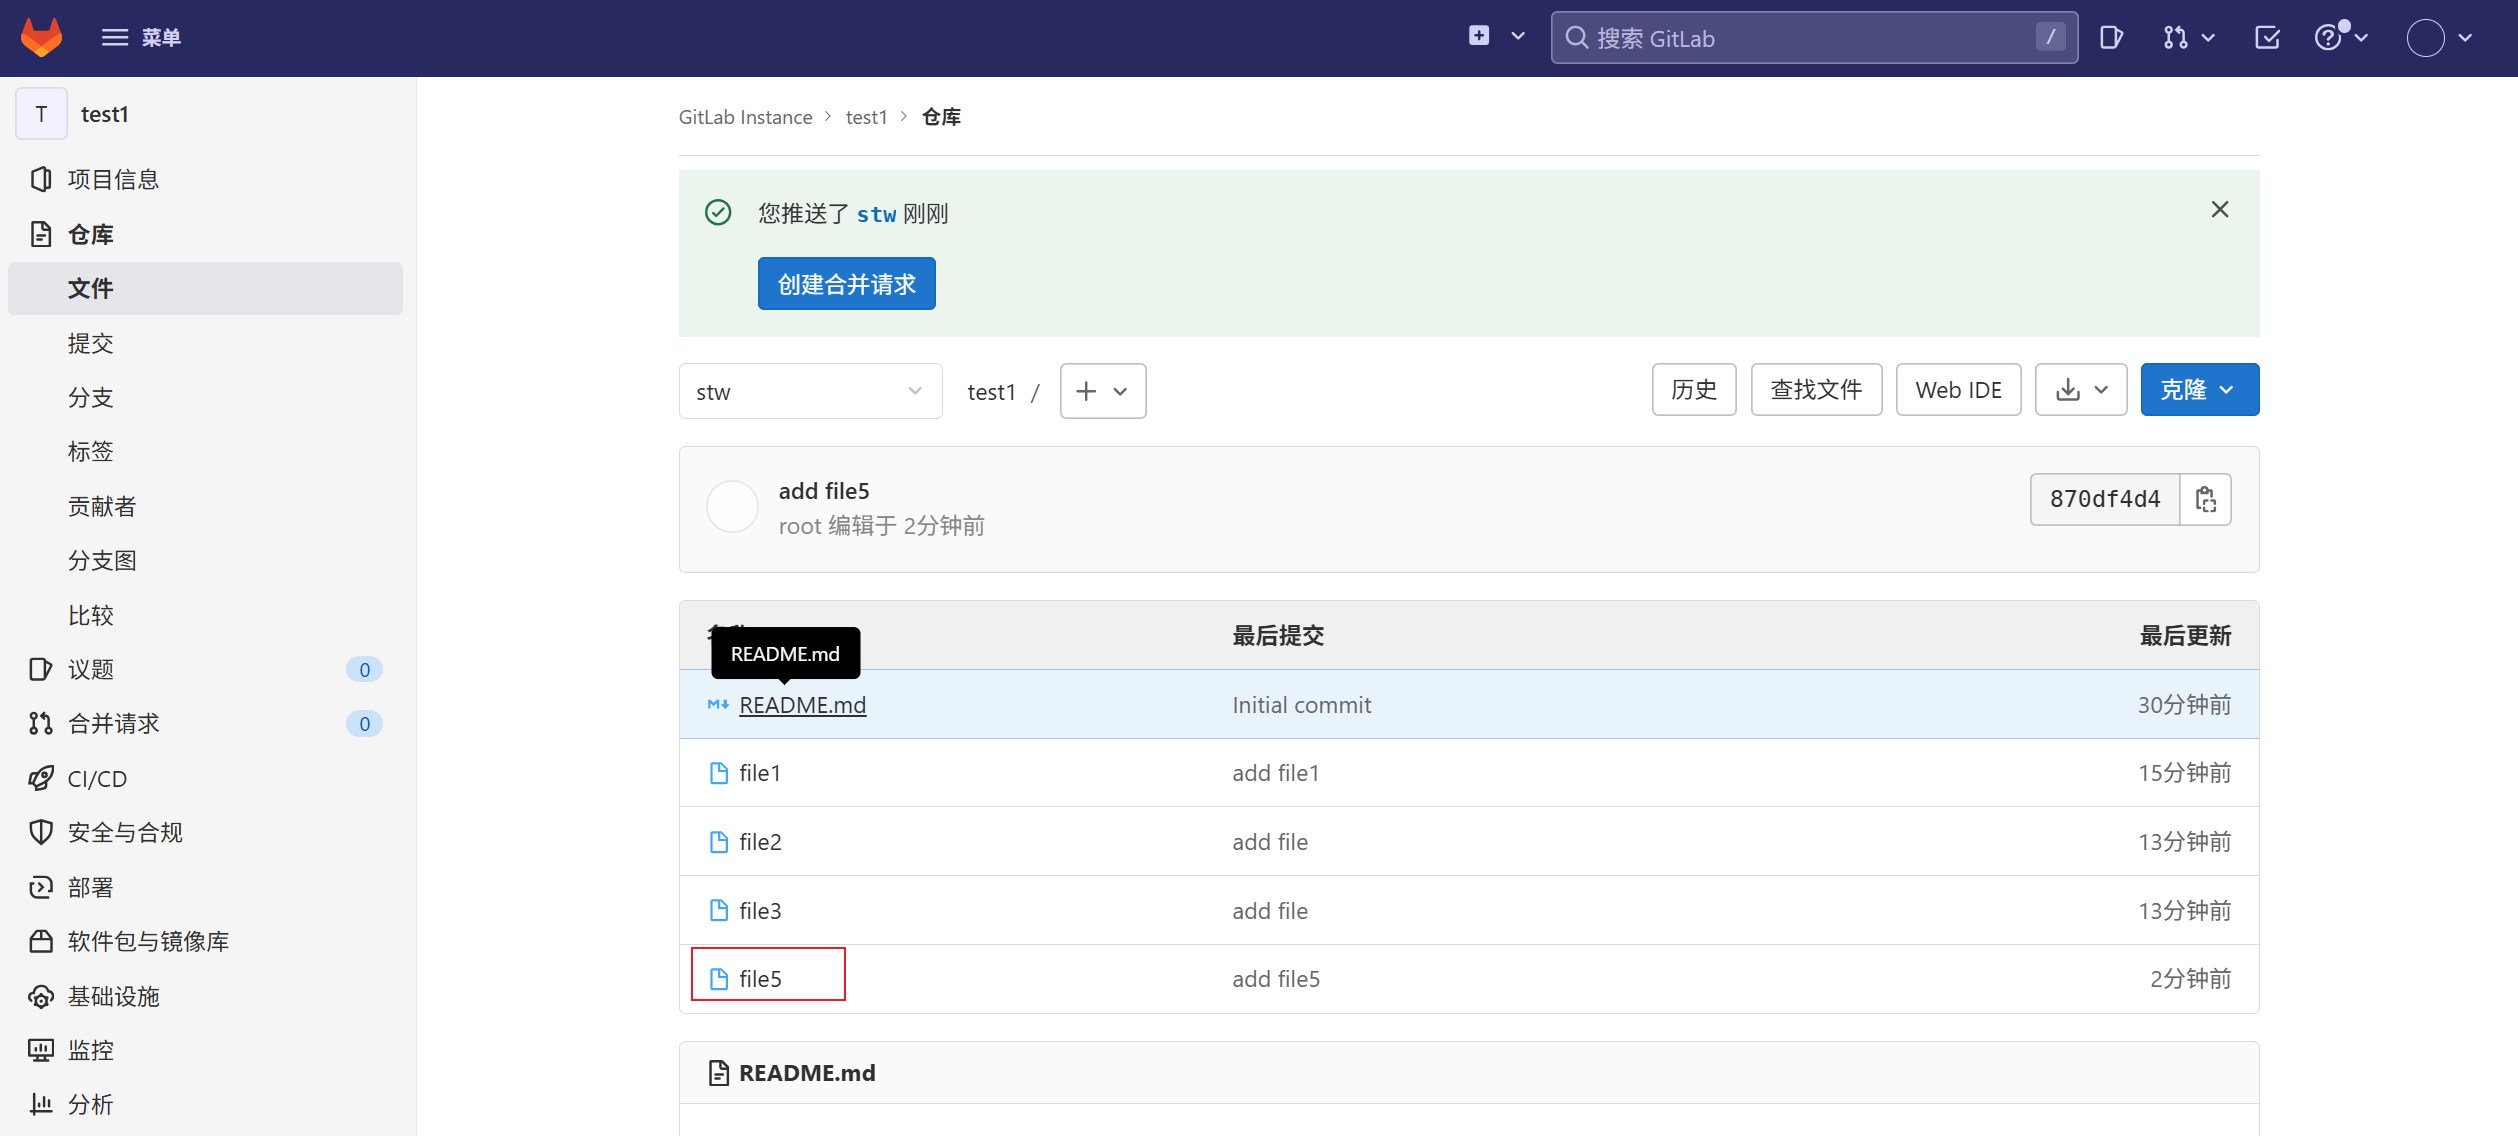
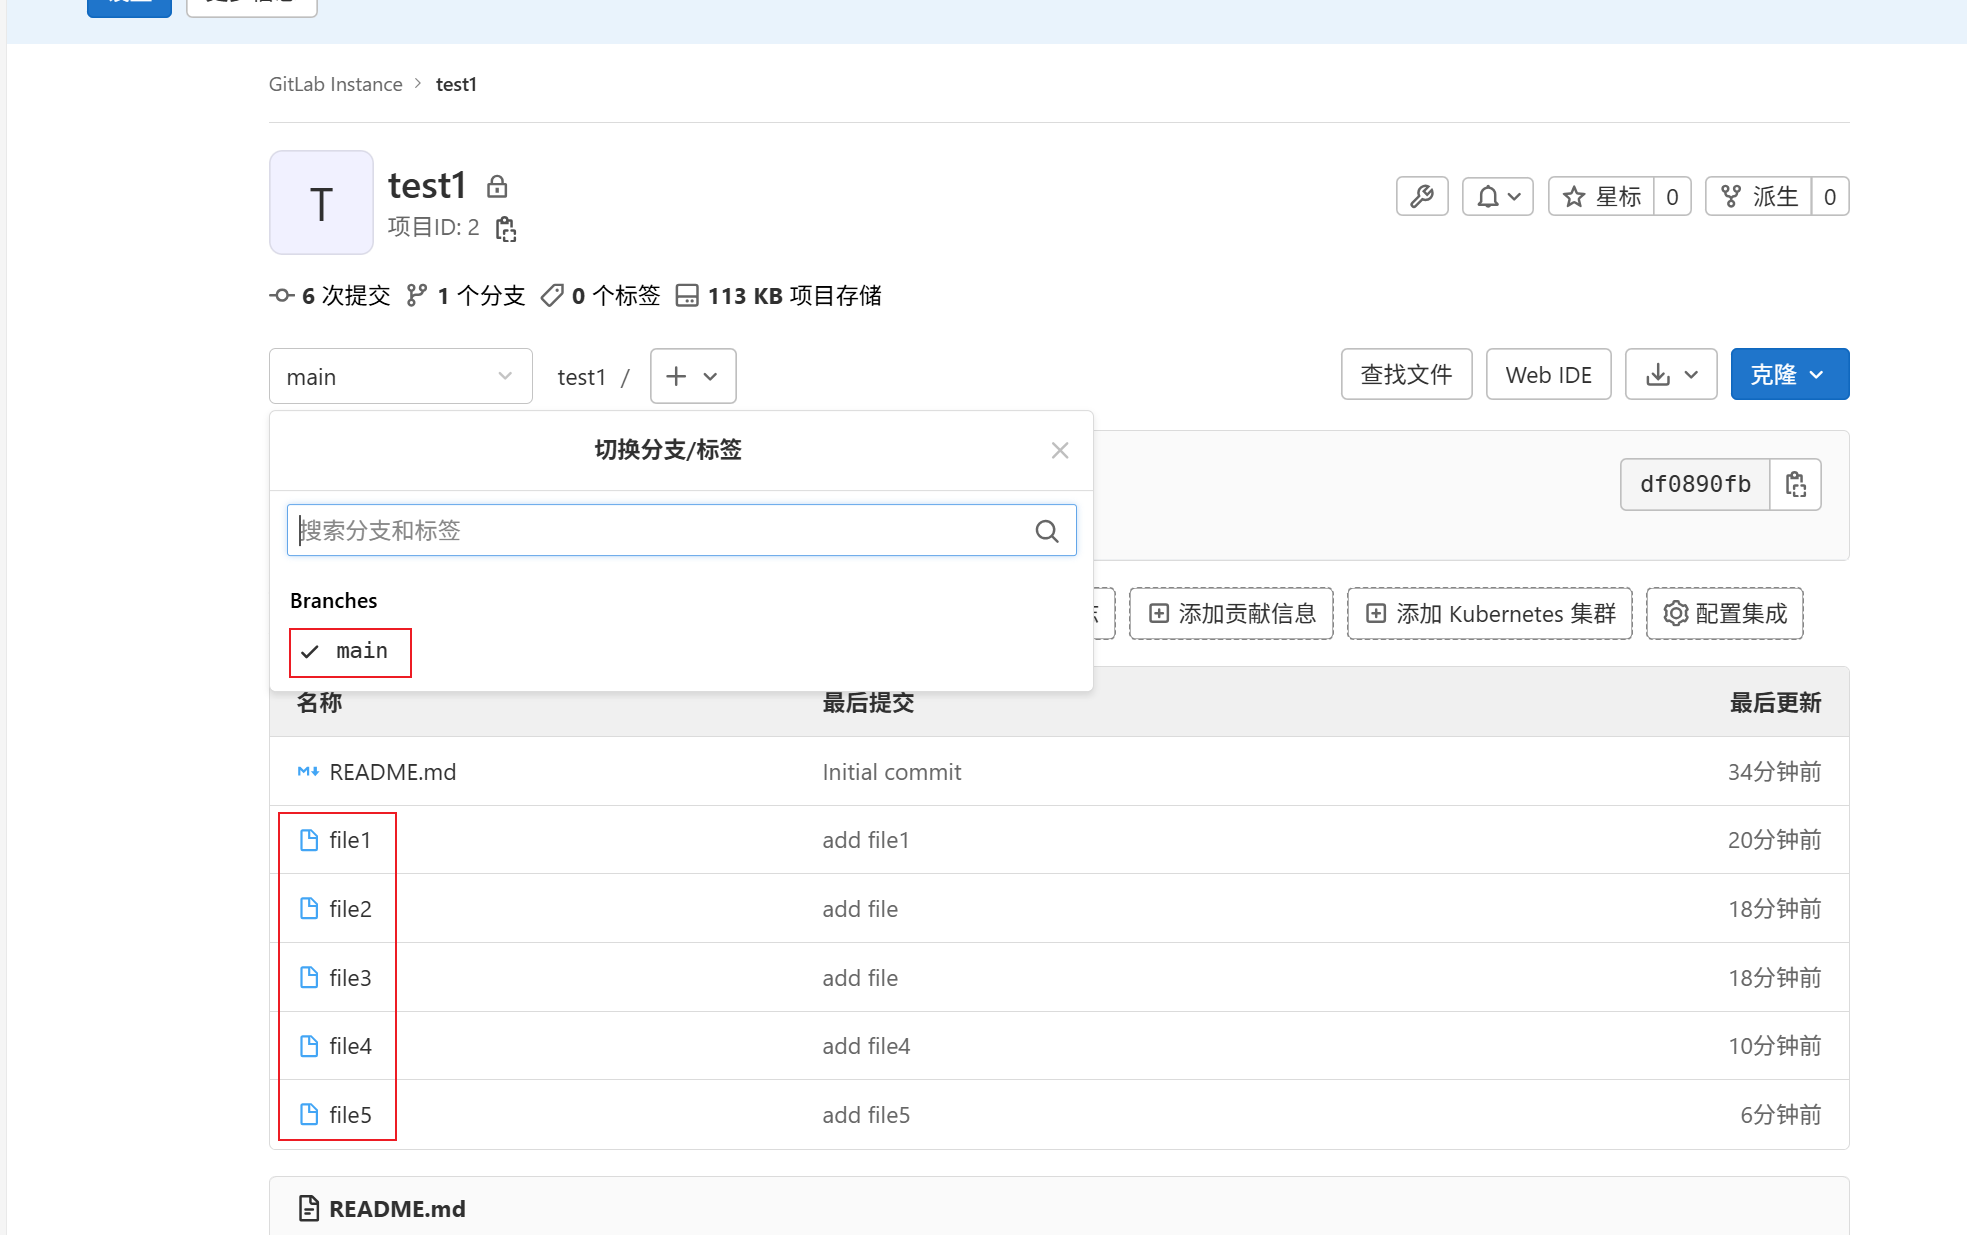
main分支中没有file5
可以对两个分支进行合并
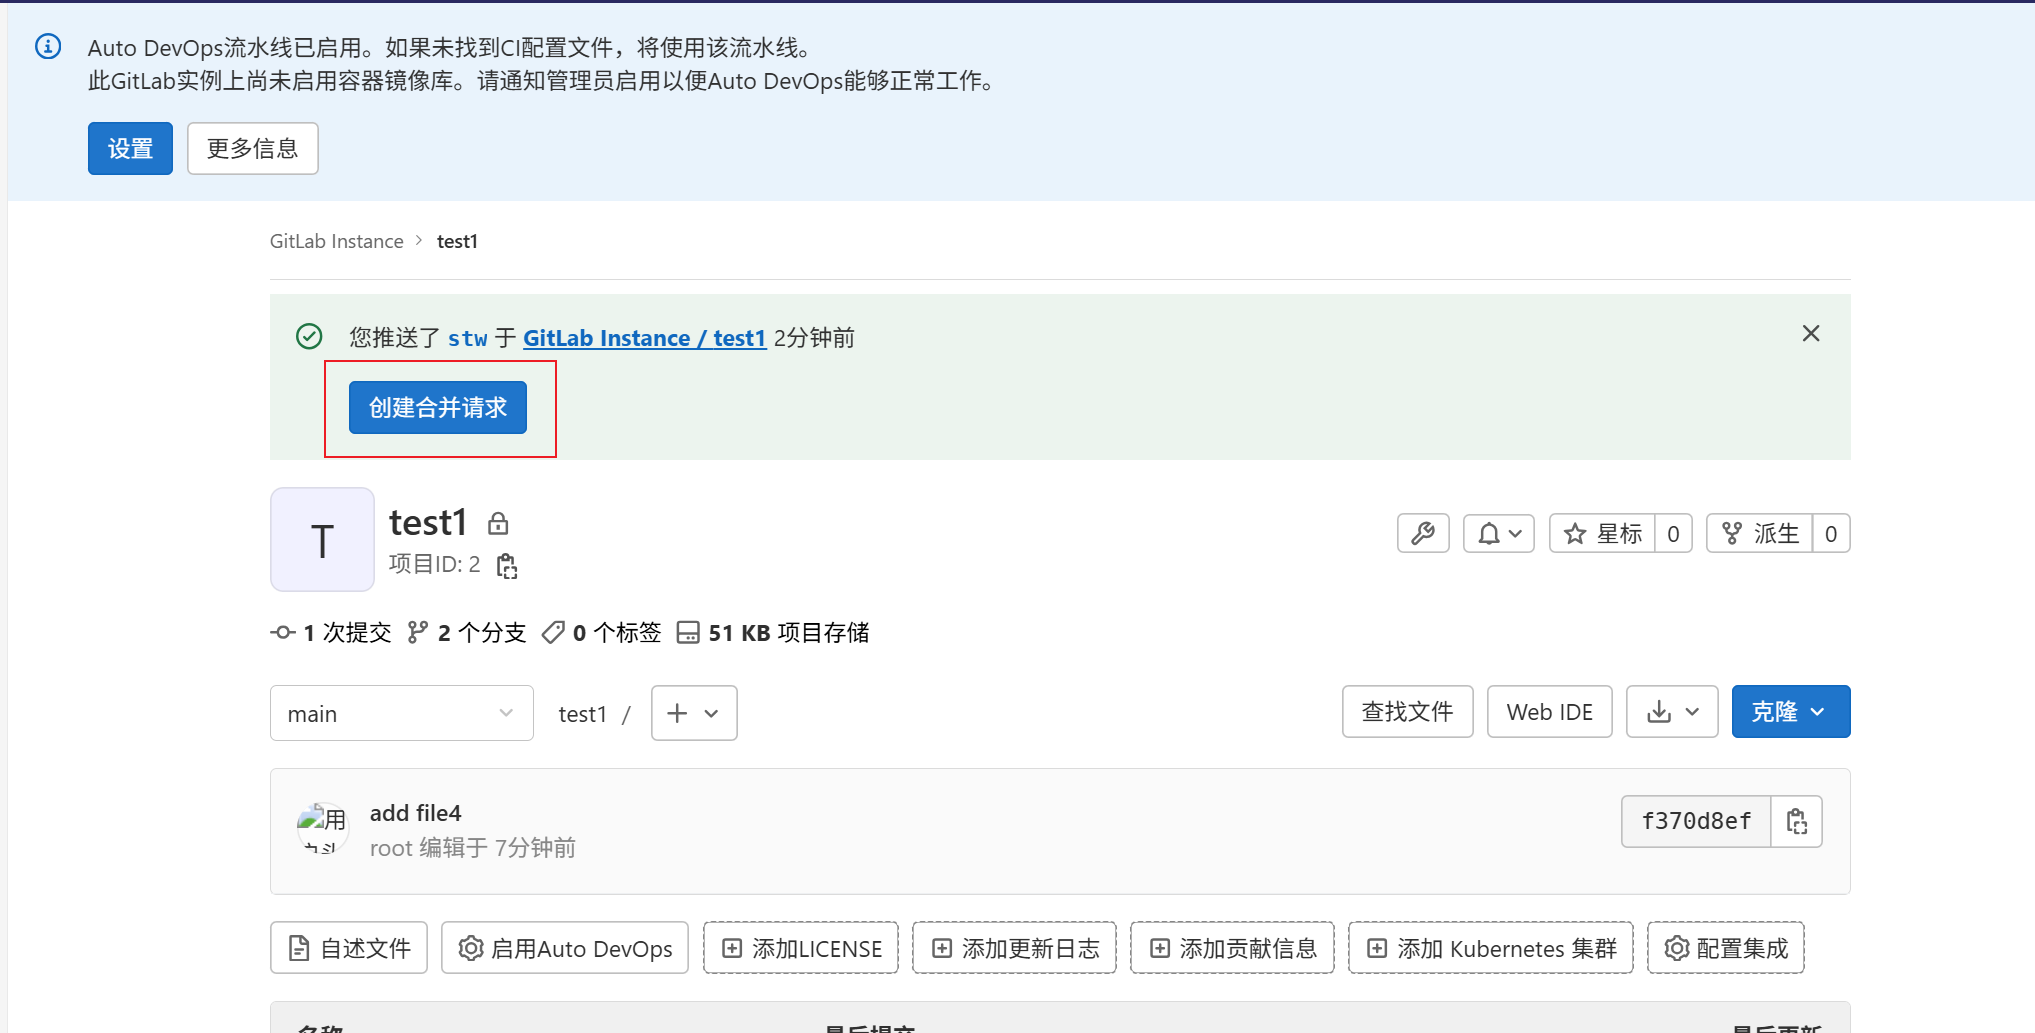
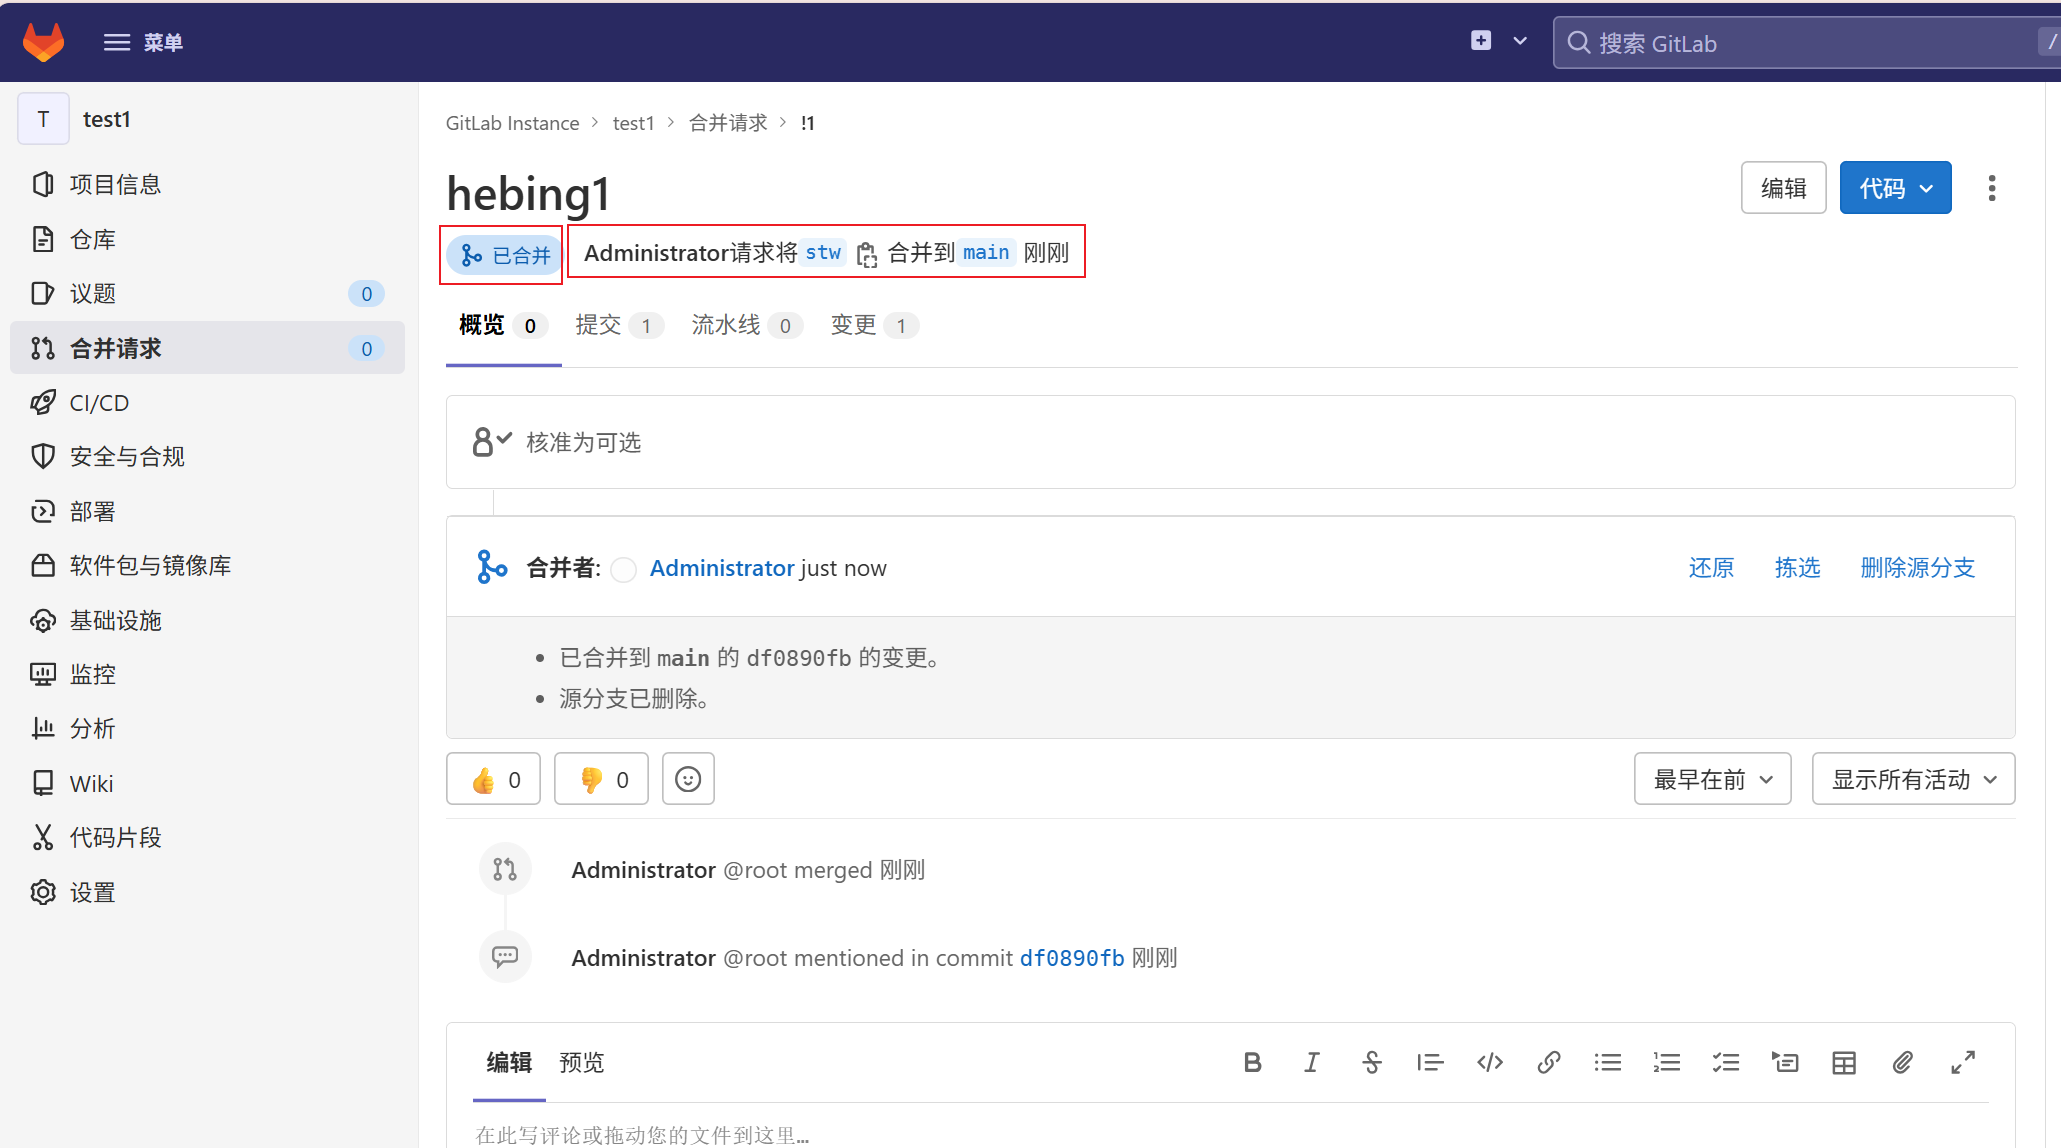
只有main分支没有stw分支了
另外:如果是在自己电脑里面写的代码,也可以直接登录平台,将文件上传,不用通过服务器上传
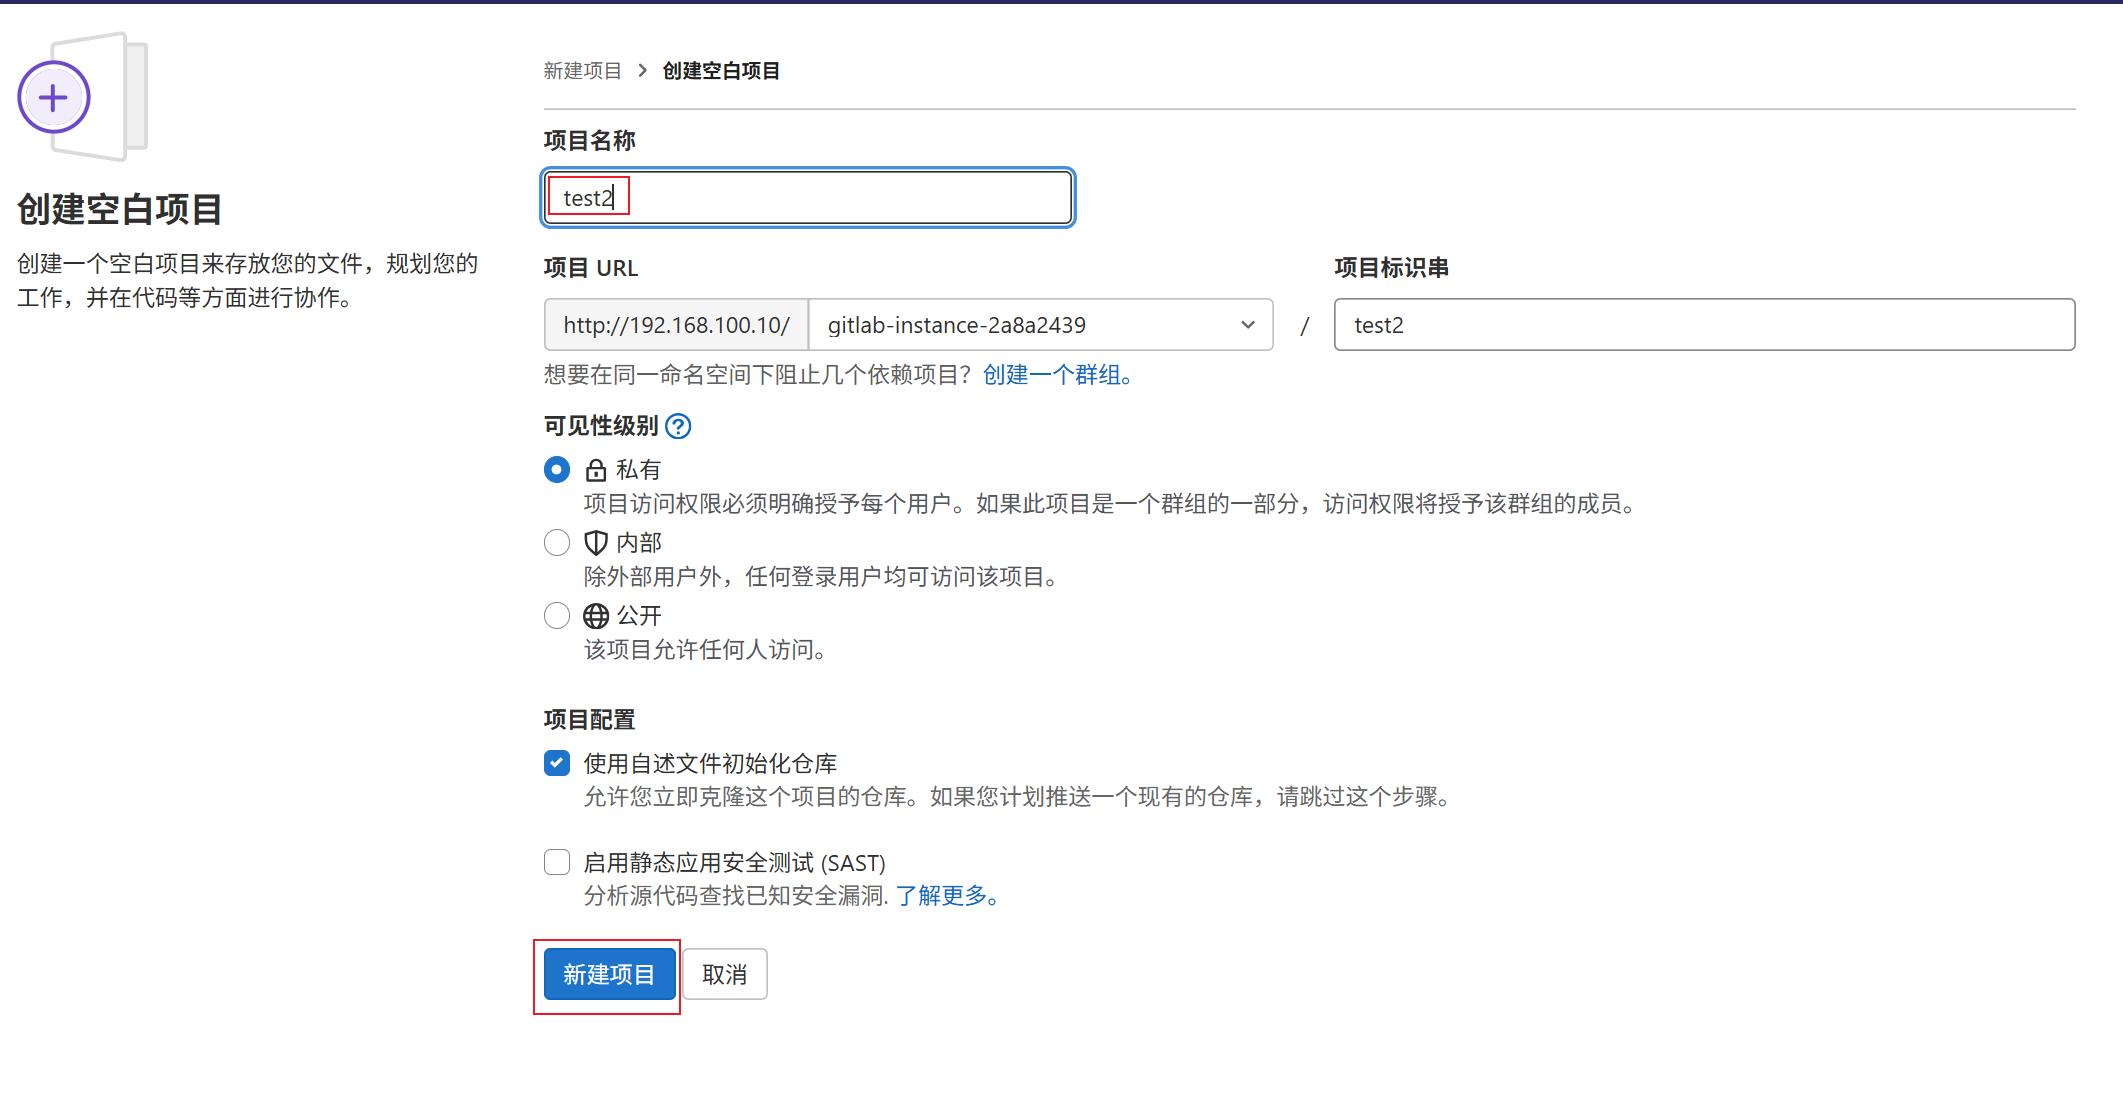
1、再次新建一个项目
新建项目------>创建空白项目
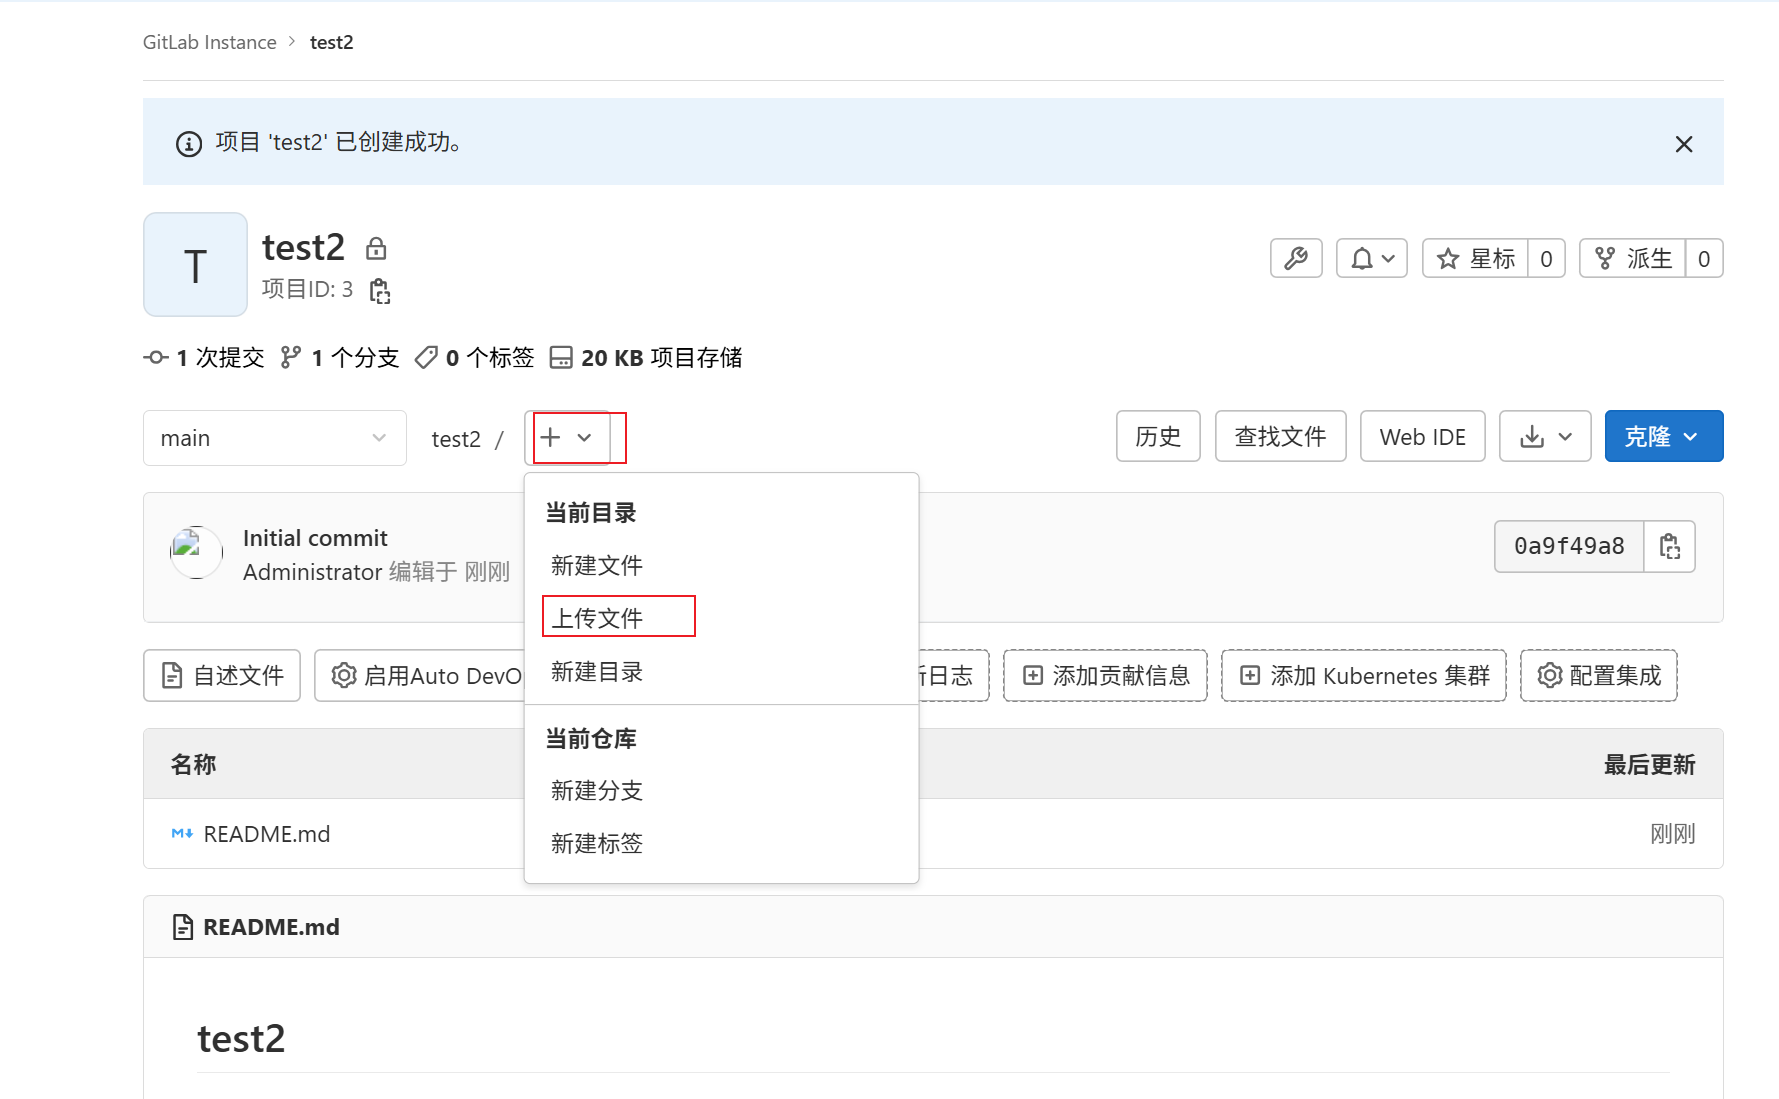
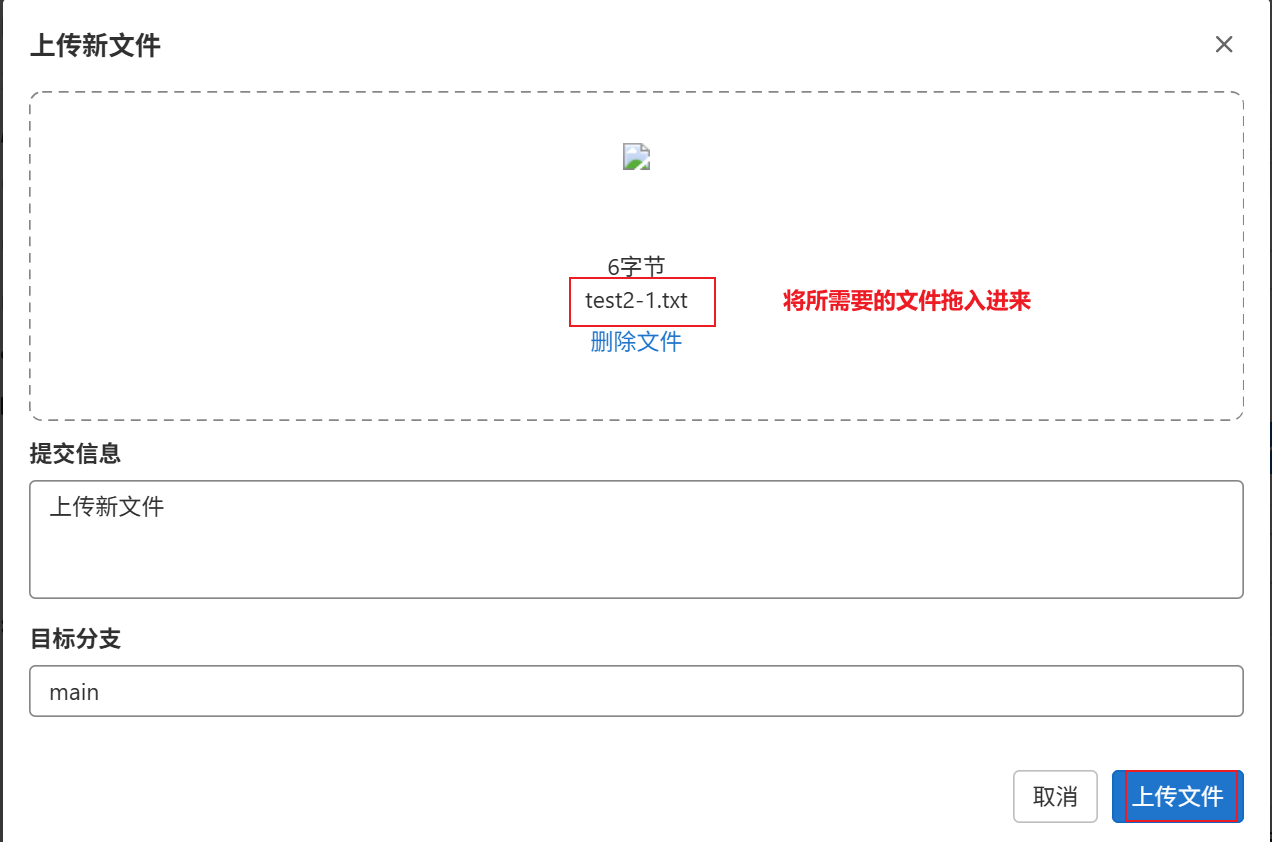
2、上传文件
3、新建分支(另外创建两个分支)
分支------>新建分支
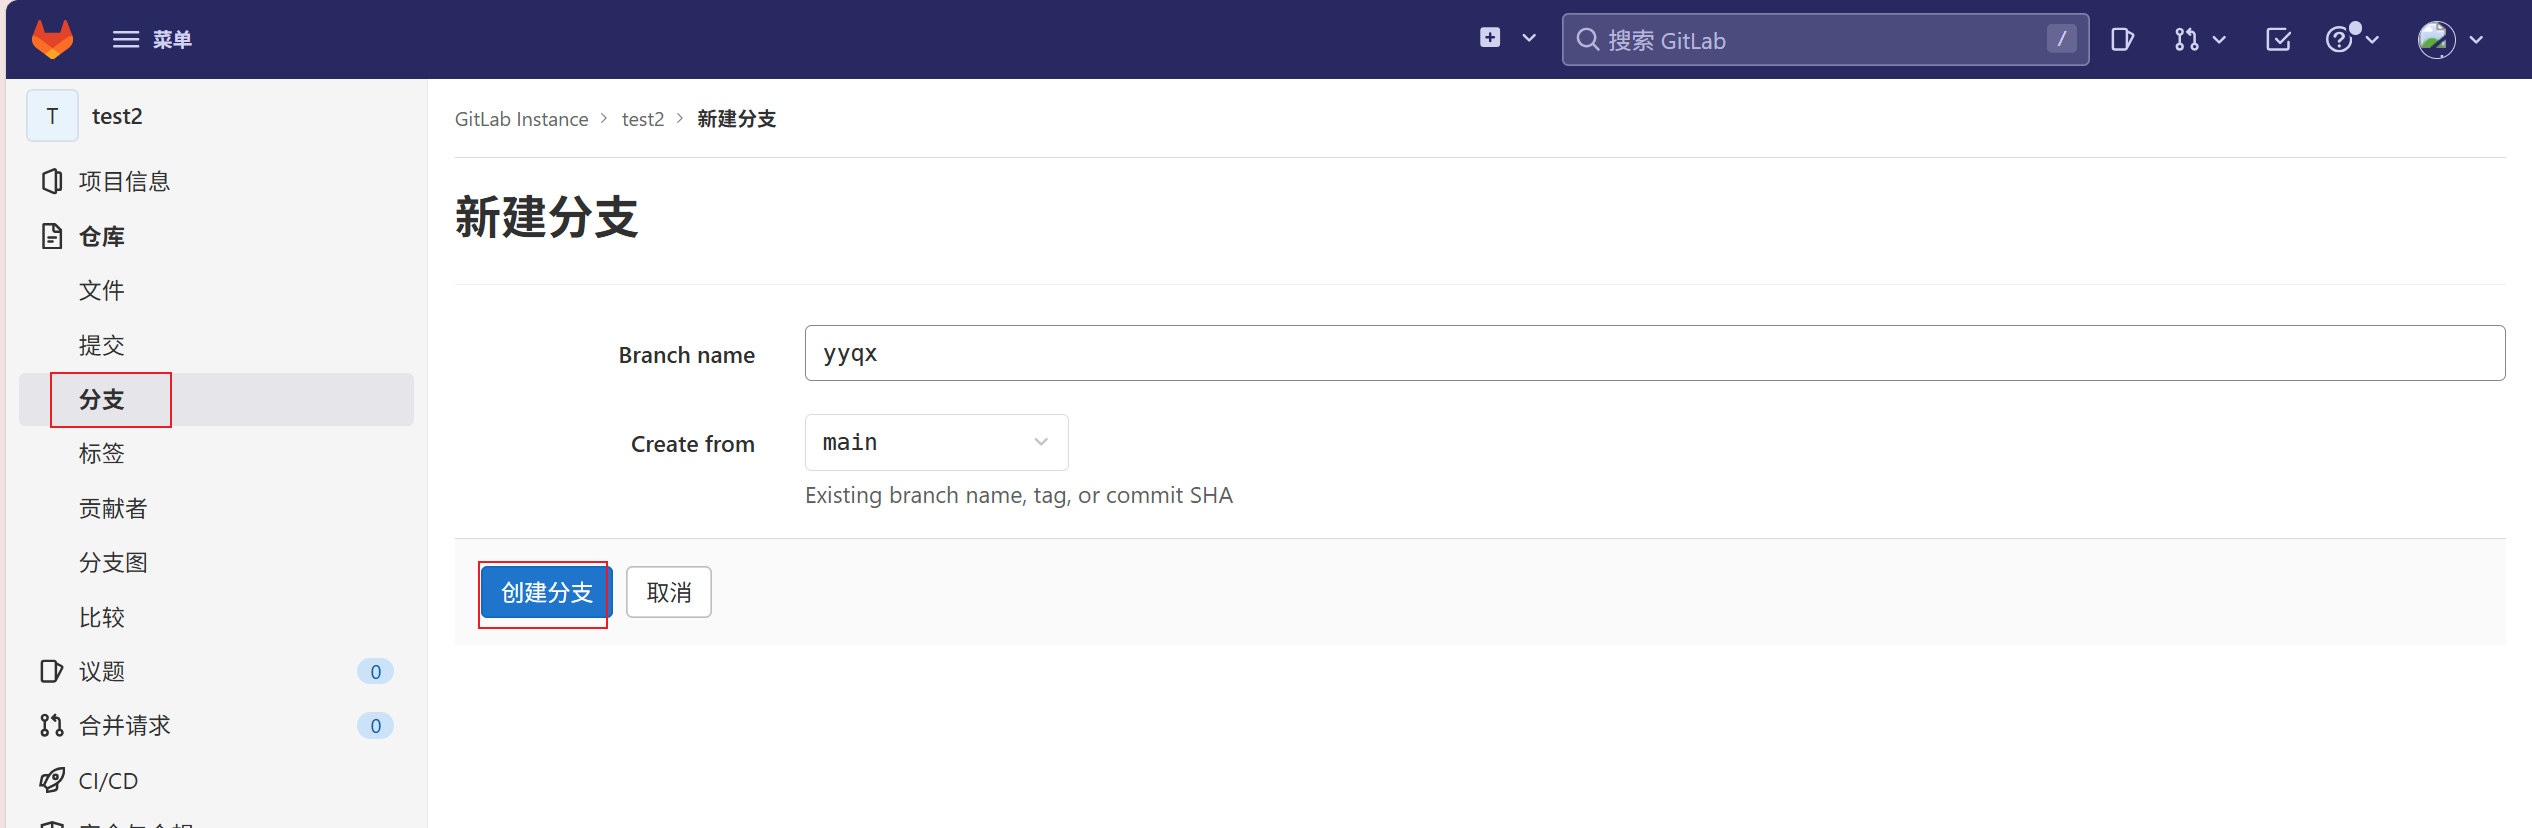
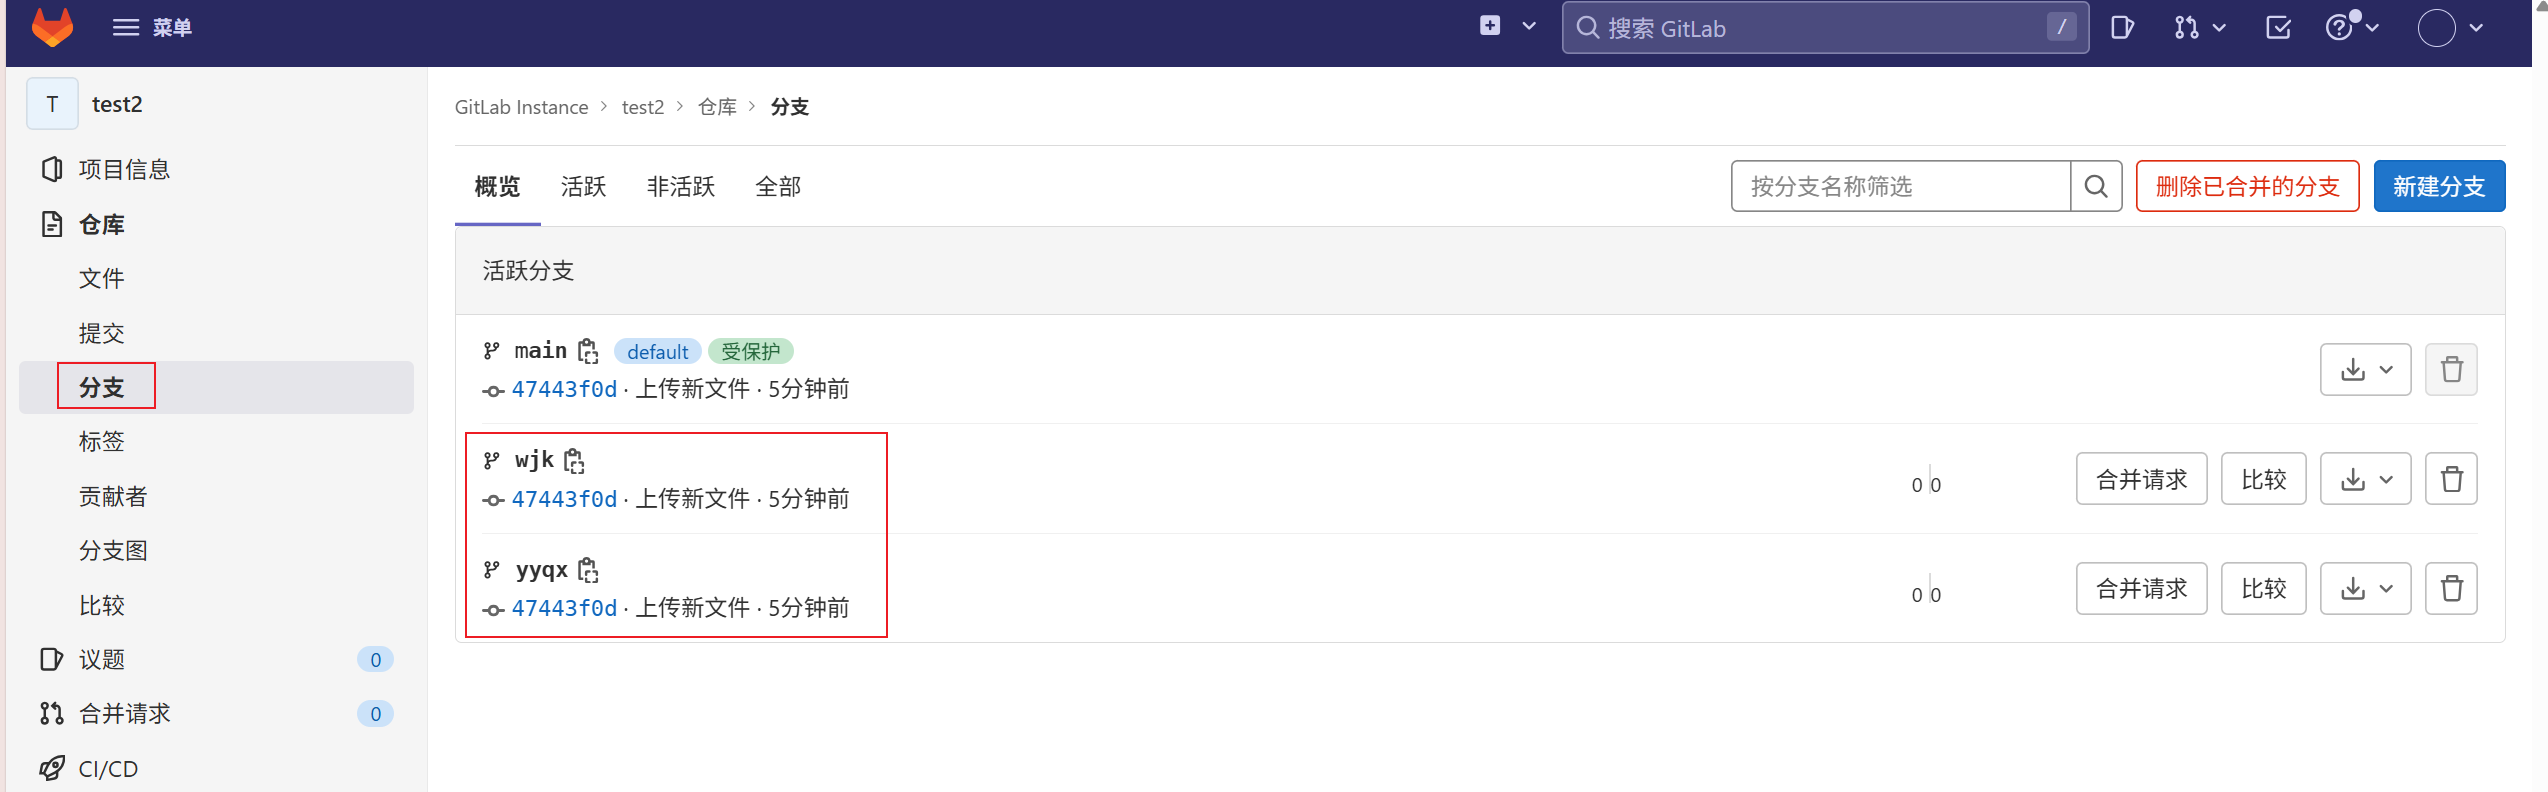
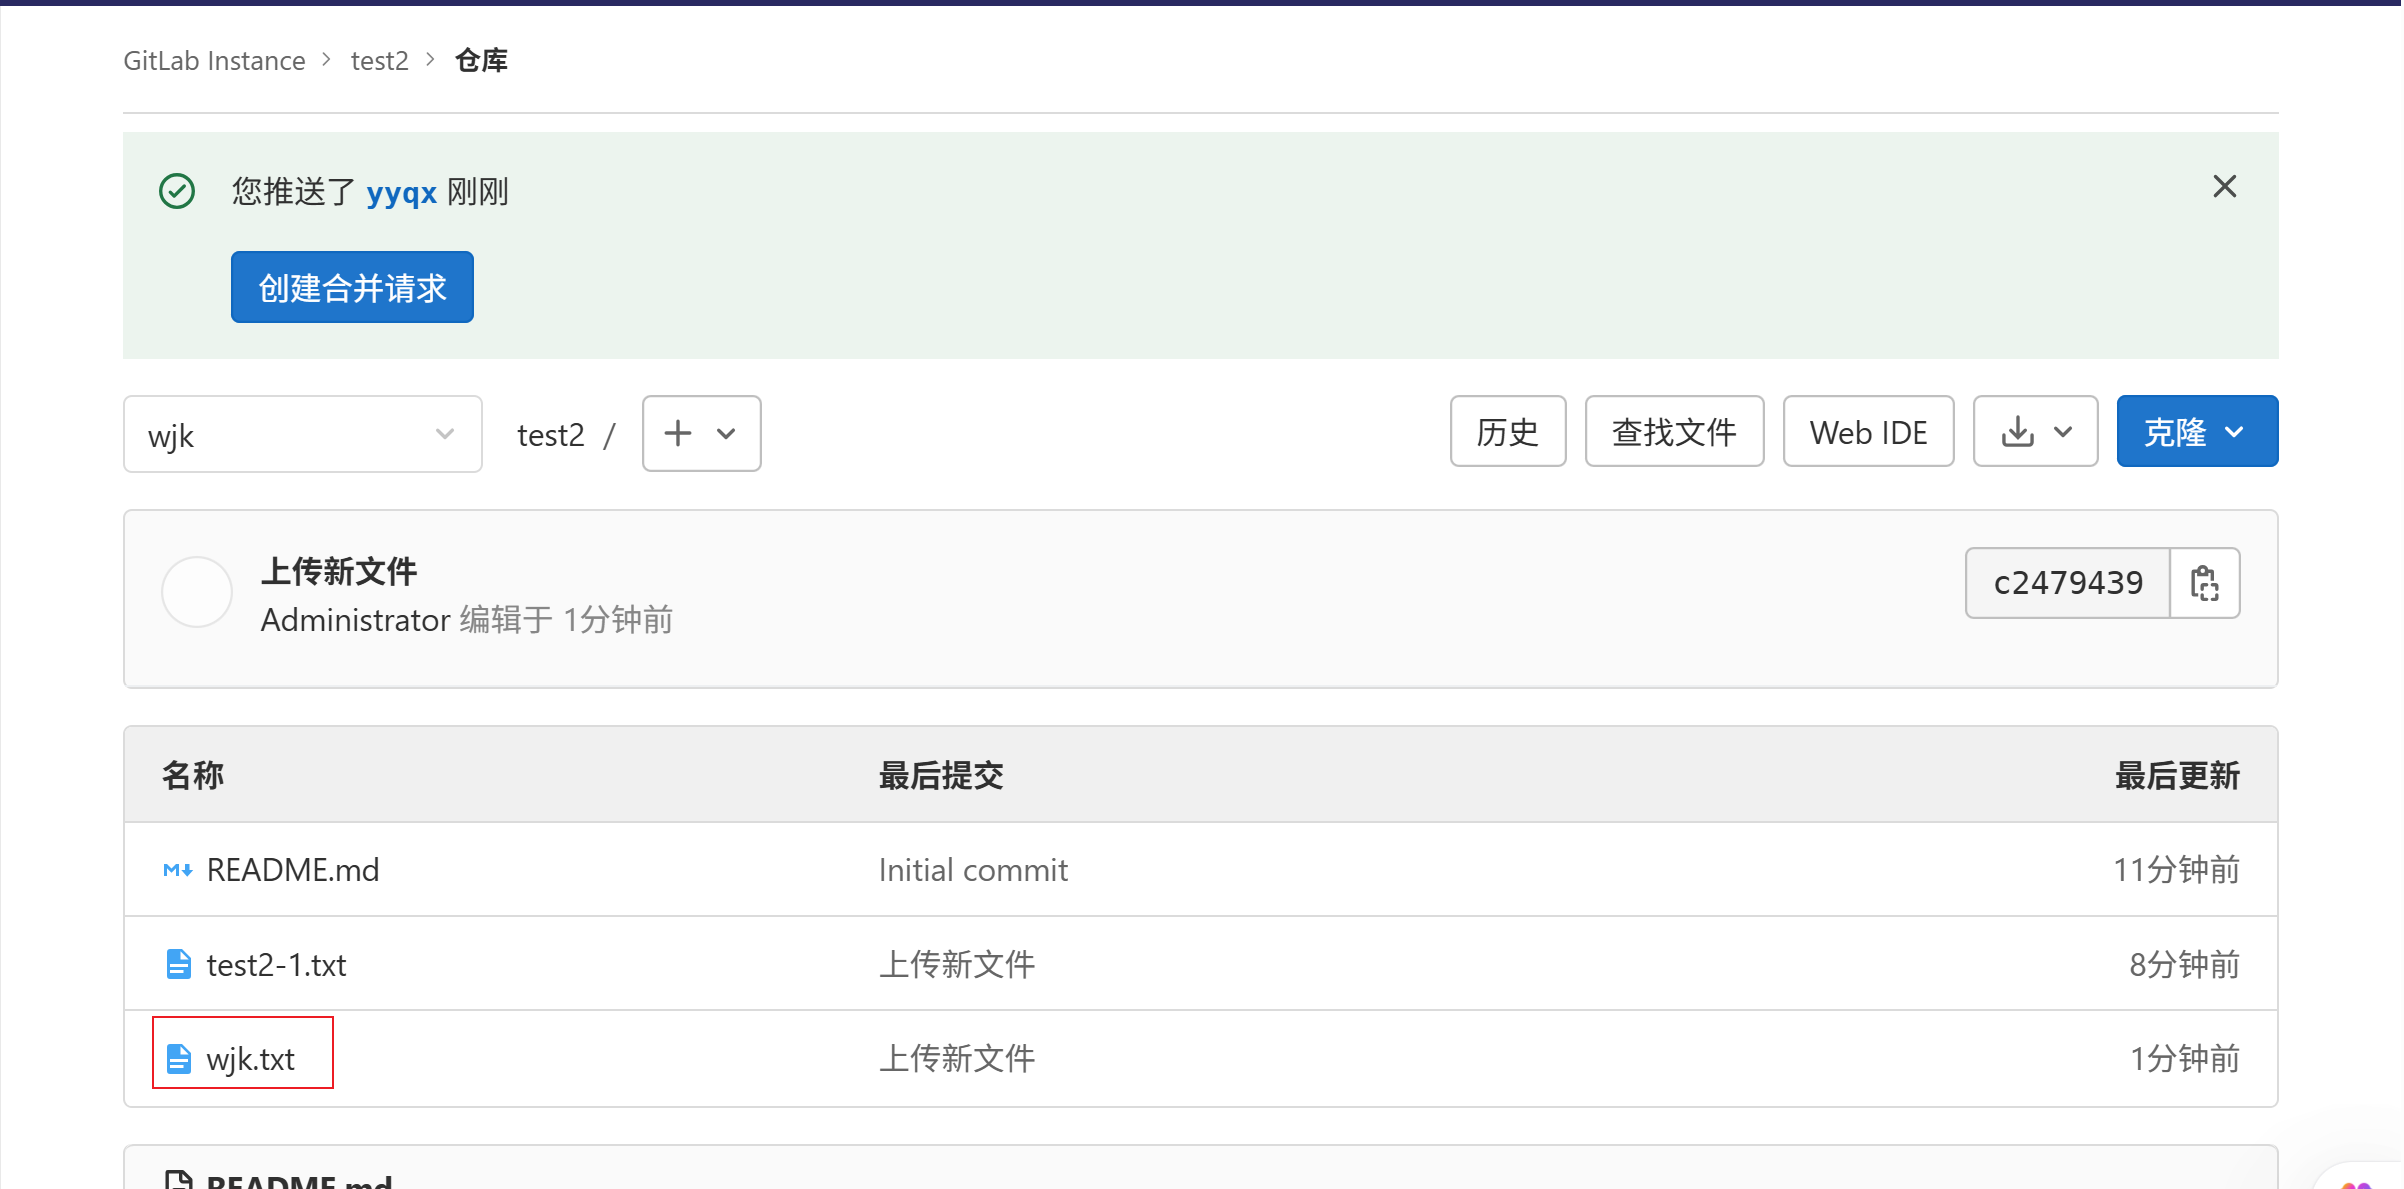
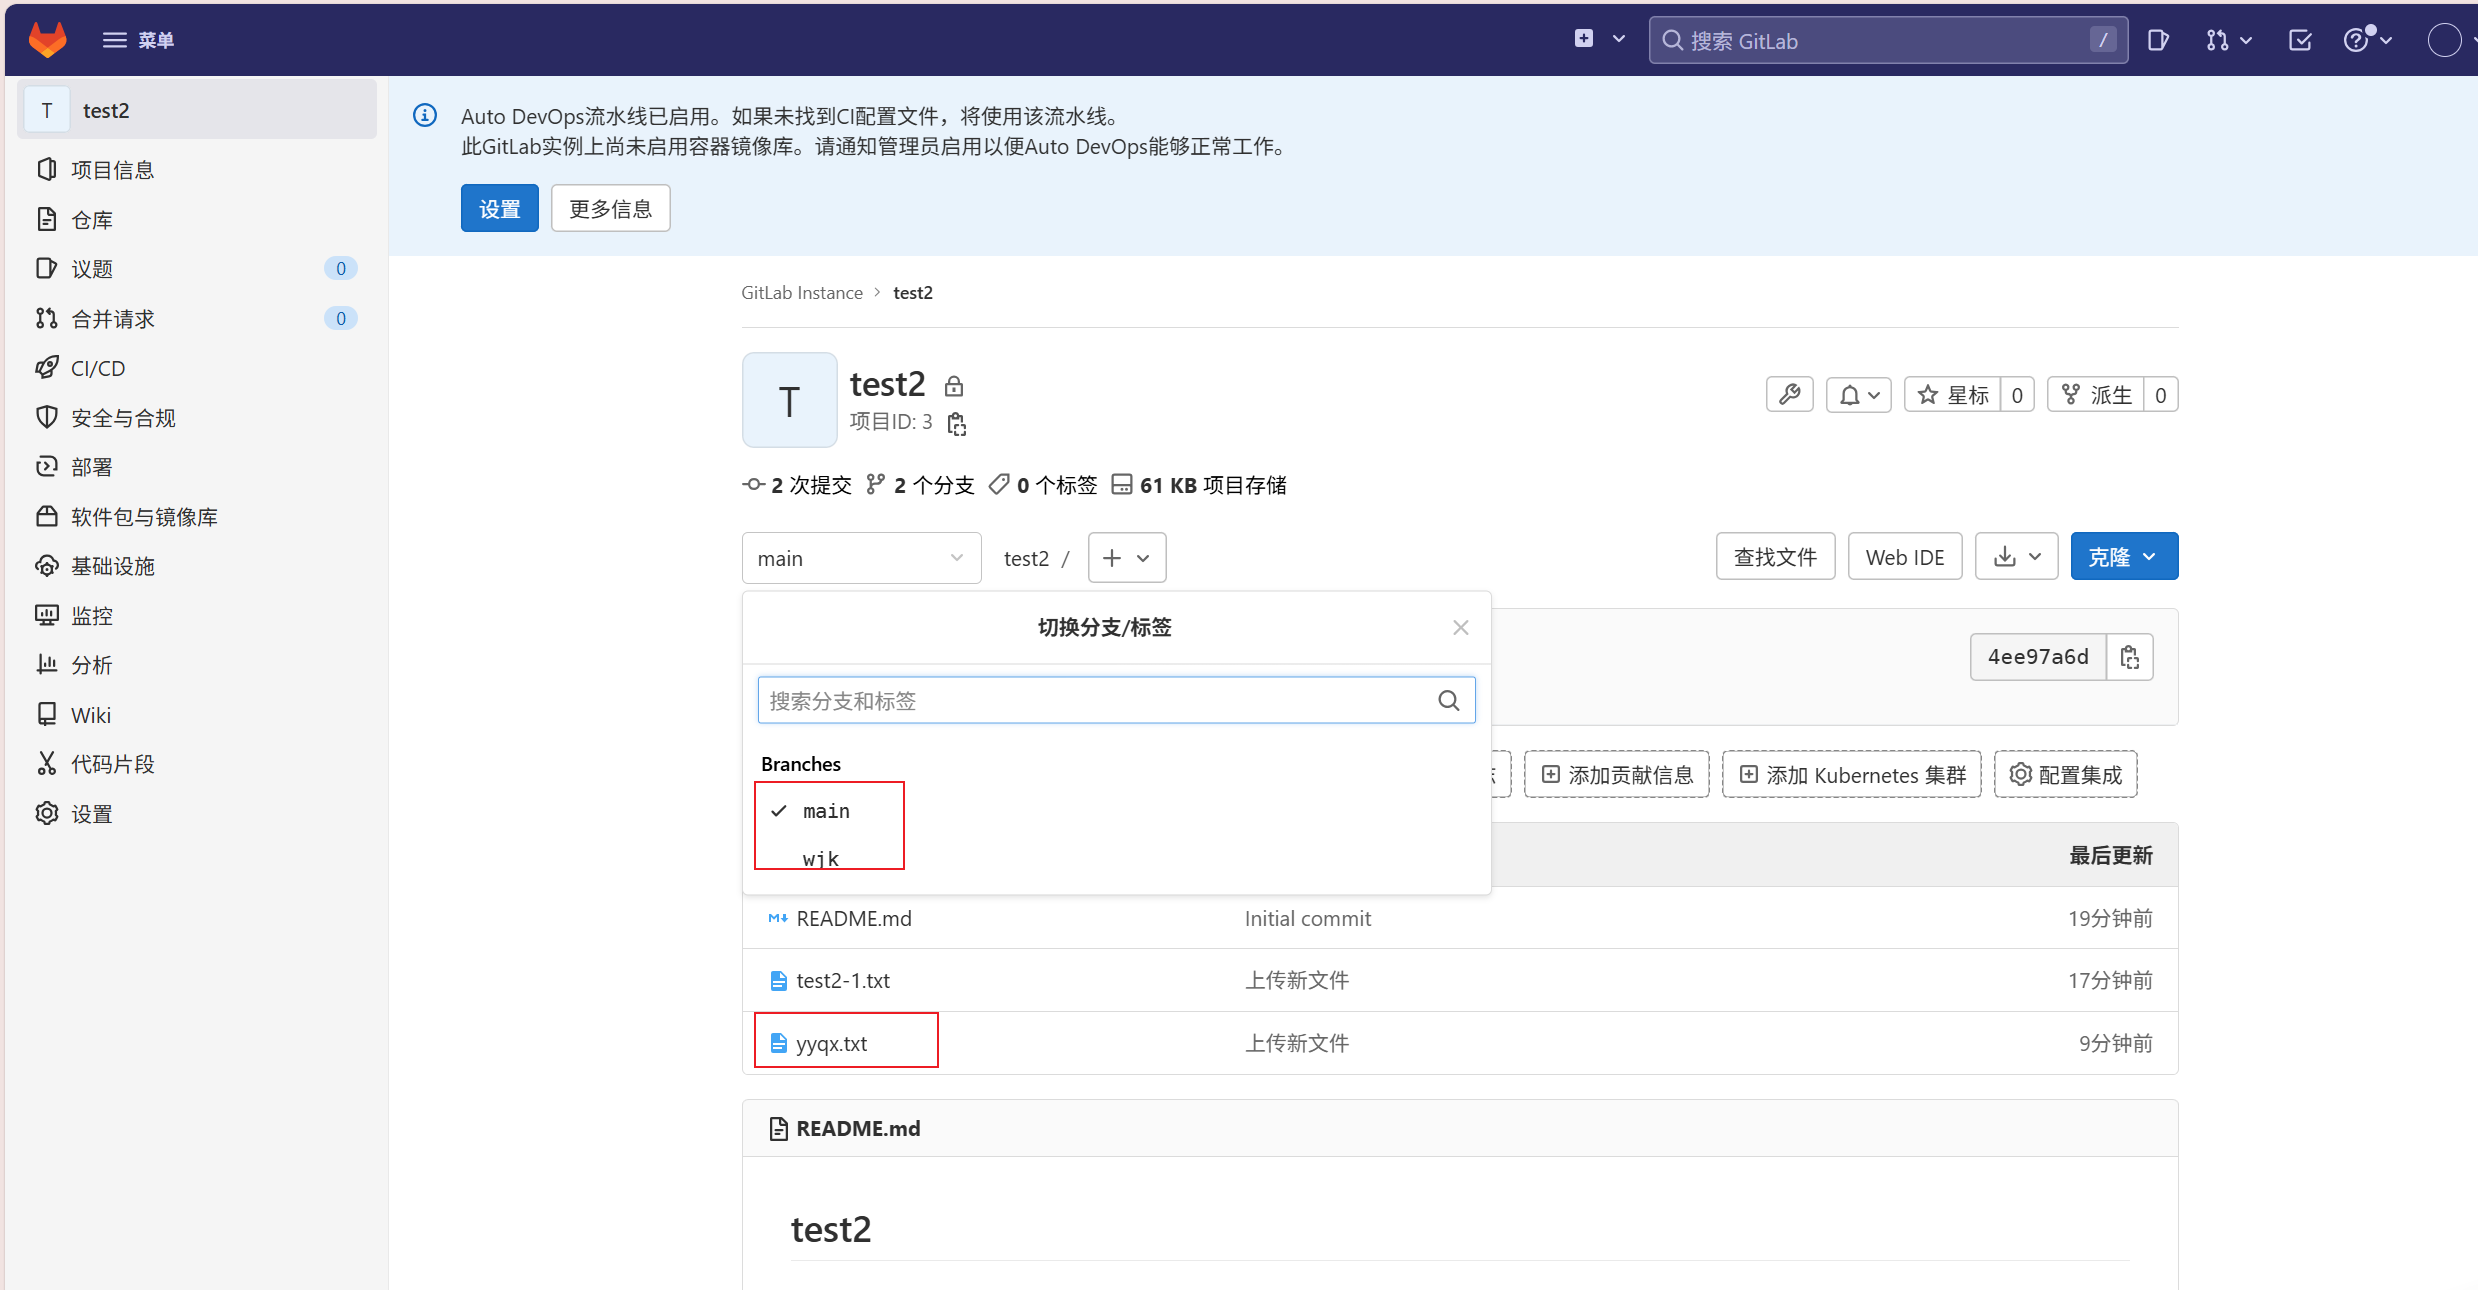
4、对应将两方文件上传到对应分支(一个分支的文件代表一个人的文件)
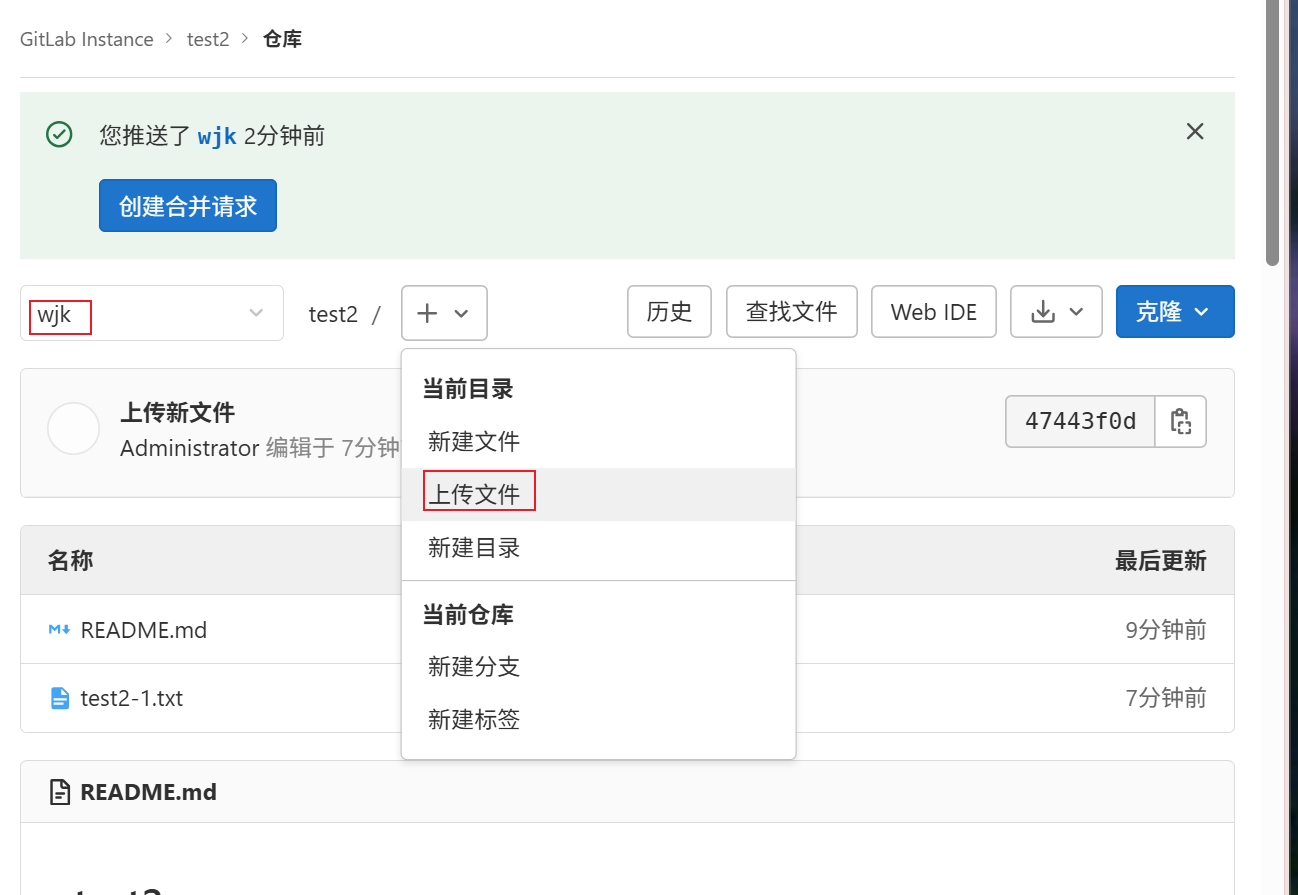
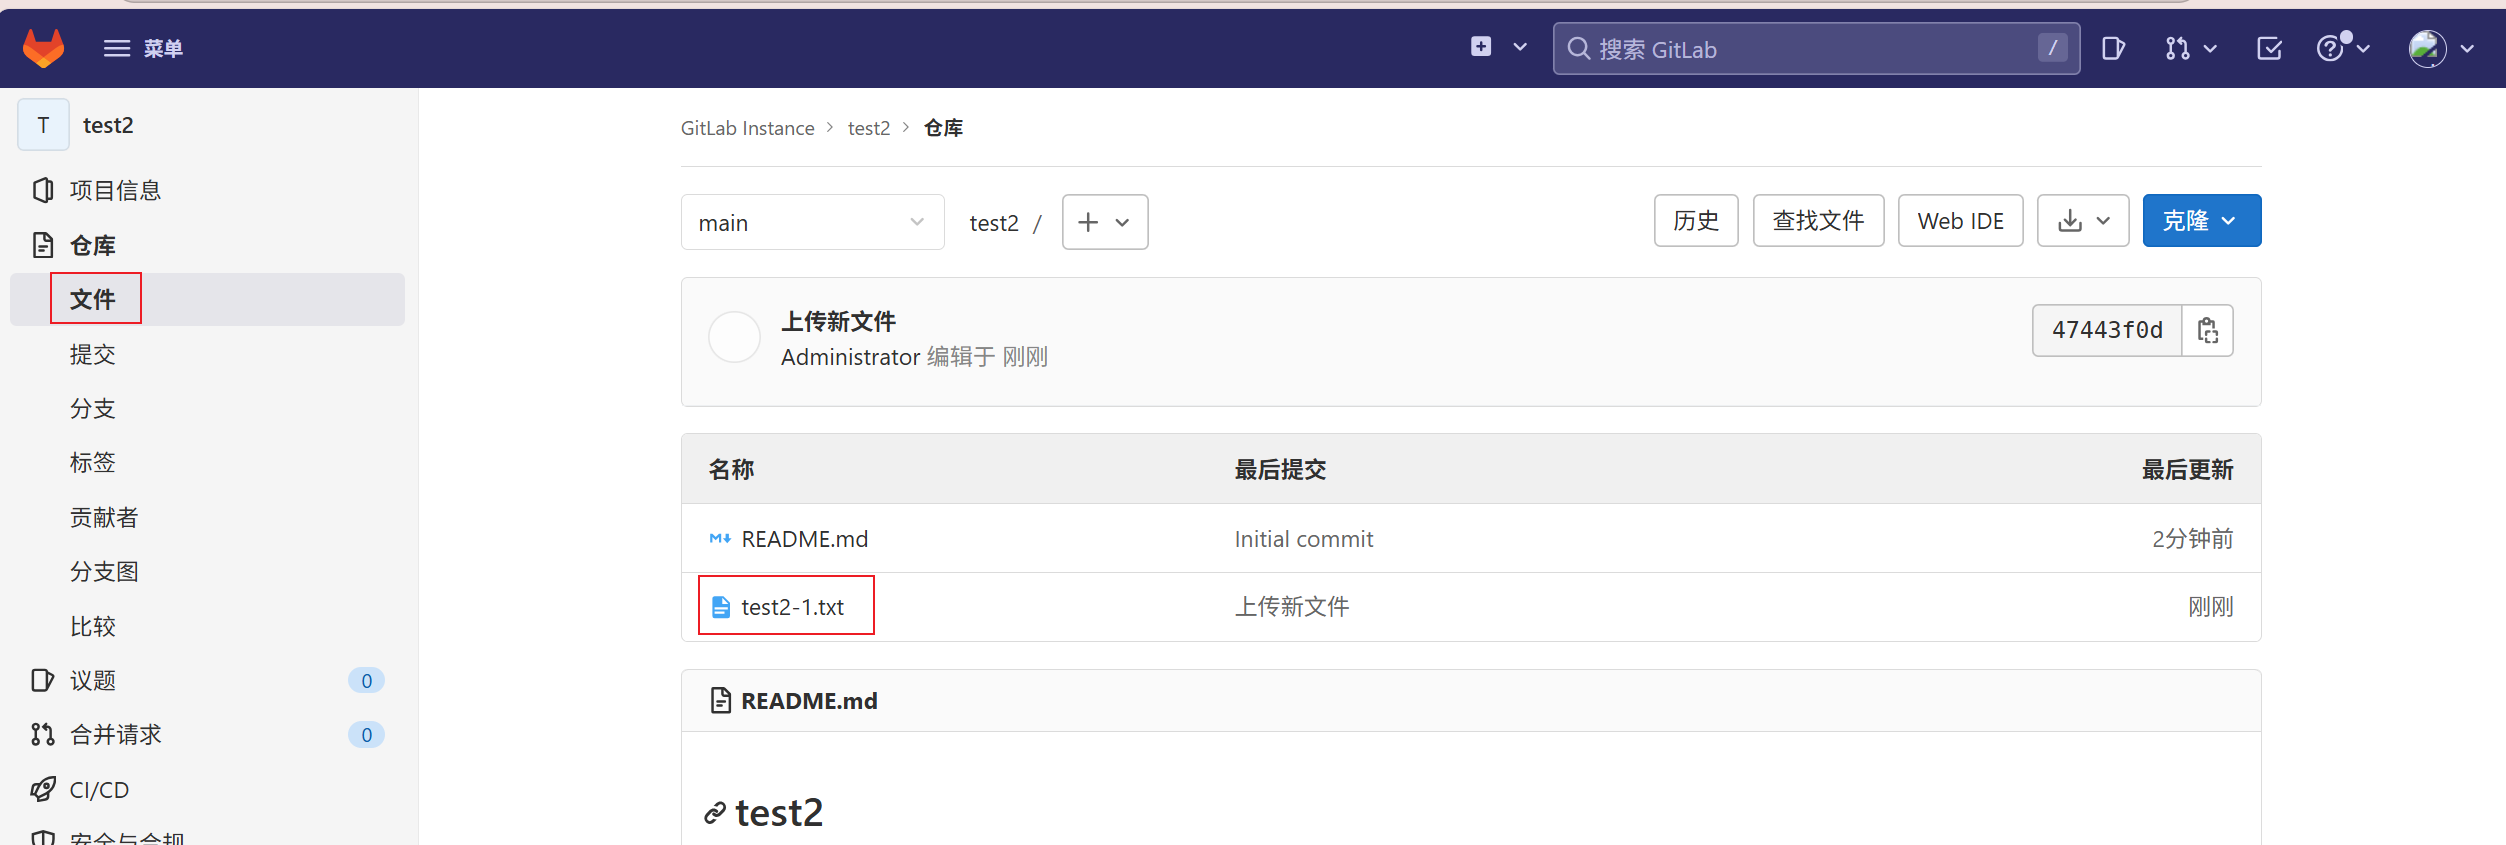
查看对应文件

注意:在创建分支的同时main分支的文件会同步到新创建的分支中,也就是说在真实开发项目中,将基本项目架构先写入main分支,给到对应写项目的人,然后负责项目的人,每人负责一个版块,将自己的对应完成的板块再上传到自己的分支中,最后进行合并
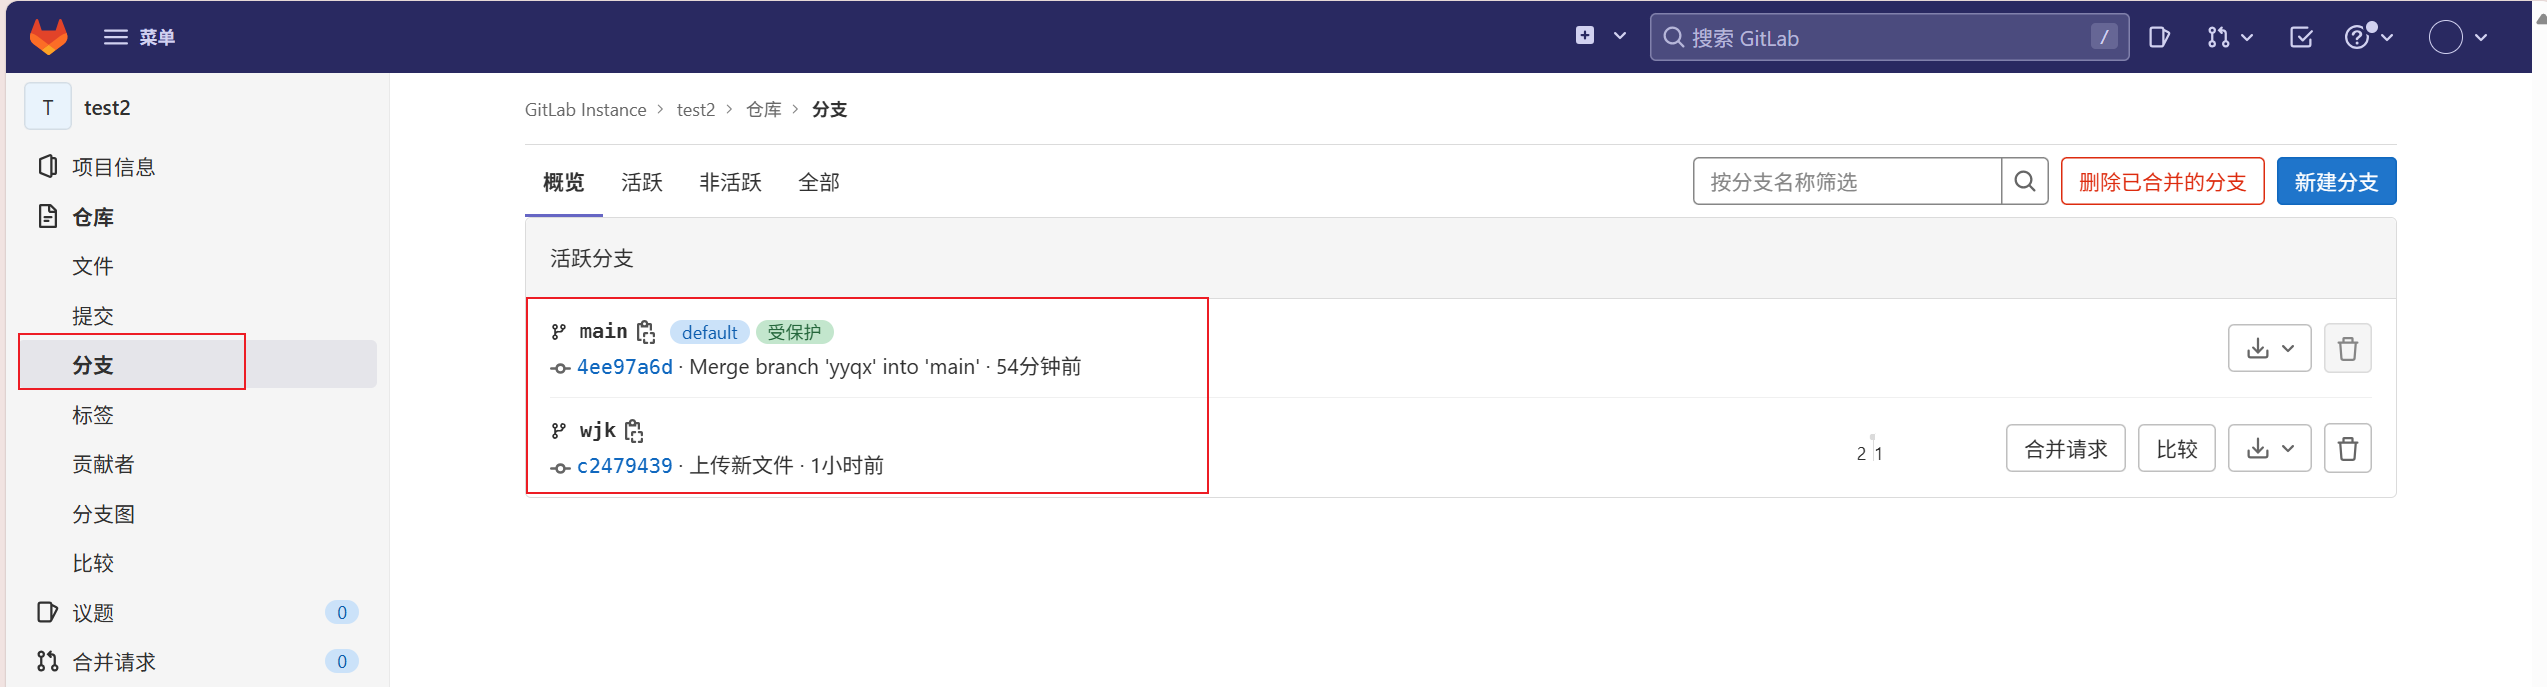
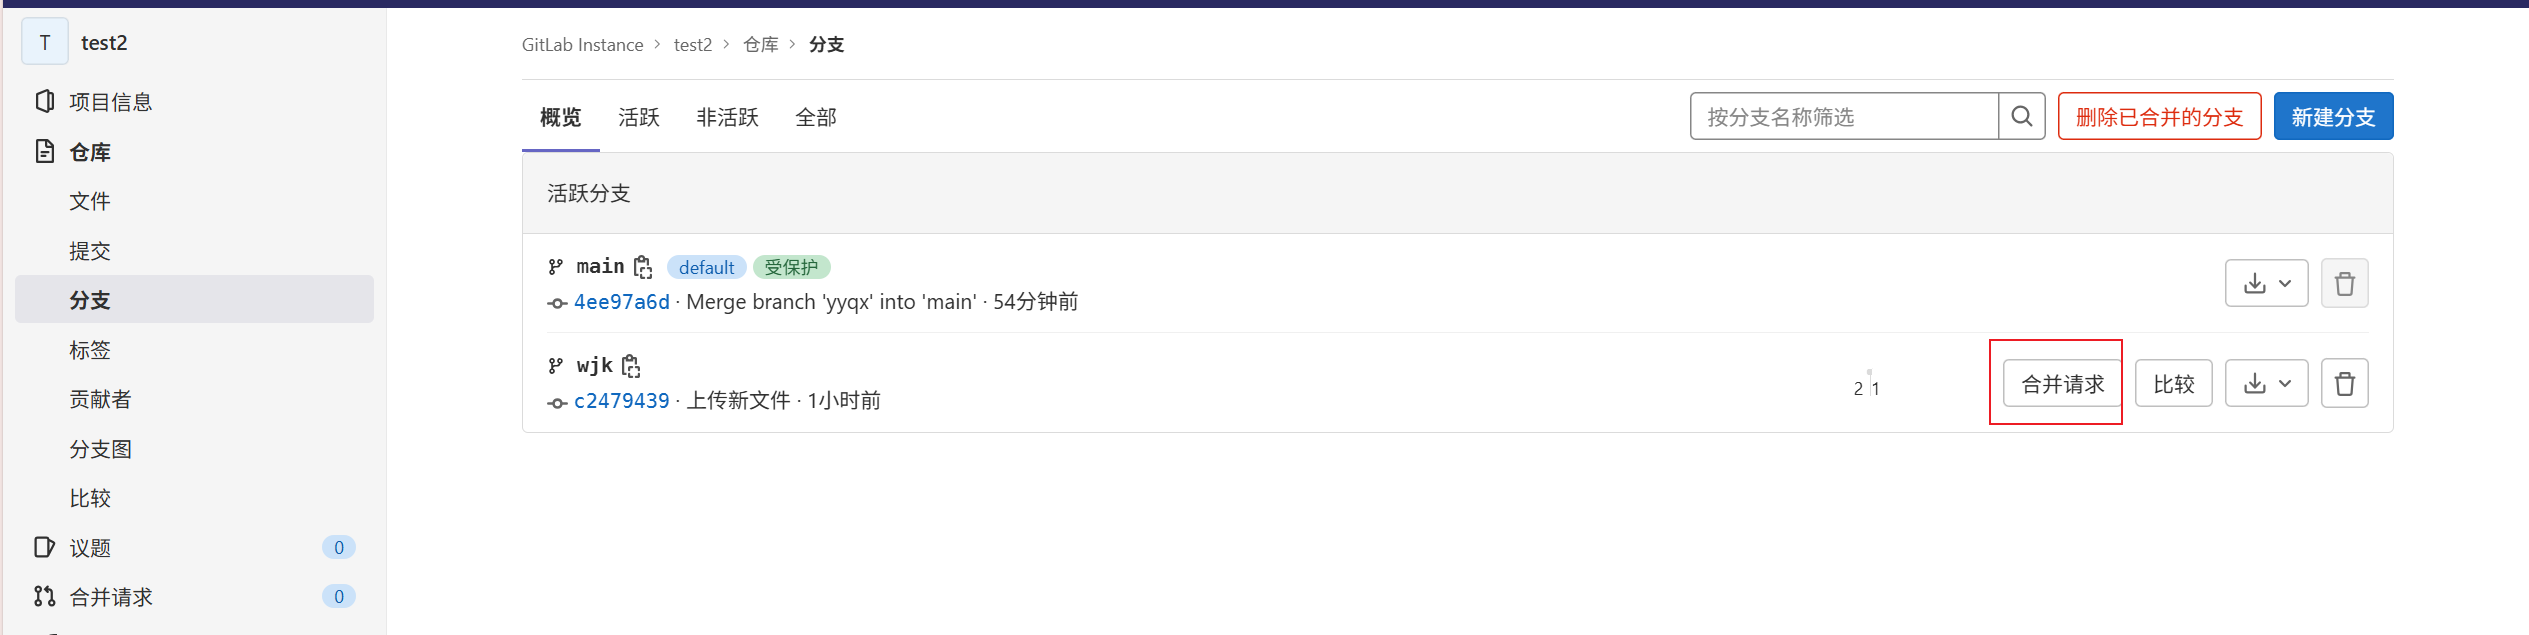
5、合并分支
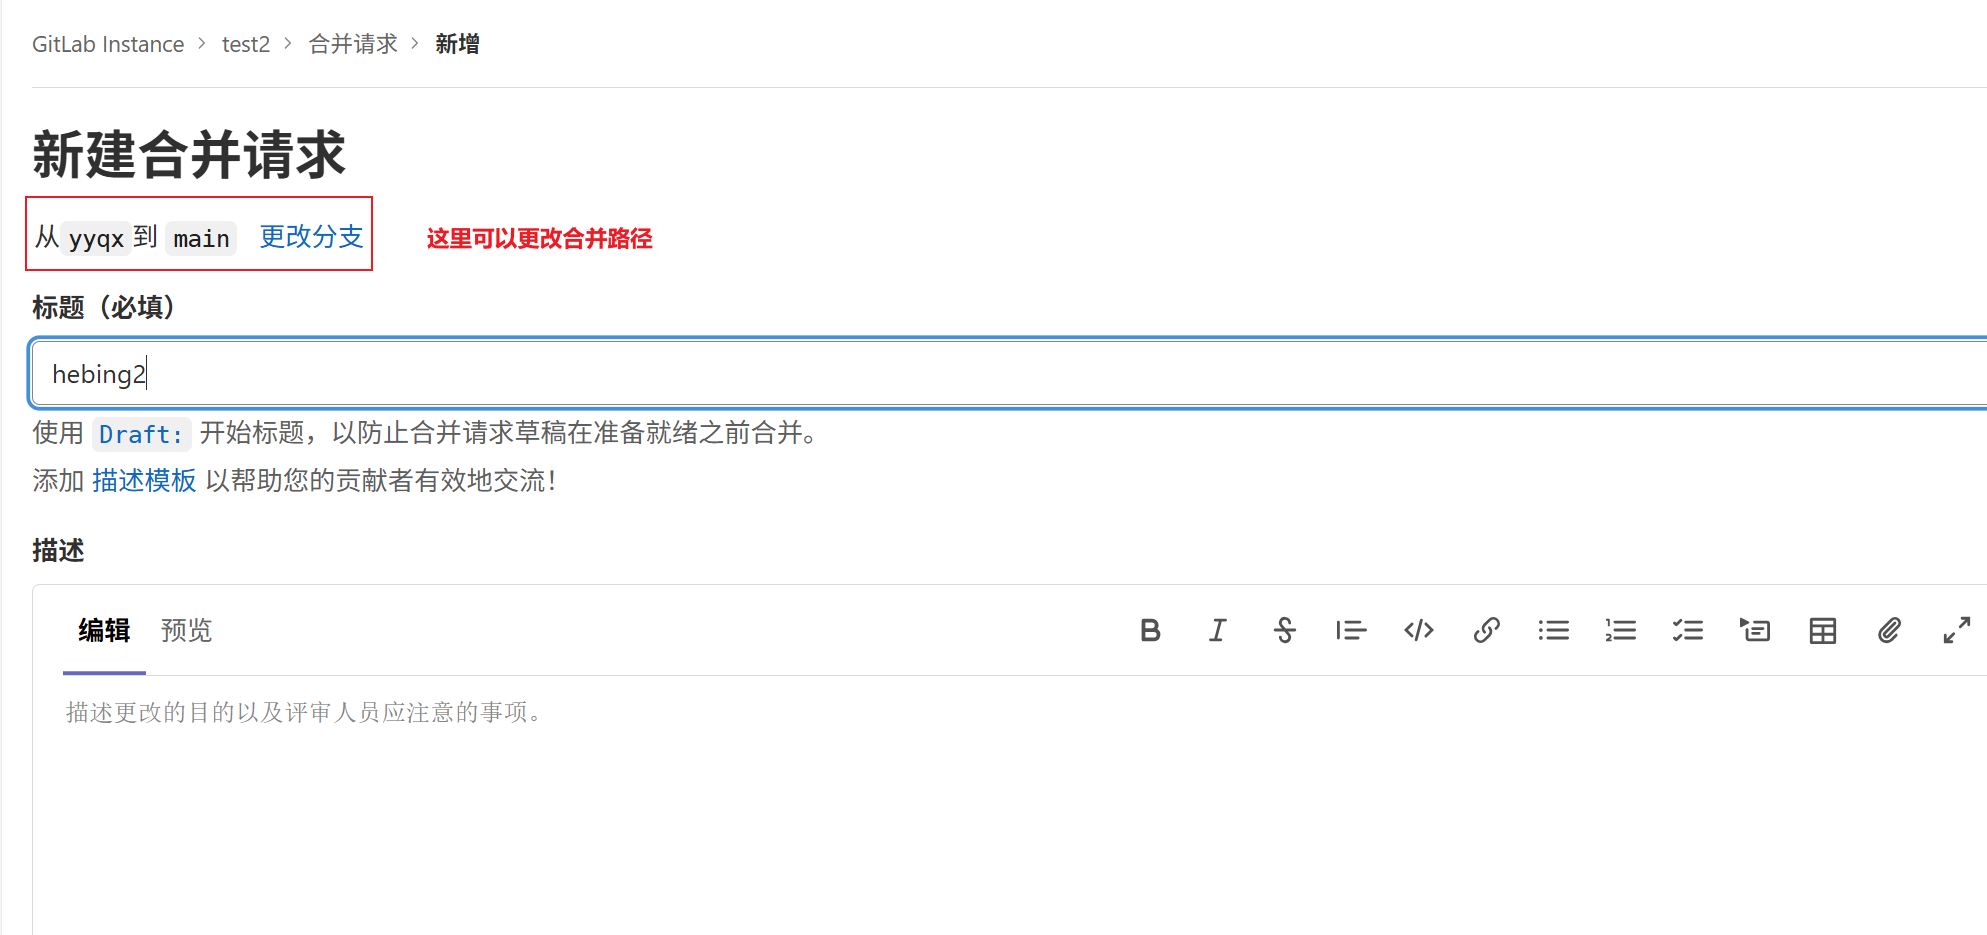
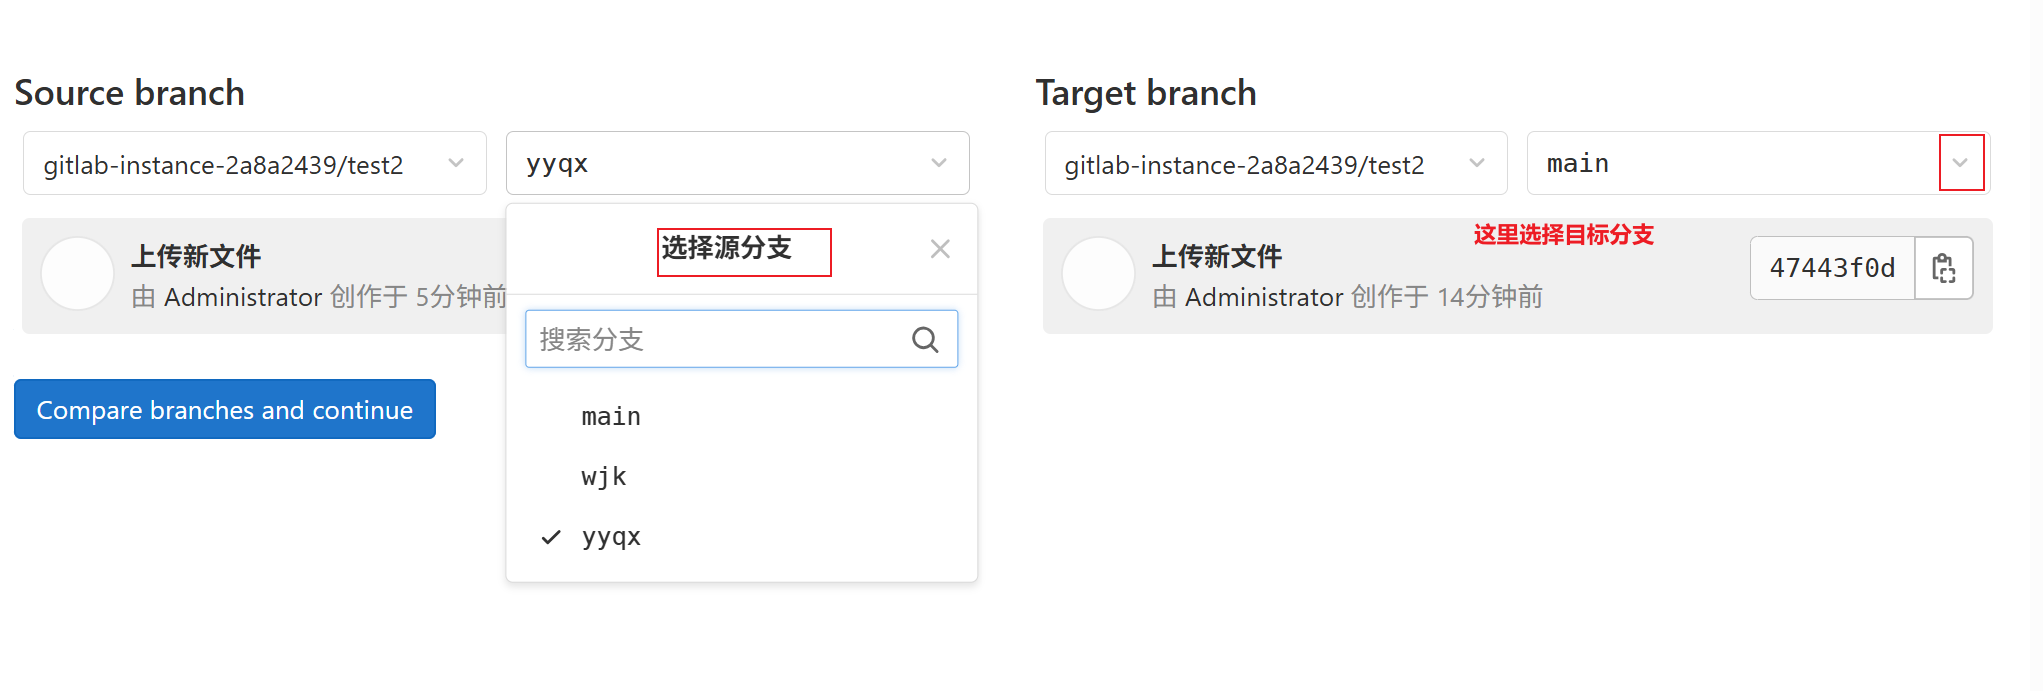
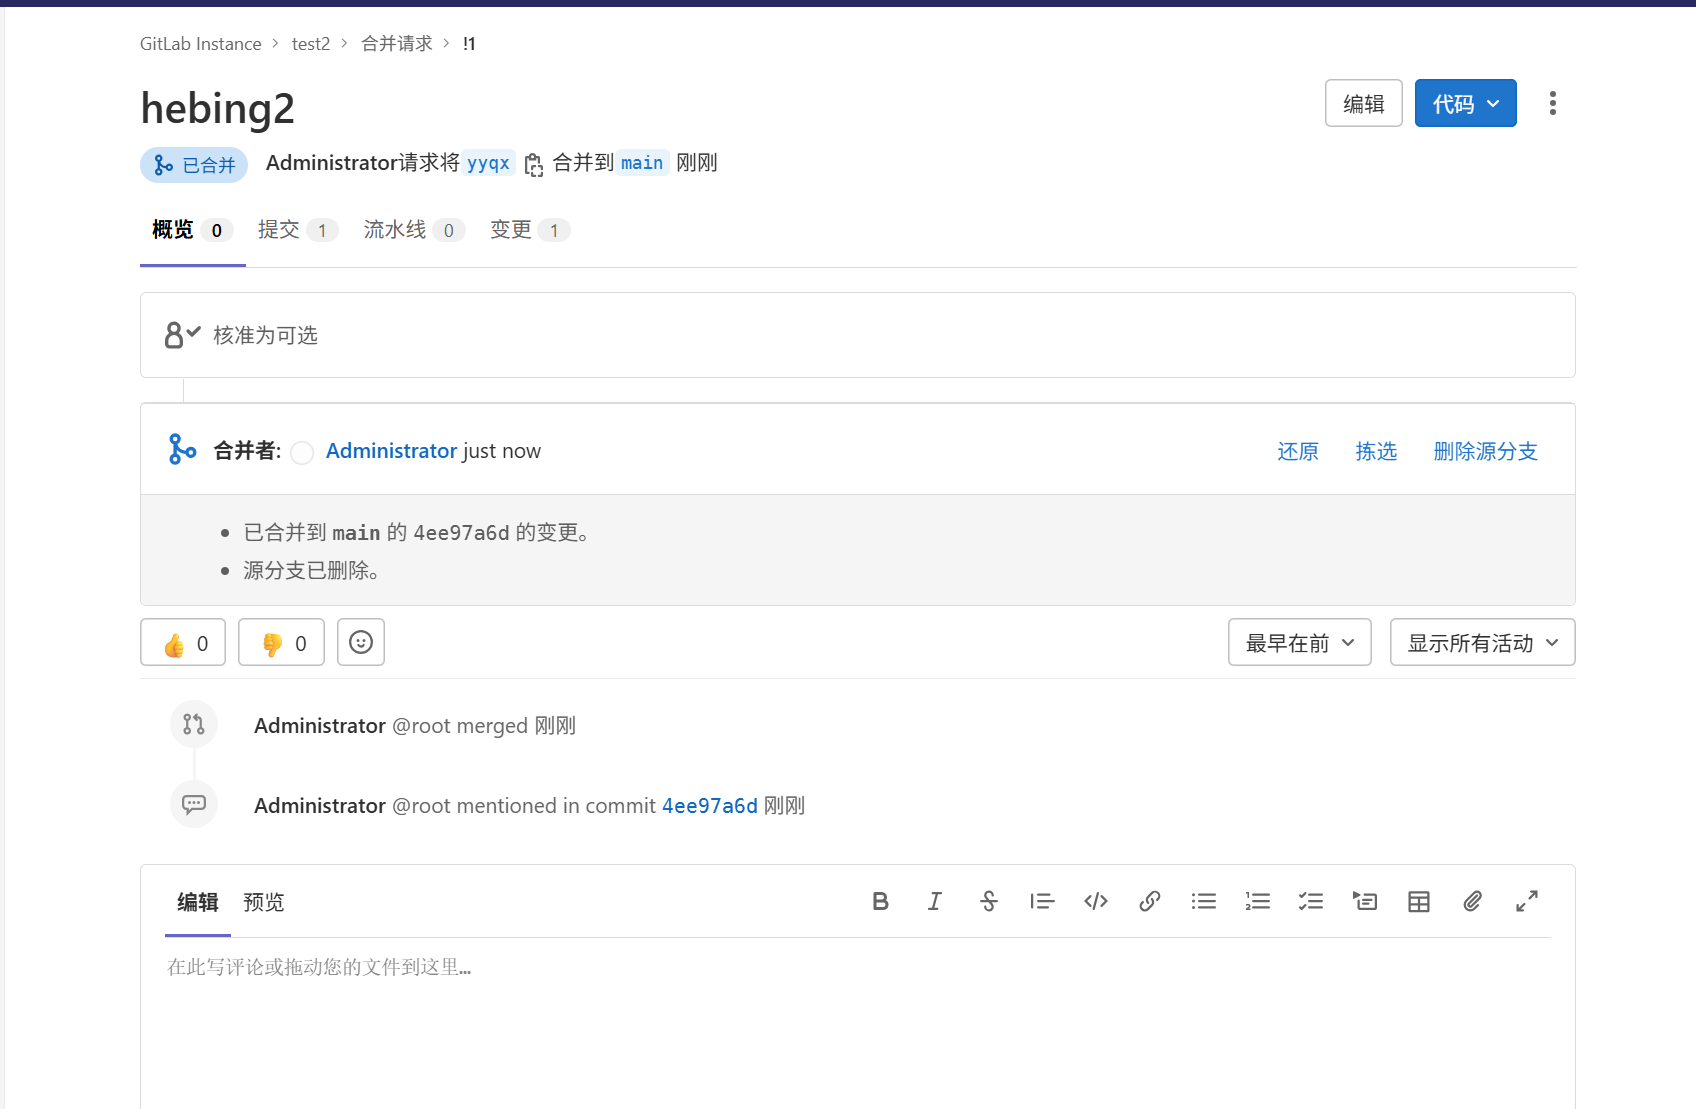
没有了yyqx分支,yyqx.txt也传输到main分支中
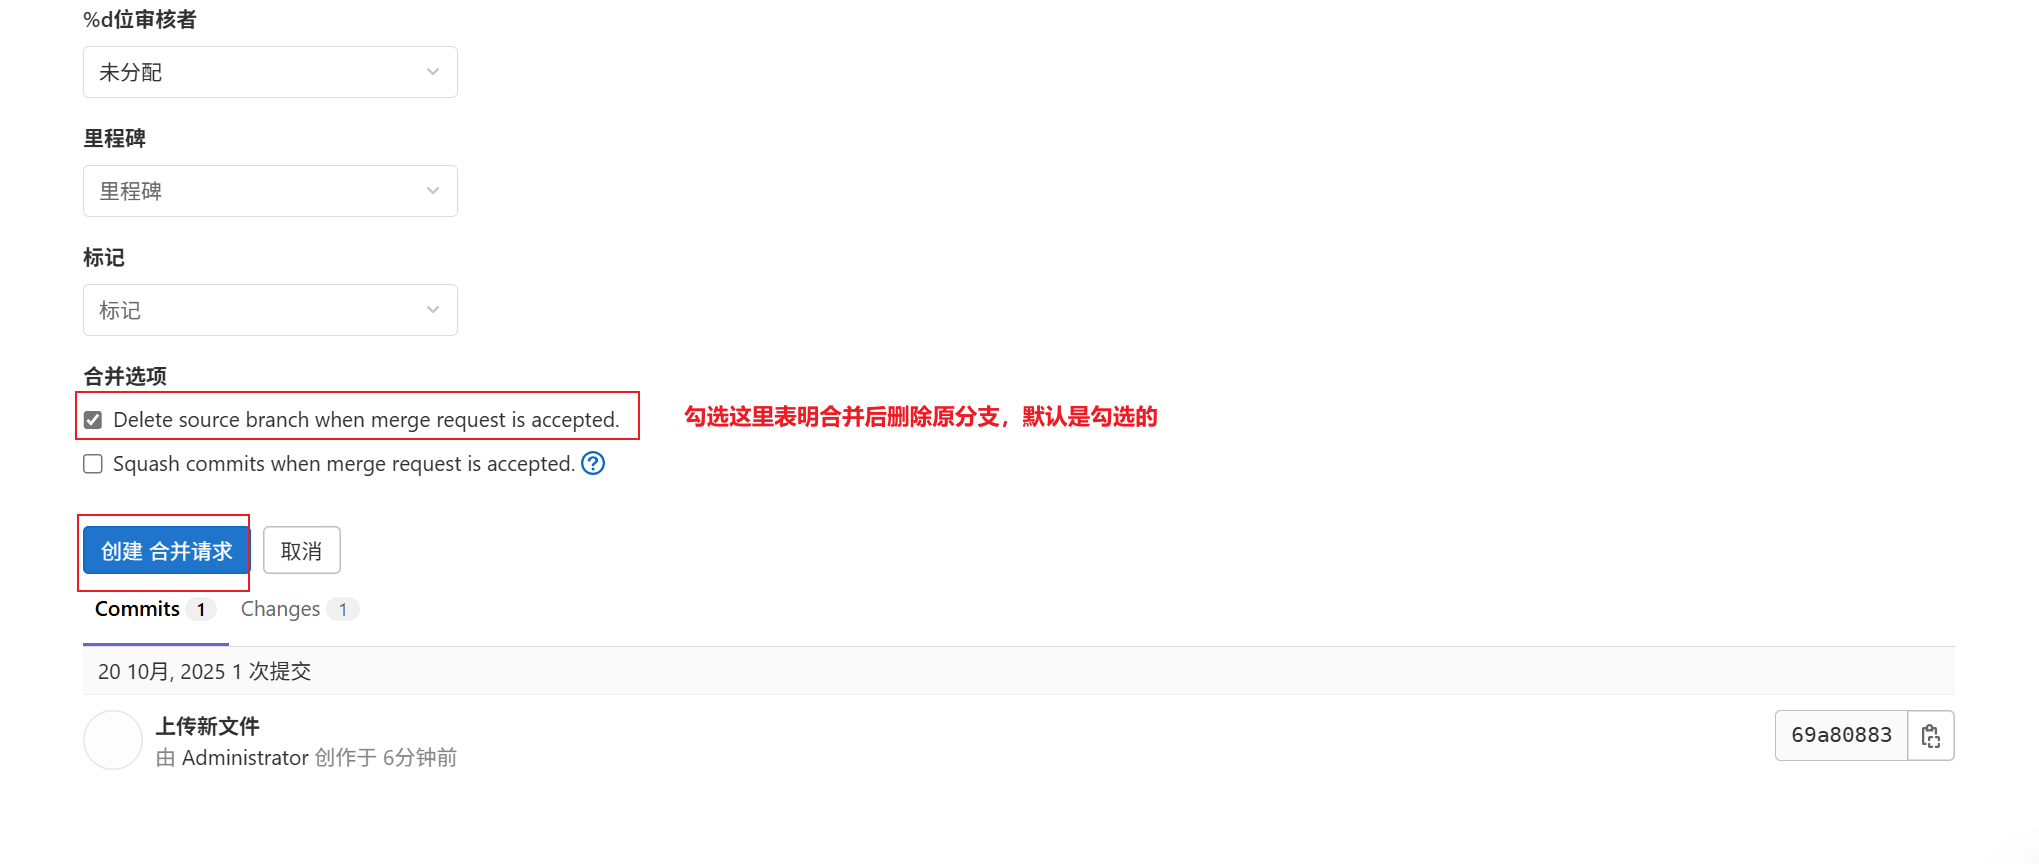
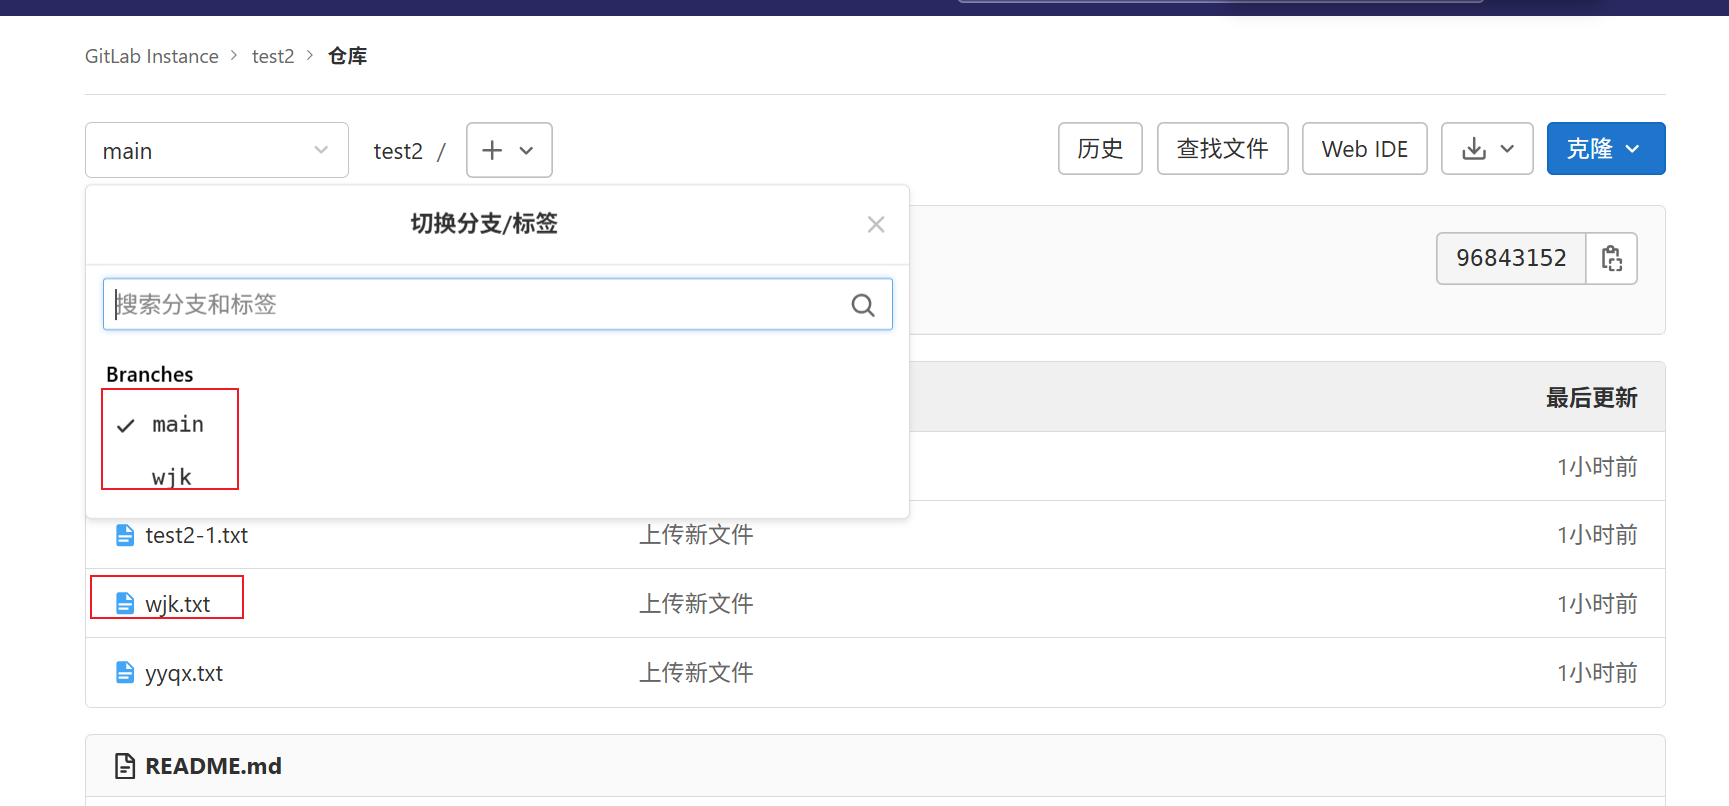
可以将删除原分支取消勾选(这里以将wjk分支合并到main分支为例)
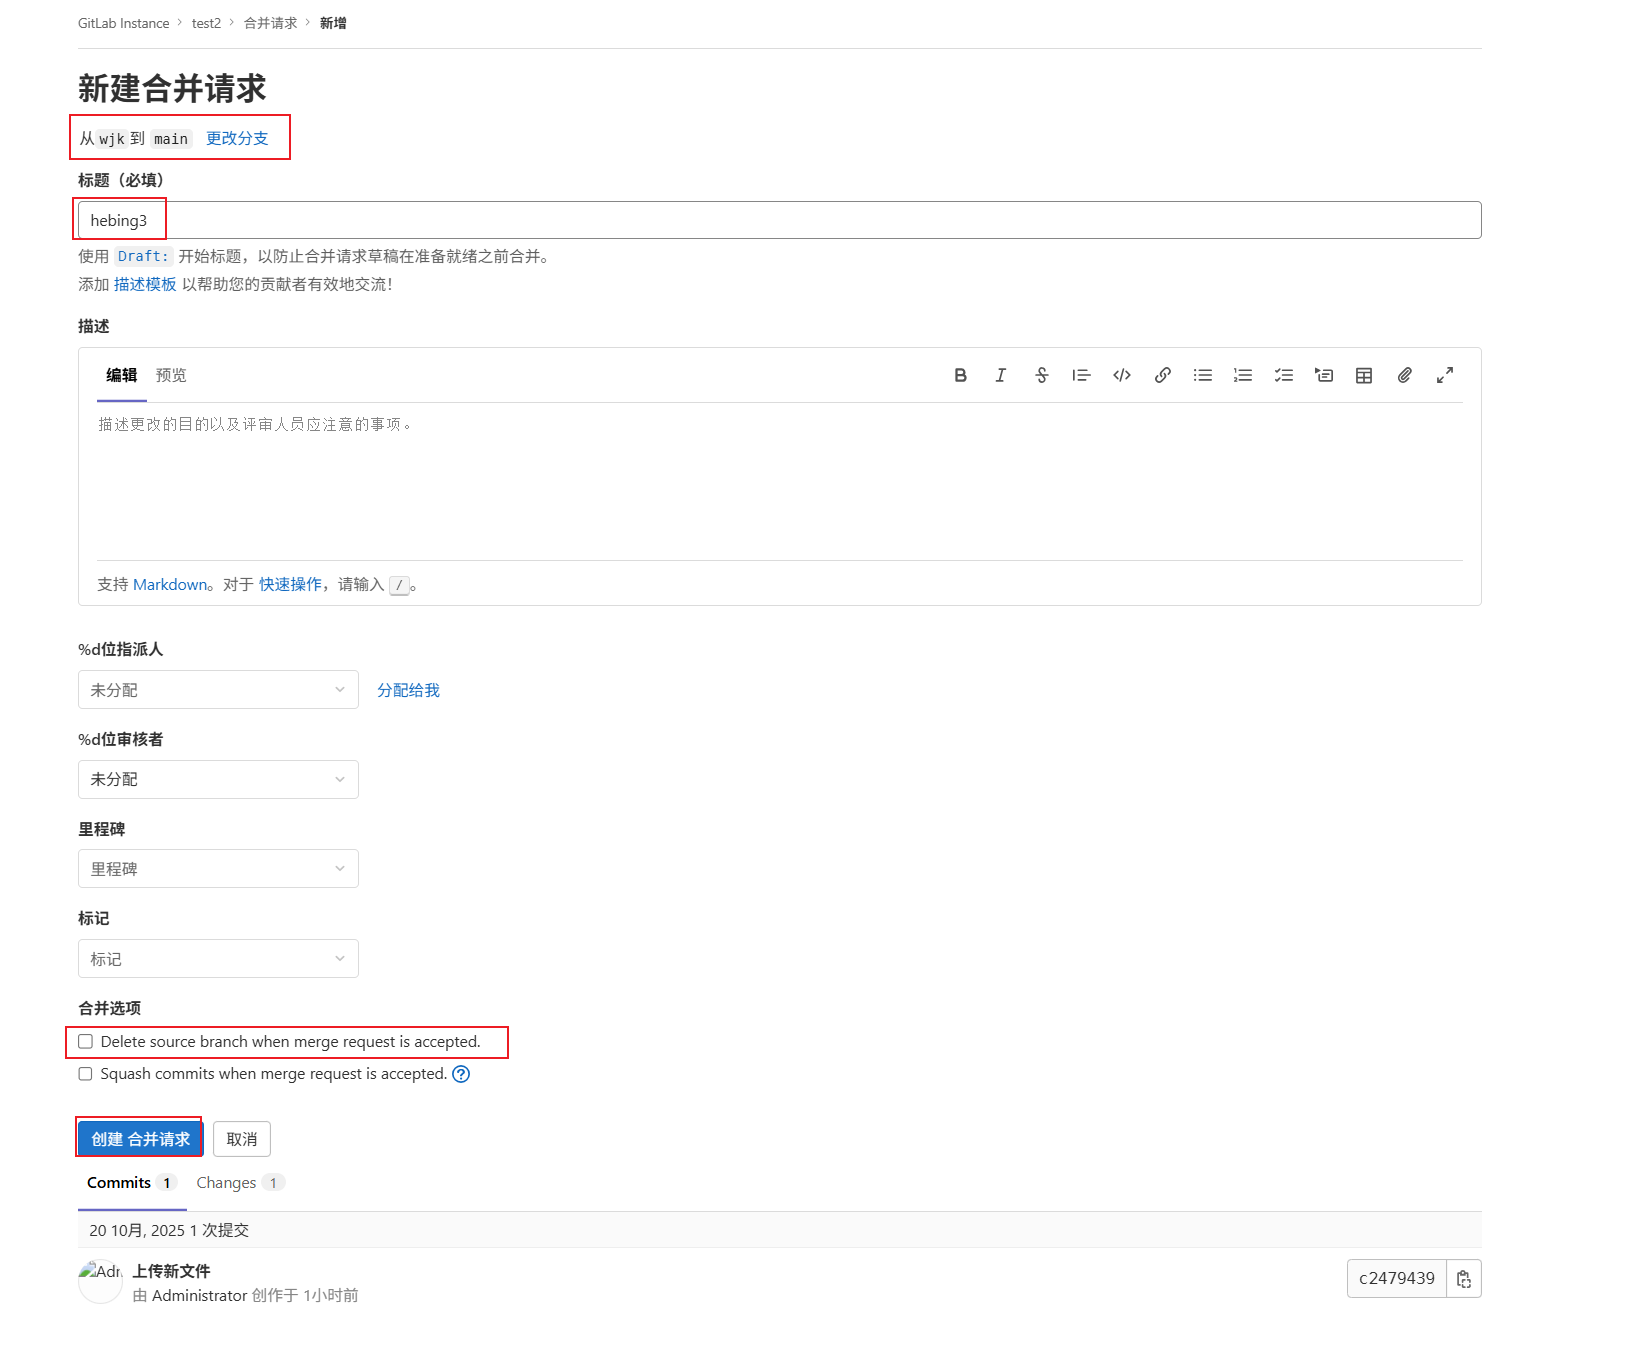
可以看到wjk分支依旧存在,且wjk分支里的文件也同步到了main分支中
创建用户
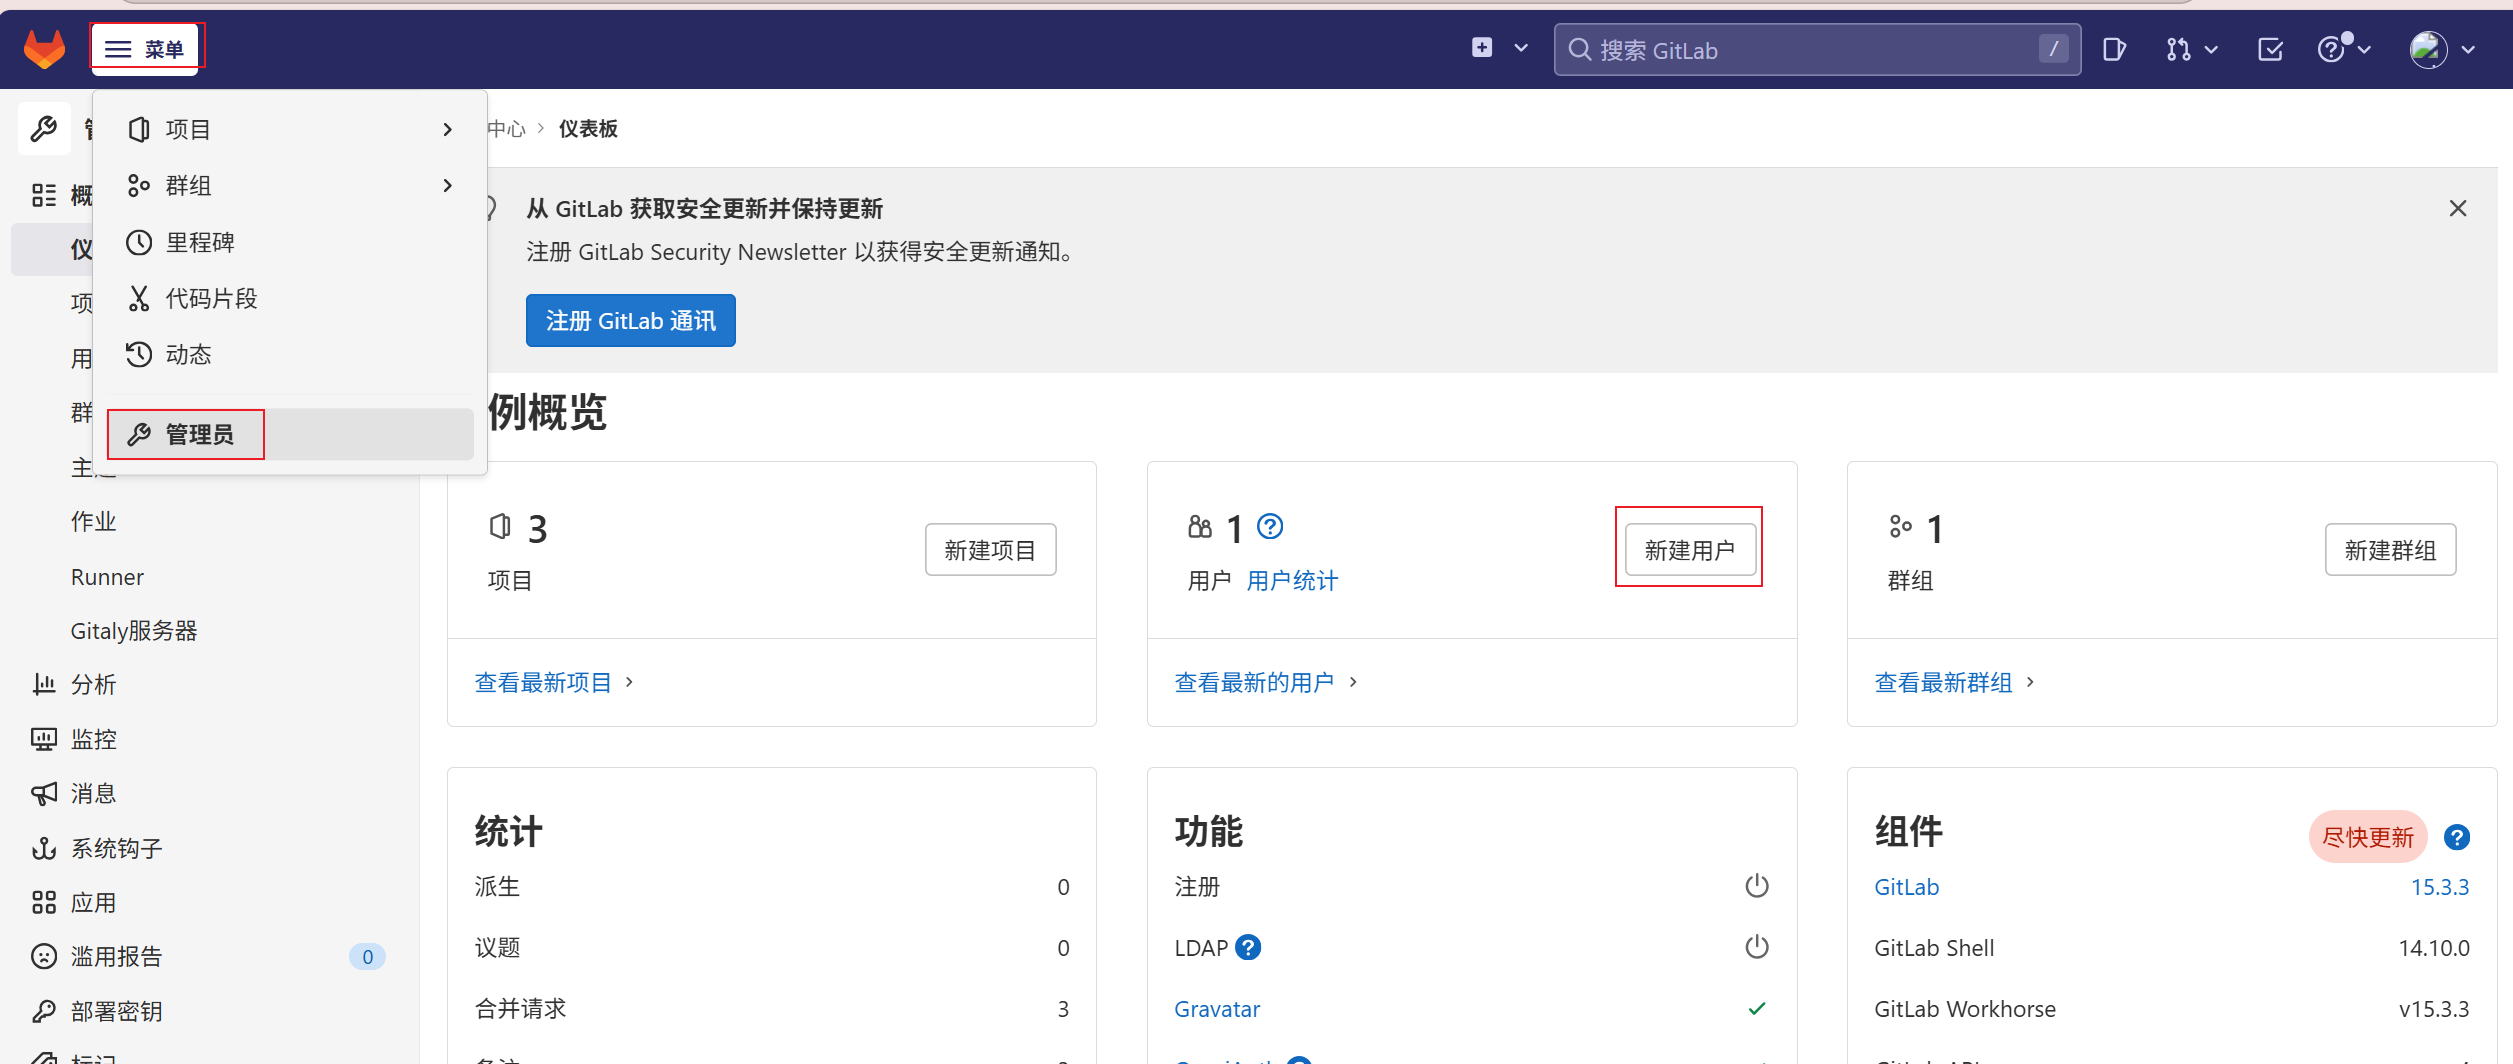
根据需求设置
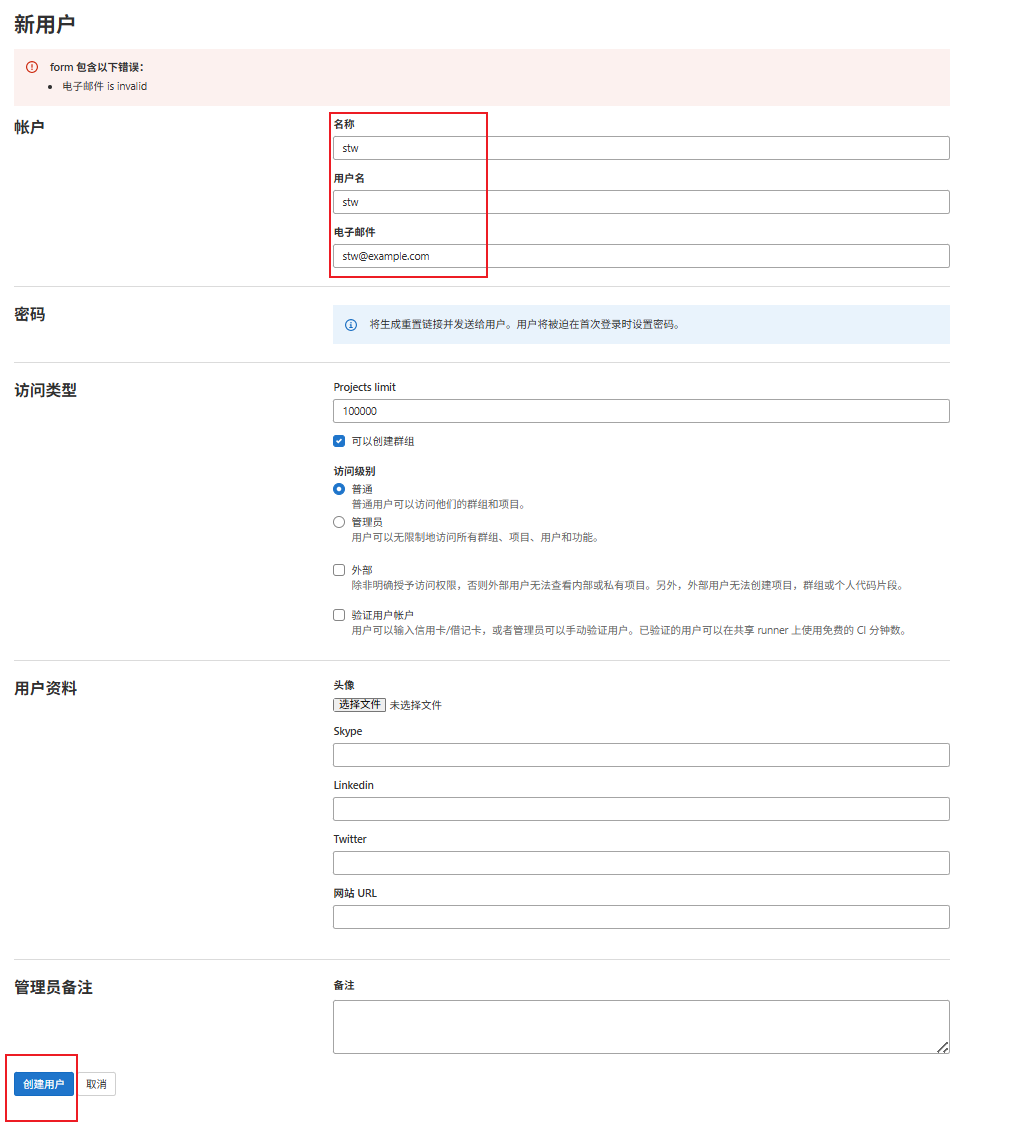
点击编辑设置密码------保存更改
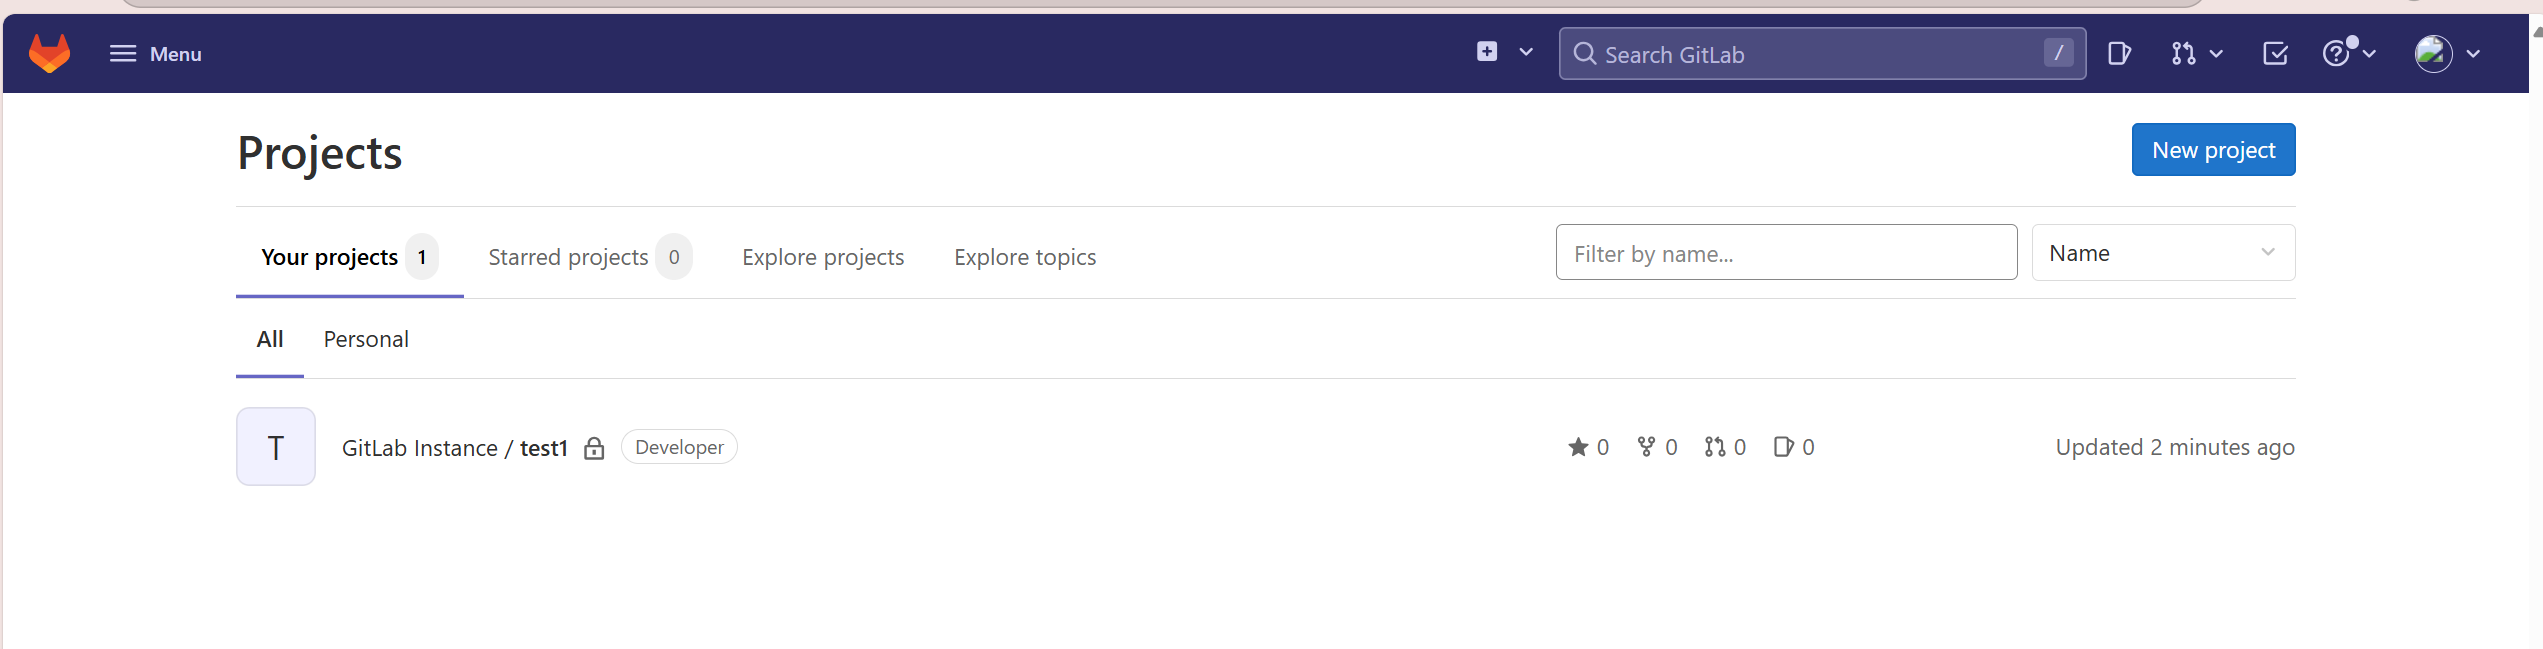
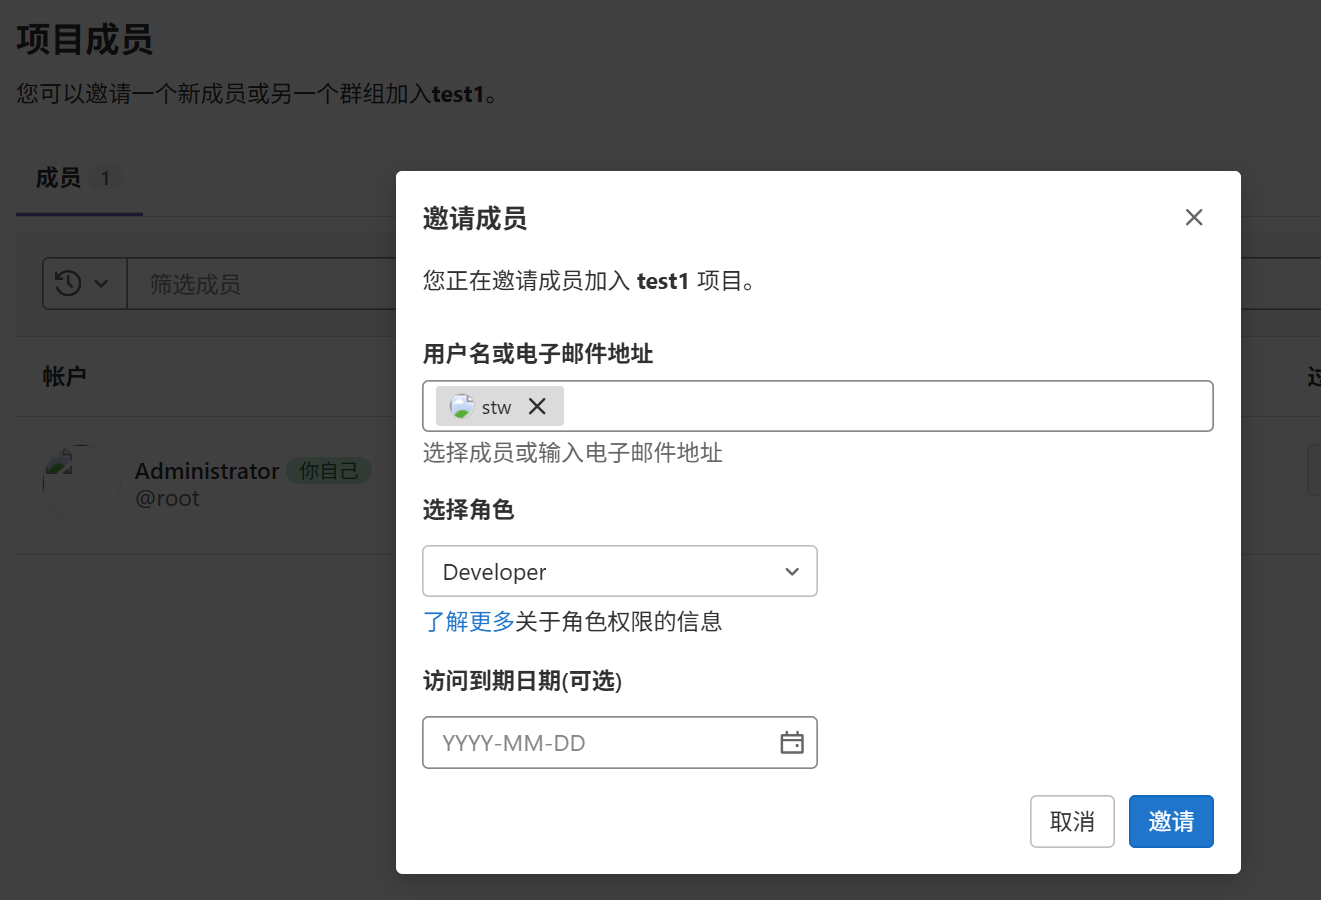
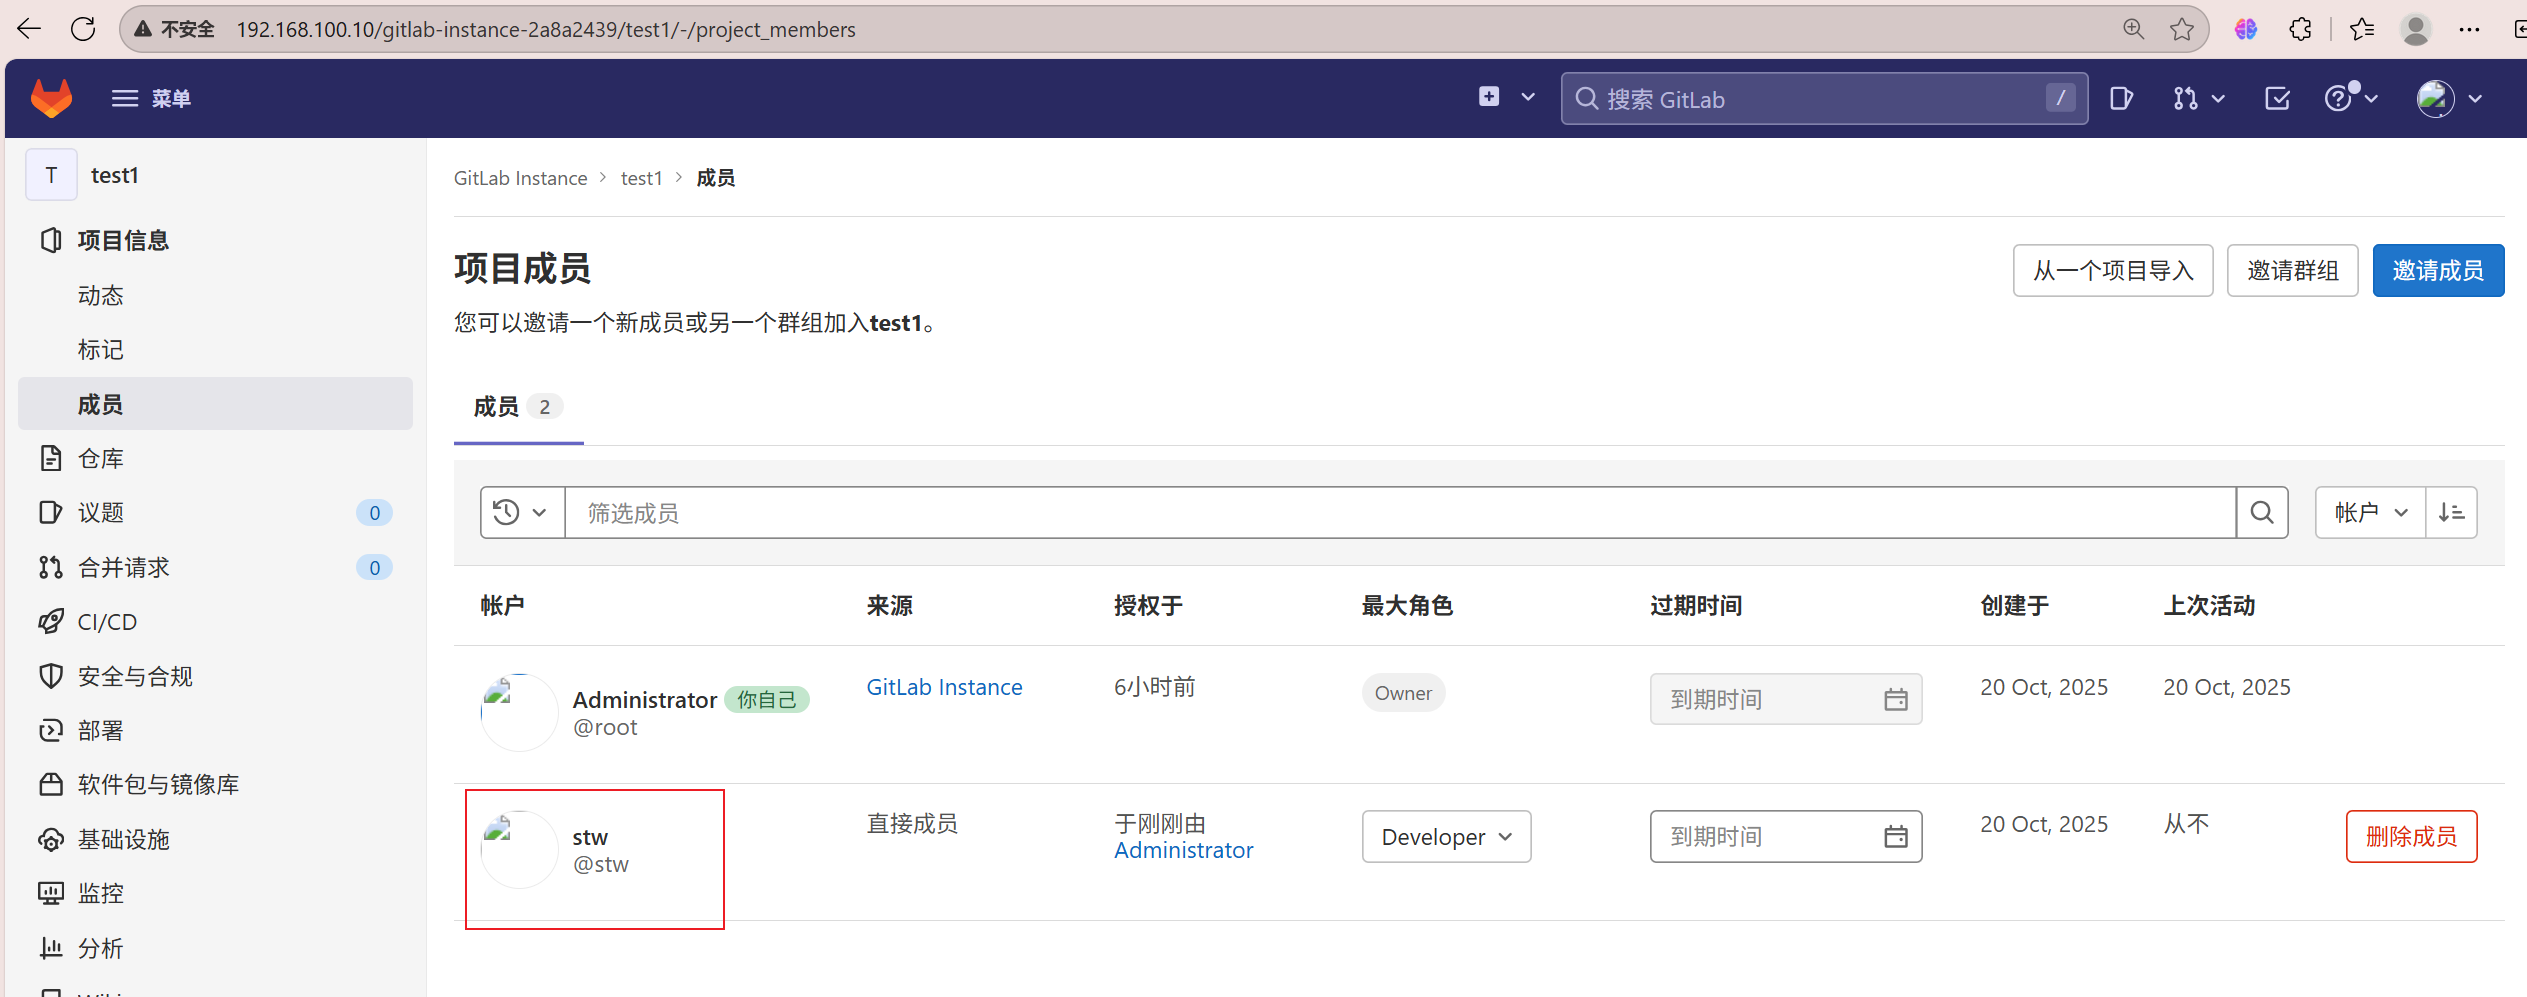
也可以将用户添加进项目
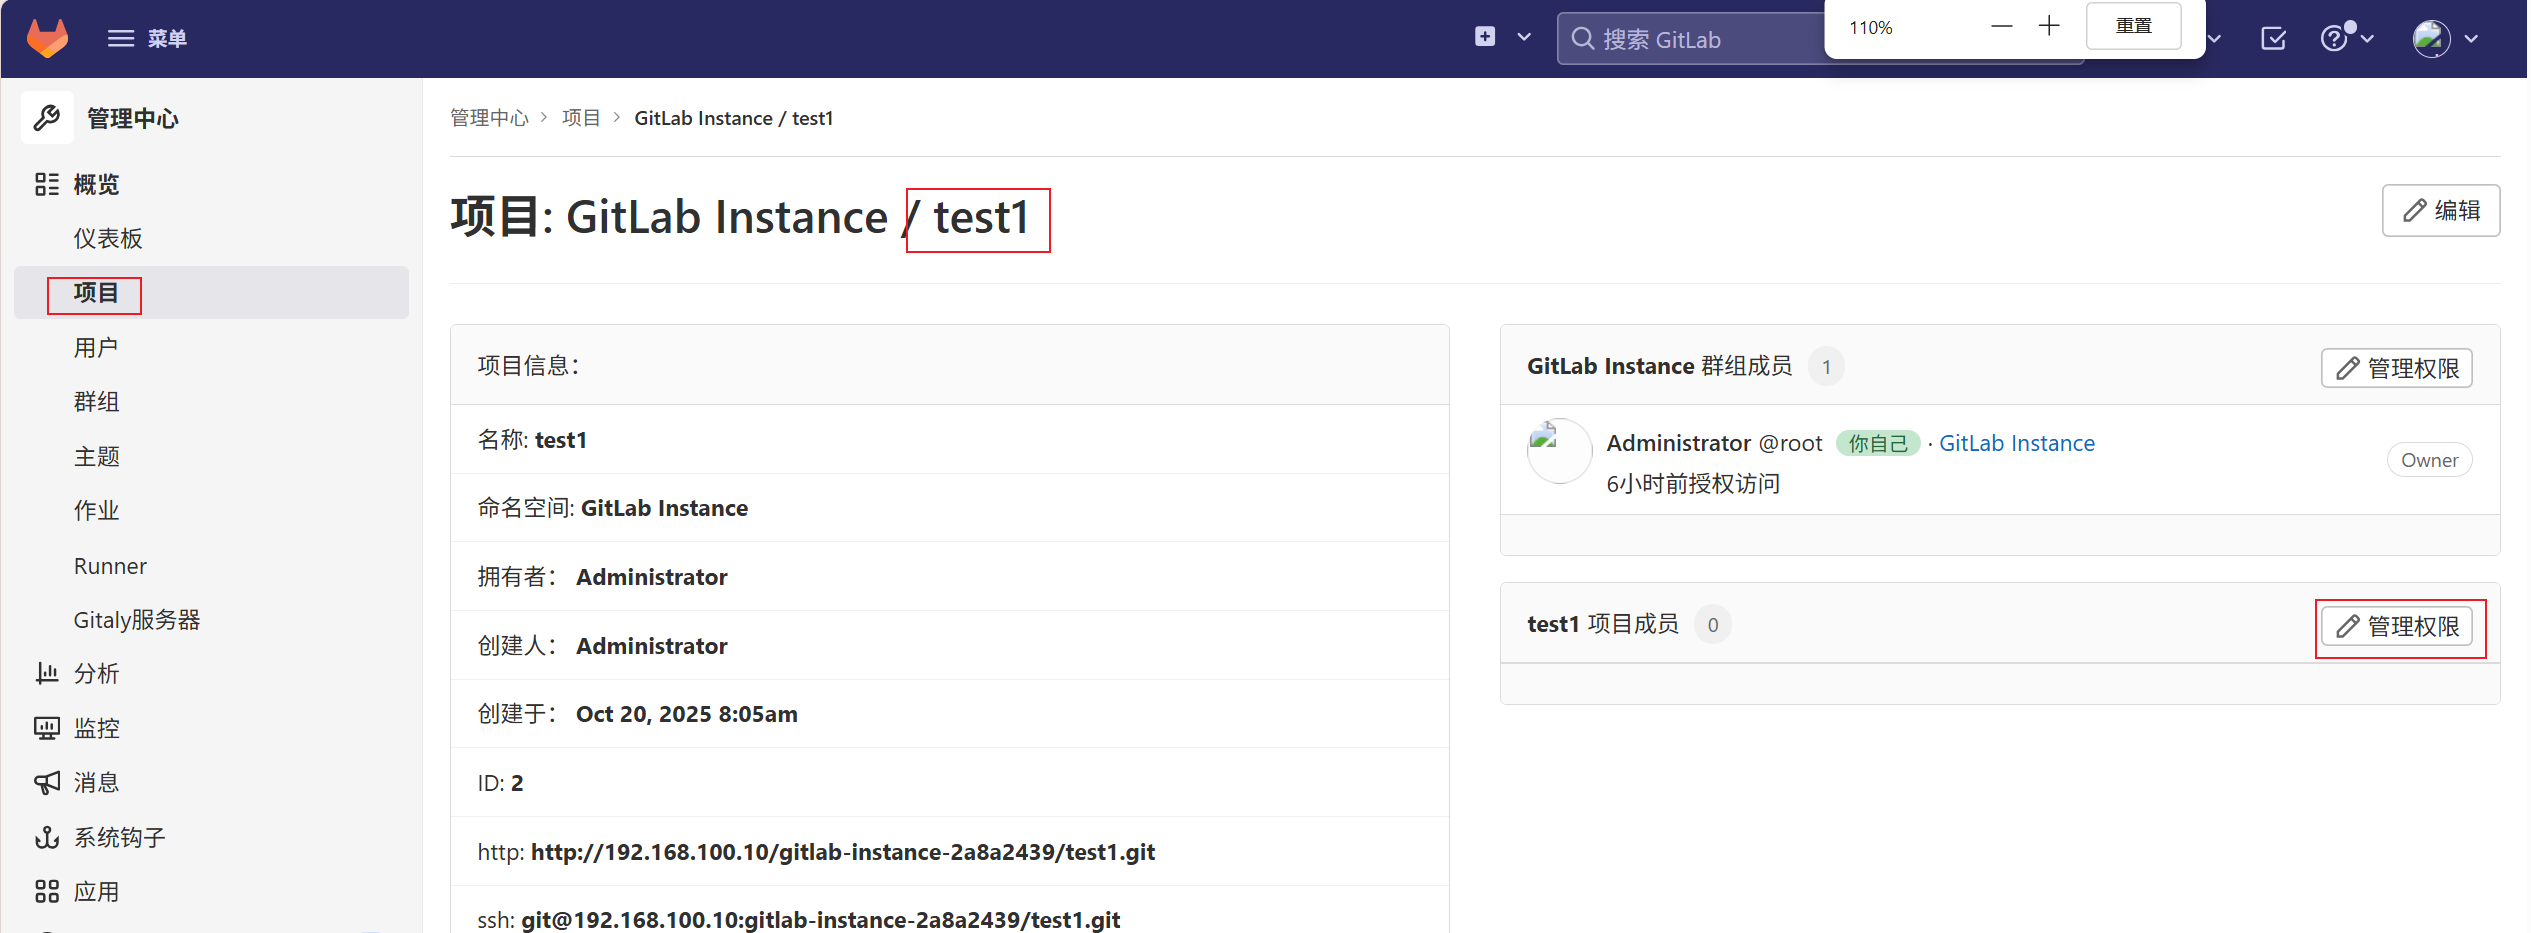
邀请成员
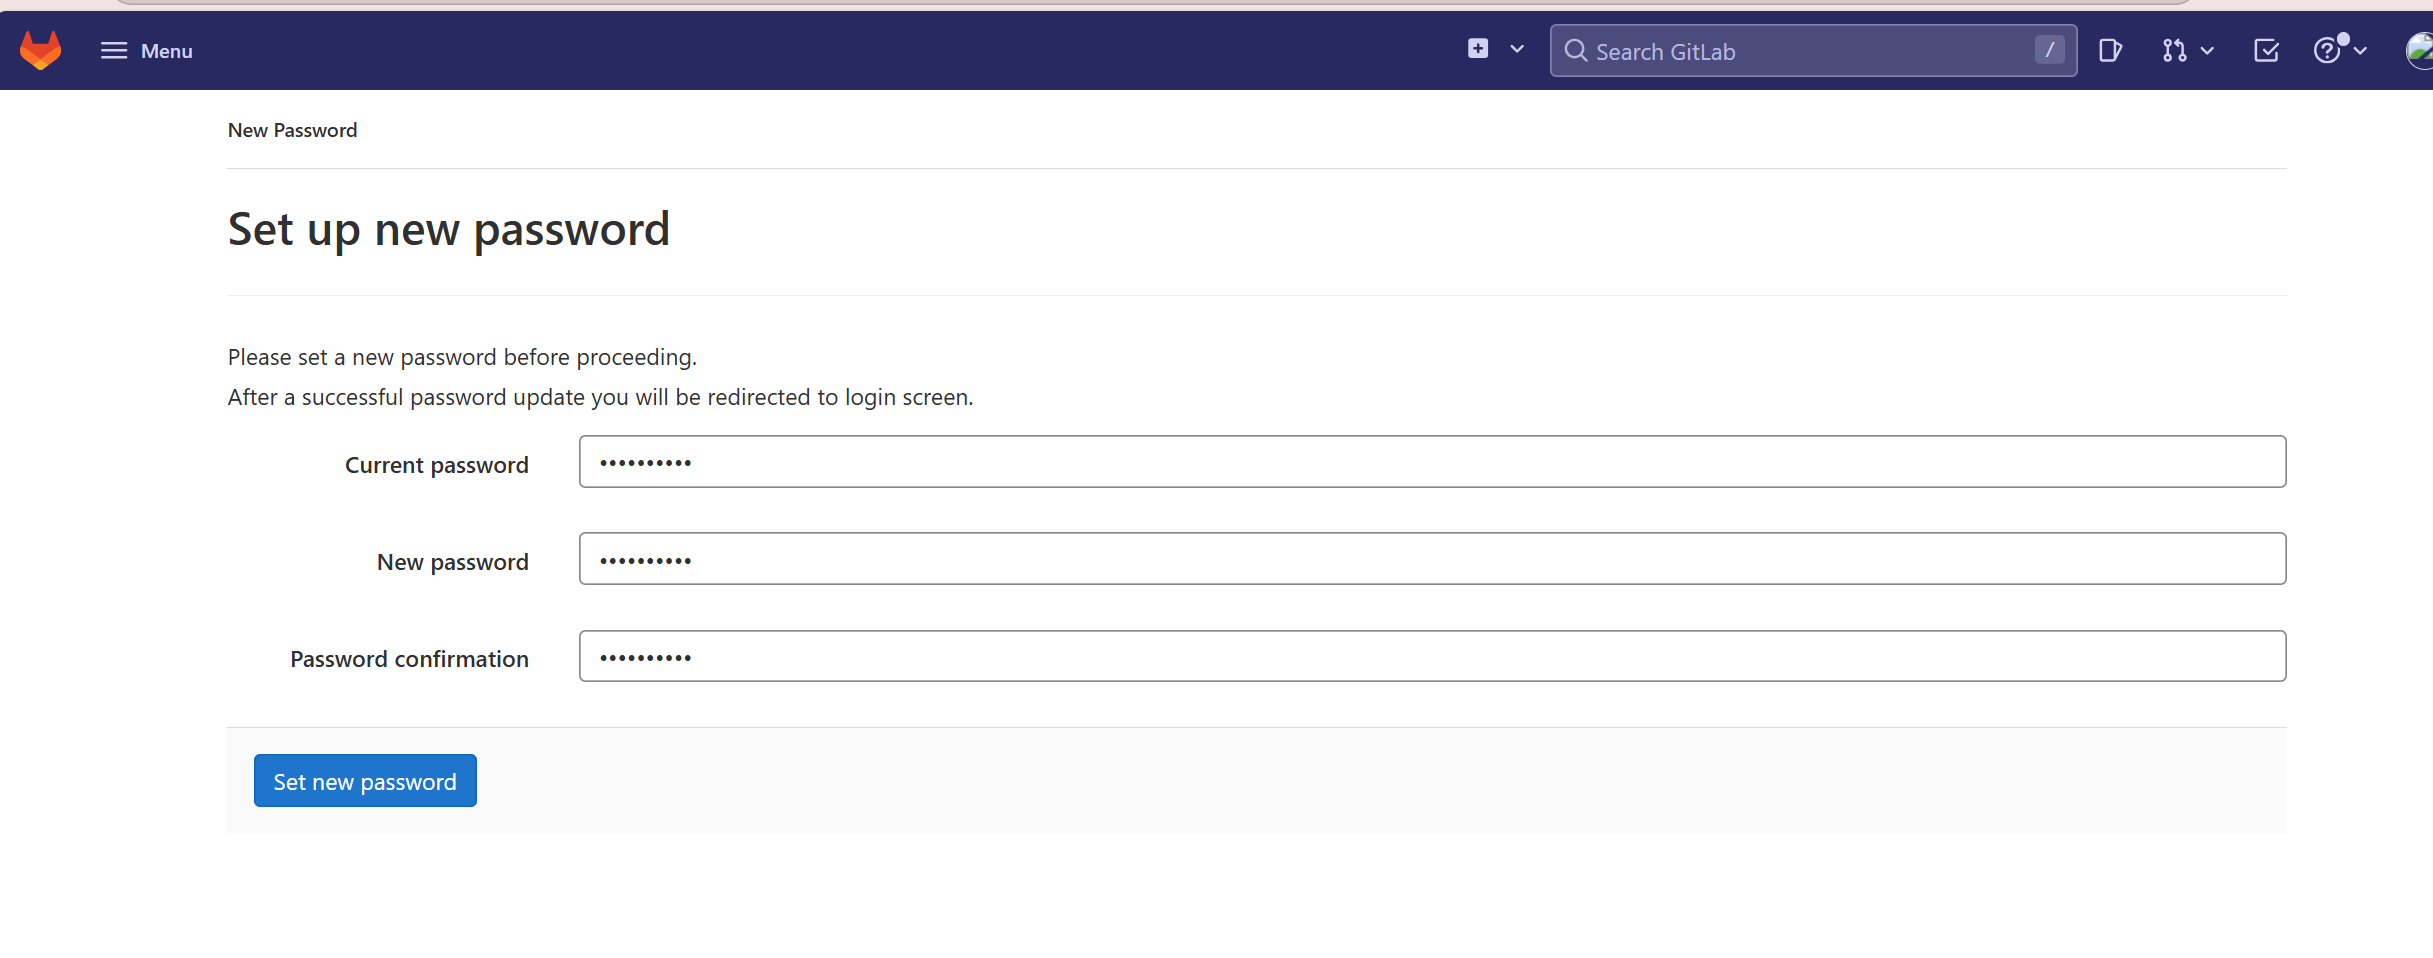
用stw的身份登录
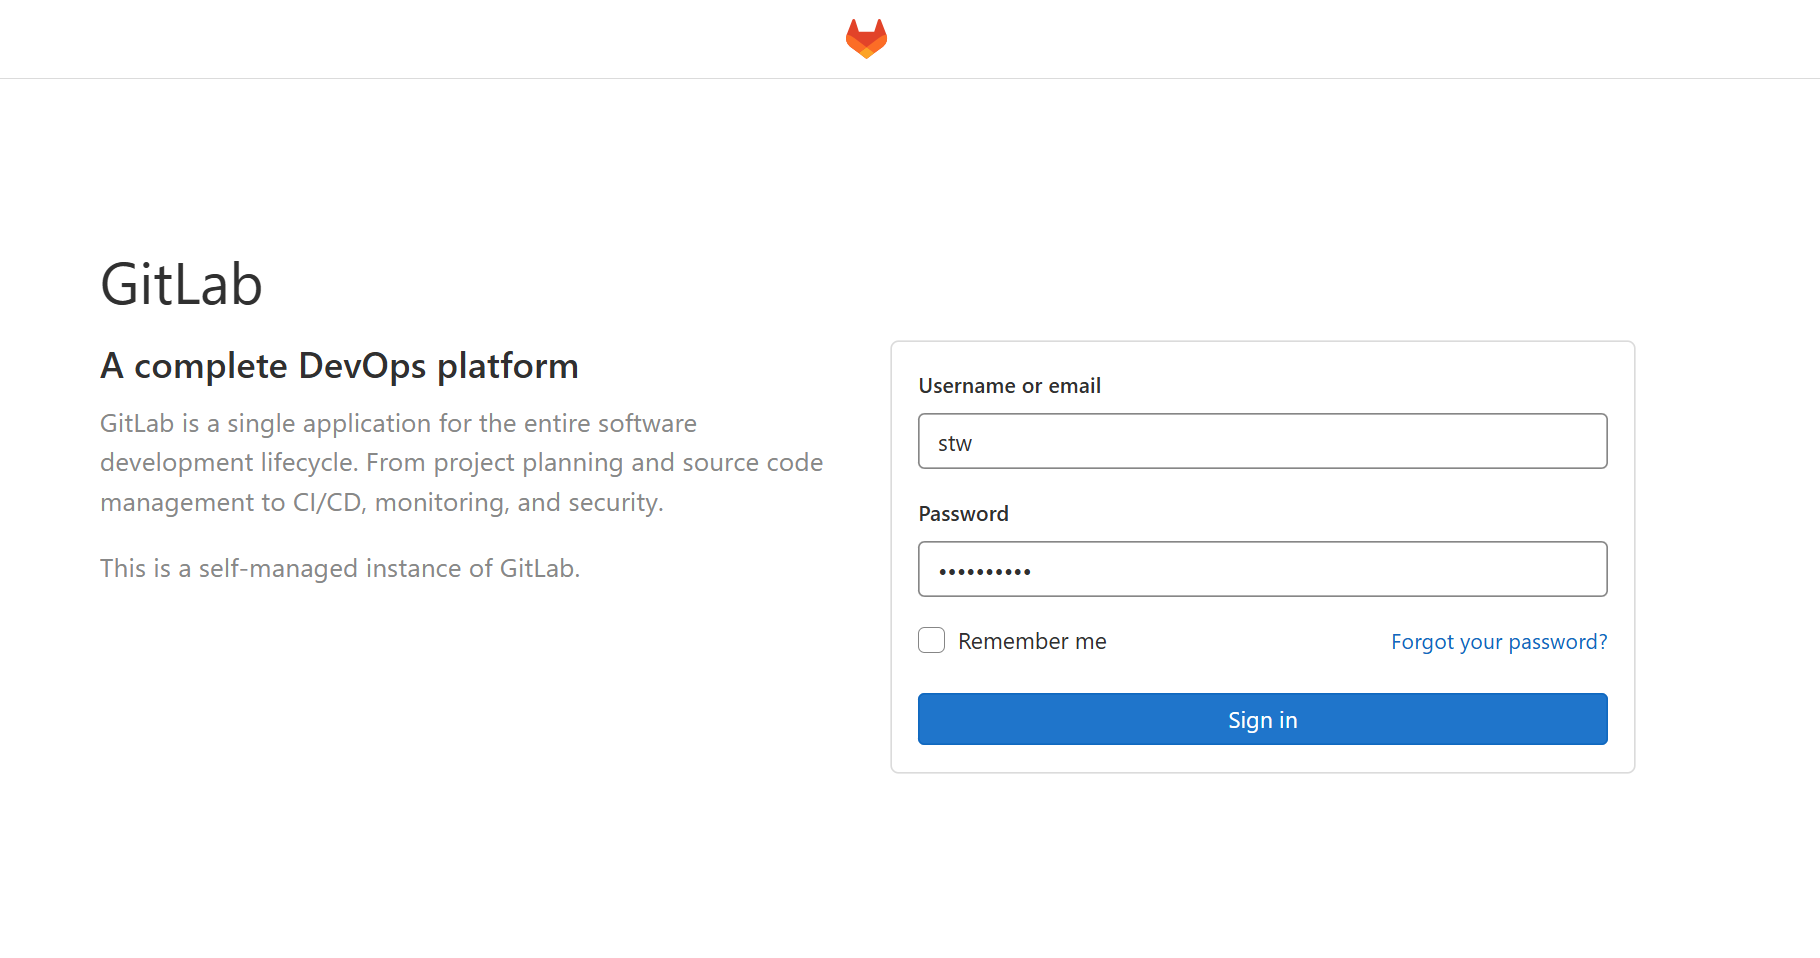
第一次登录需要更改密码