继续让Trae输出后面的内容
提示词:
按照安卓手机App开发教程规划,已完成第一章,咱们继续后面的学习吧
👇下面是Trae输出的教程及创建相关程序
太好了!看到您已经完成了第一章的项目结构搭建。现在让我们开始 第二章:后端API开发 。这是整个项目的核心基础,将为安卓App和小程序提供数据支持。
第二章:后端API开发
2.1 后端项目初始化
首先让我检查一下您现有的后端项目结构:
backend\package.json
很好!您的package.json配置是正确的。现在让我们开始创建后端项目的核心文件。
2.2 创建Express服务器主文件(backend\src\app.js)
const express = require('express');
const cors = require('cors');
const mongoose = require('mongoose');
require('dotenv').config();

// 导入路由
const authRoutes = require('./routes/auth');
const taskRoutes = require('./routes/tasks');

const app = express();
const PORT = process.env.PORT || 3000;

// 中间件配置
app.use(cors());
app.use(express.json());
app.use(express.urlencoded({ extended: true }));

// 数据库连接
mongoose.connect(process.env.MONGODB_URI || 'mongodb://localhost:27017/todoapp', {
    useNewUrlParser: true,
    useUnifiedTopology: true,
})
.then(() => {
    console.log('✅ MongoDB连接成功');
})
.catch((error) => {
    console.error('❌ MongoDB连接失败:', error);
});

// 路由配置
app.use('/api/auth', authRoutes);
app.use('/api/tasks', taskRoutes);

// 健康检查端点
app.get('/api/health', (req, res) => {
    res.status(200).json({
        status: 'OK',
        message: '服务器运行正常',
        timestamp: new Date().toISOString()
    });
});

// 404处理
app.use('*', (req, res) => {
    res.status(404).json({
        error: '接口不存在',
        path: req.originalUrl
    });
});

// 全局错误处理
app.use((error, req, res, next) => {
    console.error('服务器错误:', error);
    res.status(500).json({
        error: '服务器内部错误',
        message: process.env.NODE_ENV === 'development' ? error.message : '内部服务器错误'
    });
});

// 启动服务器
app.listen(PORT, () => {
    console.log(`🚀 服务器启动成功,端口: ${PORT}`);
    console.log(`📊 环境: ${process.env.NODE_ENV || 'development'}`);
    console.log(`🌐 访问地址: http://localhost:${PORT}`);
});

module.exports = app;
2.3 创建数据模型
用户模型(backend\src\models\User.js)
const mongoose = require('mongoose');
const bcrypt = require('bcryptjs');

const userSchema = new mongoose.Schema({
    username: {
        type: String,
        required: [true, '用户名不能为空'],
        unique: true,
        trim: true,
        minlength: [3, '用户名至少3个字符'],
        maxlength: [20, '用户名最多20个字符']
    },
    email: {
        type: String,
        required: [true, '邮箱不能为空'],
        unique: true,
        trim: true,
        lowercase: true,
        match: [/^\w+([.-]?\w+)*@\w+([.-]?\w+)*(\.\w{2,3})+$/, '请输入有效的邮箱地址']
    },
    password: {
        type: String,
        required: [true, '密码不能为空'],
        minlength: [6, '密码至少6个字符']
    }
}, {
    timestamps: true // 自动添加 createdAt 和 updatedAt
});

// 保存前加密密码
userSchema.pre('save', async function(next) {
    if (!this.isModified('password')) return next();

    try {
        const salt = await bcrypt.genSalt(10);
        this.password = await bcrypt.hash(this.password, salt);
        next();
    } catch (error) {
        next(error);
    }
});

// 验证密码方法
userSchema.methods.comparePassword = async function(candidatePassword) {
    return await bcrypt.compare(candidatePassword, this.password);
};

// 转换为JSON时移除密码
userSchema.methods.toJSON = function() {
    const user = this.toObject();
    delete user.password;
    return user;
};

module.exports = mongoose.model('User', userSchema);
任务模型(backend\src\models\Task.js)
const mongoose = require('mongoose');

const taskSchema = new mongoose.Schema({
    title: {
        type: String,
        required: [true, '任务标题不能为空'],
        trim: true,
        maxlength: [100, '任务标题最多100个字符']
    },
    description: {
        type: String,
        trim: true,
        maxlength: [500, '任务描述最多500个字符']
    },
    completed: {
        type: Boolean,
        default: false
    },
    category: {
        type: String,
        enum: ['工作', '学习', '生活', '其他'],
        default: '其他'
    },
    priority: {
        type: String,
        enum: ['低', '中', '高'],
        default: '中'
    },
    dueDate: {
        type: Date
    },
    user: {
        type: mongoose.Schema.Types.ObjectId,
        ref: 'User',
        required: true
    }
}, {
    timestamps: true
});

// 创建索引以提高查询性能
taskSchema.index({ user: 1, createdAt: -1 });
taskSchema.index({ user: 1, completed: 1 });
taskSchema.index({ user: 1, dueDate: 1 });

module.exports = mongoose.model('Task', taskSchema);
2.4 创建认证中间件
backend\src\middleware\auth.js
const jwt = require('jsonwebtoken');
const User = require('../models/User');

// JWT认证中间件
const authenticateToken = async (req, res, next) => {
    try {
        const authHeader = req.headers['authorization'];
        const token = authHeader && authHeader.split(' ')[1]; // Bearer TOKEN

        if (!token) {
            return res.status(401).json({
                error: '访问令牌不存在',
                message: '请先登录'
            });
        }

        // 验证JWT令牌
        const decoded = jwt.verify(token, process.env.JWT_SECRET);

        // 查找用户
        const user = await User.findById(decoded.userId).select('-password');
        if (!user) {
            return res.status(401).json({
                error: '用户不存在',
                message: '令牌无效'
            });
        }

        // 将用户信息添加到请求对象
        req.user = user;
        next();
    } catch (error) {
        if (error.name === 'JsonWebTokenError') {
            return res.status(401).json({
                error: '令牌无效',
                message: '请重新登录'
            });
        }

        if (error.name === 'TokenExpiredError') {
            return res.status(401).json({
                error: '令牌已过期',
                message: '请重新登录'
            });
        }

        console.error('认证中间件错误:', error);
        res.status(500).json({
            error: '服务器认证错误',
            message: '认证过程出现错误'
        });
    }
};

module.exports = { authenticateToken };
2.5 创建认证路由
backend\src\routes\auth.js
const express = require('express');
const jwt = require('jsonwebtoken');
const User = require('../models/User');
const { authenticateToken } = require('../middleware/auth');

const router = express.Router();

// 生成JWT令牌
const generateToken = (userId) => {
    return jwt.sign(
        { userId },
        process.env.JWT_SECRET,
        { expiresIn: '7d' } // 7天有效期
    );
};

// 用户注册
router.post('/register', async (req, res) => {
    try {
        const { username, email, password } = req.body;

        // 验证输入
        if (!username || !email || !password) {
            return res.status(400).json({
                error: '参数不完整',
                message: '请提供用户名、邮箱和密码'
            });
        }

        // 检查用户是否已存在
        const existingUser = await User.findOne({
            $or: [{ email }, { username }]
        });

        if (existingUser) {
            return res.status(400).json({
                error: '用户已存在',
                message: '邮箱或用户名已被使用'
            });
        }

        // 创建新用户
        const user = new User({ username, email, password });
        await user.save();

        // 生成令牌
        const token = generateToken(user._id);

        res.status(201).json({
            message: '注册成功',
            user: {
                id: user._id,
                username: user.username,
                email: user.email
            },
            token
        });

    } catch (error) {
        console.error('注册错误:', error);

        if (error.name === 'ValidationError') {
            const messages = Object.values(error.errors).map(err => err.message);
            return res.status(400).json({
                error: '验证失败',
                messages
            });
        }

        res.status(500).json({
            error: '注册失败',
            message: '服务器内部错误'
        });
    }
});

// 用户登录
router.post('/login', async (req, res) => {
    try {
        const { email, password } = req.body;

        // 验证输入
        if (!email || !password) {
            return res.status(400).json({
                error: '参数不完整',
                message: '请提供邮箱和密码'
            });
        }

        // 查找用户
        const user = await User.findOne({ email });
        if (!user) {
            return res.status(401).json({
                error: '登录失败',
                message: '邮箱或密码错误'
            });
        }

        // 验证密码
        const isPasswordValid = await user.comparePassword(password);
        if (!isPasswordValid) {
            return res.status(401).json({
                error: '登录失败',
                message: '邮箱或密码错误'
            });
        }

        // 生成令牌
        const token = generateToken(user._id);

        res.json({
            message: '登录成功',
            user: {
                id: user._id,
                username: user.username,
                email: user.email
            },
            token
        });

    } catch (error) {
        console.error('登录错误:', error);
        res.status(500).json({
            error: '登录失败',
            message: '服务器内部错误'
        });
    }
});

// 获取当前用户信息
router.get('/me', authenticateToken, async (req, res) => {
    try {
        res.json({
            user: req.user
        });
    } catch (error) {
        console.error('获取用户信息错误:', error);
        res.status(500).json({
            error: '获取用户信息失败',
            message: '服务器内部错误'
        });
    }
});

module.exports = router;
2.6 创建任务路由
backend\src\routes\tasks.js
const express = require('express');
const Task = require('../models/Task');
const { authenticateToken } = require('../middleware/auth');

const router = express.Router();

// 所有任务路由都需要认证
router.use(authenticateToken);

// 获取任务列表
router.get('/', async (req, res) => {
    try {
        const { page = 1, limit = 10, completed, category, priority } = req.query;

        // 构建查询条件
        const query = { user: req.user._id };

        if (completed !== undefined) {
            query.completed = completed === 'true';
        }

        if (category) {
            query.category = category;
        }

        if (priority) {
            query.priority = priority;
        }

        // 分页查询
        const tasks = await Task.find(query)
            .sort({ createdAt: -1 })
            .limit(limit * 1)
            .skip((page - 1) * limit);

        // 获取总数
        const total = await Task.countDocuments(query);

        res.json({
            tasks,
            pagination: {
                page: parseInt(page),
                limit: parseInt(limit),
                total,
                pages: Math.ceil(total / limit)
            }
        });

    } catch (error) {
        console.error('获取任务列表错误:', error);
        res.status(500).json({
            error: '获取任务失败',
            message: '服务器内部错误'
        });
    }
});

// 创建新任务
router.post('/', async (req, res) => {
    try {
        const { title, description, category, priority, dueDate } = req.body;

        // 验证必填字段
        if (!title) {
            return res.status(400).json({
                error: '参数错误',
                message: '任务标题不能为空'
            });
        }

        const task = new Task({
            title,
            description,
            category,
            priority,
            dueDate: dueDate ? new Date(dueDate) : null,
            user: req.user._id
        });

        await task.save();

        res.status(201).json({
            message: '任务创建成功',
            task
        });

    } catch (error) {
        console.error('创建任务错误:', error);

        if (error.name === 'ValidationError') {
            const messages = Object.values(error.errors).map(err => err.message);
            return res.status(400).json({
                error: '验证失败',
                messages
            });
        }

        res.status(500).json({
            error: '创建任务失败',
            message: '服务器内部错误'
        });
    }
});

// 更新任务
router.put('/:id', async (req, res) => {
    try {
        const { id } = req.params;
        const updates = req.body;

        // 检查任务是否存在且属于当前用户
        const task = await Task.findOne({ _id: id, user: req.user._id });
        if (!task) {
            return res.status(404).json({
                error: '任务不存在',
                message: '未找到该任务'
            });
        }

        // 更新任务
        Object.keys(updates).forEach(key => {
            if (key in task) {
                task[key] = updates[key];
            }
        });

        await task.save();

        res.json({
            message: '任务更新成功',
            task
        });

    } catch (error) {
        console.error('更新任务错误:', error);

        if (error.name === 'ValidationError') {
            const messages = Object.values(error.errors).map(err => err.message);
            return res.status(400).json({
                error: '验证失败',
                messages
            });
        }

        res.status(500).json({
            error: '更新任务失败',
            message: '服务器内部错误'
        });
    }
});

// 删除任务
router.delete('/:id', async (req, res) => {
    try {
        const { id } = req.params;

        const task = await Task.findOneAndDelete({
            _id: id,
            user: req.user._id
        });

        if (!task) {
            return res.status(404).json({
                error: '任务不存在',
                message: '未找到该任务'
            });
        }

        res.json({
            message: '任务删除成功',
            task
        });

    } catch (error) {
        console.error('删除任务错误:', error);
        res.status(500).json({
            error: '删除任务失败',
            message: '服务器内部错误'
        });
    }
});

// 标记任务完成/未完成
router.patch('/:id/toggle', async (req, res) => {
    try {
        const { id } = req.params;

        const task = await Task.findOne({ _id: id, user: req.user._id });
        if (!task) {
            return res.status(404).json({
                error: '任务不存在',
                message: '未找到该任务'
            });
        }

        task.completed = !task.completed;
        await task.save();

        res.json({
            message: `任务已标记为${task.completed ? '完成' : '未完成'}`,
            task
        });

    } catch (error) {
        console.error('切换任务状态错误:', error);
        res.status(500).json({
            error: '更新任务状态失败',
            message: '服务器内部错误'
        });
    }
});

module.exports = router;
2.7 更新环境配置文件
backend\.env
# 服务器配置
PORT=3000
NODE_ENV=development

# 数据库配置
MONGODB_URI=mongodb://localhost:27017/todoapp

# JWT密钥(请在生产环境中使用更复杂的密钥)
JWT_SECRET=your-super-secret-jwt-key-change-this-in-production

# CORS配置
CORS_ORIGIN=http://localhost:8080

# 日志配置
LOG_LEVEL=info
2.8 创建项目说明文档
backend\README.md
# 任务清单应用 - 后端API
## 项目概述
这是任务清单应用的后端API服务,使用Node.js + Express + MongoDB构建。
## 功能特性
- 用户注册和登录(JWT认证)
- 任务CRUD操作
- 数据分页和筛选
- 数据验证和错误处理
- CORS跨域支持
## 技术栈
- **运行时**: Node.js
- **框架**: Express.js
- **数据库**: MongoDB + Mongoose
- **认证**: JWT (JSON Web Tokens)
- **安全**: bcryptjs密码加密
## 快速开始
### 环境要求
- Node.js 14+
- MongoDB 4+
- npm 或 yarn
### 安装依赖
```bash
npm install
```
### 环境配置
复制 `.env` 文件并配置数据库连接等信息。
### 启动开发服务器
```bash
npm run dev
```
### 生产环境启动
```bash
npm start
```
## API文档
### 认证接口
- `POST /api/auth/register` - 用户注册
- `POST /api/auth/login` - 用户登录
- `GET /api/auth/me` - 获取当前用户信息
### 任务接口
- `GET /api/tasks` - 获取任务列表
- `POST /api/tasks` - 创建新任务
- `PUT /api/tasks/:id` - 更新任务
- `DELETE /api/tasks/:id` - 删除任务
- `PATCH /api/tasks/:id/toggle` - 切换任务状态
### 健康检查
- `GET /api/health` - 服务健康状态
## 开发指南
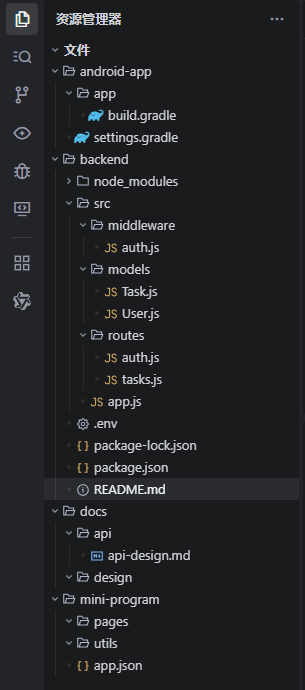
### 项目结构目录结构:
src/
├── app.js # 应用入口
├── models/ # 数据模型
│ ├── User.js
│ └── Task.js
├── routes/ # 路由处理
│ ├── auth.js
│ └── tasks.js
└── middleware/ # 中间件
└── auth.js
Trae文档结构参照:
✍️开发注意事项
-
所有用户相关操作都需要JWT认证
-
任务数据与用户关联,只能操作自己的任务
-
密码在存储前会自动加密
-
支持任务分类、优先级和截止日期
2.9 启动服务器测试
在终端运行命令:
# 进入后端目录
cd e:\99mydata\traeplace\app\backend

# 安装依赖(如已安装,可跳过)
npm install

# 启动开发服务器
npm run dev
执行界面参考:

✍️说明:没有连上数据库是正常的,因为还没有配置
web测试:
在浏览器上,输入检查地址:localhost:3000/health

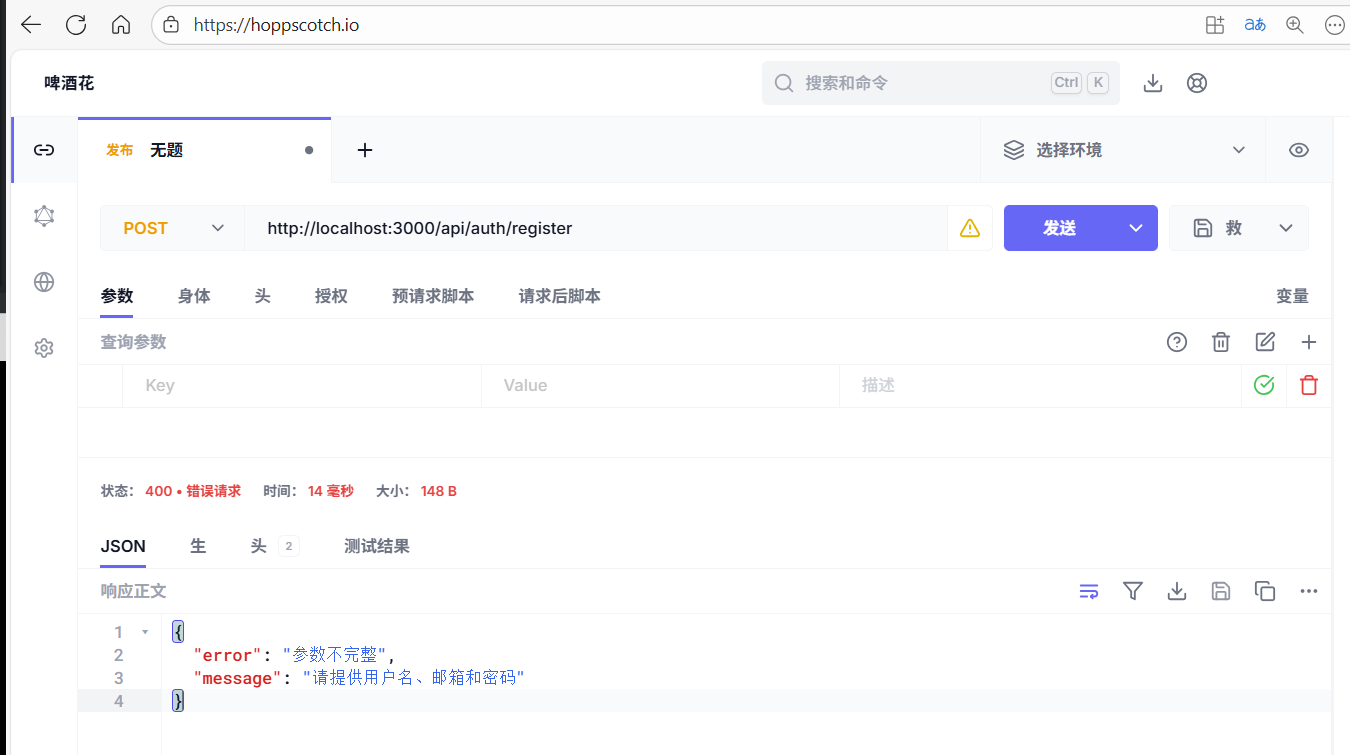
Hoppscotch测试接口:
http://localhost:3000/api/auth/register
本章总结
第二章我们完成了后端API的核心开发,包括:
✅ 已完成的工作:
- Express服务器配置 - 创建了完整的Web服务器
- 数据模型设计 - 用户和任务的数据结构
- 认证系统 - JWT令牌认证和密码加密
- API接口实现 - 完整的RESTful API
- 错误处理 - 统一的错误响应格式
🔄 下一步需要您完成的工作:
- 安装MongoDB - 下载并安装MongoDB数据库
- 安装Node.js依赖 - 在backend目录运行 npm install
- 启动服务器测试 - 运行 npm run dev 测试API
📋 测试API的方法:
服务器启动后,您可以使用以下方式测试:
- 健康检查 : GET http://localhost:3000/api/health
- 用户注册 : POST http://localhost:3000/api/auth/register
- 用户登录 : POST http://localhost:3000/api/auth/login
您准备好安装MongoDB并测试后端API了吗?如果需要帮助配置数据库环境,请告诉我!