esp8266+dht11传感器实时上报温湿度
1、接线示意图
html
DHT11               ESP8266 (NodeMCU)
┌─────────┐         ┌─────────────┐
│ VCC  ●──┼─────────│ 3.3V        │
│ OUT  ●──┼─────────│ D4 (GPIO2)  │
│ GND  ●──┼─────────│ GND         │
└─────────┘         └─────────────┘
2、esp8266控制代码
csharp
#include <DHT.h>
#include <ESP8266WiFi.h>
#include <ESP8266HTTPClient.h>
#include <WiFiClient.h>
#include <ArduinoJson.h>
#include <NTPClient.h>
#include <WiFiUdp.h>

// 温湿度传感器配置
#define DHTPIN D4
#define DHTTYPE DHT11
DHT dht(DHTPIN, DHTTYPE);

// WiFi配置
const char* ssid = "";
const char* password = "";

// NTP时间配置
WiFiUDP ntpUDP;
NTPClient timeClient(ntpUDP, "pool.ntp.org", 8*3600, 60000); // 东八区

// 上报服务器配置
const char* serverURL = "http://192.168.*.*:5000/api/sensor-data"; // 替换为你的服务器地址

// 设备标识
const String deviceId = "ESP8266_DHT11_001";

void setup() {
  Serial.begin(115200);

  // 初始化传感器
  dht.begin();

  // 连接WiFi
  WiFi.begin(ssid, password);
  Serial.print("连接WiFi");
  while (WiFi.status() != WL_CONNECTED) {
    delay(500);
    Serial.print(".");
  }
  Serial.println("\nWiFi连接成功");
  Serial.print("IP地址: ");
  Serial.println(WiFi.localIP());

  // 初始化时间客户端
  timeClient.begin();
  timeClient.update();
}

void loop() {
  // 读取温湿度
  float temperature = dht.readTemperature();
  float humidity = dht.readHumidity();

  if (isnan(temperature) || isnan(humidity)) {
    Serial.println("传感器读取失败");
  } else {
    // 获取当前时间
    timeClient.update();
    String timestamp = timeClient.getFormattedTime();
    String date = getFormattedDate();

    Serial.print("时间: "); Serial.print(date); Serial.print(" "); Serial.println(timestamp);
    Serial.print("温度: "); Serial.print(temperature); Serial.print("°C ");
    Serial.print("湿度: "); Serial.println(humidity);

    // 上报数据到服务器
    if (reportToServer(date, timestamp, temperature, humidity)) {
      Serial.println("数据上报成功");
    } else {
      Serial.println("数据上报失败");
    }
  }

  delay(5000); // 5秒读取一次
}

bool reportToServer(String date, String time, float temperature, float humidity) {
  if (WiFi.status() == WL_CONNECTED) {
    WiFiClient client;
    HTTPClient http;

    // 准备JSON数据
    DynamicJsonDocument doc(512);
    doc["deviceId"] = deviceId;
    doc["date"] = date;
    doc["time"] = time;
    doc["timestamp"] = timeClient.getEpochTime();
    doc["temperature"] = temperature;
    doc["humidity"] = humidity;

    String jsonString;
    serializeJson(doc, jsonString);

    // 发送HTTP POST请求
    http.begin(client, serverURL);
    http.addHeader("Content-Type", "application/json");

    int httpResponseCode = http.POST(jsonString);

    if (httpResponseCode > 0) {
      String response = http.getString();
      Serial.print("服务器响应: ");
      Serial.println(response);
      http.end();
      return true;
    } else {
      Serial.print("错误代码: ");
      Serial.println(httpResponseCode);
      http.end();
      return false;
    }
  }
  return false;
}

String getFormattedDate() {
  time_t rawtime = timeClient.getEpochTime();
  struct tm * ti;
  ti = localtime (&rawtime);

  uint16_t year = ti->tm_year + 1900;
  uint8_t month = ti->tm_mon + 1;
  uint8_t day = ti->tm_mday;

  return String(year) + "-" +
         String(month < 10 ? "0" : "") + String(month) + "-" +
         String(day < 10 ? "0" : "") + String(day);
}
3、服务器端示例
python
from flask import Flask, request, jsonify
from datetime import datetime
import json
app = Flask(__name__)
# 存储最新的数据(可选,用于显示)
latest_data = {}
@app.route('/api/sensor-data', methods=['POST'])
def receive_sensor_data():
"""
接收传感器数据接口
"""
try:
# 获取JSON数据
data = request.get_json()
# 添加服务器接收时间
data['server_received_at'] = datetime.now().strftime('%Y-%m-%d %H:%M:%S')
# 保存最新数据
global latest_data
latest_data = data.copy()
# 打印接收到的数据
print("\n" + "=" * 50)
print("收到传感器数据:")
print(f"设备ID: {data.get('deviceId', 'N/A')}")
print(f"日期: {data.get('date', 'N/A')}")
print(f"时间: {data.get('time', 'N/A')}")
print(f"时间戳: {data.get('timestamp', 'N/A')}")
print(f"温度: {data.get('temperature', 'N/A')}°C")
print(f"湿度: {data.get('humidity', 'N/A')}%")
print(f"服务器接收时间: {data['server_received_at']}")
print("=" * 50)
# 返回成功响应
return jsonify({
'status': 'success',
'message': '数据接收成功',
'received_at': data['server_received_at']
}), 200
except Exception as e:
print(f"错误: {str(e)}")
return jsonify({
'status': 'error',
'message': f'数据接收失败: {str(e)}'
}), 400
@app.route('/api/sensor-data/latest', methods=['GET'])
def get_latest_data():
"""
获取最新接收到的数据
"""
if latest_data:
return jsonify({
'status': 'success',
'data': latest_data
}), 200
else:
return jsonify({
'status': 'error',
'message': '暂无数据'
}), 404
@app.route('/api/health', methods=['GET'])
def health_check():
"""
健康检查接口
"""
return jsonify({
'status': 'success',
'message': '服务运行正常',
'timestamp': datetime.now().strftime('%Y-%m-%d %H:%M:%S')
}), 200
@app.route('/', methods=['GET'])
def index():
"""
首页
"""
return """
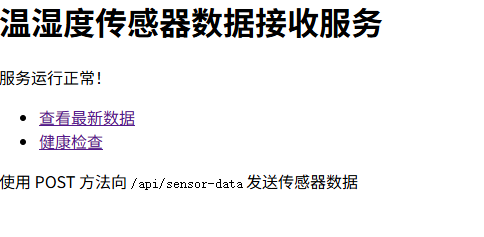
<h1>温湿度传感器数据接收服务</h1>
<p>服务运行正常!</p>
<ul>
<li><a href="/api/sensor-data/latest">查看最新数据</a></li>
<li><a href="/api/health">健康检查</a></li>
</ul>
<p>使用 POST 方法向 <code>/api/sensor-data</code> 发送传感器数据</p>
"""
if __name__ == '__main__':
print("启动温湿度传感器数据接收服务...")
print("访问 http://127.0.0.1:5000 查看服务状态")
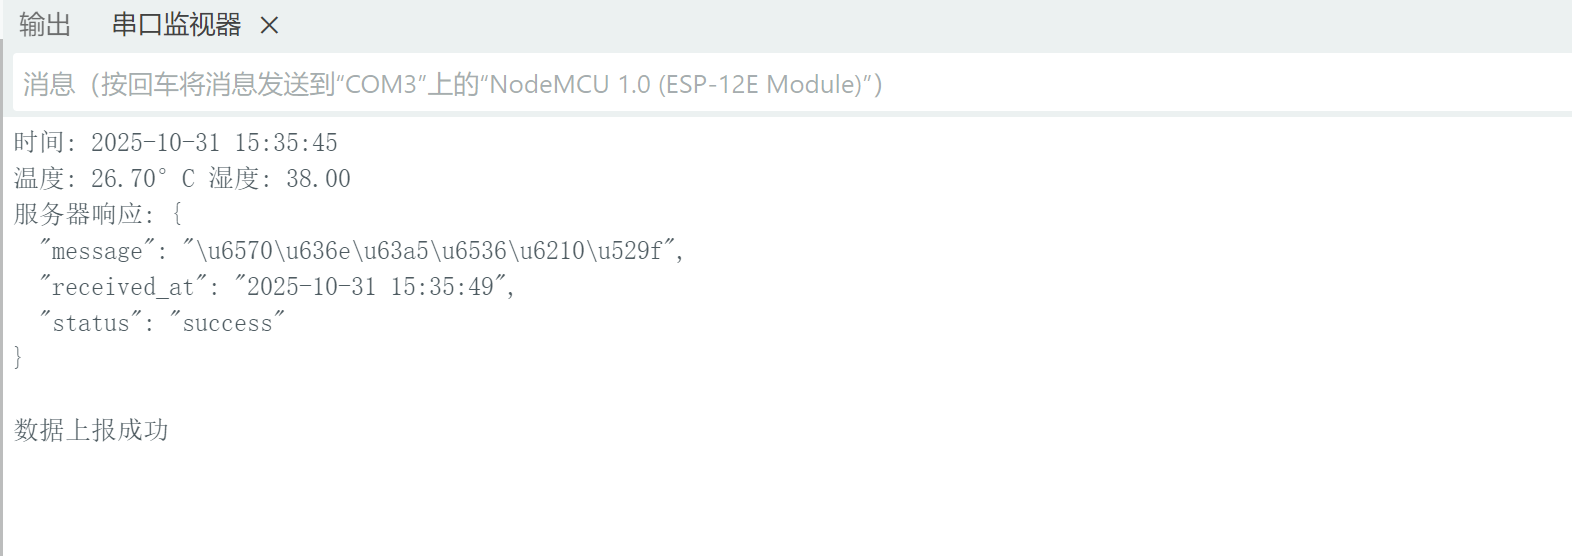
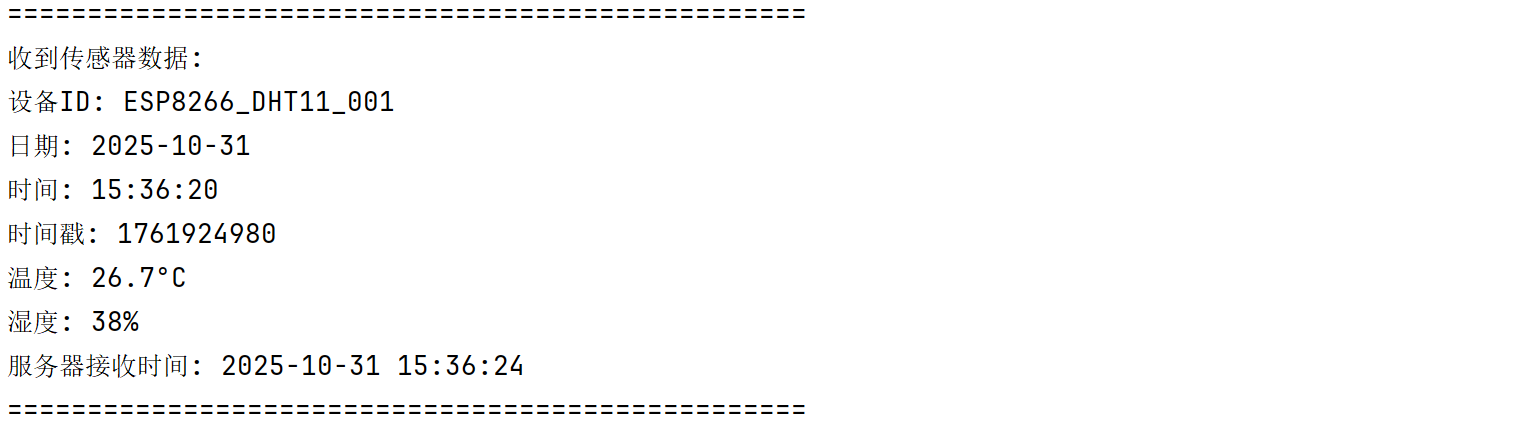
app.run(host='0.0.0.0', port=5000, debug=True)4、效果图