在上期Notebook详解系列中,我们介绍了《基于Isaac仿真的操作动作数据扩增与模仿学习》,本期我们将介绍一套类似的方案,同样可以完成人工演示、数据扩增、模仿学习、模型测评这几个环节,但完全使用Cosmos世界模型作为内核。 
相比基于Isaac仿真的方案,使用Cosmos世界模型的方案具有以下特点:
- 人工演示、数据扩增环节无需仿真算力(RT Core),全流程使用AI算力(CUDA Core/Tensor Core)
- 无需对人工演示数据进行动作打标处理,直接使用视频数据即可实现扩增
- 无需单独的数据增强环节,可在数据扩增环节通过调整提示词实现数据增强
- 需要额外的拒绝采样步骤以过滤不合理的生成内容,以及额外的IDM逆解算步骤以补齐视频中缺少的action序列
在PAI的Notebook Gallery中,我们已经预置了一个最佳实践,就是这个过程的一个具体示例: gallery.pai-ml.com/#/preview/d...

下面我们来详细解读这个示例。
人工少量演示
与基于仿真的数据扩增相同,人工演示可以在真实空间或仿真空间中进行,但无需进行动作打标,仅需录制视频即可 查看演示 >>
在视频中,左上角的操控者远程控制机器人本体,对蔬菜进行了"Pick and Place"的动作。同时,由操控者对视频内容进行文字描述,例如:
Use the right hand to pick up green bok choy from tan table right side to bottom level of wire basket.
采集类似的视频数据,直至满足Cosmos-Predict模型微调的要求(本样例中为100条)。

数据扩增
利用Cosmos世界模型进行数据扩增,首先要使用人工演示数据对Cosmos-Predict模型进行微调。本例中使用Cosmos-Predict2-2B-Video2World模型,在4*GU8T机型中进行微调:
python
!torchrun --nproc_per_node=4 --master_port=12341 -m scripts.train --config=cosmos_predict2/configs/base/config.py -- experiment=predict2_video2world_training_2b_groot_gr1_480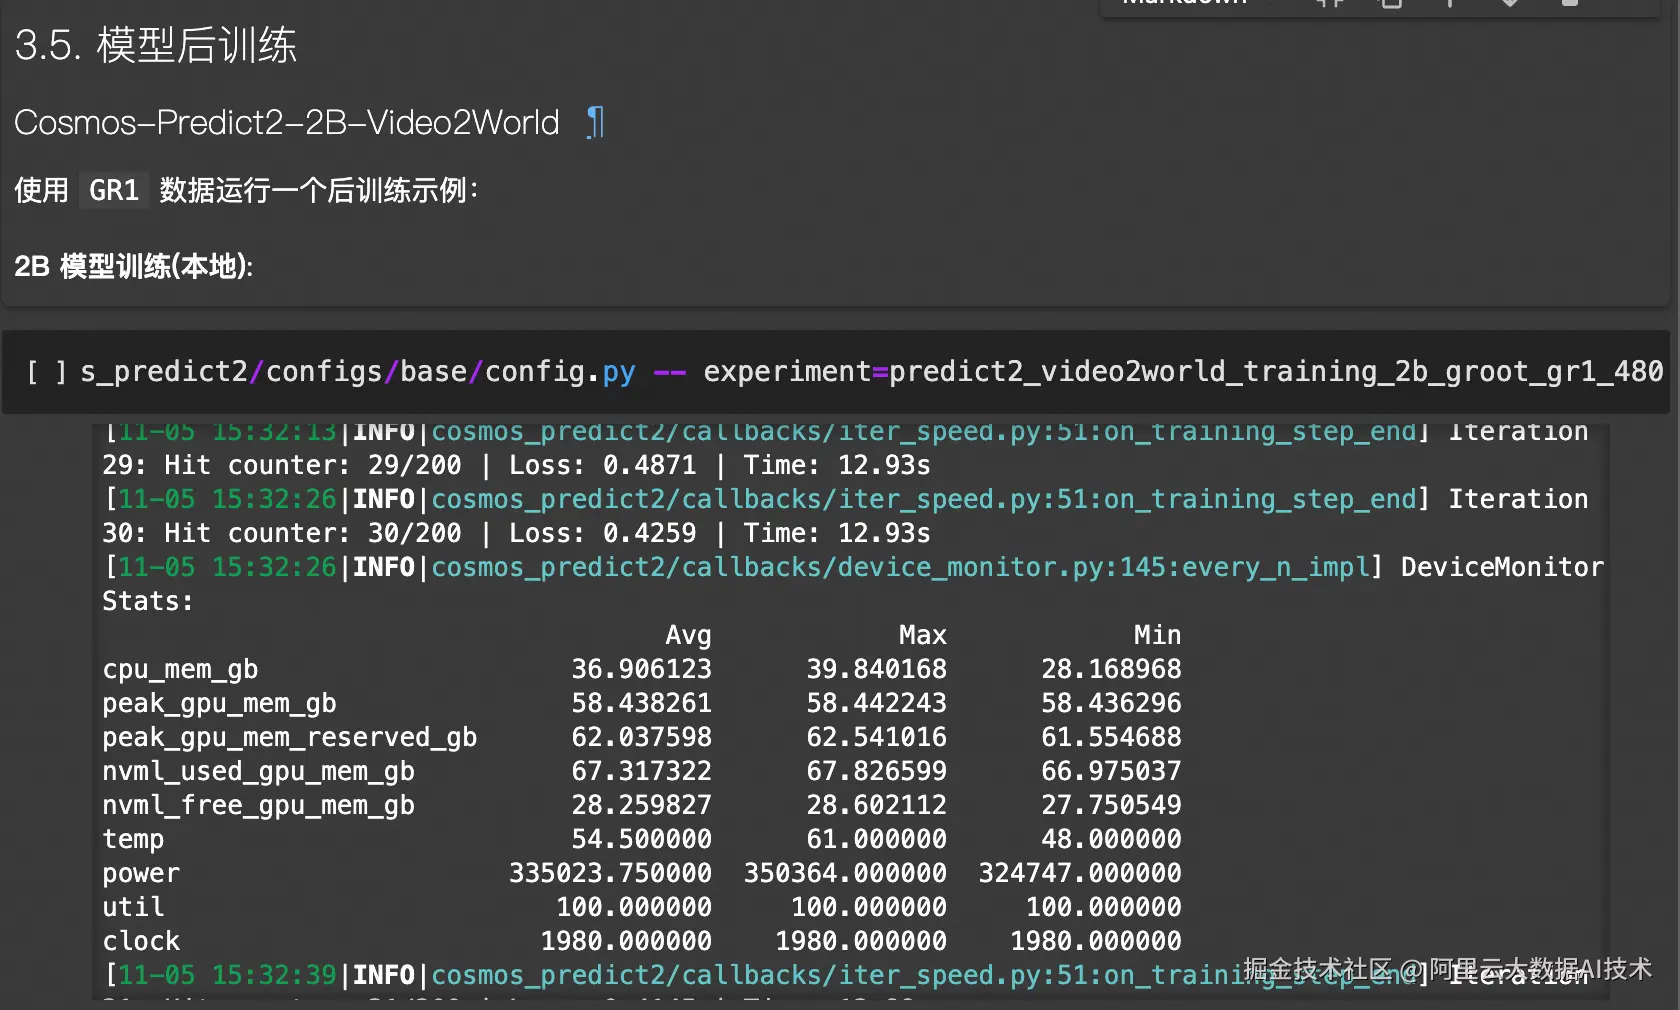
对于更大的世界模型,例如Cosmos-Predict2-14B-Video2World,可以在DLC中,使用4节点 × 8*GU8T的机型中进行微调:
python
import os
import json
import time

from alibabacloud_tea_openapi.models import Config
from alibabacloud_credentials.client import Client as CredClient
from alibabacloud_credentials.models import Config as CredConfig
from alibabacloud_pai_dlc20201203.client import Client as DLCClient
from alibabacloud_pai_dlc20201203.models import (
    CreateJobRequest,
    GetJobRequest,
)

def wait_for_job_to_terminate(client, job_id):
    while True:
        job = client.get_job(job_id, GetJobRequest()).body
        print('job({}) is {}'.format(job_id, job.status))
        if job.status in ('Succeeded', 'Failed', 'Stopped'):
            return job.status
        time.sleep(5)
    return None


def main():
    current_time_tuple = time.localtime()
    year = current_time_tuple.tm_year
    month = current_time_tuple.tm_mon
    day = current_time_tuple.tm_mday
    hour = current_time_tuple.tm_hour
    minute = current_time_tuple.tm_min
    # 请确认您的主账号已授权DLC,且拥有足够的权限。
    display_name = f"train_cosmos-predict2_14b_{day}_{hour}-{minute}"  #设置任务名称
    region_id = os.environ.get("dsw_region") #设置regionid
    workspace_id = os.environ.get('PAI_WORKSPACE_ID') #设置成用户自己的工作空间id
    image_uri = f"dsw-registry.{region_id}.cr.aliyuncs.com/pai-training-algorithm/isaac-sim:gr00t-dreams-v9" #使用官方镜像
    ecs_spec = "ecs.gn8v-8x.16xlarge"
    num_gpus = 8 # 与资源规格保持一致
    num_nodes = 4
    #########训练任务相关配置#############
    config = "cosmos_predict2/configs/base/config.py"
    exp = "predict2_video2world_training_14b_groot_gr1_480"
    #########训练任务相关配置#############

    # 本示例通过Credentials SDK默认从环境变量中读取AccessKey,来实现身份验证。
    credentialsConfig = CredConfig(
        type='credentials_uri'   # 选填。若您未配置其他"默认凭据链"访问方式,您无需再显式指定,Credentials SDK会通过uri方式获取临时凭证
    )
    cred = CredClient(credentialsConfig)

    # 1. create client;
    dlc_client = DLCClient(
         config=Config(
            credential=cred,
            region_id=region_id,
            endpoint='pai-dlc.{}.aliyuncs.com'.format(region_id),
         )
    )

    print('-------- Create Job ----------')
    # 创建DLC作业。
    create_job_resp = dlc_client.create_job(CreateJobRequest().from_map({
        'WorkspaceId': workspace_id,
        'DisplayName': display_name,
        'JobType': 'PyTorchJob',
        # 'ResourceId': resource_quota_id,
        'JobSpecs': [
            {
                "Type": "Worker",
                "Image": image_uri,
                "PodCount": num_nodes,
                "EcsSpec": ecs_spec,
            },
        ],
        'DataSources': [
            {
                "DataSourceId": dataset_id,
            },
        ],
       'UserVpc': {
            "VpcId": vpc_id,  # 替换为实际 VPC ID
            "SwitchId": switch_id,  # 替换为实际交换机 ID
            "SecurityGroupId": security_groupid  # 替换为实际安全组 ID
        },
        "UserCommand": f" export NVTE_FUSED_ATTN=0 && \
            rm -rf /workspace/cosmos-predict2/checkpoints && \
            rm -rf /workspace/cosmos-predict2/datasets/benchmark_train/gr1 && \
            ln -s /mnt/data/notebook2/checkpoints /workspace/cosmos-predict2/checkpoints && \
            ln -s /mnt/data/notebook2/gr1 /workspace/cosmos-predict2/datasets/benchmark_train/gr1 && \
            cd /workspace/cosmos-predict2 && \
            torchrun --nproc_per_node={num_gpus} --nnodes={num_nodes} --rdzv_id 123 --rdzv_backend c10d --rdzv_endpoint $MASTER_ADDR:1234 -m \
            scripts.train --config={config} \
            -- experiment={exp} \
            model.config.fsdp_shard_size=0"
    }))
    job_id = create_job_resp.body.job_id

    wait_for_job_to_terminate(dlc_client, job_id)

    pass


if __name__ == '__main__':
    main()
完成微调后,即可使用微调后的模型进行推理:
python
!torchrun --nproc_per_node=4 --master_port=12341 -m examples.video2world_gr00t \
--num_gpus 4   --model_size 14B   --gr00t_variant gr1   \
--batch_input_json dream_gen_benchmark/gr1_object/batch_input.json   --disable_guardrail
在上述代码中,使用batch_input.json来记录推理所需的prompts与起始帧:
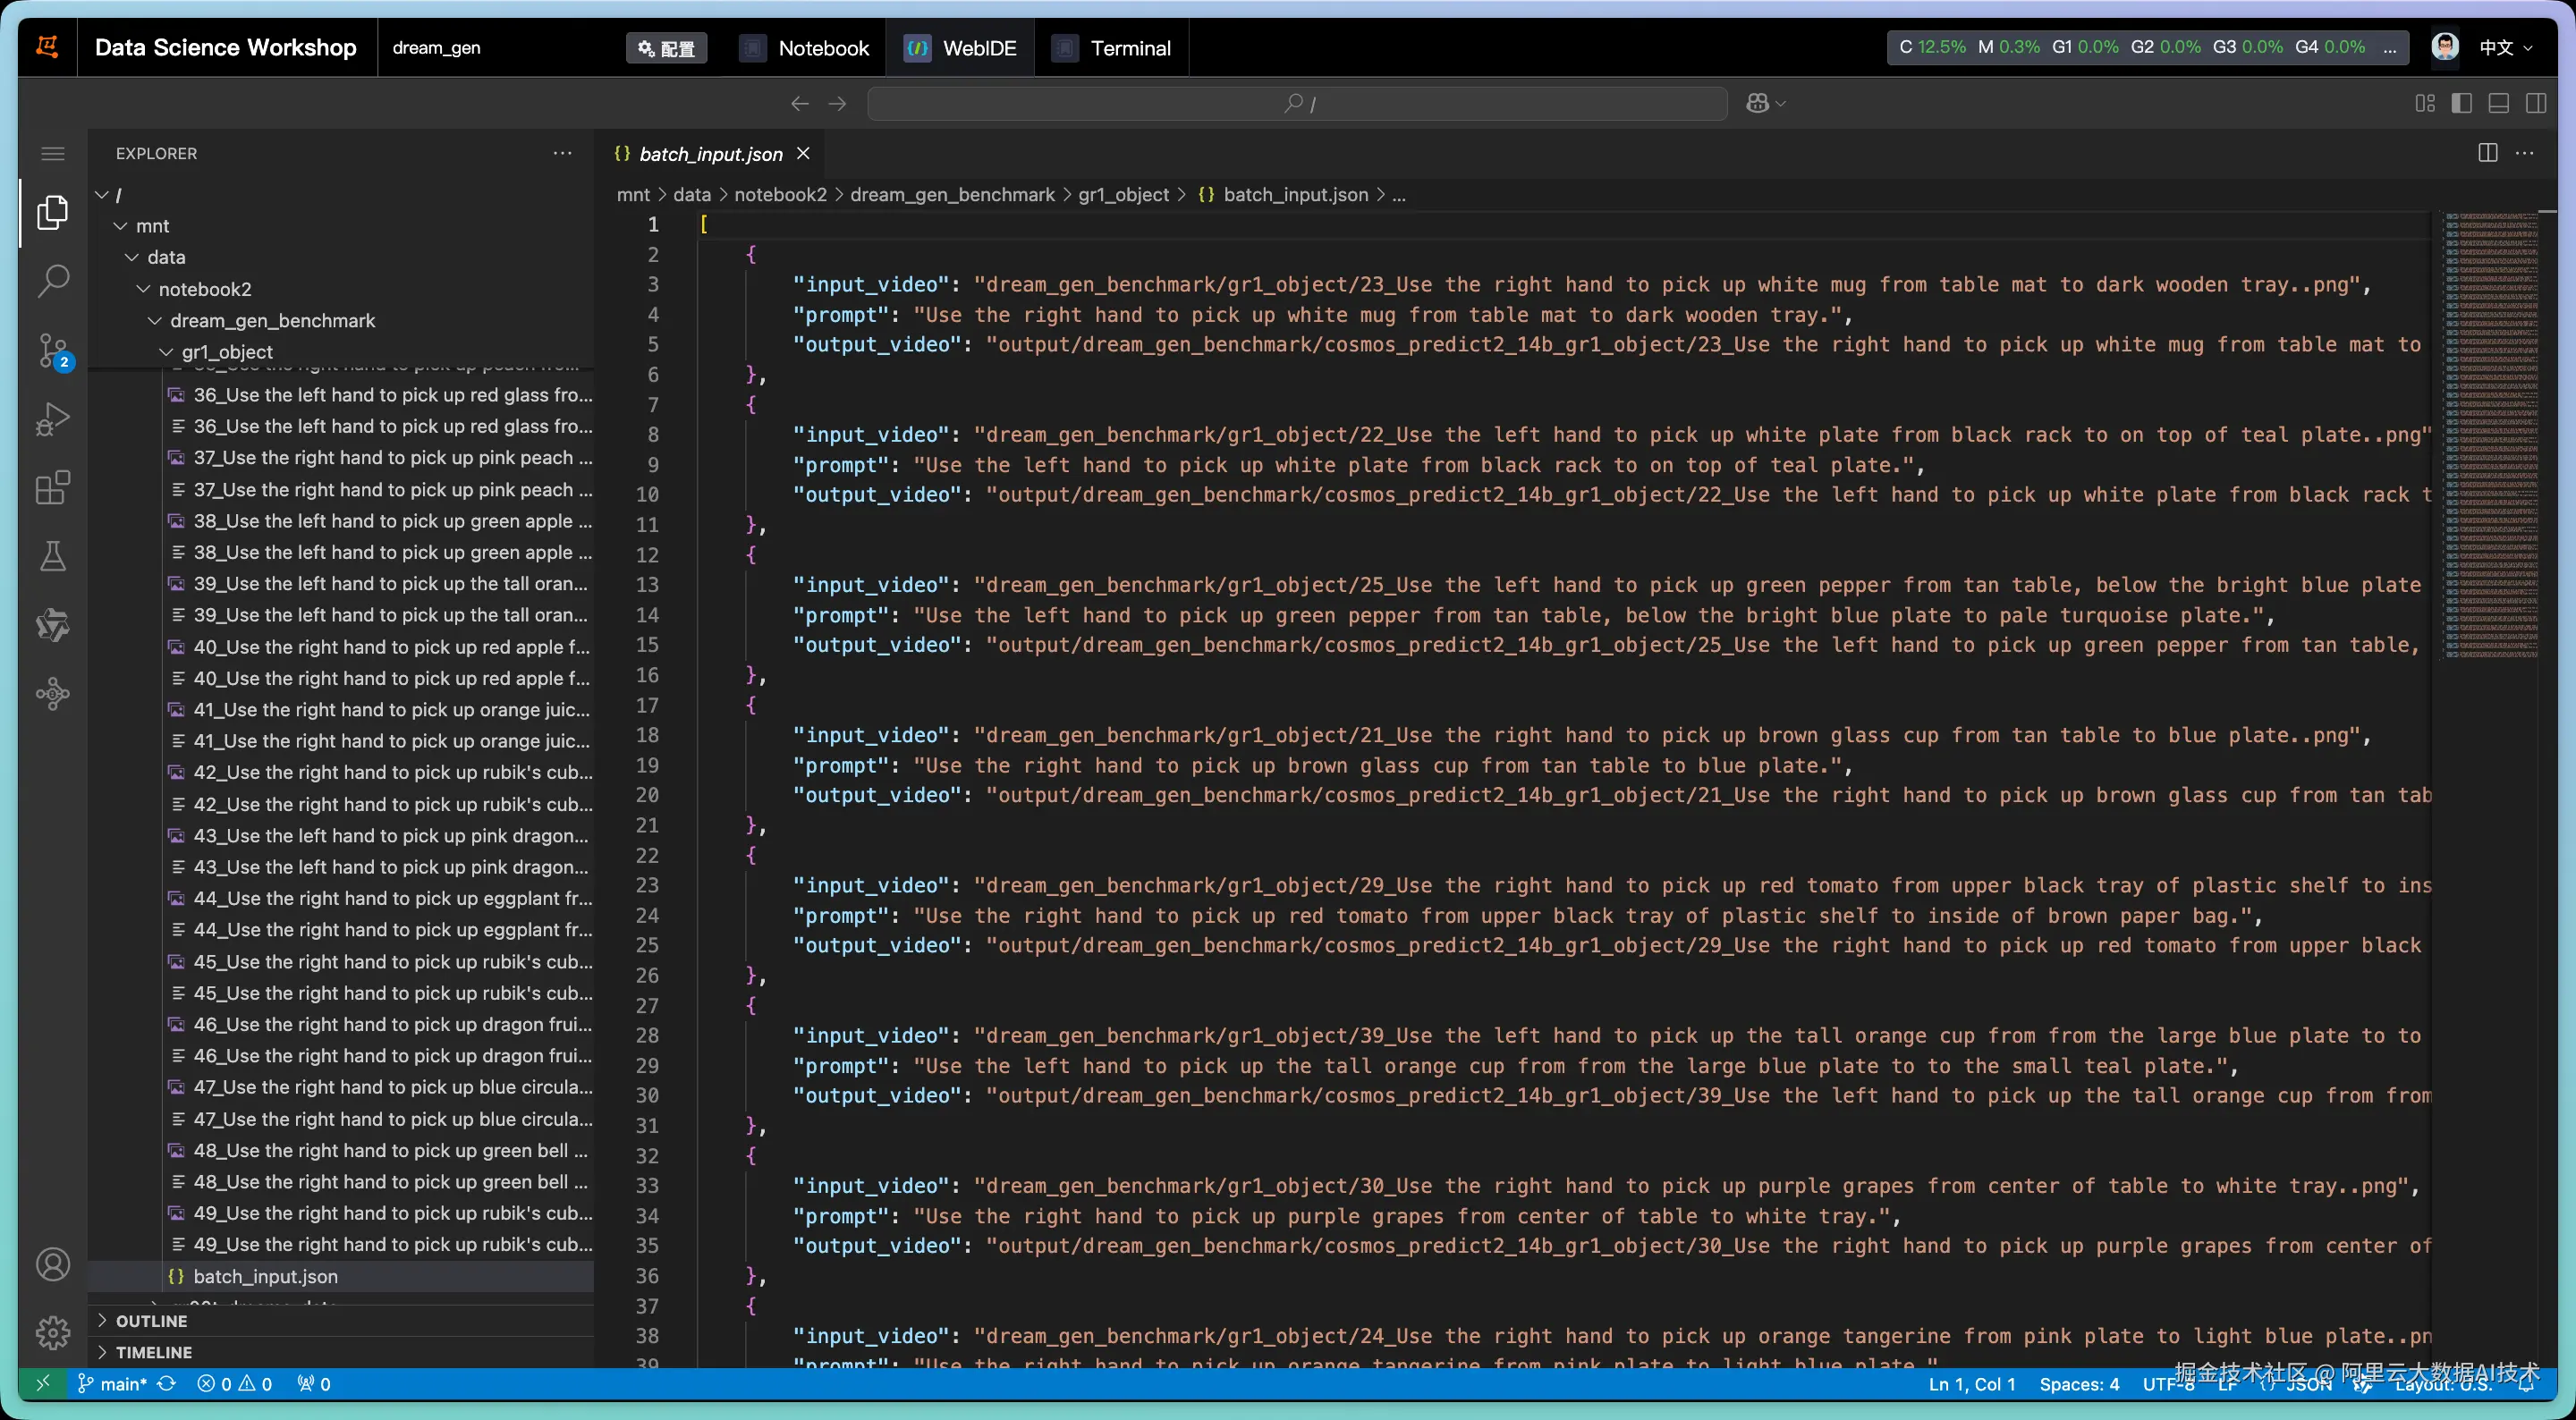
执行上述推理过程:

按照batch_input.json,脚本会输出一系列推理结果,实现数据扩增。扩增的数量取决于batch_input.json的prompt数量。以下是输出结果示例,查看演示 >>
从上述结果中可以看出,右上角的水壶出现了明显的变形,不符合真实物理规律。在实际生产中,我们需要剔除这类视频,因此需要使用Cosmos-Reason1模型进行拒绝采样。
拒绝采样
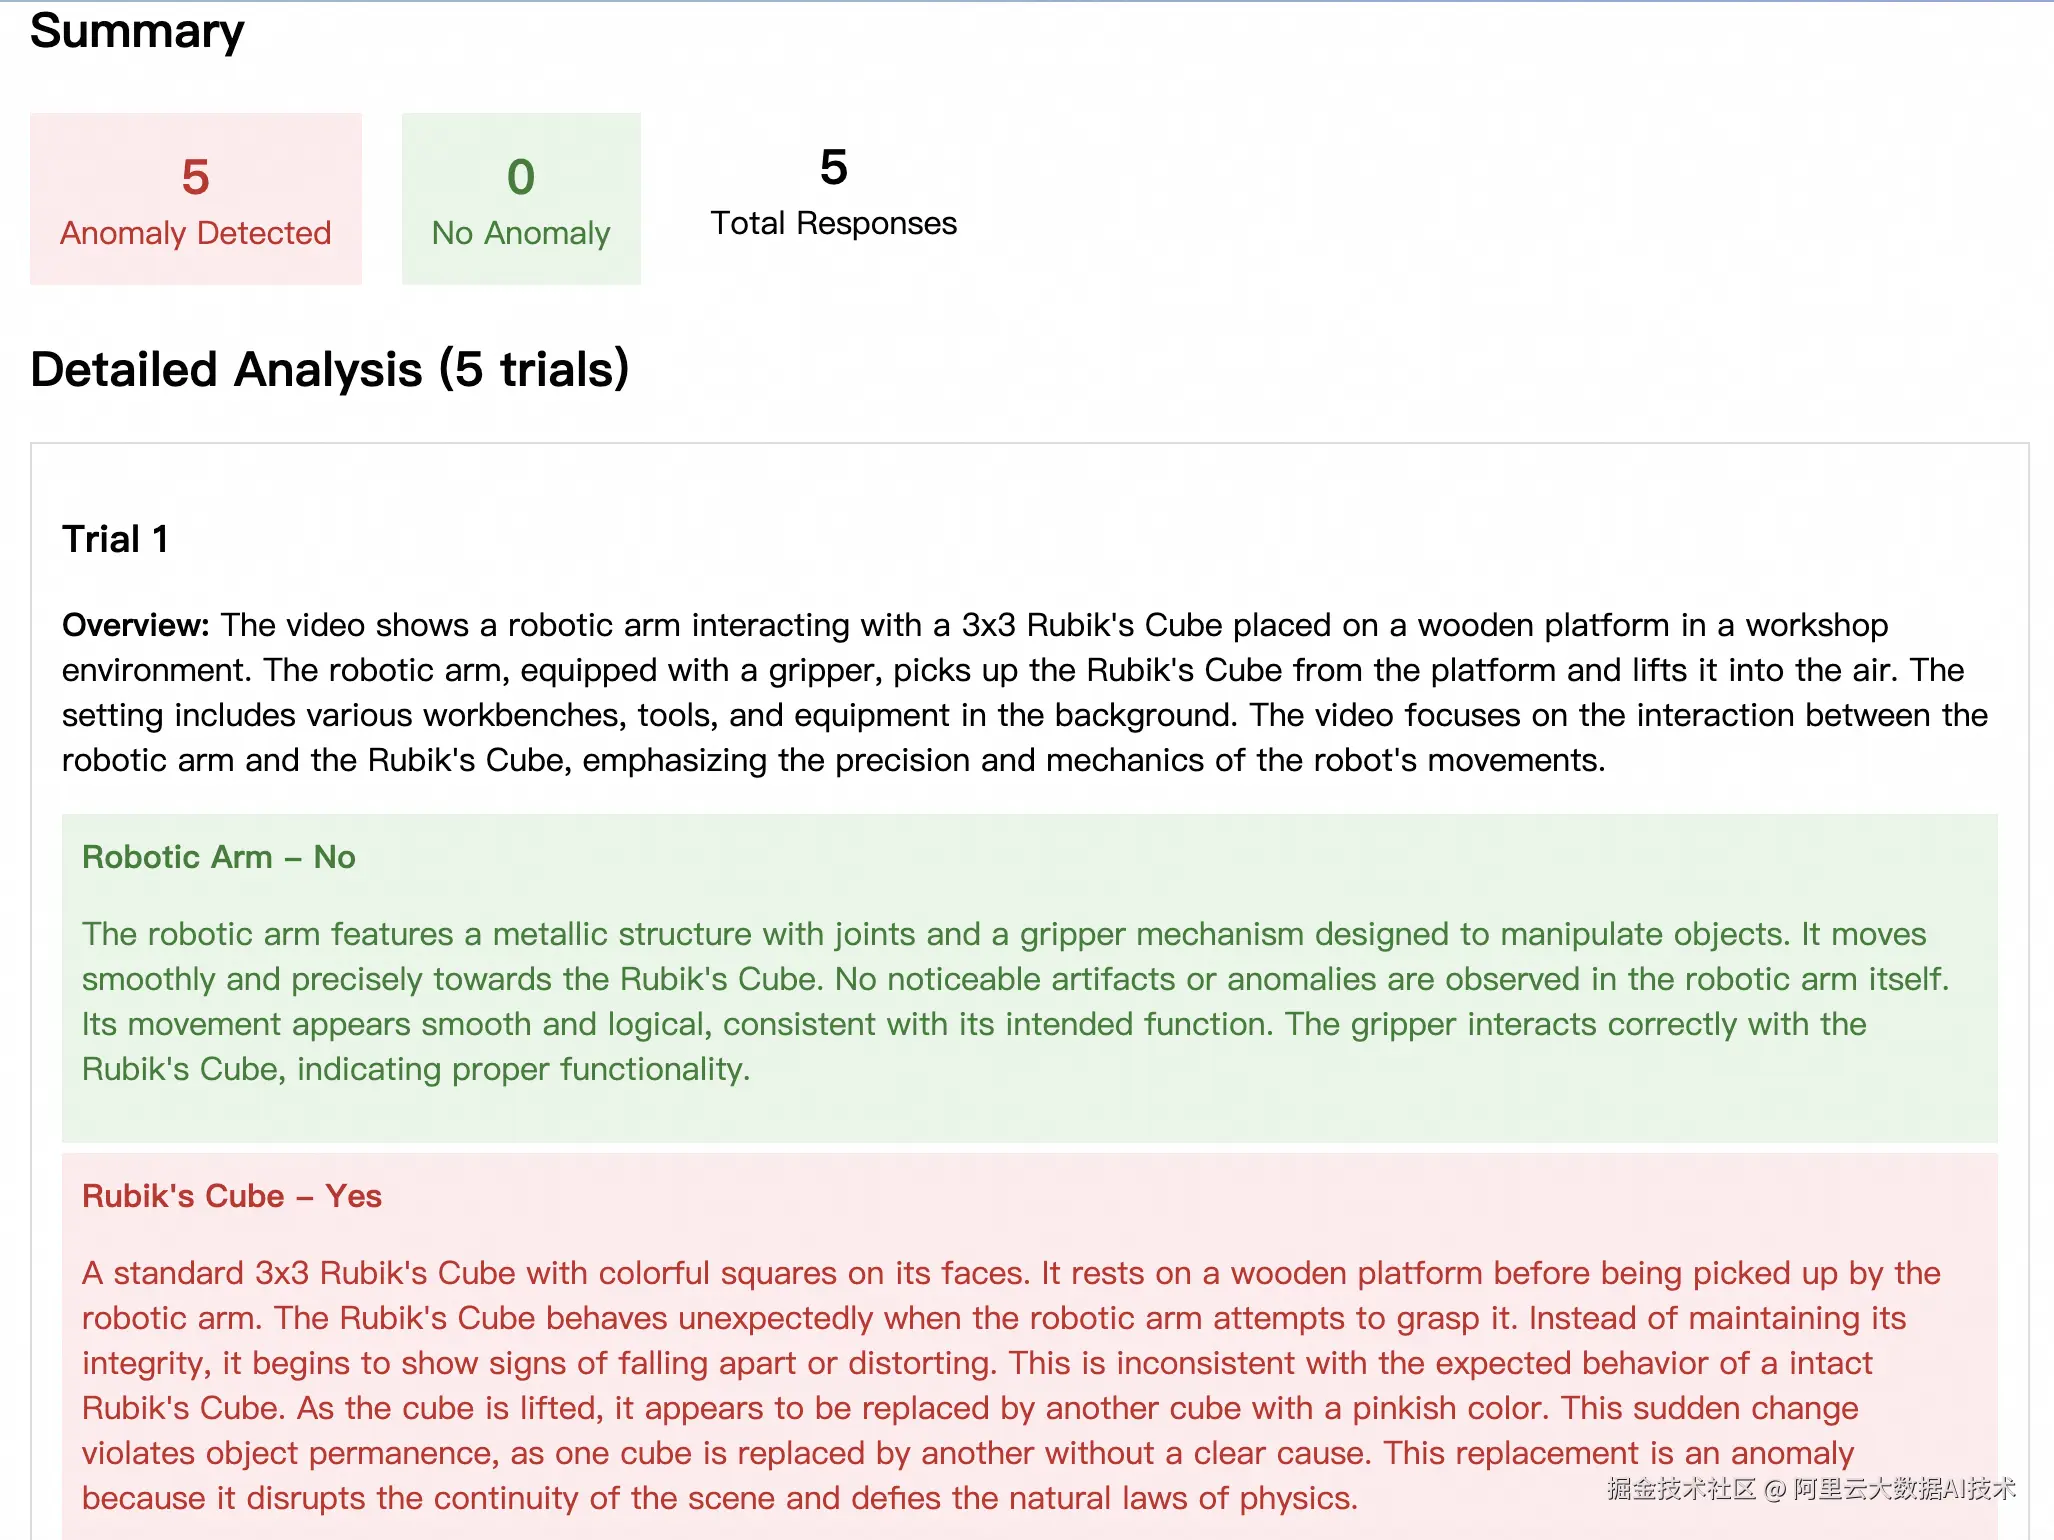
拒绝采样的原理是:生成多个候选视频,然后使用Cosmos-Reason1对这些视频进行评分,选择评分最高的视频作为最终输出。评分将从以下几个方面进行考量:
- 运动连贯性: 物体移动是否自然流畅
- 时间一致性: 帧与帧之间是否存在突兀变化
- 物理合理性: 重力、光影、材质是否符合物理规律
- 视觉质量: 是否存在伪影、模糊、扭曲等问题
- 内容逻辑: 场景元素之间的关系是否合理
可以使用以下脚本进行拒绝采样:
python
!torchrun --nproc_per_node=4 --master_port=12341   -m examples.video2world_bestofn   \
--model_size 14B   --gr00t_variant gr1   \
--prompt "Use the right hand to pick up rubik's cube from from the bottom of the three-tiered wooden shelf to to the top of the three-tiered wooden shelf."   \
--input_path assets/sample_gr00t_dreams_gr1/8_Use_the_right_hand_to_pick_up_rubik\'s_cube_from_from_the_bottom_of_the_three-tiered_wooden_shelf_to_to_the_top_of_the_three-tiered_wooden_shelf..png   \
--num_gpus 2   --num_generations 4   --prompt_prefix ""   \
--disable_guardrail   --save_path output/best-of-n-gr00t-gr1
该脚本会使用相同的prompt生成4条视频,然后通过Cosmos-Reason1进行打分,以下分别是0分和100分的视频,以示对比:
| 0分 | 100分 |
|---|---|
| 0分视频演示 >> | 100分视频演示 >> |
 |
 |
IDM逆解算
上述数据扩增和拒绝采样的结果,为一系列的"prompt-视频"数据对。一般来说,如果用于VLA模型的模仿学习,仅有这样的数据对是不够的,还需给出视频内容中的action序列。但由于Cosmos-Predict2模型直接输出了视频,没有action序列,我们需要通过IDM(Inverse Dynamics Model,逆向动力学模型)对视频进行处理,逆向解析出其中的action序列。
可以使用以下脚本进行IDM逆解算:
python
!PYTHONPATH=. CUDA_VISIBLE_DEVICES=0,1,2,3 python IDM_dump/dump_idm_actions.py \
    --checkpoint "seonghyeonye/IDM_gr1" \
    --dataset "IDM_dump/data/gr1_unified.data" \
    --output_dir "IDM_dump/data/gr1_unified.data_idm" \
    --num_gpus 4 \
    --video_indices "0 8"
由于需要使用huggingface获取IDM模型,在国内的网络环境中,执行上述命令可能出现网络问题,可以使用以下环境变量进行代理加速:
python
HF_ENDPOINT=https://hf-mirror.com 逆解算结果以parquet格式保存,可以通过以下命令查看:
python
!uv pip install parquet-tools
!parquet-tools csv IDM_dump/data/gr1_unified.data_idm/data/chunk-000/episode_000000.parquet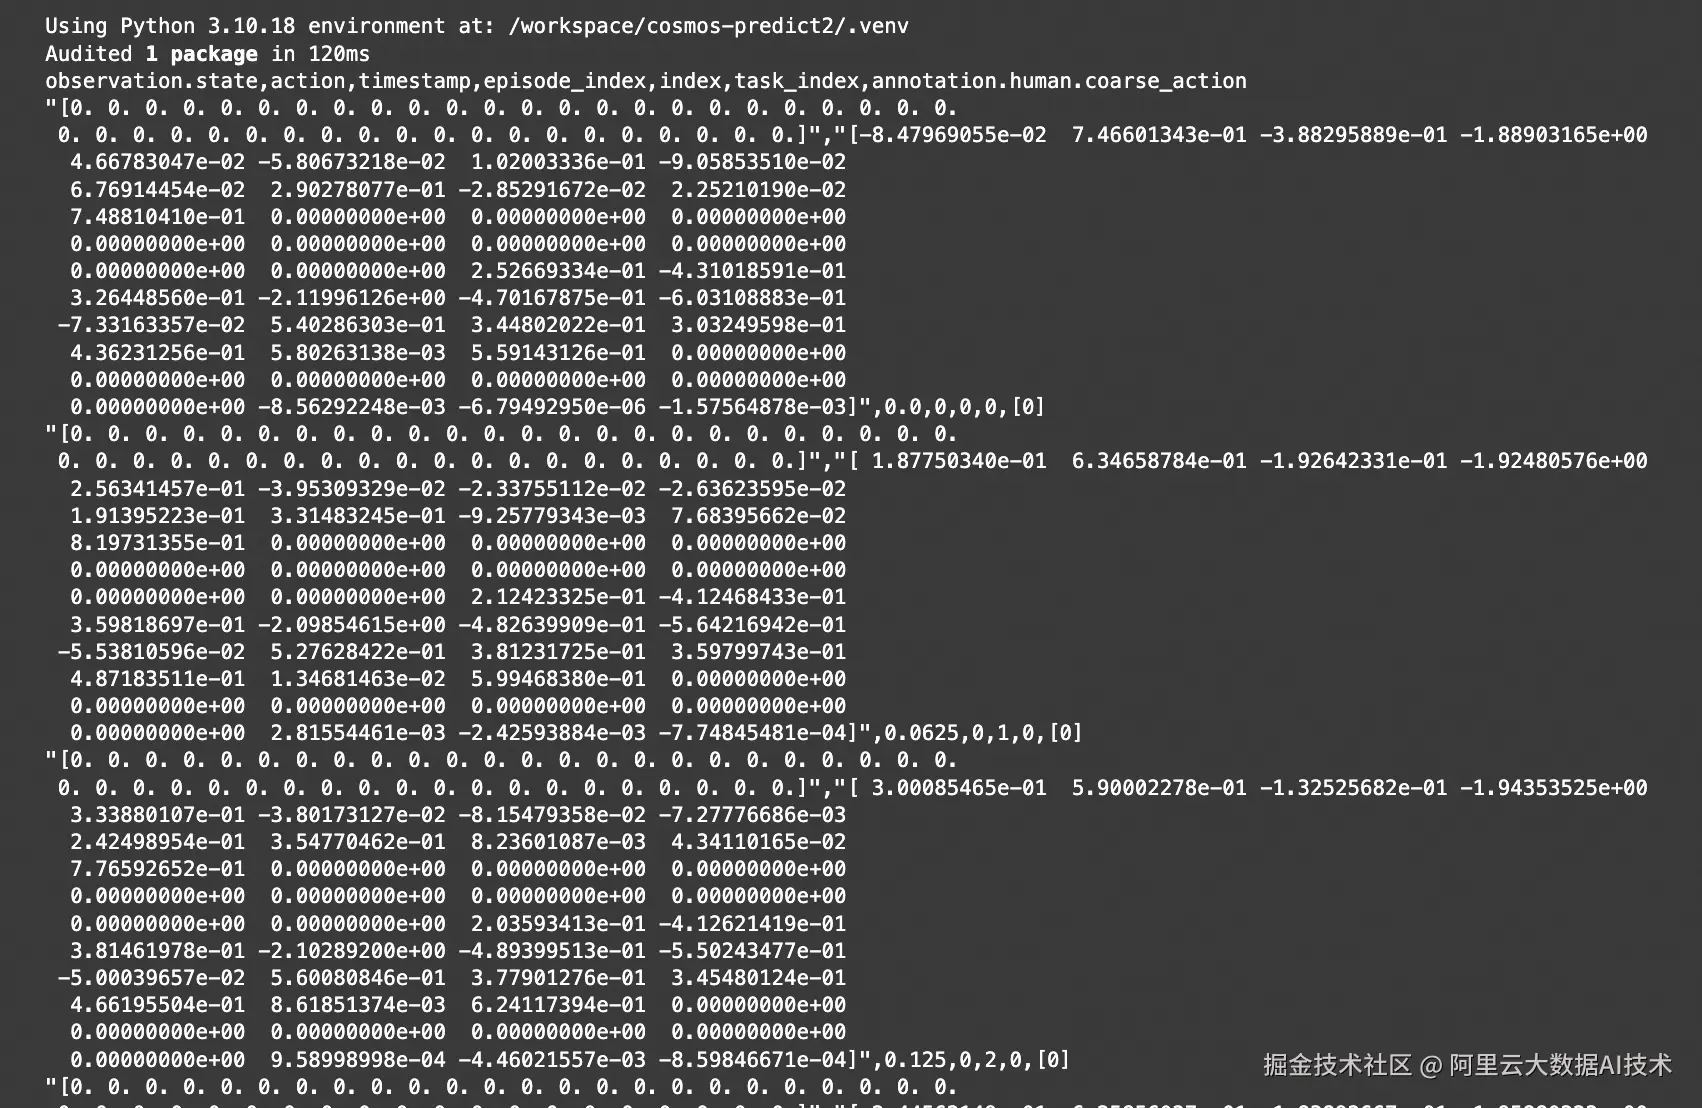
如果需要使用自定义机器人本体构型,也可以自定义微调IDM模型:
python
cd /workspace/GR00T-Dreams/
export HF_HOME=/mnt/data/notebook2
PYTHONPATH=. WANDB_MODE=disabled CUDA_VISIBLE_DEVICES=0 torchrun scripts/idm_training.py \
    --dataset-path demo_data/robot_sim.PickNPlace/ \
    --embodiment_tag gr1
模仿学习
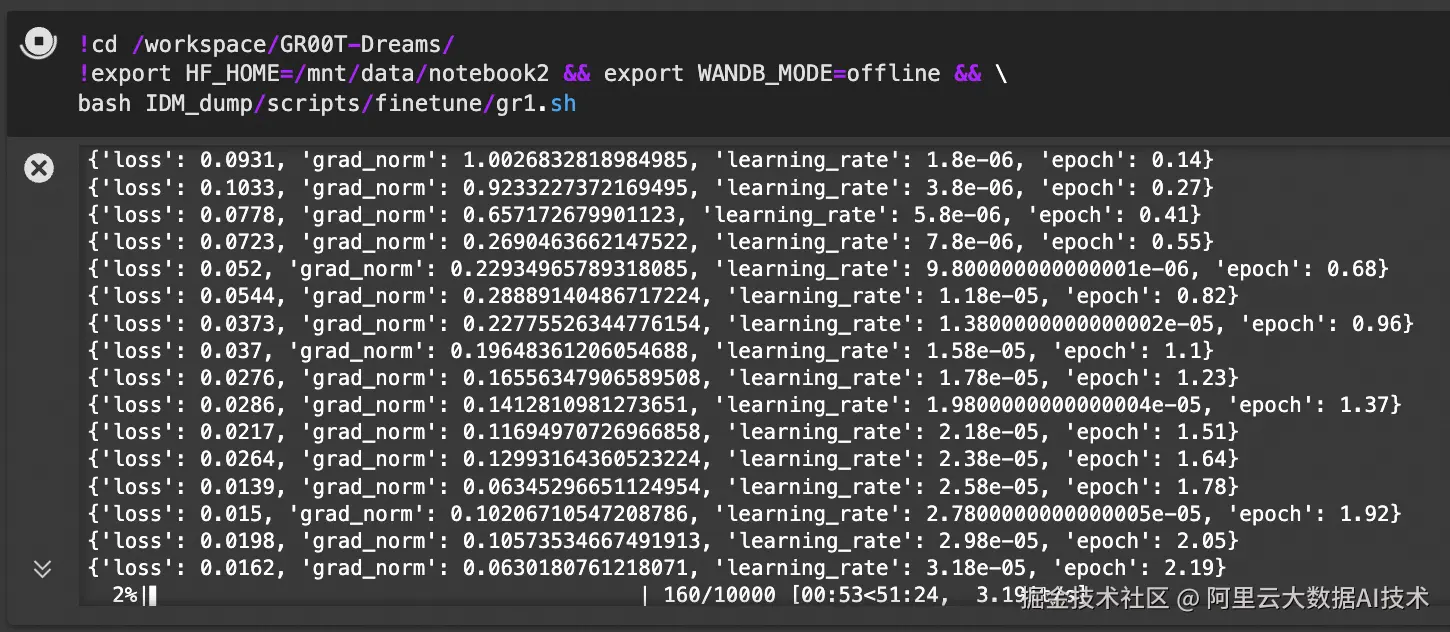
使用上述过程得到的扩增数据,可以用与GR00T-N1模型的模仿学习:
python
!cd /workspace/GR00T-Dreams/
!export HF_HOME=/mnt/data/notebook2 && export WANDB_MODE=offline && \
bash IDM_dump/scripts/finetune/gr1.sh
详细训练脚本gr1.sh如下:
python
import os
import subprocess
import sys
from dataclasses import dataclass
from pathlib import Path

import torch
import tyro
from transformers import TrainingArguments

from gr00t.data.dataset import LeRobotSingleDataset
from gr00t.data.schema import EmbodimentTag
from gr00t.experiment.data_config import DATA_CONFIG_MAP
from gr00t.experiment.runner import TrainRunner
from gr00t.model.gr00t_n1 import GR00T_N1
from gr00t.utils.peft import get_lora_model


@dataclass
class Config:
    """Configuration for GR00T model fine-tuning."""

    # Dataset parameters
    dataset_path: str
    """Path to the dataset directory."""

    output_dir: str = "/tmp/gr00t"
    """Directory to save model checkpoints."""

    data_config: str = "gr1_arms_only"
    """Data configuration name from DATA_CONFIG_MAP."""

    # Training parameters
    batch_size: int = 16
    """Batch size per GPU for training."""

    max_steps: int = 10000
    """Maximum number of training steps."""

    num_gpus: int = 1
    """Number of GPUs to use for training."""

    save_steps: int = 500
    """Number of steps between saving checkpoints."""

    # Model parameters
    base_model_path: str = "nvidia/GR00T-N1-2B"
    """Path or HuggingFace model ID for the base model."""

    tune_llm: bool = False
    """Whether to fine-tune the language model backbone."""

    tune_visual: bool = True
    """Whether to fine-tune the vision tower."""

    tune_projector: bool = True
    """Whether to fine-tune the projector."""

    tune_diffusion_model: bool = True
    """Whether to fine-tune the diffusion model."""

    resume: bool = False
    """Whether to resume from a checkpoint."""

    # Advanced training parameters
    learning_rate: float = 1e-4
    """Learning rate for training."""

    weight_decay: float = 1e-5
    """Weight decay for AdamW optimizer."""

    warmup_ratio: float = 0.05
    """Ratio of total training steps used for warmup."""

    lora_rank: int = 0
    """Rank for the LORA model."""

    lora_alpha: int = 16
    """Alpha value for the LORA model."""

    lora_dropout: float = 0.1
    """Dropout rate for the LORA model."""

    dataloader_num_workers: int = 8
    """Number of workers for data loading."""

    report_to: str = "wandb"
    """Where to report training metrics (e.g., 'wandb', 'tensorboard')."""

    # Data loading parameters
    embodiment_tag: str = "new_embodiment"
    """Embodiment tag to use for training. e.g. 'new_embodiment', 'gr1'"""

    video_backend: str = "decord"
    """Video backend to use for training. [decord, torchvision_av]"""


#####################################################################################
# main training function
#####################################################################################


def main(config: Config):
    """Main training function."""
    # ------------ step 1: load dataset ------------
    embodiment_tag = EmbodimentTag(config.embodiment_tag)

    # 1.1 modality configs and transforms
    data_config_cls = DATA_CONFIG_MAP[config.data_config]
    modality_configs = data_config_cls.modality_config()
    transforms = data_config_cls.transform()

    # 1.2 data loader
    train_dataset = LeRobotSingleDataset(
        dataset_path=config.dataset_path,
        modality_configs=modality_configs,
        transforms=transforms,
        embodiment_tag=embodiment_tag,  # This will override the dataset's embodiment tag to "new_embodiment"
        video_backend=config.video_backend,
    )

    # ------------ step 2: load model ------------
    model = GR00T_N1.from_pretrained(
        pretrained_model_name_or_path=config.base_model_path,
        tune_llm=config.tune_llm,  # backbone's LLM
        tune_visual=config.tune_visual,  # backbone's vision tower
        tune_projector=config.tune_projector,  # action head's projector
        tune_diffusion_model=config.tune_diffusion_model,  # action head's DiT
    )

    # Set the model's compute_dtype to bfloat16
    model.compute_dtype = "bfloat16"
    model.config.compute_dtype = "bfloat16"

    if config.lora_rank > 0:
        model = get_lora_model(
            model,
            rank=config.lora_rank,
            lora_alpha=config.lora_alpha,
            lora_dropout=config.lora_dropout,
        )

    # 2.1 modify training args
    training_args = TrainingArguments(
        output_dir=config.output_dir,
        run_name=None,
        remove_unused_columns=False,
        deepspeed="",
        gradient_checkpointing=False,
        bf16=True,
        tf32=True,
        per_device_train_batch_size=config.batch_size,
        gradient_accumulation_steps=1,
        dataloader_num_workers=config.dataloader_num_workers,
        dataloader_pin_memory=False,
        dataloader_persistent_workers=True,
        optim="adamw_torch",
        adam_beta1=0.95,
        adam_beta2=0.999,
        adam_epsilon=1e-8,
        learning_rate=config.learning_rate,
        weight_decay=config.weight_decay,
        warmup_ratio=config.warmup_ratio,
        lr_scheduler_type="cosine",
        logging_steps=10.0,
        num_train_epochs=300,
        max_steps=config.max_steps,
        save_strategy="steps",
        save_steps=config.save_steps,
        save_total_limit=8,
        report_to=config.report_to,
        seed=42,
        do_eval=False,
        ddp_find_unused_parameters=False,
        ddp_bucket_cap_mb=100,
        torch_compile_mode=None,
    )

    # 2.2 run experiment
    experiment = TrainRunner(
        train_dataset=train_dataset,
        model=model,
        training_args=training_args,
        resume_from_checkpoint=config.resume,
    )

    # 2.3 run experiment
    experiment.train()


if __name__ == "__main__":
    # Parse arguments using tyro
    config = tyro.cli(Config)

    # Print the tyro config
    print("\n" + "=" * 50)
    print("GR00T FINE-TUNING CONFIGURATION:")
    print("=" * 50)
    for key, value in vars(config).items():
        print(f"{key}: {value}")
    print("=" * 50 + "\n")

    available_gpus = torch.cuda.device_count() if torch.cuda.is_available() else 1

    # Validate GPU configuration
    assert (
        config.num_gpus <= available_gpus
    ), f"Number of GPUs requested ({config.num_gpus}) is greater than the available GPUs ({available_gpus})"
    assert config.num_gpus > 0, "Number of GPUs must be greater than 0"
    print(f"Using {config.num_gpus} GPUs")

    if config.num_gpus == 1:
        # Single GPU mode - set CUDA_VISIBLE_DEVICES=0
        os.environ["CUDA_VISIBLE_DEVICES"] = "0"
        # Run the script normally
        main(config)
    else:
        if os.environ.get("IS_TORCHRUN", "0") == "1":
            main(config)
        else:
            # Multi-GPU mode - use torchrun
            script_path = Path(__file__).absolute()
            # Remove any existing CUDA_VISIBLE_DEVICES from environment
            if "CUDA_VISIBLE_DEVICES" in os.environ:
                del os.environ["CUDA_VISIBLE_DEVICES"]

            # Use subprocess.run instead of os.system
            cmd = [
                "torchrun",
                "--standalone",
                f"--nproc_per_node={config.num_gpus}",
                "--nnodes=1",  # default to 1 node for now
                str(script_path),
            ]

            # Convert config to command line arguments
            for key, value in vars(config).items():
                if isinstance(value, bool):
                    # For boolean values, use --flag or --no-flag format
                    if value:
                        cmd.append(f"--{key.replace('_', '-')}")
                    else:
                        cmd.append(f"--no-{key.replace('_', '-')}")
                else:
                    # For non-boolean values, use --key value format
                    cmd.append(f"--{key.replace('_', '-')}")
                    cmd.append(str(value))
            print("Running torchrun command: ", cmd)
            env = os.environ.copy()
            env["IS_TORCHRUN"] = "1"
            sys.exit(subprocess.run(cmd, env=env).returncode)
建议在实际训练中,将 batch size 尽可能调大,并训练 20k steps。请在 DreamGen 环境中运行相应命令。
模型测评
在本例中,使用真实的GR1机器人进行模型效果验证,得到结果如下:
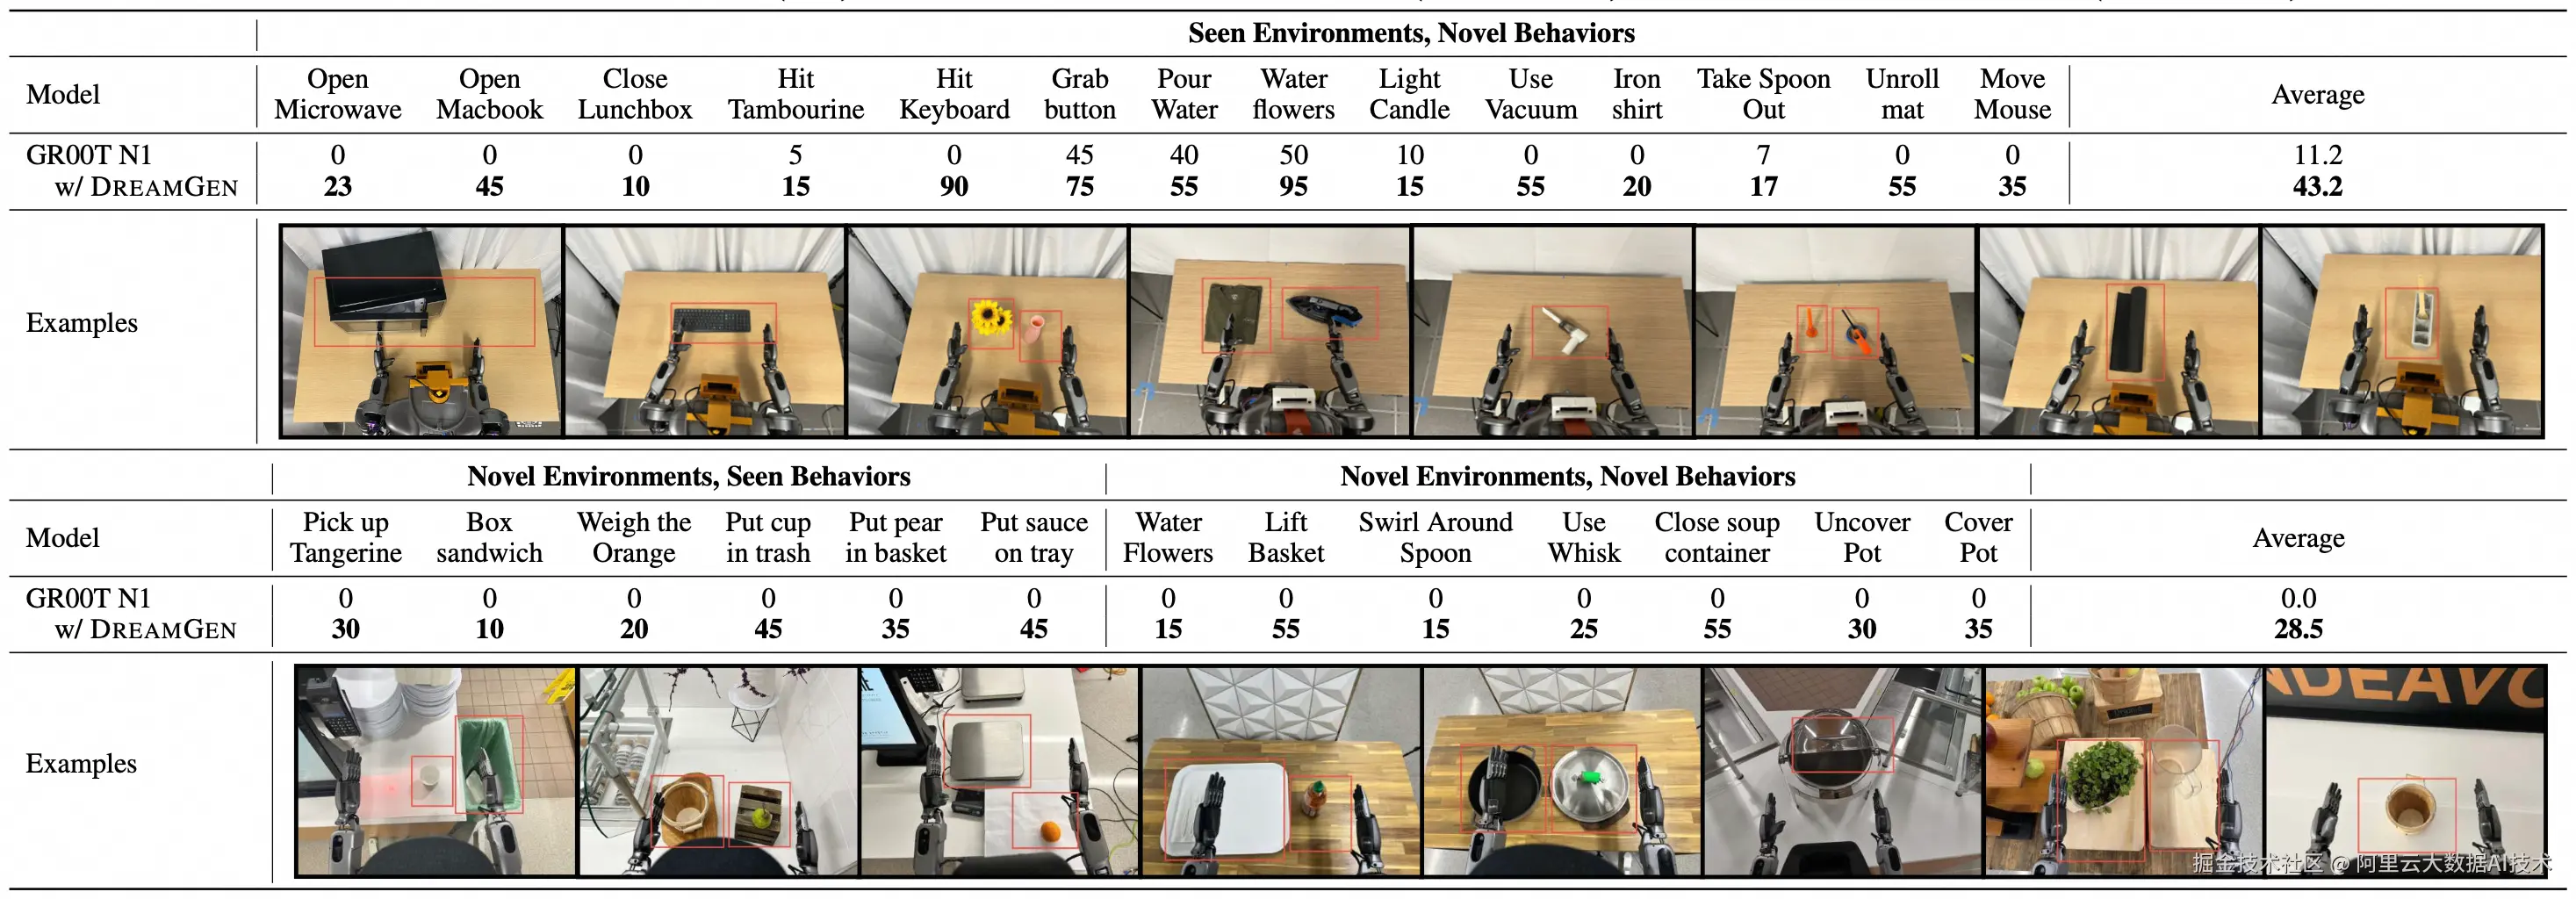
从结果中可以看到:
-
在已知场景中执行全新的动作,未使用扩增数据微调的GR00T N1模型仅有11.2%的成功率,使用扩增数据微调后可以达到43.2%的成功率
-
在未知场景中执行已知或未知动作,未使用扩增数据微调的GR00T N1模型全部失败,但是使用扩增数据微调后可以达到28.5%的成功率
总结
在本最佳实践中,基于阿里云 PAI 平台的特性,我们实现了基于Cosmos世界模型的操作动作数据扩增与模仿学习,包含从人工少量演示、数据扩增、拒绝采样、IDM逆解算、模仿学习再到模型测评的端到端实现
与基于Isaac仿真的数据扩增技术一样,Cosmos 数据扩增后训练的模型在各个场景下的成功率均有较高提升。相比于Isaac仿真,Cosmos数据扩增有以下特点:
-
人工演示、数据扩增环节无需仿真算力(RT Core),全流程使用同构算力(CUDA Core/Tensor Core)
-
无需对人工演示数据进行动作打标处理,直接使用视频数据即可实现扩增
-
无需单独的数据增强环节,可在数据扩增环节通过调整提示词实现数据增强
-
需要额外的拒绝采样步骤以过滤不合理的生成内容,以及额外的IDM逆解算步骤以补齐视频中缺少的action序列
markdown
!torchrun --nproc_per_node=4 --master_port=12341 -m examples.video2world_gr00t \
--num_gpus 4   --model_size 14B   --gr00t_variant gr1   \
--batch_input_json dream_gen_benchmark/gr1_object/batch_input.json
--disable_guardrail