文章目录
-
- [📚 我的专栏|持续更新中](#📚 我的专栏|持续更新中)
- 主流告警通知方式
- 邮件告警 (163邮箱)
-
- [163 邮箱账号设置](#163 邮箱账号设置)
- [编辑 Alertmanager 配置文件](#编辑 Alertmanager 配置文件)
- 测试邮件通知
- 钉钉通知
-
- [创建钉钉机器人并获取 webhook](#创建钉钉机器人并获取 webhook)
- 部署格式转换服务(prometheus-webhook-dingtalk)
- [配置 Alertmanager 对接钉钉](#配置 Alertmanager 对接钉钉)
- 钉钉群测试效果
- prometheus-webhook-dingtalk插件自定义告警模板
📚 我的专栏|持续更新中
🐍 Vben Admin框架实战(Python Flask后端)
上 一节内容,已经部署好了Alertmanager服务,同时也接受到了页面上的告警,本节将介绍通过多种方式将告警发送出来。
主流告警通知方式
- 邮件通知:最基础通用的方式,配置简单,适合所有场景,可附带告警详情和图表链接。
- 即时通讯工具:企业常用,响应速度快,支持 Slack、钉钉、企业微信、Telegram 等,需通过对应机器人或 API 集成。
- 短信通知:适合紧急告警(如服务宕机),需对接短信服务商(如云片网、Twilio),注意成本控制。
- WebHook 通知:灵活性最高,可自定义转发告警到自研系统、监控平台(如 Grafana)或第三方工具(如 PagerDuty)。
- 语音通知:极端紧急场景使用,对接语音呼叫服务商,通过电话语音播报告警内容。
所有通知方式均需在 Alertmanager 的配置文件(alertmanager.yml)中定义,核心步骤:
- 配置 "receivers"(接收者),指定通知方式的具体参数(如邮件服务器地址、钉钉机器人 token)。
- 配置 "route"(路由规则),将不同类型的告警分发到对应的接收者。
邮件告警 (163邮箱)
163 邮箱账号设置
- 拥有 163 邮箱账号,并开启 SMTP 服务(163 邮箱需单独开启,默认关闭):
- 登录 163 邮箱 → 进入「设置」→「POP3/SMTP/IMAP」→ 开启「SMTP 服务」
- 开启时可能需要验证手机,最终会获得一个 授权码(注意:不是邮箱登录密码,后续配置需用此授权码)
参考地址:
编辑 Alertmanager 配置文件
cd /data/middleware/alertmanager-0.28.1
vim alertmanager.yml
bash
global:
  # SMTP服务器配置(163邮箱的SMTP服务器)
  smtp_smarthost: 'smtp.163.com:25'  # 163 SMTP服务器地址和端口(25或465,25更常用)
  smtp_from: 'your_email@163.com'    # 发件人邮箱(必须是你的163邮箱)
  smtp_auth_username: 'your_email@163.com'  # 邮箱账号(同发件人)
  smtp_auth_password: 'your_auth_code'      # 163邮箱的授权码(不是登录密码)
  smtp_require_tls: false  # 163 SMTP默认支持TLS,但部分环境可能需要关闭(根据实际情况调整)

route:
  group_by: ['alertname']  # 按alertname分组
  group_wait: 10s          # 组内第一个警报触发后等待10s再发送
  group_interval: 10s      # 组内再次发送的间隔
  repeat_interval: 1h      # 重复发送相同警报的间隔(避免频繁通知)
  receiver: 'email-notifications'  # 关联到下面的receiver

receivers:
- name: 'email-notifications'
  email_configs:
  - to: 'recipient@example.com'  # 收件人邮箱(可以是任意邮箱,如个人QQ/企业邮箱)
    send_resolved: true  # 当警报解除时,是否发送恢复通知(建议开启)
重启 Alertmanager 使配置生效:
bash
# 若用systemd管理
systemctl restart alertmanager
# 若直接运行
kill -HUP $(pgrep alertmanager)  # 热重载配置(推荐)
若仍报错,查看 Alertmanager 日志(如journalctl -u alertmanager)
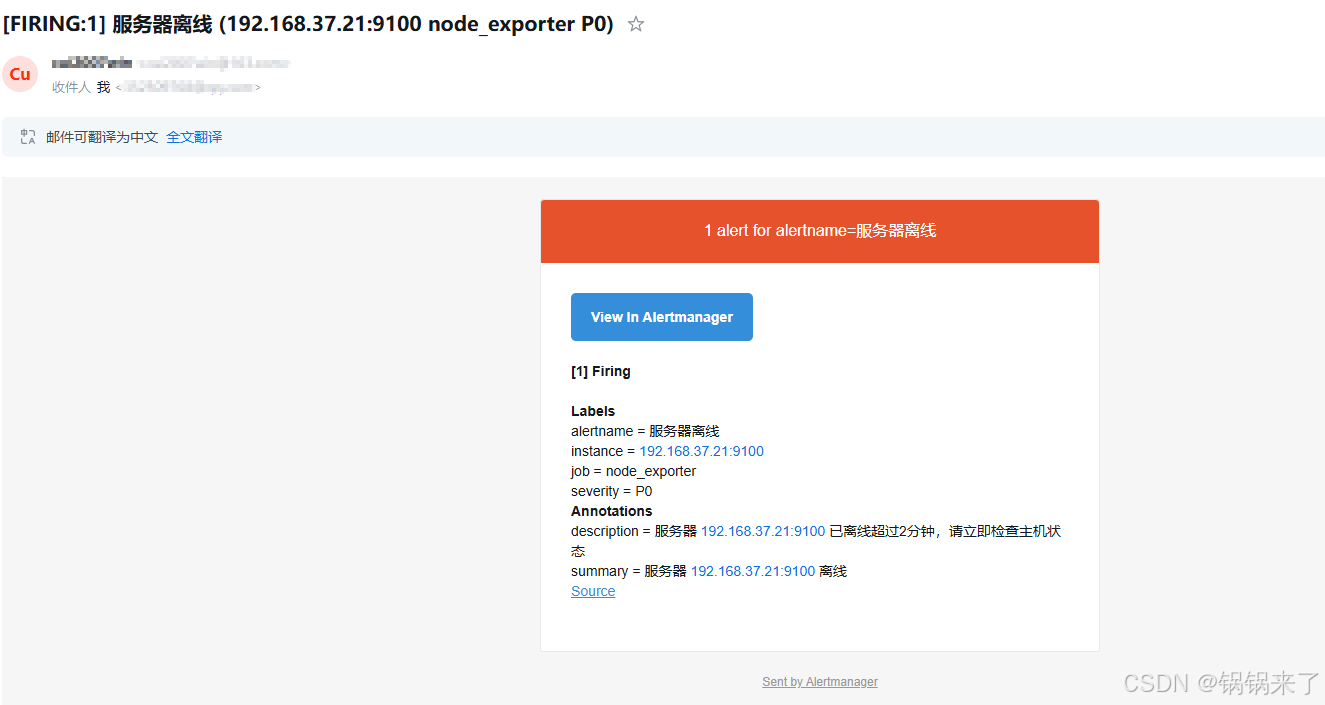
测试邮件通知
可以通过模拟一个警报触发来测试:
主机关机后,接受到告警:
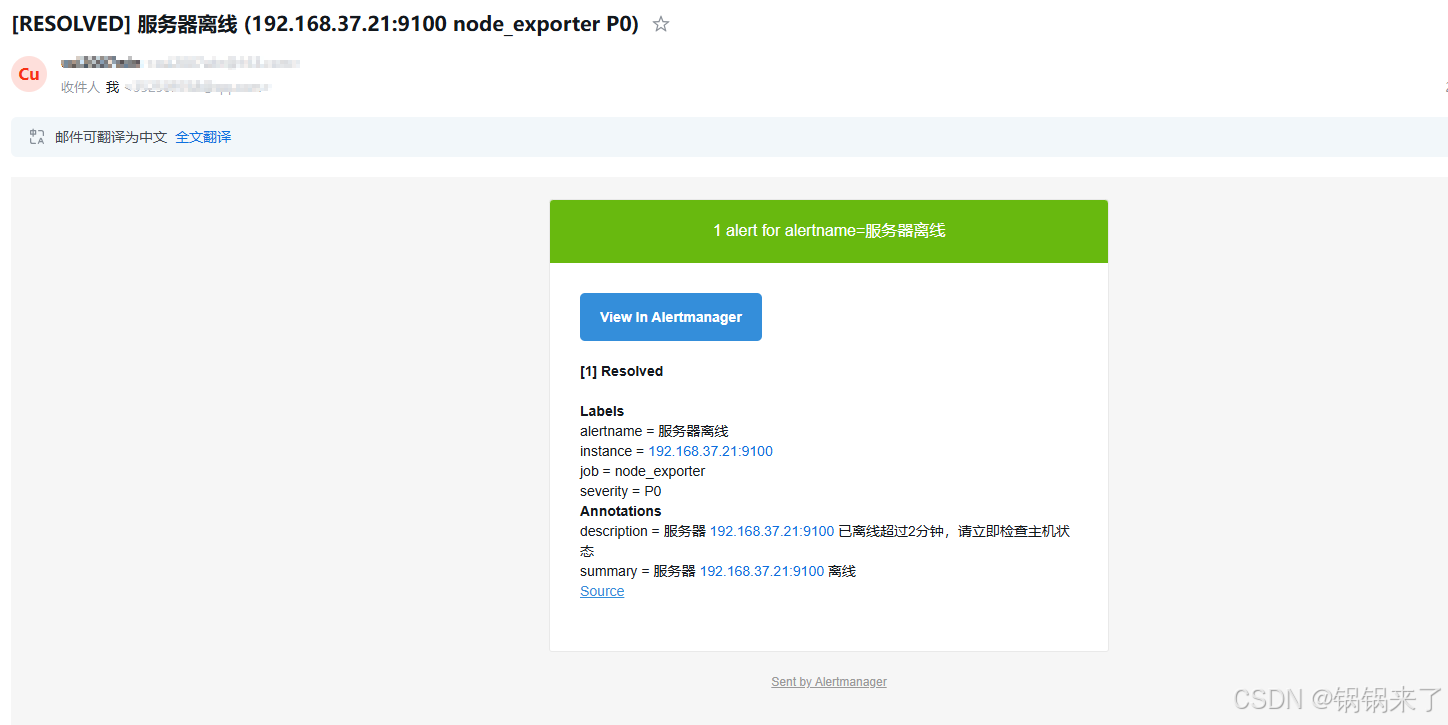
处理好告警后,也接受到了告警恢复通知。
钉钉通知
在 Alertmanager 中配置钉钉通知,需要通过 webhook 方式对接钉钉机器人。
创建钉钉机器人并获取 webhook
- 打开钉钉群,点击右上角「群设置」→「智能群助手」→「添加机器人」→「自定义机器人」
- 给机器人命名(如 Alertmanager-Notify),设置安全策略(推荐「自定义关键词」,例如添加 监控报警 作为关键词,确保通知内容包含该词)
- 点击「完成」后,复制机器人的 webhook 地址(格式:https://oapi.dingtalk.com/robot/send?access_token=xxxx)
部署格式转换服务(prometheus-webhook-dingtalk)
prometheus-webhook-dingtalk 是官方推荐的工具,可将 Alertmanager 告警格式转为钉钉支持的格式。
下载地址: https://github.com/timonwong/prometheus-webhook-dingtalk/releases
bash
cd /data/middleware/

wget https://github.com/timonwong/prometheus-webhook-dingtalk/releases/download/v2.1.0/prometheus-webhook-dingtalk-2.1.0.linux-amd64.tar.gz

tar xvf prometheus-webhook-dingtalk-2.1.0.linux-amd64.tar.gz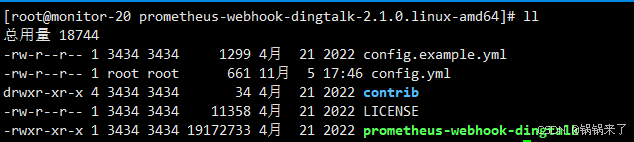
根据配置文件模板,创建一个新的配置。cp config.example.yml config.yml
bash
[root@monitor-20 prometheus-webhook-dingtalk-2.1.0.linux-amd64]# cat config.yml
## Request timeout
# timeout: 5s

## Uncomment following line in order to write template from scratch (be careful!)
#no_builtin_template: true

## Customizable templates path
#templates:
#  - contrib/templates/legacy/template.tmpl

## You can also override default template using `default_message`
## The following example to use the 'legacy' template from v0.3.0
#default_message:
#  title: '{{ template "legacy.title" . }}'
#  text: '{{ template "legacy.content" . }}'

## Targets, previously was known as "profiles"
# 这里要注意: default, 后面Alertmanager对接web-hook的地址要用到。
# access_token, 要填写自己申请的。
targets:
  default:
    url: https://oapi.dingtalk.com/robot/send?access_token=xxxxxxxxxx
启动 prometheus-webhook-dingtalk
bash
[root@monitor-20 prometheus-webhook-dingtalk-2.1.0.linux-amd64]# ./prometheus-webhook-dingtalk --web.enable-ui
ts=2025-11-06T07:40:29.076Z caller=main.go:59 level=info msg="Starting prometheus-webhook-dingtalk" version="(version=2.1.0, branch=HEAD, revision=8580d1395f59490682fb2798136266bdb3005ab4)"
ts=2025-11-06T07:40:29.076Z caller=main.go:60 level=info msg="Build context" (gogo1.18.1,userroot@177bd003ba4d,date20220421-08:19:05)=(MISSING)
ts=2025-11-06T07:40:29.076Z caller=coordinator.go:83 level=info component=configuration file=config.yml msg="Loading configuration file"
ts=2025-11-06T07:40:29.076Z caller=coordinator.go:91 level=info component=configuration file=config.yml msg="Completed loading of configuration file"
ts=2025-11-06T07:40:29.076Z caller=main.go:97 level=info component=configuration msg="Loading templates" templates=
ts=2025-11-06T07:40:29.077Z caller=main.go:113 component=configuration msg="Webhook urls for prometheus alertmanager" urls=http://localhost:8060/dingtalk/default/send
ts=2025-11-06T07:40:29.077Z caller=web.go:208 level=info component=web msg="Start listening for connections" address=:8060
配置 Alertmanager 对接钉钉
bash
global:
  # SMTP服务器配置(163邮箱的SMTP服务器)
  smtp_smarthost: 'smtp.163.com:25'  # 163 SMTP服务器地址和端口(25或465,25更常用)
  smtp_from: 'your_email@163.com'    # 发件人邮箱(必须是你的163邮箱)
  smtp_auth_username: 'your_email@163.com'  # 邮箱账号(同发件人)
  smtp_auth_password: 'your_auth_code'      # 163邮箱的授权码(不是登录密码)
  smtp_require_tls: false  # 163 SMTP默认支持TLS,但部分环境可能需要关闭(根据实际情况调整)

route:
  group_by: ['alertname']  # 按alertname分组
  group_wait: 10s          # 组内第一个警报触发后等待10s再发送
  group_interval: 10s      # 组内再次发送的间隔
  repeat_interval: 1h      # 重复发送相同警报的间隔(避免频繁通知)
  #receiver: 'email-notifications'  # 关联到下面的receiver
  receiver: 'dingtalk'  # 关联到下面的receiver

receivers:
- name: 'dingtalk'
  webhook_configs:
  - url: 'http://127.0.0.1:8060/dingtalk/default/send'  # 替换为实际地址,这里的default和上节对应。
    send_resolved: true
重启 Alertmanager 使配置生效:
bash
# 若用systemd管理
systemctl restart alertmanager
# 若直接运行
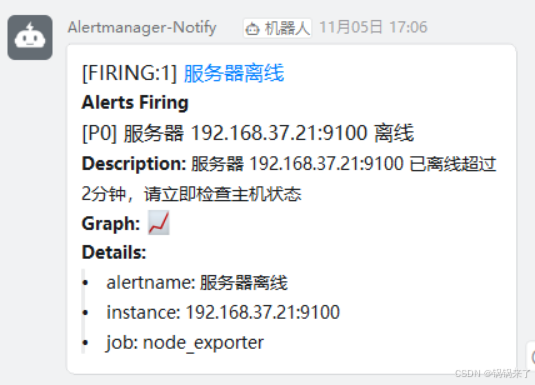
kill -HUP $(pgrep alertmanager) # 热重载配置(推荐)钉钉群测试效果
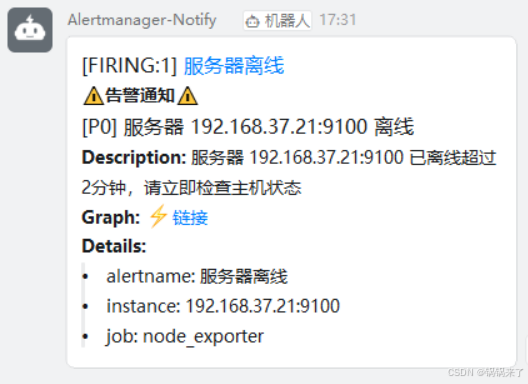
告警效果
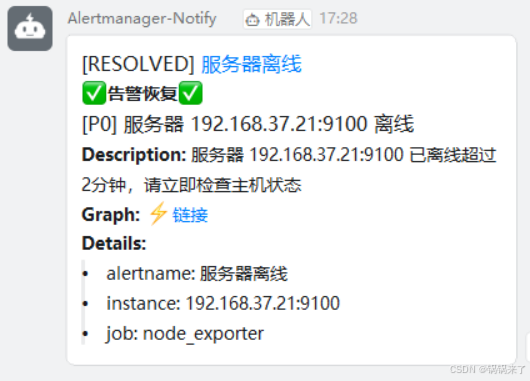
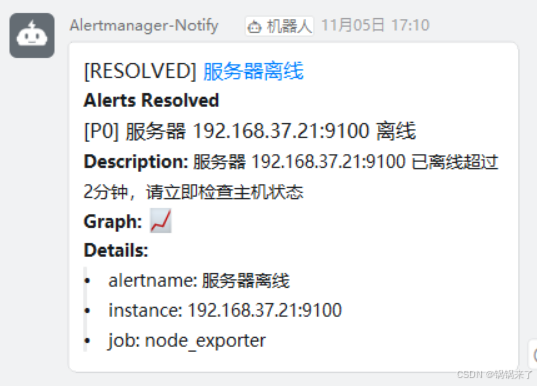
告警恢复效果
prometheus-webhook-dingtalk插件自定义告警模板
定义模板文件
bash
mkdir -p templates/cuiwin/vim templates/cuiwin/template.tmpl
bash
{{ define "__subject" }}[{{ .Status | toUpper }}{{ if eq .Status "firing" }}:{{ .Alerts.Firing | len }}{{ end }}] {{ .GroupLabels.SortedPairs.Values | join " " }} {{ if gt (len .CommonLabels) (len .GroupLabels) }}({{ with .CommonLabels.Remove .GroupLabels.Names }}{{ .Values | join " " }}{{ end }}){{ end }}{{ end }}
{{ define "__alertmanagerURL" }}{{ .ExternalURL }}/#/alerts?receiver={{ .Receiver }}{{ end }}

{{ define "__text_alert_list" }}{{ range . }}
**Labels**
{{ range .Labels.SortedPairs }}> - {{ .Name }}: {{ .Value | markdown | html }}
{{ end }}
**Annotations**
{{ range .Annotations.SortedPairs }}> - {{ .Name }}: {{ .Value | markdown | html }}
{{ end }}
**Source:** [{{ .GeneratorURL }}]({{ .GeneratorURL }})
{{ end }}{{ end }}

{{ define "cuiwin.__text_alert_list" }}{{ range . }}
#### \[{{ .Labels.severity | upper }}\] {{ .Annotations.summary }}

**Description:** {{ .Annotations.description }}

**Graph:** [?链接]({{ .GeneratorURL }})

**Details:**
{{ range .Labels.SortedPairs }}{{ if and (ne (.Name) "severity") (ne (.Name) "summary") }}> - {{ .Name }}: {{ .Value | markdown | html }}
{{ end }}{{ end }}
{{ end }}{{ end }}

{{/* cuiwin */}}
{{ define "cuiwin.title" }}{{ template "__subject" . }}{{ end }}
{{ define "cuiwin.content" }}#### \[{{ .Status | toUpper }}{{ if eq .Status "firing" }}:{{ .Alerts.Firing | len }}{{ end }}\] **[{{ index .GroupLabels "alertname" }}]({{ template "__alertmanagerURL" . }})**
{{ if gt (len .Alerts.Firing) 0 -}}
**?告警通知?**
{{ template "cuiwin.__text_alert_list" .Alerts.Firing }}
{{ range .AtMobiles }}@{{ . }}{{ end }}
{{- end }}
{{ if gt (len .Alerts.Resolved) 0 -}}
**?告警恢复?**
{{ template "cuiwin.__text_alert_list" .Alerts.Resolved }}
{{ range .AtMobiles }}@{{ . }}{{ end }}
{{- end }}
{{- end }}
prometheus-webhook-dingtalk引入模板
bash
[root@monitor-20 prometheus-webhook-dingtalk-2.1.0.linux-amd64]# cat config.yml
## Request timeout
# timeout: 5s

## Uncomment following line in order to write template from scratch (be careful!)
#no_builtin_template: true

## Customizable templates path
templates:
  - templates/cuiwin/template.tmpl

## You can also override default template using `default_message`
## The following example to use the 'legacy' template from v0.3.0
#default_message:
#  title: '{{ template "legacy.title" . }}'
#  text: '{{ template "legacy.content" . }}'

## Targets, previously was known as "profiles"
targets:
  default:
    url: https://oapi.dingtalk.com/robot/send?access_token=1625b24f3da3c4861b6d9d25685a0a5c682a5b1193230df3133a14ce56c022f8
    # Customize template content
    message:
      # Use my  template
      title: '{{ template "cuiwin.title" . }}'
      text: '{{ template "cuiwin.content" . }}'
执行 ./prometheus-webhook-dingtalk --web.enable-ui 启动插件,可以看到已经加载了我们的模板

访问 http://192.168.37.20:8060/ui/ 可以预览模板样式。
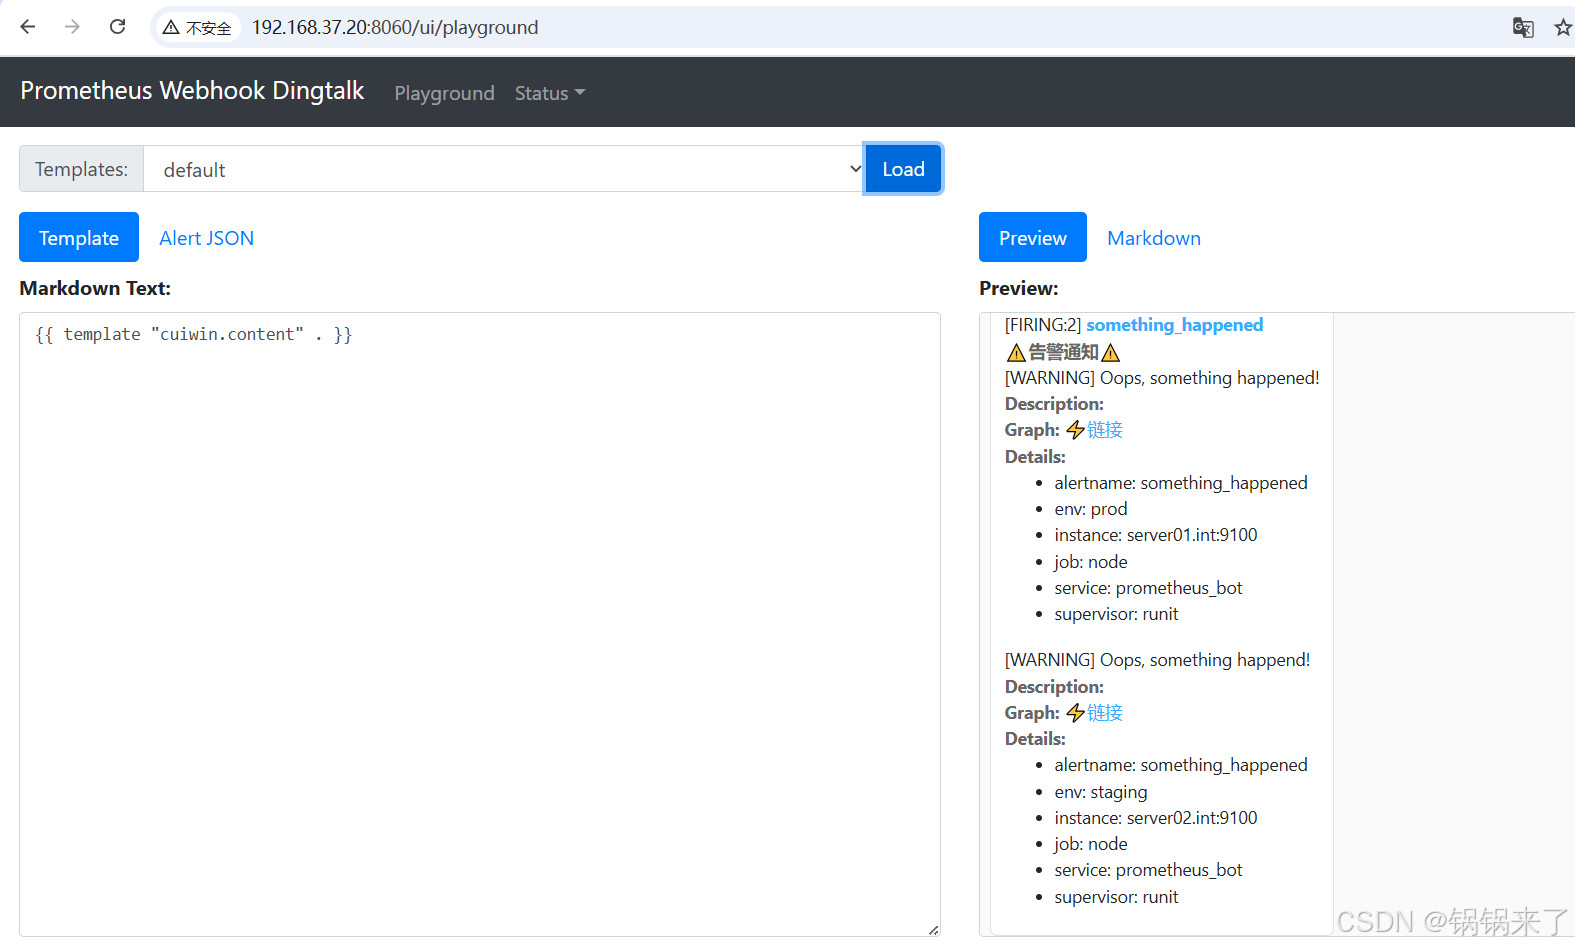
自定义模板告警效果