本示例的目的
1,在 Trixie(Debian 13) 镜像上完成 Docker 环境准备。
2,通过 docker‑compose 启动 Mosquitto(开源 MQTT broker),开启 1883(TCP) 与 9001(WebSocket) 两种常用协议。
3,编写完整的 Mosquitto 配置文件,并在 Docker 容器中映射持久化目录。
4,编写 ESP32 端(Arduino IDE 使用 PubSubClient 库)示例代码,实现 Wi‑Fi体条件下 Mosquitto 的 发布/订阅 双向交互。
5,给出完整的 快速验证、常见错误排查、生产安全(TLS/ACL) 完整思路,帮助同学们
在 Trixie + Docker + Mosquitto 环境下快速跑通并迁移到生产环境。
Trixie镜像设置清华大学源
Docker 架设 Eclipse Mosquitto
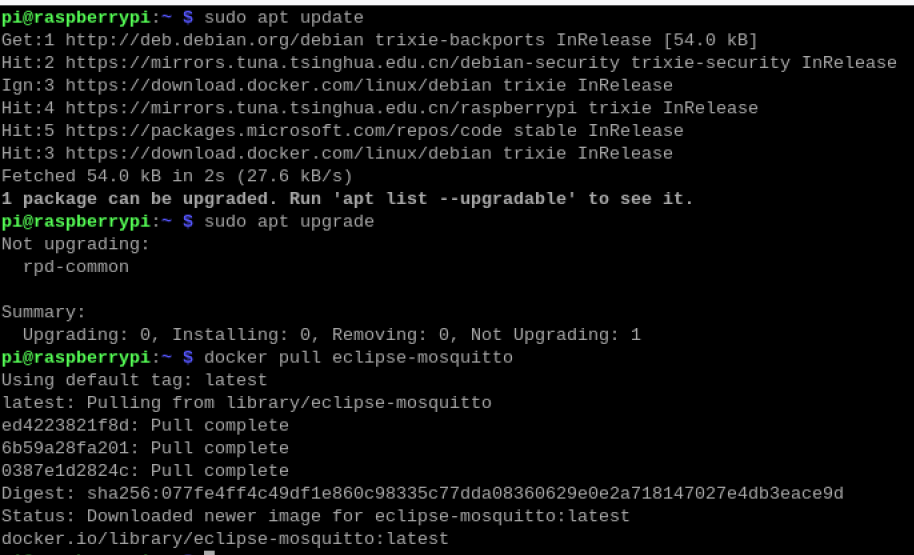
1,树莓派 5上安装docker,拉取eclipse-mosquitto:latest镜像
bash
doclker pull eclipse-mosquitto:latest2,建立项目文件夹,文件结构如下
bash
~/
 ├─ docker‑compose.yml   # 编排 Mosquitto 容器
 ├─ mosquitto.conf            # Mosquitto 主配置文件(中文注释)
 ├─ data/                     # Mosquitto 持久化数据(JSON、ACL 等)
 │
 ├─ log/                       # 业务日志(可选)
 ├─ keys/                      # TLS 密钥(生产化时使用)
 └─ auth/                     # 账号/密码(可选)
3,编写 docker‑compose.yml(aarch64 Mosquitto)
bash
services:
  mosquitto:
    image: eclipse-mosquitto:latest
    container_name: mosquitto
    restart: unless-stopped
    ports:
      - "1883:1883"
      - "9001:9001"
    volumes:
      - ./mosquitto.conf:/mosquitto/config/mosquitto.conf
      - ./data:/mosquitto/data
      - ./log:/mosquitto/log
    environment:
      - MOSQUITTO_USERNAME=${MOSQUITTO_USERNAME:-}
      - MOSQUITTO_PASSWORD=${MOSQUITTO_PASSWORD:-}
4,启动服务端
bash
docker compose up -d 5,订阅主题"aily_blockly_mqtt"
bash
docker exec mosquitto mosquitto_sub -t "aily_blockly_mqtt" -v6,查询树莓派IP
bash
hostname -I树莓派5服务器端端口显示的效果

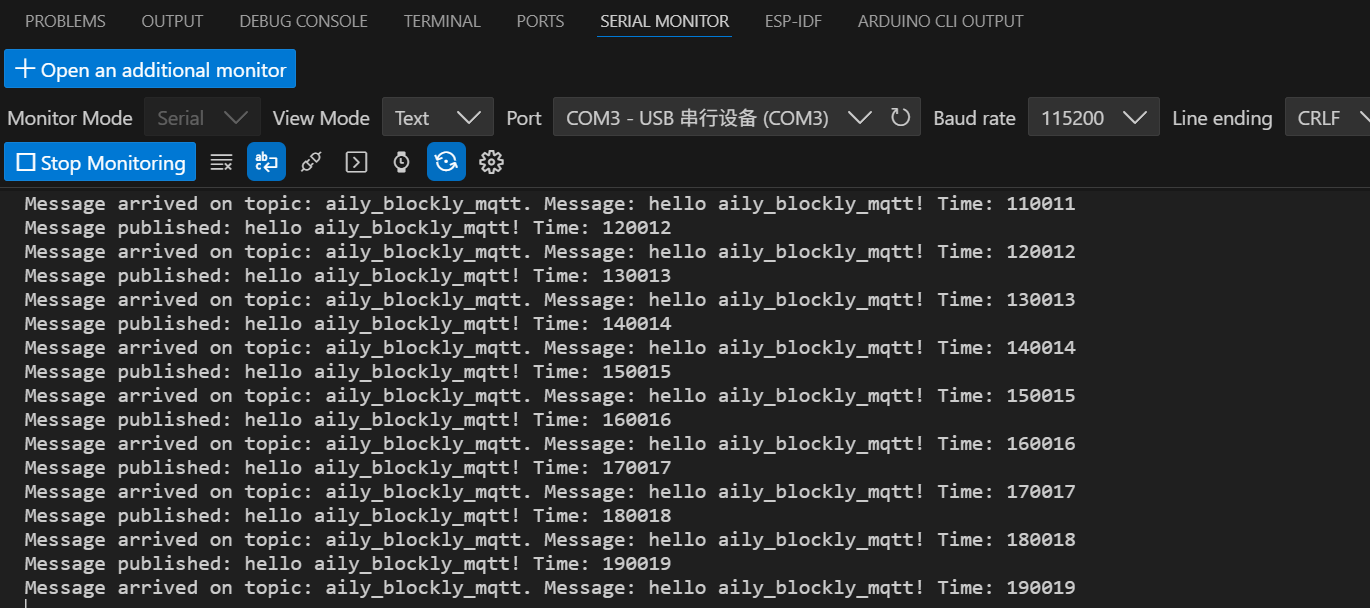
ESP32向服务器主题发送MQTT信息
1,使用pubsubclient库
https://github.com/knolleary/pubsubclient/
2,程序如下:
cpp
#include <WiFi.h>
#include <PubSubClient.h>

// WiFi credentials
const char* ssid = "WiFi名称";
const char* password = "WiFi密码";

// MQTT broker settings
const char* mqtt_server = "192.168.3.17";  // Your Raspberry Pi IP
const int mqtt_port = 1883;
const char* mqtt_topic = "aily_blockly_mqtt";

// WiFi and MQTT clients
WiFiClient espClient;
PubSubClient client(espClient);

void setup_wifi() {
  delay(10);
  Serial.println();
  Serial.print("Connecting to ");
  Serial.println(ssid);

  WiFi.begin(ssid, password);

  while (WiFi.status() != WL_CONNECTED) {
    delay(500);
    Serial.print(".");
  }

  Serial.println("");
  Serial.println("WiFi connected");
  Serial.println("IP address: ");
  Serial.println(WiFi.localIP());
}

void callback(char* topic, byte* message, unsigned int length) {
  Serial.print("Message arrived on topic: ");
  Serial.print(topic);
  Serial.print(". Message: ");

  String messageTemp;
  for (int i = 0; i < length; i++) {
    messageTemp += (char)message[i];
  }
  Serial.println(messageTemp);
}

void reconnect() {
  while (!client.connected()) {
    Serial.print("Attempting MQTT connection...");

    if (client.connect("ESP32Client")) {
      Serial.println("connected");
      client.subscribe(mqtt_topic);
    } else {
      Serial.print("failed, rc=");
      Serial.print(client.state());
      Serial.println(" try again in 5 seconds");
      delay(5000);
    }
  }
}

void setup() {
  Serial.begin(115200);
  setup_wifi();

  client.setServer(mqtt_server, mqtt_port);
  client.setCallback(callback);
}

void loop() {
  if (!client.connected()) {
    reconnect();
  }
  client.loop();

  // Example: Publish a message every 10 seconds
  static unsigned long lastMsg = 0;
  if (millis() - lastMsg > 10000) {
    lastMsg = millis();

    String message = "hello aily_blockly_mqtt! Time: " + String(millis());
    client.publish(mqtt_topic, message.c_str());
    Serial.println("Message published: " + message);
  }
}
3,esp32串口显示效果