Vue3路由query参数
基础概念
query其实我们在说to的对象写法的时候已经大致介绍过了,现在来仔细的讲讲;query参数是URL中?后面的部分,用于传递键值对数据;
例如https://example.com/users?page=1\&search=vue
实例展示
- 首先为我们之前的项目,联系我们设计一下嵌套路由,先更新路由的配置文件;
js
{
        path: '/Contact',
        component: Contact,
        name: 'contact',
        children: [{
            path: '',
            component: ContactContent.vue
        }]
}]- 之后我们直接写子组件代码
js
<!-- components/ContactContent.vue -->
<template>
<div class="contact-content">
<!-- 根据 query.type 显示不同内容 -->
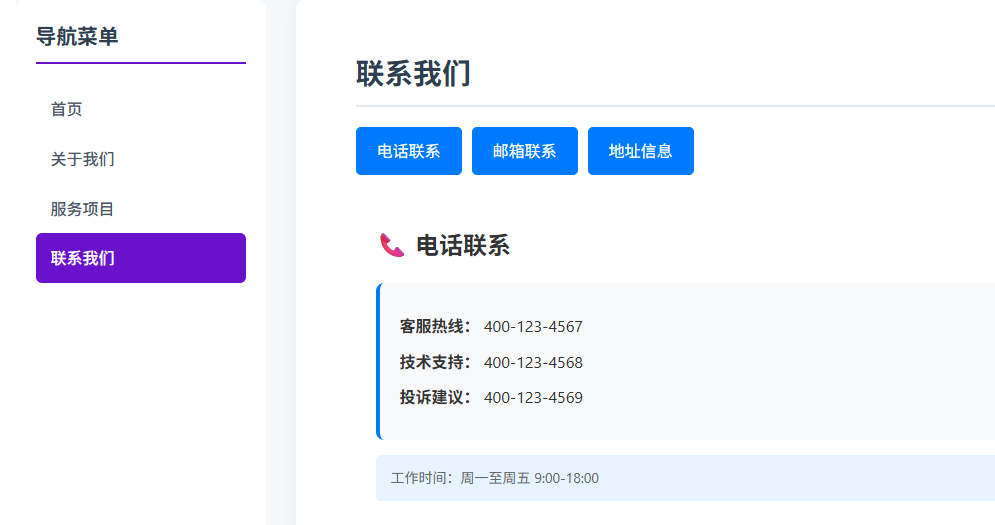
<div v-if="contentType === 'phone'" class="content-section">
<h3>📞 电话联系</h3>
<div class="info-card">
<p><strong>客服热线:</strong> 400-123-4567</p>
<p><strong>技术支持:</strong> 400-123-4568</p>
<p><strong>投诉建议:</strong> 400-123-4569</p>
</div>
<div class="tips">
<p>工作时间:周一至周五 9:00-18:00</p>
</div>
</div>
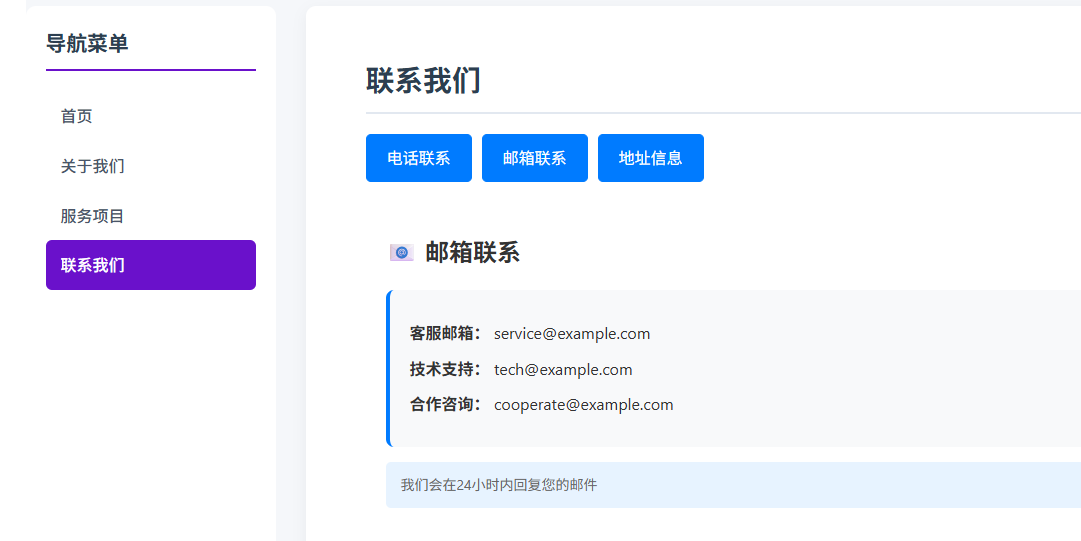
<div v-else-if="contentType === 'email'" class="content-section">
<h3>📧 邮箱联系</h3>
<div class="info-card">
<p><strong>客服邮箱:</strong> service@example.com</p>
<p><strong>技术支持:</strong> tech@example.com</p>
<p><strong>合作咨询:</strong> cooperate@example.com</p>
</div>
<div class="tips">
<p>我们会在24小时内回复您的邮件</p>
</div>
</div>
<div v-else-if="contentType === 'address'" class="content-section">
<h3>📍 地址信息</h3>
<div class="info-card">
<p><strong>总部地址:</strong> 北京市朝阳区某某街道123号</p>
<p><strong>上海分公司:</strong> 上海市浦东新区某某路456号</p>
<p><strong>深圳办事处:</strong> 深圳市南山区科技园789号</p>
</div>
<div class="tips">
<p>来访前请提前预约</p>
</div>
</div>
<div v-else-if="contentType === 'hours'" class="content-section">
<h3>⏰ 工作时间</h3>
<div class="info-card">
<p><strong>客服中心:</strong> 周一至周日 8:00-22:00</p>
<p><strong>技术支持:</strong> 周一至周五 9:00-18:00</p>
<p><strong>线下门店:</strong> 周一至周日 10:00-21:00</p>
</div>
<div class="tips">
<p>节假日工作时间可能调整,请关注公告</p>
</div>
</div>
<div v-else class="content-section">
<h3>👋 欢迎联系我们</h3>
<p>请选择上方的联系方式查看详细信息</p>
</div>
</div>
</template>- 我们这里使用v-if来判断页面的内容
js
<script setup>
import { useRoute } from 'vue-router'
import { computed } from 'vue'

const route = useRoute()

// 从 query 参数获取内容类型
const contentType = computed(() => {
    return route.query.type || 'phone' // 默认显示电话信息
})
</script>
这里使用一个计算属性来获取当前路由的query的属性,默认情况下显示电话信息
- 顺便展示一下CSS的内容
js
<style scoped>
.contact-content {
    padding: 20px;
}

.content-section h3 {
    color: #333;
    margin-bottom: 20px;
    font-size: 1.5em;
}

.info-card {
    background: #f8f9fa;
    padding: 20px;
    border-radius: 8px;
    margin-bottom: 15px;
    border-left: 4px solid #007bff;
}

.info-card p {
    margin: 10px 0;
    font-size: 16px;
}

.tips {
    background: #e7f3ff;
    padding: 12px 15px;
    border-radius: 5px;
    font-size: 14px;
    color: #666;
}
</style>
现在看主路由的配置
js
<template>
    <div class="contact-container">
        <h2 class="content-title">联系我们</h2>

        <!-- 使用 router-link 的 to 对象写法传递 query 参数 -->
        <div class="tab-buttons">
            <router-link :to="{
                path: '/contact',
                query: { type: 'phone' }
            }" class="tab-button">
                电话联系
            </router-link>

            <router-link :to="{
                path: '/contact',
                query: { type: 'email' }
            }" class="tab-button">
                邮箱联系
            </router-link>

            <router-link :to="{
                path: '/contact',
                query: { type: 'address' }
            }" class="tab-button">
                地址信息
            </router-link>
        </div>
        <!-- 子组件会通过路由自动接收 query 参数 -->
        <div class="content-area"><router-view></router-view></div>

    </div>
</template>
我们这里为每个路由链接添加一个query的type属性,如果我们点击这个按钮的话,这个query就有type属性的值了,这样我们就可以被子组件收到了,然后就可以展示不同的内容了,这里不要忘记在组件中使用router-view来渲染子路由的东西
- 父组件的也看下吧
js
<style scoped>
.contact-container {
    max-width: 800px;
    margin: 0 auto;
    padding: 20px;
}

.tab-buttons {
    display: flex;
    gap: 10px;
    margin: 20px 0;
    flex-wrap: wrap;
}

.tab-button {
    padding: 10px 20px;
    border: 1px solid #007bff;
    background: white;
    color: #007bff;
    text-decoration: none;
    border-radius: 5px;
    cursor: pointer;
}

.tab-button:hover,
.tab-button.router-link-active {
    background: #007bff;
    color: white;
}

.content-area {
    margin-top: 30px;
    min-height: 200px;
}
</style>