大家好,我是java1234_小锋老师,看到一个不错的免费基于Python的车辆车牌识别系统(PyTorch2卷积神经网络CNN+OpenCV实现)【论文+源码+SQL脚本】,分享下哈。
项目视频演示
https://www.bilibili.com/video/BV1DV2aBdEsf
项目介绍
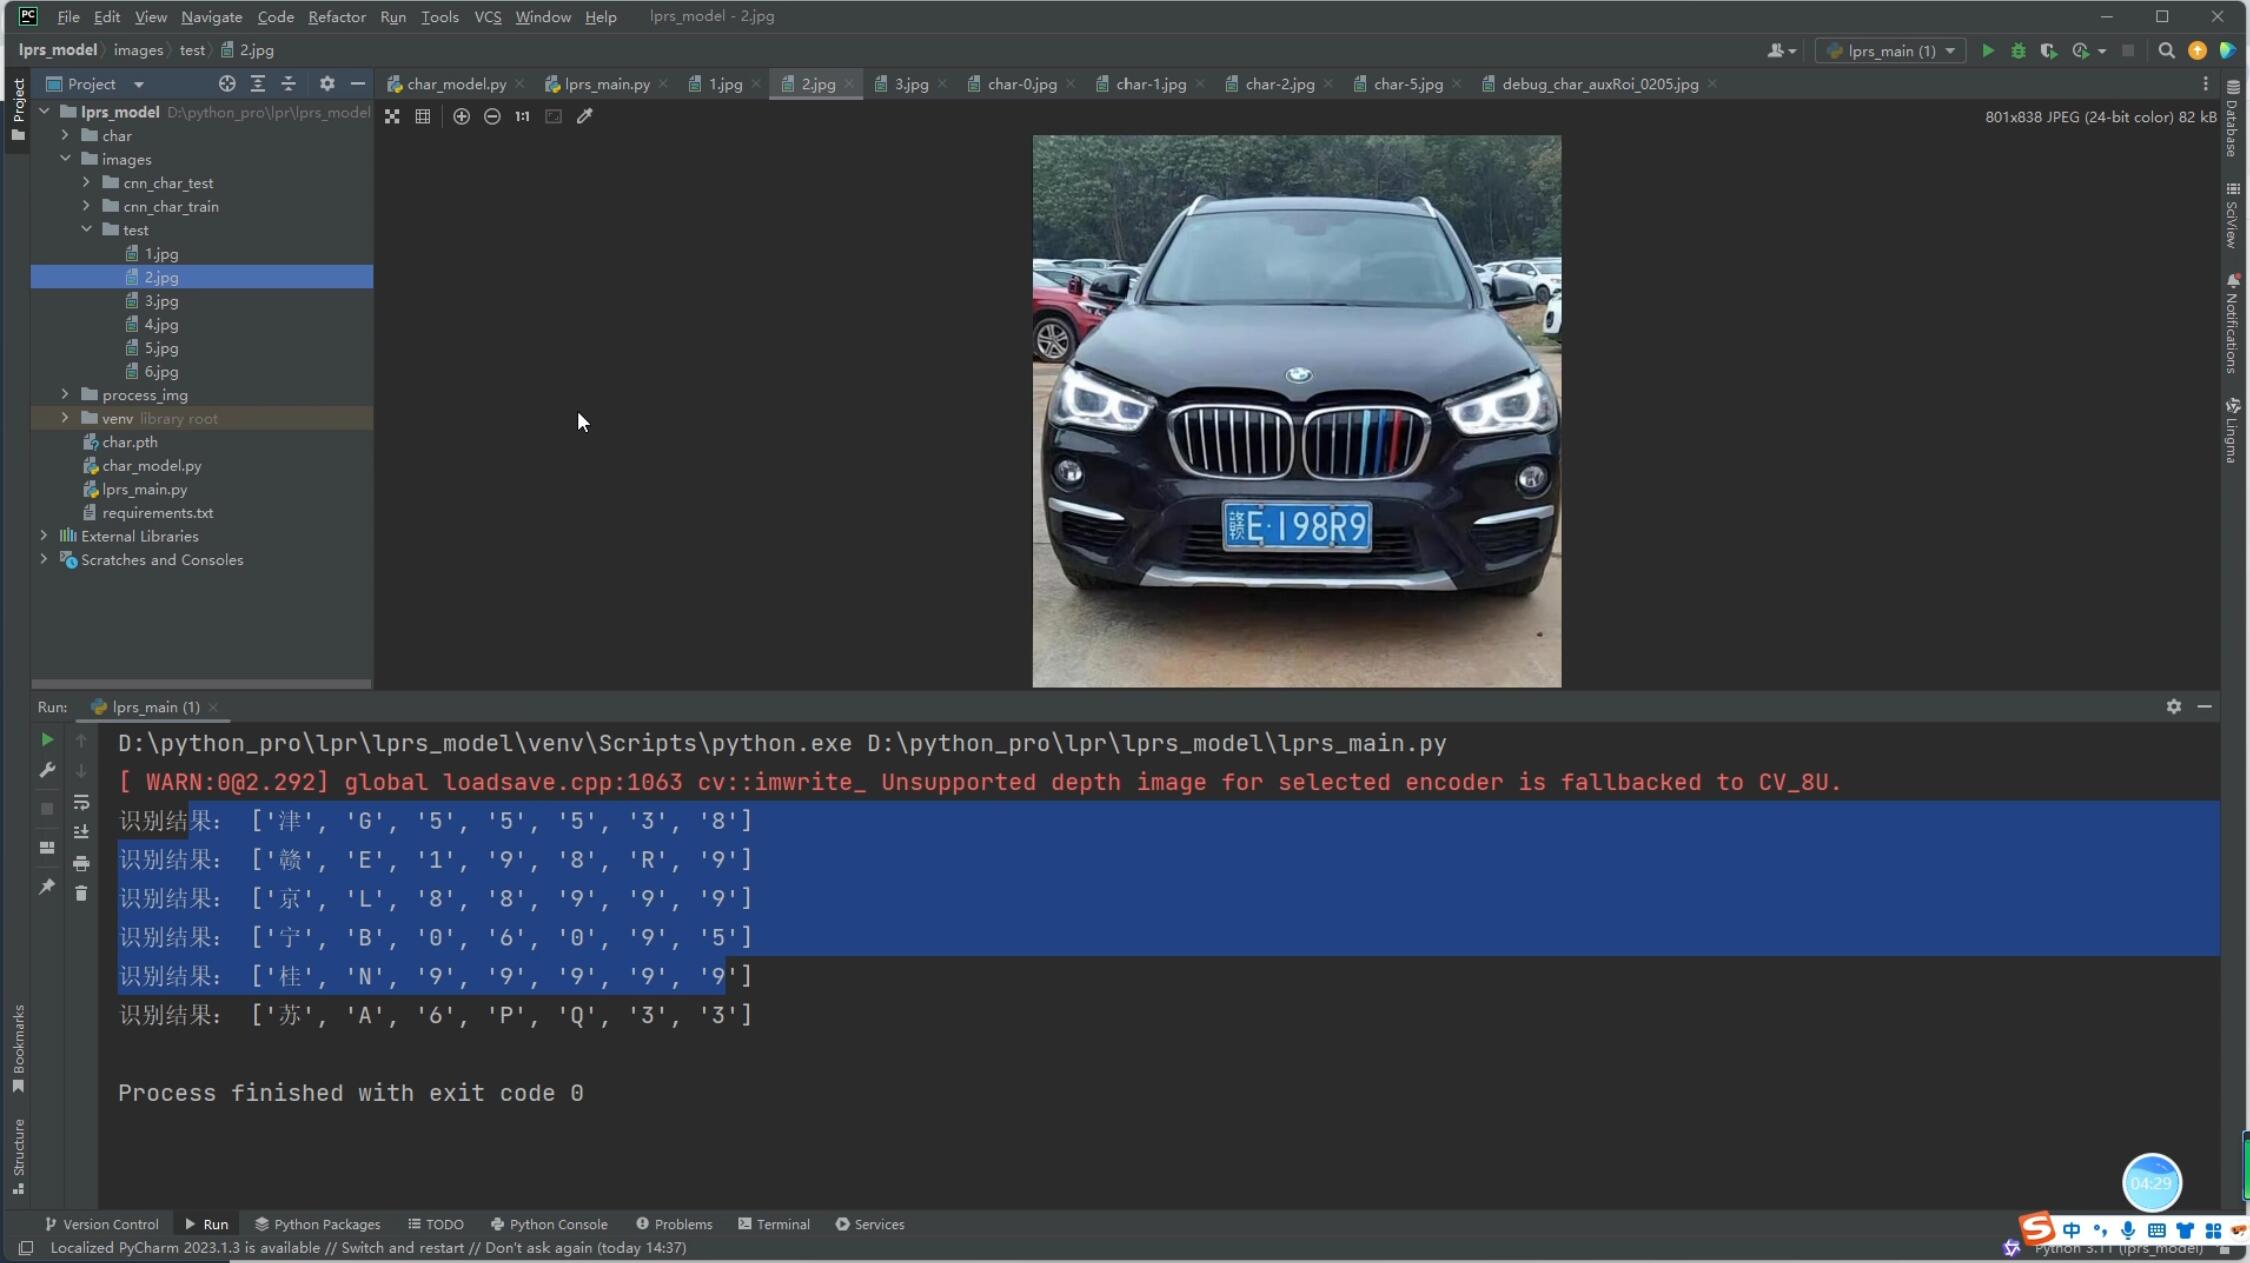
本项目提出了一种基于Python的车辆车牌识别系统,利用卷积神经网络(CNN)和OpenCV实现车辆车牌的自动检测与识别。该系统通过大量实际图像数据的训练与测试,展示了良好的鲁棒性和较高的识别准确率。实验结果表明,本系统具有较强的适应能力,在复杂背景与不同光照条件下仍能有效识别车牌信息,具有较好的应用前景,尤其在智能交通、车辆管理等领域具有重要的实际意义。
系统展示


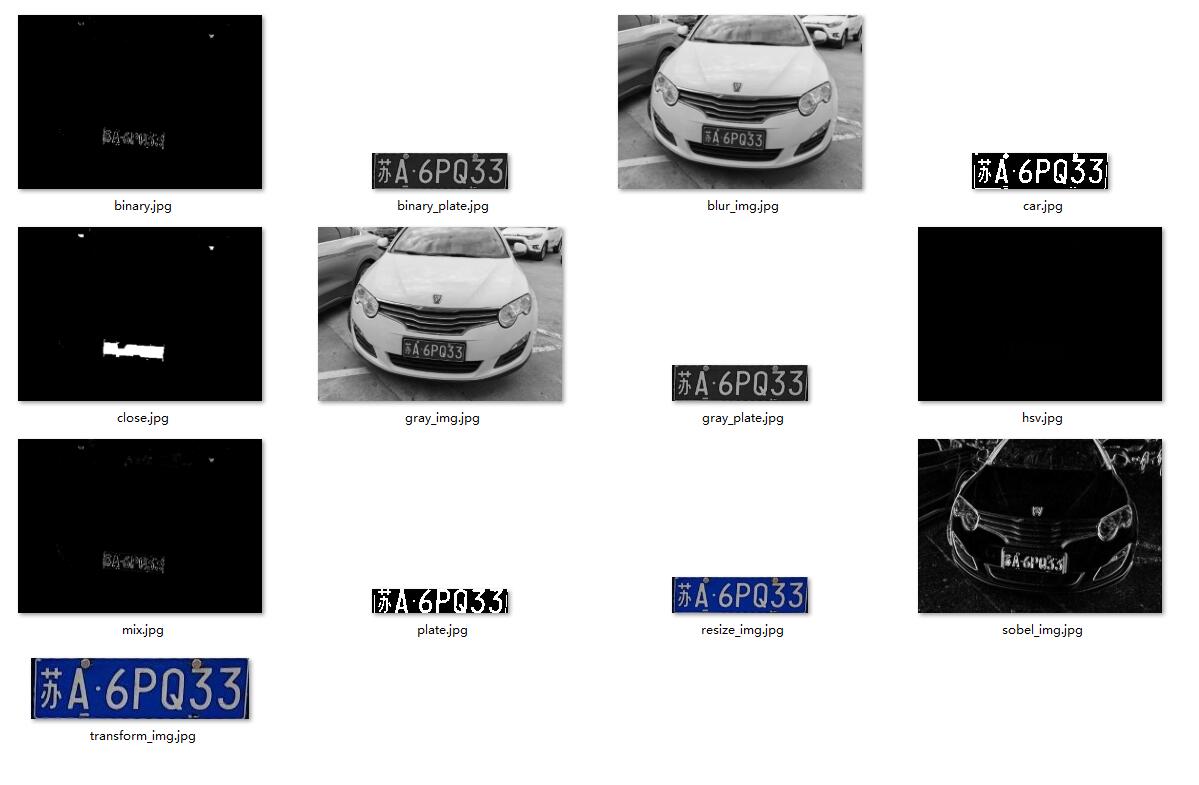
部分代码
import os

import cv2
import numpy as np
import torch
from torch import nn
from torch.autograd import Variable
from torch.nn import Sequential
from torch.utils import data
from torchvision import transforms

# 说明:训练图片像素是20*20
# 目前中国大陆车牌字符 31个汉字 26个字母 10个数字 一个67种
numbers = ['0', '1', '2', '3', '4', '5', '6', '7', '8', '9']
alphbets = ['A', 'B', 'C', 'D', 'E', 'F', 'G', 'H', 'I', 'J', 'K', 'L', 'M', 'N', 'O', 'P', 'Q', 'R', 'S', 'T',
            'U', 'V', 'W', 'X', 'Y', 'Z']
chinese = ['zh_cuan', 'zh_e', 'zh_gan', 'zh_gan1', 'zh_gui', 'zh_gui1', 'zh_hei', 'zh_hu', 'zh_ji', 'zh_jin',
           'zh_jing', 'zh_jl', 'zh_liao', 'zh_lu', 'zh_meng', 'zh_min', 'zh_ning', 'zh_qing', 'zh_qiong',
           'zh_shan', 'zh_su', 'zh_sx', 'zh_wan', 'zh_xiang', 'zh_xin', 'zh_yu', 'zh_yu1', 'zh_yue', 'zh_yun',
           'zh_zang', 'zh_zhe']

# 定义卷积神经网络模型
cnn_model = Sequential(
    # 第一层卷积层,输入1通道,输出32通道,卷积核大小3x3,填充1,
    nn.Conv2d(1, 32, kernel_size=3, padding=1),
    nn.ReLU(),
    nn.MaxPool2d(2, 2),  # 卷积层后接池化层 池化核大小2x2,步长2

    # 第二层卷积层,输入32通道,输出64通道,卷积核大小3x3,填充1,
    nn.Conv2d(32, 64, kernel_size=3, padding=1),
    nn.ReLU(),
    nn.MaxPool2d(2, 2),  # 卷积层后接池化层 池化核大小2x2,步长2

    # 展平操作,将数据从二维转为一维
    nn.Flatten(),

    # 第一个全连接层,输入64 * 5 * 5通道,输出512通道  像素20*20 经过2次卷积,得到64 * 5 * 5
    nn.Linear(64 * 5 * 5, 512),
    nn.ReLU(),

    # 第二全连接层,输入512通道,输出256通道
    nn.Linear(512, 256),
    nn.ReLU(),

    # 第三全连接层,输入256通道,输出67通道
    nn.Linear(256, 67)
)


# 自定义字符图片数据集
class CharPicDataset(data.Dataset):

    # 根据路径获取所有文件
    def list_all_files(self, root):
        files = []
        list = os.listdir(root)  # 获取目录下的所有文件名
        for i in range(len(list)):
            path = os.path.join(root, list[i])  # 获取文件绝对路径
            if os.path.isfile(path):  # 判断是否是文件
                files.append(path)
            elif os.path.isdir(path):  # 递归获取所有文件
                files.extend(self.list_all_files(path))
        return files

    def __init__(self, data_dir):
        super().__init__()
        if not os.path.exists(data_dir):
            raise Exception('数据目录不存在')
        files = self.list_all_files(data_dir)
        self.X = []
        self.y = []
        self.dataset = numbers + alphbets + chinese
        for file in files:
            src_img = cv2.imread(file, cv2.IMREAD_GRAYSCALE)  # 读取灰度图
            resize_img = cv2.resize(src_img, (20, 20))  # 改变图片大小
            self.X.append(resize_img)
            dir = os.path.dirname(file)  # 获取文件的目录  结果类似  ./images/cnn_char_train\A
            dir_name = os.path.split(dir)[-1]  # 获取目录名,类似 A 0  1 苏
            index_y = self.dataset.index(dir_name)  # 获取标签索引
            self.y.append([index_y])
        self.X = np.array(self.X)
        self.y = np.array(self.y)

    def __len__(self):
        return len(self.X)

    def __getitem__(self, index):
        tf = transforms.ToTensor()
        return tf(self.X[index]), torch.LongTensor(self.y[index])


# 定义损失函数
criterion = nn.CrossEntropyLoss()  # 交叉熵损失函数
optimizer = torch.optim.Adam(cnn_model.parameters(), lr=0.001)  # 优化器


def train(epochs):
    cnn_model.train()  # 训练模式
    for epoch in range(epochs):
        loss = 0
        for image, target in train_loader:
            target = Variable(target).reshape(1, )
            # 前向传播
            output = cnn_model(image)
            loss = criterion(output, target)  # 计算损失

            # 反向传播和优化
            optimizer.zero_grad()  # 清空梯度
            loss.backward()  # 反向传播
            optimizer.step()  # 优化 更新参数
        print(f'Epoch [{epoch + 1}/{epochs}],  Loss: {loss.item():.4f}')


def test():
    cnn_model.eval()  # 测试模式
    correct = 0
    total = 0
    with torch.no_grad():  # 测试模式,不进行梯度计算
        for image, target in test_loader:
            target = Variable(target).reshape(1, )  # 转成一维
            output = cnn_model(image)  # 预测
            _, predicted = torch.max(output.data, 1)  # 获取预测结果
            total += target.size(0)
            correct += (predicted == target).sum().item()
    print('测试集总样本数:', total)
    print('测试集正确数:', correct)
    print(f'Accuracy: {100 * correct / total:.2f}%')


if __name__ == '__main__':
    train_data_dir = './images/cnn_char_train'
    test_data_dir = './images/cnn_char_test'
    train_model_path = 'char.pth'
    print('开始训练..')
    traindataset = CharPicDataset(train_data_dir)
    testdataset = CharPicDataset(test_data_dir)
    train_loader = data.DataLoader(traindataset, batch_size=1, shuffle=True)
    test_loader = data.DataLoader(testdataset, batch_size=1, shuffle=True)
    epochs = 3
    torch.save(cnn_model, train_model_path)
    train(epochs)
    test()
    print('训练完成..')
源码下载
链接:https://pan.baidu.com/s/16e3guiYtxxmT_ms7MAx5_g
提取码:1234