什么是负载均衡
我们将负载均衡称为SLB(Server Load Balance),Nginx就是SLB的一种,负载均衡的叫法有很多,还可以叫负载、Load Balance、LB。Nginx负载均衡是一种基于反向代理的流量分发技术,它作为前端入口接收客户端请求,然后按照预定义的算法和策略将这些请求分发到后端多个服务器实例上。从技术架构角度看,Nginx负载均衡本质上是一个七层(应用层)负载均衡器,工作在OSI模型的第七层,能够解析HTTP/HTTPS协议,基于请求内容进行智能路由决策。
负载均衡配置
在web01和web02分别配置nginx,并且创建测试代码文件,再在lb01配置负载均衡,指向web01和web02
bash
配置web01
[root@Web01 ~]# cat /etc/nginx/conf.d/static.conf
server {
	listen 80;
	server_name www.static.com;
	location /{
		root /code/static;
		index index.html;
	}
}
[root@Web01 ~]# mkdir -p /code/static
[root@Web01 ~]# echo 'Web01' > /code/static/index.html
[root@Web01 ~]# nginx -t
nginx: the configuration file /etc/nginx/nginx.conf syntax is ok
nginx: configuration file /etc/nginx/nginx.conf test is successful
[root@Web01 ~]# systemctl restart nginx

配置web02
[root@Web02 ~]# cat /etc/nginx/conf.d/static.conf
server {
	listen 80;
	server_name www.static.com;
	location /{
		root /code/static;
		index index.html;
	}
}
[root@Web02 ~]# mkdir -p /code/static
[root@Web02 ~]# echo 'Web02' > /code/static/index.html
[root@Web02 ~]# nginx -t
nginx: the configuration file /etc/nginx/nginx.conf syntax is ok
nginx: configuration file /etc/nginx/nginx.conf test is successful
[root@Web02 ~]# systemctl restart nginx

配置负载均衡
[root@lb01 conf.d]#cat default.conf
upstream webs {
    server 172.16.1.7;
    server 172.16.1.8;
}
server {
    listen 80;
    server_name www.static.com;
location / {
    proxy_pass http://webs;
    include proxy_params;
    }
}
bash
注意:当其中一台服务器出现错误时,为了保证如果出错能直接访问到下一台,而不是返回错误,就需要我们增加一个设置。

proxy_next_upstream error timeout http_500 http_502 http_503 http_504;


例如:
[root@lb01 conf.d]#cat default.conf
upstream webs {
    server 172.16.1.7;
    server 172.16.1.8;
}
server {
    listen 80;
    server_name www.static.com;
location / {
    proxy_pass http://webs;
    proxy_next_upstream error timeout http_500 http_502 http_503 http_504;
    include proxy_params;
    }
}
负载均衡调度算法
负载均衡的实现方式:
使用upstream模块配置地址池的方式实现负载均衡
负载均衡的几种调度算法:
轮询 按照时间顺序逐一分配到不同的后端服务器(默认)
weight 加权轮询,weight值越大,分配到的访问几率越高
ip_hash 每个请求按访问IP的hash结果分配,这样来自同一ip的固定访问一个后端
url_hash 按照访问url的hash结果来分配请求,是每个url定向到同一个服务器
least_conn 最少连接数,那个机器连接数量最少就分发
1)轮询配置
bash
upstream load_pass {
    server 10.0.0.7:80;
    server 10.0.0.8:80;
}
2)权重轮询配置
bash
upstream load_pass {
    server 10.0.0.7:80;
    server 10.0.0.8:80 weight=10;
}
3)ip_hash配置
bash
upstream load_pass {
    ip_hash;
    server 10.0.0.7:80;
    server 10.0.0.8:80;
}
Nginx后端服务状态
bash
upstream webs {
    server 172.16.1.7 down; web01 不参与调度 和"#"注释相同
    server 172.16.1.8;
}
upstream webs {
    server 172.16.1.7;
    server 172.16.1.8 backup; # 其他所有服务器挂掉后 web02参数调度 类似备胎
}
Nginx负载均衡健康检查
使用nginx_upstream_check_modulee来检测后端服务的健康状态。
bash
想要实现一个功能,但是Nginx默认没有此模块,需要编译安装的方式将新的模块编译进已安装的Nginx服务中
nginx_upstream_check

检查nginx默认模块:
[root@lb01 ~]#nginx -V
nginx version: nginx/1.24.0
built by gcc 4.8.5 20150623 (Red Hat 4.8.5-44) (GCC)
built with OpenSSL 1.0.2k-fips 26 Jan 2017
TLS SNI support enabled
configure arguments: --prefix=/etc/nginx --sbin-path=/usr/sbin/nginx --modules-
path=/usr/lib64/nginx/modules --conf-path=/etc/nginx/nginx.conf --error-log-path=/var/log/nginx/error.log
--http-log-path=/var/log/nginx/access.log --pid-path=/var/run/nginx.pid --lock-path=/var/run/nginx.lock --
http-client-body-temp-path=/var/cache/nginx/client_temp --http-proxy-temp-path=/var/cache/nginx/proxy_temp
--http-fastcgi-temp-path=/var/cache/nginx/fastcgi_temp --http-uwsgi-temp-path=/var/cache/nginx/uwsgi_temp
--http-scgi-temp-path=/var/cache/nginx/scgi_temp --user=nginx --group=nginx --with-compat --with-file-aio
--with-threads --with-http_addition_module --with-http_auth_request_module --with-http_dav_module --with-
http_flv_module --with-http_gunzip_module --with-http_gzip_static_module --with-http_mp4_module --with-
http_random_index_module --with-http_realip_module --with-http_secure_link_module --with-http_slice_module
--with-http_ssl_module --with-http_stub_status_module --with-http_sub_module --with-http_v2_module --with-
mail --with-mail_ssl_module --with-stream --with-stream_realip_module --with-stream_ssl_module --with-
stream_ssl_preread_module --add-module=/root/nginx_upstream_check_module-master --with-cc-opt='-O2 -g -
pipe -Wall -Wp,-D_FORTIFY_SOURCE=2 -fexceptions -fstack-protector-strong --param=ssp-buffer-size=4 -
grecord-gcc-switches -m64 -mtune=generic -fPIC' --with-ld-opt='-Wl,-z,relro -Wl,-z,now -pie'
1)安装依赖
bash
[root@lb01 ~]#yum install -y gcc glibc gcc-c++ pcre-devel openssl-devel patch2)下载和已安装nginx同版本的源码包
bash
[root@lb01 ~]#nginx -v    #查看nginx版本
nginx version: nginx/1.26.1
[root@lb01 ~]#wget http://nginx.org/download/nginx-1.26.1.tar.gz

解压源码包
[root@lb01 ~]#tar xf nginx-1.26.1.tar.gz

下载第三方插件模块
1)windows访问http://github.com/yaoweibin/nginx_upstream_check_module/archive/master.zip
2)上传到lb01
3)解压第三方插件
[root@lb01 ~]#unzip nginx_upstream_check_module-master.zip 第三方插件:https://pan.baidu.com/s/1FQWZSRbbnqqox7_zqHvzCg?pwd=u3g5
3)将下载的模块加载到nginx模块中
bash
#将下载的模块加载到nginx模块中
[root@lb01 nginx-1.26.1]#patch -p1 < ../nginx_upstream_check_module-master/check_1.20.1+.patch

#将模块目录配置到nginx中
[root@lb01 nginx-1.26.1]#./configure --prefix=/etc/nginx --sbin-path=/usr/sbin/nginx --modules-path=/usr/lib64/nginx/modules --conf-path=/etc/nginx/nginx.conf --error-log-path=/var/log/nginx/error.log --http-log-path=/var/log/nginx/access.log --pid-path=/var/run/nginx.pid --lock-path=/var/run/nginx.lock --http-client-body-temp-path=/var/cache/nginx/client_temp --http-proxy-temp-path=/var/cache/nginx/proxy_temp --http-fastcgi-temp-path=/var/cache/nginx/fastcgi_temp --http-uwsgi-temp-path=/var/cache/nginx/uwsgi_temp --http-scgi-temp-path=/var/cache/nginx/scgi_temp --user=nginx --group=nginx --with-compat --with-file-aio --with-threads --with-http_addition_module --with-http_auth_request_module --with-http_dav_module --with-http_flv_module --with-http_gunzip_module --with-http_gzip_static_module --with-http_mp4_module --with-http_random_index_module --with-http_realip_module --with-http_secure_link_module --with-http_slice_module --with-http_ssl_module --with-http_stub_status_module --with-http_sub_module --with-http_v2_module --with-mail --with-mail_ssl_module --add-module=/root/nginx_upstream_check_module-master --with-stream --with-stream_realip_module --with-stream_ssl_module --with-stream_ssl_preread_module --with-cc-opt='-O2 -g -pipe -Wall -Wp,-D_FORTIFY_SOURCE=2 -fexceptions -fstack-protector-strong --param=ssp-buffer-size=4 -grecord-gcc-switches -m64 -mtune=generic -fPIC' --with-ld-opt='-Wl,-z,relro -Wl,-z,now -pie'
4)make编译安装
bash
[root@lb01 ~/nginx-1.26.1]#make && make install5)测试模块是否可用
bash
[root@lb01 conf.d]#cat default.conf
upstream webs {         #最大失败次数 失败时间窗口 + 恢复时间
    server 172.16.1.7:80 max_fails=2 fail_timeout=10s;
    server 172.16.1.8:80 max_fails=2 fail_timeout=10s;
    check interval=3000 rise=2 fall=3 timeout=1000 type=tcp;
    #interval    检测间隔时间,单位为毫秒
    #rise        表示请求2次正常,标记此后端的状态为up
    #fall        表示请求3次失败,标记此后端的状态为down
    #timeout     超时时间,单位为毫秒
    #type        类型为tcp
}
server {
    listen 80;
    server_name www.static.com;
location / {
    proxy_pass http://webs;
    include proxy_params;
}
location /check {
    check_status;
    }
}

windows hosts解析:10.0.0.5 www.static.com
访问:www.static.com
Nginx负载均衡会话保持
1)两种处理会话保持问题的方法
1、使用nginx的ip_hash,根据客户端不同的IP,将请求分配到对应的IP
2、基于服务端的session会话共享(NFS、MySQL、redis)
2)session和cookie的区别
Cookie是存储在客户端浏览器中的信息,而Session则是保存在服务器端的数据。当用户登录时,系统会将Cookie信息存储在浏览器中,同时将Session数据保存在服务器上。登录验证时,系统会比对Cookie和Session信息,匹配成功即视为登录成功。在负载均衡环境下,由于请求可能被分配到不同的服务器,可能出现Session数据不一致的情况:某台服务器存储了Session,而其他服务器却没有,从而导致登录失败。为解决这个问题,我们可以使用Redis集中存储Session数据,将其部署在独立的服务器上。这样每次登录时,系统都会从这台Redis服务器获取Session信息,确保Cookie和Session始终匹配,避免登录失败的情况发生。
3)会话登录失败场景
第一步:配置nginx
bash
[root@web01 /etc/nginx/conf.d]#cat admin.conf
server {
	listen 80;
	server_name www.admin.com;
	root /code/admin;

	location / {
		index index.php index.html;
	}

	location ~ \.php$ {
		fastcgi_pass 127.0.0.1:9000;
		fastcgi_param SCRIPT_FILENAME $document_root$fastcgi_script_name;
		include fastcgi_params;
	}
}
第二步:配置代码目录
bash
[root@web01 /etc/nginx/conf.d]#mkdir /code/admin
[root@web01 /etc/nginx/conf.d]#cd /code/admin/
[root@web01 /code/admin]#wget https://files.phpmyadmin.net/phpMyAdmin/4.8.4/phpMyAdmin-4.8.4-all-languages.zip
第三步:配置数据库信息
bash
复制成生效的配置文件:
[root@web01 admin]#cp config.sample.inc.php config.inc.php
修改链接数据库信息:
[root@web01 admin]#grep 172.16.1.51 config.inc.php
$cfg['Servers'][$i]['host'] = '172.16.1.51';
第四步:快速部署WEB02 phpmyadmin业务
bash
1.scp配置文件
[root@web02 ~]#scp 172.16.1.7:/etc/nginx/conf.d/admin.conf /etc/nginx/conf.d/
[root@web02 ~]#nginx -t
nginx: the configuration file /etc/nginx/nginx.conf syntax is ok
nginx: configuration file /etc/nginx/nginx.conf test is successful
[root@web02 ~]#systemctl restart nginx

2.scp代码文件
[root@web02 ~]#scp -r 172.16.1.7:/code/admin /code/

3.做hosts解析到web02检查
第五步:负载均衡配置
bash
[root@lb01 conf.d]#cat admin.conf
upstream admin {
    server 172.16.1.7;
    server 172.16.1.8;
}
server {
    listen 80;
    server_name www.admin.com;
location / {
    proxy_pass http://admin;
    include proxy_params;
    }
}
第六步:配置授权
bash
web01和web02全部授权
[root@Web01 conf.d]# chown -R www.www /var/lib/php/
[root@Web02 code]# chown -R www.www /var/lib/php/
第七步:测试
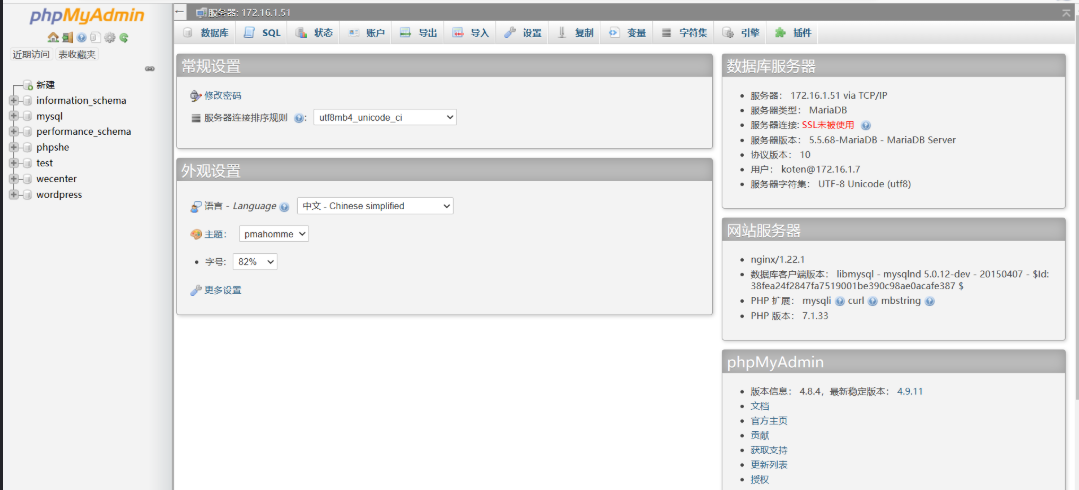
经过测试发现,如果session保存在本地,登录不上去phpmyadmin

phpmyadmin实现会话保持写入到redis
1)部署redis
bash
[root@db01 ~]#yum install -y redis2)配置redis
修改监听地址为172内网段 默认只监听到127.0.0.1
bash
[root@db01 ~]#grep 172.16.1.51 /etc/redis.conf
bind 127.0.0.1 172.16.1.51
3)启动redis
bash
[root@db01 ~]#systemctl start redis
[root@db01 ~]#systemctl enable redis
4)配置php会话加入redis
bash
1)修改/etc/php.ini
[root@web01 /code/admin]#egrep -n "172.16.1.51|redis" /etc/php.ini
1231:session.save_handler = redis
1264:session.save_path = "tcp://172.16.1.51:6379"
redis有密码的话
1264:session.save_path = "tcp://172.16.1.51:6379?auth=xxx"

2)注释/etc/php-fpm.d/www.conf 中的两行配置
[root@web01 ~]#tail -4 /etc/php-fpm.d/www.conf
;php_value[session.save_handler] = files
;php_value[session.save_path] = /var/lib/php/session

web02同样

#重启php
[root@Web01 code]# systemctl restart php-fpm
5)查看redis的session数据
bash
查看redis中的session数据
[root@db01 ~]#redis-cli
127.0.0.1:6379> keys *
1) "PHPREDIS_SESSION:1f478e841ddf4b6b4729a9657382ab3a"
2) "PHPREDIS_SESSION:18e970436510a41ff7d4396aa611afb2"
6)测试登录
成功登录!