一、类型转换
1、内置类型与内置类型之间转换
(1)隐式类型转换
整形、浮点数、字符之间可互相隐式类型转换
cpp
int i = 3.14;   // double ->  int
int i1 = 'A';   // char   ->  int
double d = 10;  // int    ->  double
char c = 97;    // int    ->  char
(2)显式类型转换(也叫强制转换)
指针与整形,指针与指针之间可以强制类型转换
cpp
// int* pi = 100;       // err, int不可隐式转换为int*
int* pi = (int*)100;    // int可强转为int*

// char* pc = pi;       // err, int*不可隐式转换为char*
char* pc = (char*)pi;   // int*可强转为char*
2、自定义类型与内置类型之间的转换
(1)内置类型 →\to→ 自定义类型
通过构造函数,内置类型可以隐式转换为自定义类型
cpp
class A
{
    int _a;
public:
    A(int a)
        :_a(a)
    {}
};

void test02()
{
    string s = "xxxxx"; // const char* -> string
    A a = 20;  // int -> A
}
(2)自定义类型 →\to→ 内置类型
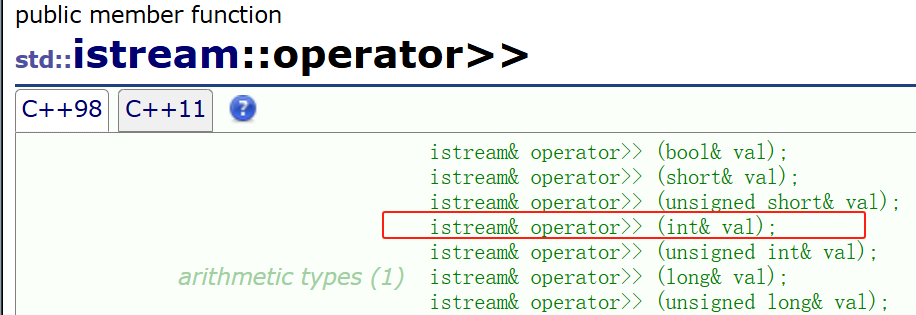
通过operator 内置类型,自定义类型可以转换为内置类型
cpp
class A
{
    int _a;
public:
    A(int a)
        :_a(a)
    {}

    // 将A类对象转为int类型。不需要写返回值
    operator int()
    {
        return 10 * _a;
    }

    // 将A类对象转为bool类型
    operator bool()
    {
        if(_a % 2 == 0)
            return true;
        else
        	return false;
    }
};
void test03()
{
    A a(9);
    int i = a;          // 等价于 int i = a.operator int();
    cout << i << endl;  // 输出 90
    bool t = a;         // 等价于 bool t = a.operator bool();
    cout << t << endl;  // 输出 0
}比较典型的应用就是在OJ刷题中,可能会遇到输入数据个数未知 的情况
C语言写法:
cpp
int t; //t是你要输入的数据
while (scanf("%d", &t) != EOF)
{
    //...
}
C++写法:
cpp
int t; //t是你要输入的数据
while (cin >> t)
{
    //...
}
C++写法本质上依赖下面两个函数
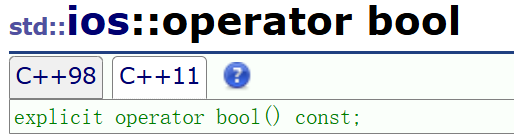
cin >> t返回值仍然是istream对象,istream类型的对象可以转化为bool类型
(3)自定义类型 →\to→ 自定义类型
也是通过构造函数支持
cpp
class A
{
    int _a;
public:
    A(int a)
        :_a(a)
    {}

    int get() { return _a; }
};

class B
{
    int _b;
public:
    B(int b)
        :_b(b)
    {}

    // 提供了A类对象的构造
    B(A a)
        :_b(a.get())
    {}
};

void test04()
{
    A a(999);
    B b = a;    // A类型 -> B类型
}
3、C++新增的类型转换(了解即可)
C++祖师爷觉得C语言的类型转换不够规范,于是就引入了下面四种类型转换操作符
(1)static_cast
static_cast对应隐式类型转换
cpp
double d = 3.14;
int i = static_cast<int>(d);
// 相当于 int i = d;
(2)reinterpret_cast
reinterpret_cast对应强制类型转换
cpp
int i = 10;
char* p = reinterpret_cast<char*>(&i);
// 相当于 char* p = (char*)&i;
(3)const_cast
const_cast最常用的用途就是删除变量的const属性
cpp
void test05()
{
    int a = 10;
    const int* p1 = &a;
    int* p2 = const_cast<int*>(p1);  // const int* 转 int*
    // 等价于 int* p2 = (int*)p1;

    *p2 = 20;
    cout << a << endl;      // 20
    cout << *p1 << endl;    // 20
    cout << *p2 << endl;    // 20
}注意不要像下面那样去掉const属性
cpp
void test05()
{
    const int a = 10;
    int* p = (int*)&a;  // a被const修饰,这里却用非const指针接收
    *p = 999;

    cout << a << endl;
    cout << *p << endl;

    printf("%p\n", &a);
    printf("%p\n", p);
}
运行结果
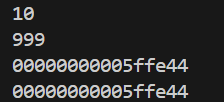
这个结果很是意外,p存储的就是a的地址,但*p的结果却与a不同!这与编译器优化有关,实践中不要写这样的代码。
(4)dynamic_cast
dynamic_cast用于多态类型的向下转换(运行时检查)
向上转换:子类指针/引用 →\to→ 父类指针/引用(赋值兼容规则)
向下转换:父类指针/引用 →\to→ 子类指针/引用(用dynamic_cast更安全)
注:dynamic_cast只能用于父类含有虚函数的类
cpp
class A
{
public :
int _a; // 为了方便观察,设为共有
A(int a)
:_a(a)
{}
virtual void f(){}
};
class B : public A
{
public:
int _b; // 为了方便观察,设为共有
B(int b)
:A(999)
,_b(b)
{}
};
void func_ptr(A* p)
{
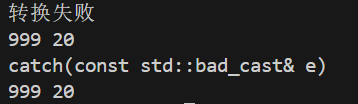
// 若p指向是B类对象(或者B的子类),则可以转换;否则转换失败,返回nullptr
B* pb = dynamic_cast<B*>(p); // A* 转 B*
if(pb)
cout << pb->_a << ' ' << pb->_b << endl;
else
cout << "转换失败" << endl;
}
void func_ref(A& r)
{
try{
// 若r引用的是B类对象(或者B的子类),则可以转换;否则转换失败,抛异常std::bad_cast
B& rb = dynamic_cast<B&>(r); // A& 转 B&
cout << rb._a << ' ' << rb._b << endl;
}
catch(const std::bad_cast& e)
{
cout << "catch(const std::bad_cast& e)" << endl;
}
}
void test06()
{
A a(10);
B b(20);
func_ptr(&a);
func_ptr(&b);
func_ref(a);
func_ref(b);
}运行结果
二、IO流
这里只介绍一些常用的
1、C++标准IO流
用法
1.流插入、流提取
cpp
cout << t: 把变量t里的内容写入到终端
cin >> t: 从终端读取数据,并将其放到变量t。注意: 该过程会自动忽略掉空白字符!2.get与put
cpp
int get(); 从终端读取单个字符,返回其ASCII码值
istream& get (char& c); 从终端读取单个字符并把其放到c中,返回cin(istream只有一个对象cin)
// get()函数不会忽略掉空白字符!

ostream& put (char c);	把字符c写入到终端
举例
cpp
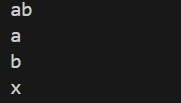
void test()
{
    char c;
    c = cin.get();     // 输入ab, 然后按回车
    cout << c << endl;
    cin.get(c);
    cout << c << endl;

    cout.put('x');
}
运行结果
效率
为了兼容C语言的IO流,cin与cout的效率会略低于 printf与scanf(只有输入/输出数据量达到 106 及以上时,才会有明显差距)
打比赛时,如果你只想用cin与cout,可以加上下面代码关闭流同步从而提高cin与cout的效率
cpp
ios::sync_with_stdio(0);
cin.tie(0);
cout.tie(0);
// 加上上面代码后,就不能将C++的IO与 C的IO混用(例如一会用cout,一会用printf)
2、C++文件IO流
ofstream
ofstream用于把内容写入到文件。
示例:
cpp
#include<fstream>   // 文件操作要包含这个头文件
void test01()
{
    ofstream fout("test.txt");
    // 创建一个ofstream对象fout,并将其连接到文件test.txt
    // 若test.txt不存在,则会新建该文件;若test.txt存在,则会清空其内容

    fout << "abcdef";	// 把abcdef写入到test.txt
    fout << "你好!";	// 把你好!写入到test.txt
    // fout的用法与cout类似。(因为ofstream继承了ostream)
    // fout析构时会自动关闭文件。
}运行后查看test.txt文件

如果想在原文件末尾追加内容,需加上ios::app
cpp
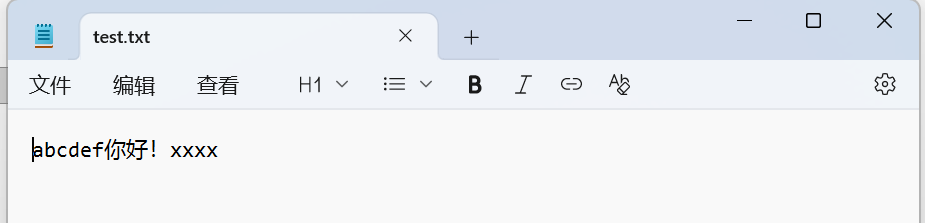
// test.txt内容:abcdef你好!
ofstream fout("test.txt", ios::app); // ios::app表示在文件末尾追加内容
fout << "xxxx";
运行后查看文件
ifstream
ifstream用于从文件中读取数据
示例1
cpp
void test02()
{
    // test.txt的内容:abcdef你好!
    ifstream fin("test.txt");
    // 创建一个ifstream对象fin,并将其连接到文件test.txt

    string s;
    fin >> s;       // 从test.txt中读取数据并放入到s
    cout << s;
    // fin的用法与cin类似。(因为ifstream继承了istream)
    // fin析构时会自动关闭文件。
}
运行结果

示例2
cpp
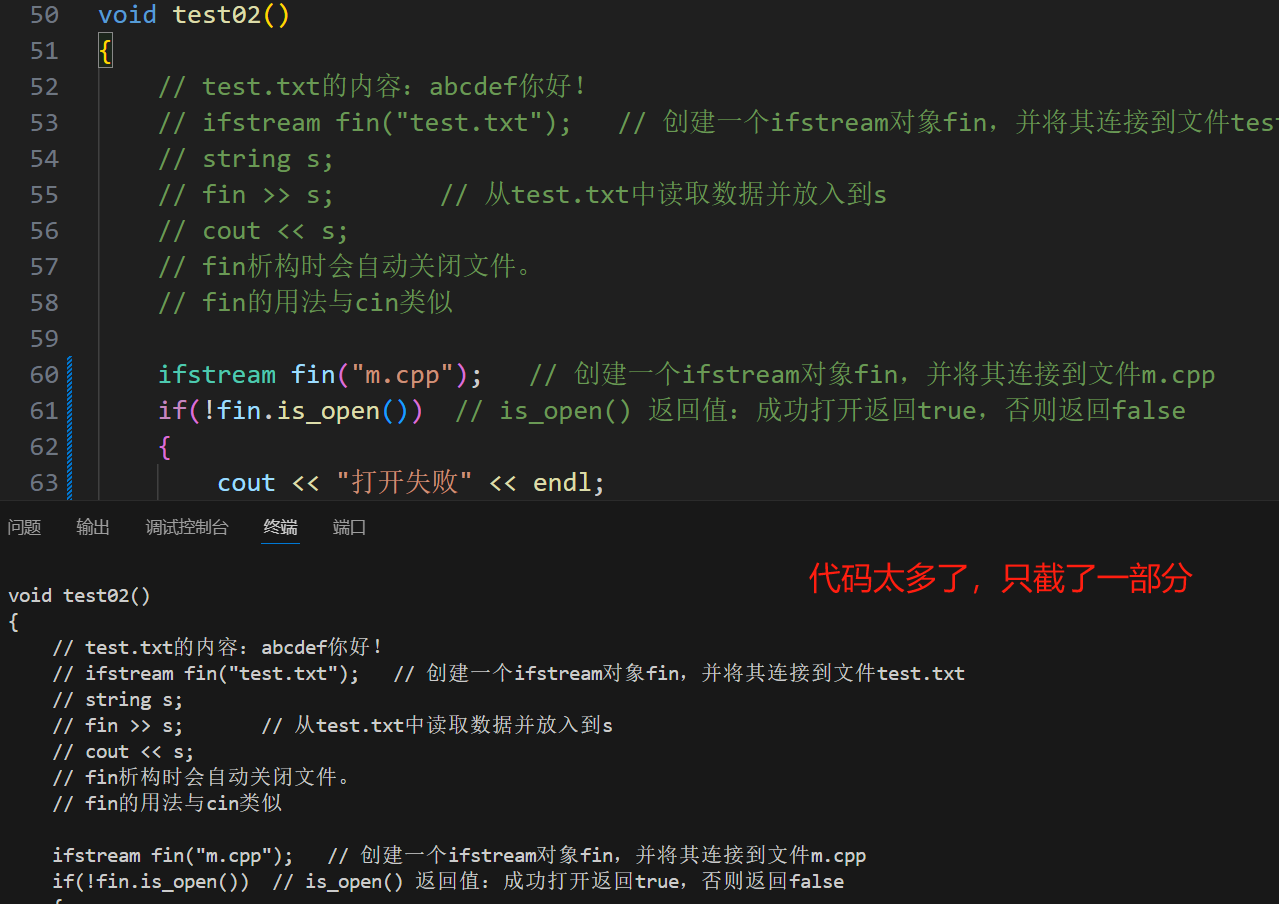
void test02()
{
    ifstream fin("m.cpp");   // 创建一个ifstream对象fin,并将其连接到文件m.cpp

    // is_open返回值:成功打开返回true,否则返回false。
    if(!fin.is_open())  // 也可这样写:if(!fin),因为有operator bool函数
    {
        cout << "打开失败" << endl;
        return;
    }

    // 把m.cpp的代码全部打印到终端
    char c;
    while(fin.get(c)) // 不要用 fin >> c, 会忽略掉空白字符
        cout << c;

	// 或者写成下面那样,与上面等价,效率更高
	// cout << fin.rdbuf();
}
运行结果
文本读写与二进制读写
(1)文本读写
上述介绍的文件操作都是对文本 进行操作,该操作其实会把数据转换为字符流。
cpp
ofstream fout("test.txt");
int t = 123456;
fout << t;t是int类型,占四个字节,值为123456,在内存中的存储方式是00000000 00000001 11100010 01000000。
fout << t是把t写入到test.txt文件,难道是把00000000 00000001 11100010 01000000写进去吗?
答:并非如此,而是先把整数123456转换为字符串"123456",然后再写入到test.txt。
(你想一想,二进制文件全是0101...多难读懂啊,转化为字符流不就好多了)
cpp
// test.txt内容:123456
ifstream fin("test.txt");
int t;
fin >> t;test.txt文件的内容都是字符,实际存储的内容是字符串123456。
fin >> t是先把字符串"123456"转为整数123456,再放到变量t中
(2)二进制读写文件
文本读写会把数据转化为字符流,而二进制读写不会。
二进制读写:数据在内存中怎么存,就怎么写。
二进制读写需要用到以下两个函数:
cpp
ostream& write (const char* s, streamsize n);
// 把地址从s开始、共有n个字节的数据写入到文件

istream& read (char* s, streamsize n);
// 从文件中读取n个字节的数据,放到地址为s的位置
示例
cpp
struct Date
{
int year;
int month;
int day;
};
void test03()
{
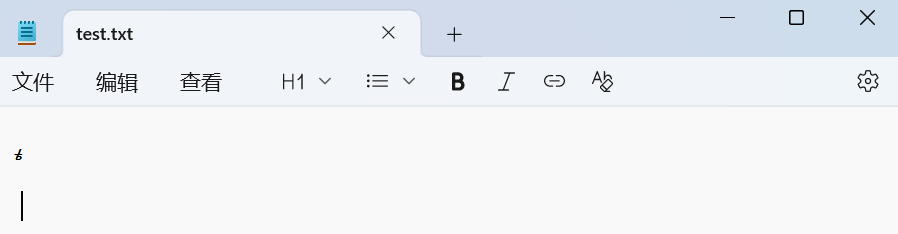
ofstream fout("test.txt", ios::binary); // ios::binary 表示以二进制模式
Date d = { 2025,12,12 };
fout.write((const char*)&d, sizeof(d)); // 把d以二进制形式写到test.txt
fout.close(); // 关闭文件,防止与下面的fin冲突
Date d1;
ifstream fin("test.txt", ios::binary);
fin.read((char*)&d1, sizeof(d1)); // 把test.txt内容读取到d1
cout << d1.year << ' ' << d1.month << ' ' << d1.day; // 输出:2025 12 12
}打开test.txt,发现是乱码。因为记事本无法识别二进制文件
图片、音频、游戏存档等文件是以二进制方式存储的,此时就需要用二进制读写文件。
现在我有一张图片,路径是C:\E\Furina.jpg,我想把它拷贝到当前写代码的文件下
cpp
void test03()
{
	// 注意:\是转义字符,\\ 表示单个斜杠
    ifstream fin("C:\\E\\Furina.jpg", ios::binary);
    ofstream fout("fufu.jpg", ios::binary);
    char c;
    while(fin.get(c))	// 本质是逐字节读取数据
        fout.put(c);

    // 也可以这样写,效率更快:
    // fout << fin.rdbuf();
}
运行一下,就成功把照片复制过来了

三、特殊类的设计
1、不能被拷贝的类
将其拷贝构造与赋值重载用delete修饰即可
cpp
class A
{
    // ...
public:
	// 加上delete
    A(const A&) = delete;
    A& operator=(const A& ) = delete;
    // ...
};
例如库里面的cin、cout对象就不能被拷贝
2、不能被继承的类
加上final即可
cpp
class A  final
{
    // ....
};
3、只能在堆上创建对象的类
学习下面两部分前,需回顾一下前置知识
cpp
#include<iostream>
using namespace std;

class A
{
private:
    int _val = 888;
    void func()
    {
        cout << "void func()" << endl;
    }

public:
    static void test()
    {
        A a;
        cout << a._val << endl;	// 这里可以访问私有成员变量吗?
        a.func();		// 这里可以访问私有成员函数吗?
    }
};

int main()
{
    A::test();
    return 0;
}
运行结果
你可以这样理解:类中的静态成员函数是该类的友元。
回过头再来设计只能在堆上创建对象的类:
将构造函数设为私有,然后禁用拷贝构造与赋值重载。再提供静态create函数用于返回堆上的对象指针
cpp
class HeapOnly
{
	// ... 省略成员变量

private:
    HeapOnly()
    {
        // ...
    };

public:
    static HeapOnly* create()
    {
        return new HeapOnly;
        // 构造函数是private,而new会调用其构造函数,这里不会报错吗?
        // 答:不会,你可以理解为create函数是HeapOnly类的友元
    }
    HeapOnly(const HeapOnly&) = delete;
    HeapOnly& operator=(const HeapOnly&) = delete;
};

void test()
{
    HeapOnly* h1 = HeapOnly::create();
}
4、只能实例化一个对象的类
将构造函数设为私有,然后禁用拷贝构造与赋值重载。再提供静态getObj函数用于返回单一对象
cpp
class SingleObj
{
	// ... 省略成员变量

private:
    SingleObj()
    {
        // ...
    };

public:
    SingleObj(const SingleObj&) = delete;
    SingleObj& operator=(const SingleObj&) = delete;

    static SingleObj& getObj()
    {
        static SingleObj obj;   // 局部的静态,第一次运行到这里才会被初始化
        return obj;
    }

    void func()
    {
        cout << "void func()" << endl;
    }
};

void test()
{
    SingleObj& s = SingleObj::getObj();
    s.func();
}