Qt 重写QRadioButton实现动态radioButton源码分享
- 一、源码分享
- 二、实现原理
-
- [1、Qt 控件重写的基本概念](#1、Qt 控件重写的基本概念)
- 2、核心重写方法:`paintEvent`
- 3、完整重写示例:自定义按钮
- 4、如何替换事件行为
- 5、注意事项
- 6、总结
一、源码分享
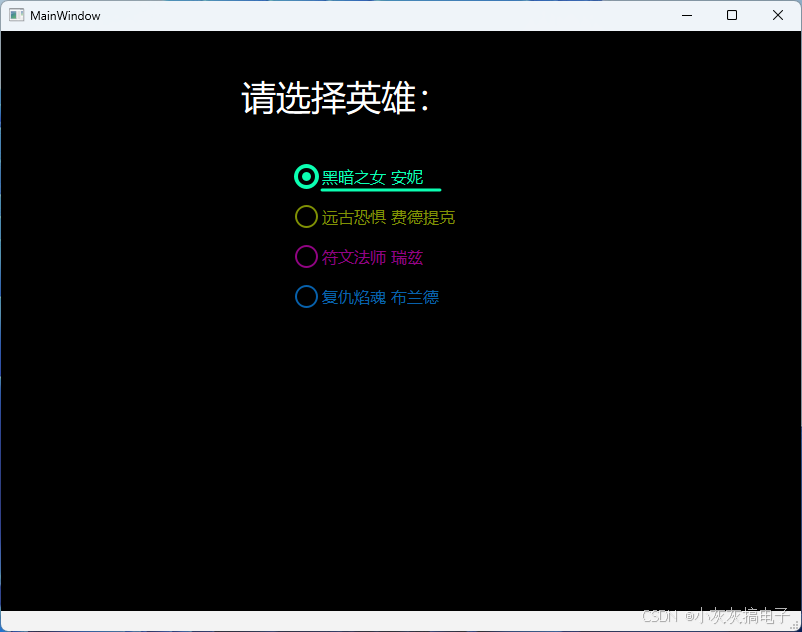
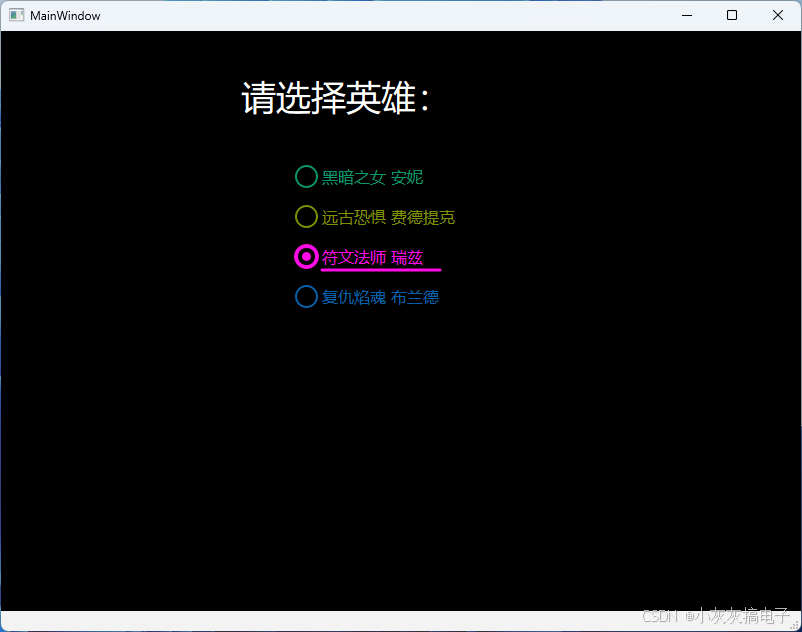
1、效果展示
2、源码分享
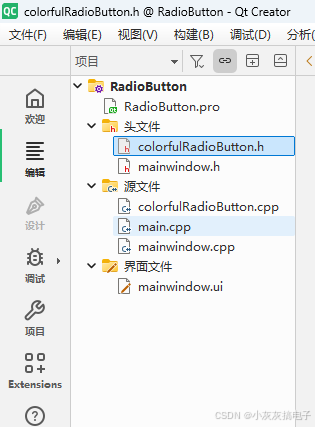
2.1、工程结构
2.2、mainwindow.cpp
cpp
#include "mainwindow.h"
#include "ui_mainwindow.h"

MainWindow::MainWindow(QWidget *parent)
    : QMainWindow(parent)
    , ui(new Ui::MainWindow)
{
    ui->setupUi(this);

    this->ui->radioButton_2->setColor("#C7E006","#809104");
    this->ui->radioButton_3->setColor("#FF0CE7","#910483");
    this->ui->radioButton_4->setColor("#0C92FF","#0761AC");
}

MainWindow::~MainWindow()
{
    delete ui;
}
2.3、colorfulRadioButton.h
cpp
#ifndef COLORFULRADIOBUTTON_H
#define COLORFULRADIOBUTTON_H

#include <QWidget>
#include <QRadioButton>
#include <QPainter>
#include <QPropertyAnimation>

class ColorfulRadioButton : public QRadioButton
{
    Q_OBJECT

    Q_PROPERTY(int bottomLineWidth READ getBottomLineWidth WRITE setBottomLineWidth NOTIFY bottomLineWidthChanged FINAL)
signals:
    void bottomLineWidthChanged();
public:
    explicit ColorfulRadioButton(QWidget *parent = nullptr);

    int getBottomLineWidth() const
    {
        return bottomLineWidth;
    }

    void setBottomLineWidth(int newBottomLineWidth)
    {
        if (bottomLineWidth == newBottomLineWidth)
            return;
        bottomLineWidth = newBottomLineWidth;
        emit bottomLineWidthChanged();
    }
    void setColor(QColor checked,QColor unchecked)
    {
        this->colorChecked = checked;
        this->colorUnchecked = unchecked;
    }
protected:
    void paintEvent(QPaintEvent *e) override;
private:
    QColor colorChecked = "#0BFFB2";
    QColor colorUnchecked = "#0C976B";

    int leftPadding = 5;
    int textX = 0;
    int bottomLineWidth;

    QPropertyAnimation *animBottomLineWidth = nullptr;
};

#endif // COLORFULRADIOBUTTON_H
2.4、colorfulRadioButton.cpp
cpp
#include "colorfulRadioButton.h"
ColorfulRadioButton::ColorfulRadioButton(QWidget *parent)
: QRadioButton{parent}
{
connect(this,&QRadioButton::toggled,this,
[=](bool checked)
{
if(checked)
{
this->animBottomLineWidth->setStartValue(textX);
this->animBottomLineWidth->setEndValue(this->width() - textX);
this->animBottomLineWidth->start();
}
else
{
this->animBottomLineWidth->setStartValue(this->width() - textX);
this->animBottomLineWidth->setEndValue(textX);
this->animBottomLineWidth->start();
}
});
this->animBottomLineWidth = new QPropertyAnimation(this,"bottomLineWidth",this);
this->animBottomLineWidth->setDuration(300);
connect(this->animBottomLineWidth,&QPropertyAnimation::valueChanged,this,
[=](const QVariant &value)
{
Q_UNUSED(value);
this->update();
});
}
void ColorfulRadioButton::paintEvent(QPaintEvent *e)
{
QPainter painter(this);
painter.setRenderHint(QPainter::Antialiasing,true);
int width = this->width();
int height = this->height();
QColor color = this->isChecked()?this->colorChecked:this->colorUnchecked;
QRect rectRoundBorder(5,5,height-10,height-10);
painter.setPen(QPen(color, this->isChecked()?4:2, Qt::SolidLine, Qt::RoundCap, Qt::MiterJoin));
painter.setBrush(Qt::transparent);
painter.drawEllipse(rectRoundBorder);
if(this->isChecked())
{
//绘制内圆
int roundWidth = (float)rectRoundBorder.width()/2.0f;
QRect rectRound(5+roundWidth/2,0+5 + roundWidth/2,roundWidth,roundWidth);
rectRound.setX(rectRoundBorder.center().x() - roundWidth/2 +1);
rectRound.setY(rectRoundBorder.center().y() - roundWidth/2 +1);
painter.setPen(Qt::NoPen);
painter.setBrush(color);
painter.drawEllipse(rectRound);
}
painter.setPen(QPen(color, 3, Qt::SolidLine, Qt::RoundCap, Qt::MiterJoin));
QRect rectText(rectRoundBorder.x() + rectRoundBorder.width()+5,0,this->width(),this->height());
painter.drawText(rectText, Qt::AlignLeft | Qt::AlignVCenter, this->text());
textX = rectText.x();
if(bottomLineWidth == 0)
bottomLineWidth = textX;
painter.drawLine(QPoint(rectText.x(), height-2),QPoint(bottomLineWidth, height-2));
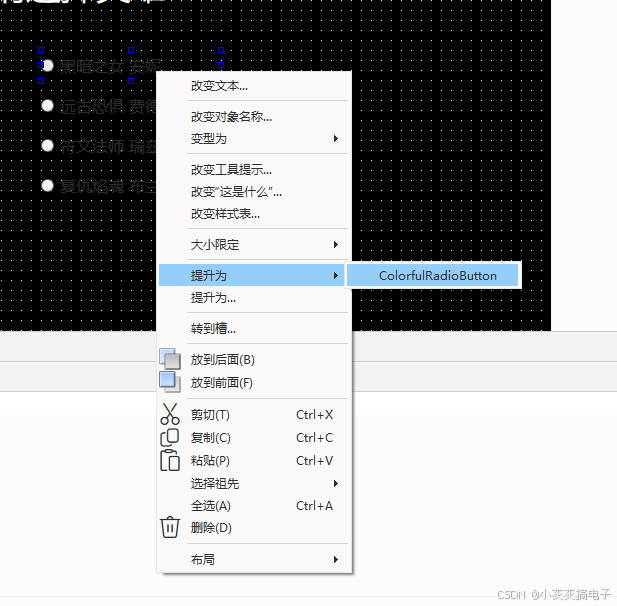
}2.5、使用方法
放置一个QRadioButton,然后右键提升:
2.6、完整工程下载
文章顶部下载。
二、实现原理
通过继承相关控件然后通过paintEvent重绘来实现。这是Qt GUI开发中非常核心的技术,用于创建具有独特外观或行为的控件。
1、Qt 控件重写的基本概念
在Qt中,所有的控件(如 QPushButton、QLineEdit、QComboBox 等)都是 QWidget 的子类。要自定义一个控件,通常需要继承自该控件类,并重写其特定方法。最常见的方法是重写以下事件或方法:
-
事件处理函数:
mousePressEvent(QMouseEvent *event)keyPressEvent(QKeyEvent *event)paintEvent(QPaintEvent *event)(最核心)
-
大小相关方法:
sizeHint()minimumSizeHint()
2、核心重写方法:paintEvent
paintEvent 是绘制控件外观的核心方法。通过重写此方法,你可以完全自定义控件的外观。以下是一个重写 QPushButton 的简单示例:
cpp
#include <QPainter>
#include <QPushButton>

class CustomButton : public QPushButton {
public:
    CustomButton(QWidget *parent = nullptr) : QPushButton(parent) {}

protected:
    void paintEvent(QPaintEvent *event) override {
        // 先调用父类的绘制方法(保留基础样式)
        QPushButton::paintEvent(event);

        // 自定义绘制逻辑
        QPainter painter(this);
        painter.setPen(Qt::red);
        painter.drawEllipse(rect().adjusted(5, 5, -5, -5)); // 在按钮上画一个红色圆圈
    }
};
3、完整重写示例:自定义按钮
下面是一个更完整的自定义按钮示例,支持渐变背景和圆角边框:
cpp
class GradientButton : public QPushButton {
public:
    GradientButton(const QString &text, QWidget *parent = nullptr)
        : QPushButton(text, parent) {}

protected:
    void paintEvent(QPaintEvent *event) override {
        Q_UNUSED(event);

        QPainter painter(this);
        painter.setRenderHint(QPainter::Antialiasing);

        // 绘制渐变背景
        QLinearGradient gradient(0, 0, width(), height());
        gradient.setColorAt(0, Qt::blue);
        gradient.setColorAt(1, Qt::cyan);
        painter.setBrush(gradient);

        // 绘制圆角矩形
        painter.drawRoundedRect(rect(), 10, 10);

        // 绘制文字(居中)
        painter.setPen(Qt::white);
        painter.drawText(rect(), Qt::AlignCenter, text());
    }
};
4、如何替换事件行为
如果你想改变控件的事件响应逻辑(如鼠标点击),可以重写对应的事件处理器。例如,实现一个双击按钮:
cpp
class DoubleClickButton : public QPushButton {
protected:
    void mouseDoubleClickEvent(QMouseEvent *event) override {
        Q_UNUSED(event);
        qDebug() << "Button double-clicked!";
        // 触发自定义逻辑...
    }
};
5、注意事项
-
调用父类方法 :在重写
paintEvent时,通常先调用父类方法(如QPushButton::paintEvent(event))以保留基础样式,再添加自定义绘制。 -
性能优化 :避免在
paintEvent中执行耗时操作,否则会导致界面卡顿。 -
样式表(QSS)vs 重写:
- 简单样式 :使用样式表(如
.setStyleSheet("background: blue;"))。 - 复杂逻辑 :必须重写
paintEvent。
- 简单样式 :使用样式表(如
6、总结
| 需求场景 | 推荐方法 |
|---|---|
| 修改简单样式(颜色、字体) | 使用 QSS(样式表) |
| 完全自定义外观 | 重写 paintEvent |
| 修改事件行为 | 重写事件处理器 |
重写控件是Qt高级UI开发的核心技能,通过合理使用 paintEvent 和事件处理器,你可以实现高度定制化的界面效果。
