建议先阅读这篇博客,本文中只描述了关键信息,整体流程可以看下面文章中间件升级-CSDN博客
说明:
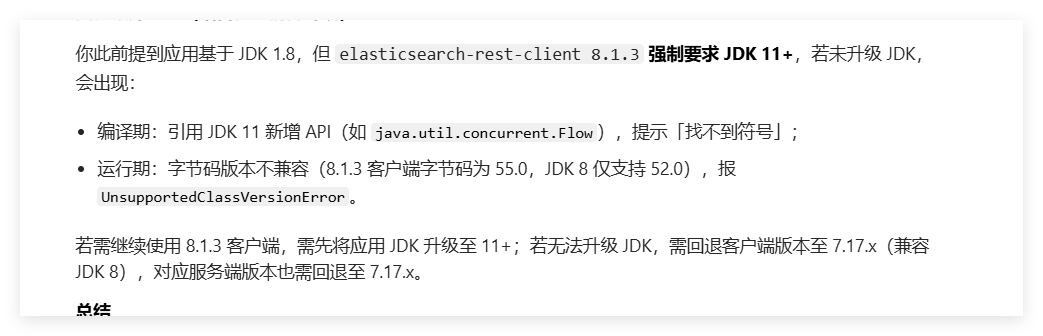
检索文档,jdk=1.8客户端最高支持到elasticsearch-rest-client=7.17.x。不推荐进行升级,如升级后使用需充分验证当前使用功能是否正常。
-
es原始版本: 8.1.3
-
Kibana 等版本需同步升级。
-
springboot版本:2.7.18 , 默认elasticsearch-rest-client =7.17.15
平台指定: elasticsearch-rest-client =8.1.3
升级后推荐指定:elasticsearch-rest-client =8.15.3
服务安装
Docker 安装:
详见: https://www.elastic.co/guide/en/elasticsearch/reference/8.15/docker.html
docker pull docker.elastic.co/elasticsearch/elasticsearch:8.15.3
docker run -d --name elasticsearch-8.15.3 -p 9200:9200 docker.elastic.co/elasticsearch/elasticsearch:8.15.3
linux安装包下载:
# 下载地址: https://www.elastic.co/downloads/past-releases/elasticsearch-8-15-3
# 进入目录
cd /opt/easy-cloud
# 下载文件(arm框架请自行调整,当前标记的为centos7版本,其它版本请自行调整)
wget https://artifacts.elastic.co/downloads/elasticsearch/elasticsearch-8.15.3-linux-x86_64.tar.gz
# 解压文件
tar --no-same-owner -zxvf elasticsearch-8.15.3-*.tar.gz
# 创建用户
useradd elastic && passwd elastic
# 赋权限给elastic用户
chown -R elastic:elastic /opt/easy-cloud/elasticsearch-8.15.3
# 进入目录
cd elasticsearch-8.15.3
# 备份配置文件
cp config/elasticsearch.yml  config/elasticsearch.yml.bak
# 核实内存是否更改:本文设置为2g,默认是4g,如果服务内存充足,可不进行修改
# vim config/jvm.options
# 推荐更改-xms=2g     -xmx=2g
windows安装包下载:
载地址:https://artifacts.elastic.co/downloads/elasticsearch/elasticsearch-8.15.3-windows-x86_64.zip服务升级:
数据备份:
数据备份:
- 进入文件夹
cd /opt/easy-cloud
- 历史安装文件备份
tar -zcvf elasticsearch-8.1.3.tar.gz elasticsearch-8.1.3 /
- 创建路径并授权
mkdir -p /data/es/backup_repo
chown -R elastic:elastic /data/es/backup_repo
-- 报错:mkdir: cannot create directory '/data': Permission denied 使用docker exec -u root -it xxx bash 进入容器
- 设置备份路径:(先查看是否存在 cat config/elasticsearch.yml |grep "path.repo")
echo 'path.repo: "/data/es/backup_repo"' >> config/elasticsearch.yml
- 重启当前es服务:
systemctl restart elasticsearch
- 创建快照仓库
curl -k -u elastic:elastic -XPUT "https://localhost:9200/_snapshot/my_local_repo" -H "Content-Type: application/json" -d '{
"type": "fs",
"settings": {
"location": "/data/es/backup_repo",
"compress": true,
"chunk_size": "100mb"
}
}'
- 验证快照仓库创建是否成功
curl -k -u elastic:elastic -XGET "https://localhost:9200/_snapshot/my_local_repo?pretty"
- 真实创建快照
curl -k -u elastic:elastic -XPUT "https://localhost:9200/_snapshot/my_local_repo/upgrade_backup_8.1.3?wait_for_completion=true" -H "Content-Type: application/json" -d '{
"indices": "*",
"include_global_state": true
}'
- 验证快照有效性
curl -k -u elastic:elastic -XGET "https://localhost:9200/_snapshot/my_local_repo/upgrade_backup_8.1.3?pretty"
新服务启动:
- 停止历史服务
pgrep -f -u elastic elasticsearch | xargs -r kill -15
- 进入目录
cd /opt/easy-cloud/elasticsearch-8.15.3
- 配置文件检查(是否替换为了期望的配置文件):
cat config/elasticsearch.yml
- JVM内存检查。
cat config/jvm.options |grep -E "Xms|Xmx"
- 系统内存检查
sysctl -p
-- 如果输出没有:vm.max_map_count=262144
-- 执行指令追加配置到文件:echo "vm.max_map_count=262144" >> /etc/sysctl.conf
- 默认文件数检查
ulimit -Hn
ulimit -Sn
--期望> 65535,否则执行以下指令:vim /etc/security/limits.conf 在 #End of file之前写入以下信息
* hard nofile 65536
* soft nofile 65536
- 最后再次重新授权一下
chown -R elastic:elastic /opt/easy-cloud/elasticsearch-8.15.3
- 启动新服务
su - elastic
cd /opt/easy-cloud/elasticsearch-8.15.3 && ./bin/elasticsearch -d
- 生成并重置默认密码
bin/elasticsearch-reset-password -u elastic -i
bin/elasticsearch-users useradd easy-es -p easyES@123 -r superuser
- 验证服务是否启动
curl -k -XGET -u elastic:elastic -k "https://127.0.0.1:9200"
-- 看到版本号8.15.3输出说明正常生成。
- copy配置文件到目录(空环境easy-cloud-linux\es-config\elasticsearch.yml)
对比给出配置文件和当前配置文件(config/elasticsearch.yml)(验证先更改配置文件对应的证书无法生成)
- 停止服务
pgrep -f -u elastic elasticsearch | xargs -r kill -15
- 重新启动
./bin/elasticsearch -d
数据恢复
此时不要启动业务服务,不要让业务服务连接es并创建索引,否则索引相同会导致恢复失败。
- 创建快照仓库
curl -k -u elastic:elastic -XPUT "https://localhost:9200/_snapshot/my_local_repo" -H "Content-Type: application/json" -d '{
"type": "fs",
"settings": {
"location": "/data/es/backup_repo",
"compress": true,
"chunk_size": "100mb"
}
}'
- 从快照恢复指定索引(恢复前建议关闭目标索引,恢复后重新打开)
curl -k -u elastic:elastic -XPOST "https://localhost:9200/_snapshot/es_backup_repo/upgrade_backup_8.1.3/_restore?wait_for_completion=true" -H "Content-Type: application/json" -d '{
"indices": "*",
"include_global_state": true,
"ignore_unavailable": true,
"partial": false
}'
- 报错:cannot restore index hs_log_trace_20251205 because an open index with same name already exists in the cluster. Either close or delete the existing index or restore the index under a different name by providing a rename pattern and replacement name"
如果已经产生了索引,可以进行索引的删除或者关闭。
curl -k -XDELETE -u elastic:elastic -k "https://127.0.0.1:9200/\[需要删除的索引id\]?pretty"
-- 示例:curl -k -XDELETE -u elastic:elastic -k "https://127.0.0.1:9200/hs_log_trace_20251205?pretty"
功能验证:
-
数据恢复后,数据条数验证。
-
程序是否可以正常构建新的索引。
-
数据能正常写入
版本回退
- 停止新服务
pgrep -f -u elastic elasticsearch | xargs -r kill -15
- 进入文件夹
cd /opt/hussar-cloud
- 解压老版本数据(如果原始文件夹未删除可忽略)
tar -zxvf elasticsearch-8.1.3.tar.gz
- 启动老服务
cd /opt/hussar-cloud/elasticsearch-8.1.3 && ./bin/elasticsearch -d
- 验证服务正常启动(返回版本号8.1.3)
curl -k -XGET -u elastic:elastic -k "https://127.0.0.1:9200"
- 风险点:
新版本的快照,老版本加载较慢,需要删除所有索引重新创建。新版本运行期间数据丢失。
备注:
- 启动报错:java.nio.file.AccessDeniedException
没有权限,root账号执行:chown -R elastic:elastic /opt/hussar-cloud/elasticsearch-8.15.3
- 启动报错:config/certs/transport.p12 because the file does not exist
缺少证书,从之前项目copy(config/certs目录)或者以下命令重新生成。
./bin/elasticsearch-certutil cert --self-signed -out config/certs/transport.p12 -pass "elastic"
./bin/elasticsearch-keystore add xpack.security.transport.ssl.keystore.secure_password
- 如果https 访问报错时, 可以更改curl 的地址为http