当我们希望一个元素在鼠标移入时,能像一扇门一样从正确的一侧滑开,或者让提示信息从鼠标来的方向自然浮现,这个看似"智能"的效果,其核心就是一个经典的几何计算:判断鼠标的进入方向。
核心原理
想象一下,你正站在一个房间的正中央。有人从门口进来,你怎么判断他是从左边门还是右边门进来的?你会对比他出现的位置和你(中心点)的左右关系。我的思路是:
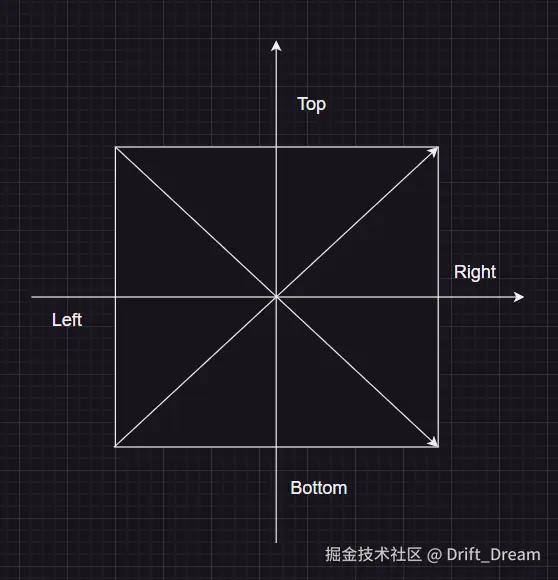
- 算出元素中心点坐标
- 根据中心坐标建立坐标象限
- 每个象限分为两个部分
- 依据鼠标进入的位置,算出鼠标进入时的坐标点
- 根据坐标点判断进入方向
第一版代码
html
<!DOCTYPE html>
<html lang="en">
  <head>
    <meta charset="UTF-8" />
    <meta name="viewport" content="width=device-width, initial-scale=1.0" />
    <title>判断鼠标进入方向</title>
  </head>
  <style>
    * {
      margin: 0;
      padding: 0;
    }
    body {
      width: 100vw;
      height: 100vh;
      display: flex;
      align-items: center;
      justify-content: center;
    }
    .box {
      width: 600px;
      height: 600px;
      background-color: aquamarine;
    }
  </style>
  <body>
    <div class="box"></div>
  </body>
  <script>
    const box = document.querySelector(".box");

    box.addEventListener("mouseenter", (event) => {
      // 计算元素中心点坐标
      const rect = box.getBoundingClientRect();
      const centerX = rect.x + rect.width / 2;
      const centerY = rect.y + rect.height / 2;

      // 鼠标位置
      const clientX = event.clientX;
      const clientY = event.clientY;

      // 坐标
      const x = clientX - centerX;
      const y = centerY - clientY;

      // 第一象限
      if (x > 0 && y > 0) {
        if (y > x) {
          console.log("top");
        } else {
          console.log("right");
        }
      }
      // 第四象限
      if (x > 0 && y < 0) {
        if (x > -y) {
          console.log("right");
        } else {
          console.log("bottom");
        }
      }
      // 第三象限
      if (x < 0 && y < 0) {
        if (-x > -y) {
          console.log("left");
        } else {
          console.log("bottom");
        }
      }
      // 第二象限
      if (x < 0 && y > 0) {
        if (y > -x) {
          console.log("top");
        } else {
          console.log("left");
        }
      }
    });
  </script>
</html>但是第一版代码分支判断过多,我们仔细观察后能发现,实际上核心判断就是"比较水平偏差和垂直偏差哪个更大"
第二版代码
javascript
const box = document.querySelector(".box");

box.addEventListener("mouseenter", (event) => {
  // 获取中心点坐标
  const rect = box.getBoundingClientRect();
  const centerX = rect.x + rect.width / 2;
  const centerY = rect.y + rect.height / 2;

  const clientX = event.clientX;
  const clientY = event.clientY;

  // 优化后的核心逻辑
  const deltaX = event.clientX - centerX; // 水平偏差
  const deltaY = event.clientY - centerY; // 垂直偏差

  if (Math.abs(deltaX) > Math.abs(deltaY)) {
    // 水平方向主导
    console.log(deltaX > 0 ? "right" : "left");
  } else {
    // 垂直方向主导
    console.log(deltaY > 0 ? "bottom" : "top");
  }
});
在vue3项目使用示例
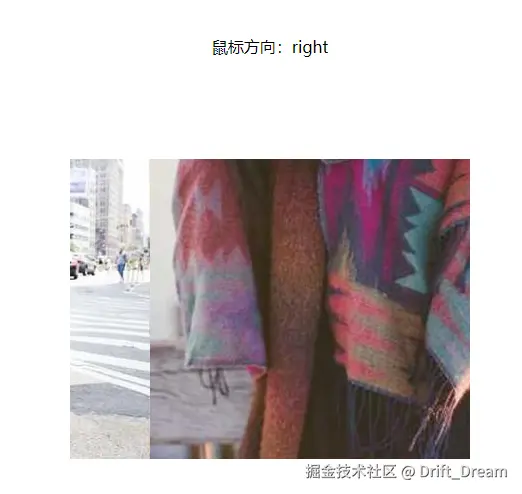
我们可以做一个鼠标移入时图片从不同方向进入的效果
xml
<template>
  <div class="mouse-direction-container">
    <p>鼠标方向:{{ direction }}</p>

    <div :class="['box', direction]">
      <img class="top-img" src="@/assets/top.jpg" alt="" />
      <img class="right-img" src="@/assets/right.jpg" alt="" />
      <img class="bottom-img" src="@/assets/bottom.jpg" alt="" />
      <img class="left-img" src="@/assets/left.jpg" alt="" />
      <img class="center-img" src="@/assets/center.jpg" alt="" />
    </div>
  </div>
</template>

<script setup lang="ts">
import { ref, onMounted } from "vue";

const direction = ref<"top" | "bottom" | "left" | "right" | "">("");

onMounted(() => {
  const box = document.querySelector(".box")!;

  box.addEventListener("mouseenter", (e) => {
    const { clientX, clientY } = e as MouseEvent;
    const { left, top, width, height } = box.getBoundingClientRect();

    const centerX = left + width / 2;
    const centerY = top + height / 2;

    const deltaX = clientX - centerX; // 水平偏差
    const deltaY = clientY - centerY; // 垂直偏差
    if (Math.abs(deltaX) > Math.abs(deltaY)) {
      direction.value = deltaX > 0 ? "right" : "left";
    } else {
      direction.value = deltaY > 0 ? "bottom" : "top";
    }
  });
});
</script>

<style scoped lang="scss">
.mouse-direction-container {
  width: 100%;
  height: 100%;
  display: flex;
  flex-direction: column;
  align-items: center;
  justify-content: center;
  gap: 100px;
}

.box {
  width: 400px;
  height: 300px;
  background-color: red;
  position: relative;
  overflow: hidden;
  &.top {
    .top-img {
      transform: translateY(0);
    }
  }
  &.right {
    .right-img {
      transform: translateX(0);
    }
  }
  &.bottom {
    .bottom-img {
      transform: translateY(0);
    }
  }
  &.left {
    .left-img {
      transform: translateX(0);
    }
  }
  img {
    position: absolute;
    transition: all 0.3s linear;
    &.center-img {
      top: 0;
      left: 0;
      z-index: 1;
    }
    &.top-img {
      transform: translateY(-100%);
      z-index: 2;
    }
    &.right-img {
      transform: translateX(100%);
      z-index: 2;
    }
    &.bottom-img {
      transform: translateY(100%);
      z-index: 2;
    }
    &.left-img {
      transform: translateX(-100%);
      z-index: 2;
    }
  }
}
</style>