在 PySide6 的 QSS 属性选择器中,所有控件的内置可访问属性 (即有 xxx() 方法可以读取的属性)都可作为筛选条件,不同控件有专属属性,也有跨控件通用属性。
下面将学习一些常用的部件和属性,完整官方文档见:https://doc.qt.io/qt-6/stylesheet-reference.html#list-of-sub-controls。
一、常见的跨控件通用属性(所有控件都支持)
这类属性是 Qt 控件的基础属性,几乎所有控件(QWidget 子类)都具备,可作为通用筛选条件:
| 属性名 | 类型 | 说明 | QSS 匹配示例 |
|---|---|---|---|
enabled |
布尔 | 控件是否启用(可交互) | QWidget[enabled=false](禁用控件) |
visible |
布尔 | 控件是否可见 | QWidget[visible=true](可见控件) |
focus |
布尔 | 控件是否获取焦点 | QLineEdit[focus=true](获焦输入框) |
checked |
布尔 | 控件是否选中(复选框 / 单选框 / 按钮等) | QCheckBox[checked=true](选中复选框) |
windowTitle |
字符串 | 窗口标题(仅顶层窗口) | QMainWindow[windowTitle=主界面] |
objectName |
字符串 | 控件唯一标识(setObjectName 设置) |
QPushButton[objectName=submitBtn] |
minimumWidth |
整数 | 控件最小宽度 | QWidget[minimumWidth=200] |
maximumHeight |
整数 | 控件最大高度 | QWidget[maximumHeight=100] |
tooltip |
字符串 | 控件提示文本(setToolTip 设置) |
QPushButton[tooltip=提交表单] |
示例:通用属性筛选
/* 禁用的所有控件置灰 */
QWidget[enabled=false] {
    color: #999;
    background-color: #f5f5f5;
}
/* 获取焦点的输入框高亮边框 */
QLineEdit[focus=true] {
    border: 2px solid #2196F3;
}
/* 提示文本包含"删除"的按钮标红 */
QPushButton[tooltip*=删除] {
    color: #f44336;
}
二、专属属性
以QPushButton为例:
QPushButton 作为高频控件,除了 flat,还有以下专属属性可用于 QSS 筛选:
| 属性名 | 类型 | 说明 | QSS 匹配示例 |
|---|---|---|---|
text |
字符串 | 按钮显示的文字 | QPushButton[text=删除](文字为 "删除") |
default |
布尔 | 是否为 "默认按钮"(回车触发) | QPushButton[default=true](默认提交按钮) |
autoDefault |
布尔 | 是否自动成为默认按钮 | QPushButton[autoDefault=false] |
checkable |
布尔 | 按钮是否可选中(切换状态) | QPushButton[checkable=true](可选中按钮) |
checked |
布尔 | 可选中按钮的选中状态(继承通用属性) | QPushButton[checkable=true][checked=true] |
iconSize |
QSize | 图标尺寸(需匹配宽高,仅支持数值) | QPushButton[iconSize=64,64](图标 64x64) |
shortcut |
字符串 | 快捷键(如 Ctrl+S) |
QPushButton[shortcut=Ctrl+S] |
示例:QPushButton 专属属性筛选
/* 默认按钮(回车触发)强化样式 */
QPushButton[default=true] {
    background-color: #2196F3;
    color: white;
    border-radius: 4px;
    padding: 10px 20px;
}
/* 可选中的按钮(切换按钮) */
QPushButton[checkable=true] {
    background-color: #4CAF50;
    color: white;
}
/* 文字为"取消"的按钮灰色样式 */
QPushButton[text=取消] {
    background-color: #9E9E9E;
    color: white;
}- 注意:
- Qt 样式表(QSS)的属性选择器严格遵循「属性存在 + 属性值匹配 」的逻辑,所以要注意属性调用的前提,比如
checked属性有特殊前提的:
checked是「可勾选控件(checkable=true)」的专属状态属性,只有当控件的checkable为true时,checked属性才会被 Qt 识别。
所以,下面的代码是不生效的:
python
import sys

from PySide6.QtWidgets import QApplication, QPushButton, QVBoxLayout
from PySide6.QtWidgets import QWidget


app = QApplication(sys.argv)
window = QWidget()
btn1 = QPushButton("确定")
btn1.setCheckable(True)
btn1.clicked.connect(lambda: btn1.setStyleSheet(btn1.styleSheet()))

layout = QVBoxLayout(window)
layout.addWidget(btn1)
window.setStyleSheet("""
    QPushButton[checkable=true] {
        background-color: #ff0000;
        color: white;
        padding: 10px;
        border: none;
        border-radius: 5px;
    }
    QPushButton[checked=true] {
        background-color: #00ff00;
    }
}""")
window.resize(300, 200)
window.show()
sys.exit(app.exec())因为默认QPushButton的checkable=False,那么它就不具备checked这个属性,也就无从判断checked=true这个条件。正确写法是
python
QPushButton[checkable=true][checked=true] {
background-color: #00ff00;在checkable=true的QPushButton范围内判断checked=true。
- 当判断条件的属性发生了变化,就要重新加载一次样式表以更新样式。例如:
python
import sys

from PySide6.QtWidgets import QApplication, QPushButton, QVBoxLayout
from PySide6.QtWidgets import QWidget


app = QApplication(sys.argv)
window = QWidget()
btn1 = QPushButton("确定")
btn1.setCheckable(True)
# btn1.clicked.connect(lambda :btn1.setStyleSheet(btn1.styleSheet()))
btn2 = QPushButton("确定")
btn3 = QPushButton("取消")
layout = QVBoxLayout(window)
layout.addWidget(btn1)
layout.addWidget(btn2)
layout.addWidget(btn3)
window.setStyleSheet("""
    QPushButton[checkable=true] {
        background-color: #ff0000;
        color: white;
        padding: 10px;
        border: none;
        border-radius: 5px;
    }
    QPushButton[checkable=true][checked=true] {
        background-color: #00ff00;
    }
}""")
window.resize(300, 200)
window.show()
sys.exit(app.exec())运行后发现,即使btn1的checked属性已经发生了变化,它的背景色仍然没有变化。这是因为虽然btn1的checked属性发生了变化,但是它在上一次设置样式表时并不符合"checked=true"这个条件,所以就要在checked属性发生了变化之后再次给它设置样式表,这一次它符合"checked=true"这个条件:
增加语句:
python
btn1.clicked.connect(lambda :btn1.setStyleSheet(btn1.styleSheet()))重新设置一次样式表。
比运行一次"btn1.setStyleSheet(btn1.styleSheet()"更好的办法是使用btn.style().unpolish(btn) + btn.style().polish(btn)来清除样式缓存和重新初始化:
python
btn.style().unpolish(btn)
btn.style().polish(btn)- unpolish(btn) :清除控件
btn关联的样式缓存(如样式表解析结果、原生样式的状态缓存),解除样式与控件的绑定; - polish(btn):重新让样式系统「处理」控件,重新解析样式规则(包括样式表、原生样式、自定义样式),并应用到控件上。
完整代码:
python
import sys

from PySide6.QtWidgets import QApplication, QWidget, QVBoxLayout, QPushButton

app = QApplication(sys.argv)
window = QWidget()
window.resize(300, 100)
layout = QVBoxLayout(window)
btn = QPushButton("按钮")
btn.setCheckable(True)

def btn_clicked():
    btn.style().unpolish(btn)
    btn.style().polish(btn)

btn.clicked.connect(btn_clicked)

layout.addWidget(btn)
window.setStyleSheet("""
    QPushButton[checked=true] {
    background-color: red;}
    """)

window.show()
sys.exit(app.exec())
当然了,最好的办法是用伪状态来取代属性,这是最优解:
python
QPushButton[checkable=true]:checked {}全部代码:
python
import sys

from PySide6.QtWidgets import QApplication, QPushButton, QVBoxLayout
from PySide6.QtWidgets import QWidget


app = QApplication(sys.argv)
window = QWidget()
btn1 = QPushButton("确定")
btn1.setCheckable(True)

layout = QVBoxLayout(window)
layout.addWidget(btn1)
window.setStyleSheet("""
    QPushButton[checkable=true] {
        background-color: #ff0000;
        color: white;
        padding: 10px;
        border: none;
        border-radius: 5px;
    }
    QPushButton[checkable=true]:checked {
        background-color: #00ff00;
        color: black;
    }
}""")
window.resize(300, 200)
window.show()
sys.exit(app.exec())
还有,基于上面讲过的原因,不要把
python
QPushButton[checkable=true]:checked { /*[checkable=true]必不可少*/写成
python
QPushButton:checked {因为默认的QPushButton是没有checked这个伪状态的。
三、常用控件核心属性(按控件类型分类)
不同控件有专属核心属性,是 QSS 精细化样式的关键,以下整理高频控件的可筛选属性:
1. QLineEdit(输入框)
| 属性名 | 类型 | 说明 | QSS 匹配示例 |
|---|---|---|---|
readOnly |
布尔 | 是否只读 | QLineEdit[readOnly=true] |
placeholderText |
字符串 | 占位提示文本 | QLineEdit[placeholderText*=手机号] |
echoMode |
枚举 | 输入回显模式(如密码隐藏) | QLineEdit[echoMode="Password"] |
示例:输入框属性筛选
python
import sys

from PySide6.QtWidgets import QApplication, QPushButton, QVBoxLayout, QLineEdit
from PySide6.QtWidgets import QWidget


app = QApplication(sys.argv)
window = QWidget()
line_edit1 = QLineEdit()
line_edit1.setReadOnly(True)
line_edit2 = QLineEdit()
line_edit2.setEchoMode(QLineEdit.Password)

layout = QVBoxLayout(window)
layout.addWidget(line_edit1)
layout.addWidget(line_edit2)
window.setStyleSheet("""
    /* 只读输入框禁用编辑样式 */
    QLineEdit[readOnly=true] {
        background-color: #f5f5f5;
        border: 1px solid red;
        color: #666;
}
    /* 密码输入框自定义样式 */
    QLineEdit[echoMode="Password"] {
        border: 2px solid green;
}
    }
}""")
window.resize(300, 200)
window.show()
sys.exit(app.exec())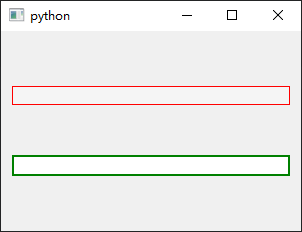
2. QCheckBox/QRadioButton(复选框 / 单选框)
| 属性名 | 类型 | 说明 | QSS 匹配示例 |
|---|---|---|---|
checked |
布尔 | 是否选中(核心) | QRadioButton[checked=true] |
tristate |
布尔 | 是否支持半选状态(仅复选框) | QCheckBox[tristate=true] |
indeterminate |
布尔 | 是否半选状态(仅复选框) | QCheckBox[indeterminate=true] |
text |
字符串 | 提示文字 | QCheckBox[text*=同意] |
示例:复选框状态样式
python
import sys

from PySide6.QtCore import Qt
from PySide6.QtWidgets import QApplication, QPushButton, QVBoxLayout, QLineEdit, QCheckBox
from PySide6.QtWidgets import QWidget


app = QApplication(sys.argv)
window = QWidget()

check_box = QCheckBox("三态复选框")
check_box.setTristate(True)  # 开启三态模式
check_box.setCheckState(Qt.PartiallyChecked)

layout = QVBoxLayout()
layout.addWidget(check_box)
window.setLayout(layout)


window.setStyleSheet("""
    /*基础复选框样式(控制文字与框体间距) */
    QCheckBox {
        font-size: 20px;
        spacing: 10px;  /* 框体和文字的间距,避免重叠 */
    }
    /*设置复选框的指示器尺寸*/
    QCheckBox::indicator {
        width: 24px;    /* 宽度 */
        height: 24px;   /* 高度 */
}
    /* 半选状态的复选框 */
    QCheckBox[tristate=true]::indicator:indeterminate {
     background-color: red;
}
    /* 选中状态的复选框 */
   QCheckBox[tristate=true]::indicator:checked {
     background-color: green;
}
    /* 未选中状态的复选框 */
    QCheckBox[tristate=true]::indicator:unchecked {
     background-color: blue;
}
    """)
window.resize(300, 200)
window.show()
sys.exit(app.exec())
3. QComboBox(下拉框)
| 属性名 | 类型 | 说明 | QSS 匹配示例 |
|---|---|---|---|
editable |
布尔 | 是否可编辑(输入文本) | QComboBox[editable=true] |
currentIndex |
整数 | 当前选中项索引 | QComboBox[currentIndex=0](默认第一项) |
count |
整数 | 下拉选项数量 | QComboBox[count>5](选项 > 5 个) |
QComboBox的子部件
| 子部件名 | 说明 | 备注 |
| lineEdit | 文本编辑框 | 当setEditable(True),才有此编辑框。可通过 combobox.lineEdit().setStyleSheet("")设置 |
| drop_down | 下拉按钮 | QComboBox::drop-down { } |
| down-arrow | 下拉按钮上的箭头图片 | QComboBox::down-arrow { } |
|---|
示例:可编辑下拉框样式
python
from PySide6.QtWidgets import QApplication, QWidget, QVBoxLayout, QComboBox, QLineEdit
import sys

app = QApplication(sys.argv)
window = QWidget()
window.resize(300, 100)
layout = QVBoxLayout(window)
cb = QComboBox()
cb.addItems(["1", "2", "3"])
cb.setEditable(True)

cb.setStyleSheet("""QComboBox {
    border: 1px solid gray;
    border-radius: 3px;
    padding: 1px 18px 1px 3px;
    font-size: 30px;
    min-width: 6em;
}
QComboBox::drop-down {
    width: 30px;
    background: white;

}
QComboBox[editable=true] {
    background: blue;
}

QComboBox::down-arrow {
    image: url(arrow_down1.png);
}""")

# cb.lineEdit().setStyleSheet("background-color:red;")
layout.addWidget(cb)
window.show()
sys.exit(app.exec())
QComboBox的linEdit子部件(文本编辑框))很奇怪,并不能通过"QComboBox::子部件"的方式来修改,只能用类似
python
cb.lineEdit().setStyleSheet("background-color:red;")或:
python
from PySide6.QtWidgets import QApplication, QWidget, QVBoxLayout, QComboBox, QLineEdit
import sys

app = QApplication(sys.argv)
window = QWidget()
window.resize(300, 100)
layout = QVBoxLayout(window)
cb = QComboBox()
cb.addItems(["1", "2", "3"])
cb.setEditable(True)
line_edit = QLineEdit()
line_edit.setStyleSheet("""
    QLineEdit {
        background-color:red;
    }""")
cb.setLineEdit(line_edit)

layout.addWidget(cb)


window.show()
sys.exit(app.exec())
这样的方法来间接设定。我查找了各种官方文档也没能找到在样式表中修改它的方法。看上去好像QComboBox的QLinEdit部件并不是它的子部件,QComboBox像是一个用QLinEdit、下拉按钮、下拉箭头拼凑起来的缝合怪。
4. QSlider(滑块)
| 属性名 | 类型 | 说明 | QSS 匹配示例 |
|---|---|---|---|
orientation |
枚举 | 方向(0 = 水平,1 = 垂直) | QSlider[orientation=1](垂直滑块) |
minimum |
整数 | 最小值 | QSlider[minimum=0] |
maximum |
整数 | 最大值 | QSlider[maximum=100] |
value |
整数 | 当前值 | QSlider[value>50] |
前面已经有滑块的学习记录https://blog.csdn.net/xulibo5828/article/details/156028492
5. QProgressBar(进度条)
| 属性名 | 类型 | 说明 | QSS 匹配示例 |
|---|---|---|---|
value |
整数 | 当前进度值 | QProgressBar[value>=100](进度完成) |
minimum/maximum |
整数 | 最小 / 最大值 | QProgressBar[maximum=100] |
textVisible |
布尔 | 是否显示进度文字 | QProgressBar[textVisible=false] |
下一节详细学习进度条。
四、自定义属性(扩展无内置属性的场景)
如果内置属性无法满足筛选需求,可通过 setProperty() 给控件设置自定义属性,QSS 同样支持匹配:
步骤 1:设置自定义属性
python
btn = QPushButton("危险按钮")
# 设置自定义属性:type=danger
btn.setProperty("type", "danger")

# 如果是动态修改属性,需刷新样式才能生效
btn.style().unpolish(btn)
btn.style().polish(btn)
步骤 2:QSS 匹配自定义属性
python
import sys

from PySide6.QtWidgets import QApplication, QWidget, QVBoxLayout, QPushButton

app = QApplication(sys.argv)
window = QWidget()
window.resize(300, 100)
layout = QVBoxLayout(window)

btn = QPushButton("危险按钮")
# 设置自定义属性:type=danger、size=large
btn.setProperty("type", "danger")

btn2 = QPushButton("启动按钮")
btn2.setProperty("func", "start")

layout.addWidget(btn)
layout.addWidget(btn2)
window.setStyleSheet("""
    QPushButton[type=danger] {
    background-color: red;}
    QPushButton[func=start] {
    background-color: green;}
    """)

window.show()
sys.exit(app.exec())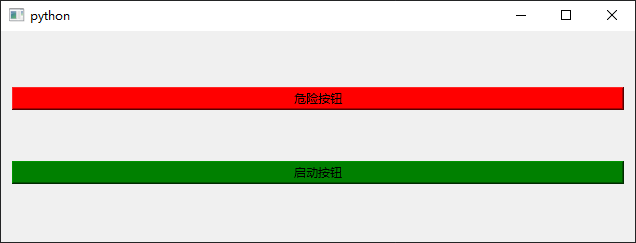
五、关键注意事项
-
属性值类型匹配
- 布尔值:必须写
true/false(小写),不能写True/False或1/0; - 字符串:无需加引号(如
[text=删除],而非[text="删除"]); - 复合类型(如 QSize):用逗号分隔(如
[iconSize=64,64])。
- 布尔值:必须写
-
动态属性刷新 运行时修改控件属性(如
btn.setFlat(True)、btn.setProperty("type", "success"))后,需手动刷新样式:widget.style().unpolish(widget) # 清除旧样式缓存 widget.style().polish(widget) # 应用新属性的样式 widget.update() # 刷新控件显示 -
优先级规则 属性选择器优先级:
控件类[属性1=值1][属性2=值2](多属性组合) >控件类[属性=值]> 纯类选择器(如QPushButton)。
总结
QSS 属性选择器的核心是「控件的可访问属性」,可筛选的属性分为三类:
- 通用属性(所有控件):
enabled/focus/objectName等; - 控件专属属性(如 QPushButton 的
default/checkable、QLineEdit 的readOnly); - 自定义属性(通过
setProperty扩展)。
灵活组合这些属性,可实现 "精准定位控件 + 差异化样式",避免为每个控件单独写样式,大幅提升 QSS 的复用性和维护性。