系列文章目录
文章目录
前言
大模型微调的核心目的是让通用预训练模型适应特定领域或任务,以解决"通用但不专精"的问题。主要原因包括:
领域适应------通用模型在医疗、法律等专业领域表现欠佳,微调可使其掌握专业知识和术语;
任务定制------针对文本分类、客服对话等具体需求优化模型性能;
成本效益------相比从头训练,微调只需少量数据和计算资源,成本极低、周期极短;
数据隐私------企业可利用内部数据定制专属模型,保障信息安全。
此外,微调还能减少模型"幻觉"、提高输出一致性,是连接通用能力与实际应用的关键桥梁。
Unsloth是一个专注于高效微调大型语言模型的开源库,旨在显著提升训练速度并降低内存消耗。它通过优化算法、内核融合与混合精度训练等技术,使研究人员和开发者能在单张消费级硬件上快速微调Llama、Qwen等主流大模型。Unsloth支持LoRA、QLoRA等参数高效微调方法,并兼容Hugging Face生态,简化了从加载模型到保存检查点的全流程。其核心优势在于保持模型性能的同时,将微调时间缩短至传统方法的1/3到1/5,大幅降低了实践门槛与成本。

一、unsloth训练
1、环境部署
当前环境
ubuntu22 系统(ubuntu18不太支持部分第三方库的安装)
 NVIDIA 570.181 驱动
cuda12.1 cudnn8.9.7.29
anaconda3 虚拟环境
2080ti 显卡安装步骤主要参考unsloth的github官网,但是直接使用官网教程安装似乎有些问题,所以以下步骤会有所不同。
使用anaconda创建虚拟环境。
conda create -n unsloth python=3.11 进入虚拟环境。
conda activate unsloth离线安装相关pytorch库,可参考这篇博客。
conda install --offline pytorch-2.5.0-py3.11_cuda12.1_cudnn9.1.0_0.tar.bz2
conda install --offline torchaudio-2.5.0-py311_cu121.tar.bz2
conda install --offline torchvision-0.20.0-py311_cu121.tar.bz2
或者使用pip在线安装pytorch库。
pip install torch==2.5.0 torchvision==0.20.0 torchaudio==2.5.0 --index-url https://download.pytorch.org/whl/cu121pip安装xformers库
pip install -U xformers==0.0.28.post2 --index-url https://download.pytorch.org/whl/cu121pip安装unsloth库
pip install "unsloth[cu121-torch250] @ git+https://github.com/unslothai/unsloth.git"使用conda list检查虚拟环境中以下必要环境是否已安装:
xformers 0.0.28.post2
bitsandbytes 0.48.2
triton 3..0.0
sympy 1.13.1
markupsafe 3.0.3
pyarrow 22.0.0
trl 0.24.0
datasets 4.3.0
diffusers 0.35.2
networkx 3.6
unsloth 2025.11.6
unsloth-zoo 2025.12.1在魔搭modelscope下载一个Qwen3-4B-Instruct-2507模型进行微调。
安装下载器
pip install modelscope模型下载
modelscope download --model Qwen/Qwen3-4B-Instruct-2507 --local_dir /home/xxx/Qwen3-4B-Instruct-25072、微调训练
这里找了一个关于儿童对话的文本数据集对Qwen3-4B-Instruct-2507模型进行微调,参考代码如下。
import torch
# 临时修复 torch.intn 缺失问题
if not hasattr(torch, 'int1'):
    torch.int1 = torch.int8
if not hasattr(torch, 'int2'):
    torch.int2 = torch.int8
if not hasattr(torch, 'int3'):
    torch.int3 = torch.int8
if not hasattr(torch, 'int4'):
    torch.int4 = torch.int8
if not hasattr(torch, 'int5'):
    torch.int5 = torch.int8
if not hasattr(torch, 'int6'):
    torch.int6 = torch.int8
if not hasattr(torch, 'int7'):
    torch.int7 = torch.int8

import json
from unsloth import FastLanguageModel
from datasets import load_dataset, Dataset
from trl import SFTTrainer
from transformers import TrainingArguments


def fine_tune_qwen3_child_chat(json_data_path, model_path, output_path):
    # 1. 加载模型和分词器
    print("正在加载模型和分词器...")
    model, tokenizer = FastLanguageModel.from_pretrained(
        model_name=model_path,
        max_seq_length=2048,
        load_in_4bit=True,
        trust_remote_code=True,
        local_files_only=True
    )
    print("模型和分词器加载完成。")

    # 2. 配置LoRA适配器
    print("正在配置LoRA适配器...")
    model = FastLanguageModel.get_peft_model(
        model,
        # LoRA秩
        r=16,
        target_modules=["q_proj", "k_proj", "v_proj", "o_proj",
                        "gate_proj", "up_proj", "down_proj"],
        lora_alpha=16,
        lora_dropout=0,
        bias="none",
        # 使用Unsloth的优化梯度检查点
        use_gradient_checkpointing="unsloth",
        random_state=3407,
    )
    print("LoRA适配器配置完成。")

    # 3. 加载和预处理数据集
    print("正在加载和预处理数据集...")

    def load_and_process_child_chat_data(file_path):
        """加载对话数据并转换为训练格式"""
        with open(file_path, 'r', encoding='utf-8') as f:
            data = json.load(f)

        processed_samples = []

        for dialog in data:
            topic = dialog.get("topic", "")
            conversations = dialog.get("conversations", [])

            # 构建多轮对话文本
            dialog_text = ""
            for i, conv in enumerate(conversations):
                role = "user" if conv["from"] == "human" else "assistant"
                content = conv["value"]

                # 使用Qwen3的对话格式
                if role == "user":
                    dialog_text += f"<|im_start|>user\n{content}<|im_end|>\n"
                else:
                    dialog_text += f"<|im_start|>assistant\n{content}<|im_end|>\n"

            # 添加系统提示,使模型学习儿童陪伴风格
            system_prompt = "你是一个友好、耐心、有趣的儿童陪伴助手,用简单易懂的语言和孩子们交流,充满爱心和鼓励。"
            full_text = f"<|im_start|>system\n{system_prompt}<|im_end|>\n{dialog_text}"

            processed_samples.append({"text": full_text})

        return processed_samples

    # 处理数据集
    processed_data = load_and_process_child_chat_data(json_data_path)

    # 转换为HuggingFace数据集格式
    dataset_dict = {"text": [item["text"] for item in processed_data]}
    dataset = Dataset.from_dict(dataset_dict)

    # 分割训练集和验证集
    dataset = dataset.train_test_split(test_size=0.1, seed=3407)
    train_dataset = dataset["train"]
    eval_dataset = dataset["test"]

    print(f"训练集大小: {len(train_dataset)}")
    print(f"验证集大小: {len(eval_dataset)}")
    print("数据集预处理完成。")

    # 4. 配置训练参数
    print("正在配置训练参数...")

    training_args = TrainingArguments(
        output_dir=output_path,
        per_device_train_batch_size=2,  # 根据GPU内存调整
        gradient_accumulation_steps=4,  # 有效批次大小 = 2 * 4 = 8
        warmup_steps=10,
        max_steps=300,  # 训练步数,可根据数据集大小调整
        learning_rate=2e-4,
        fp16=not torch.cuda.is_bf16_supported(),
        bf16=torch.cuda.is_bf16_supported(),
        logging_steps=10,
        optim="adamw_8bit",
        weight_decay=0.01,
        lr_scheduler_type="linear",
        seed=3407,
        report_to="none",  # 禁用外部日志记录
        save_steps=100,  # 每100步保存一次检查点
        eval_steps=50,  # 每50步评估一次
        eval_strategy="steps",
        load_best_model_at_end=True,  # 训练结束时加载最佳模型
    )

    # 5. 创建训练器
    print("正在创建SFTTrainer...")

    trainer = SFTTrainer(
        model=model,
        tokenizer=tokenizer,
        train_dataset=train_dataset,
        eval_dataset=eval_dataset,
        dataset_text_field="text",
        max_seq_length=2048,
        args=training_args,
    )

    print("训练器创建完成。")

    # 6. 开始训练
    print("开始训练...")
    trainer.train()
    print("训练完成。")

    # 7. 保存最佳模型
    print("正在保存最佳模型...")
    trainer.save_model()
    tokenizer.save_pretrained(output_path)
    print(f"模型已保存到: {output_path}")

    # 8. 保存为16位格式,便于推理
    print("正在保存16位模型...")
    model.save_pretrained_merged(
        output_path + "_16bit",
        tokenizer,
        save_method="merged_16bit"
    )
    print("16位模型保存完成。")

    return model, tokenizer


if __name__ == "__main__":
    # 配置路径参数
    json_data_path = "data.json"  # JSON数据文件路径
    model_path = "Qwen3-4B-Instruct-2507"  # 模型路径
    output_path = "Qwen3-4B-finetuning" # 输出模型名称

    # 执行微调
    model, tokenizer = fine_tune_qwen3_child_chat(
        json_data_path,
        model_path,
        output_path
    )
训练出来的模型会有两个文件夹,Qwen3-4B-finetuning文件夹是没有合并LoRA数据,Qwen3-4B-finetuning_16bit文件夹是把LoRA数据合并到原来的模型中。
3、报错与解决
报错一:
因为torch版本问题,会提示以下报错。
Exception: module 'torch' has no attribute 'int1/int2/.../int7'在代码开头添加兼容性临时补丁。
import torch
# 临时修复 torch.intn 缺失问题
if not hasattr(torch, 'int1'):
    torch.int1 = torch.int8
if not hasattr(torch, 'int2'):
    torch.int2 = torch.int8
if not hasattr(torch, 'int3'):
    torch.int3 = torch.int8
if not hasattr(torch, 'int4'):
    torch.int4 = torch.int8
if not hasattr(torch, 'int5'):
    torch.int5 = torch.int8
if not hasattr(torch, 'int6'):
    torch.int6 = torch.int8
if not hasattr(torch, 'int7'):
    torch.int7 = torch.int8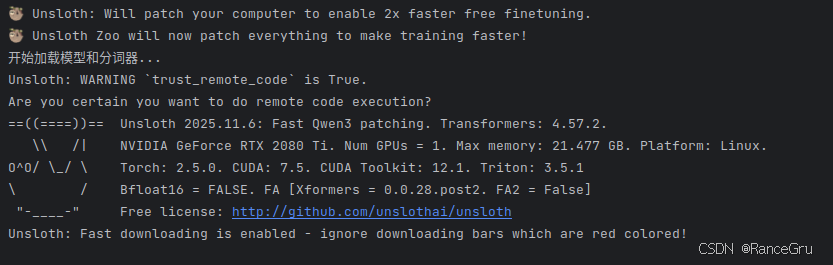
报错二:
提示"model_type"属性。
AttributeError: 'dict' object has no attribute 'model_type'似乎是transformers 4.57.2版本存在bug,无法找到Qwen3的model_type,pip卸载4.57.2版本,并指定安装4.57.1版本。
pip uninstall transformers
pip install transformers==4.57.1
报错三:
提示无法从"triton.compiler. compiler"导入名称"triton_key"。
ImportError: cannot import name 'triton_key' from 'triton.compiler.compiler'unsloth 虽然支持 Triton 加速,但 PyTorch 自带的编译器对 Triton 版本非常敏感。虽然当前的 Triton 3.5.1 是较新版本,但 PyTorch 2.5.0 可能期望的是旧一些的 Triton 版本pip卸载3.5.1版本,并指定安装3.0.0版本。
pip uninstall triton
pip install triton==3.0.0 -i https://pypi.tuna.tsinghua.edu.cn/simple
二、vllm推理
1、环境部署
vllm本地安装可能比较复杂,这里使用Docker+nvidia-container-toolkit+Docker-Compose实现vllm和openwebui进行推理,具体安装可以参考博客一和博客二。
安装vllm镜像,注意不要安装太低版本的vllm,太低版本可能不支持Qwen3架构,也不要安装太高版本的vllm,太高版本可能会有显卡架构限制,也就是Compute Capability,这里因为2080ti的Compute Capability=7.5,所以使用0.11.0版本。
docker pull vllm/vllm-openai:v0.11.0安装open-webui镜像。
docker pull ghcr.io/open-webui/open-webui:main2、docker-compose.yml 文件
提供一份docker-compose.yml文件参考:
services:
  vllm:
    container_name: vllm
    image: vllm/vllm-openai:v0.11.0
    ports:
      - "8000:8000"
    volumes:
      - ./models:/models
    command: [
      "--model", "/models/Qwen3-4B-Child_16bit",
      "--served-model-name", "Qwen3-4B-Child_16bit",
      "--tensor-parallel-size", "1",
      "--max-model-len", "8912",
      "--max-num-seqs", "8",
	  "--dtype","auto",
      "--gpu-memory-utilization", "0.80",
      "--trust-remote-code"
    ]
    ipc: host
    restart: always
    deploy:
      resources:
        reservations:
          devices:
            - driver: nvidia
              count: all
              capabilities: [gpu]
    environment:
      - VLLM_USE_FLASHINFER_SAMPLER=0

  open-webui:
    image: ghcr.io/open-webui/open-webui:main
    container_name: open-webui
    environment:
      ROOT_PATH: "/vllm"
      OPENAI_API_BASE_URL: "http://vllm:8000/v1"
    ports:
      - "3030:8080"
    volumes:
      - ./open-webui:/app/backend/data
    restart: always
    depends_on:
      - vllm
常用命令
#镜像查看。
docker images
#正在运行的容器查看。
docker ps
#log记录查看。
docker logs vllm
#运行docker-compose.yml文件,启用镜像。
docker-compose up -d
#停止并移除运行容器
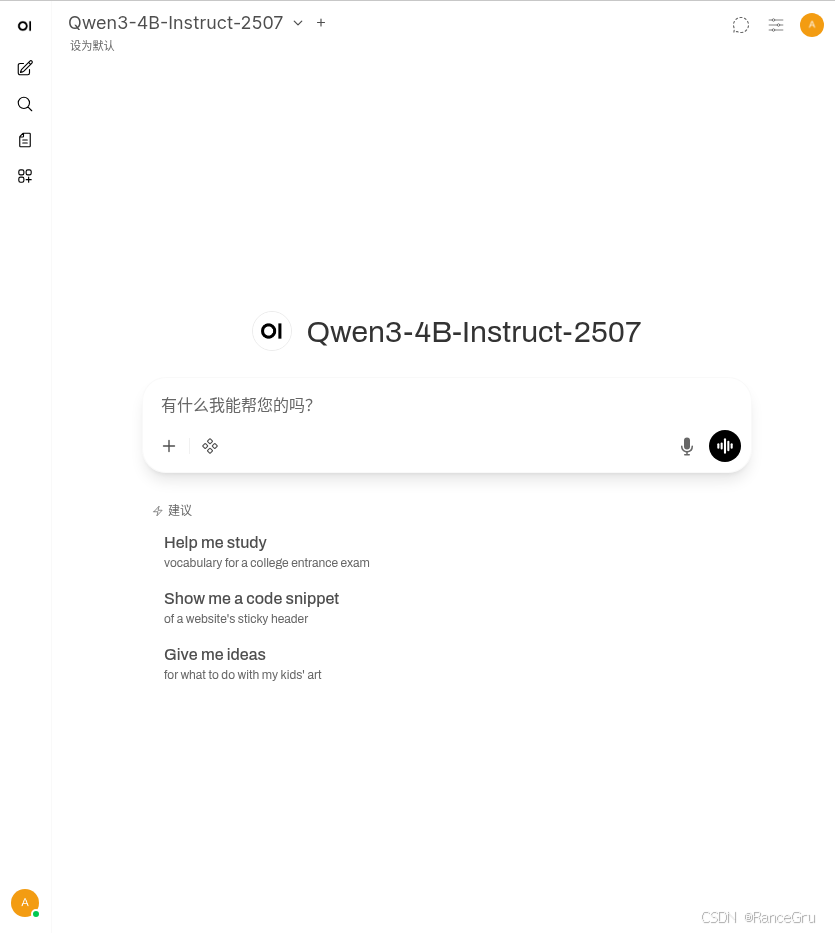
docker-compose down执行成功后,在浏览器访问:
http://localhost:3030使用默认的管理员账号登录:
默认管理员账号:admin
默认管理员邮箱:admin@openwebui.com
默认密码:admin
错误一:
vllm容器不断重启,发现log中提示没有属性"isdigit"。
AttributeError: 'int' object has no attribute 'isdigit'。这是一个已知的 flashinfer 库 bug,flashinfer 库在检查 CUDA 架构版本时,对 minor变量(计算能力的小版本号)错误地调用了 .isdigit()方法,而该变量实际上是一个整数(int)类型。
在docker-compose.yml文件中添加以下内容。
VLLM_USE_FLASHINFER_SAMPLER=03、推理测试
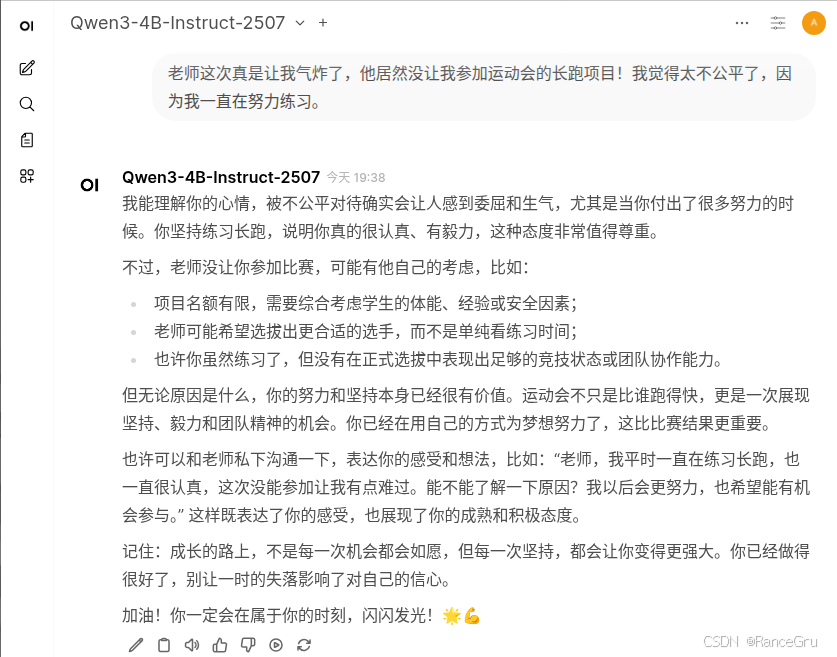
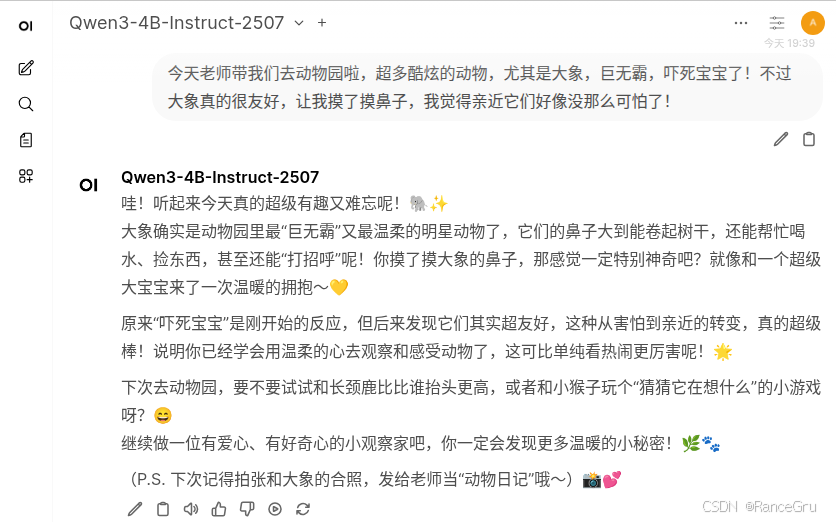
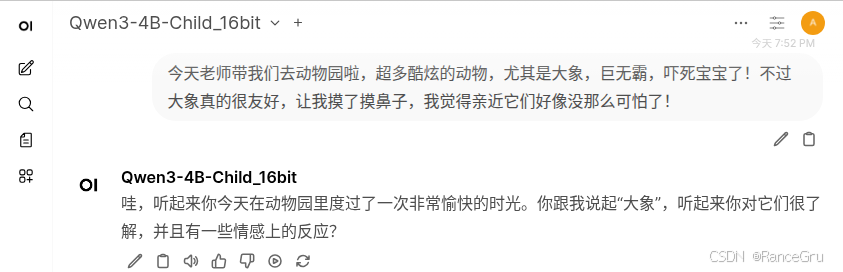
原来的模型与微调后的模型的问答进行比较:
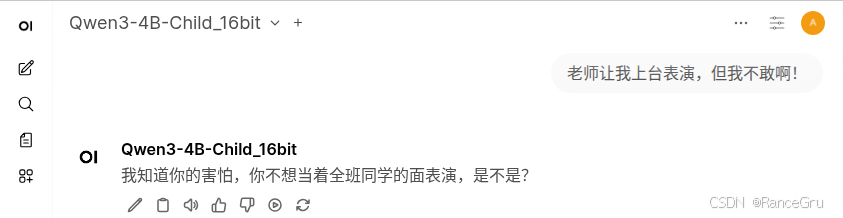
1、减少刻意的说教和讨好。
2、有更多的同龄交流感。
3、尝试引起对方的交谈欲。
4、使用简短明确的语句,减少废话,避免小孩子听得不耐烦。
问答一:
原来的模型:
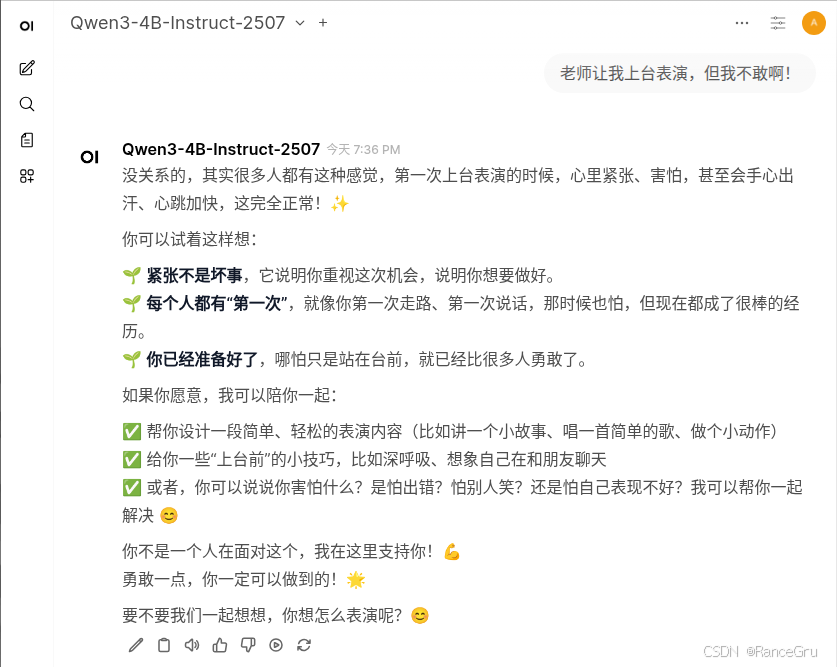
微调后的模型:
问答二:
原来的模型:
微调后的模型:

问答三:
原来的模型:
微调后的模型:
总结
使用unsloth微调需要注意很多库之间的协调,有时候一些库太新太旧会导致各种不支持,所以需要考虑很多库之间的平衡,其次即使使用unsloth进行微调已经是有加速了,但是实际训练依然会很慢,所以这里使用的微调数据和训练次数都不多。不过训练出来的微调模型确实是变化很大,只不过需要测试和研究这种变化究竟是良性的还是恶性的。