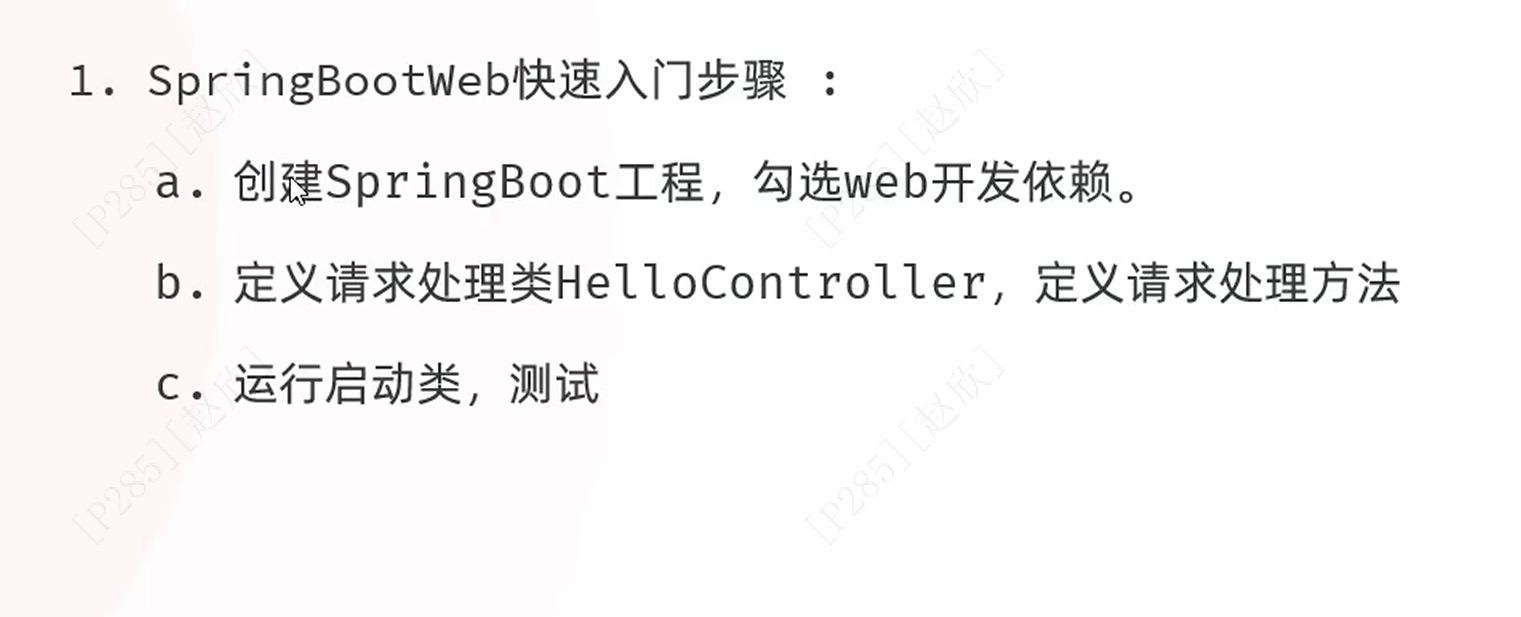
1、概述
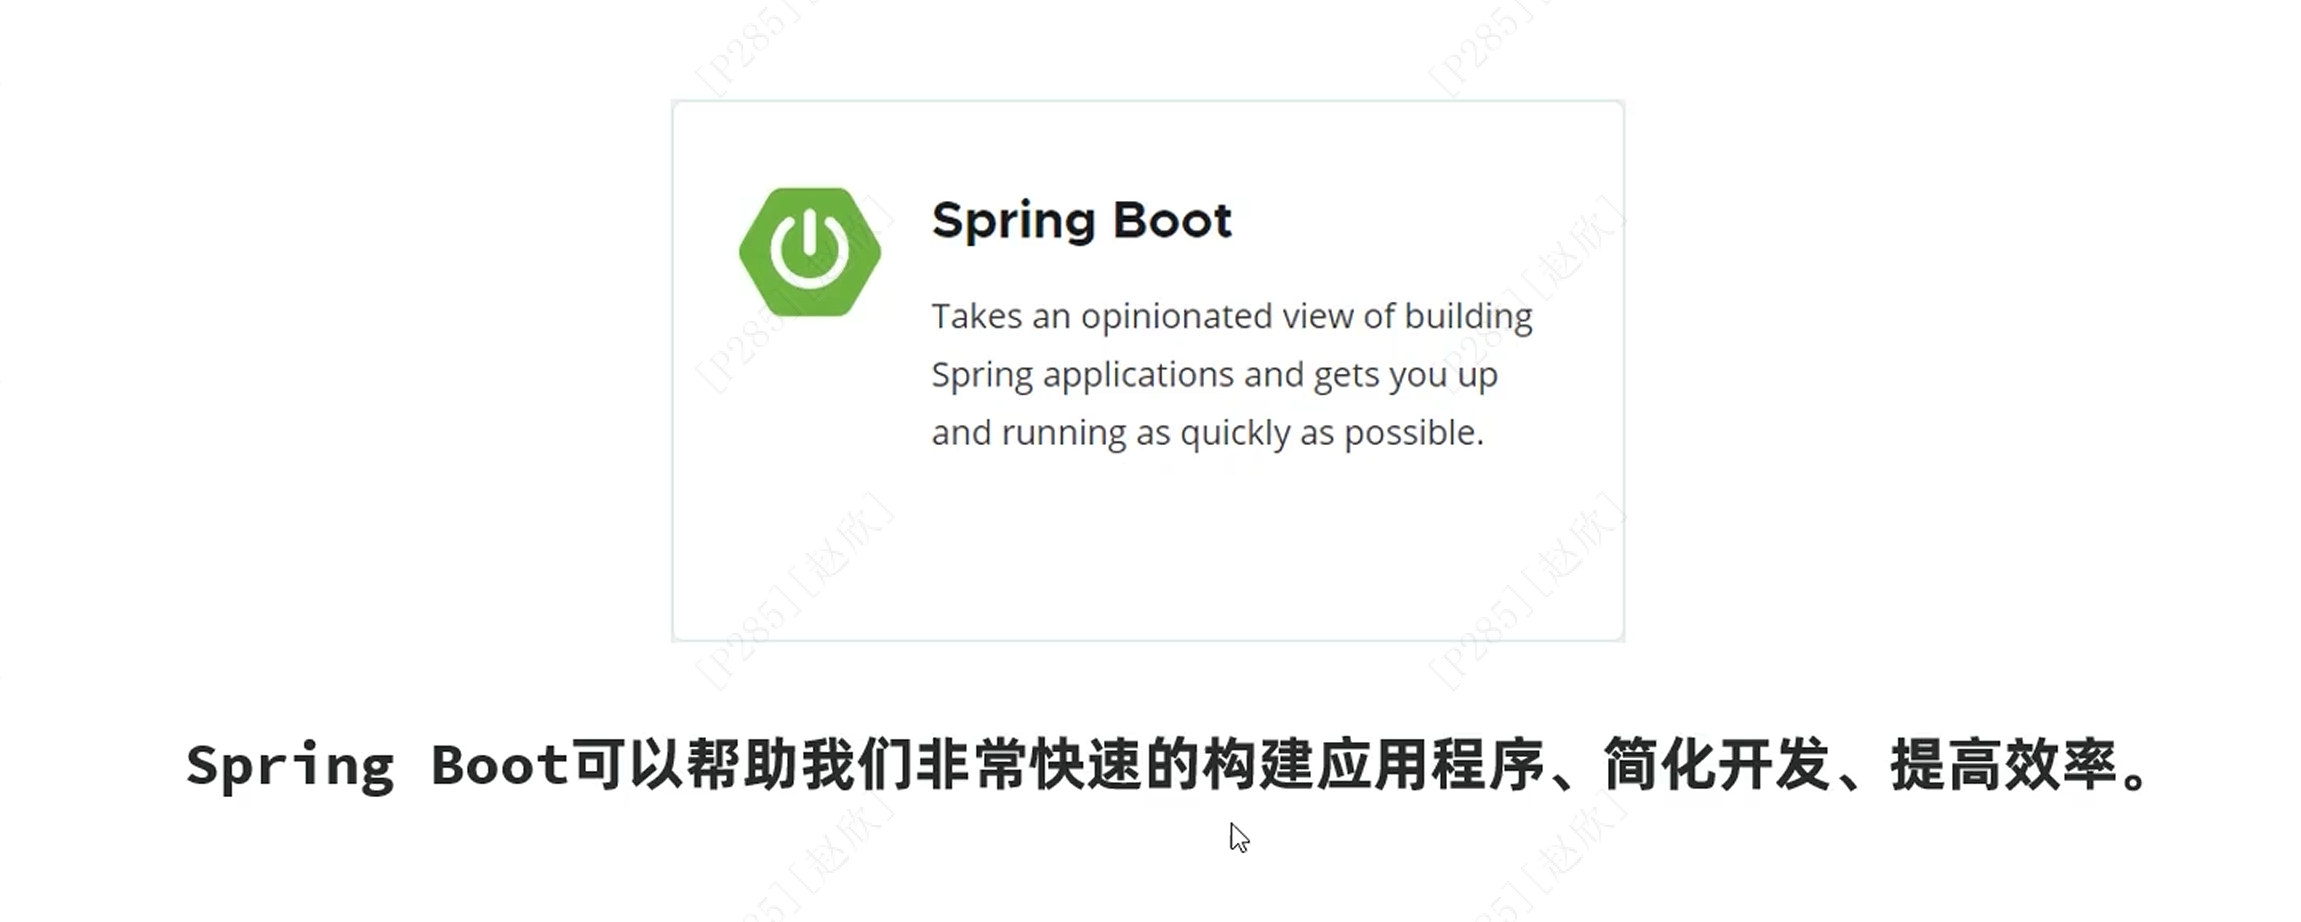
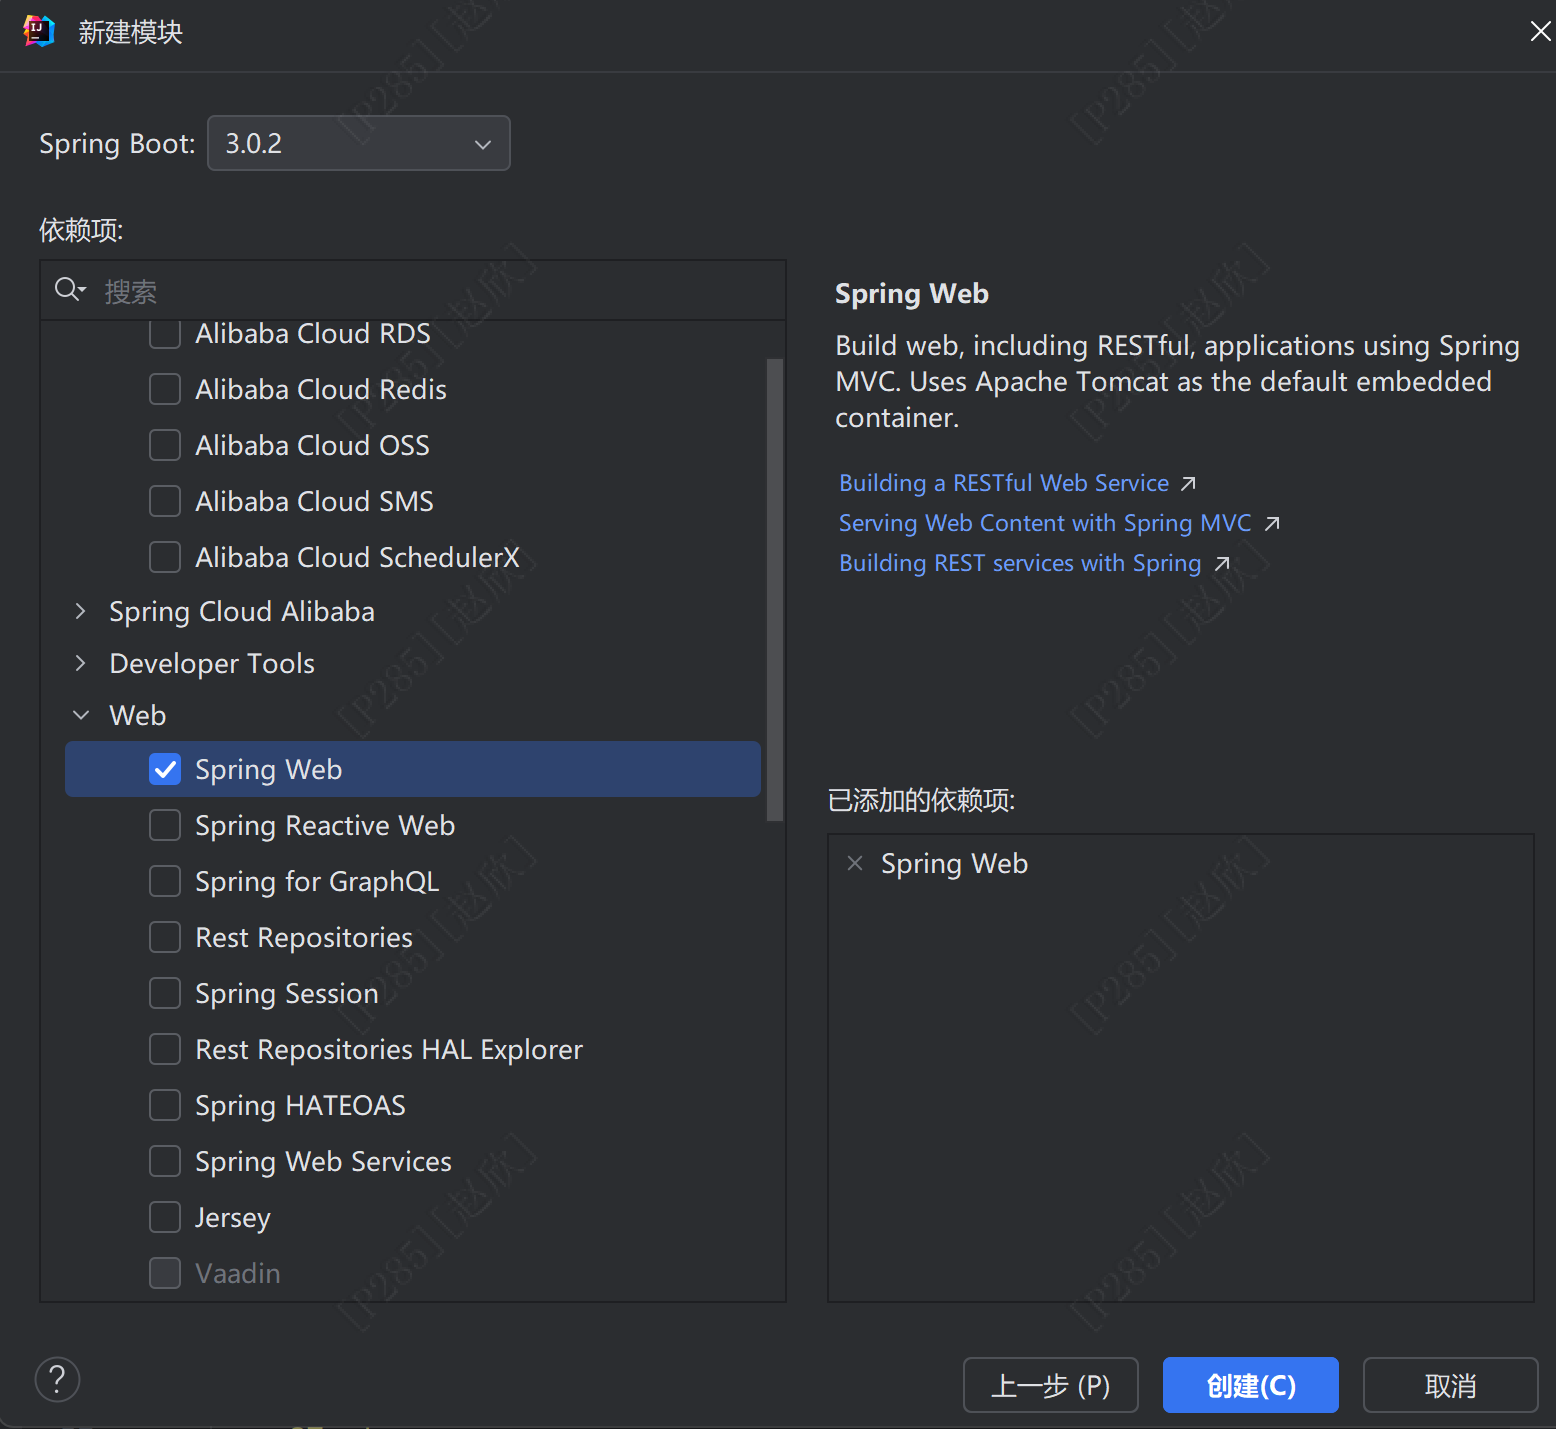
首先选择项目右键新建模块:Spring Boot
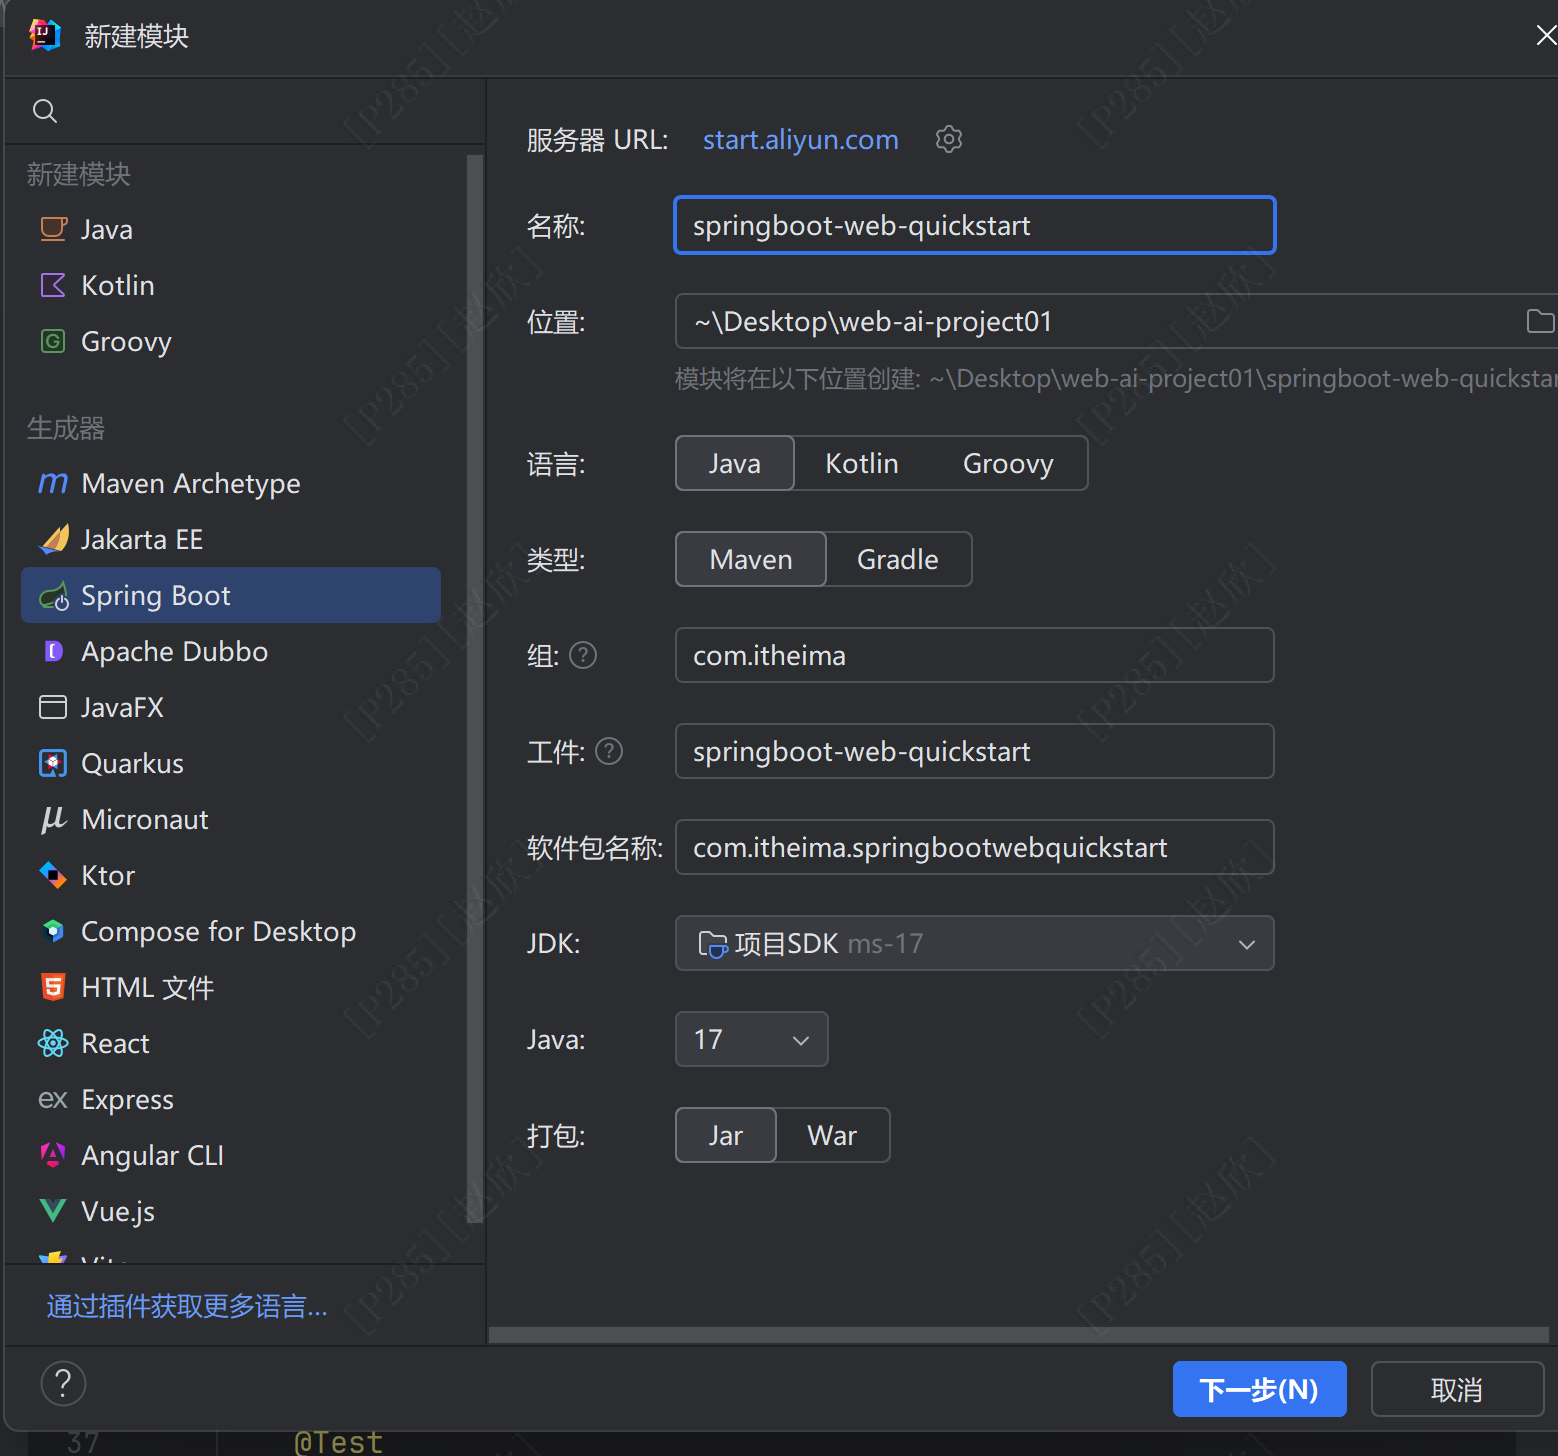
选择3.几的版本就可以!
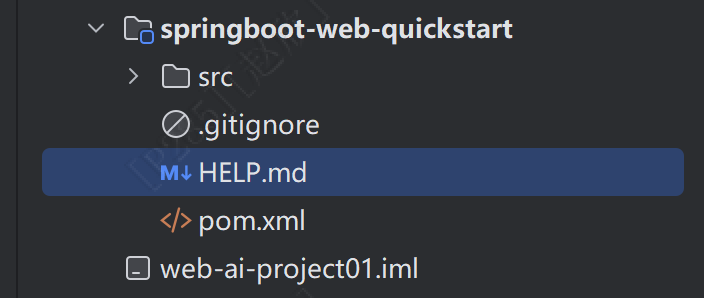
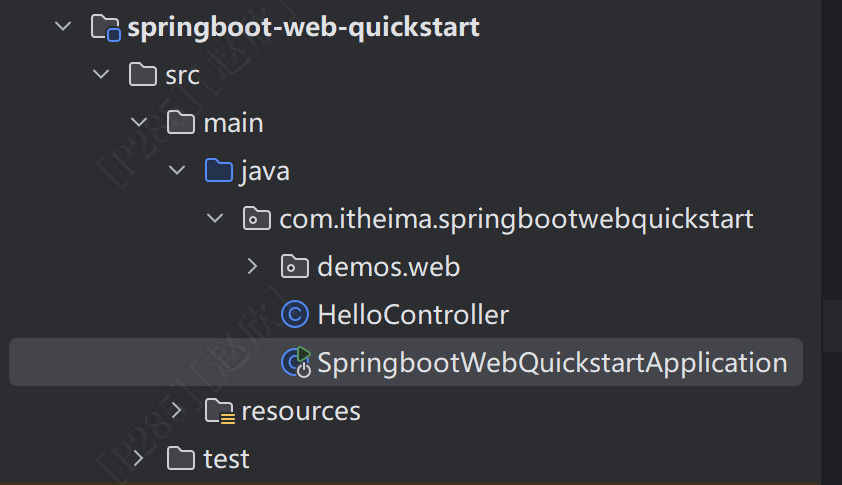
生成如下内容
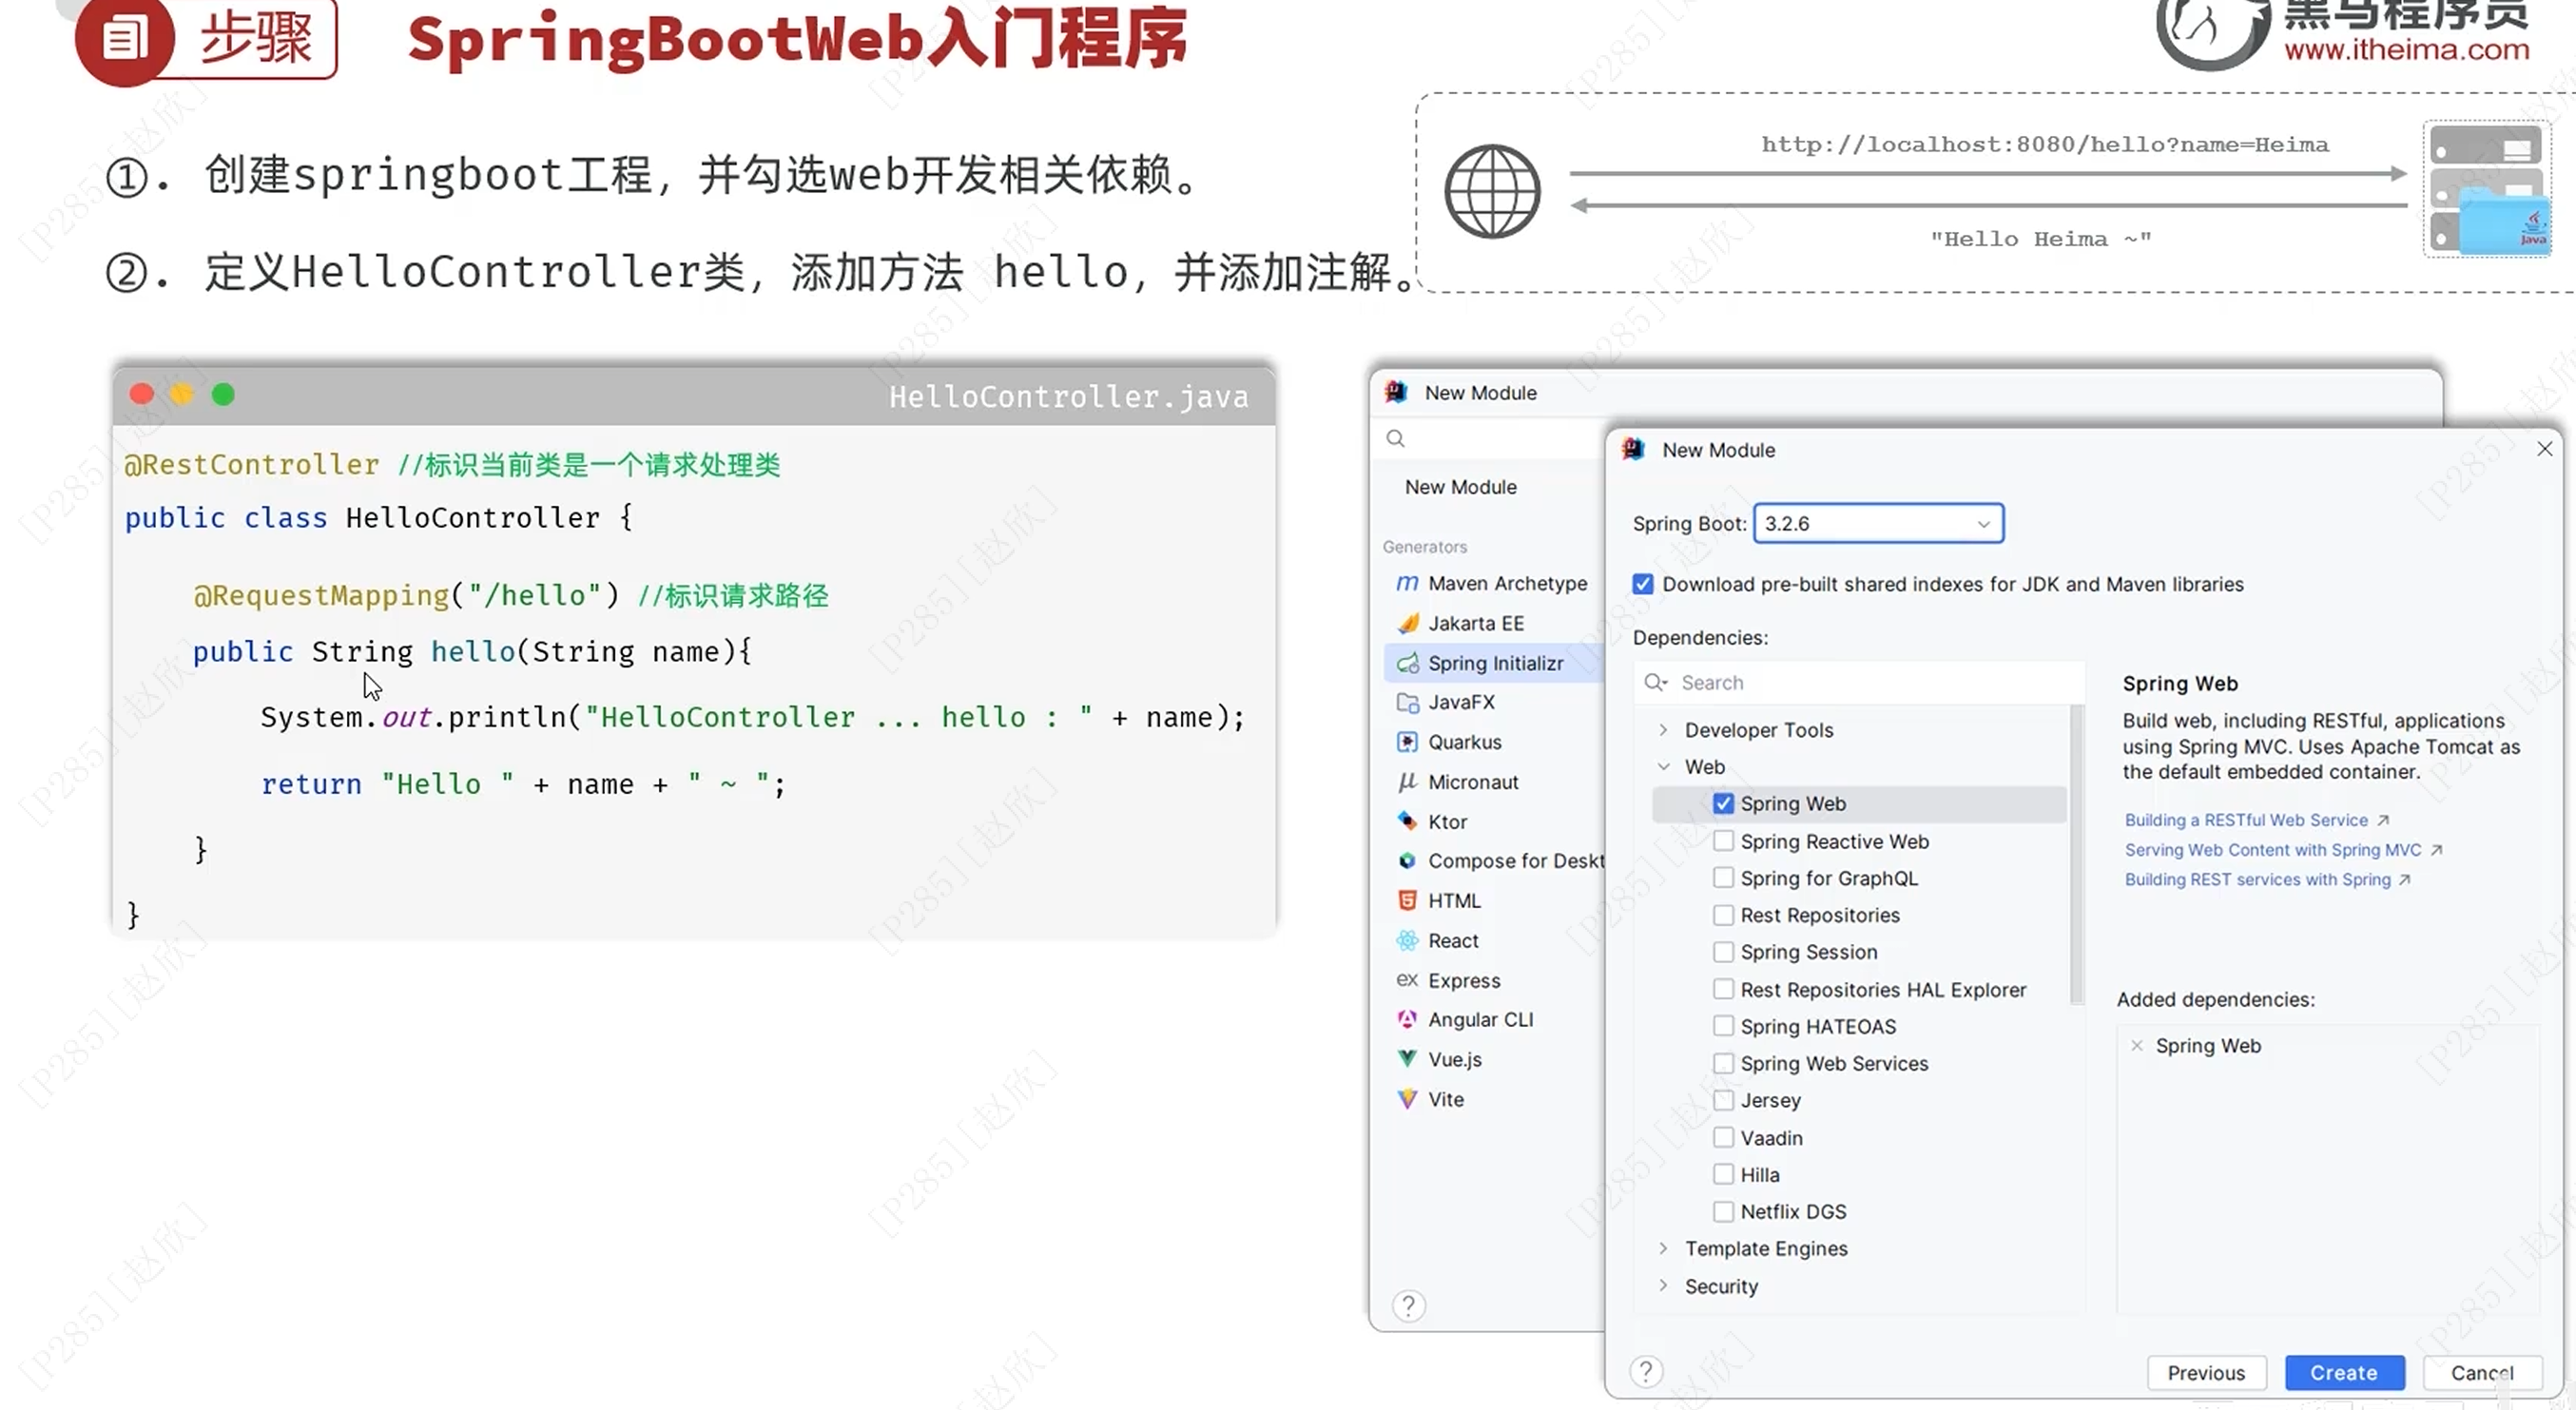
新建一个java类,命名为:HelloController
package com.itheima.springbootwebquickstart;
import org.springframework.web.bind.annotation.RequestMapping;
import org.springframework.web.bind.annotation.RestController;
@RestController
public class HelloController {
@RequestMapping("/hello")
public String hello(String name){
System.out.println("hello!"+name);
return "hello!"+name;
}
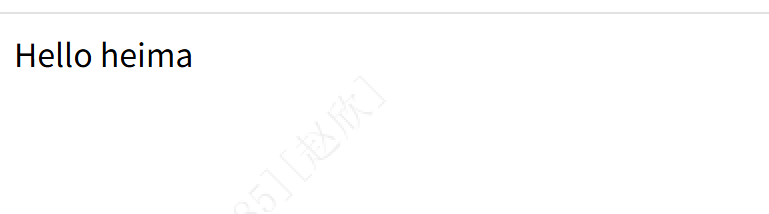
}之后在SpringbootWebQuickstartApplication中启动项目
在浏览器中输入:http://localhost:8080/hello?name=heima
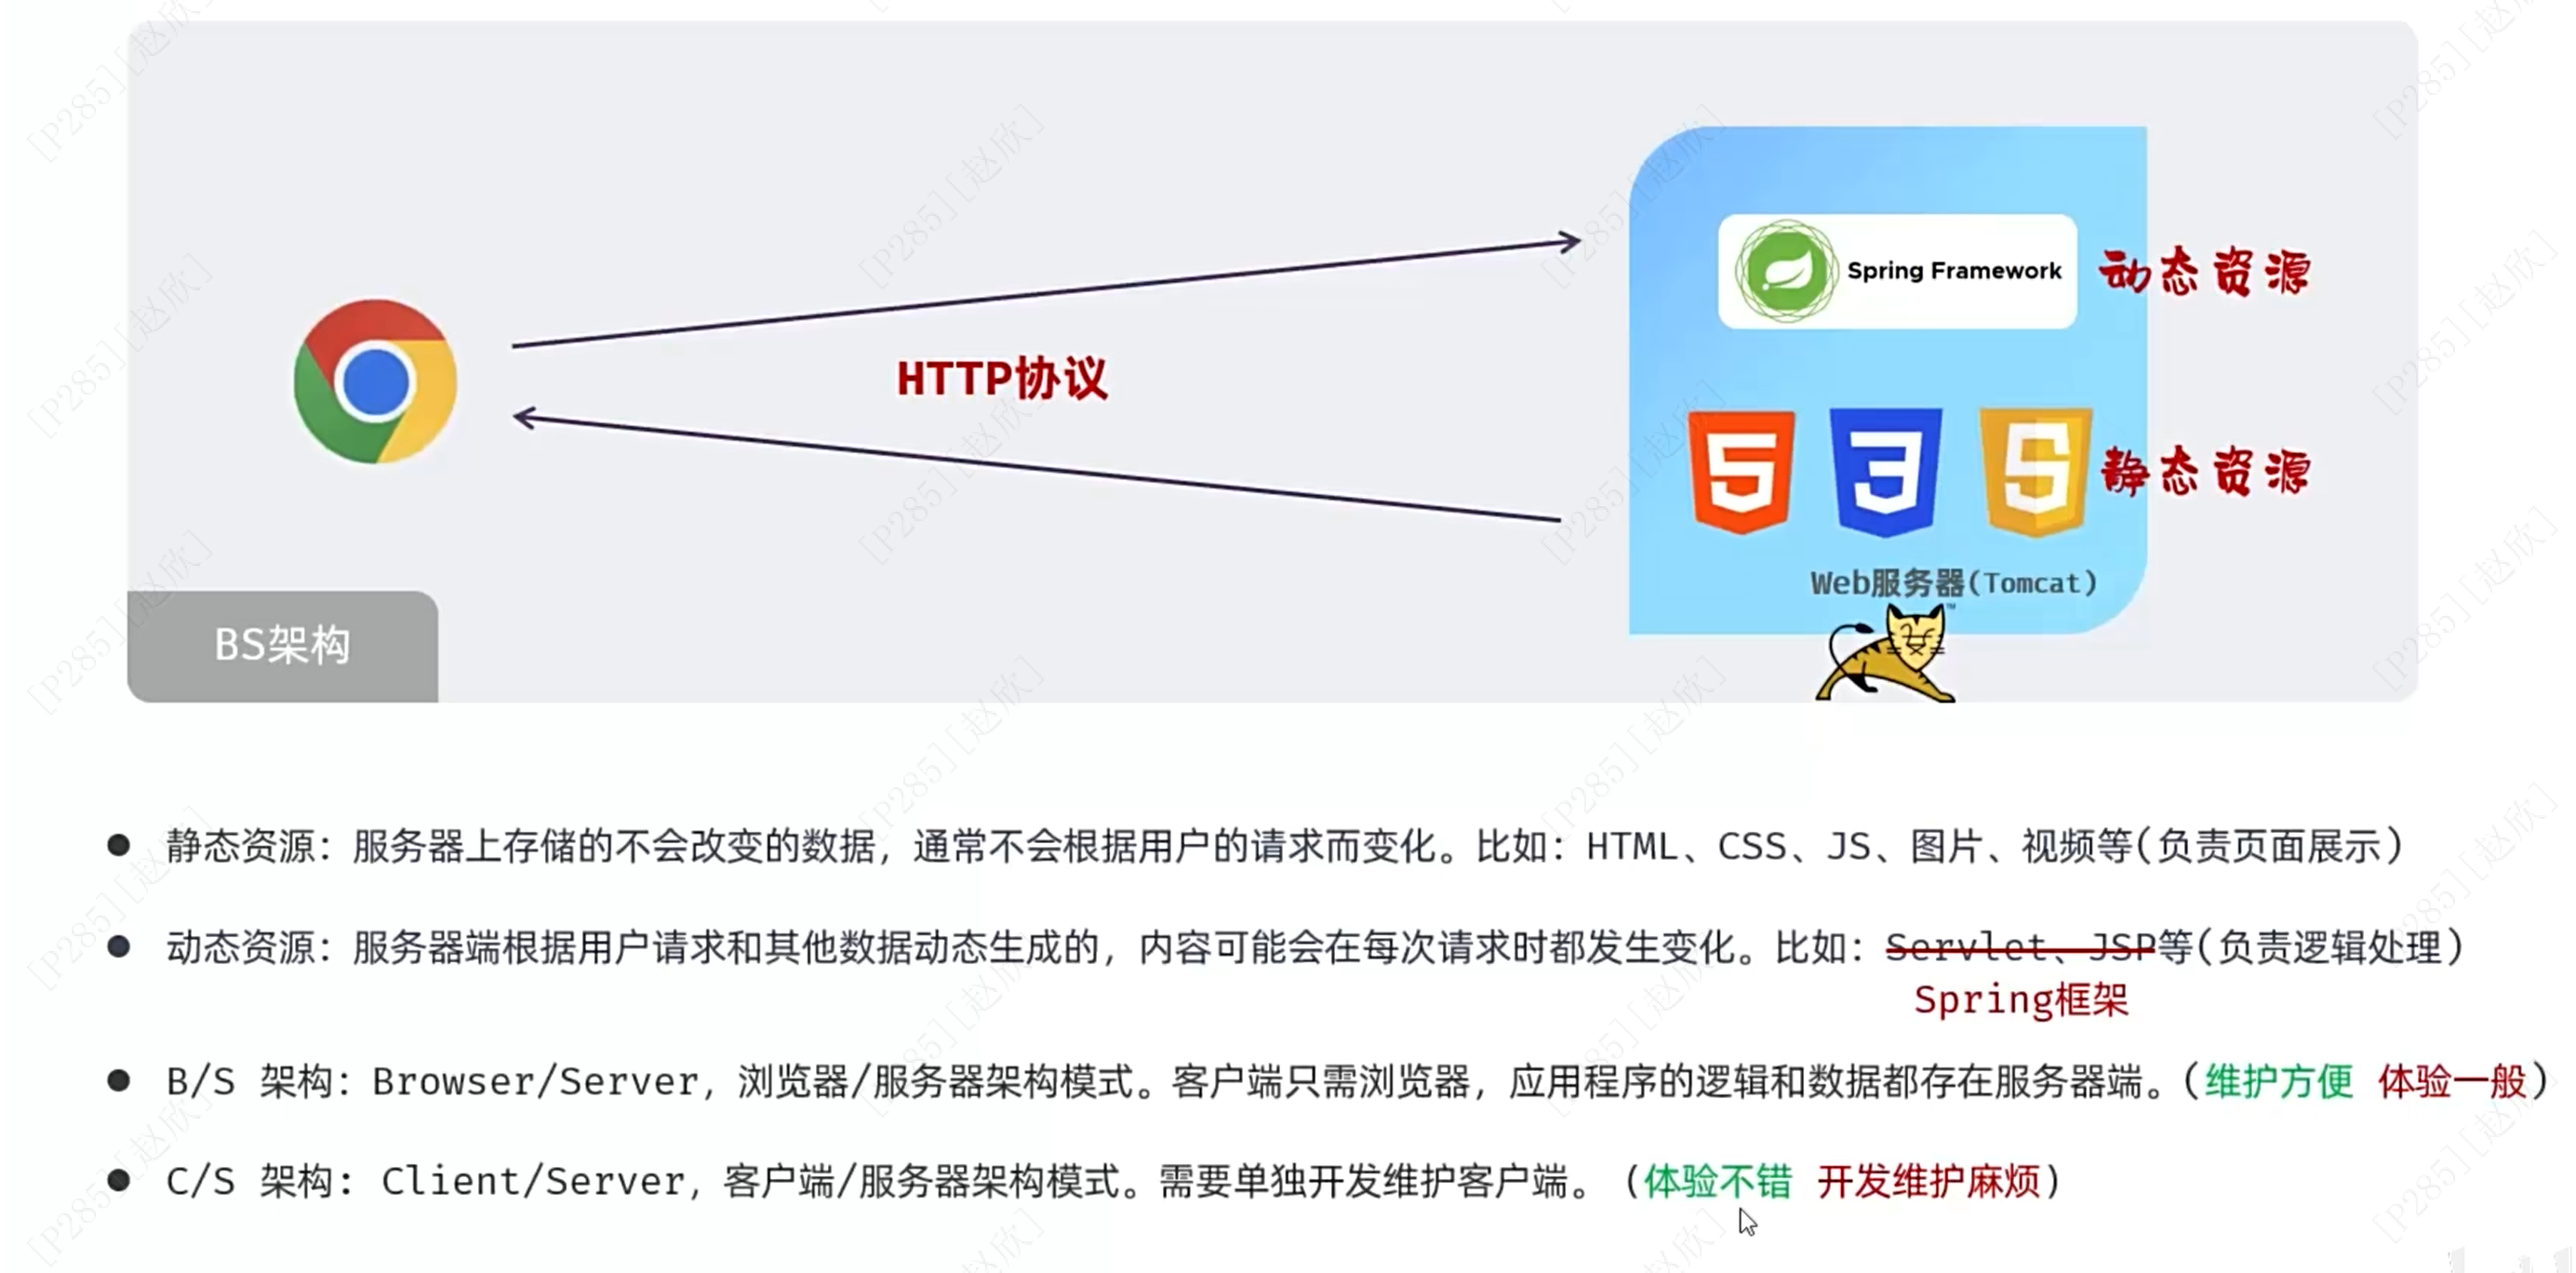
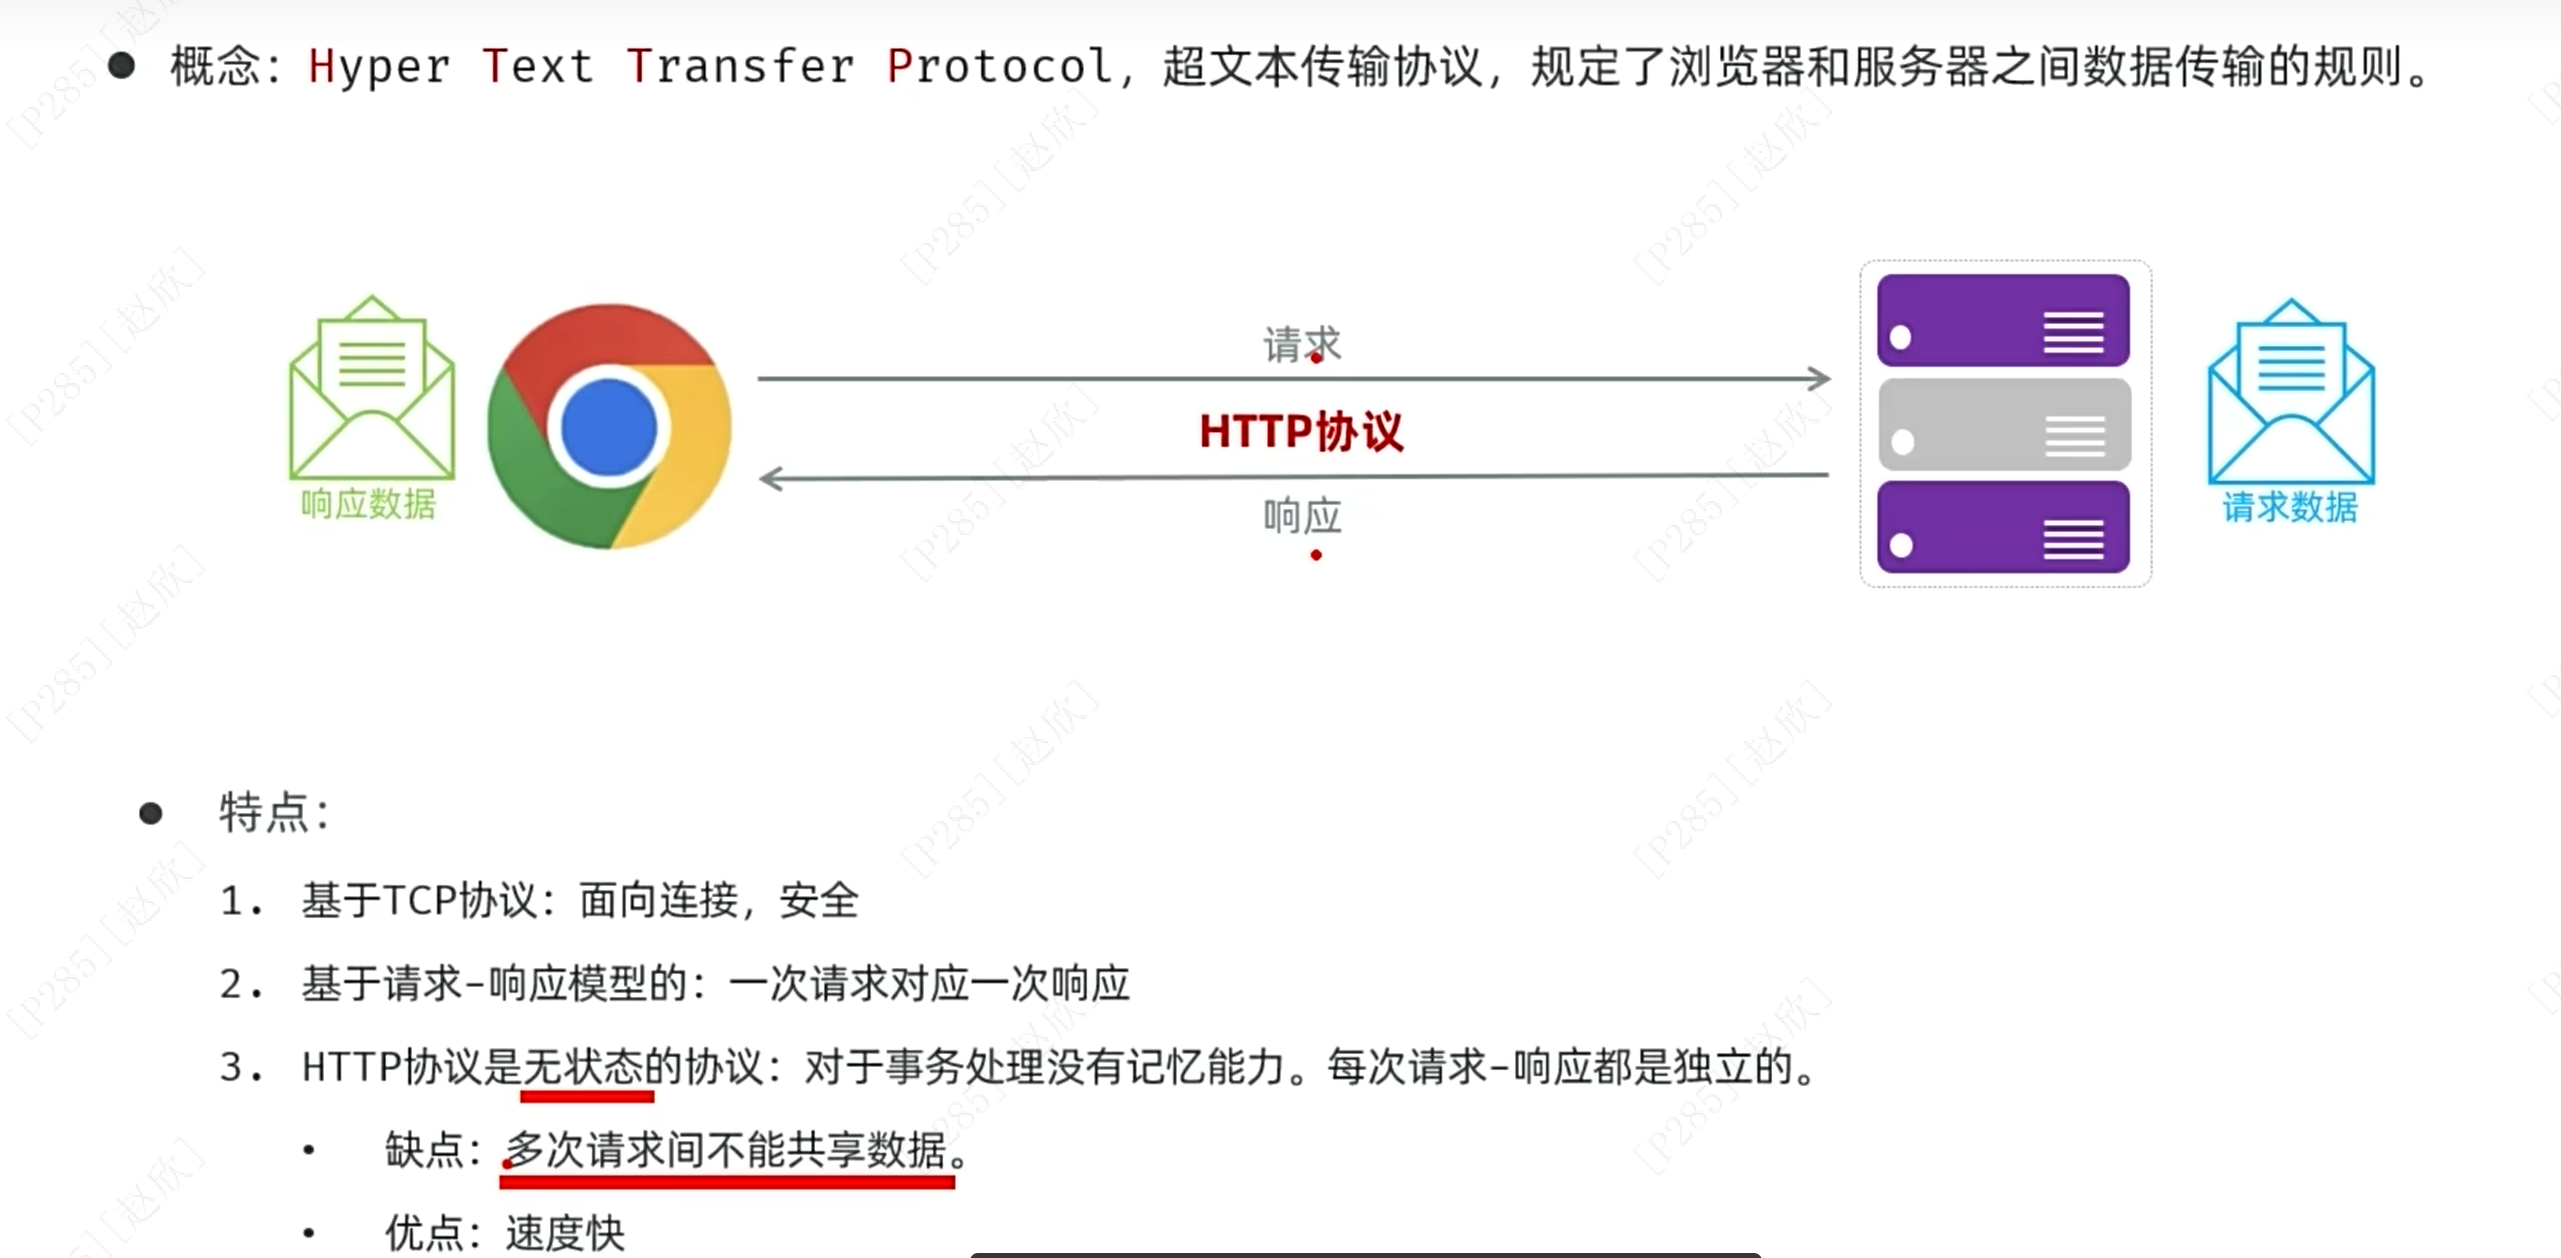
2、http协议
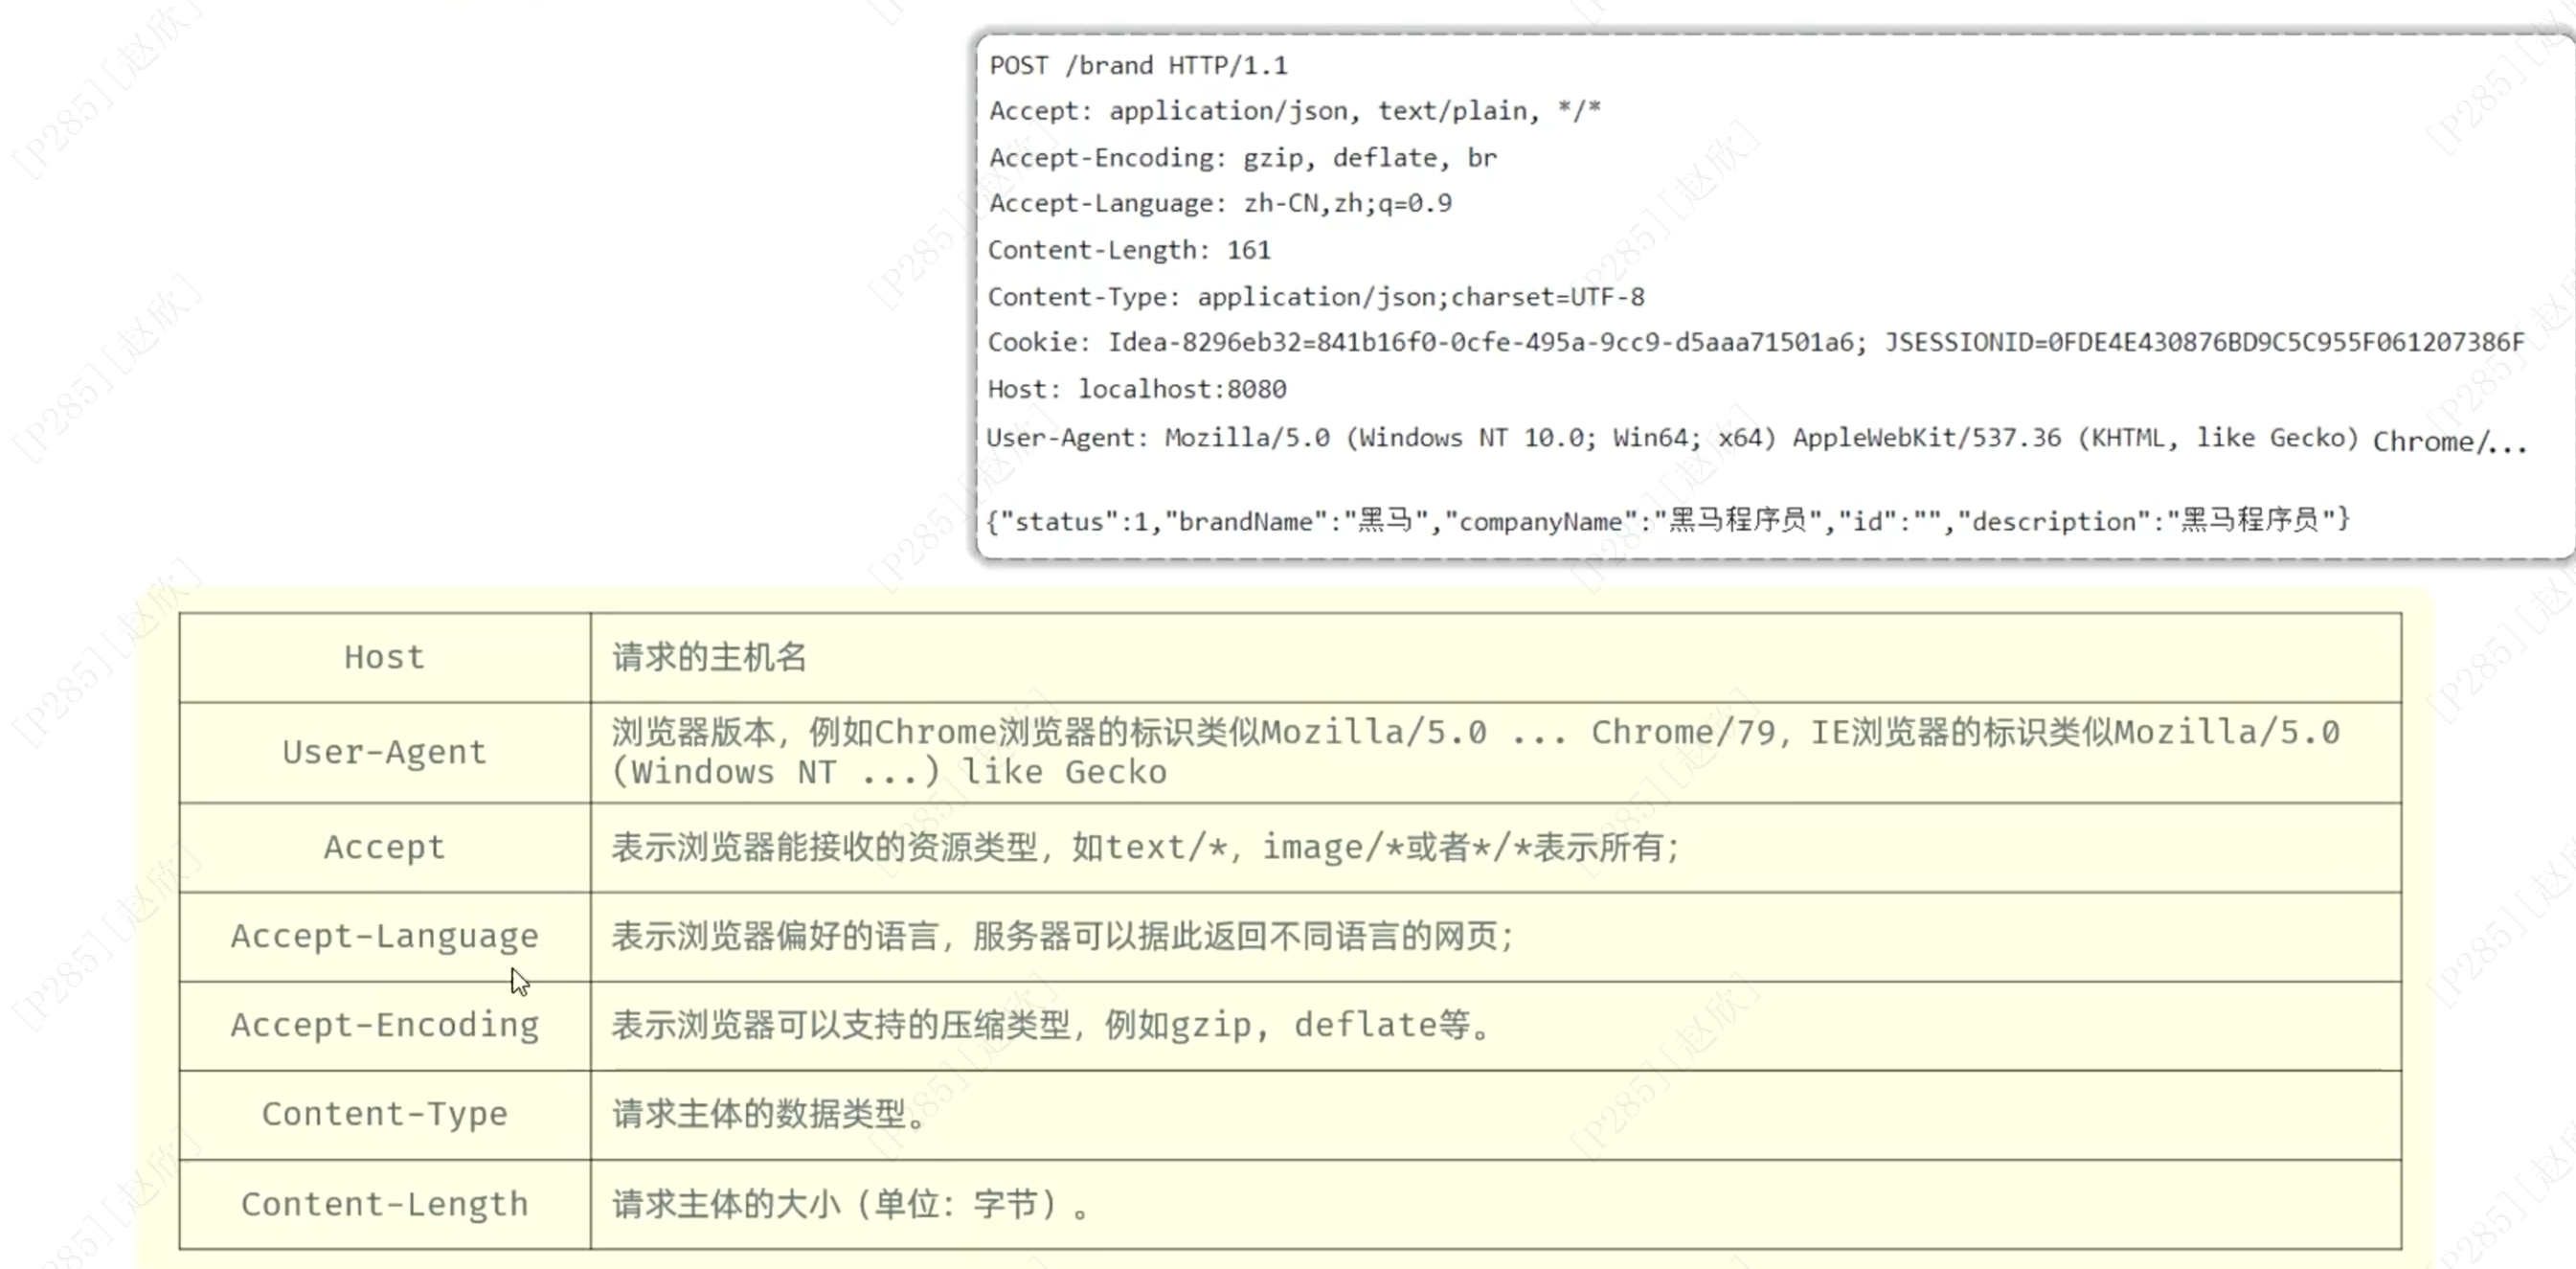
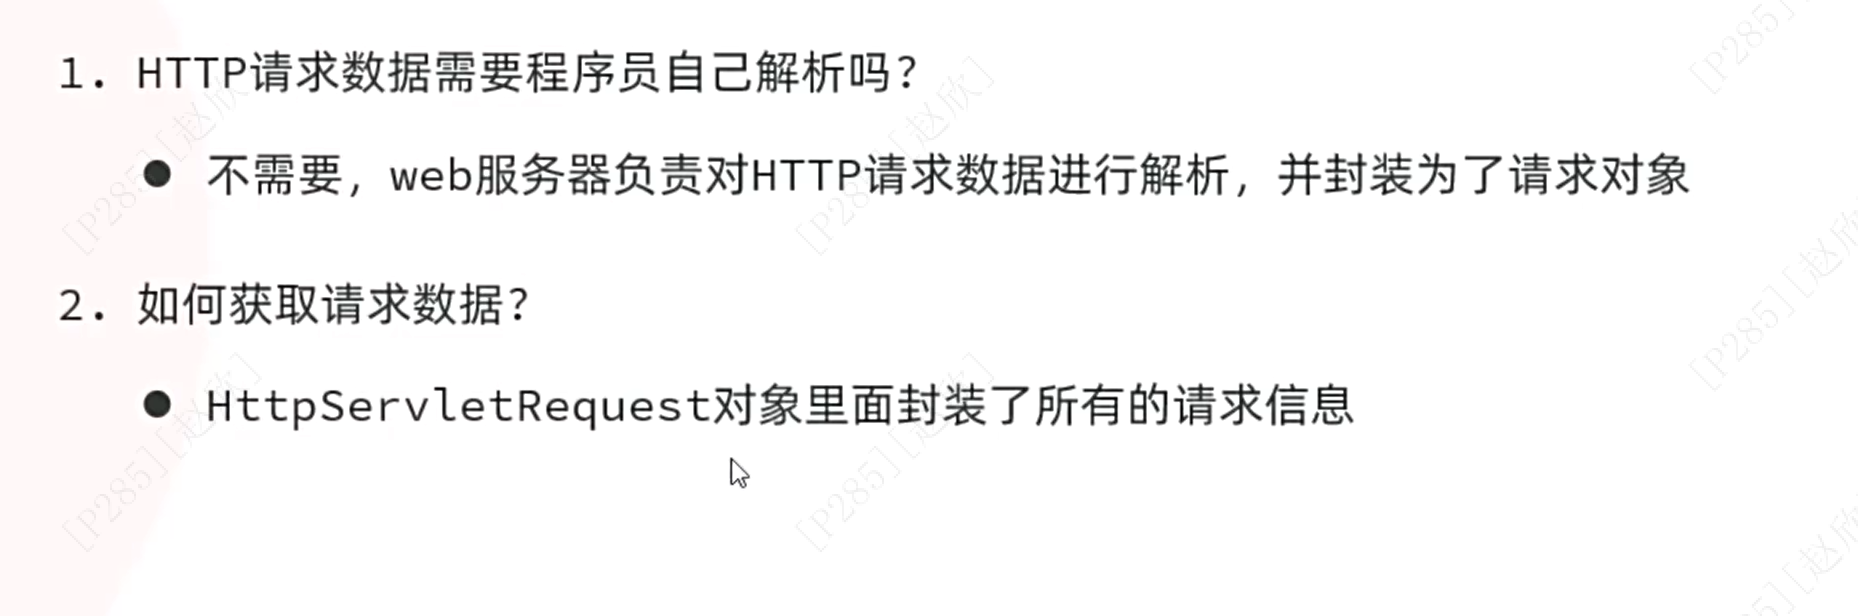
请求数据格式:

新创建一个类:RequestController
package com.itheima.springbootwebquickstart;

import jakarta.servlet.http.HttpServletRequest;
import org.springframework.web.bind.annotation.RequestMapping;
import org.springframework.web.bind.annotation.RestController;

@RestController
public class RequestController {
    @RequestMapping("/request")
    public String request(HttpServletRequest request){
        //获取请求的方式
        String method=request.getMethod();
        System.out.println(method);

        //获取请求的url地址
        String url=request.getRequestURL().toString();
        System.out.println(url);
        //获取请求的资源,即localhost:8080/之后的内容
        String uri=request.getRequestURI();
        System.out.println(uri);

        //获取协议
        String way=request.getProtocol();
        System.out.println(way);

        //获取输入的参数
        String param=request.getParameter("name");
        String para2=request.getParameter("age");
        System.out.println(param);
        System.out.println(para2);

        //获取请求头-Accept
        String header=request.getHeader("Accept");
        System.out.println(header);
        return "ok!";
    }
}在网址中输入:http://localhost:8080/request?name=itheima&age=24
之后在控制台输出:

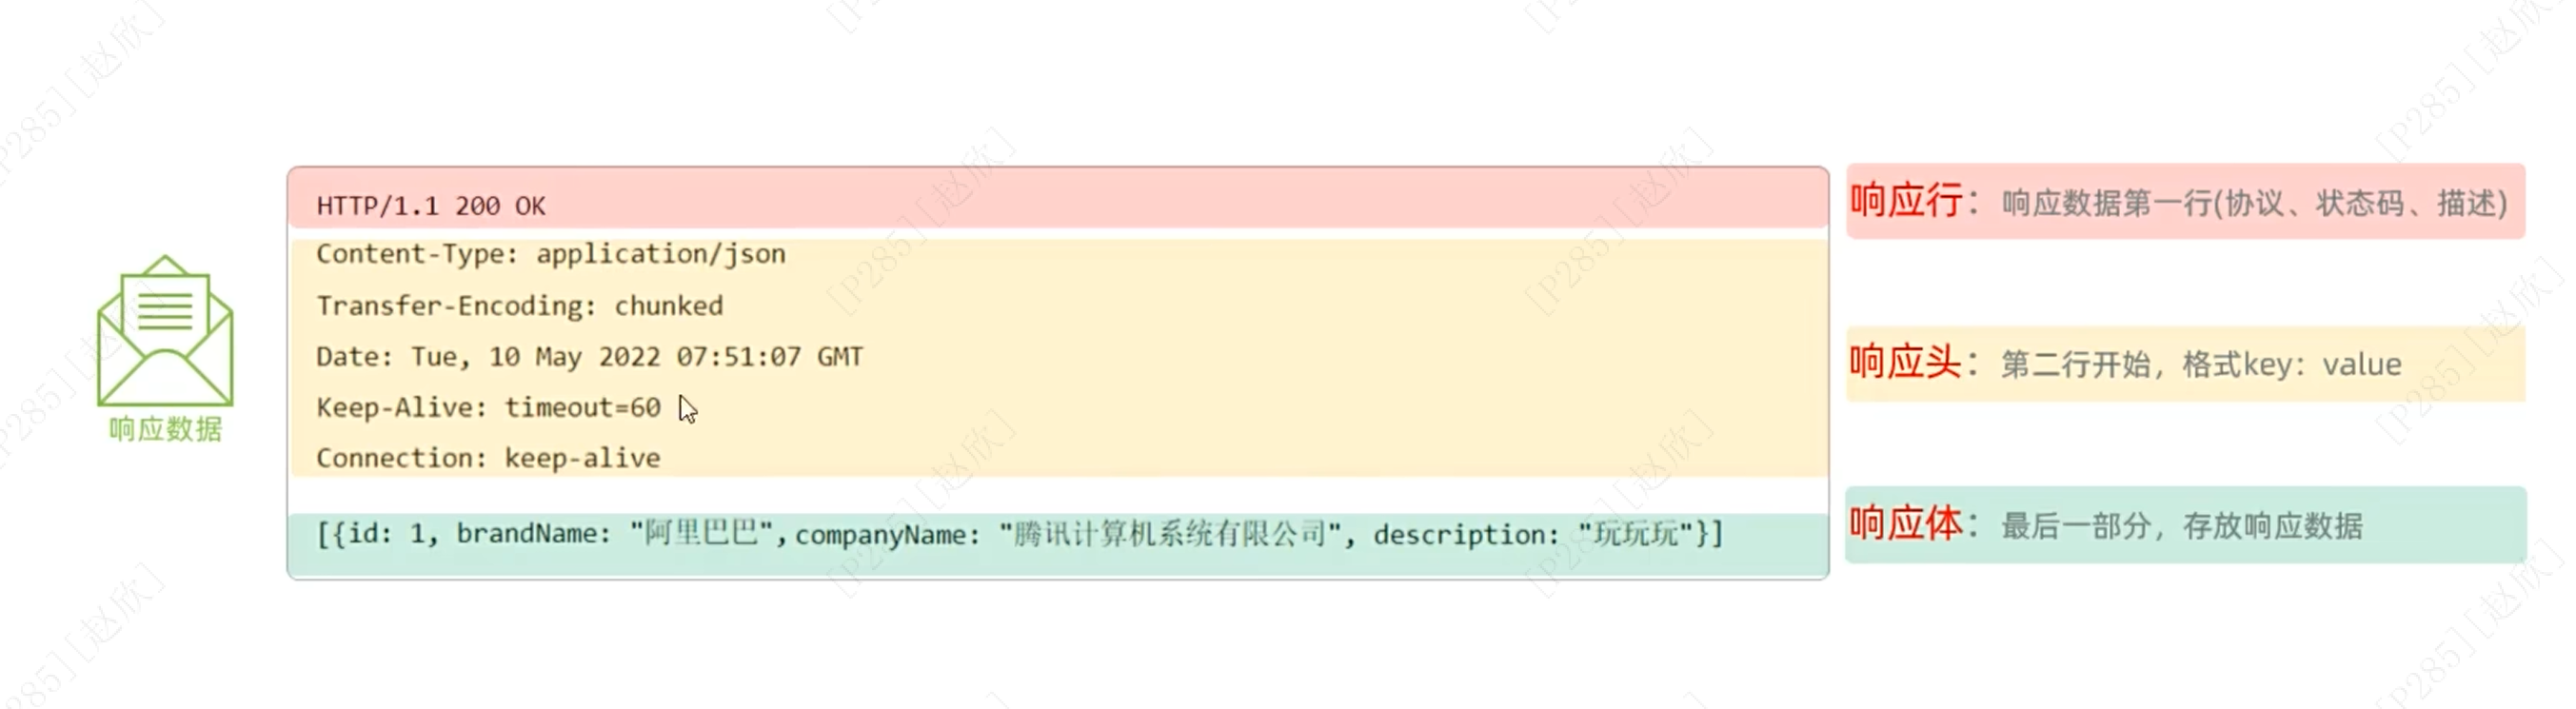
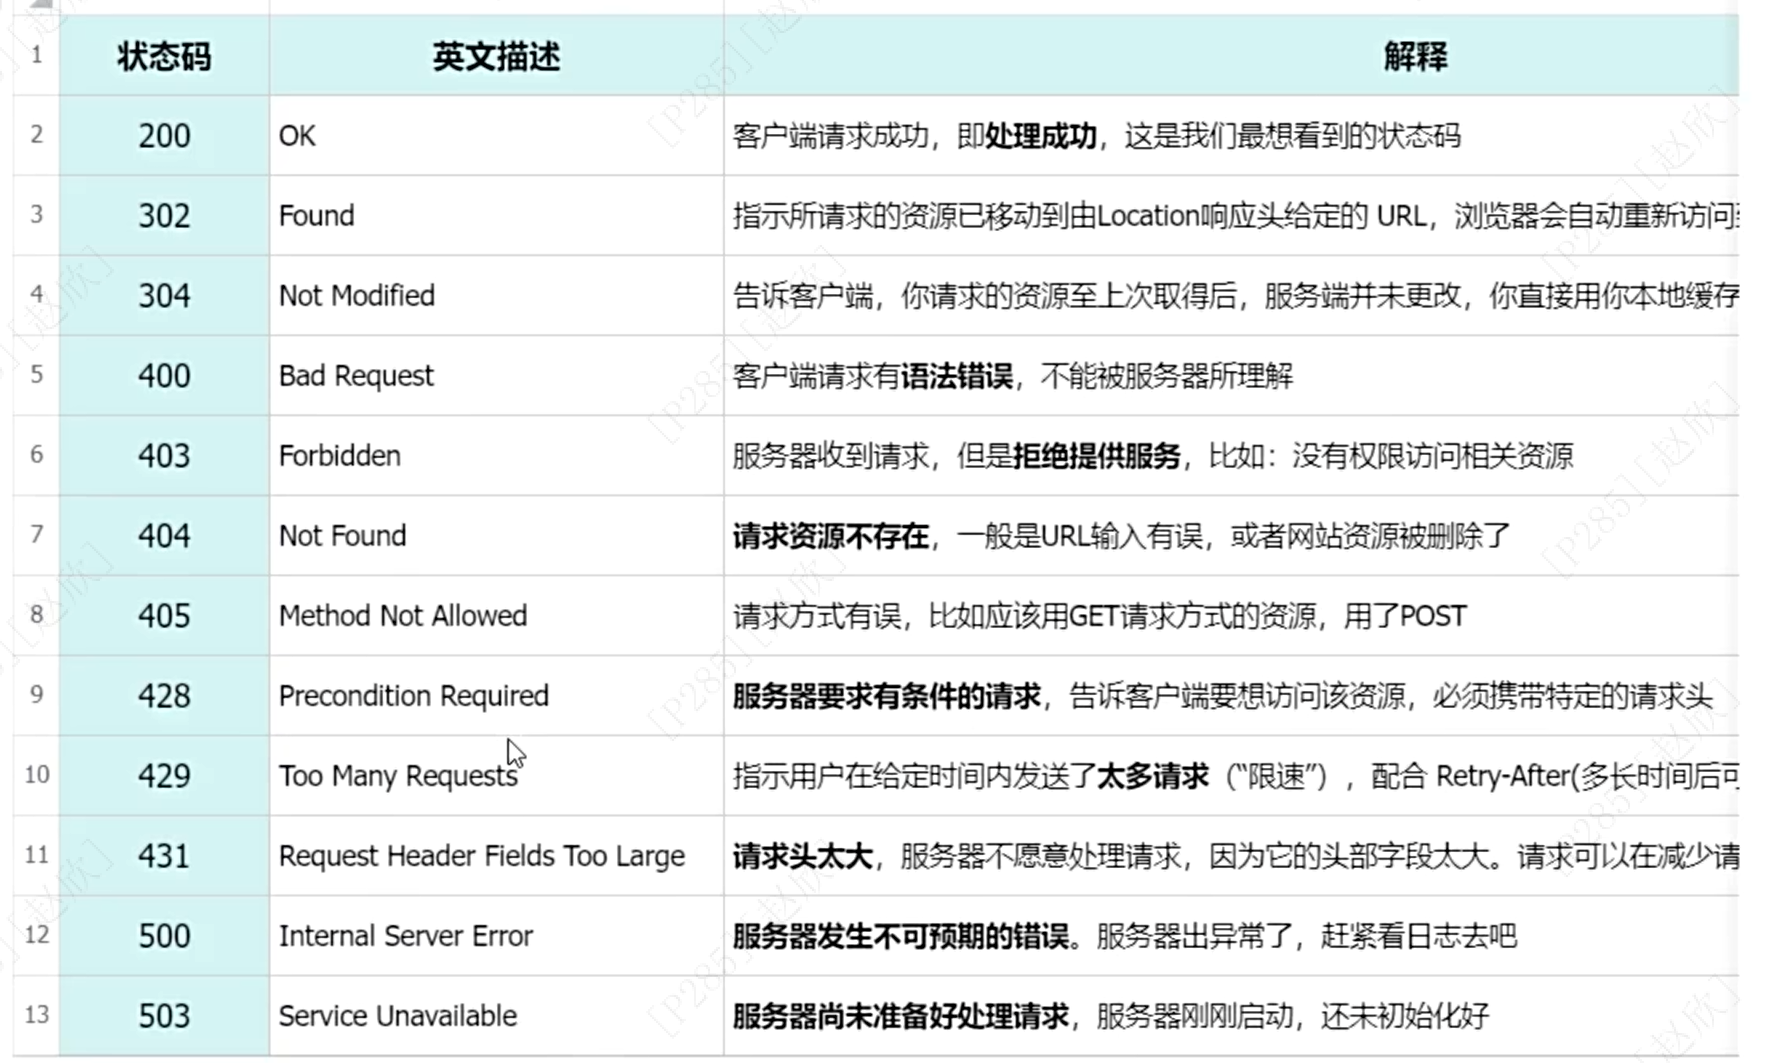
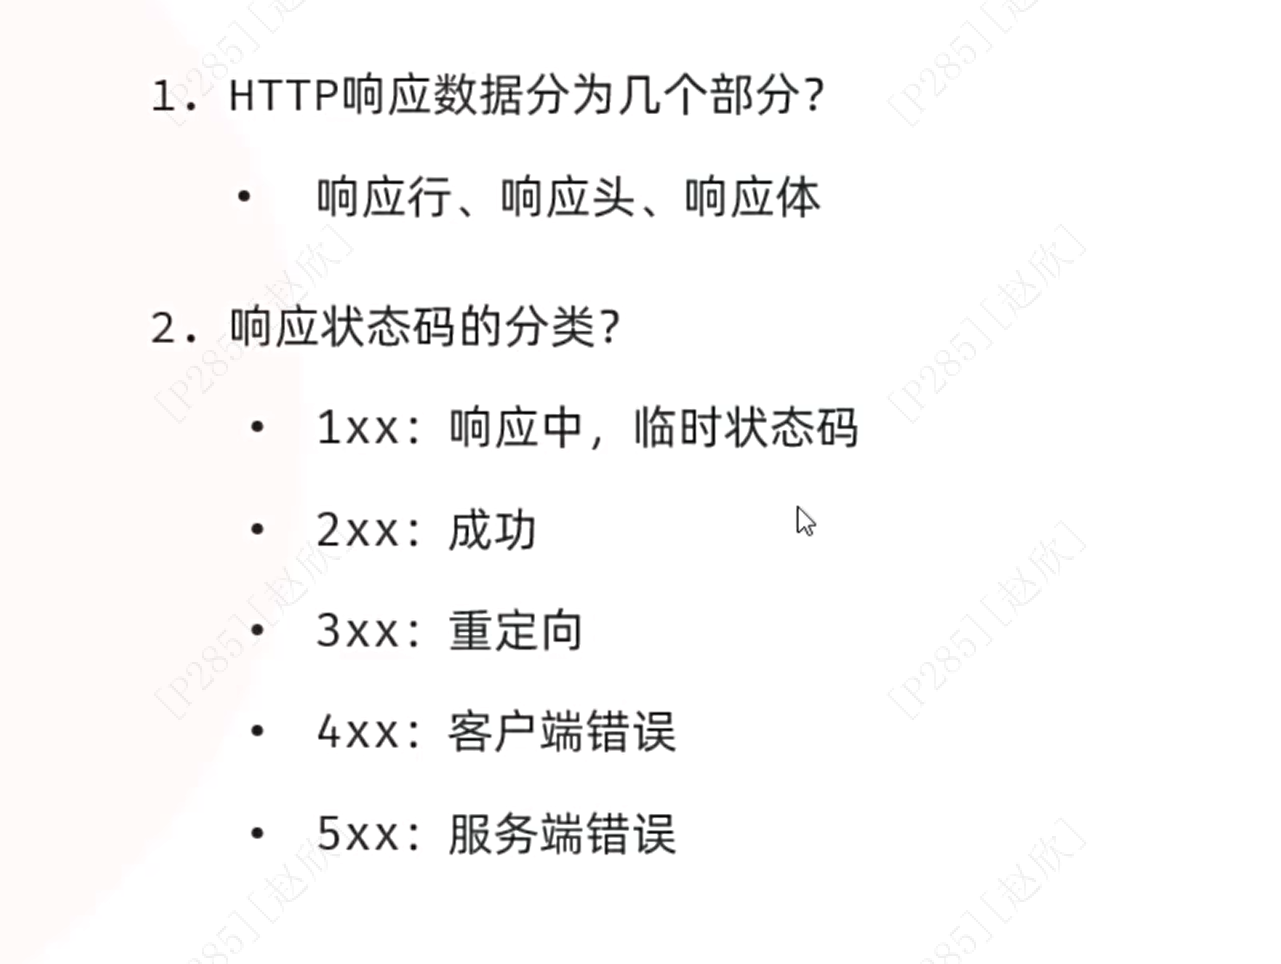
响应数据格式:
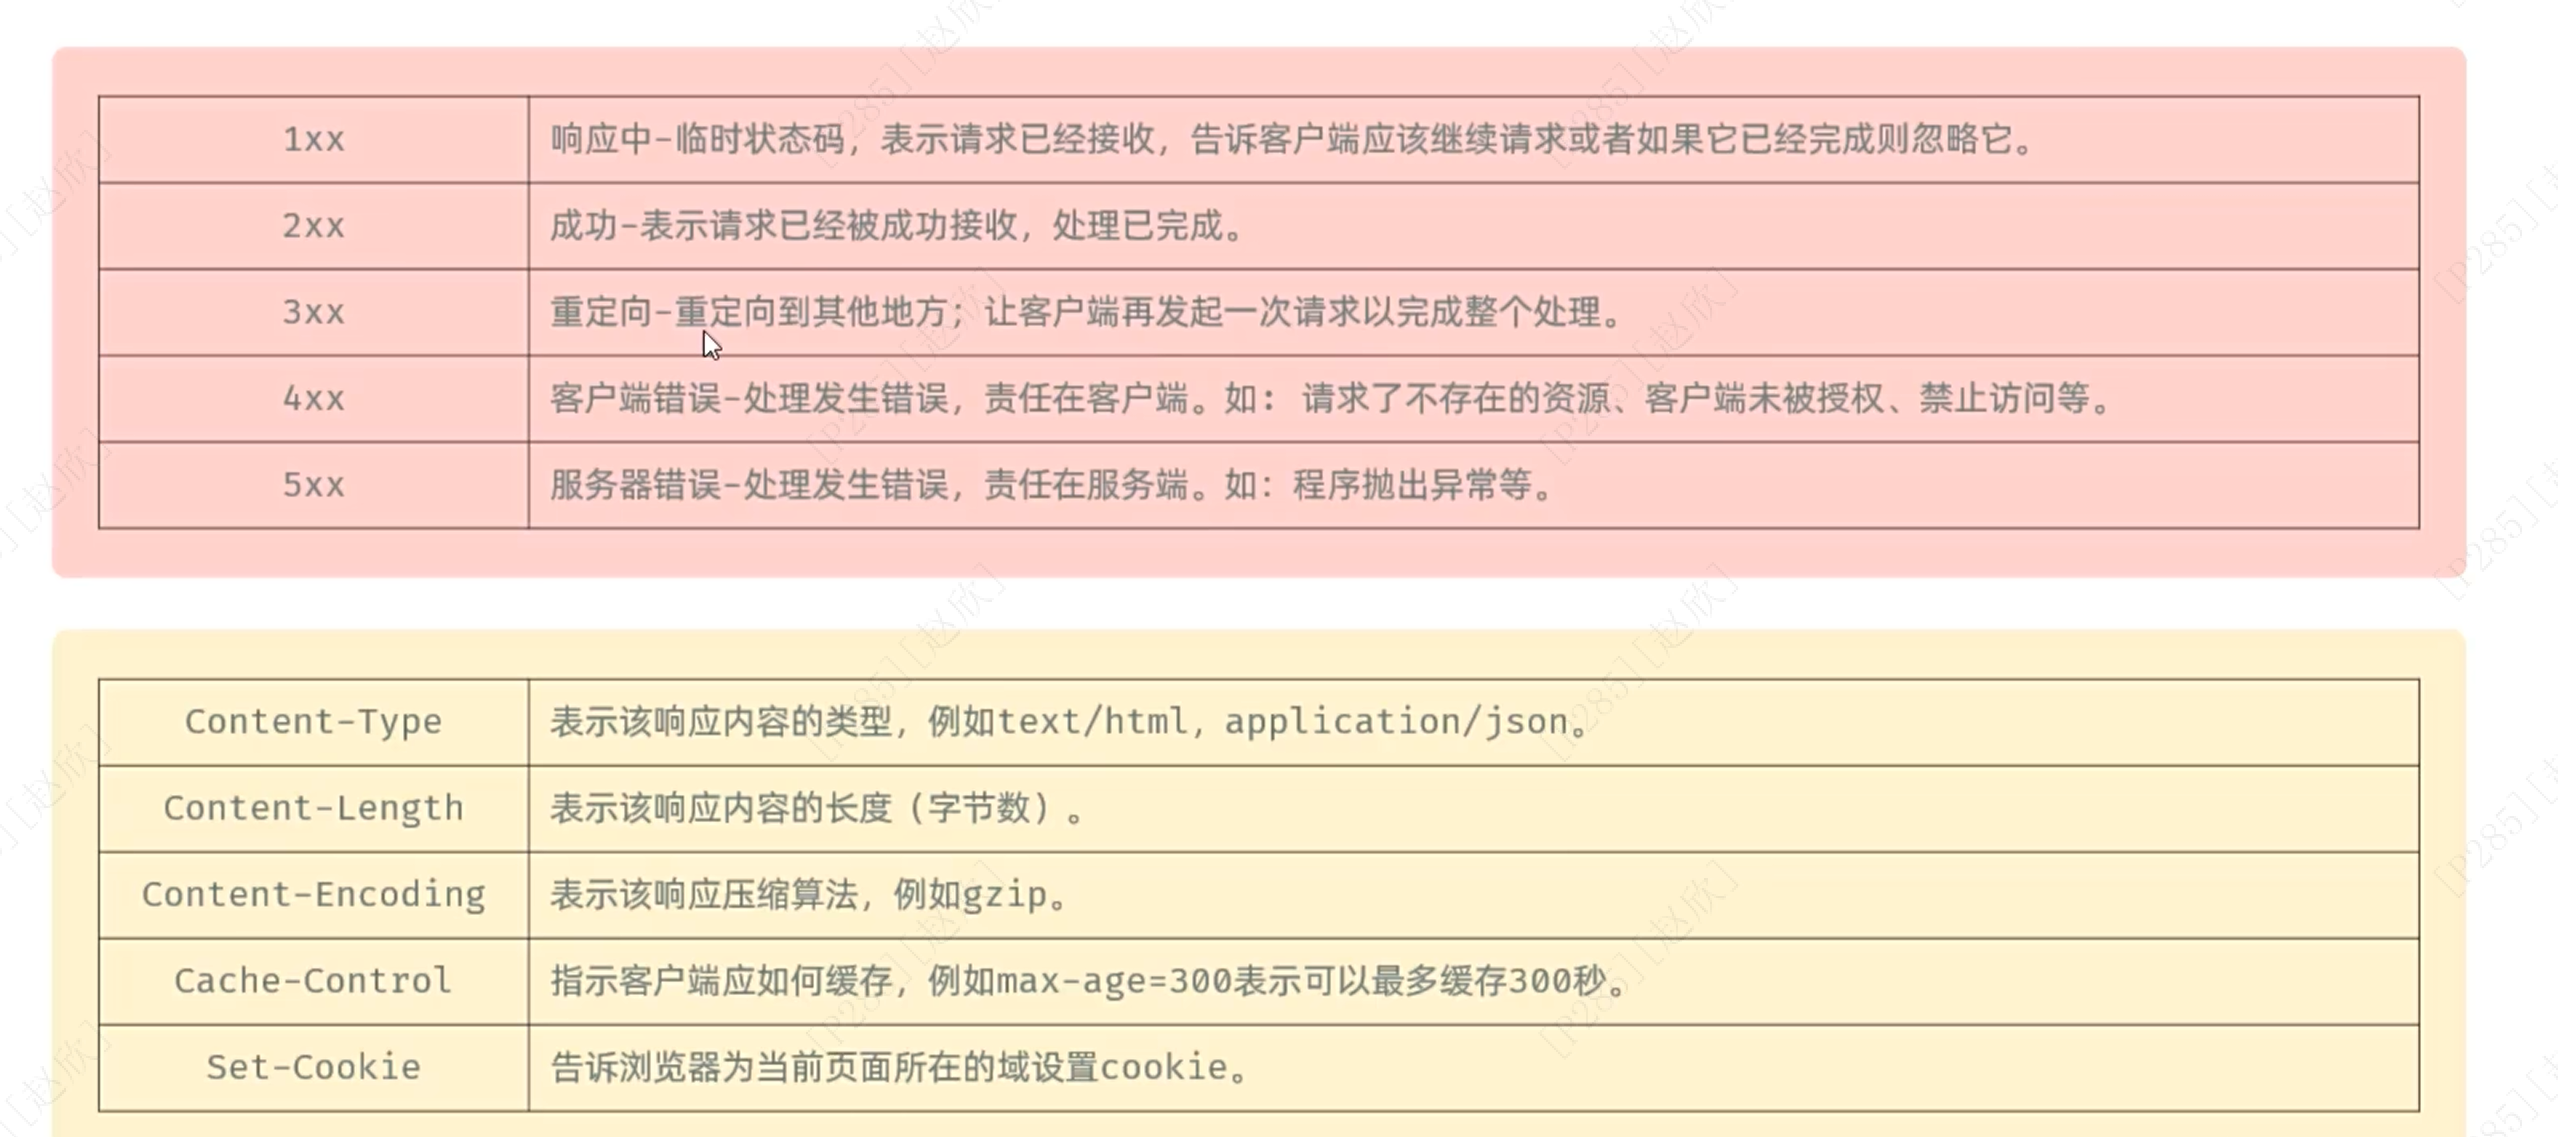
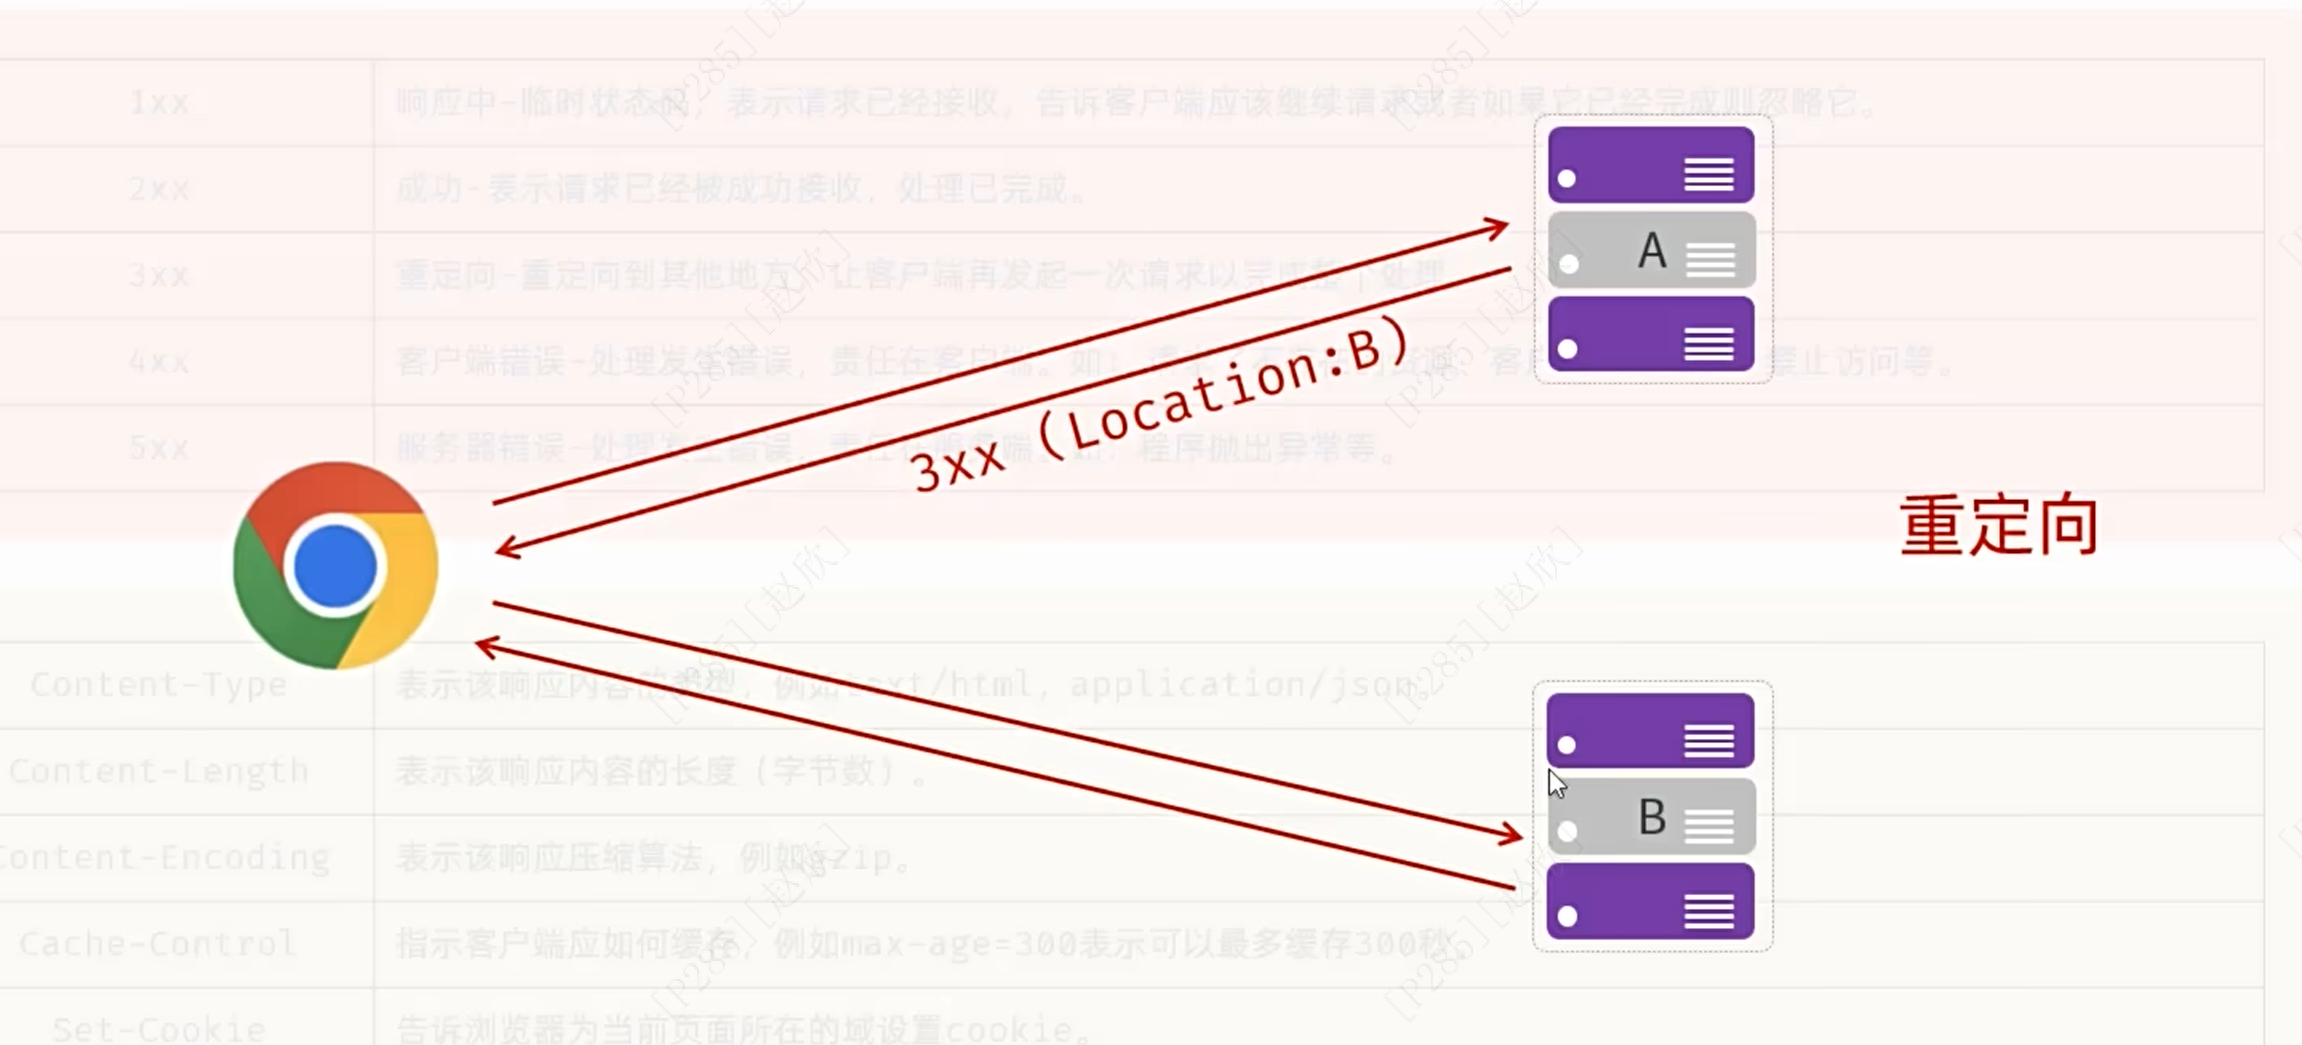
3开头的响应码
重定向:浏览器先发起一次请求给A请求资源------A发现自己没有这个资源因此给浏览器返回3xx以及location的响应头,浏览器收到3xx后就知道要重定向了即要再次重新发送请求给别的,之后看到是B之后向B发起请求,B传回资源
4开头表示资源找不到
5开头表示服务器端(或者是代码本身逻辑有问题)
总结:
设置响应数据:
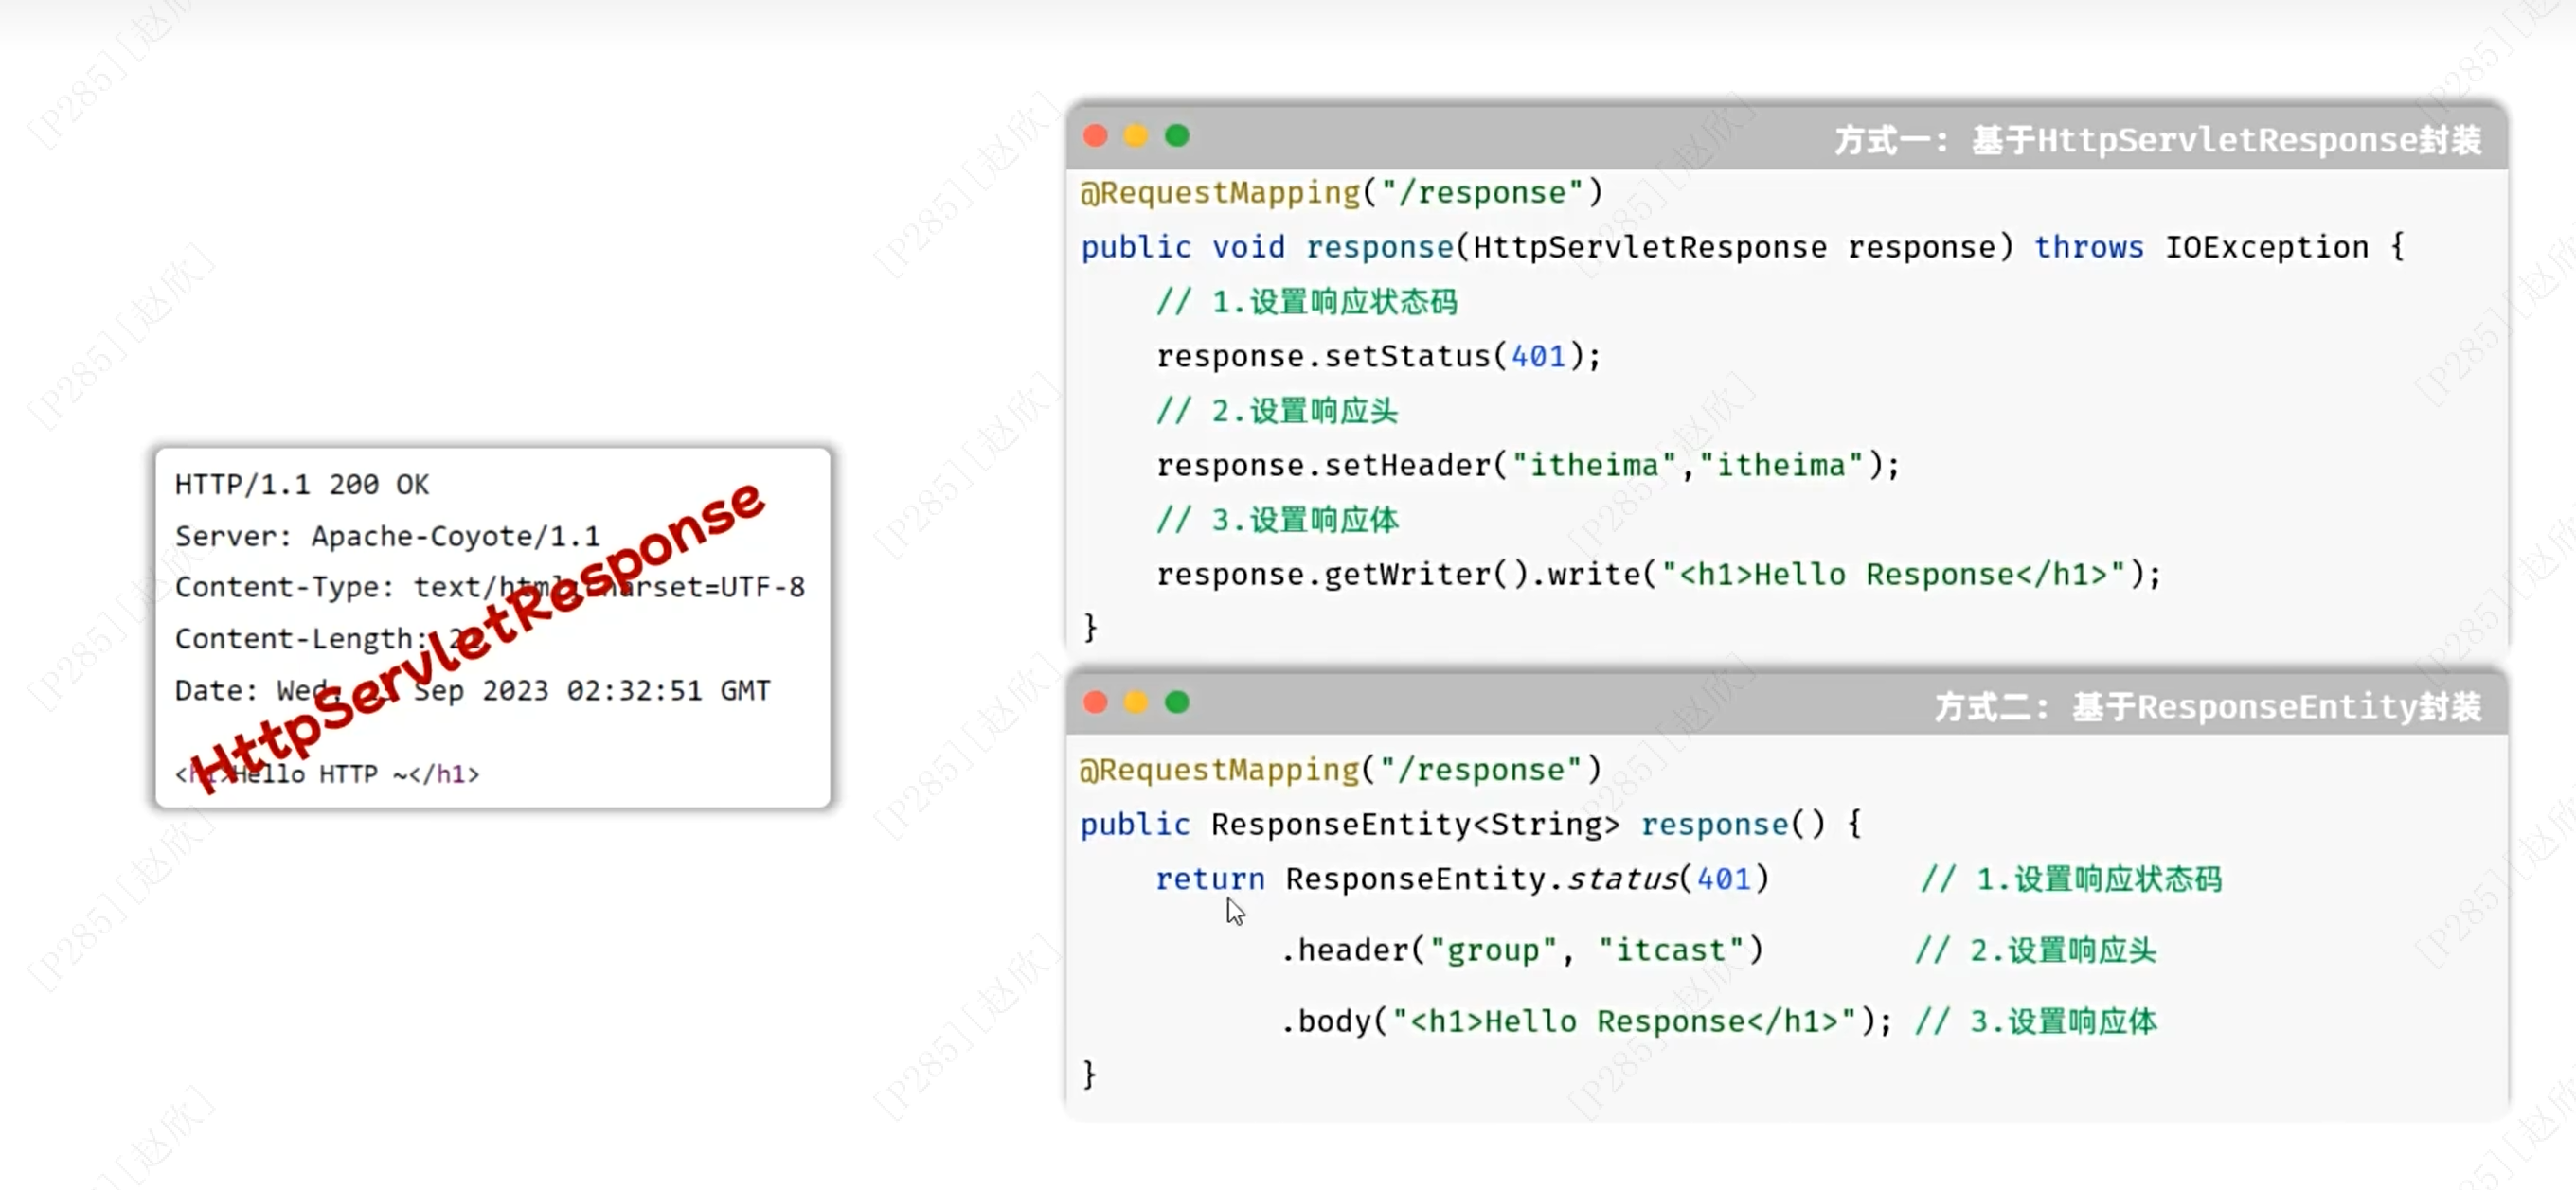
新建一个java类:采用方式一
package com.itheima.springbootwebquickstart;

import jakarta.servlet.http.HttpServletResponse;
import org.springframework.web.bind.annotation.RequestMapping;
import org.springframework.web.bind.annotation.RestController;

import java.io.IOException;

@RestController
public class ResponseController {

    @RequestMapping("/response")
    public  void response(HttpServletResponse  response) throws IOException {
        //设置响应状态码
        response.setStatus(401);
        //设置响应头
        response.setHeader("name","itheima");
        //设置响应体
        response.getWriter().write("helloworld!");


    }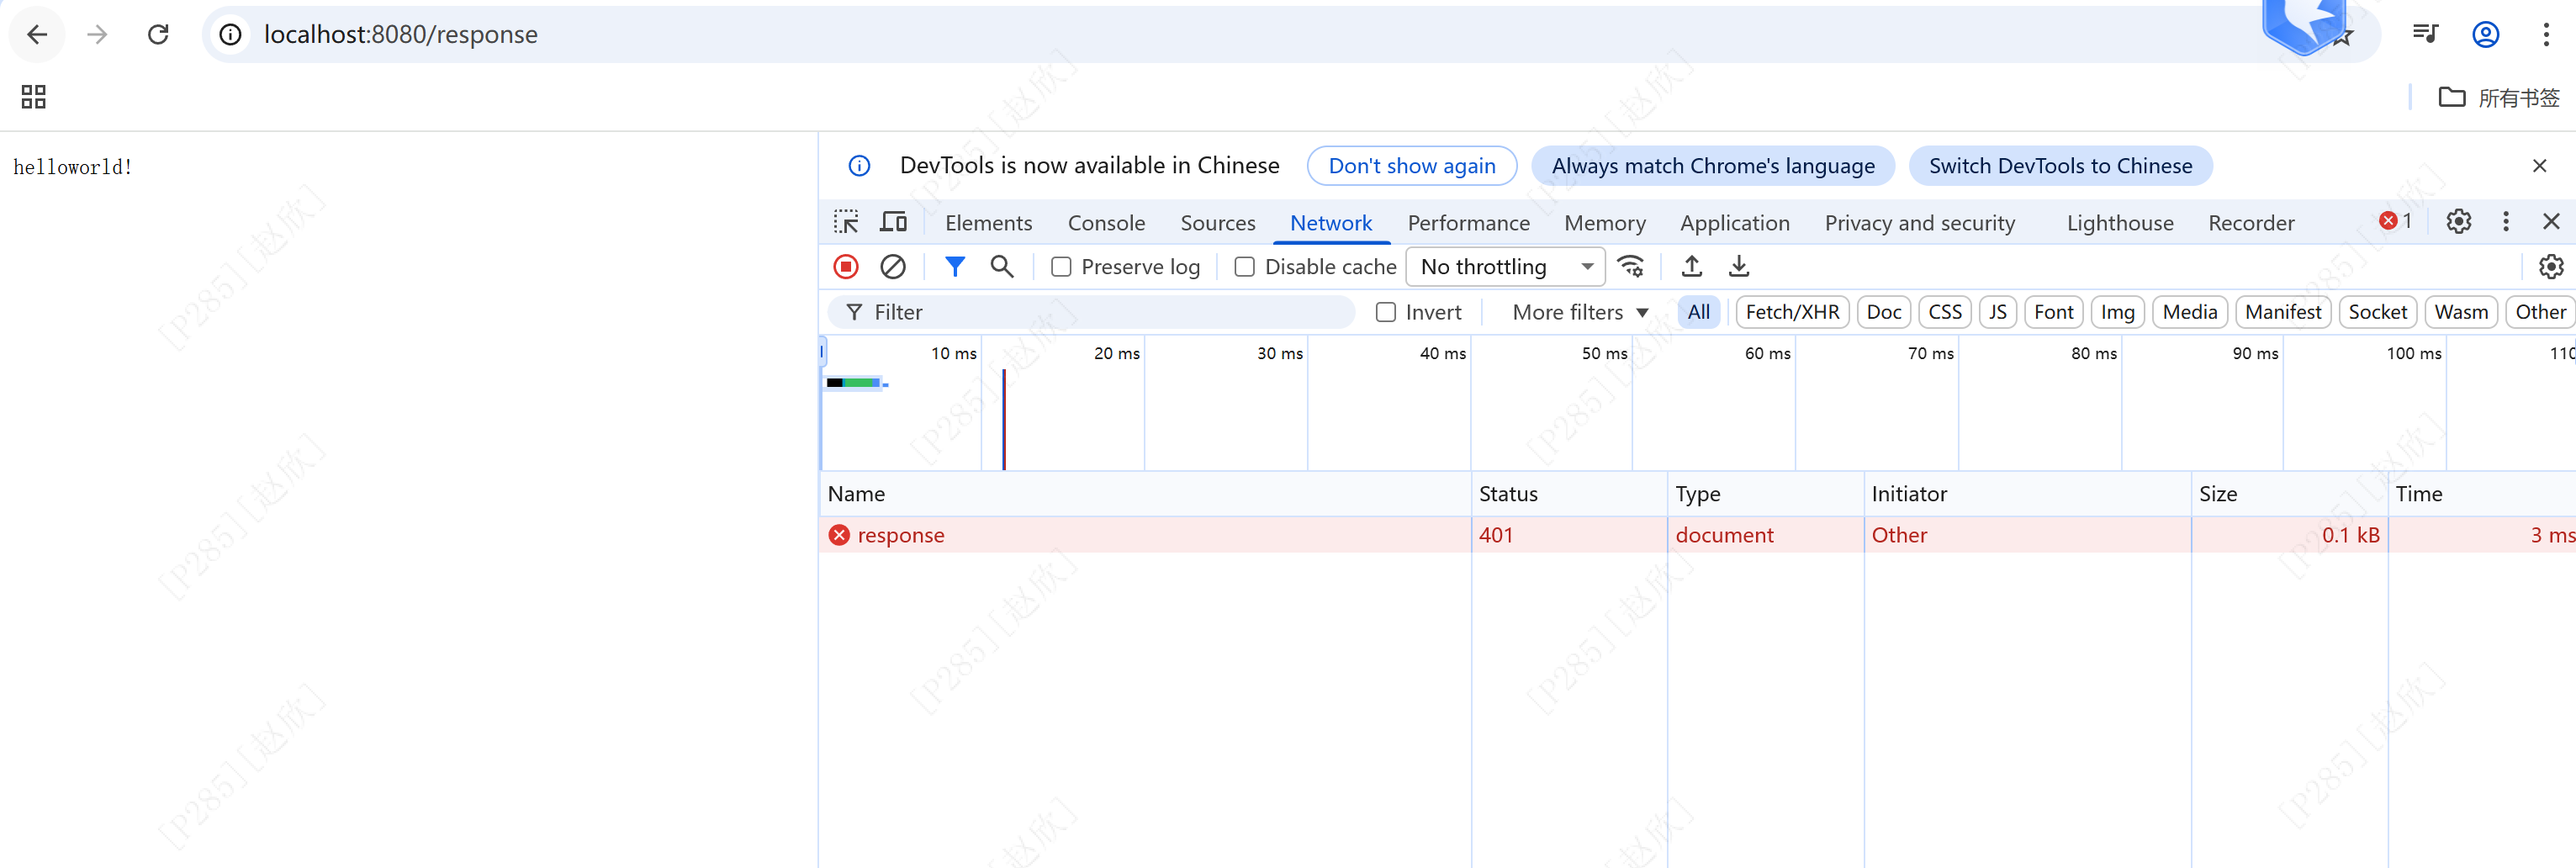
}在浏览器输入:http://localhost:8080/response
结果如下:
方式二:封装到一个对象ResponseEntity
@RequestMapping("response2")
public ResponseEntity<String> response2(){
    return ResponseEntity.status(401).header("name","itheima").body("helloworld!");
}
结果一致!!!

3、springbootweb案例
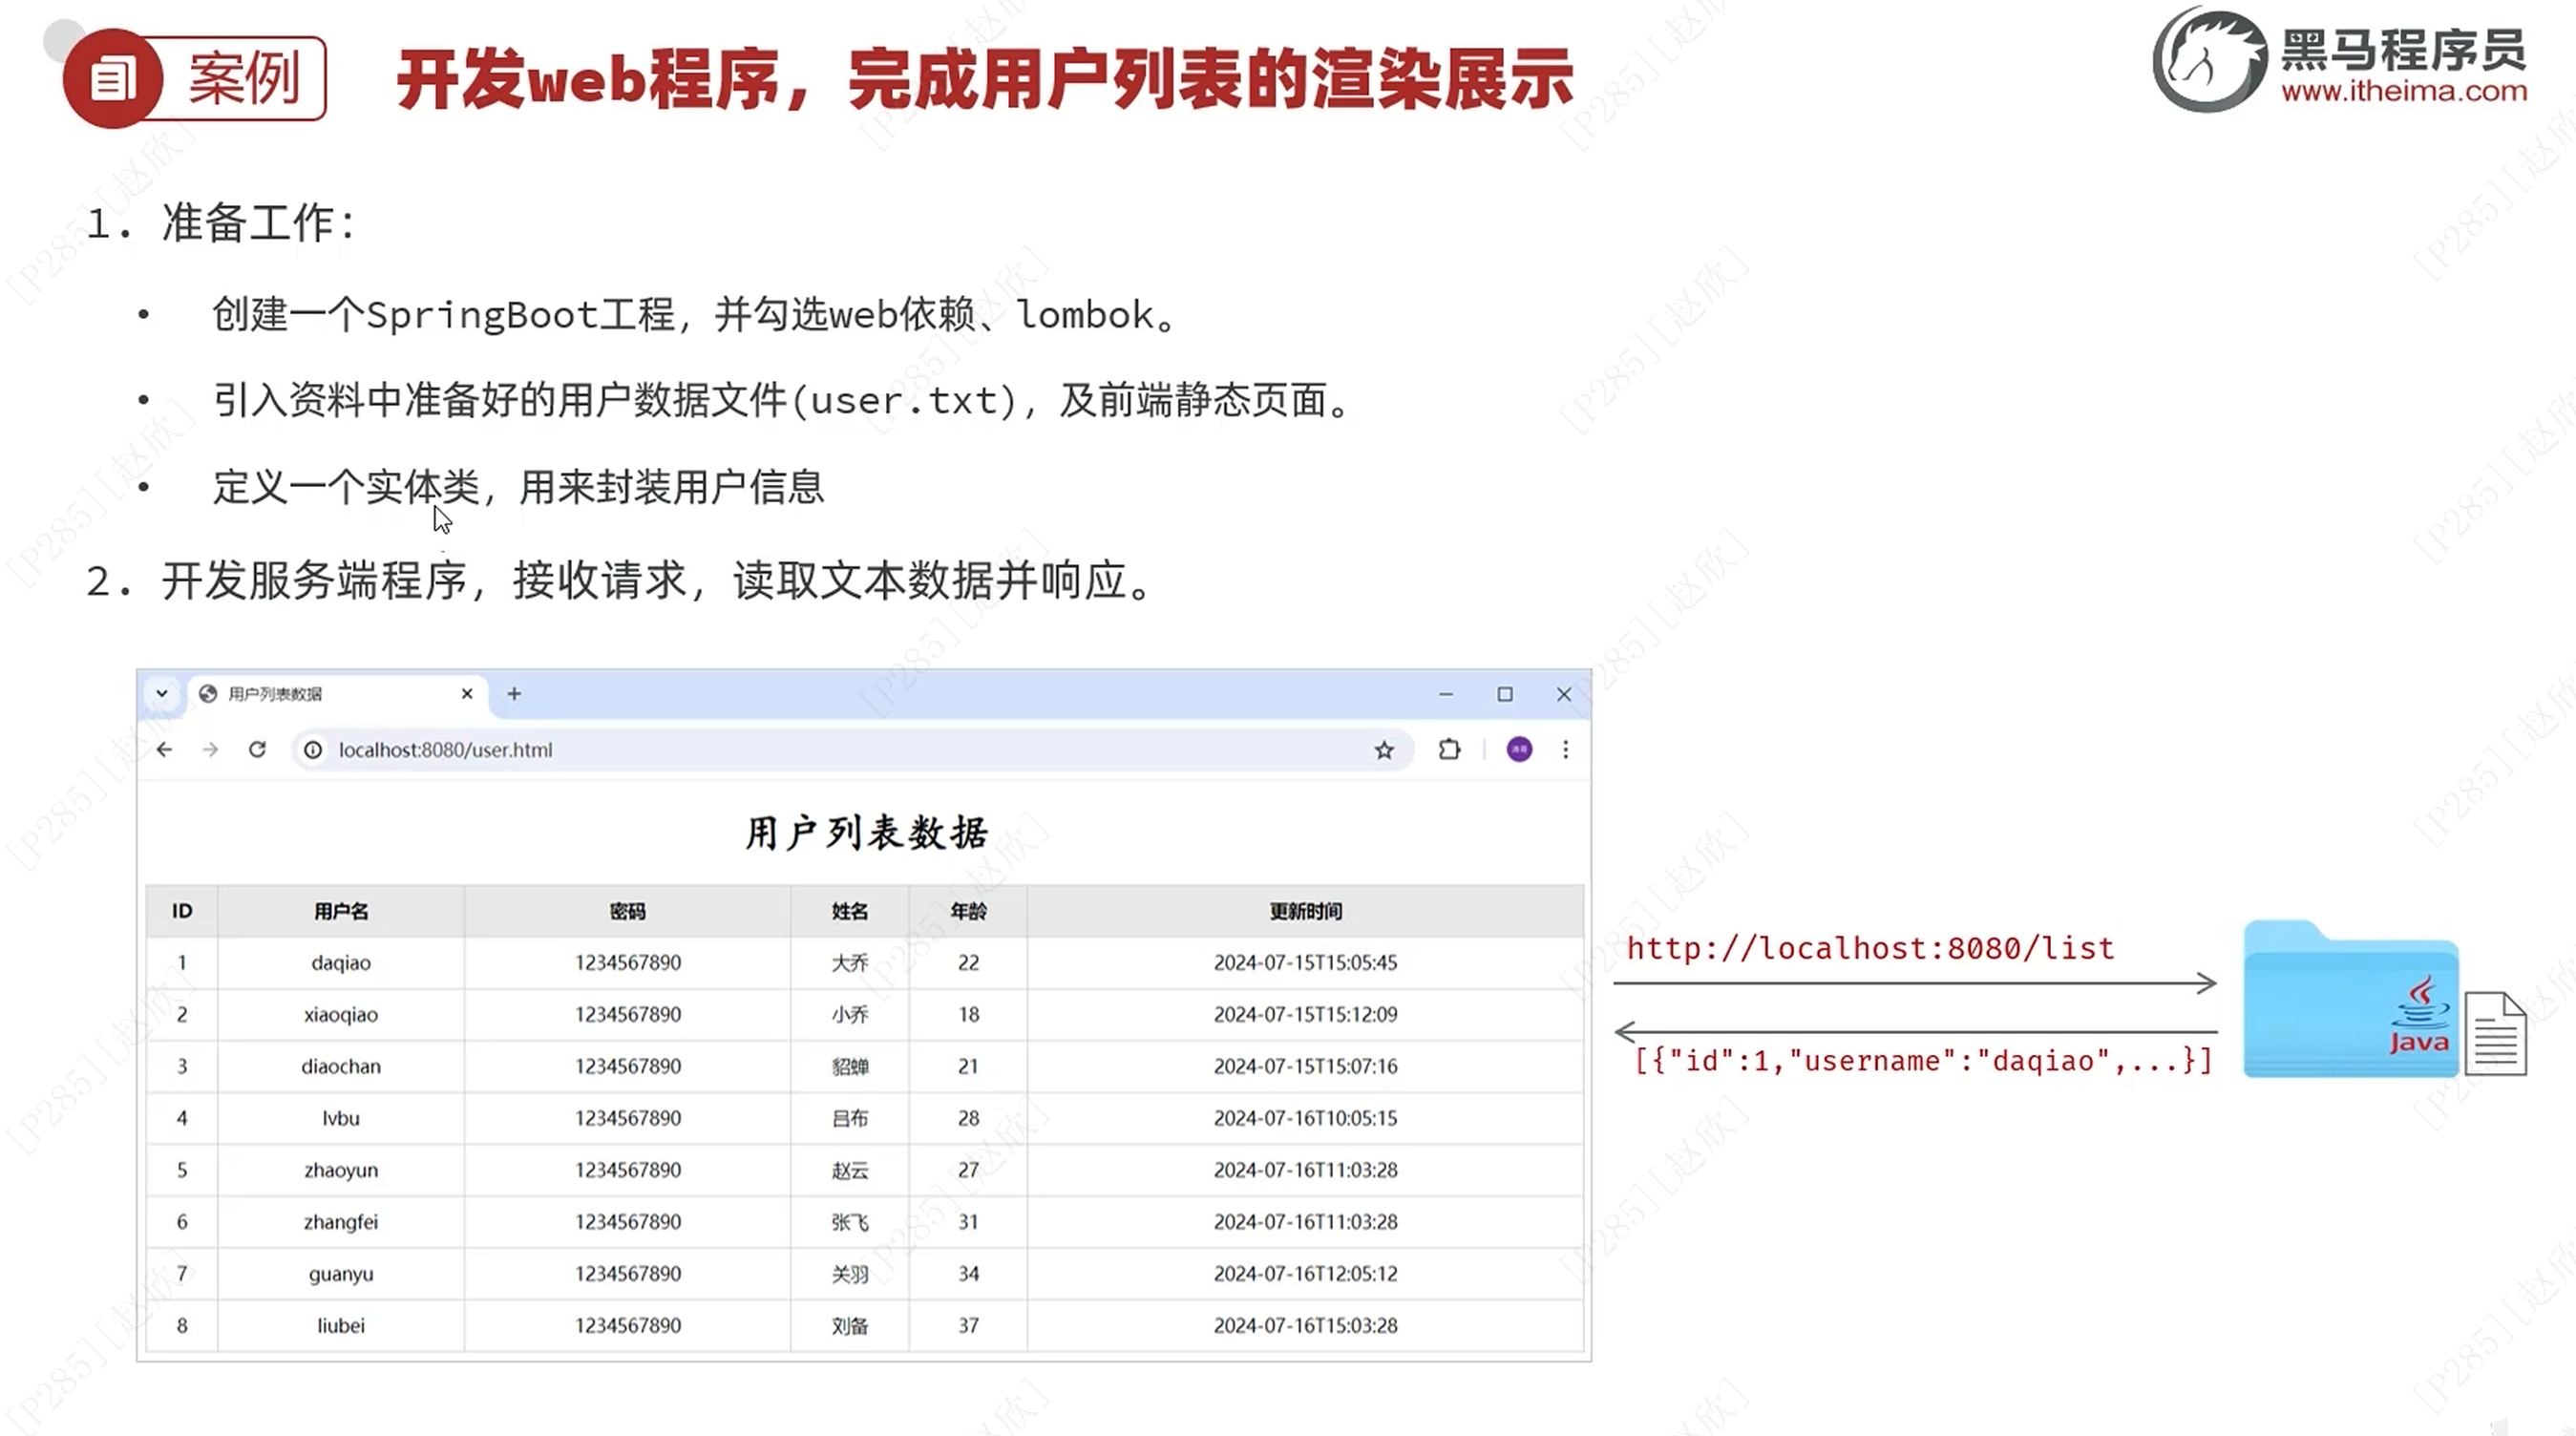
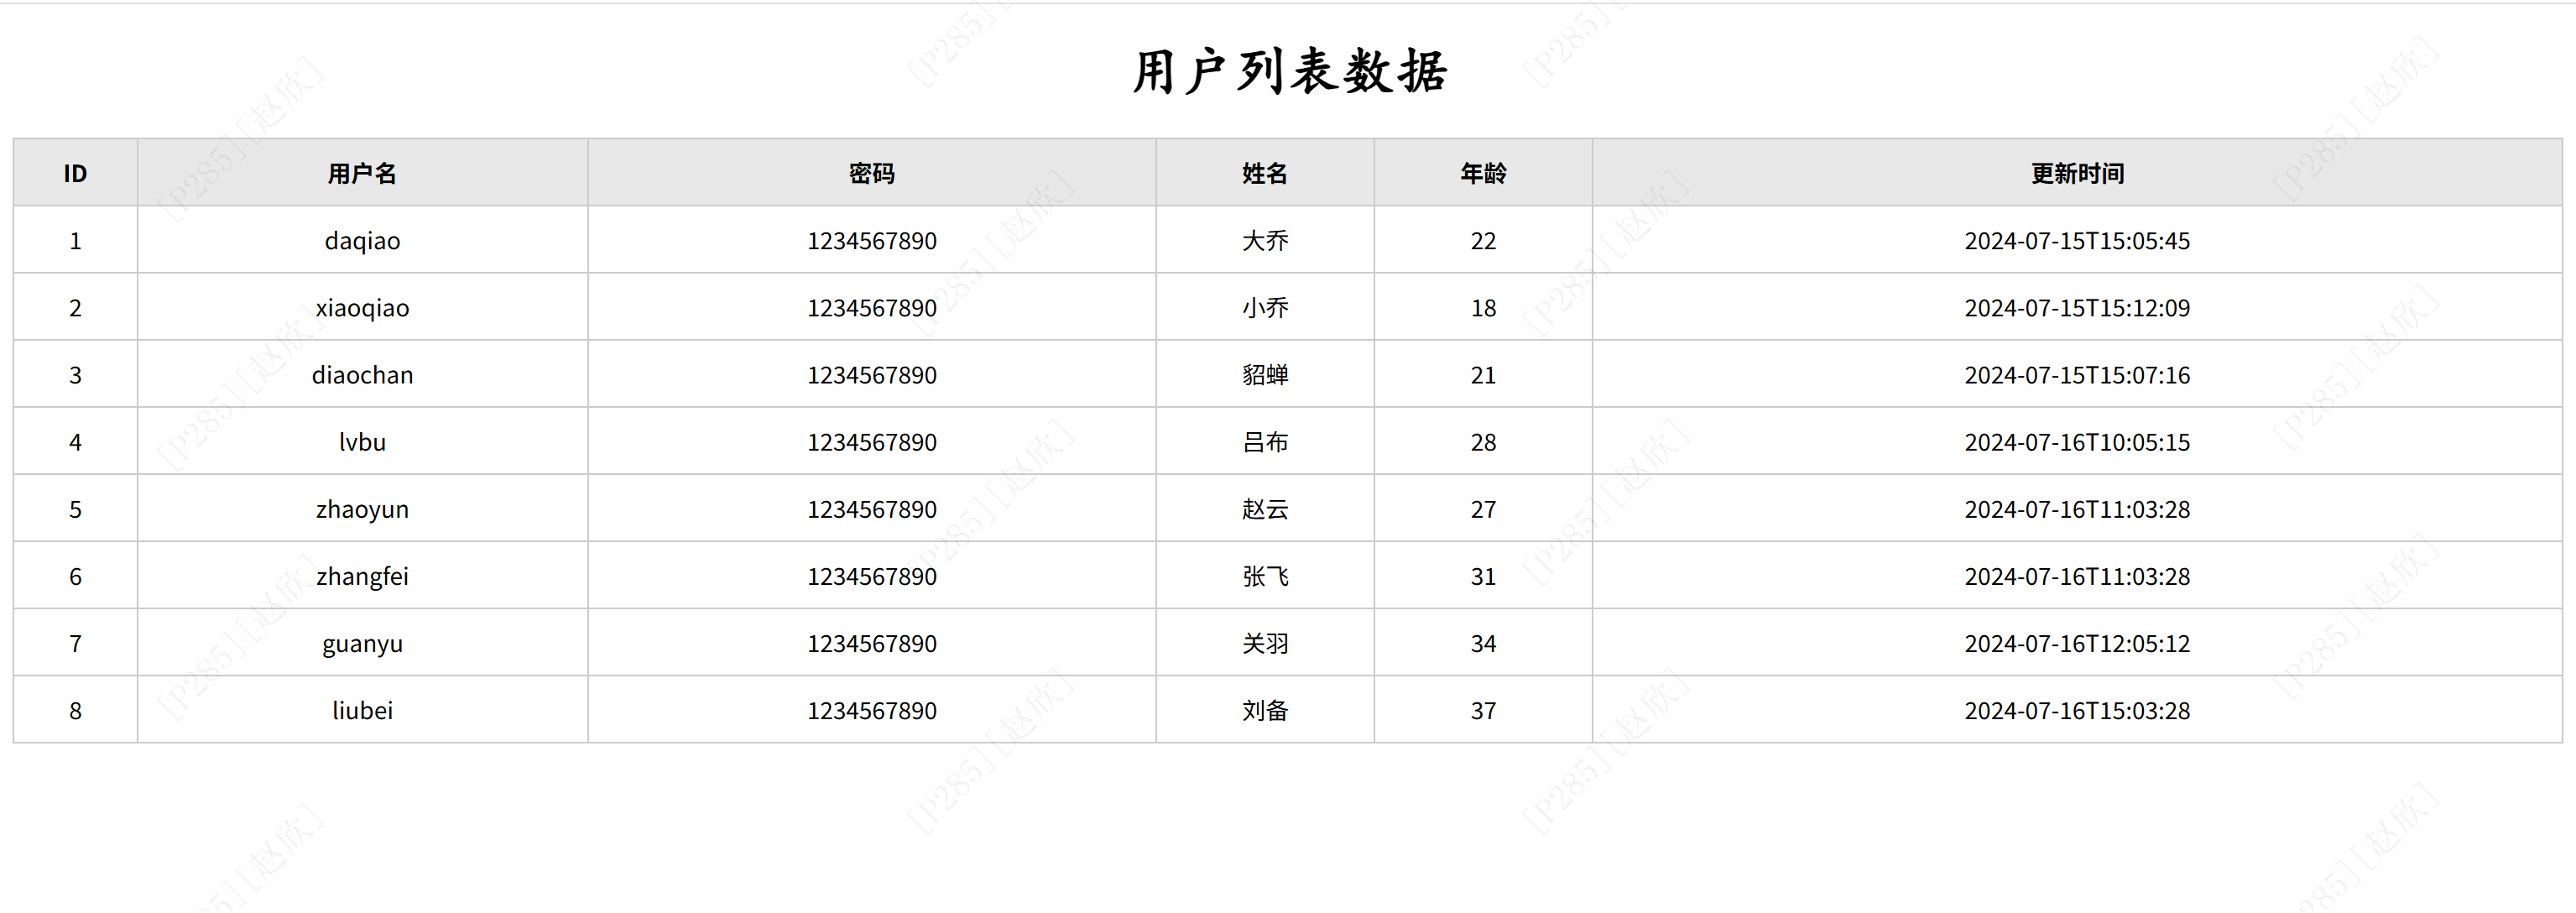
user.txt数据如下:
1,daqiao,1234567890,大乔,22,2024-07-15 15:05:45
2,xiaoqiao,1234567890,小乔,18,2024-07-15 15:12:09
3,diaochan,1234567890,貂蝉,21,2024-07-15 15:07:16
4,lvbu,1234567890,吕布,28,2024-07-16 10:05:15
5,zhaoyun,1234567890,赵云,27,2024-07-16 11:03:28
6,zhangfei,1234567890,张飞,31,2024-07-16 11:03:28
7,guanyu,1234567890,关羽,34,2024-07-16 12:05:12
8,liubei,1234567890,刘备,37,2024-07-16 15:03:28
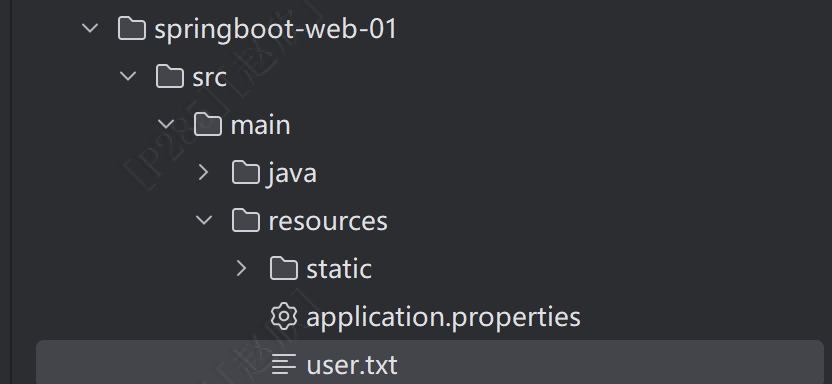
将以上数据放到resources下:
之后将静态资源放到resources下的static中,具体资料可以在以下网盘中找到:
之后新建一个类
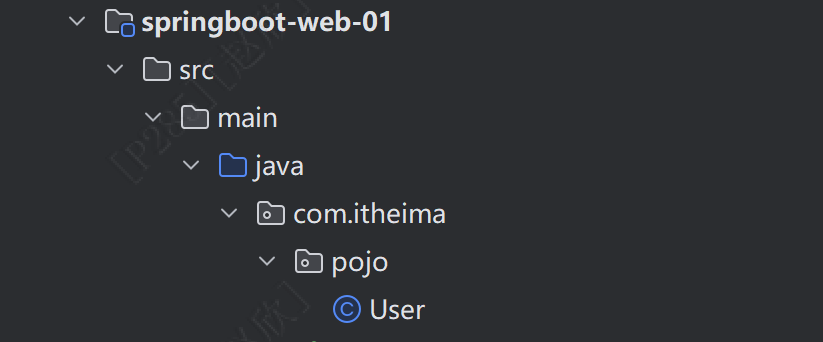
在这个类中先将属性用包装类的方式进行书写:名字不要改,与前端保持一致
private Integer id;
private String username;
private String password;
private String name;
 private Integer age;
 private LocalDateTime updateTime;
之后在方法名前写一个注解:这个的作用是不用再为属性一个一个提供get、set方法,添加之后直接包含了
@Data
@NoArgsConstructor//无参数构造
@AllArgsConstructor//全参数构造
如果爆红,可以先去pom文件看一下lombok是否正常,之后看右侧的Maven中是否存在这个项目,不存在进行手动添加,之后更新lombok即可,我这个版本号没有添加,但是系统自动生成了,之后在User中导入lombok包即可!!!
之后在文件中进行如下步骤:
//加载并读取user.txt文件,获取用户数据

 //解析用户信息,封装为User对象并封装为List集合

 //返回json数据给前端
首先在读取数据中使用工具类:hutool,在pom中添加依赖
<dependency>
    <groupId>cn.hutool</groupId>
    <artifactId>hutool-all</artifactId>
    <version>5.8.27</version>
</dependency>
之后在方法中继续编写程序,首先引入IoUtil.readLines,如果出现问题,可以点击:文件-使缓存失效-重启即可(File > Invalidate Caches>重启即可)
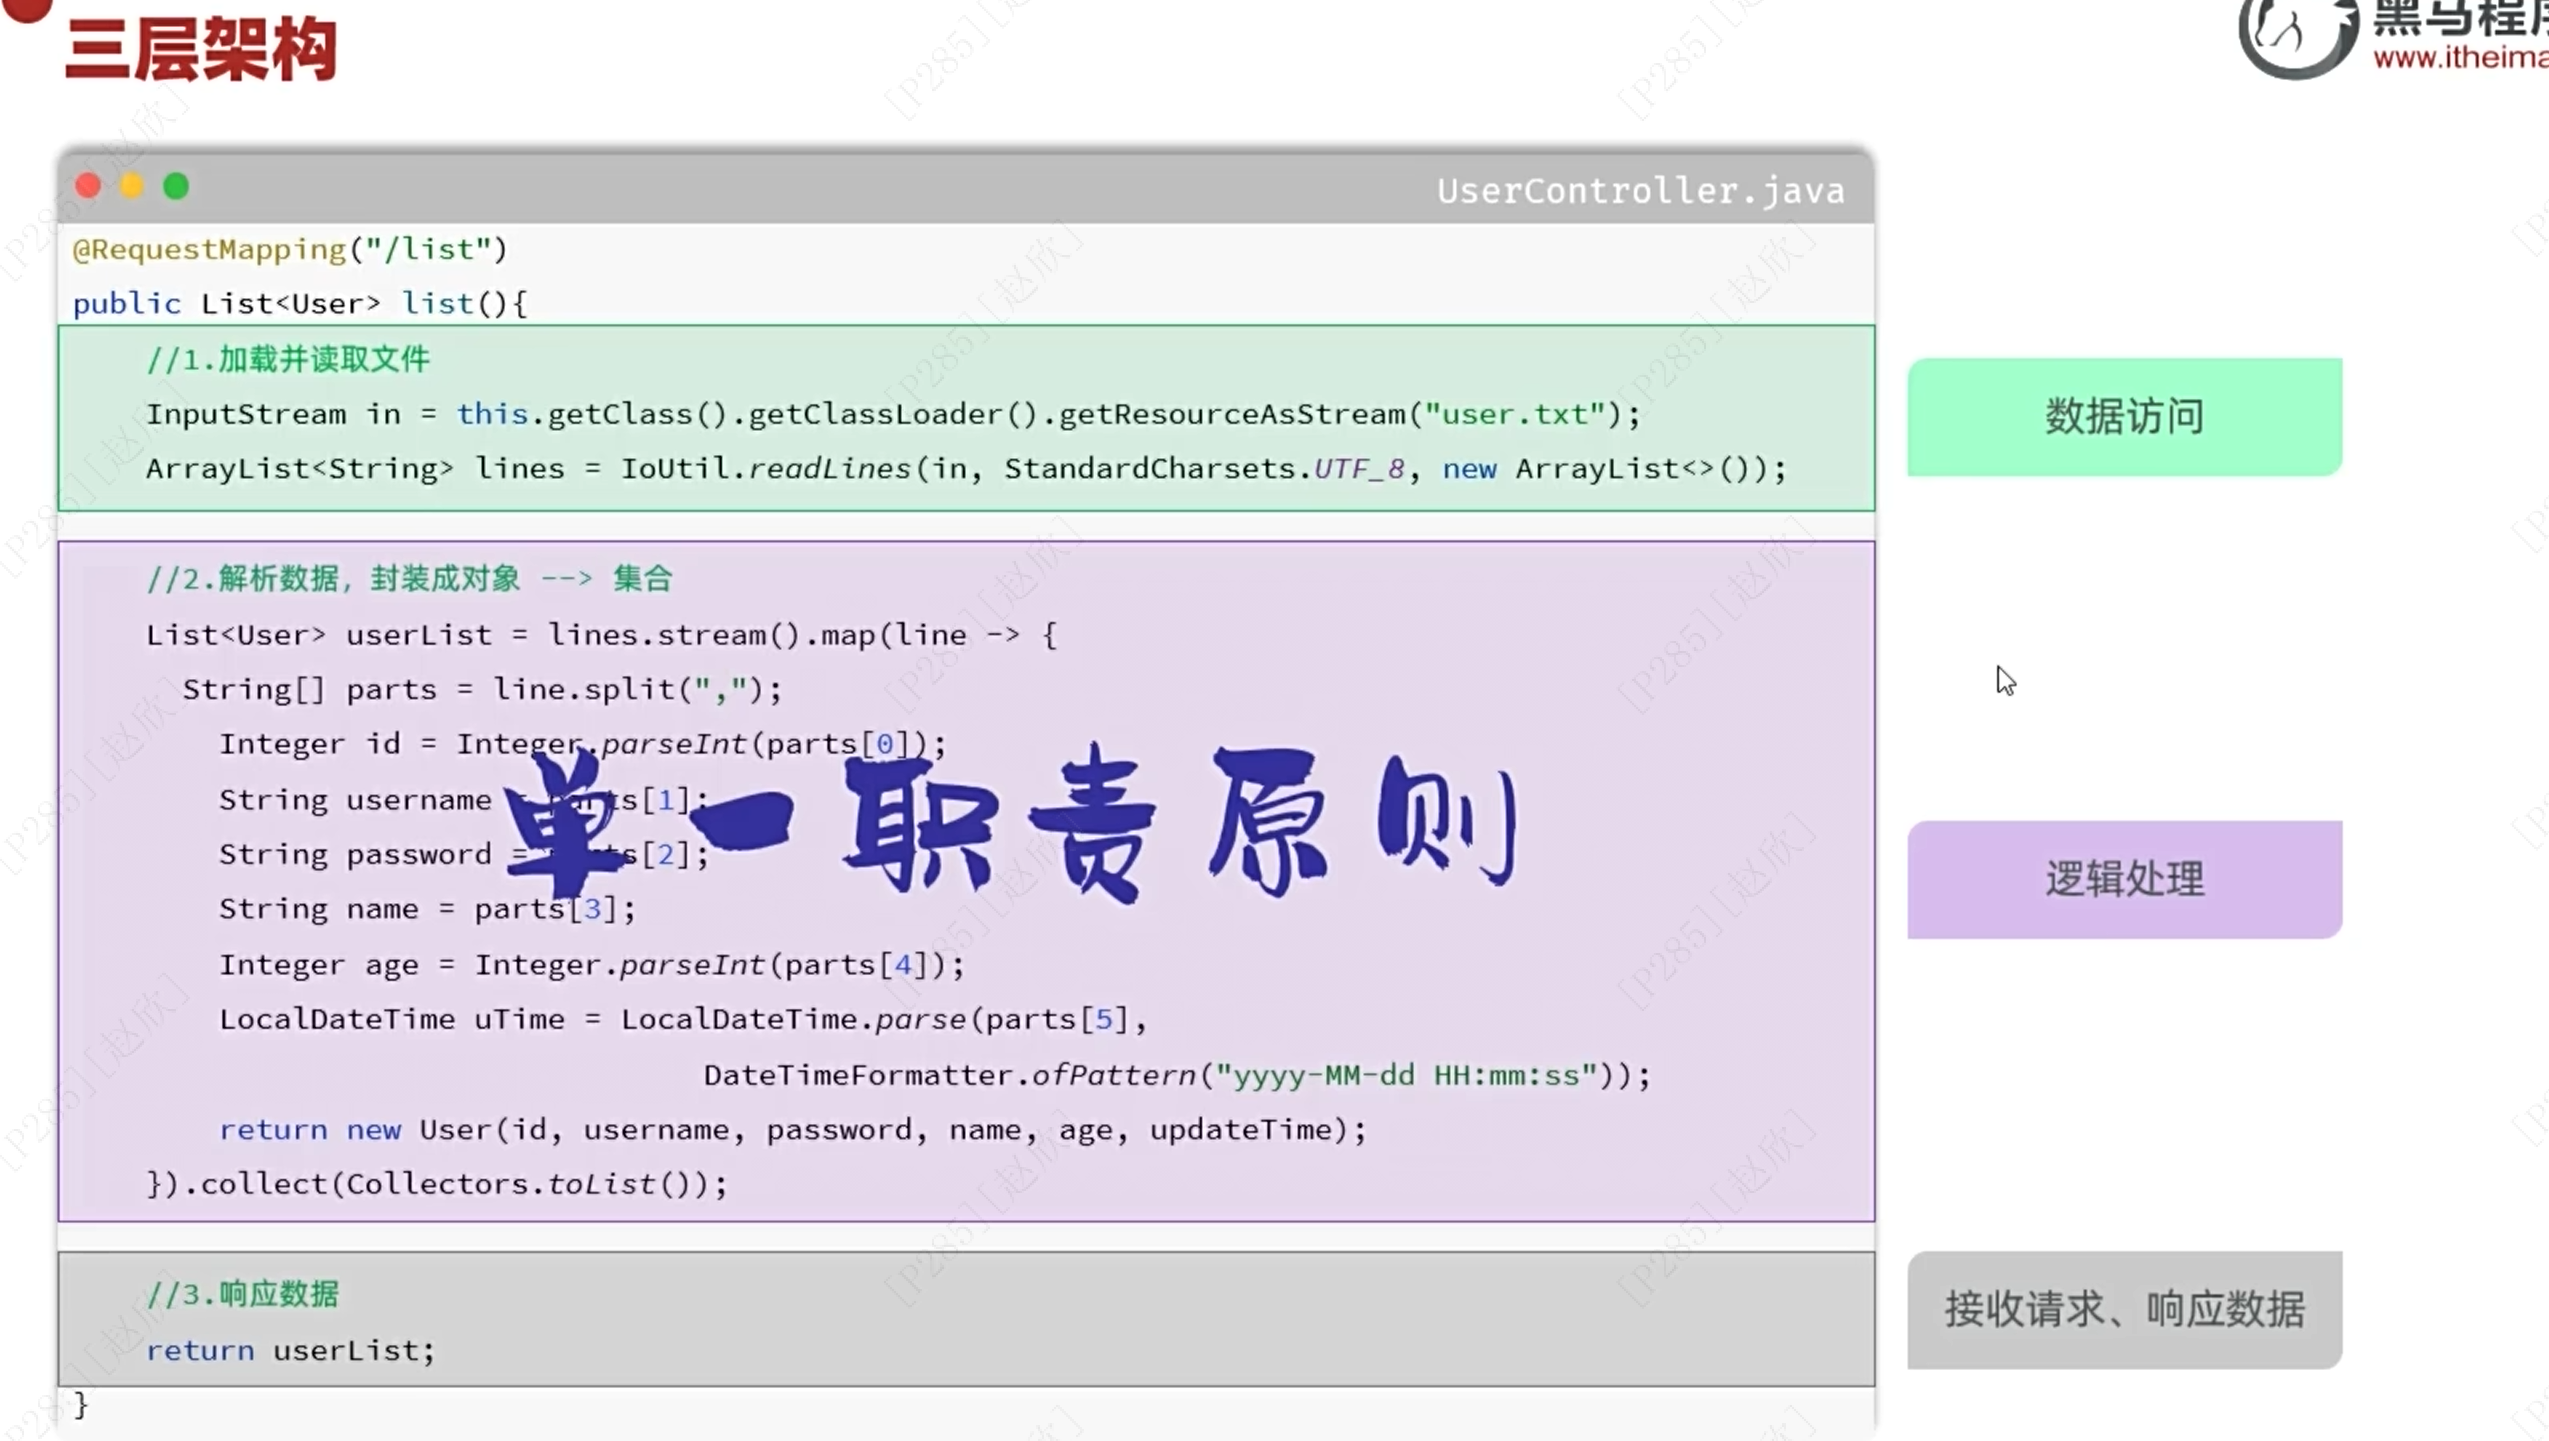
以下是UserController的全部代码:
package com.itheima.Controller;

import cn.hutool.core.date.DateTime;
import cn.hutool.core.io.IoUtil;
import com.itheima.pojo.User;
import org.springframework.web.bind.annotation.RequestMapping;
import org.springframework.web.bind.annotation.RestController;
import java.io.FileNotFoundException;
import java.io.InputStream;
import java.nio.charset.StandardCharsets;
import java.time.LocalDateTime;
import java.time.format.DateTimeFormatter;
import java.util.ArrayList;
import java.util.List;

@RestController

public class UserController {
    @RequestMapping("/list")
    public List<User> list() throws FileNotFoundException {

       //加载并读取user.txt文件,获取用户数据
        InputStream in = this.getClass().getClassLoader().getResourceAsStream("user.txt");
        ArrayList<String> lines = IoUtil.readLines(in, StandardCharsets.UTF_8, new ArrayList<>());

        //解析用户信息,封装为User对象并封装为List集合
        List<User> userlist=lines.stream().map(line->{
            String[] split = line.split(",");//使用逗号进行切割
            Integer id=Integer.parseInt(split[0]);
            String username=split[1];
            String password=split[2];
            String name=split[3];
            Integer age=Integer.parseInt(split[4]);
            LocalDateTime updateTime=LocalDateTime.parse(split[5], DateTimeFormatter.ofPattern("yyyy-MM-dd HH:mm:ss"));
            return new User(id,username,password,name,age,updateTime);
        }).toList();//将对象转换为列表

        //返回json数据给前端
        return userlist;
    }
}在网页输入:http://localhost:8080/list,结果如下,表明数据已经传输成功!

之后在网页输入:http://localhost:8080/user.html,结果如下:
以下注解中包含responseBody!!!


从而可以直接相应!!!

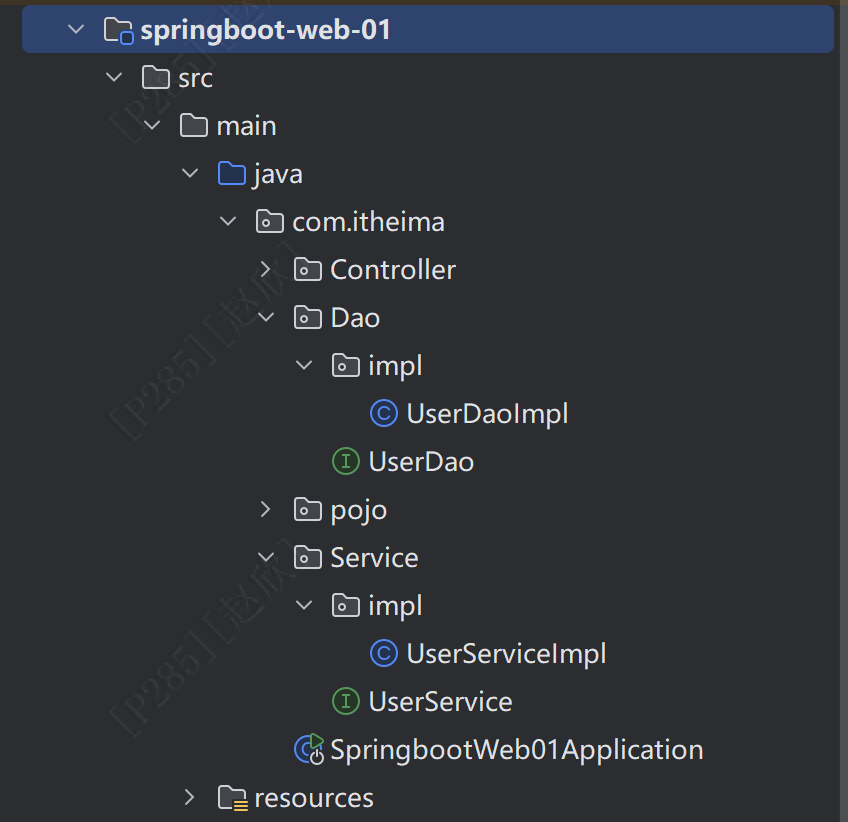
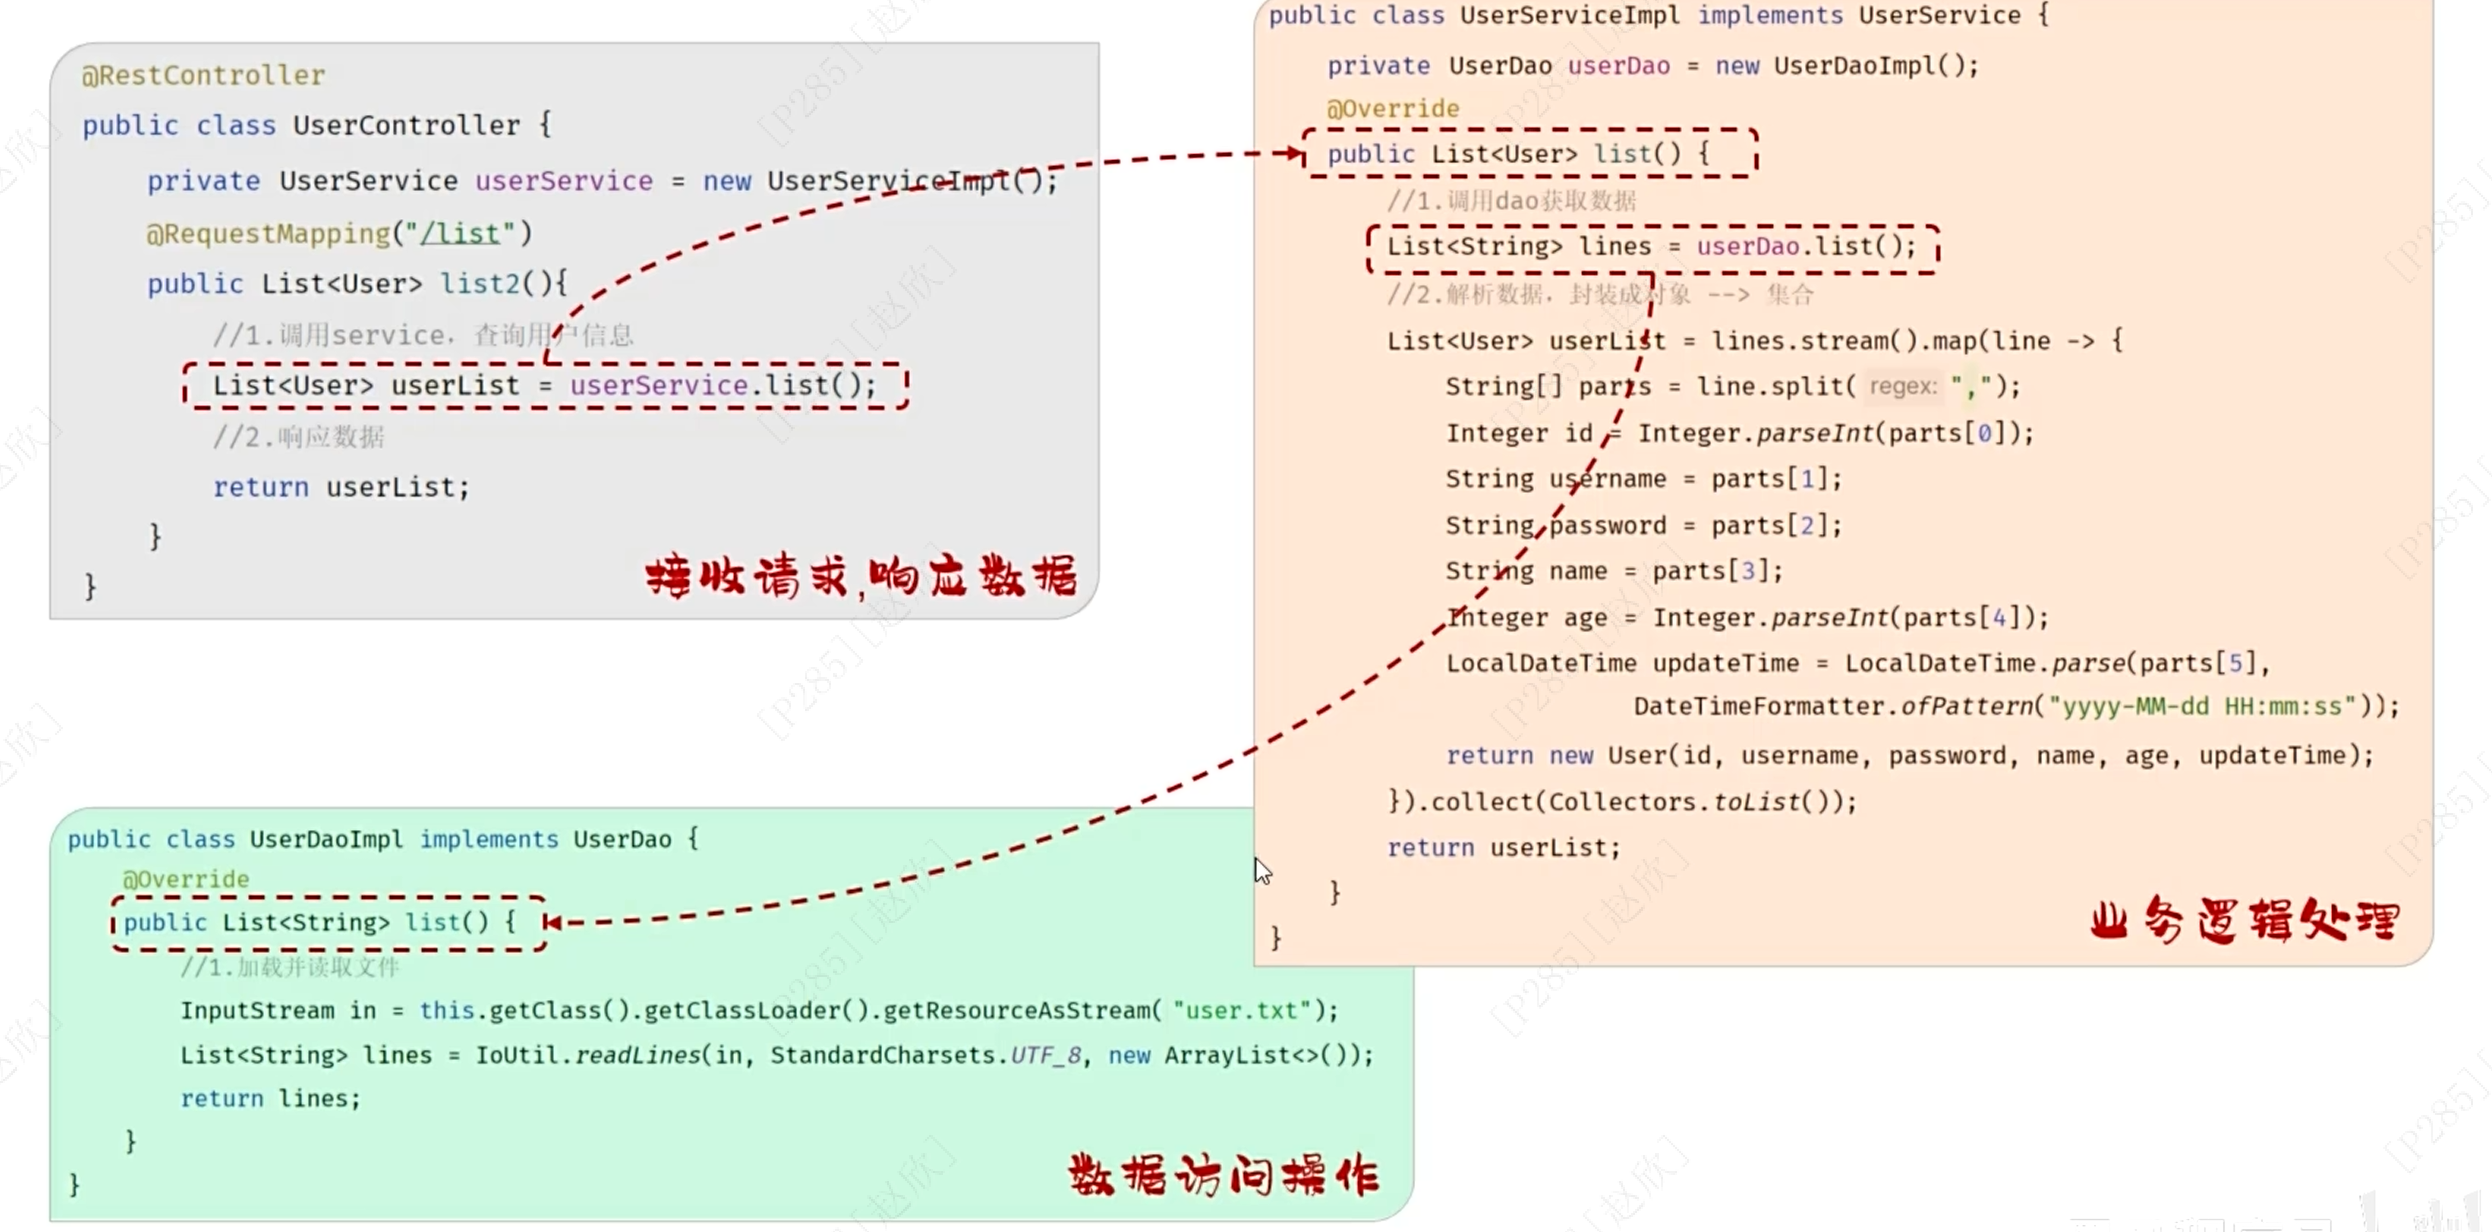
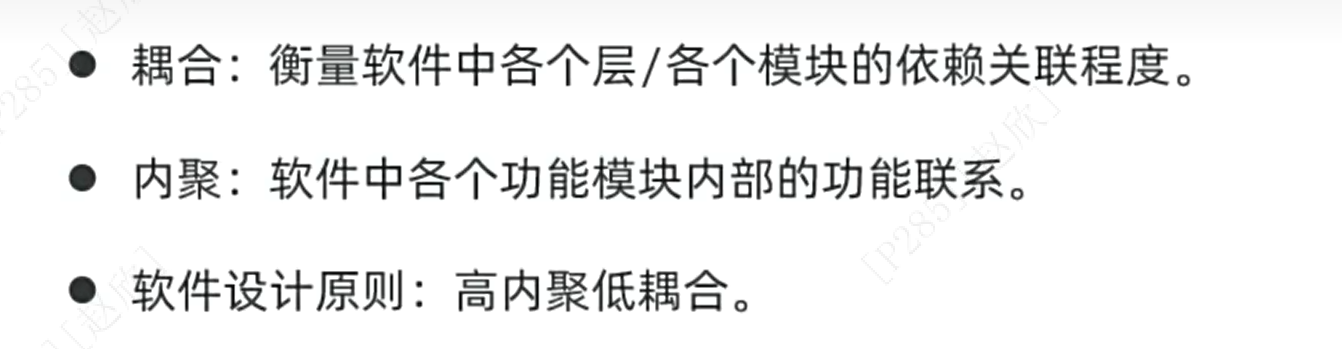
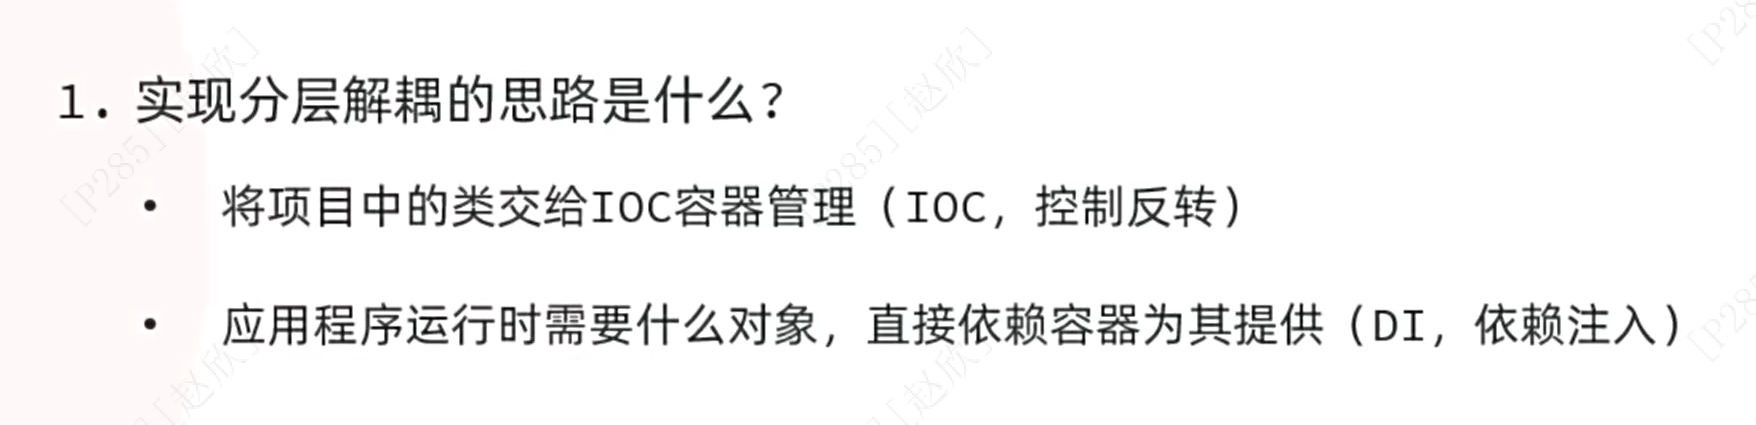
4、分层解耦
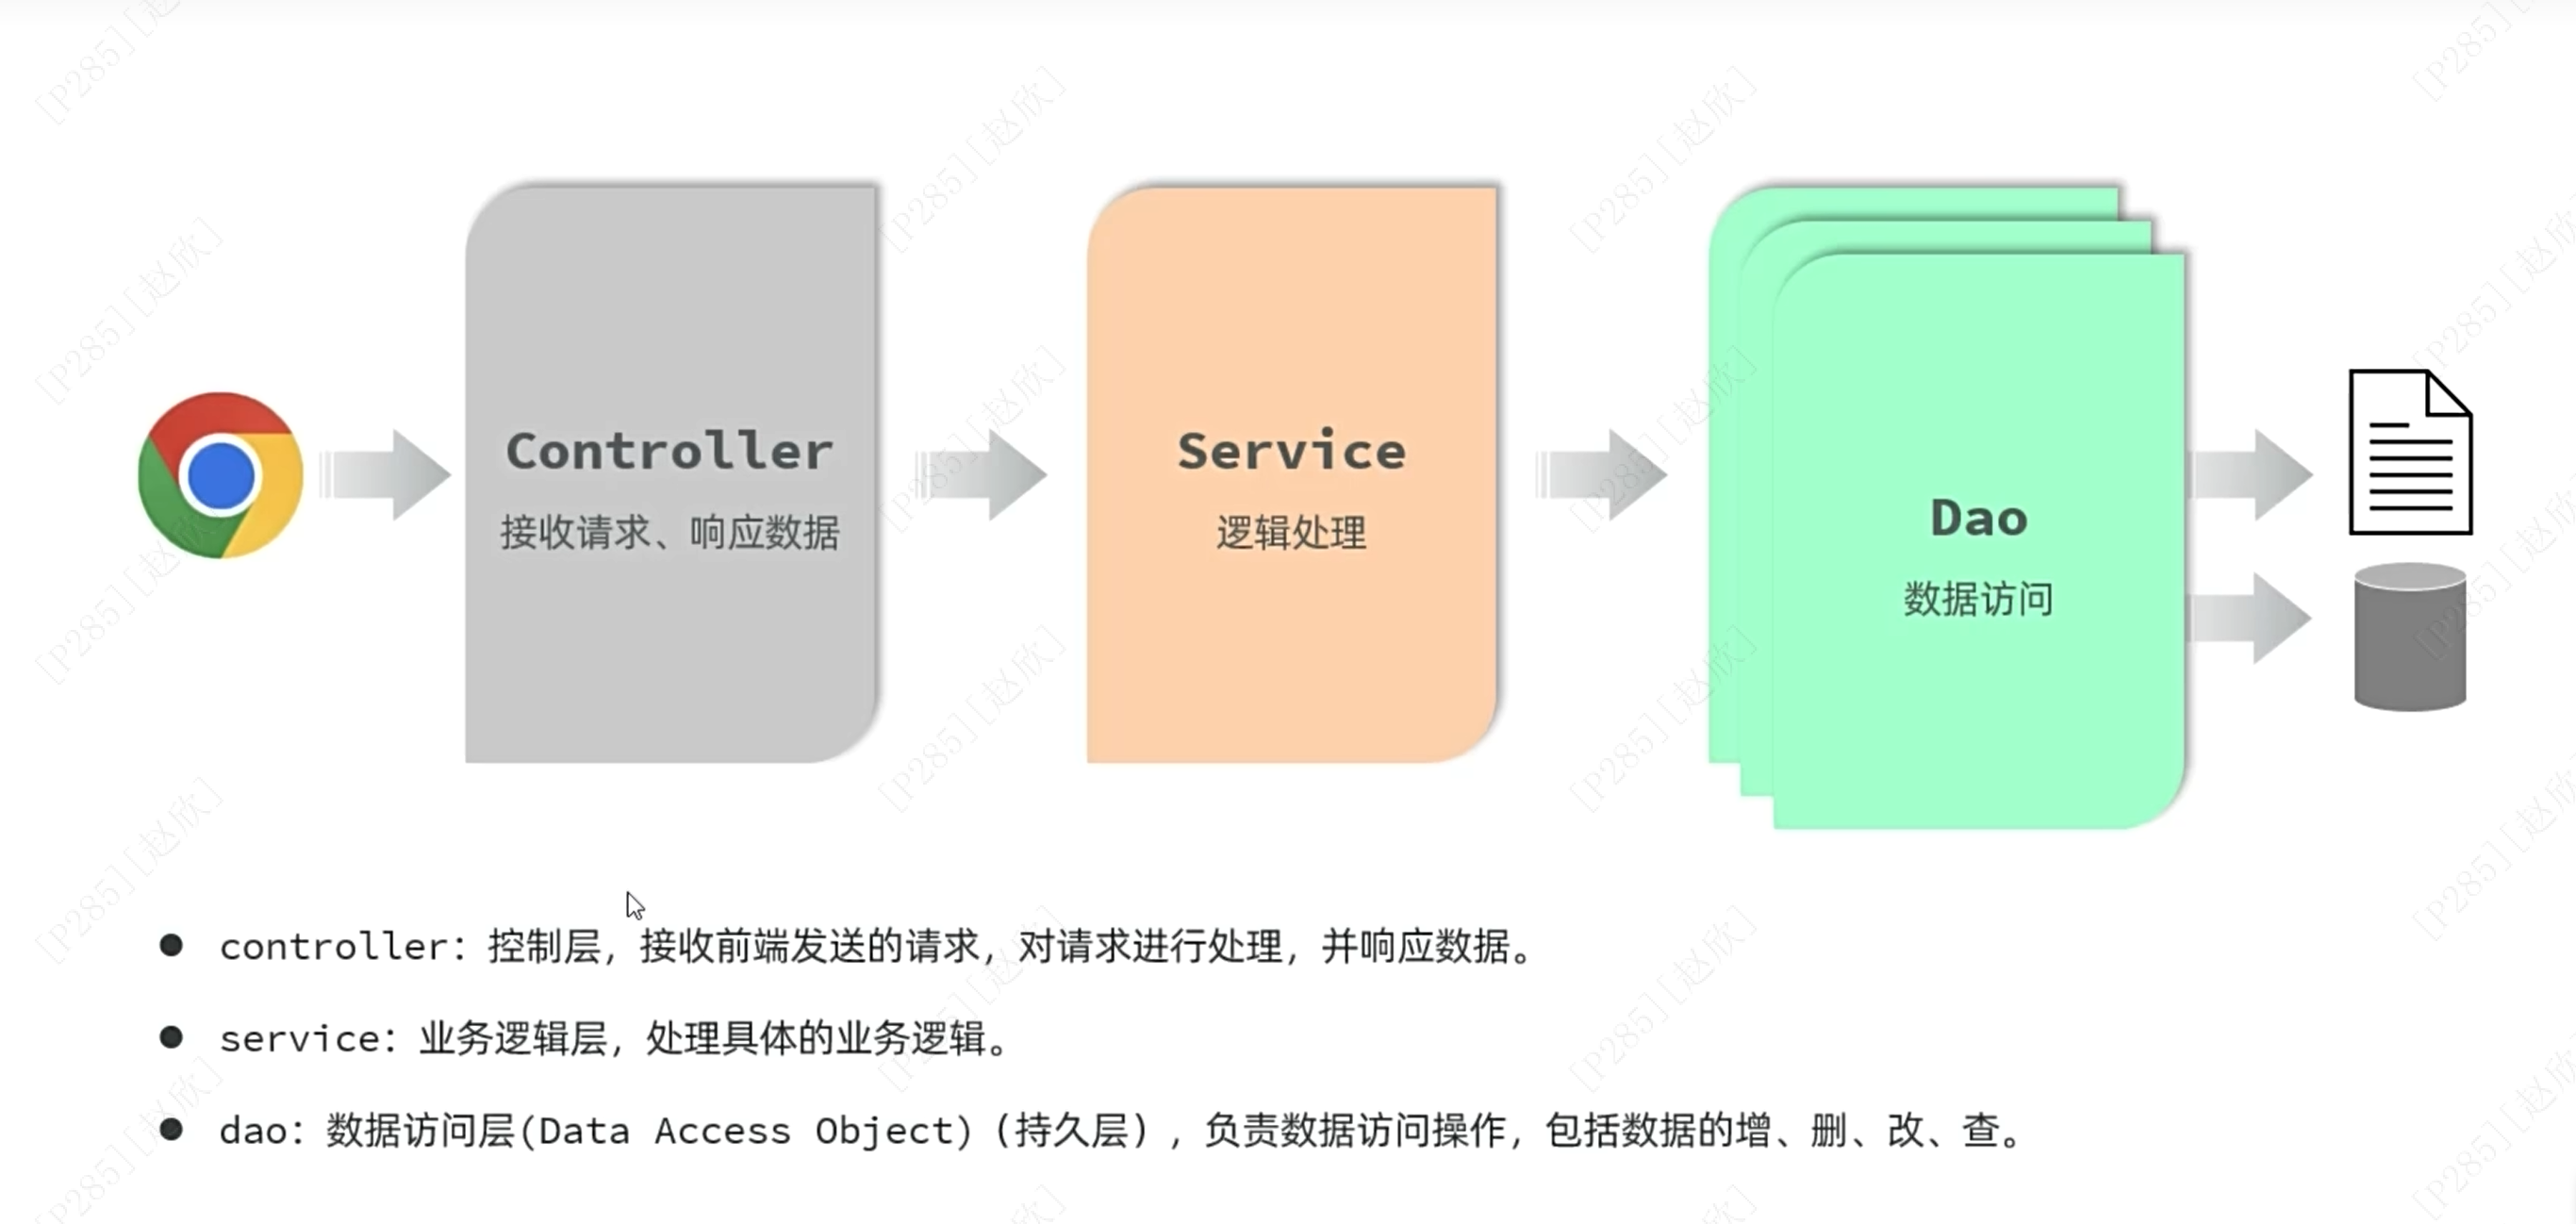
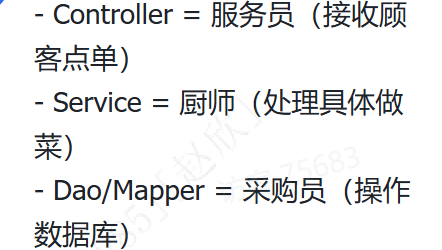
首先需要Dao包进行读取数据,之后是service包进行具体的操作,最后是用controller包进行响应数据!!!
基于此需要为项目先重新添加两个包:一个是Dao包和Service包
并分别添加相应的接口和实现类(在impl下新建)
首先是Dao包的接口:
package com.itheima.Dao;

import java.util.List;

public interface UserDao {
    public List<String> findall();
}
之后是相应的实现类:
package com.itheima.Dao.impl;

import cn.hutool.core.io.IoUtil;
import com.itheima.Dao.UserDao;

import java.io.InputStream;
import java.nio.charset.StandardCharsets;
import java.util.ArrayList;
import java.util.List;

public class UserDaoImpl implements UserDao {

    @Override
    public List<String> findall() {
        //加载并读取user.txt文件,获取用户数据
        InputStream in = this.getClass().getClassLoader().getResourceAsStream("user.txt");
        ArrayList<String> lines = IoUtil.readLines(in, StandardCharsets.UTF_8, new ArrayList<>());
        return lines;
    }
}
之后是Service包中的接口:
package com.itheima.Service;

import com.itheima.pojo.User;

import java.util.List;

public interface UserService {
    public List<User> findAll();
}
之后是实现类:
package com.itheima.Service.impl;

import com.itheima.Dao.UserDao;
import com.itheima.Service.UserService;
import com.itheima.pojo.User;
import java.time.LocalDateTime;
import java.time.format.DateTimeFormatter;
import java.util.List;
import com.itheima.Dao.impl.UserDaoImpl;

public class UserServiceImpl implements UserService {
    private UserDao userdao=new UserDaoImpl();
    @Override
    public List<User> findAll() {
        //获取用户数据
        List<String> lines=userdao.findall();
        //解析用户信息,封装为User对象并封装为List集合
        List<User> userlist=lines.stream().map(line->{
            String[] split = line.split(",");//使用逗号进行切割
            Integer id=Integer.parseInt(split[0]);
            String username=split[1];
            String password=split[2];
            String name=split[3];
            Integer age=Integer.parseInt(split[4]);
            LocalDateTime updateTime=LocalDateTime.parse(split[5], DateTimeFormatter.ofPattern("yyyy-MM-dd HH:mm:ss"));
            return new User(id,username,password,name,age,updateTime);
        }).toList();//将对象转换为列表
        return userlist;
    }
}
最后是Controller中的类:
package com.itheima.Controller;

import com.itheima.Service.UserService;
import com.itheima.Service.impl.UserServiceImpl;
import com.itheima.pojo.User;
import org.springframework.web.bind.annotation.RequestMapping;
import org.springframework.web.bind.annotation.RestController;
import java.io.FileNotFoundException;
import java.util.List;

@RestController
public class UserController {
    private UserService userservice=new UserServiceImpl();
    @RequestMapping("/list")
    public List<User> list() throws FileNotFoundException {
        List<User> userlist=userservice.findAll();//获取数据
        //返回json数据给前端
        return userlist;
    }
}
结果和之前一致,实现了三层结构的构建!!!
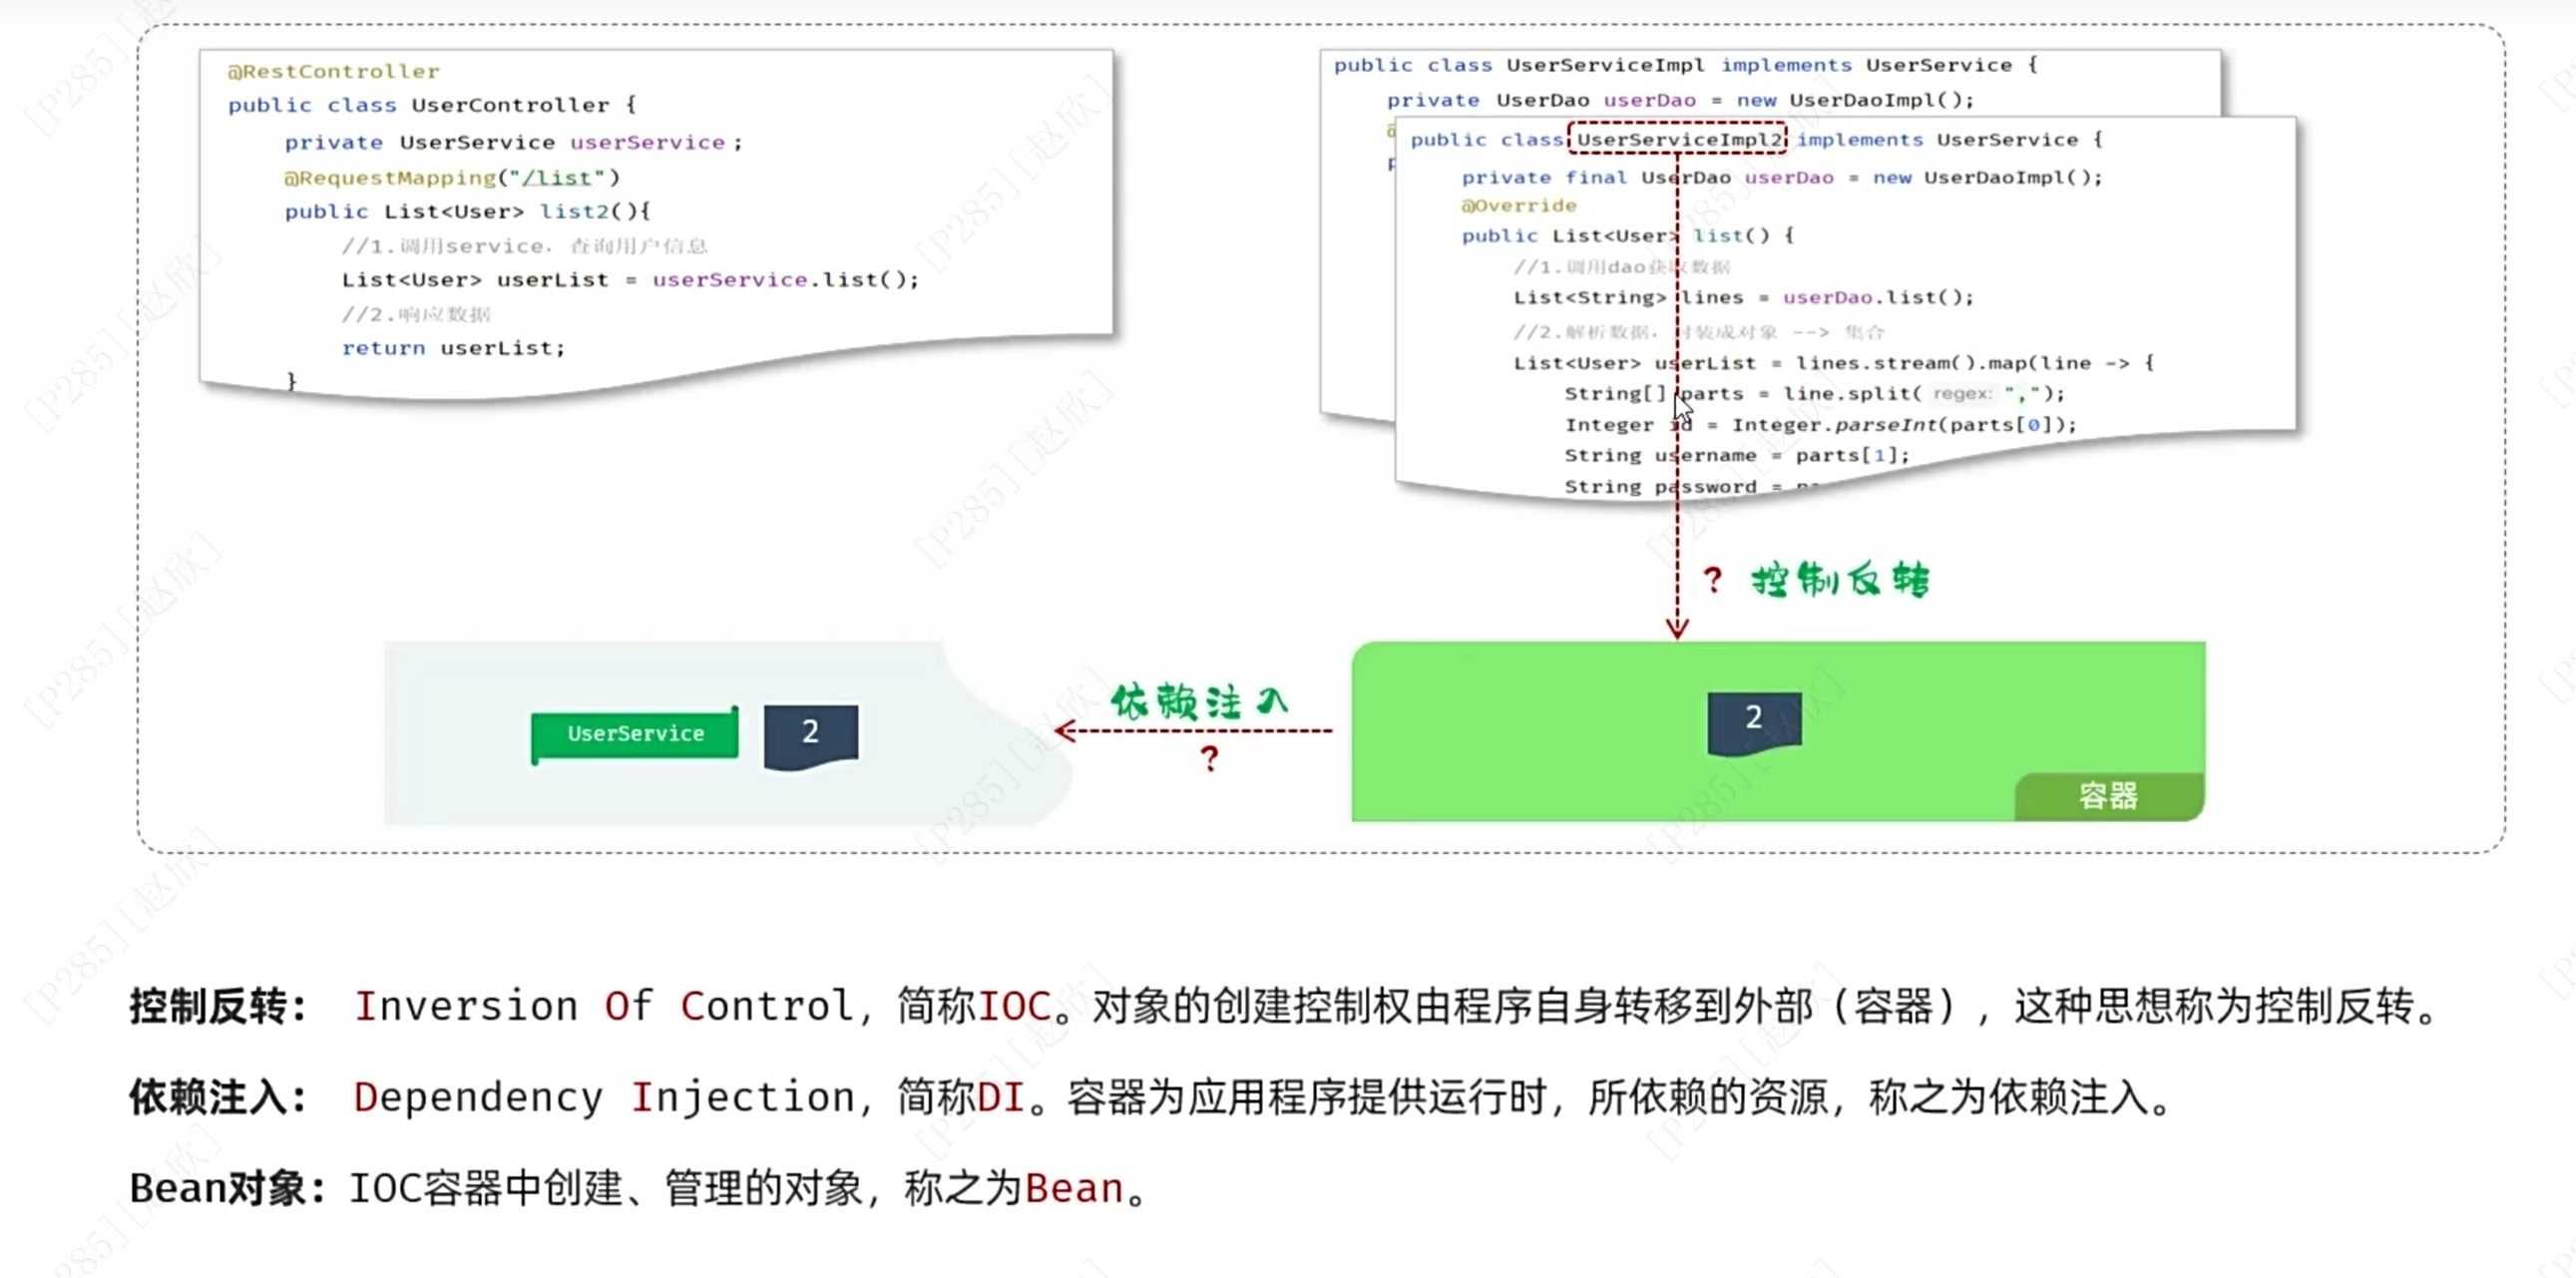
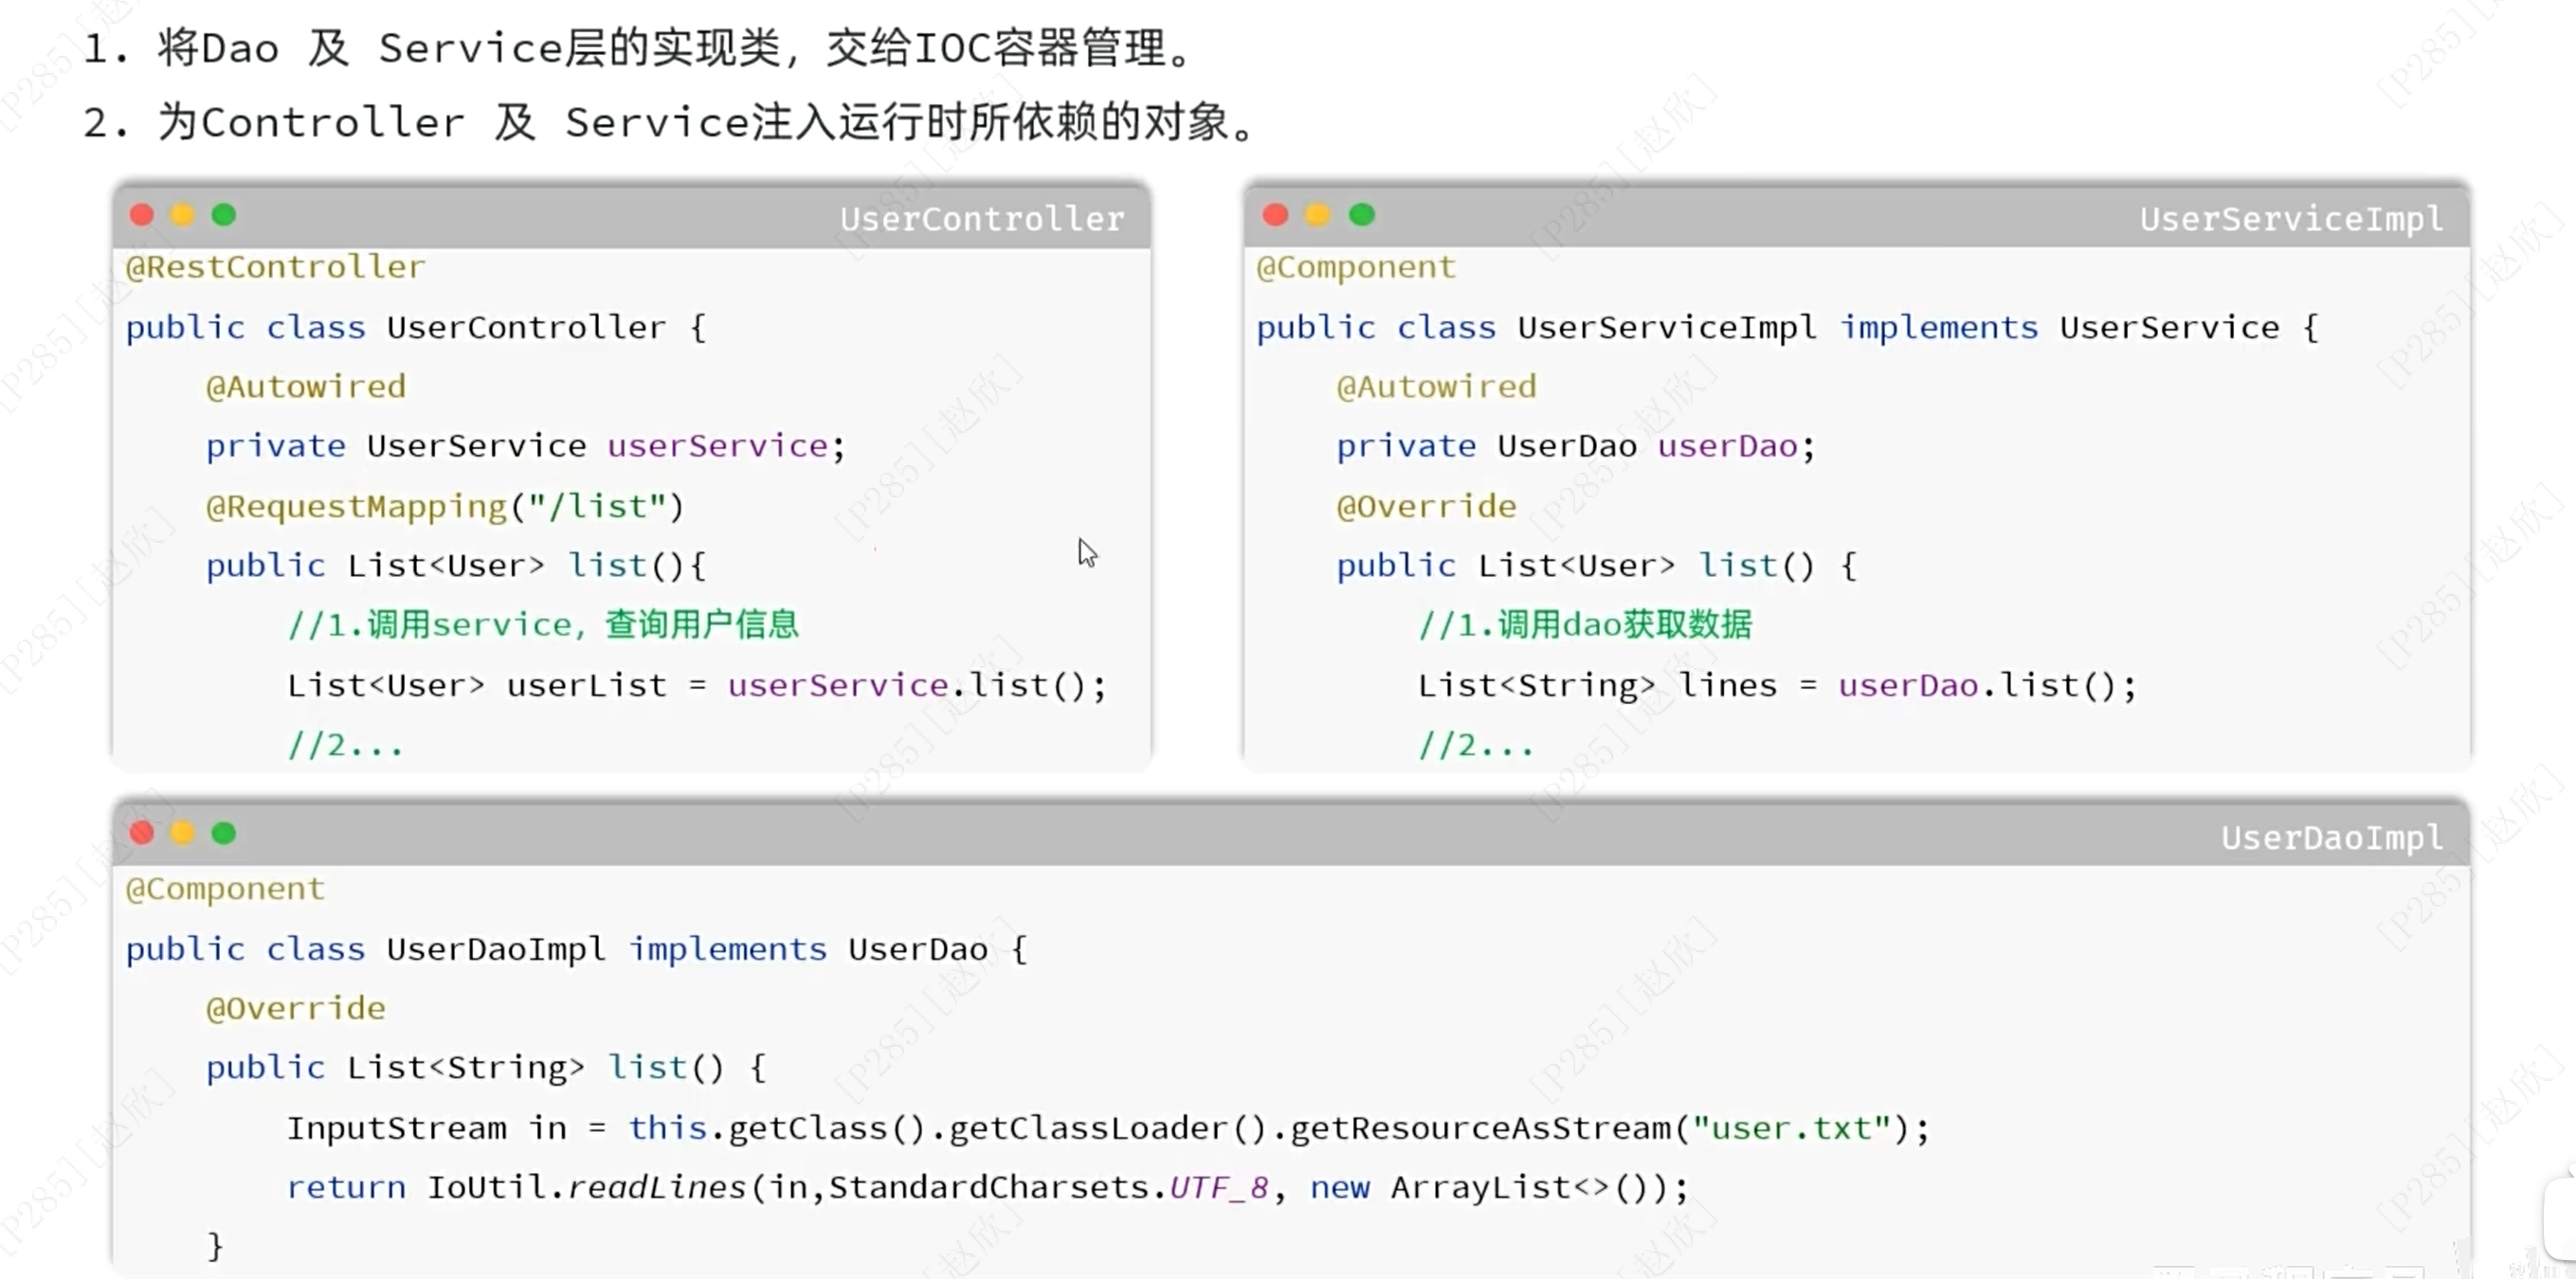
首先要在Dao的实现类方法的最开始和service的实现类的上方添加:@Component,表明将当前类交给IOC管理
之后在service的实现类和controller的实现类中的创建新对象的前面添加:@Autowired,表明应用程序自动查找Bean对象并赋值给下面的对象!!!
5、IOC详解
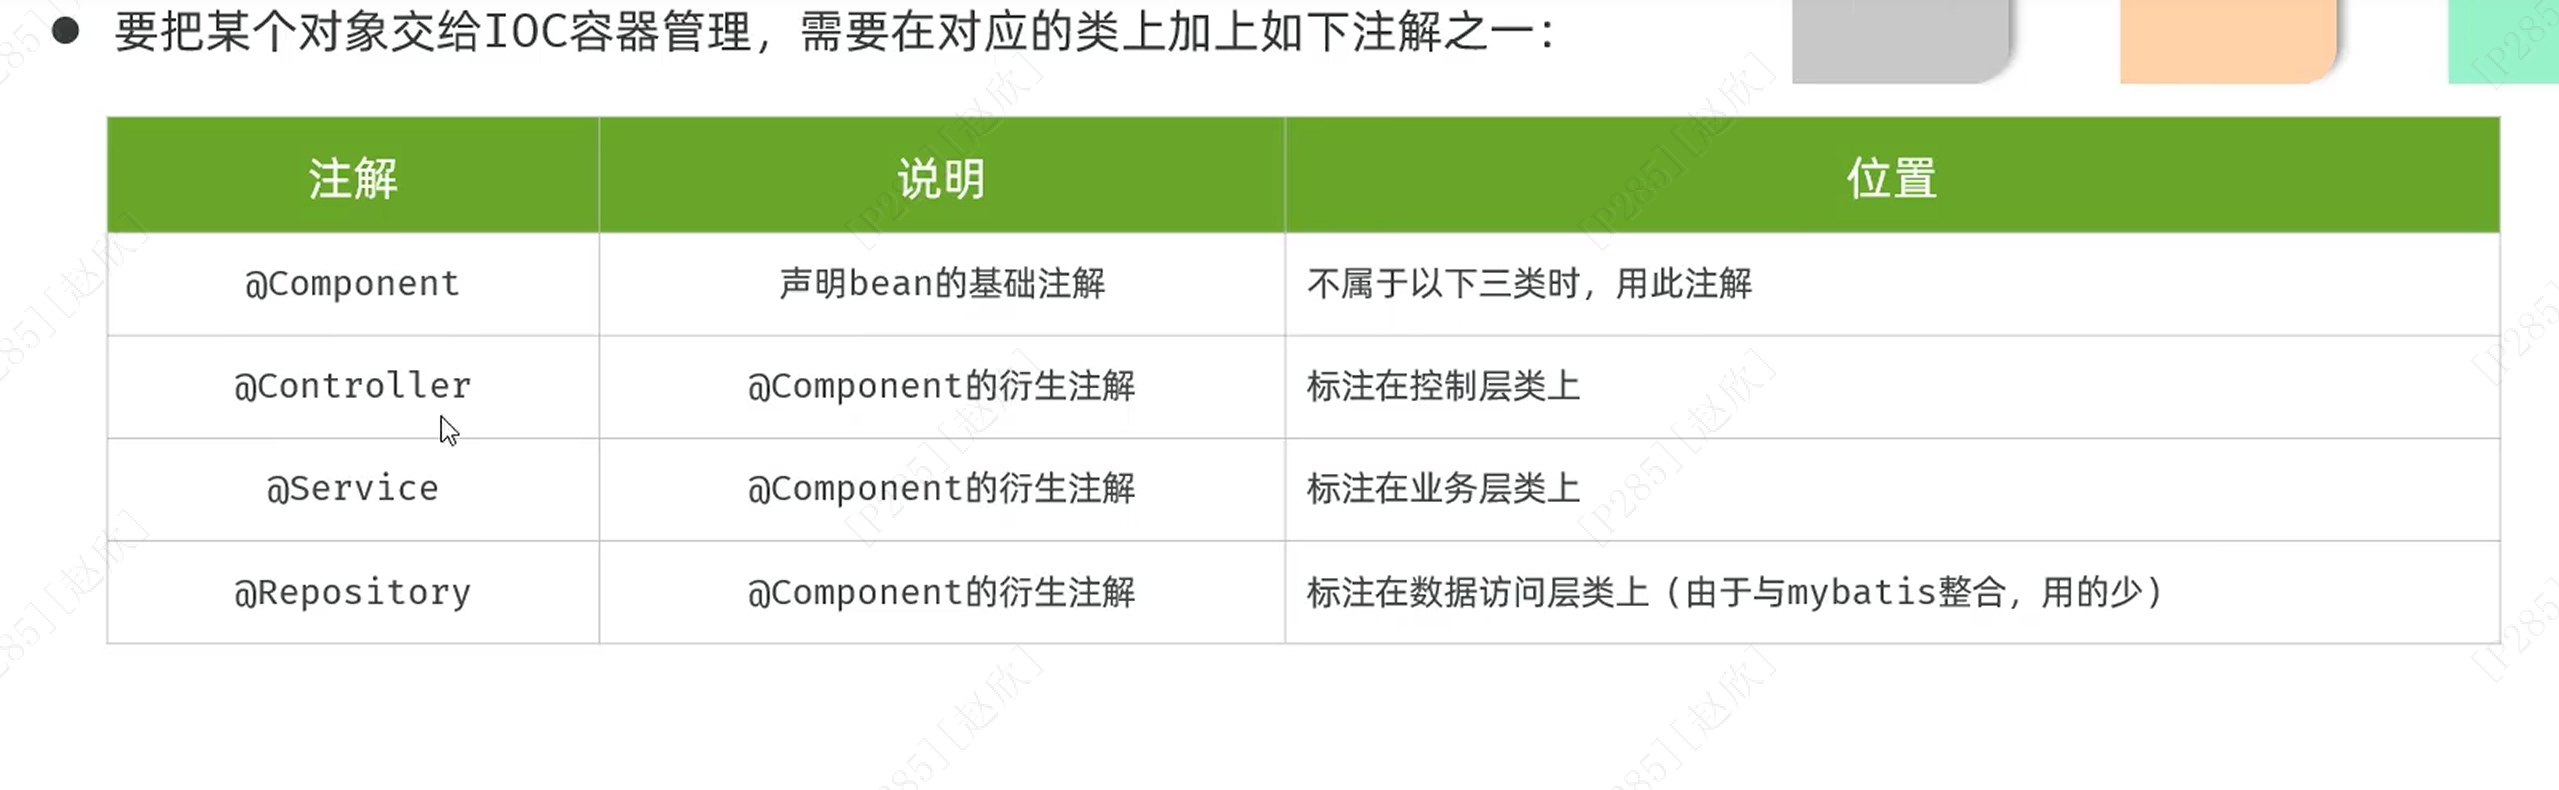
在Dao的实现类前将@component改为@Repository
Service的实现类前将@component改为@Service
controller的实现类为@RestController

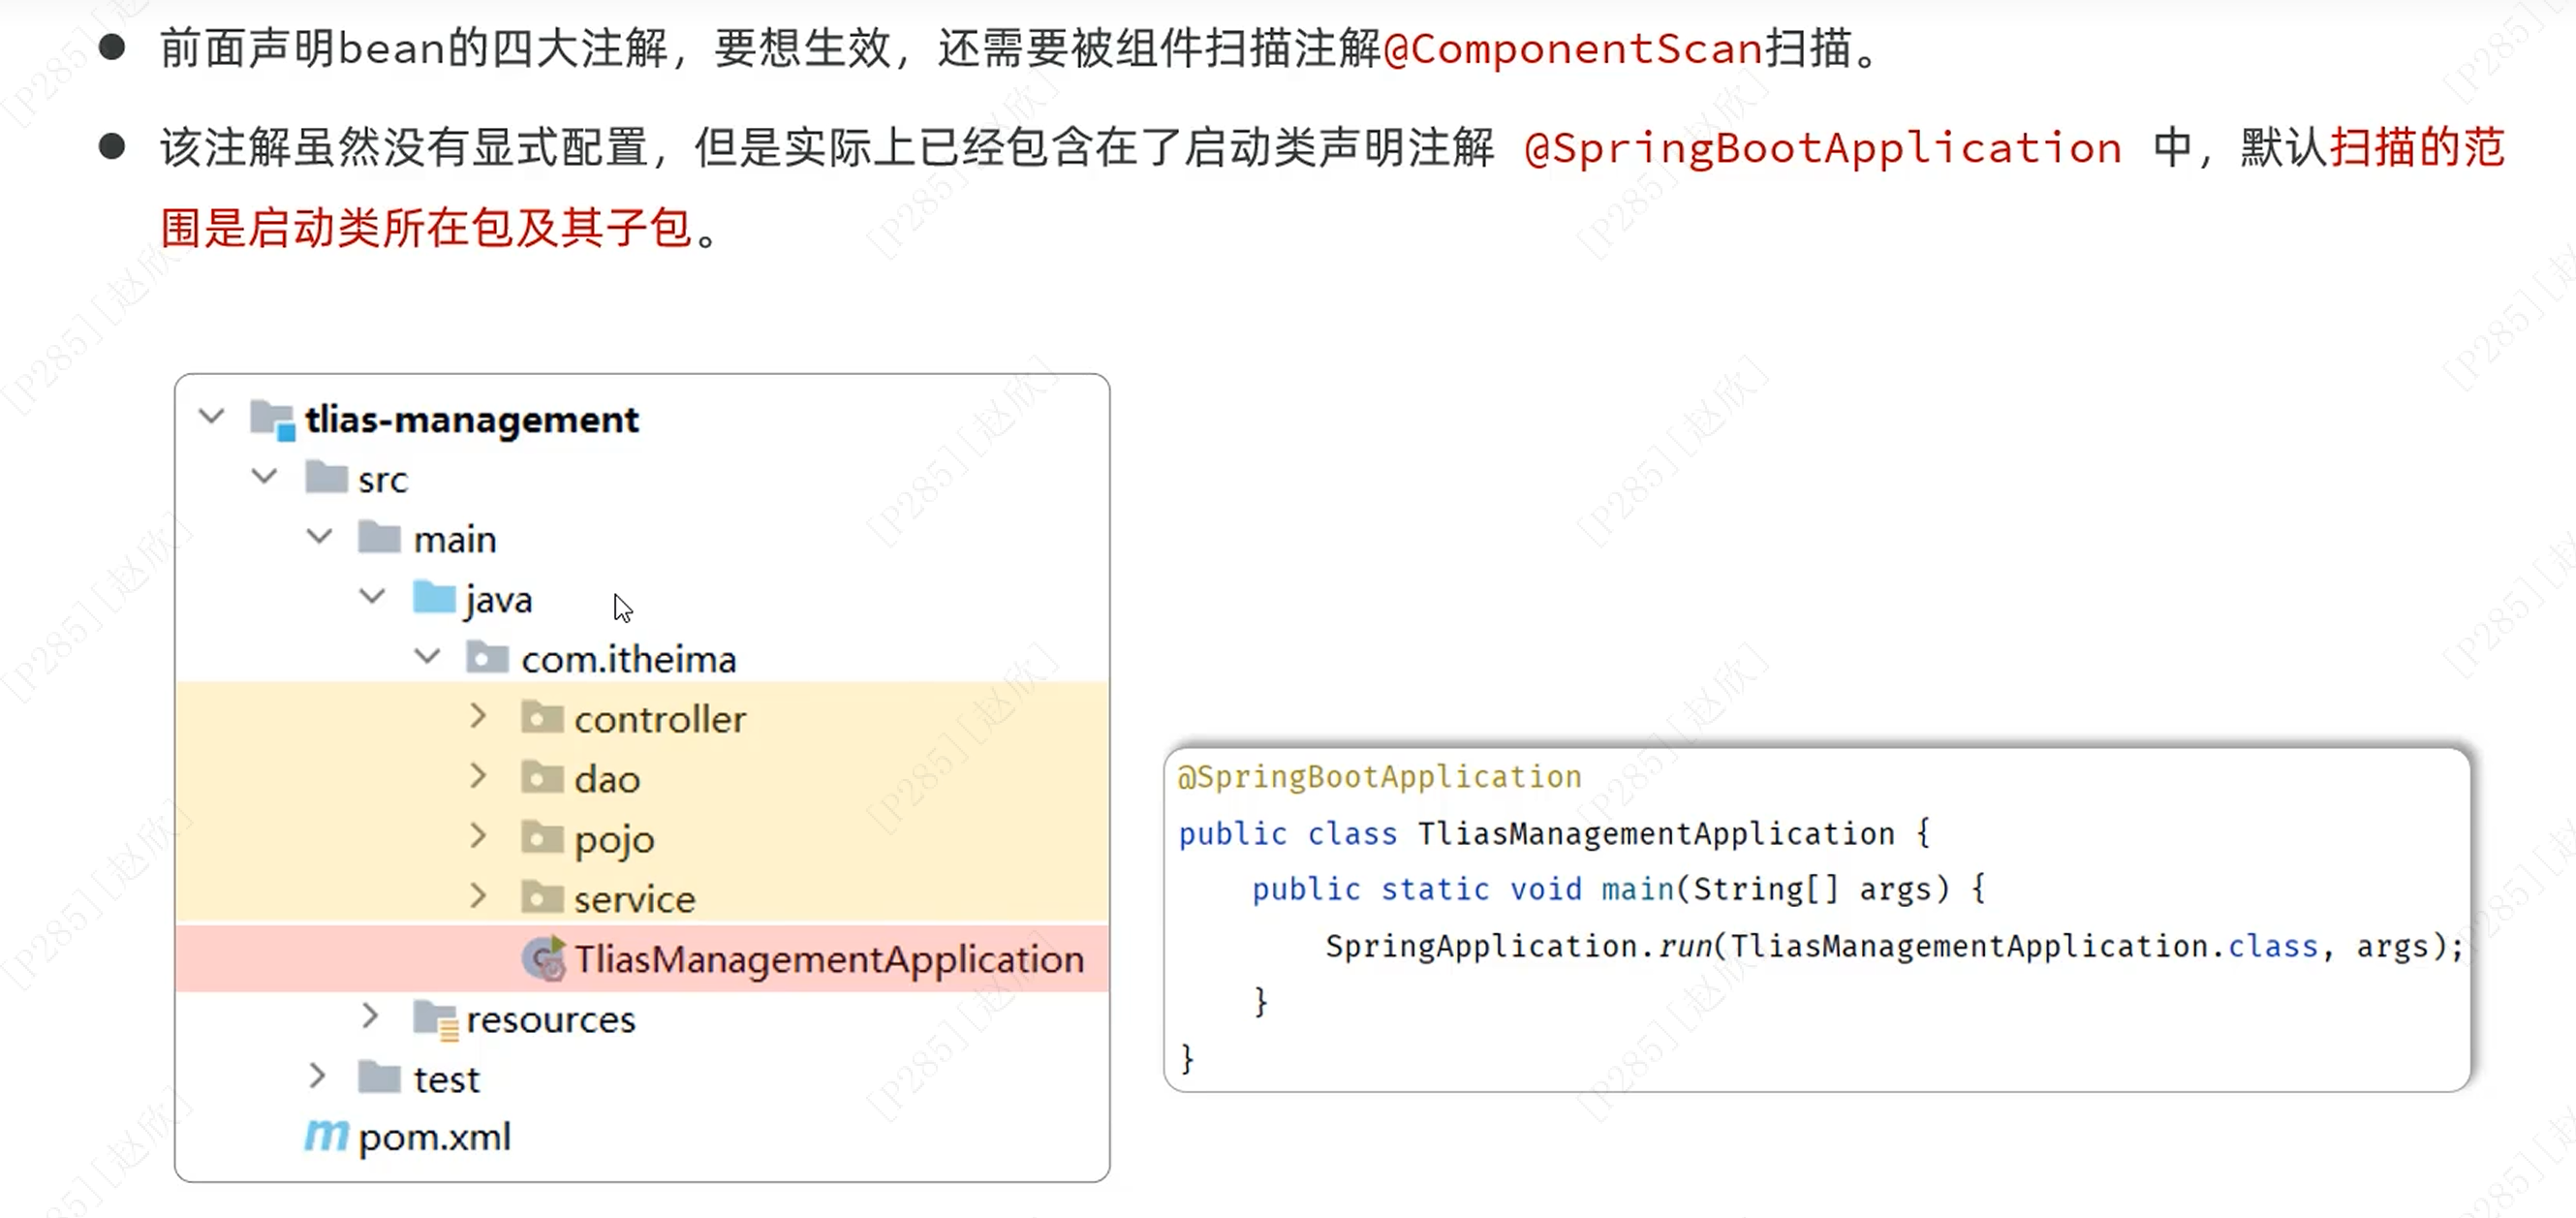
总的来说要将启动类代码放置在com.itheima的软件包下,这样才能让其组件都被扫描到!!!
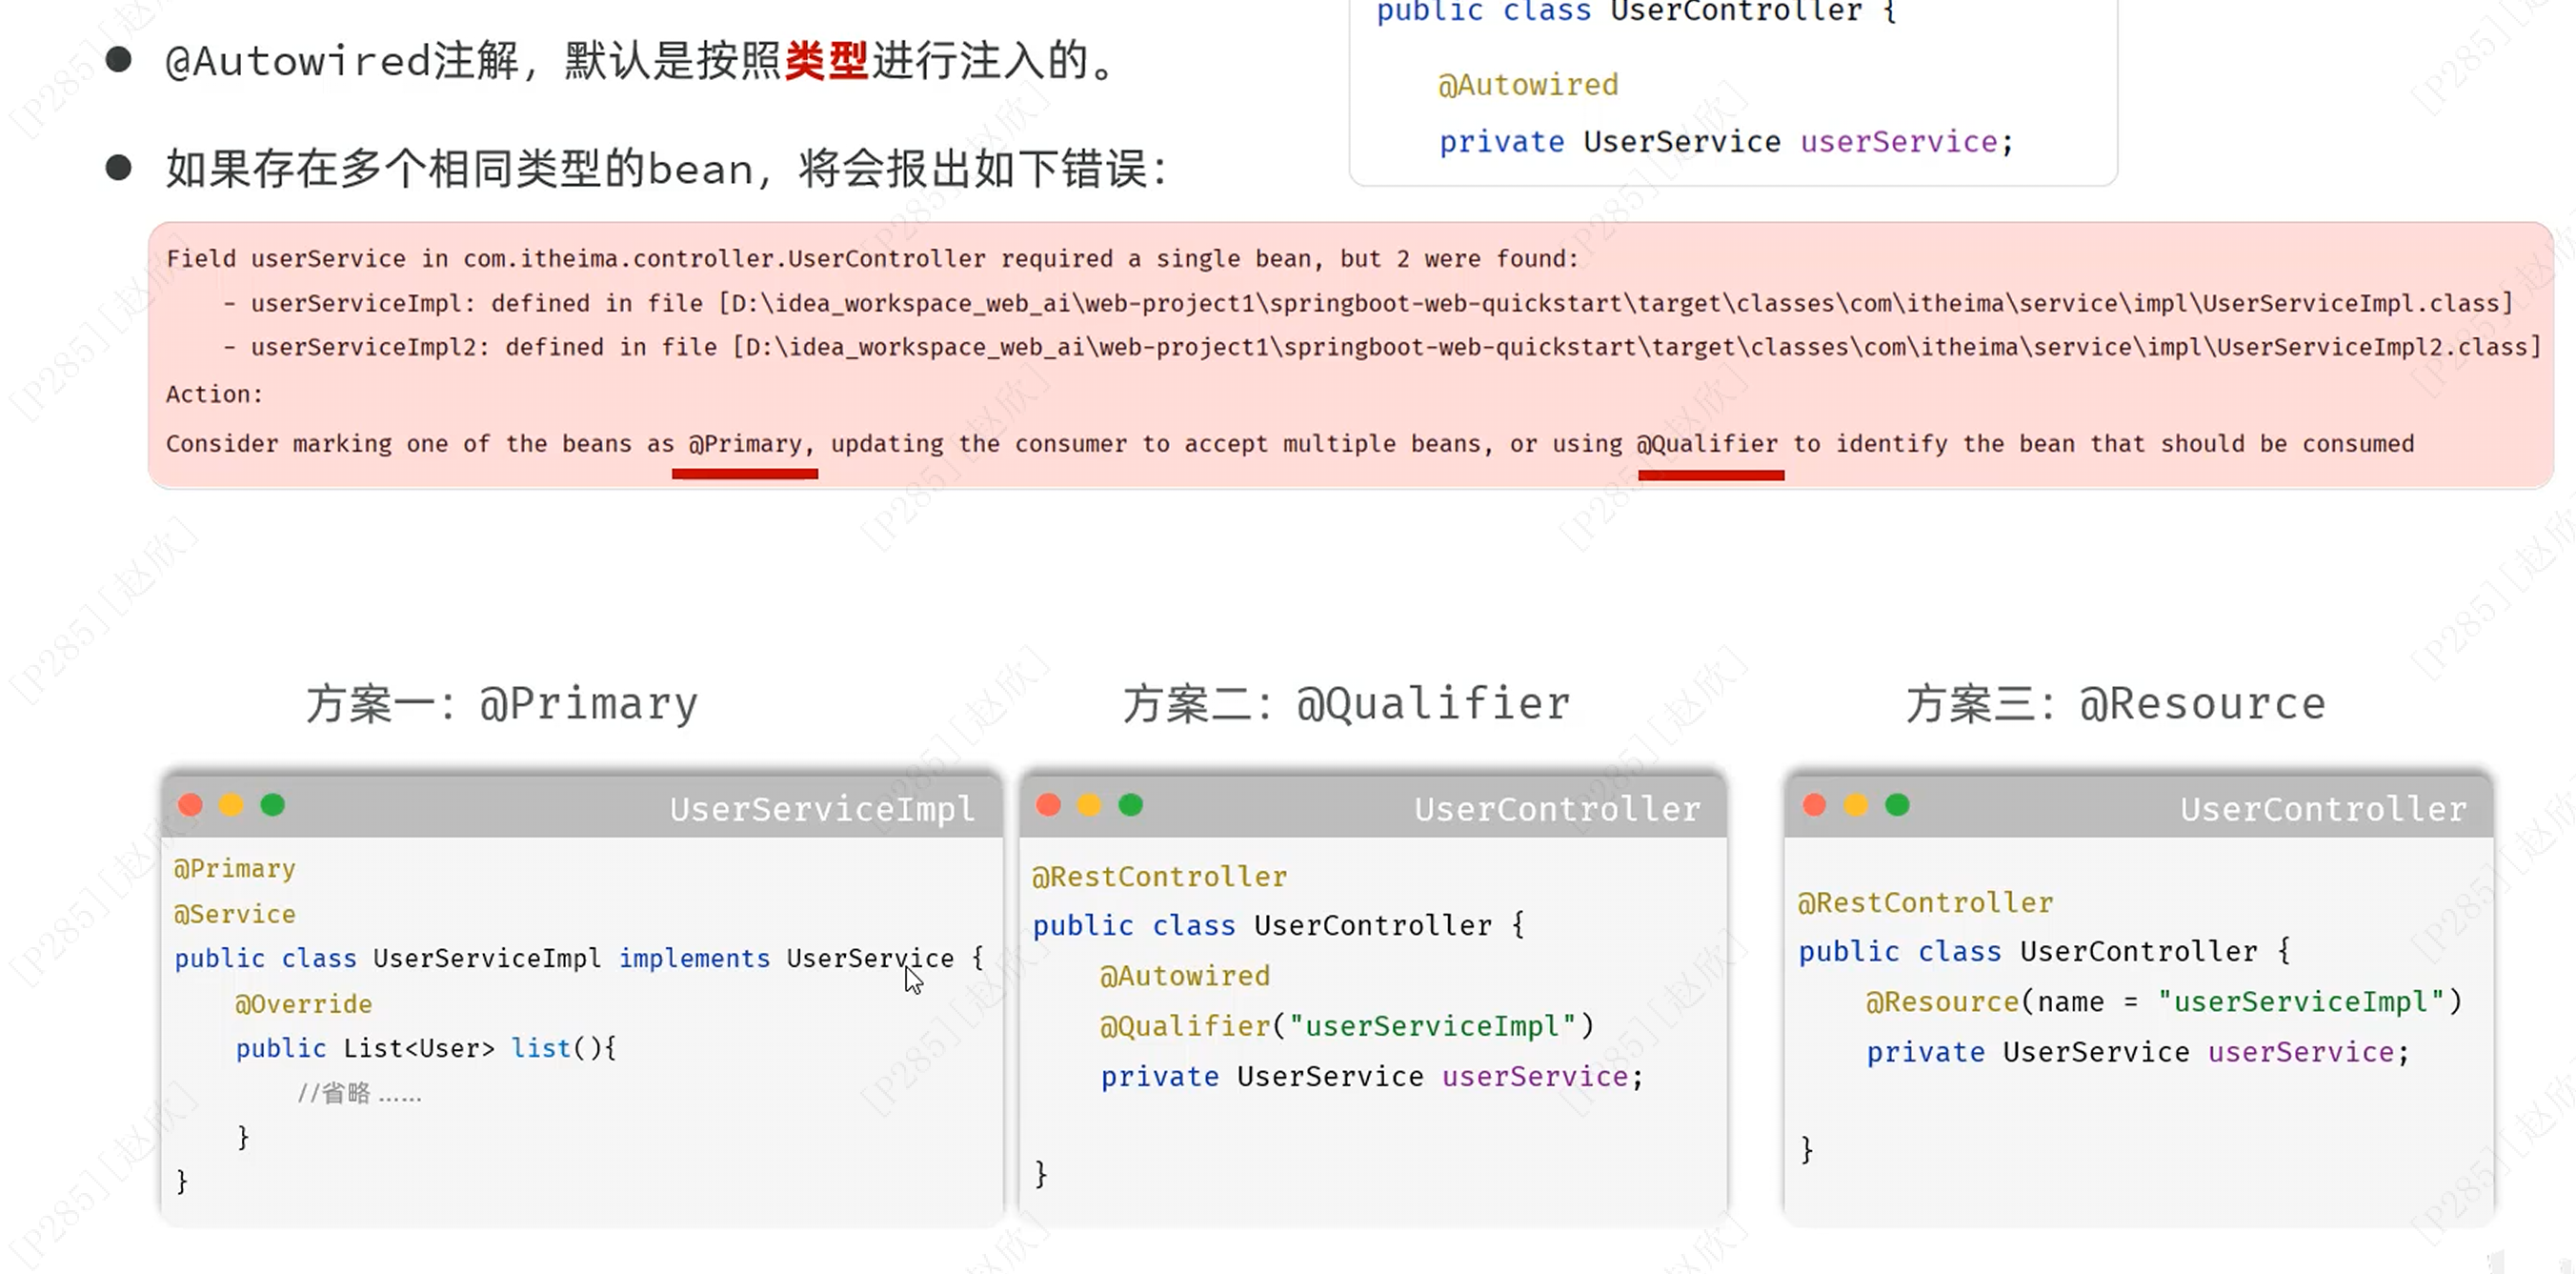
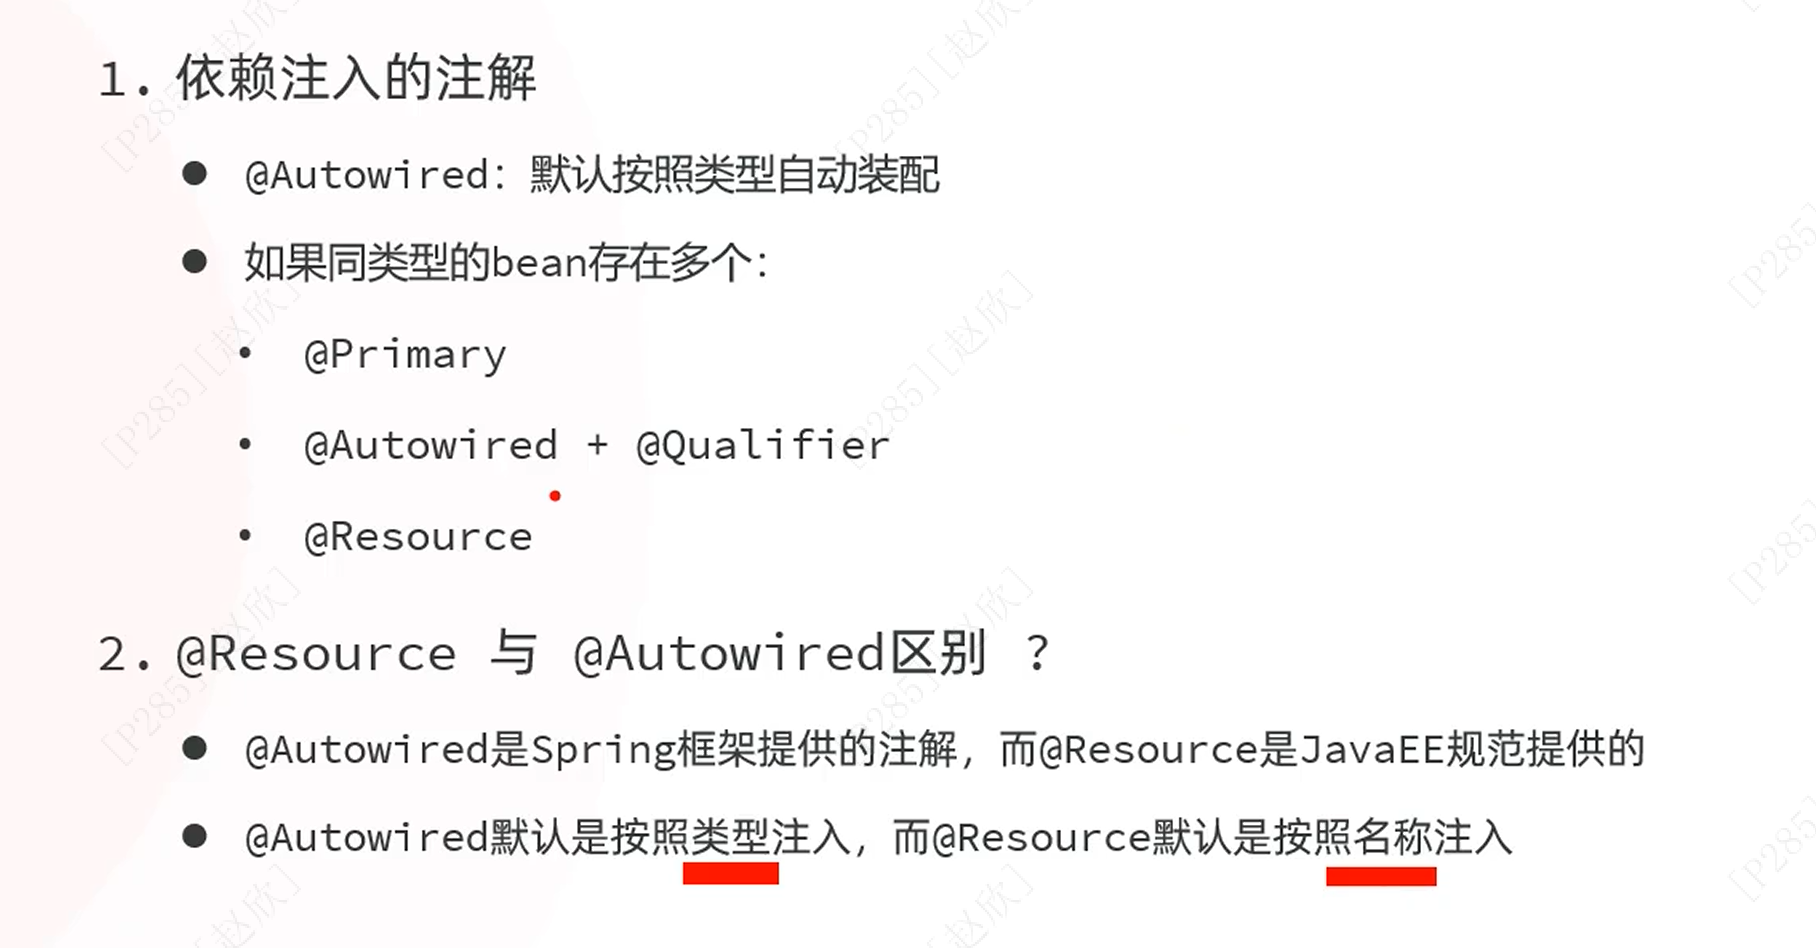
6、DI详解
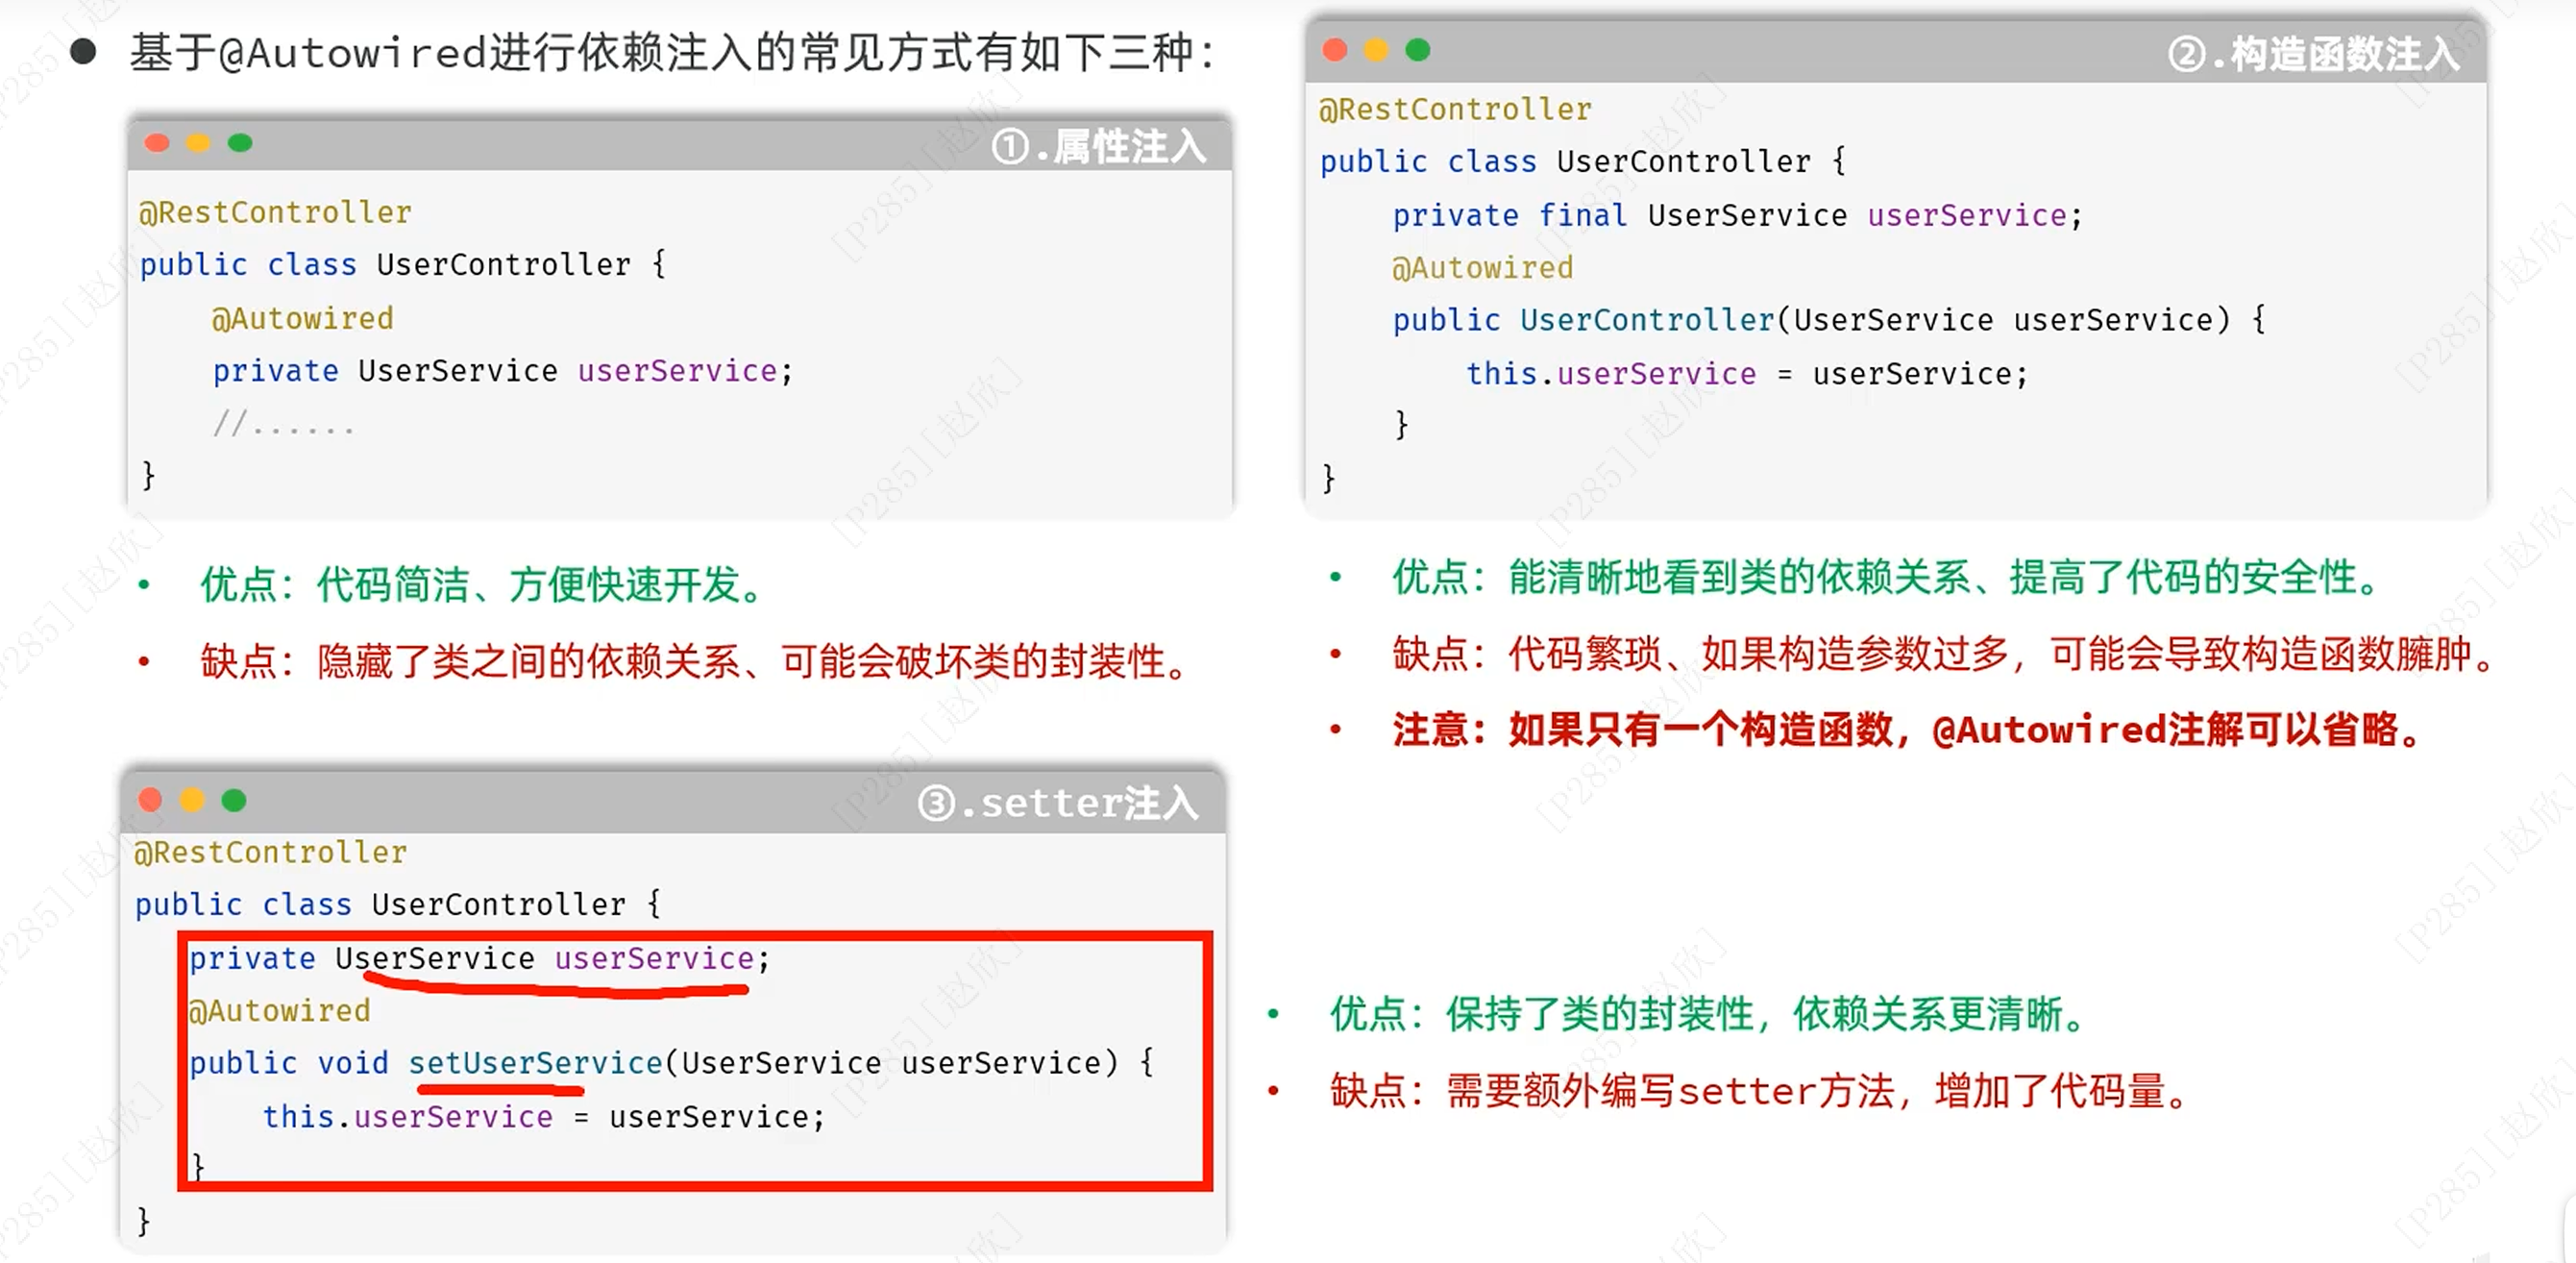
可通过以下三种方式来优先选择注入哪一个类(如果存在相同类型的Bean情况下)