系列文章:
【轻松入门SpringBoot】从0到1搭建web 工程(上)-使用SpringBoot框架
【轻松入门SpringBoot】从0到1搭建web 工程(中) -使用Spring框架
【轻松入门SpringBoot】从0到1搭建web 工程(下)-在实践中对比SpringBoot和Spring框架
【轻松入门SpringBoot】actuator健康检查(上)
【轻松入门SpringBoot】actuator健康检查(中)
目录
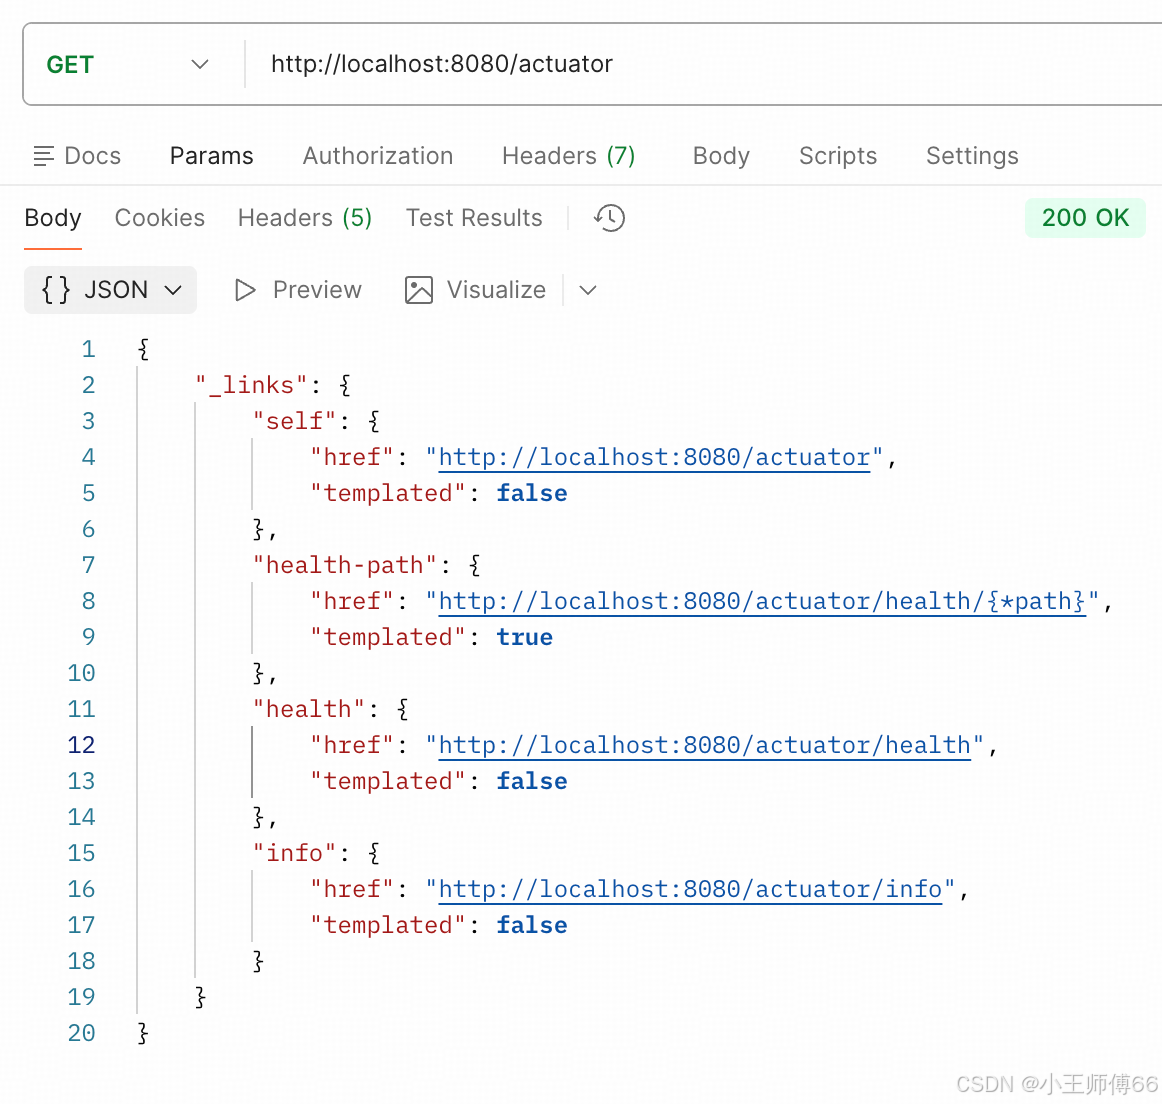
1、查看所有暴露的端点:http://localhost:8080/actuator
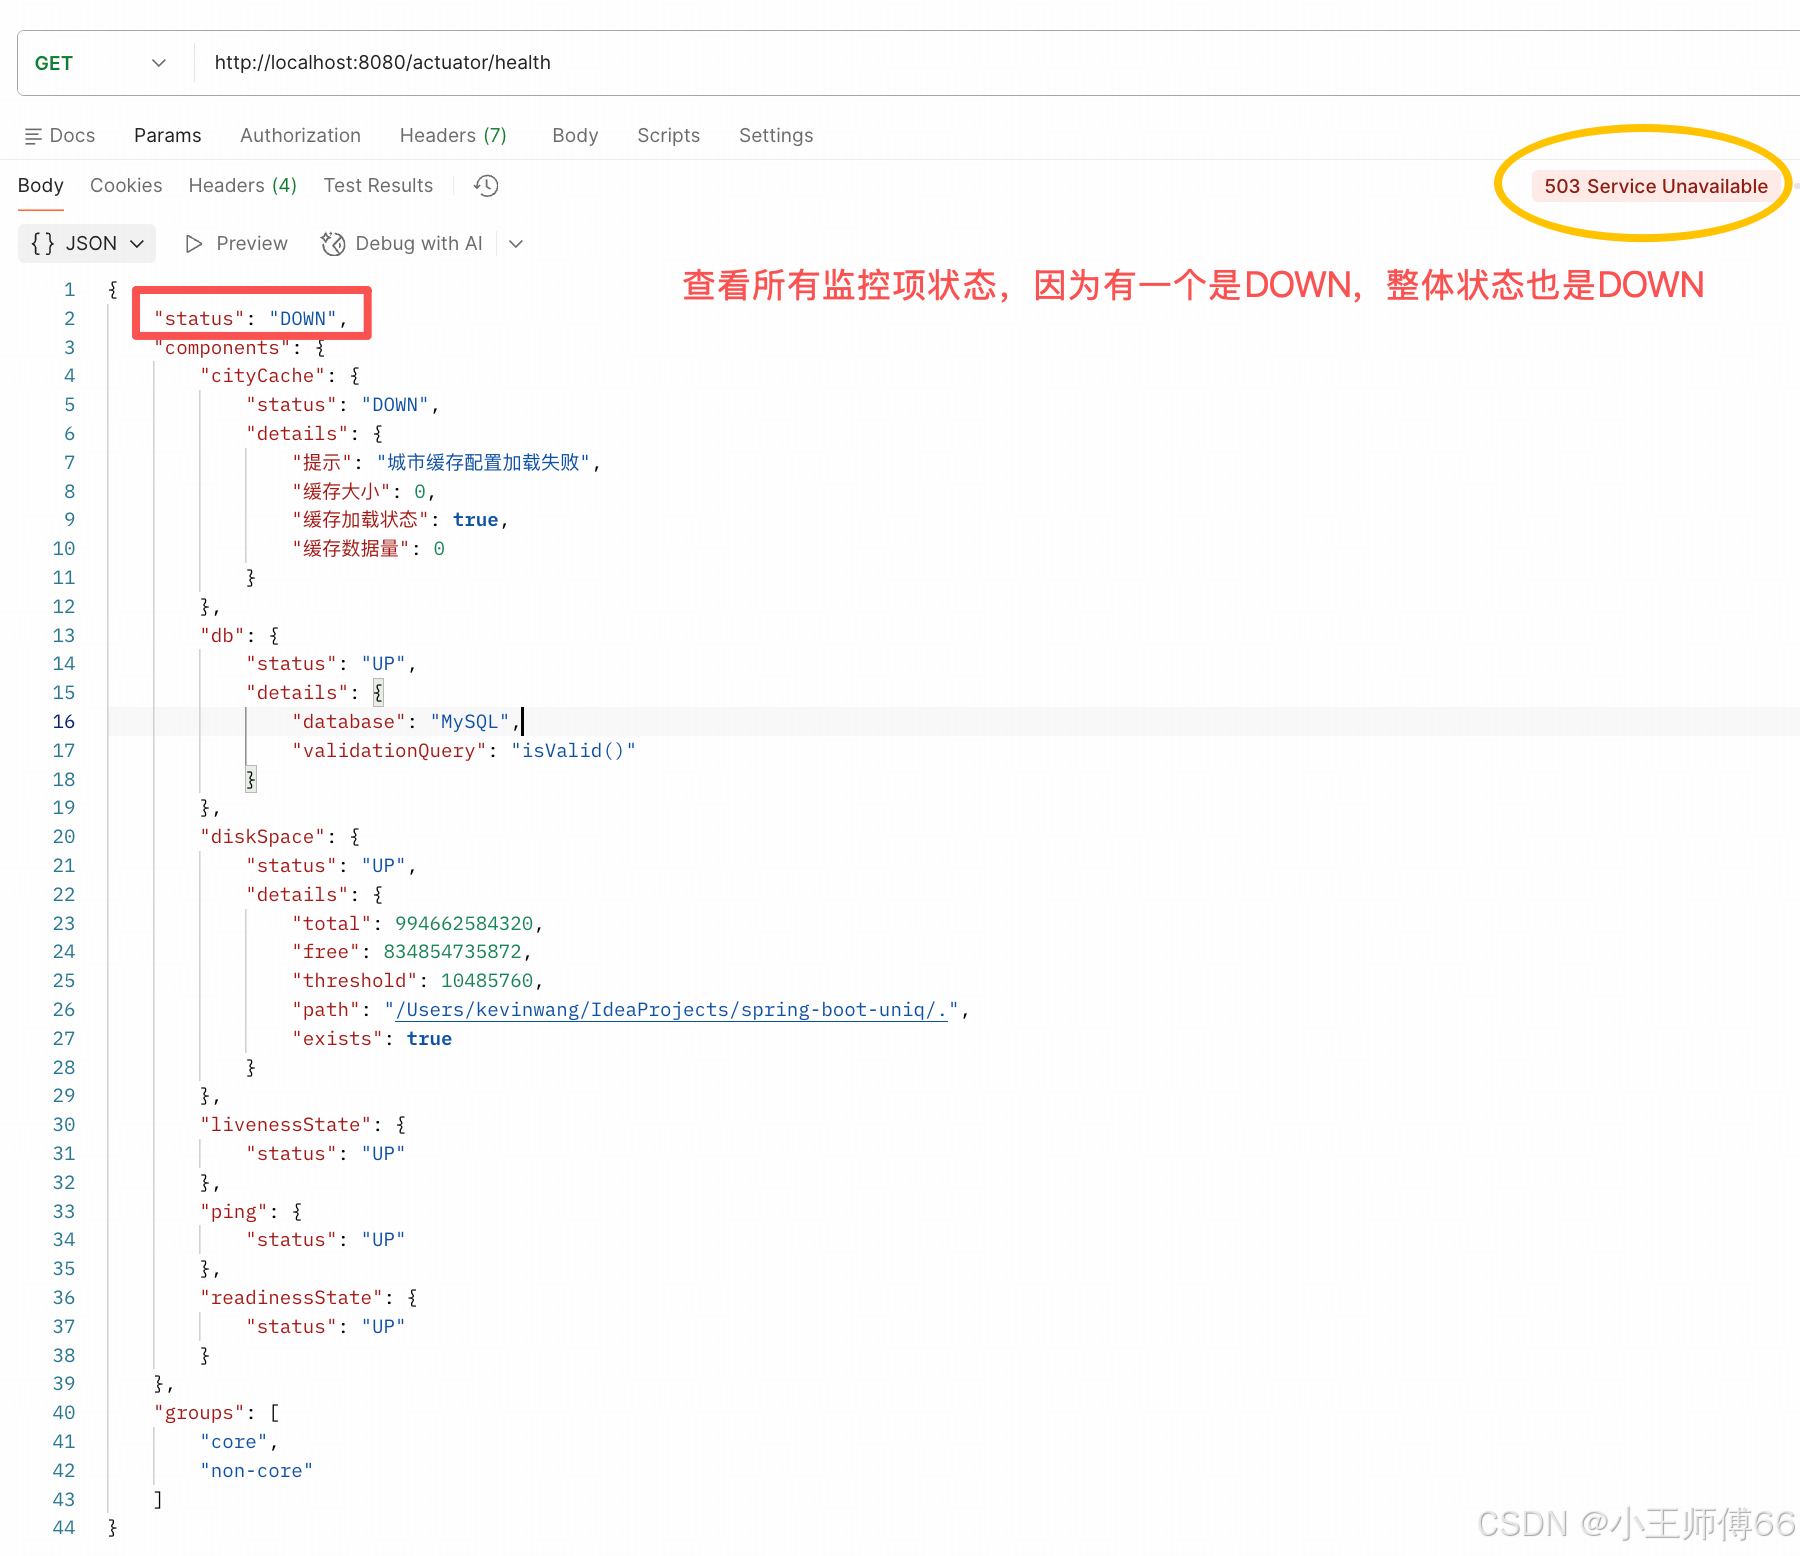
2、查看健康状态:http://localhost:8080/actuator/health
查看核心组的状态:http://localhost:8080/actuator/health/core
再看看非核心组的状态:http://localhost:8080/actuator/health/non-core
liveness访问路径:http://localhost:8080/actuator/health/livenessState
[readinessState 访问路径:http://localhost:8080/actuator/health/readinessState](#readinessState 访问路径:http://localhost:8080/actuator/health/readinessState)
前言:
本文有凑数的嫌疑,25 年快结束了,再留点痕吧。想分享一下 autuator 的分组功能测试成功啦,又鼓捣了好久,官网没写,AI 说的不对,还好脑子好使,哈哈。
上篇文章【轻松入门SpringBoot】actuator健康检查(中),结尾有说到,分组功能没玩转:

我不想放弃啊,所以这周又接着搞,终于,调了下配置,搞明白了。
再回顾一下我的诉求:我想给组件分组,只让核心组件的状态影响整体监控状态,非核心组件的状态不影响。比如,不能因为一些缓存失效了,认为我们现在的服务不可用了。
修改application.yml:
java
management:
endpoints:
web:
exposure:
include: health,info,livenessstate,readinessstate,health-core,health-non-core
endpoint:
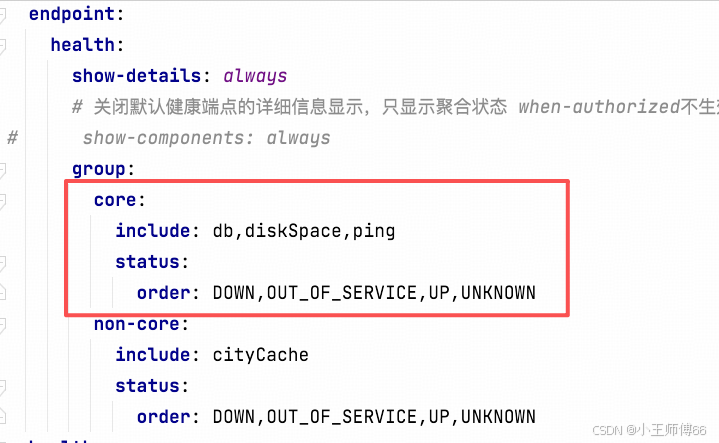
health:
show-details: always
group:
core:
include: db,diskSpace,ping
status:
order: DOWN,OUT_OF_SERVICE,UP,UNKNOWN
non-core:
include: cityCache
status:
order: DOWN,OUT_OF_SERVICE,UP,UNKNOWN
health:
# 配置默认健康端点不包含非核心组件
livenessstate:
enabled: true
readinessstate:
enabled: true
defaults:
enabled: true
status:
order: DOWN,OUT_OF_SERVICE,UP,UNKNOWN主要修改点:在management.endpoints.web.exposure.include中添加暴露端点:health-core,health-non-core
1、查看所有暴露的端点:http://localhost:8080/actuator
2、查看健康状态:http://localhost:8080/actuator/health
(缓存失效后,cityCache状态是DOWN)
3、分组功能
查看核心组的状态:http://localhost:8080/actuator/health/core
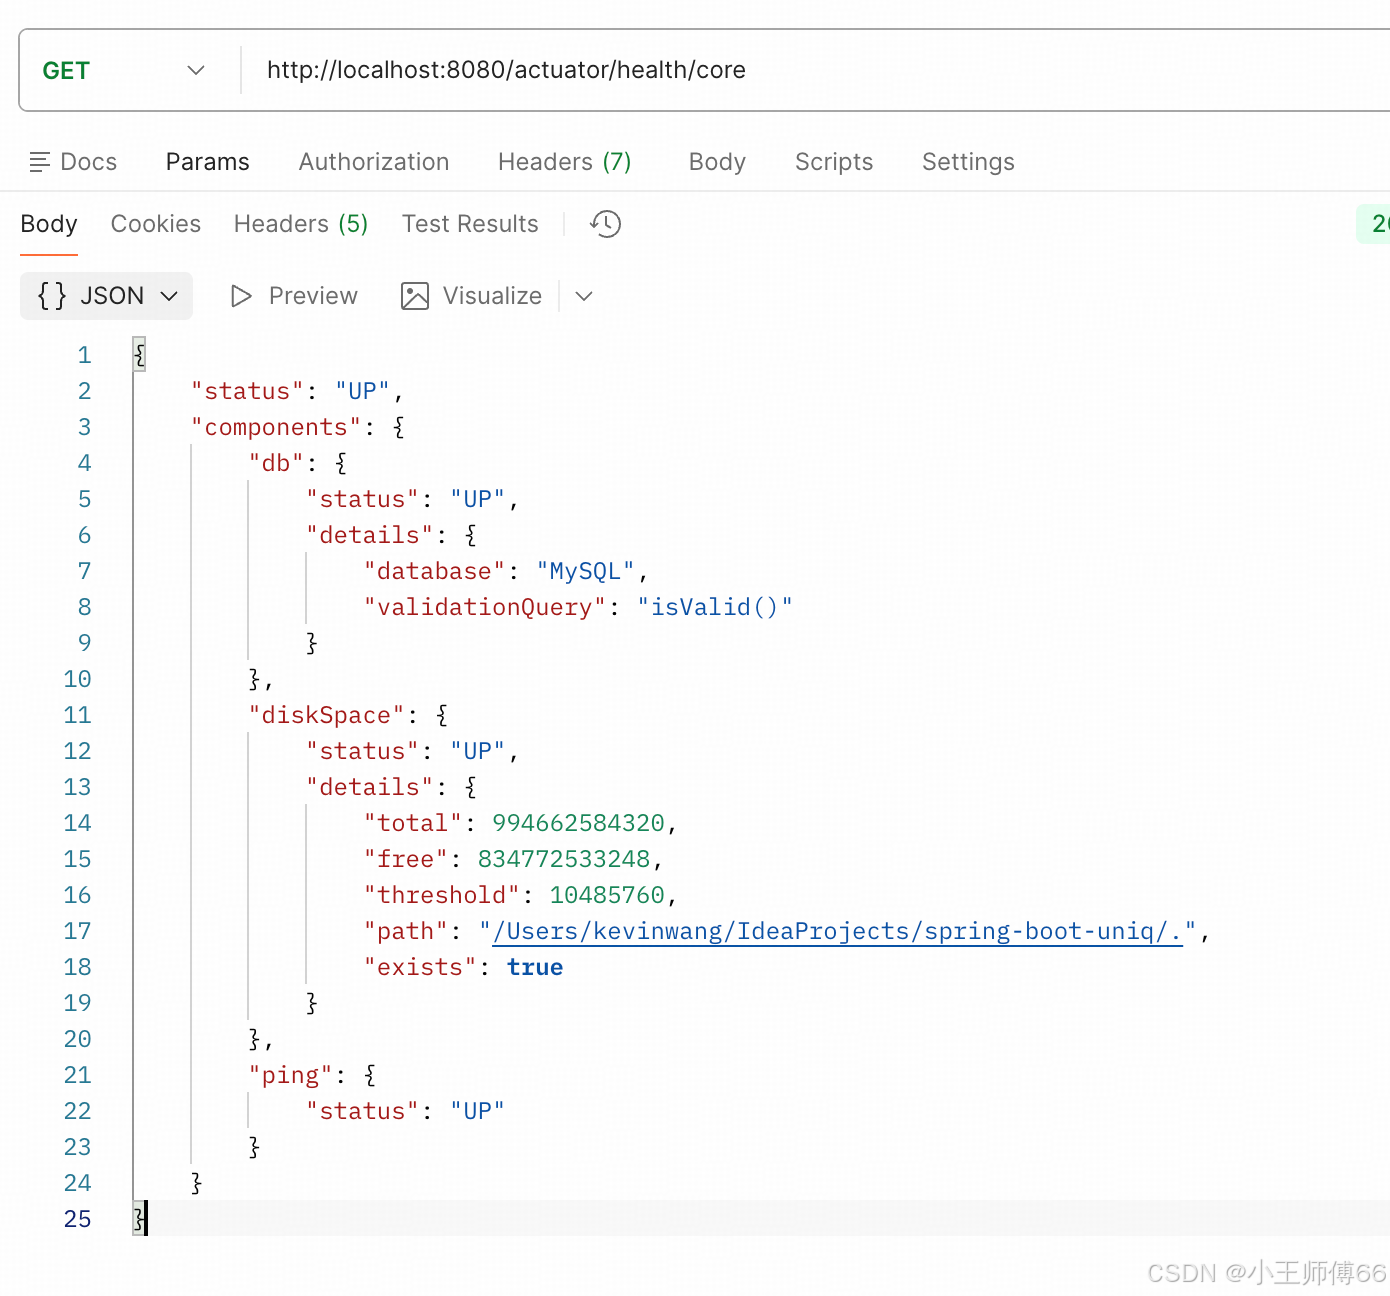
返回值跟我定义的核心组一一对应,status只聚合core组里的状态。
再看看非核心组的状态:http://localhost:8080/actuator/health/non-core
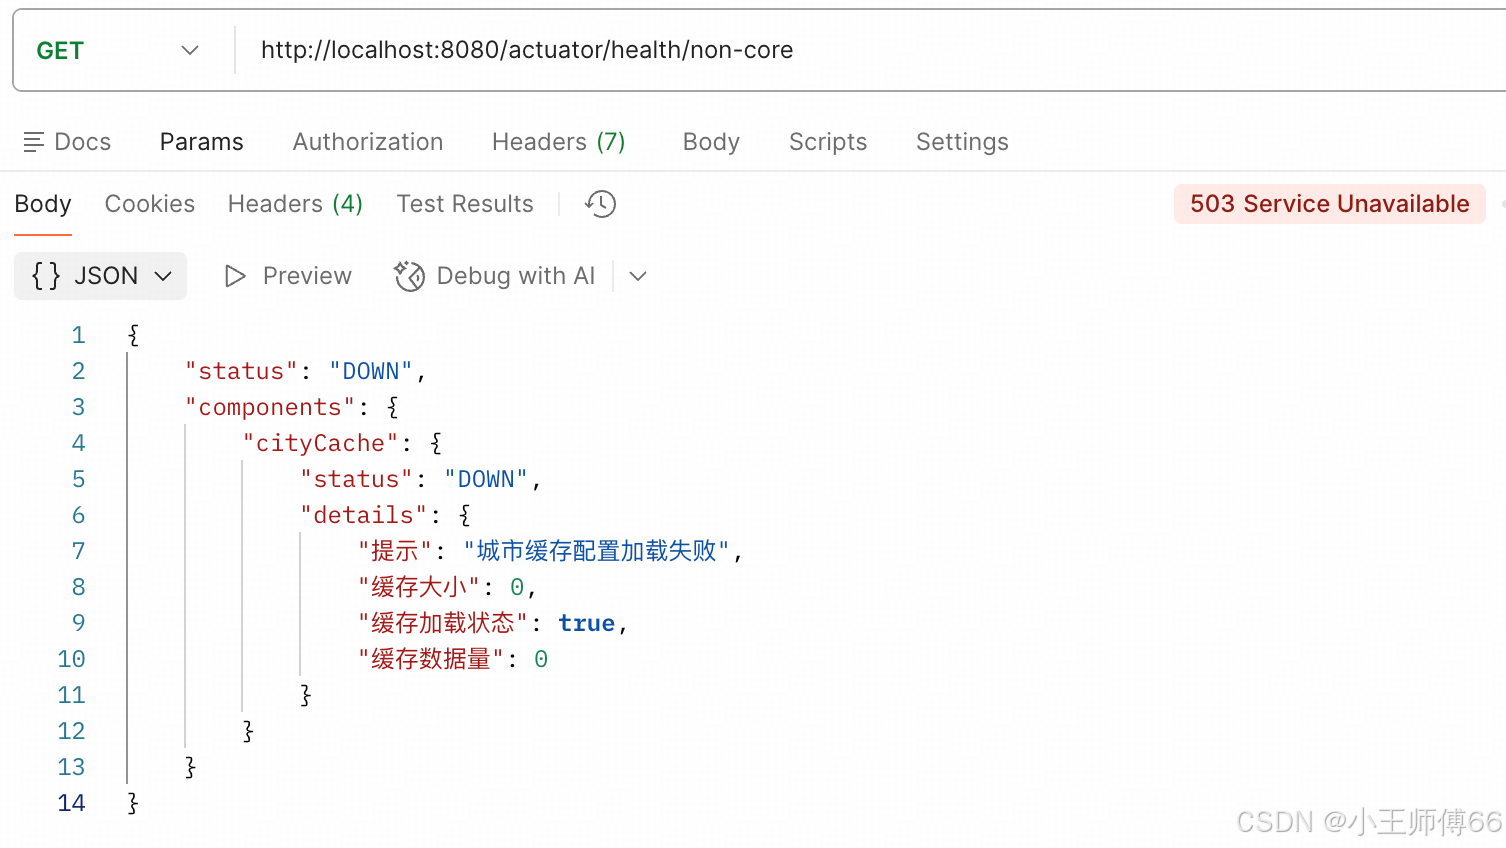
非核心组与核心组状态隔离了!
其实除了用"组"的概念,也可以把状态定义在返回值里,调用方去解析返回值,获取状态。但有了"组"的概念,我们只需要获取外层的"status"就 ok 了。
之前没生效的原因:
之前一直没生效的原因有 3 点:版本低、没暴露端点、访问路径有问题。前两个问题 AI 帮忙发现了,但访问路径的问题,AI 一直给的解决方案是访问:http://localhost:8080/actuator/health-core
,然后一直返回 404,我本地 debug,该注册的也都注册了,配置也识别到了,但就是不生效。
后来我观察,health-path的href 是:"http://localhost:8080/actuator/health/{\*path}"
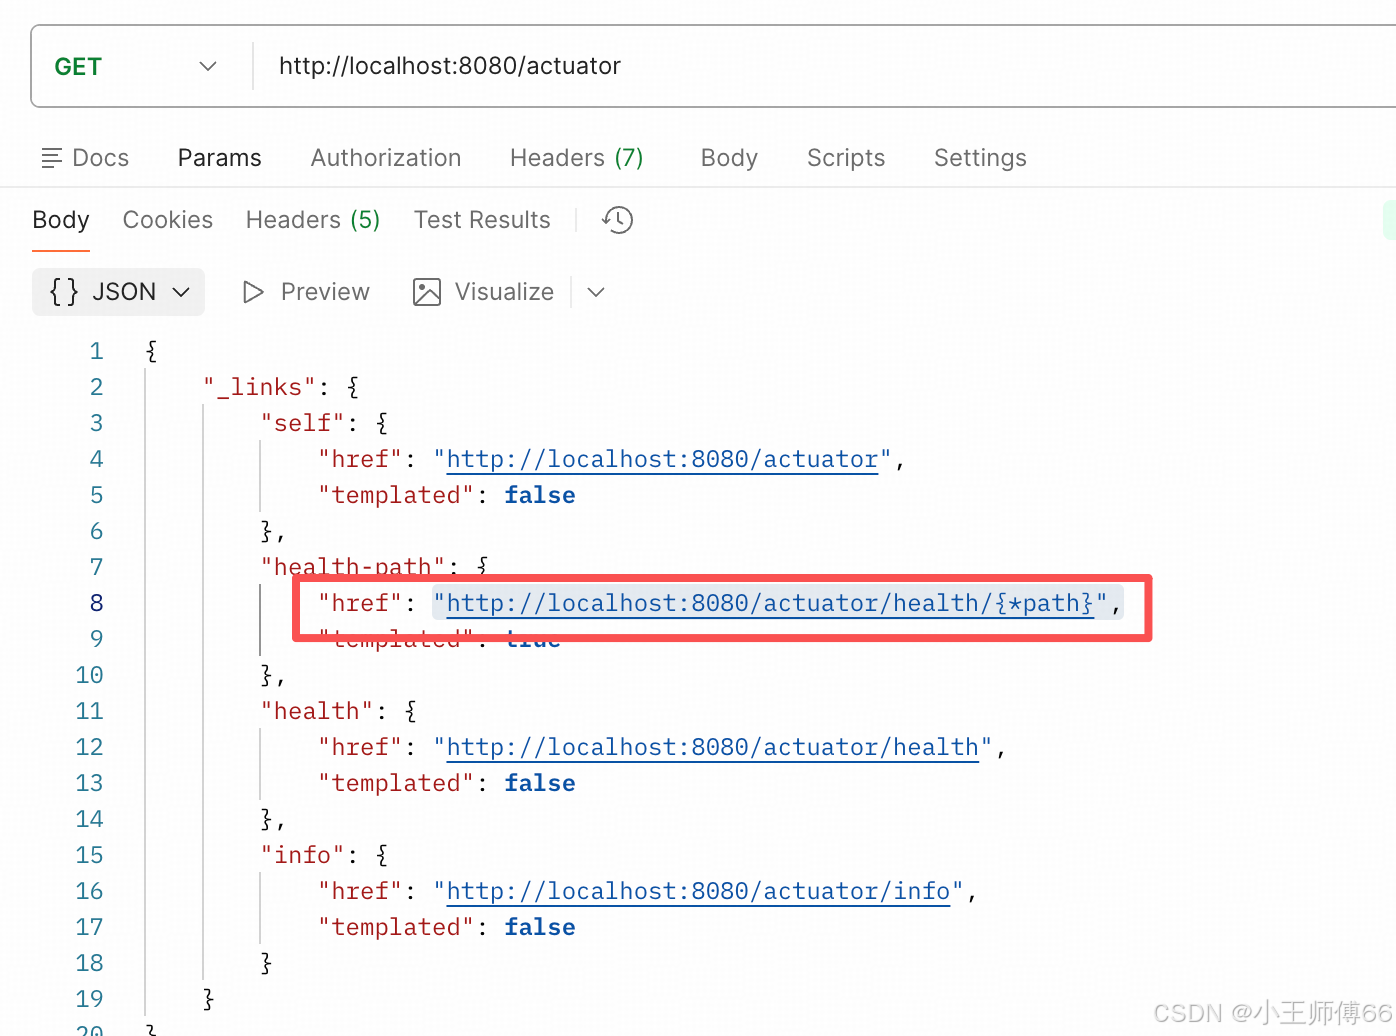
然后我修改成了:http://localhost:8080/actuator/health/core,终于生效了。庆祝🥳
4、从"存活"和"就绪"的维度进行安全检查
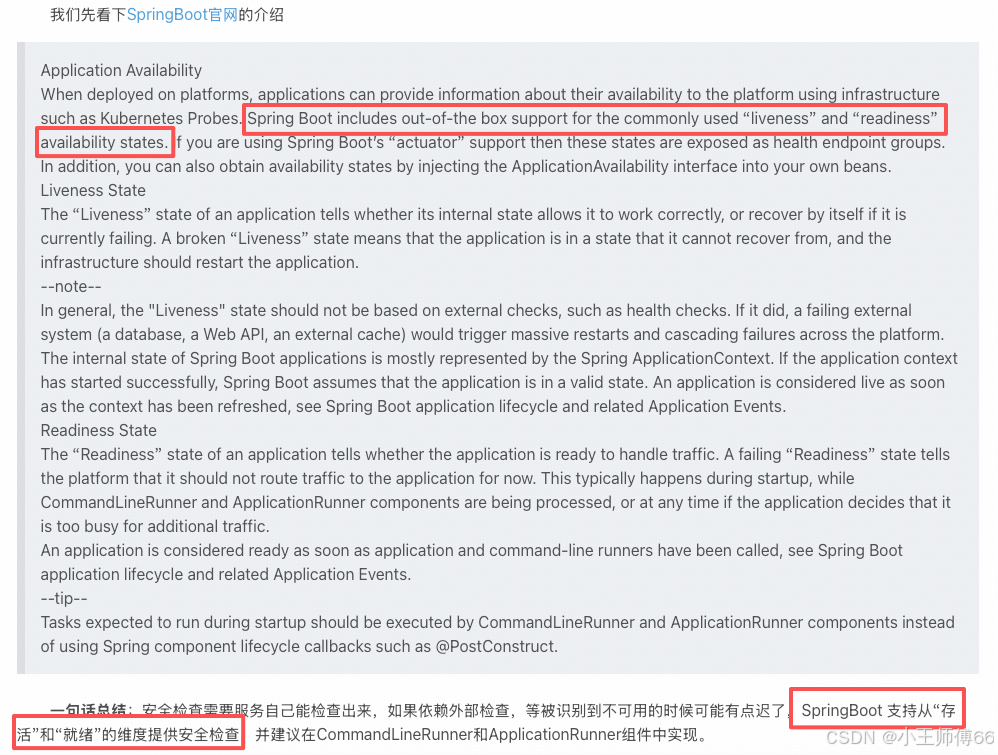
在 【轻松入门SpringBoot】actuator健康检查(上)中,我们层发过 SpringBoot 官网的解释,这里我们简单的过下这两个概念。存活:就是字面的意思,服务已启动,活着;就绪:是指可提供服务,"活着"和"能提供服务"是两码事,比如,服务已启动,但是线程池满了,那就提供不了服务。
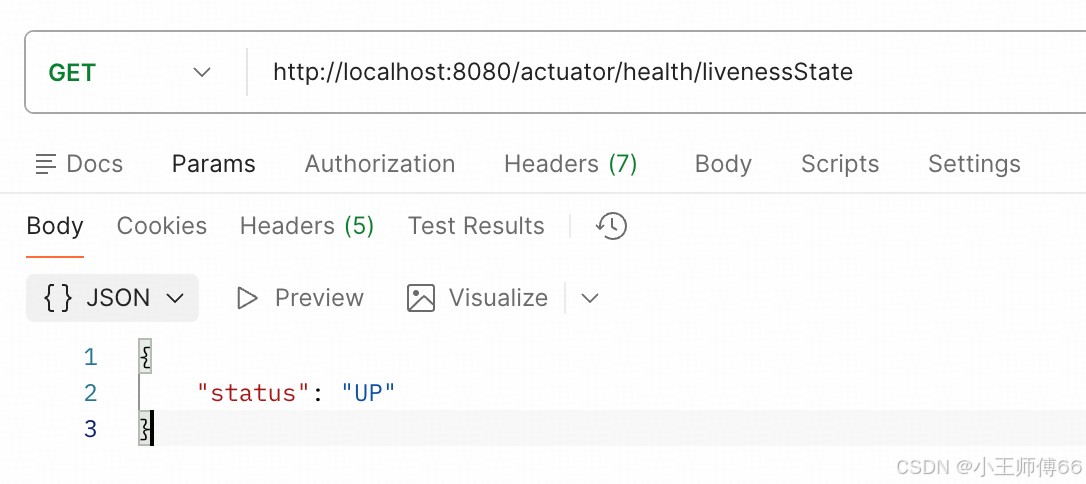
liveness访问路径:http://localhost:8080/actuator/health/livenessState
readinessState 访问路径:http://localhost:8080/actuator/health/readinessState
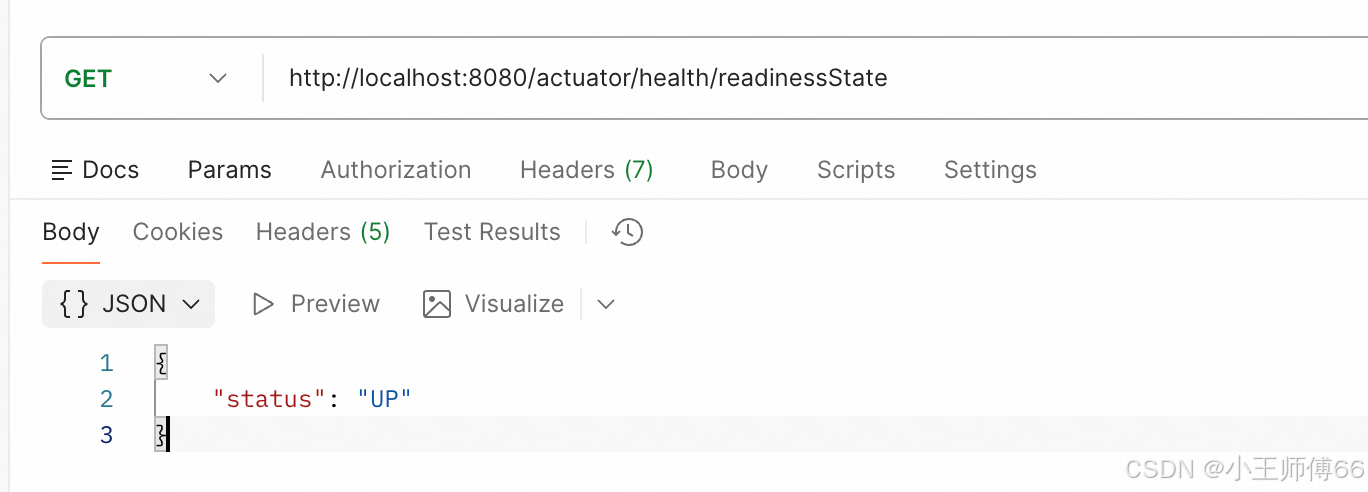
后面这两个特性的使用,我再结合具体的实例介绍。(这两个路径,AI 说的也不对)
总结:
这篇主要是对中篇文章的补充,分享了spring-boot-starter-actuator ,3.3.0 版本,6 个正确的访问路径,希望能给有需要的小伙伴们带来帮助。
http://localhost:8080/actuator
http://localhost:8080/actuator/health
http://localhost:8080/actuator/health/core
http://localhost:8080/actuator/health/non-core
http://localhost:8080/actuator/health/livenessState
http://localhost:8080/actuator/health/readinessState
写到最后,这应该是 25 年最后一篇 blog 了,明天我要跟进业务高峰,大概率不会再写一篇了。先跟我自己说句"辛苦啦",再跟 CSDN的网友们说句"辛苦啦",明年再见吧,bye~~