目录
[1. 什么是 Trae](#1. 什么是 Trae)
[1.1. 支持的操作系统](#1.1. 支持的操作系统)
[2. Trae 的安装](#2. Trae 的安装)
[2.1. 选择主题和语言](#2.1. 选择主题和语言)
[2.2. 从 VS Code 或 Cursor 中导入配置](#2.2. 从 VS Code 或 Cursor 中导入配置)
[2.3. 添加 Trae 相关的命令行](#2.3. 添加 Trae 相关的命令行)
[2.4. 登录账号](#2.4. 登录账号)
[3. 侧边对话](#3. 侧边对话)
[3.1. Chat 模式](#3.1. Chat 模式)
[3.1.1. 选择模型](#3.1.1. 选择模型)
[3.1.2. 使用 Chat 模式实操"贪吃蛇"](#3.1.2. 使用 Chat 模式实操“贪吃蛇”)
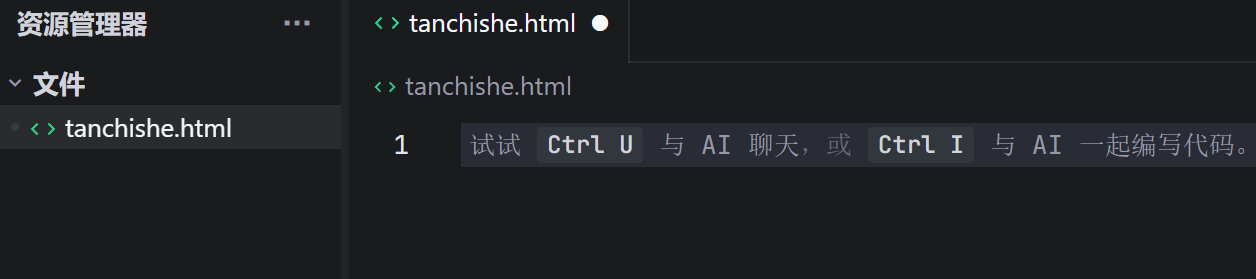
[3.1.2.1. 先创建一个文件"tanchishe.html"](#3.1.2.1. 先创建一个文件“tanchishe.html”)
[3.1.3. 选择向上下文# --> tanchishe.html](# --> tanchishe.html)
[3.1.4. 写需求](#3.1.4. 写需求)
[3.1.5. 测试代码](#3.1.5. 测试代码)
[3.1.6. 继续改进](#3.1.6. 继续改进)
[3.1.7. 历史对话](#3.1.7. 历史对话)
[3.2. Builder 模式](#3.2. Builder 模式)
前言
在现在这个 ai 的时代,编写代码,一定离不开 ai 的帮助
有了 ai 的帮助,那么就一定会事半功倍,效率说成像坐飞机都毫不为过
值此,我就来介绍一款大家都能用到的 ai 助手 --- trae
我的主页:艺杯羹
虽然现在像 idea 、vscode 等编程工具里面也有 ai 的编程工具
但现在介绍的,是一种大型,不再是插件那么简单
话不多说,现在开始~
1. 什么是 Trae
这是一款具有智能问答、代码自动补全以及基于 Agent 的 AI 自动编程能力的工具
使用 Trae 开发项目时,你可以与 AI 灵活协作,提升开发效率
是由字节跳动出品的
- 智能问答
- 实时代码建议
- 从 0 到 1 开发项目
1.1. 支持的操作系统
这里要注意,还有操作系统的要求
- macOS 10.15 及以上
- Windows 10、11
2. Trae 的安装
Trae 的安装官网传送门:http://trae.cn/

直接下这个国内版本的就可以了,虽然国外版本的模型多一些,但是不影响的!
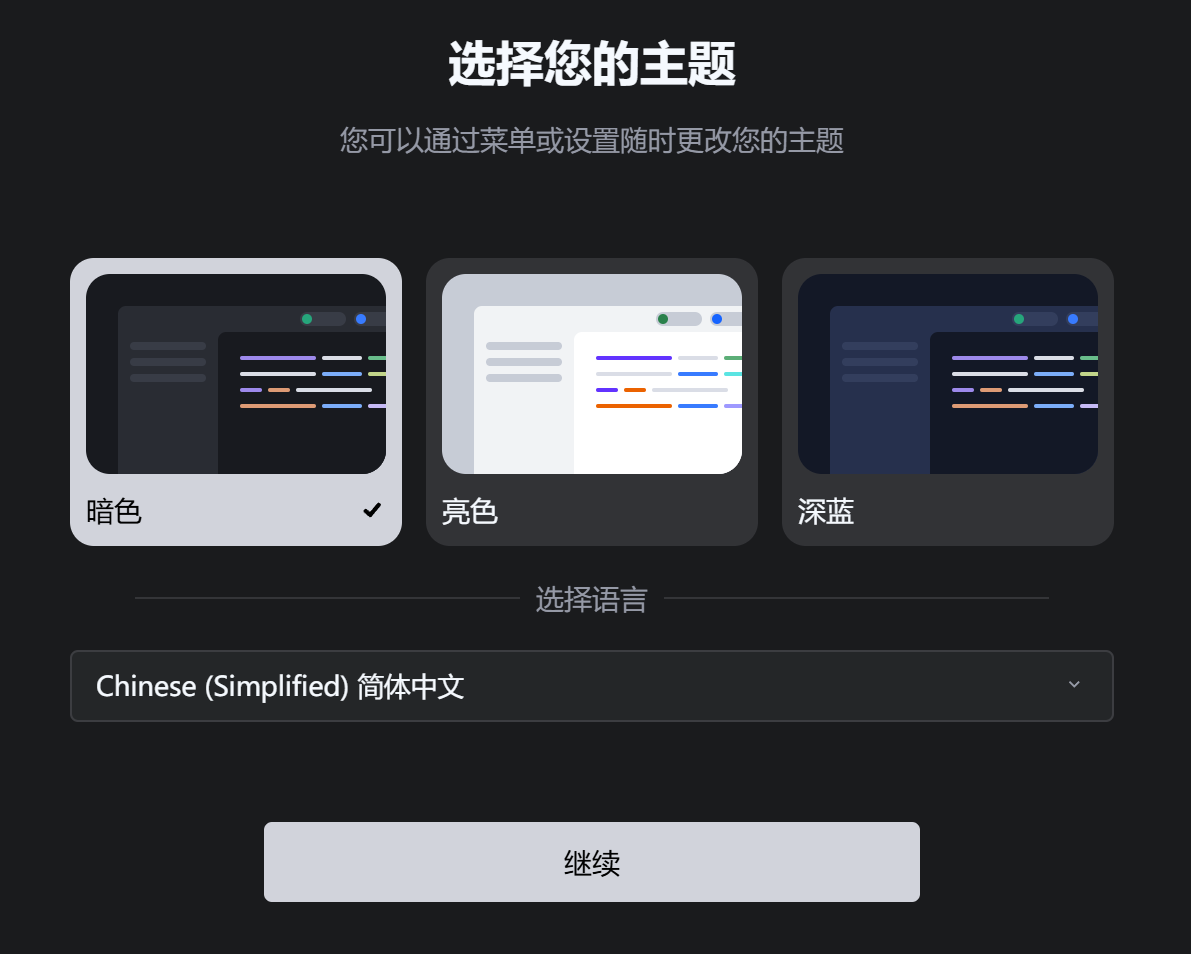
2.1. 选择主题和语言
- 选择主题。可选项为 暗色 、亮色 和 深蓝。
- 选择显示语言。可选项为 简体中文 和 English。
2.2. 从 VS Code 或 Cursor 中导入配置
这一步的意思是,如果你电脑上在用 VS Code 或者 Cursor,那么就可以导入使用这个软件的配置了
例如:我在 VS Code 里面下载的插件和用的快捷键,在现在的 Trae 中也可以用,就不用重新配置了

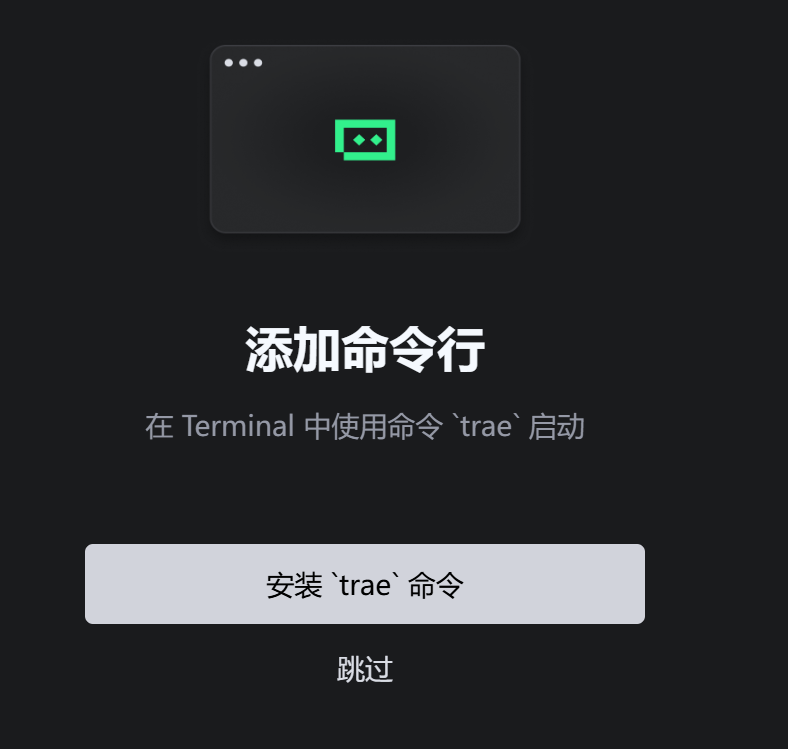
2.3. 添加 Trae 相关的命令行
添加 Trae 相关的命令行后,你可以在终端中使用命令行更快速地完成 Trae 相关的操作。例如:
- 使用 trae 命令快速唤起 Trae。
- 使用 trae my-react-app 命令在 Trae 中打开一个项目。
2.4. 登录账号
使用手机号或稀土掘金帐号登录 Trae。完成登录后,才可以在 Trae 中使用 AI 服务

3. 侧边对话
侧边对话这里介绍两种模式,一个是 Chat 模式,另一个是 Builder 模式

3.1. Chat 模式
进入 Trae 后,一般默认进入 Chat 模式
如果不是 Chat 模式,可以用以下方法来开启
- 使用快捷键(macOS:Command + U;Windows:Ctrl + U)打开侧边对话框
- 在侧边对话框的下方@符号,点击 Chat
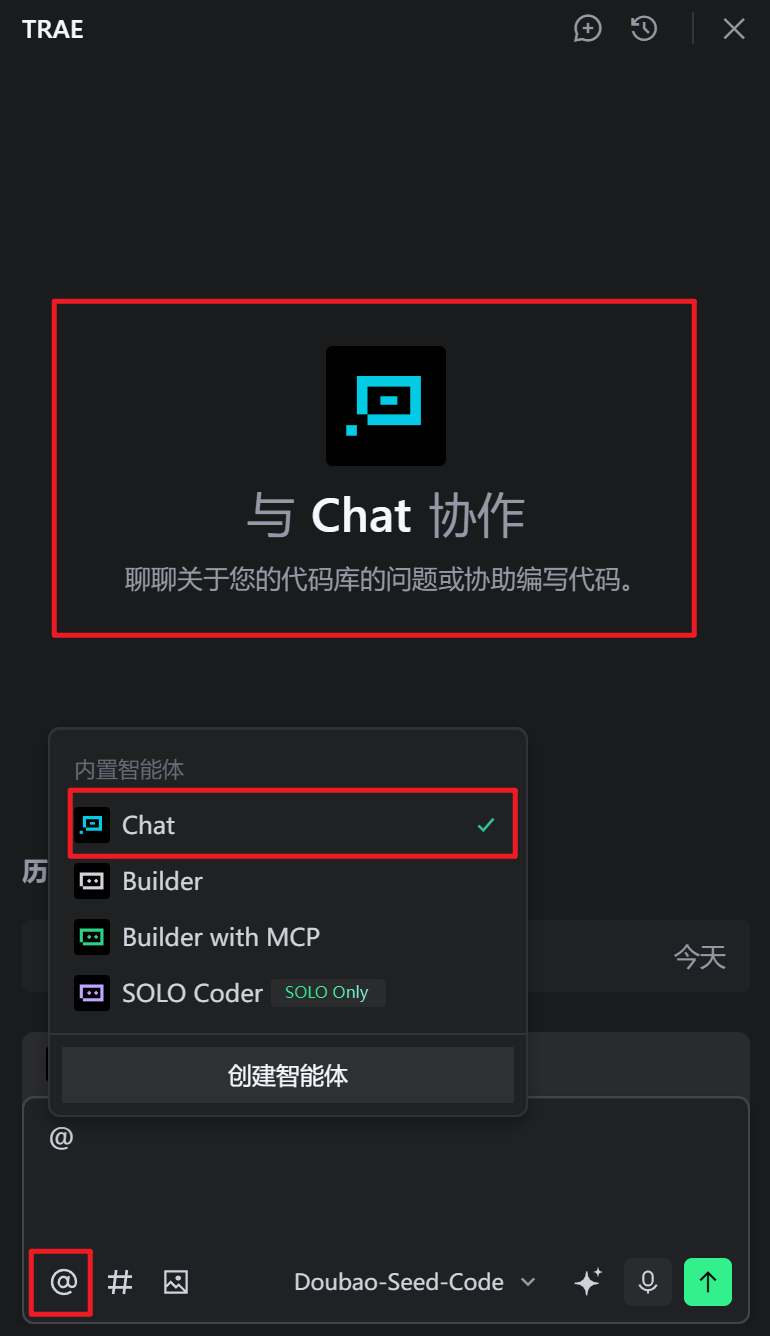
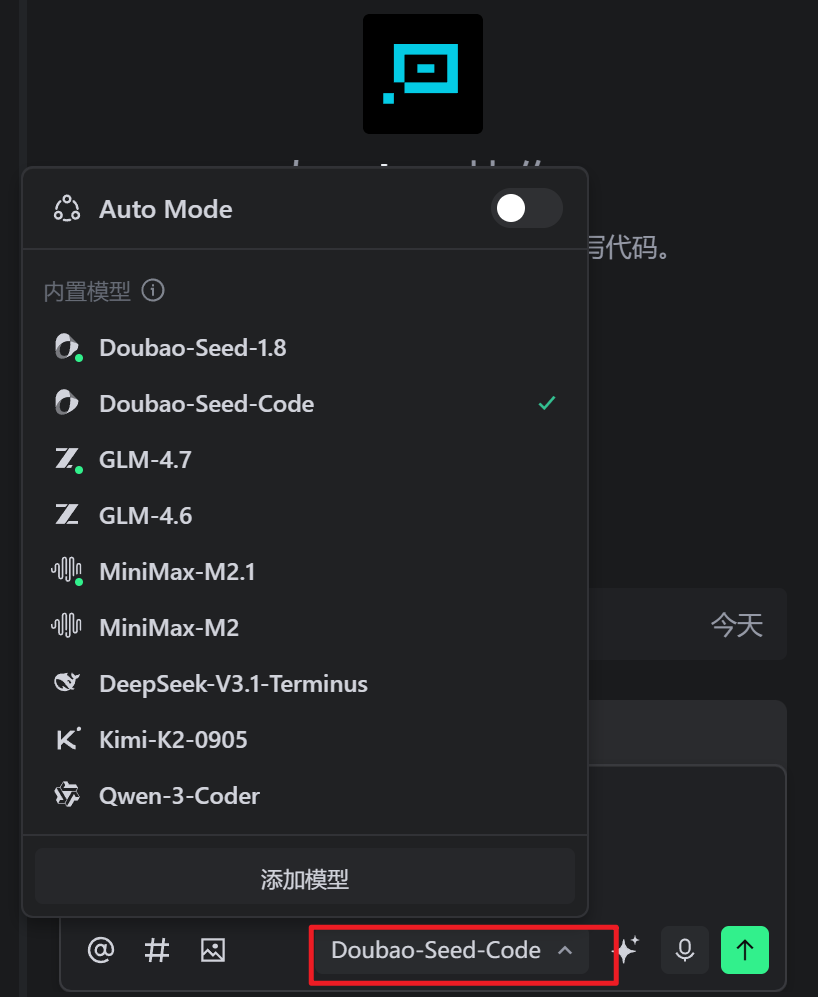
3.1.1. 选择模型
在窗口右下角,可以换智能体
3.1.2. 使用 Chat 模式实操"贪吃蛇"
3.1.2.1. 先创建一个文件"tanchishe.html"
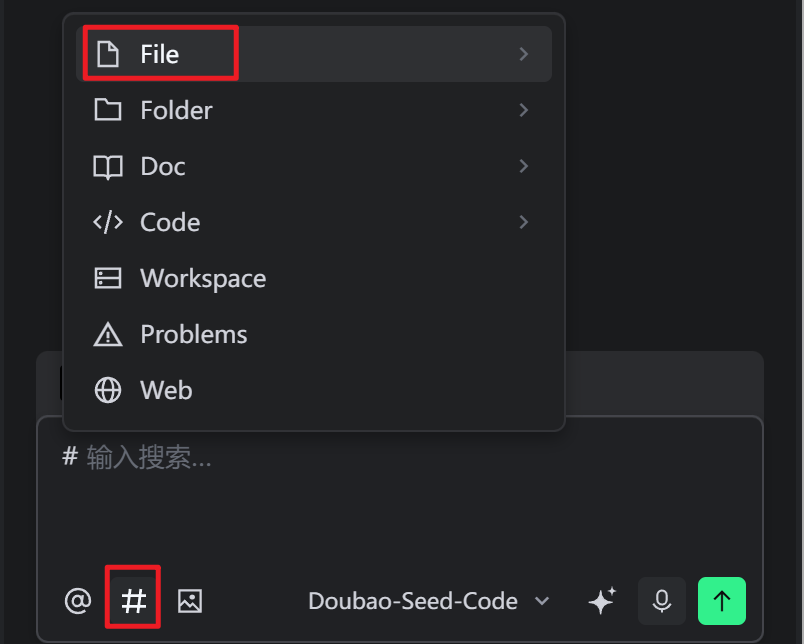
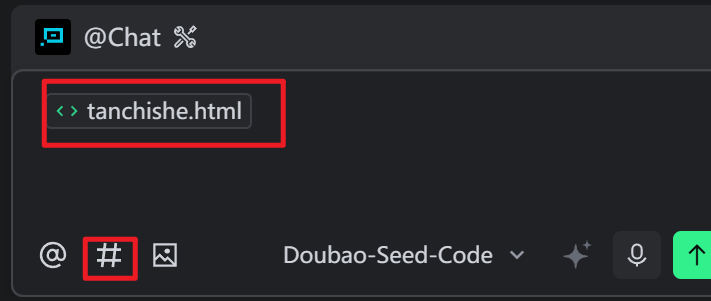
3.1.3. 选择向上下文# --> tanchishe.html
要给出具体的文件或者项目,这样 ai 才能更精准的判断
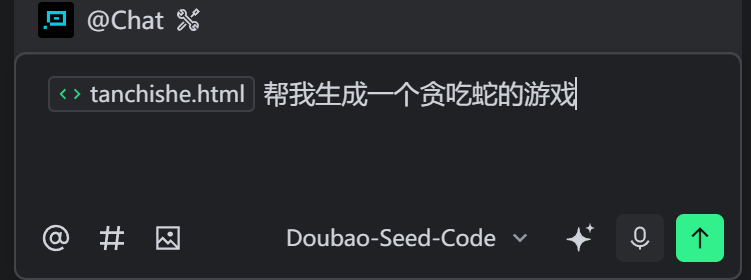
3.1.4. 写需求

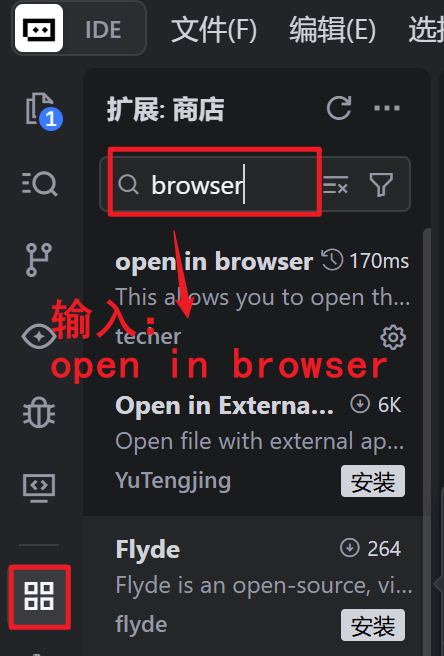
3.1.5. 测试代码
先安装一个插件:open in browser
这样就可以测试了
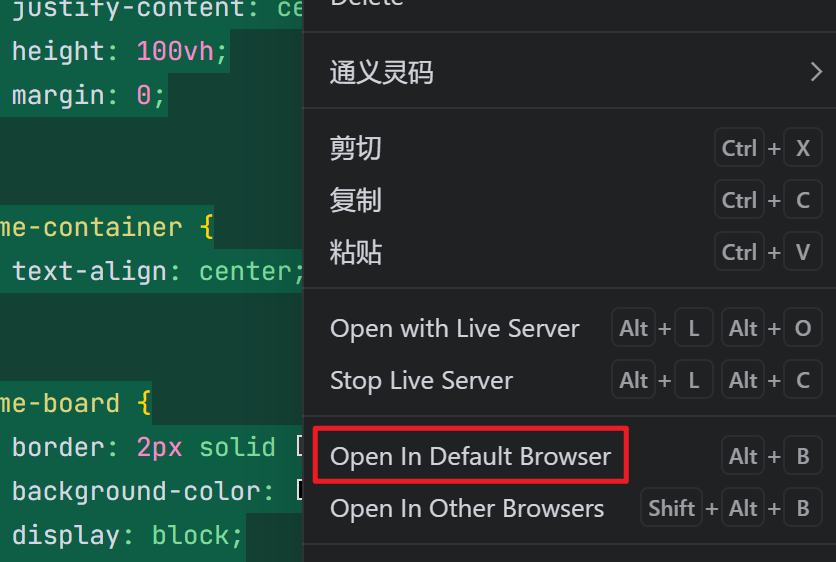
右击代码页面 ---> 单击: Open In Default Browser

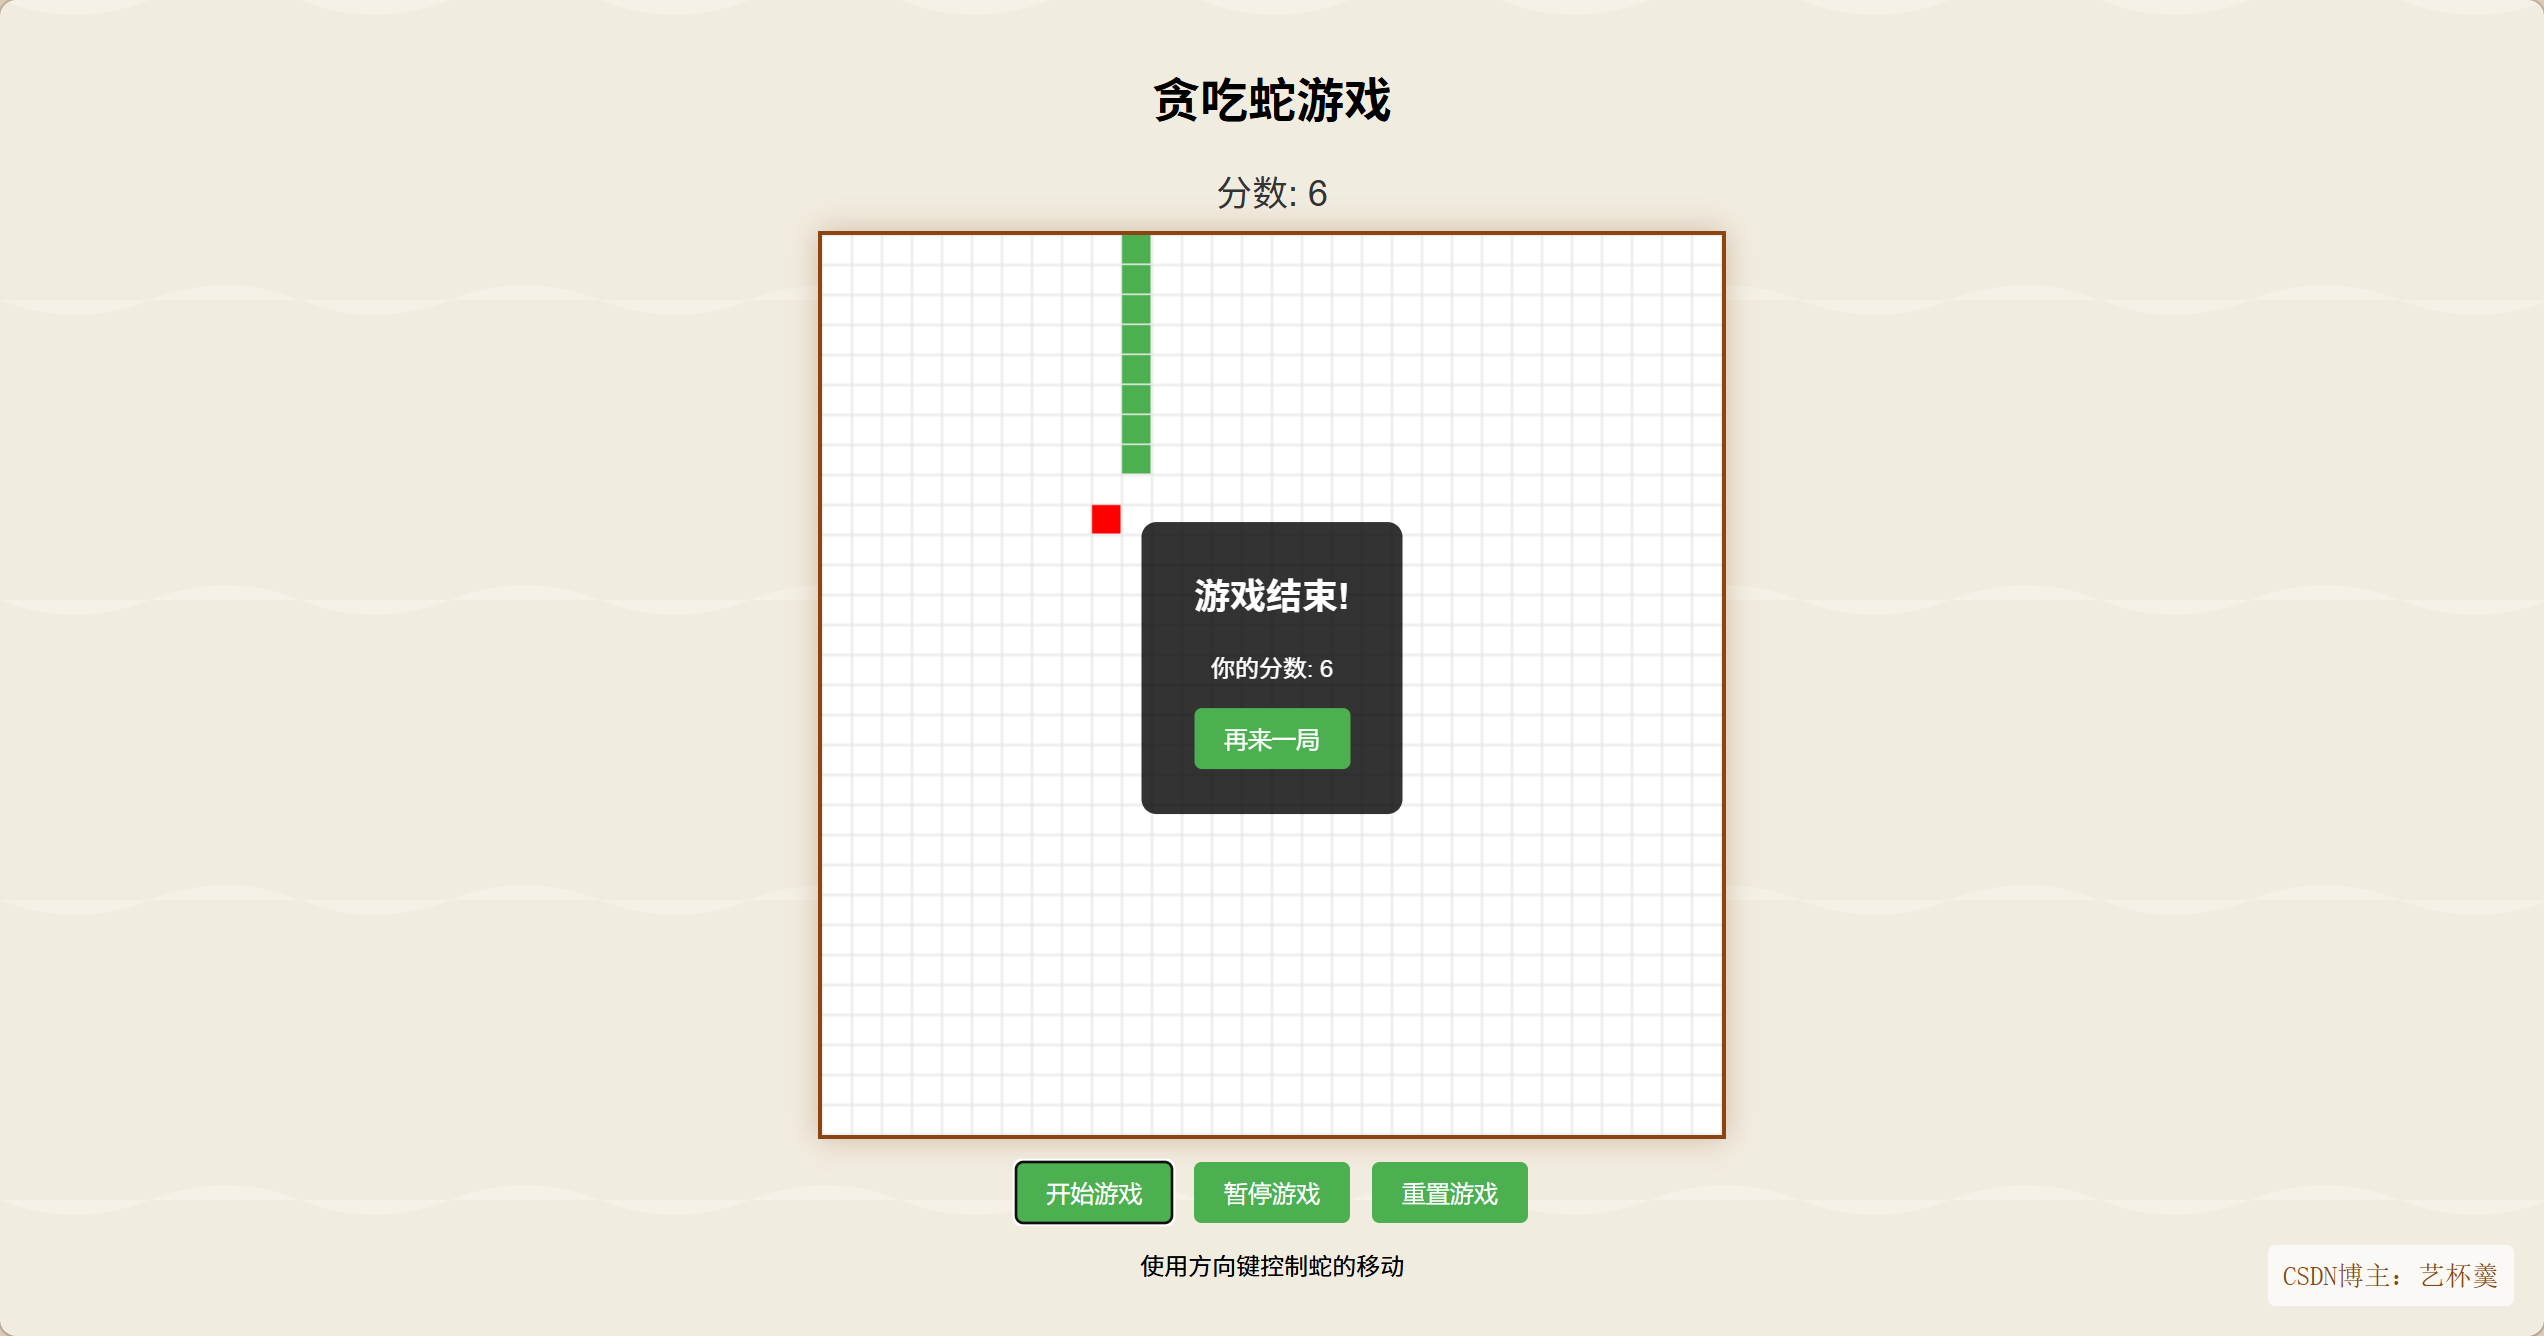
这就是 ai 创建贪吃蛇的 html
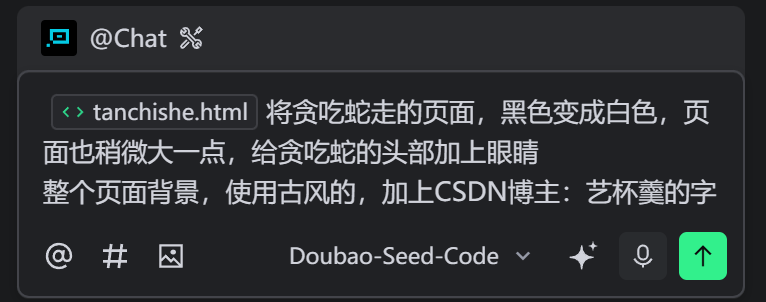
当然如果还想修改,直接把需求扔给 Ai !
3.1.6. 继续改进
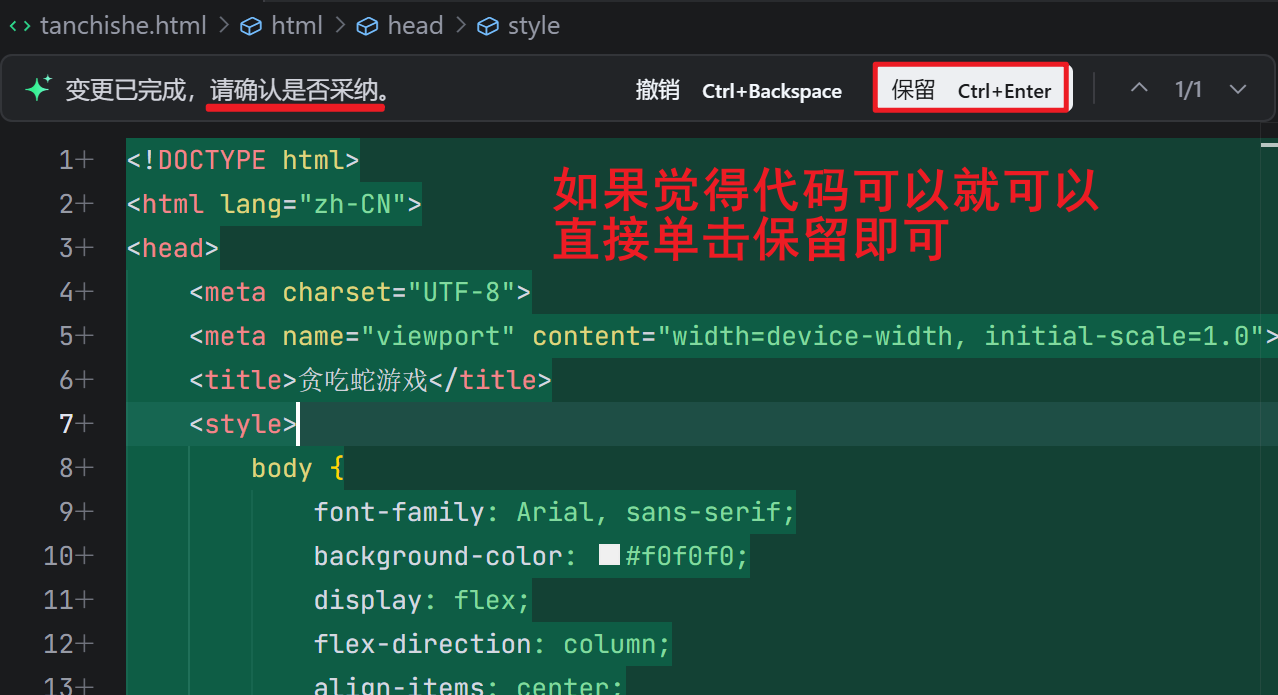
ai 一遍生成的,肯定还有很多需要修改,例如我这样修改
修改后,再单击应用
这些没有问题后,就可以直接单击保留即可
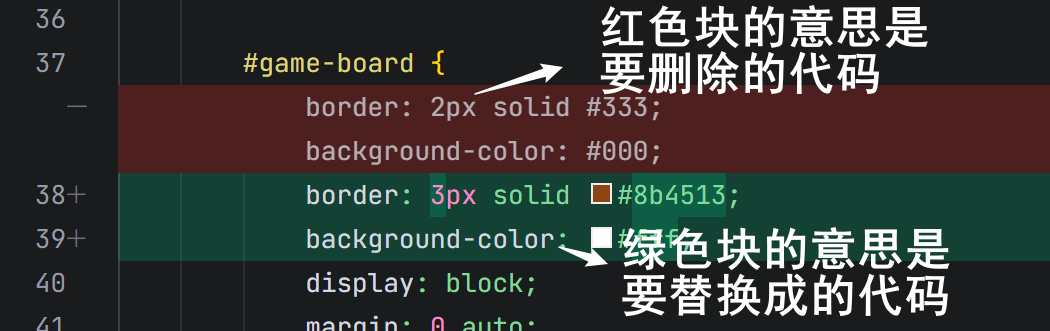

对于我要修改的内容,都能够精准的定位
代码给你们看看
html
<!DOCTYPE html>
<html lang="zh-CN">
<head>
    <meta charset="UTF-8">
    <meta name="viewport" content="width=device-width, initial-scale=1.0">
    <title>贪吃蛇游戏</title>
    <style>
        body {
            font-family: Arial, sans-serif;
            background: url('data:image/svg+xml;utf8,<svg xmlns="http://www.w3.org/2000/svg" width="100" height="100" viewBox="0 0 100 100"><rect width="100" height="100" fill="%23f5f1e6"/><path d="M0,0 Q25,10 50,0 T100,0 L100,100 Q75,90 50,100 T0,100 Z" fill="%23e8e0d1" opacity="0.3"/></svg>');
            background-size: 200px 200px;
            display: flex;
            flex-direction: column;
            align-items: center;
            justify-content: center;
            height: 100vh;
            margin: 0;
            position: relative;
        }

        .blogger-info {
            position: absolute;
            bottom: 20px;
            right: 20px;
            font-family: 'SimSun', serif;
            font-size: 18px;
            color: #8b4513;
            padding: 10px;
            background-color: rgba(255, 255, 255, 0.7);
            border-radius: 5px;
        }

        #game-container {
            text-align: center;
        }

        #game-board {
            border: 3px solid #8b4513;
            background-color: #fff;
            display: block;
            margin: 0 auto;
            box-shadow: 0 0 20px rgba(139, 69, 19, 0.3);
        }

        #score {
            font-size: 24px;
            margin: 10px 0;
            color: #333;
        }

        #controls {
            margin: 15px 0;
        }

        button {
            padding: 10px 20px;
            font-size: 16px;
            background-color: #4CAF50;
            color: white;
            border: none;
            border-radius: 5px;
            cursor: pointer;
            margin: 0 5px;
        }

        button:hover {
            background-color: #45a049;
        }

        #game-over {
            position: absolute;
            top: 50%;
            left: 50%;
            transform: translate(-50%, -50%);
            background-color: rgba(0, 0, 0, 0.8);
            color: white;
            padding: 30px;
            border-radius: 10px;
            text-align: center;
            display: none;
        }

        #game-over h2 {
            margin-top: 0;
        }
    </style>
</head>
<body>
    <div id="game-container">
        <h1>贪吃蛇游戏</h1>
        <div id="score">分数: 0</div>
        <canvas id="game-board" width="600" height="600"></canvas>
        <div id="controls">
            <button onclick="startGame()">开始游戏</button>
            <button onclick="pauseGame()">暂停游戏</button>
            <button onclick="resetGame()">重置游戏</button>
        </div>
        <p>使用方向键控制蛇的移动</p>
    </div>

    <div id="game-over">
        <h2>游戏结束!</h2>
        <p id="final-score"></p>
        <button onclick="resetGame()">再来一局</button>
    </div>

    <script>
        // 游戏变量
        const canvas = document.getElementById('game-board');
        const ctx = canvas.getContext('2d');
        const scoreElement = document.getElementById('score');
        const gameOverElement = document.getElementById('game-over');
        const finalScoreElement = document.getElementById('final-score');

        const gridSize = 20;
        const tileCount = canvas.width / gridSize;

        let snake = [];
        let food = {};
        let score = 0;
        let velocity = { x: 0, y: 0 };
        let gameLoop = null;
        let isGameOver = false;
        let isPaused = false;

        // 初始化游戏
        function initGame() {
            // 创建初始蛇
            snake = [
                { x: tileCount / 2, y: tileCount / 2 },
                { x: tileCount / 2 - 1, y: tileCount / 2 },
                { x: tileCount / 2 - 2, y: tileCount / 2 }
            ];

            // 生成初始食物
            spawnFood();

            // 重置分数和状态
            score = 0;
            updateScore();
            velocity = { x: 1, y: 0 }; // 初始向右移动
            isGameOver = false;
            isPaused = false;
            gameOverElement.style.display = 'none';
        }

        // 生成食物
        function spawnFood() {
            food = {
                x: Math.floor(Math.random() * tileCount),
                y: Math.floor(Math.random() * tileCount)
            };

            // 确保食物不在蛇身上
            for (let segment of snake) {
                if (segment.x === food.x && segment.y === food.y) {
                    spawnFood();
                    return;
                }
            }
        }

        // 更新分数
        function updateScore() {
            scoreElement.textContent = `分数: ${score}`;
        }

        // 绘制游戏
        function draw() {
            // 清空画布
            ctx.fillStyle = '#fff';
            ctx.fillRect(0, 0, canvas.width, canvas.height);

            // 绘制网格线
            ctx.strokeStyle = '#e0e0e0';
            ctx.lineWidth = 1;
            for (let i = 0; i <= tileCount; i++) {
                ctx.beginPath();
                ctx.moveTo(i * gridSize, 0);
                ctx.lineTo(i * gridSize, canvas.height);
                ctx.stroke();

                ctx.beginPath();
                ctx.moveTo(0, i * gridSize);
                ctx.lineTo(canvas.width, i * gridSize);
                ctx.stroke();
            }

            // 绘制蛇
            ctx.fillStyle = '#4CAF50';
            for (let i = 0; i < snake.length; i++) {
                const segment = snake[i];
                ctx.fillRect(segment.x * gridSize, segment.y * gridSize, gridSize - 1, gridSize - 1);

                // 给蛇头添加眼睛
                if (i === 0) {
                    ctx.fillStyle = '#000';
                    const eyeSize = gridSize / 5;
                    const eyeOffset = gridSize / 4;

                    // 根据移动方向调整眼睛位置
                    if (velocity.x === 1) { // 向右
                        ctx.fillRect((segment.x * gridSize) + gridSize - eyeOffset - eyeSize, (segment.y * gridSize) + eyeOffset, eyeSize, eyeSize);
                        ctx.fillRect((segment.x * gridSize) + gridSize - eyeOffset - eyeSize, (segment.y * gridSize) + gridSize - eyeOffset - eyeSize, eyeSize, eyeSize);
                    } else if (velocity.x === -1) { // 向左
                        ctx.fillRect((segment.x * gridSize) + eyeOffset, (segment.y * gridSize) + eyeOffset, eyeSize, eyeSize);
                        ctx.fillRect((segment.x * gridSize) + eyeOffset, (segment.y * gridSize) + gridSize - eyeOffset - eyeSize, eyeSize, eyeSize);
                    } else if (velocity.y === 1) { // 向下
                        ctx.fillRect((segment.x * gridSize) + eyeOffset, (segment.y * gridSize) + gridSize - eyeOffset - eyeSize, eyeSize, eyeSize);
                        ctx.fillRect((segment.x * gridSize) + gridSize - eyeOffset - eyeSize, (segment.y * gridSize) + gridSize - eyeOffset - eyeSize, eyeSize, eyeSize);
                    } else if (velocity.y === -1) { // 向上
                        ctx.fillRect((segment.x * gridSize) + eyeOffset, (segment.y * gridSize) + eyeOffset, eyeSize, eyeSize);
                        ctx.fillRect((segment.x * gridSize) + gridSize - eyeOffset - eyeSize, (segment.y * gridSize) + eyeOffset, eyeSize, eyeSize);
                    } else { // 默认向右
                        ctx.fillRect((segment.x * gridSize) + gridSize - eyeOffset - eyeSize, (segment.y * gridSize) + eyeOffset, eyeSize, eyeSize);
                        ctx.fillRect((segment.x * gridSize) + gridSize - eyeOffset - eyeSize, (segment.y * gridSize) + gridSize - eyeOffset - eyeSize, eyeSize, eyeSize);
                    }

                    ctx.fillStyle = '#4CAF50'; // 恢复蛇身颜色
                }
            }

            // 绘制食物
            ctx.fillStyle = '#FF0000';
            ctx.fillRect(food.x * gridSize, food.y * gridSize, gridSize - 1, gridSize - 1);
        }

        // 更新游戏状态
        function update() {
            if (isPaused || isGameOver) return;

            // 移动蛇头
            const head = {
                x: snake[0].x + velocity.x,
                y: snake[0].y + velocity.y
            };

            // 添加新头
            snake.unshift(head);

            // 检查是否吃到食物
            if (head.x === food.x && head.y === food.y) {
                score++;
                updateScore();
                spawnFood();
            } else {
                // 移除尾巴
                snake.pop();
            }

            // 检查碰撞
            checkCollision();
        }

        // 检查碰撞
        function checkCollision() {
            const head = snake[0];

            // 墙壁碰撞
            if (head.x < 0 || head.x >= tileCount || head.y < 0 || head.y >= tileCount) {
                endGame();
                return;
            }

            // 自身碰撞
            for (let i = 1; i < snake.length; i++) {
                if (head.x === snake[i].x && head.y === snake[i].y) {
                    endGame();
                    return;
                }
            }
        }

        // 结束游戏
        function endGame() {
            isGameOver = true;
            finalScoreElement.textContent = `你的分数: ${score}`;
            gameOverElement.style.display = 'block';
        }

        // 游戏主循环
        function game() {
            update();
            draw();
        }

        // 开始游戏
        function startGame() {
            if (isGameOver) {
                initGame();
            }
            isPaused = false;
            if (!gameLoop) {
                gameLoop = setInterval(game, 100);
            }
        }

        // 暂停游戏
        function pauseGame() {
            isPaused = !isPaused;
        }

        // 重置游戏
        function resetGame() {
            clearInterval(gameLoop);
            gameLoop = null;
            initGame();
            draw();
        }

        // 键盘控制
        document.addEventListener('keydown', (event) => {
            if (isGameOver) return;

            switch (event.key) {
                case 'ArrowUp':
                    if (velocity.y !== 1) {
                        velocity = { x: 0, y: -1 };
                    }
                    break;
                case 'ArrowDown':
                    if (velocity.y !== -1) {
                        velocity = { x: 0, y: 1 };
                    }
                    break;
                case 'ArrowLeft':
                    if (velocity.x !== 1) {
                        velocity = { x: -1, y: 0 };
                    }
                    break;
                case 'ArrowRight':
                    if (velocity.x !== -1) {
                        velocity = { x: 1, y: 0 };
                    }
                    break;
                case ' ': // 空格键暂停
                    event.preventDefault();
                    pauseGame();
                    break;
            }
        });

        // 初始化并绘制游戏
        initGame();
        draw();
    </script>
<div class="blogger-info">CSDN博主:艺杯羹</div>
    </body>
</html>
3.1.7. 历史对话
在对话框的右上角,可以查看历史任务
也可以新建任务
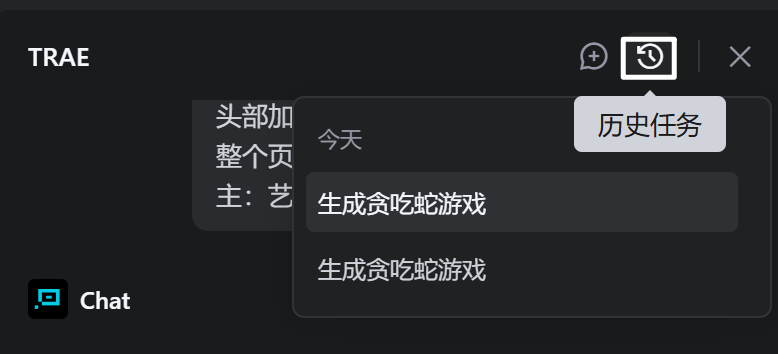
Tips:对话记录删除后无法恢复
3.2. Builder 模式
和 Chat 模式的区别就是,Builder 模式,不需要手动操作,全部自动执行完成
其他的用法,和上面一样,就不再赘述了~
|-----------|---------|-----------|
| 模式 | 核心用法 | 适用场景 |
| Chat模式 | 边写边问改代码 | 代码调试、片段生成 |
| Builder模式 | 输需求自动完成 | 快速搭新项目 |
到此,Trae的介绍,安装以及简单用法就已经介绍完了,相信你一定会有所收获!😊