近期呢kaki也是准备发愤图强了,学了一波Java与Ai结合的技术,当然kaki平时工作中最多用到的也就是ai对话类的助手,但内部的部署逻辑确实不太清楚,知己知彼百战百胜。还是要从最简单的入手学习!
先在自己本地部署个deepseek玩玩,科研一下哈~
ollama简单起手
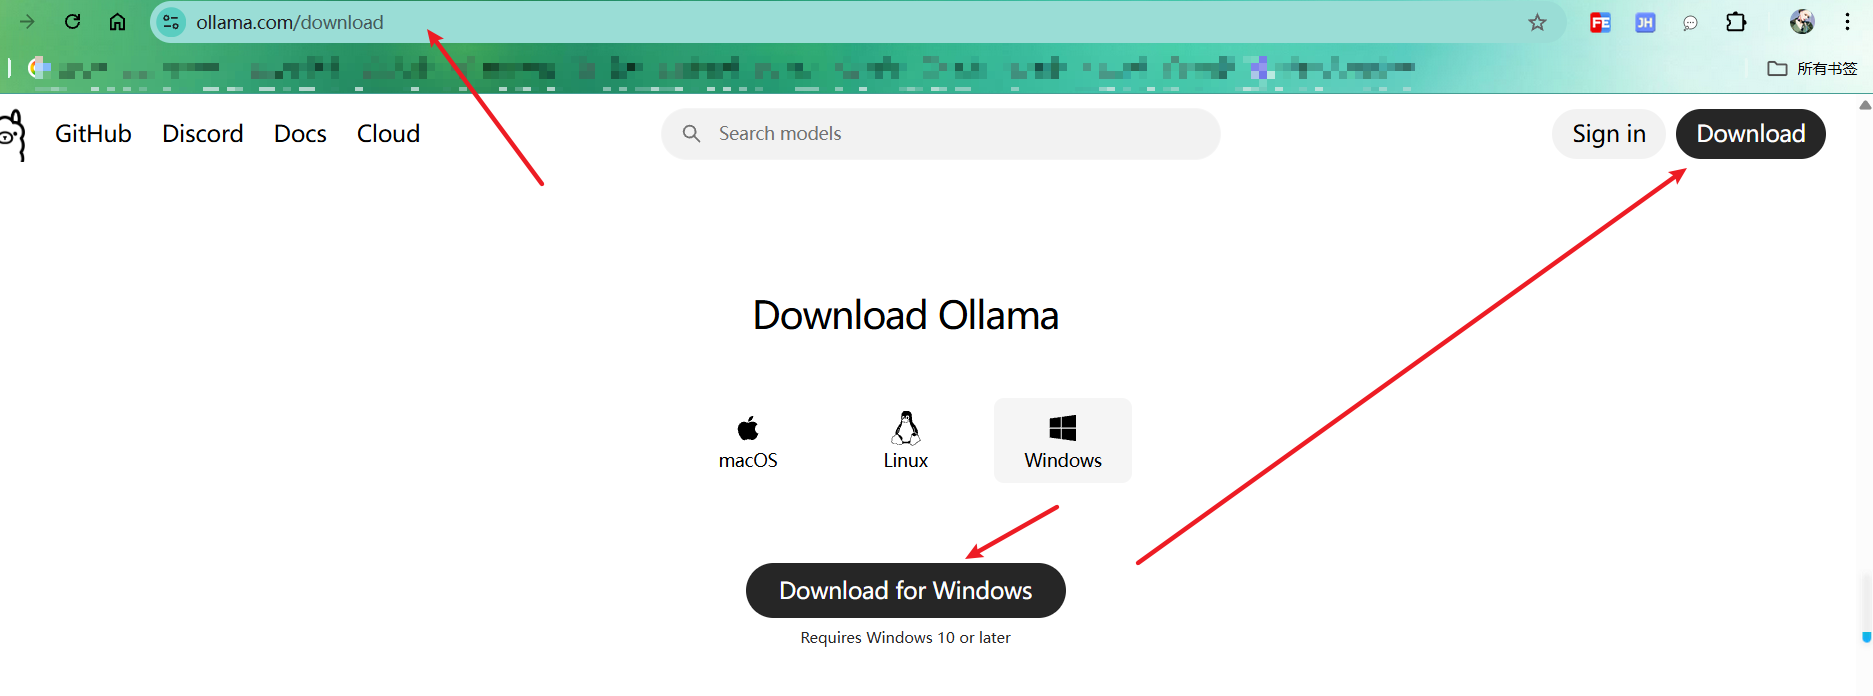
第一步下载ollama,https://ollama.com/download
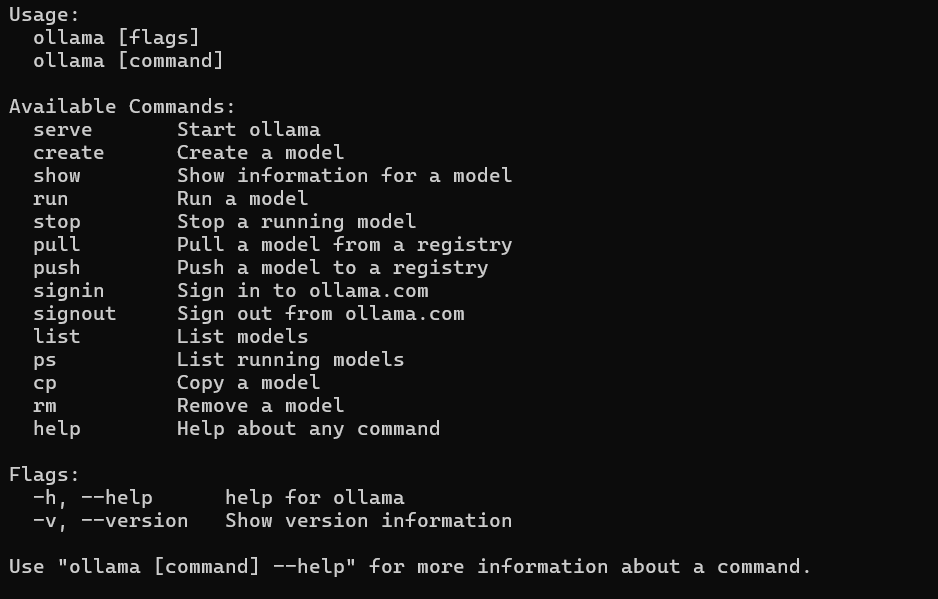
第二部:控制台黑窗口 输入ollama命令,出现如下信息,那就是成功了
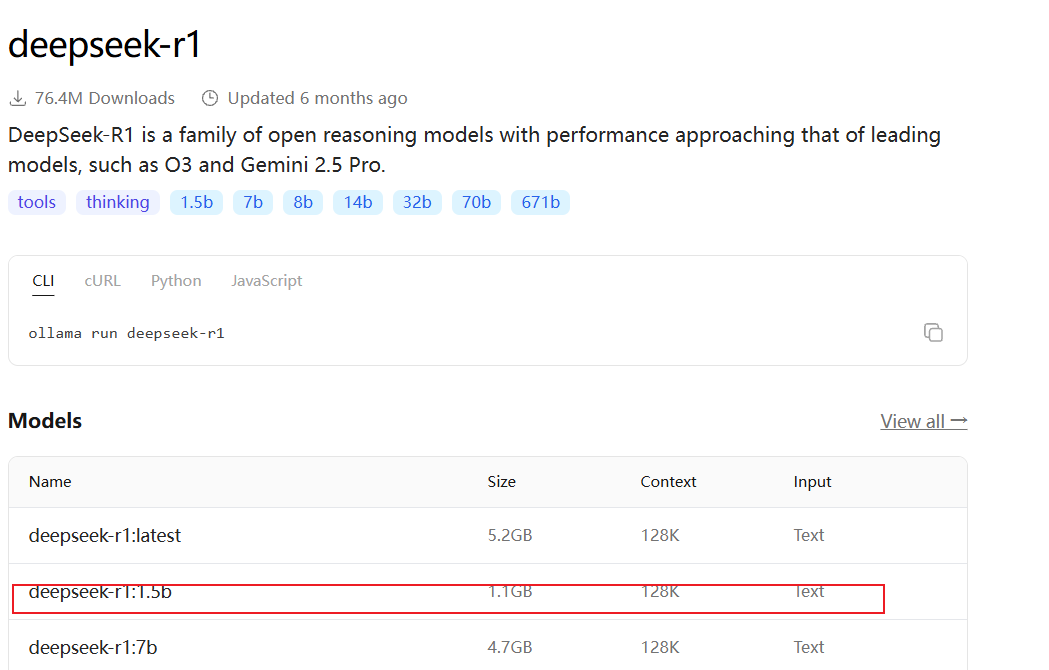
第三步,在ollama官网下载deepseek r1 (https://ollama.com/library/deepseek-r1)
配置低的小伙伴不要担心,使用1.5b或者8b即可,这里主要是了解整个流程

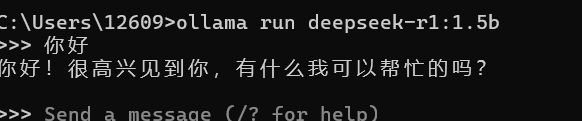
如此就算部署完成了
结合Java 的配置
此处jdk使用21,spring-boot使用338版本,spring-ai使用的是spring-ai-ollama-spring-boot-starter的,黏贴pom如下
XML
<?xml version="1.0" encoding="UTF-8"?>
<project xmlns="http://maven.apache.org/POM/4.0.0"
         xmlns:xsi="http://www.w3.org/2001/XMLSchema-instance"
         xsi:schemaLocation="http://maven.apache.org/POM/4.0.0 http://maven.apache.org/xsd/maven-4.0.0.xsd">
    <modelVersion>4.0.0</modelVersion>

    <groupId>com.kaki</groupId>
    <artifactId>kaki-deepseek</artifactId>
    <version>1.0-SNAPSHOT</version>

    <properties>
        <maven.compiler.source>21</maven.compiler.source>
        <maven.compiler.target>21</maven.compiler.target>
        <project.build.sourceEncoding>UTF-8</project.build.sourceEncoding>
    </properties>

    <parent>
        <groupId>org.springframework.boot</groupId>
        <artifactId>spring-boot-starter-parent</artifactId>
        <version>3.3.8</version>
        <relativePath />
    </parent>

    <dependencies>
        <!-- springboot ai start -->
        <dependency>
            <groupId>io.springboot.ai</groupId>
            <artifactId>spring-ai-ollama</artifactId>
            <version>1.0.3</version>
        </dependency>
        <dependency>
            <groupId>io.springboot.ai</groupId>
            <artifactId>spring-ai-ollama-spring-boot-starter</artifactId>
            <version>1.0.3</version>
        </dependency>
        <!-- springboot ai end -->

        <dependency>
            <groupId>org.springframework.boot</groupId>
            <artifactId>spring-boot-starter</artifactId>
<!--            <version>3.4.2</version>-->
        </dependency>
        <dependency>
            <groupId>org.springframework.boot</groupId>
            <artifactId>spring-boot-starter-aop</artifactId>
        </dependency>
        <dependency>
            <groupId>org.springframework.boot</groupId>
            <artifactId>spring-boot-starter-web</artifactId>
        </dependency>
        <dependency>
            <groupId>org.springframework.boot</groupId>
            <artifactId>spring-boot-configuration-processor</artifactId>
        </dependency>
        <dependency>
            <groupId>org.projectlombok</groupId>
            <artifactId>lombok</artifactId>
            <version>1.18.26</version>
            <scope>provided</scope>
        </dependency>

    </dependencies>

</project>
application.properties,这里配置了spring-ai的配置信息
TypeScript
spring:
  application:
    name: kaki-deepseek
  profiles:
    active: prod
  ai:
    anthropic:
      base-url: http://127.0.0.1:11434
    ollama:
      chat:
        model: deepseek-r1:1.5b

logging:
  level:
root: debugjava核心代码如下(spring官方资料:https://spring.io/projects/spring-ai)
java
package com.kaki.service;

import jakarta.annotation.Resource;
import org.springframework.ai.chat.ChatResponse;
import org.springframework.ai.chat.messages.UserMessage;
import org.springframework.ai.chat.prompt.Prompt;
import org.springframework.ai.ollama.OllamaChatClient;
import org.springframework.stereotype.Service;
import reactor.core.publisher.Flux;

import java.util.List;
import java.util.stream.Collectors;

@Service
public class OllamaStreamDiscover {

    @Resource
    private OllamaChatClient ollamaChatClient;

    public void doSendSteamV3(String userId,String msg){
        Prompt prompt = new Prompt(new UserMessage(msg));

        Flux<ChatResponse> streamFlux = ollamaChatClient.stream(prompt);

        List<Object> collect = streamFlux.toStream().map(chatResponse -> {
            String content = chatResponse.getResult().getOutput().getContent();
            System.out.println(content);
            SSEServer.sendMsg(userId,content,"add");
            return content;
        }).collect(Collectors.toList());
        SSEServer.sendMsg(userId,"done","finish");

    }
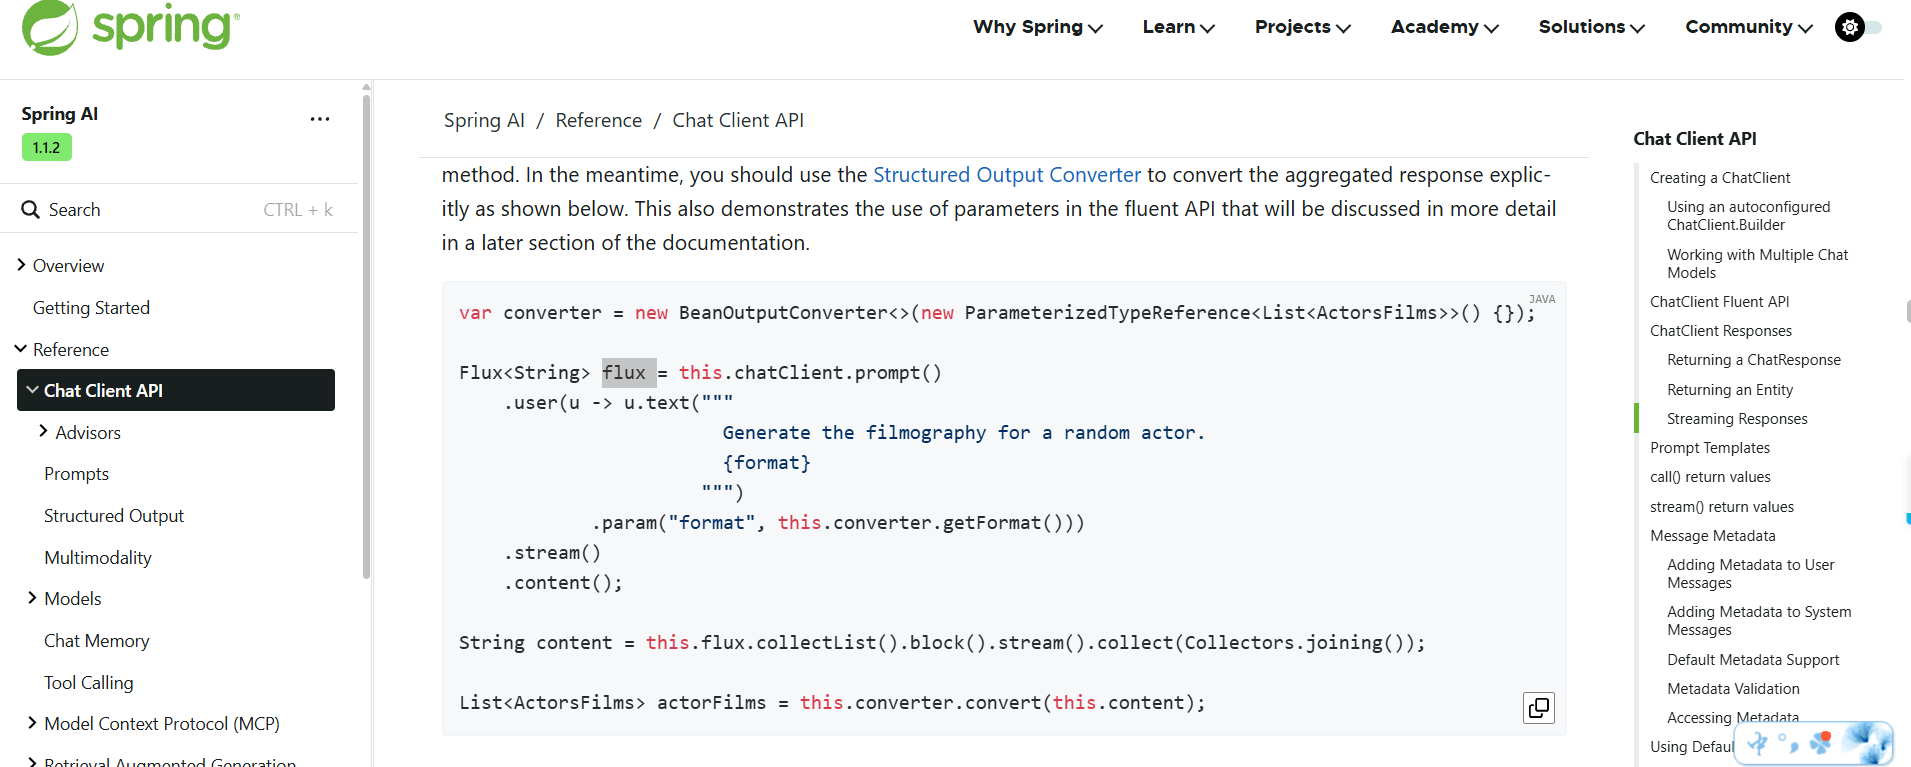
}流式官网写法:https://docs.spring.io/spring-ai/reference/api/chatclient.html
官网主页面默认提供的是完全回答完毕再返回,这种对于用户来说问完一个问题后,无法一个字一个字的回拼,页面是空白的,直到全部回答完才显示,所以才有流式写法。不过流式写法就需要结合SSE进行
SSE核心代码:
java
package com.kaki.service;


import org.springframework.stereotype.Service;
import org.springframework.web.servlet.mvc.method.annotation.SseEmitter;

import java.util.Map;
import java.util.concurrent.ConcurrentHashMap;

//@Slf4j
@Service
public class SSEServer {
    private static Map<String, SseEmitter> sseEmitterMap = new ConcurrentHashMap<>();

    public static SseEmitter connect(String userId){
        SseEmitter sseEmitter = new SseEmitter(0L);
        sseEmitter.onCompletion(completionCallBack(userId));
        sseEmitter.onTimeout(timeoutCallBack(userId));

        sseEmitterMap.put(userId,sseEmitter);
        System.out.println("创建用户,id:"+userId);
        return sseEmitter;
    }

    /**
     * 容器,保存连接,用于输出返回 ;可使用其他方法实现
     */
    private static final Map<String, SseEmitter> sseCache = new ConcurrentHashMap<>();


    /**
     * 根据客户端id获取SseEmitter对象
     *
     * @param clientId 客户端ID
     */
    public SseEmitter getSseEmitterByClientId(String clientId) {
        return sseCache.get(clientId);
    }

    public static void sendMsg(String userId,String msg,String msgType){
        if (sseEmitterMap.isEmpty()){
            return;
        }
        if (sseEmitterMap.containsKey(userId)){
            SseEmitter sseEmitter = sseEmitterMap.get(userId);
            sendSseEmitterMsg(sseEmitter,userId,msg,msgType);
        }
    }

    public static void stop(String userId){
        if (sseEmitterMap.isEmpty()){
            return;
        }

        SseEmitter sseEmitter = sseEmitterMap.get(userId);

        if (sseEmitter != null){
            // 执行完毕,断开链接
            sseEmitter.complete();
            System.out.println("执行完毕,断开链接");
        }else {
            System.out.println("无当前会话");
        }

    }

    public static void sendSseEmitterMsg(SseEmitter sseEmitter,String userId,String msg,String msgType){
        try {
            SseEmitter.SseEventBuilder data = SseEmitter.event().id(userId).name(msgType).data(msg);
            sseEmitter.send(data);
        }catch (Exception e){
            e.printStackTrace();
            System.out.println("xxxvcvvv");
        }
    }


    /**
     * 关闭连接
     *
     * @param clientId 客户端ID
     */

    public void closeConnect(String clientId) {
        SseEmitter sseEmitter = sseCache.get(clientId);
        if (sseEmitter != null) {
            sseEmitter.complete();
            removeUser(clientId);
        }
    }


    /**
     * 长链接完成后回调接口(即关闭连接时调用)
     *
     * @param clientId 客户端ID
     **/
    private static Runnable completionCallBack(String clientId) {
        return () -> {
            System.out.println("结束连接:{}"+clientId);
            removeUser(clientId);
        };
    }

    /**
     * 连接超时时调用
     *
     * @param clientId 客户端ID
     **/
    private static Runnable timeoutCallBack(String clientId) {
        return () -> {
            System.out.println("连接超时:{}"+ clientId);
            removeUser(clientId);
        };
    }


    /**
     * 移除用户连接
     *
     * @param clientId 客户端ID
     **/
    private static void removeUser(String clientId) {
        sseCache.remove(clientId);
        System.out.println("SseEmitterServiceImpl[removeUser]:移除用户:{}"+clientId);
    }
}
前端html demo
html
<!DOCTYPE html>
<html lang="en">
<head>
    <meta charset="UTF-8">
    <meta name="viewport" content="width=device-width, initial-scale=1.0">
    <title>Server-Sent Events Example</title>
    <style>
        body {
            font-family: Arial, sans-serif;
            max-width: 800px;
            margin: 0 auto;
            padding: 20px;
        }
        #messages {
            border: 1px solid #ccc;
            height: 300px;
            overflow-y: scroll;
            padding: 10px;
            margin: 20px 0;
            background-color: #f9f9f9;
        }
        .message {
            margin-bottom: 10px;
            padding: 5px;
            border-radius: 3px;
        }
        .status {
            margin: 10px 0;
        }
        button {
            padding: 10px 15px;
            margin-right: 10px;
            cursor: pointer;
        }

        /* Chat container styles */
        .chat-container {
            display: flex;
            flex-direction: column;
            height: 400px;
            border: 1px solid #ddd;
            border-radius: 8px;
            overflow: hidden;
        }

        .chat-messages {
            flex: 1;
            padding: 15px;
            overflow-y: auto;
            background-color: #f5f5f5;
        }

        .message-bubble {
            max-width: 70%;
            padding: 10px 15px;
            margin-bottom: 10px;
            border-radius: 18px;
            position: relative;
            word-wrap: break-word;
        }

        .user-message {
            background-color: #0084ff;
            color: white;
            margin-left: auto;
            text-align: right;
        }

        .received-message {
            background-color: #e5e5ea;
            color: black;
            margin-right: auto;
        }

        .chat-input-area {
            display: flex;
            padding: 10px;
            background-color: white;
            border-top: 1px solid #ddd;
        }

        #userInput {
            flex: 1;
            padding: 10px;
            border: 1px solid #ddd;
            border-radius: 20px;
            outline: none;
        }

        #sendBtn {
            margin-left: 10px;
            padding: 10px 20px;
            background-color: #0084ff;
            color: white;
            border: none;
            border-radius: 20px;
            cursor: pointer;
        }

        #sendBtn:hover {
            background-color: #0066cc;
        }

        .timestamp {
            font-size: 0.7em;
            color: #999;
            margin-top: 5px;
            text-align: right;
        }
    </style>

</head>
<body>

    <div>
        <h1>SSE 客户端</h1>
    </div>

    <div id="userBox"></div>

    <div class="chat-container">
        <div class="chat-messages" id="chatMessages">
            <div id="message" class="message-bubble received-message">
                <!-- 欢迎使用客服系统! -->
                <p id="message"></p>
                <!-- <div class="timestamp">刚刚</div> -->
            </div>
        </div>
        <div class="chat-input-area">
            <input type="text" id="userInput" placeholder="请输入消息...">
            <button id="sendBtn" onclick="aaa()">发送</button>
        </div>
    </div>

    <script>
        let source = null;
        let userId = Math.random().toString(36).substring(2, 15) + Math.random().toString(36).substring(2, 15);

        if(window.EventSource) {
            source = new EventSource('http://localhost:8099/sse/flux?userId='+'aaabbb');

            source.addEventListener('open', function(event) {
                console.log('Connection 连接成功');
                // document.getElementById('message').innerHTML = '连接成功';
            },false);

            source.addEventListener('message', function(event) {
                console.log('message',event.data)
                let text = document.getElementById('message').innerHTML;
                text+='<br>'+event.data

                displayReceivedMessage(text);
            },false);

            source.addEventListener('error', function(event) {
                console.log('连接失败');
            },false);

            source.addEventListener('add',function(event){
                 console.log('add',event.data)
                let text = document.getElementById('message').innerHTML;
                text+=event.data
                document.getElementById('message').innerHTML = text
            },false)

            source.addEventListener('finish',function(event){
                console.log('finish !!!!')
                //let text = document.getElementById('message').innerHTML;
                //text+='<br>';
                //document.getElementById('message').innerHTML = text
                //let text = document.getElementById('message').innerHTML;
                //text+='<br>'+event.data

                //displayReceivedMessage(text);
            },false)

        }

        const chatMessages = document.getElementById('chatMessages');
        const userInput = document.getElementById('userInput');

        function displayUserMessage(text) {
            const messageDiv = document.createElement('div');
            messageDiv.className = 'message-bubble user-message';

            const messageContent = document.createElement('div');
            messageContent.textContent = text;

            const timestamp = document.createElement('div');
            timestamp.className = 'timestamp';
            timestamp.textContent = getCurrentTime();

            messageDiv.appendChild(messageContent);
            messageDiv.appendChild(timestamp);
            chatMessages.appendChild(messageDiv);

            // Scroll to bottom
            chatMessages.scrollTop = chatMessages.scrollHeight;
        }

        // Function to display received message
        function displayReceivedMessage(text) {
            const messageDiv = document.createElement('div');
            messageDiv.className = 'message-bubble received-message';

            const messageContent = document.createElement('div');
            messageContent.textContent = text;

            const timestamp = document.createElement('div');
            timestamp.className = 'timestamp';
            timestamp.textContent = getCurrentTime();

            messageDiv.appendChild(messageContent);
            messageDiv.appendChild(timestamp);
            chatMessages.appendChild(messageDiv);

            // Scroll to bottom
            chatMessages.scrollTop = chatMessages.scrollHeight;
        }

        // Function to get current time in HH:MM format
        function getCurrentTime() {
            const now = new Date();
            return now.getHours() + ':' + (now.getMinutes() < 10 ? '0' : '') + now.getMinutes();
        }

        function aaa(){
            if (userInput.value.trim() === '') {
                console.log('请输入消息!');
                return;
            }

            var xhr = new XMLHttpRequest();
            xhr.open('GET', 'http://localhost:8099/sse/letsChat?userId=aaabbb&msg='+userInput.value, true);
            xhr.onreadystatechange = function() {
                if (xhr.readyState === 4 && xhr.status === 200) {
                    console.log(xhr.responseText);
                    }
            };
            xhr.send();

            displayUserMessage(userInput.value);

            //console.log(123);

        }

        function sendMessageToServer(message) {
            console.log('Sending message to server:', message);
        }

        let eventSource;
        const messagesContainer = document.getElementById('messages');
        const statusElement = document.getElementById('status');
        const startBtn = document.getElementById('startBtn');
        const stopBtn = document.getElementById('stopBtn');

        function addMessage(message) {
            const messageElement = document.createElement('div');
            messageElement.className = 'message';
            messageElement.textContent = `${new Date().toLocaleTimeString()}: ${message}`;
            messagesContainer.appendChild(messageElement);
            messagesContainer.scrollTop = messagesContainer.scrollHeight;
        }
    </script>
</body>
</html>
最终效果
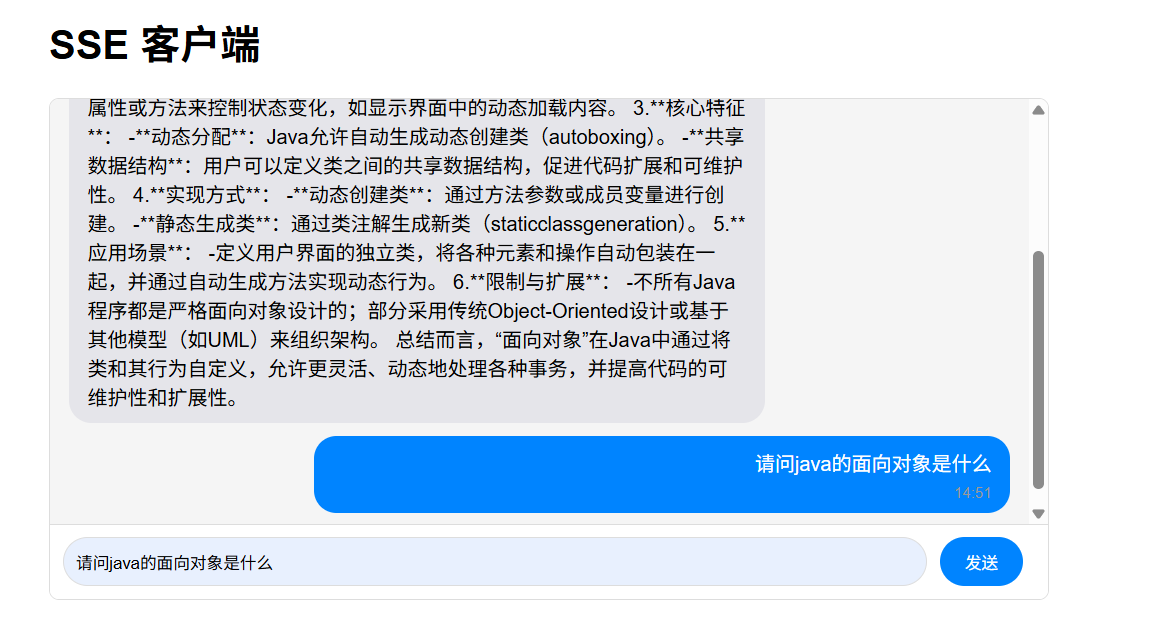
kaki与时俱进,加油💪