本项目基于 ai-engine-direct-helper (QAI_AppBuilder)
https://github.com/quic/ai-engine-direct-helper.git
第一部分:Windows 平台使用
本部分介绍如何在 Windows 环境下配置并运行 Qwen2.5-VL-3B 模型。
1.1 资源下载与准备
-
下载模型文件: 访问网站下载对应平台的模型文件:Qwen2.5-VL-3B 模型下载,将下载模型放置ai-engine-direct-helper\samples\genie\python\models目录下。
-
下载 Genie 服务程序: 前往 GitHub Releases 页面下载
GenieAPIService_v2.1.3_QAIRT_v2.42.0_v73.zip:Releases 下载页面。 -
解压文件: 将下载的压缩包解压至项目代码目录
ai-engine-direct-helper\samples下。
1.2 启动服务与运行示例
**操作步骤:**打开终端,进入 samples 目录,分别运行服务和客户端命令。
# 1. 进入目录
cd ai-engine-direct-helper\samples

# 2. 启动 GenieAPI 服务 (加载配置文件)
GenieAPIService\GenieAPIService.exe -c "genie\python\models\qwen2.5vl3b\config.json" -l
成功启动会有日志
[W] load successfully! use second: 4.56947
 [W] Model load successfully: qwen2.5vl3b
 [W] GenieService::setupHttpServer start
 [W] GenieService::setupHttpServer end
 [A] [OK] Genie API Service IS Running.
 [A] [OK] Genie API Service -> http://0.0.0.0:8910

# 3. 运行客户端进行测试 (确保当前目录下有 test.png 图片)
GenieAPIClient.exe --prompt "what is the image descript?" --img test.png --stream --model qwen2.5vl3b
注意: 运行客户端命令前,请确保当前目录下存在名为
test.png的测试图片文件。
第二部分:Android 平台使用
2.1 资源下载与安装
-
下载模型文件: 与 Windows 平台一致,请先下载对应平台的模型:Qwen2.5-VL-3B 模型下载,将下载模型放置/sdcard/GenieModels/目录下。
-
下载与安装 APK: 访问 GitHub Releases 页面下载
GenieAPIService.apk并安装至您的 Android 设备:Releases 下载页面。
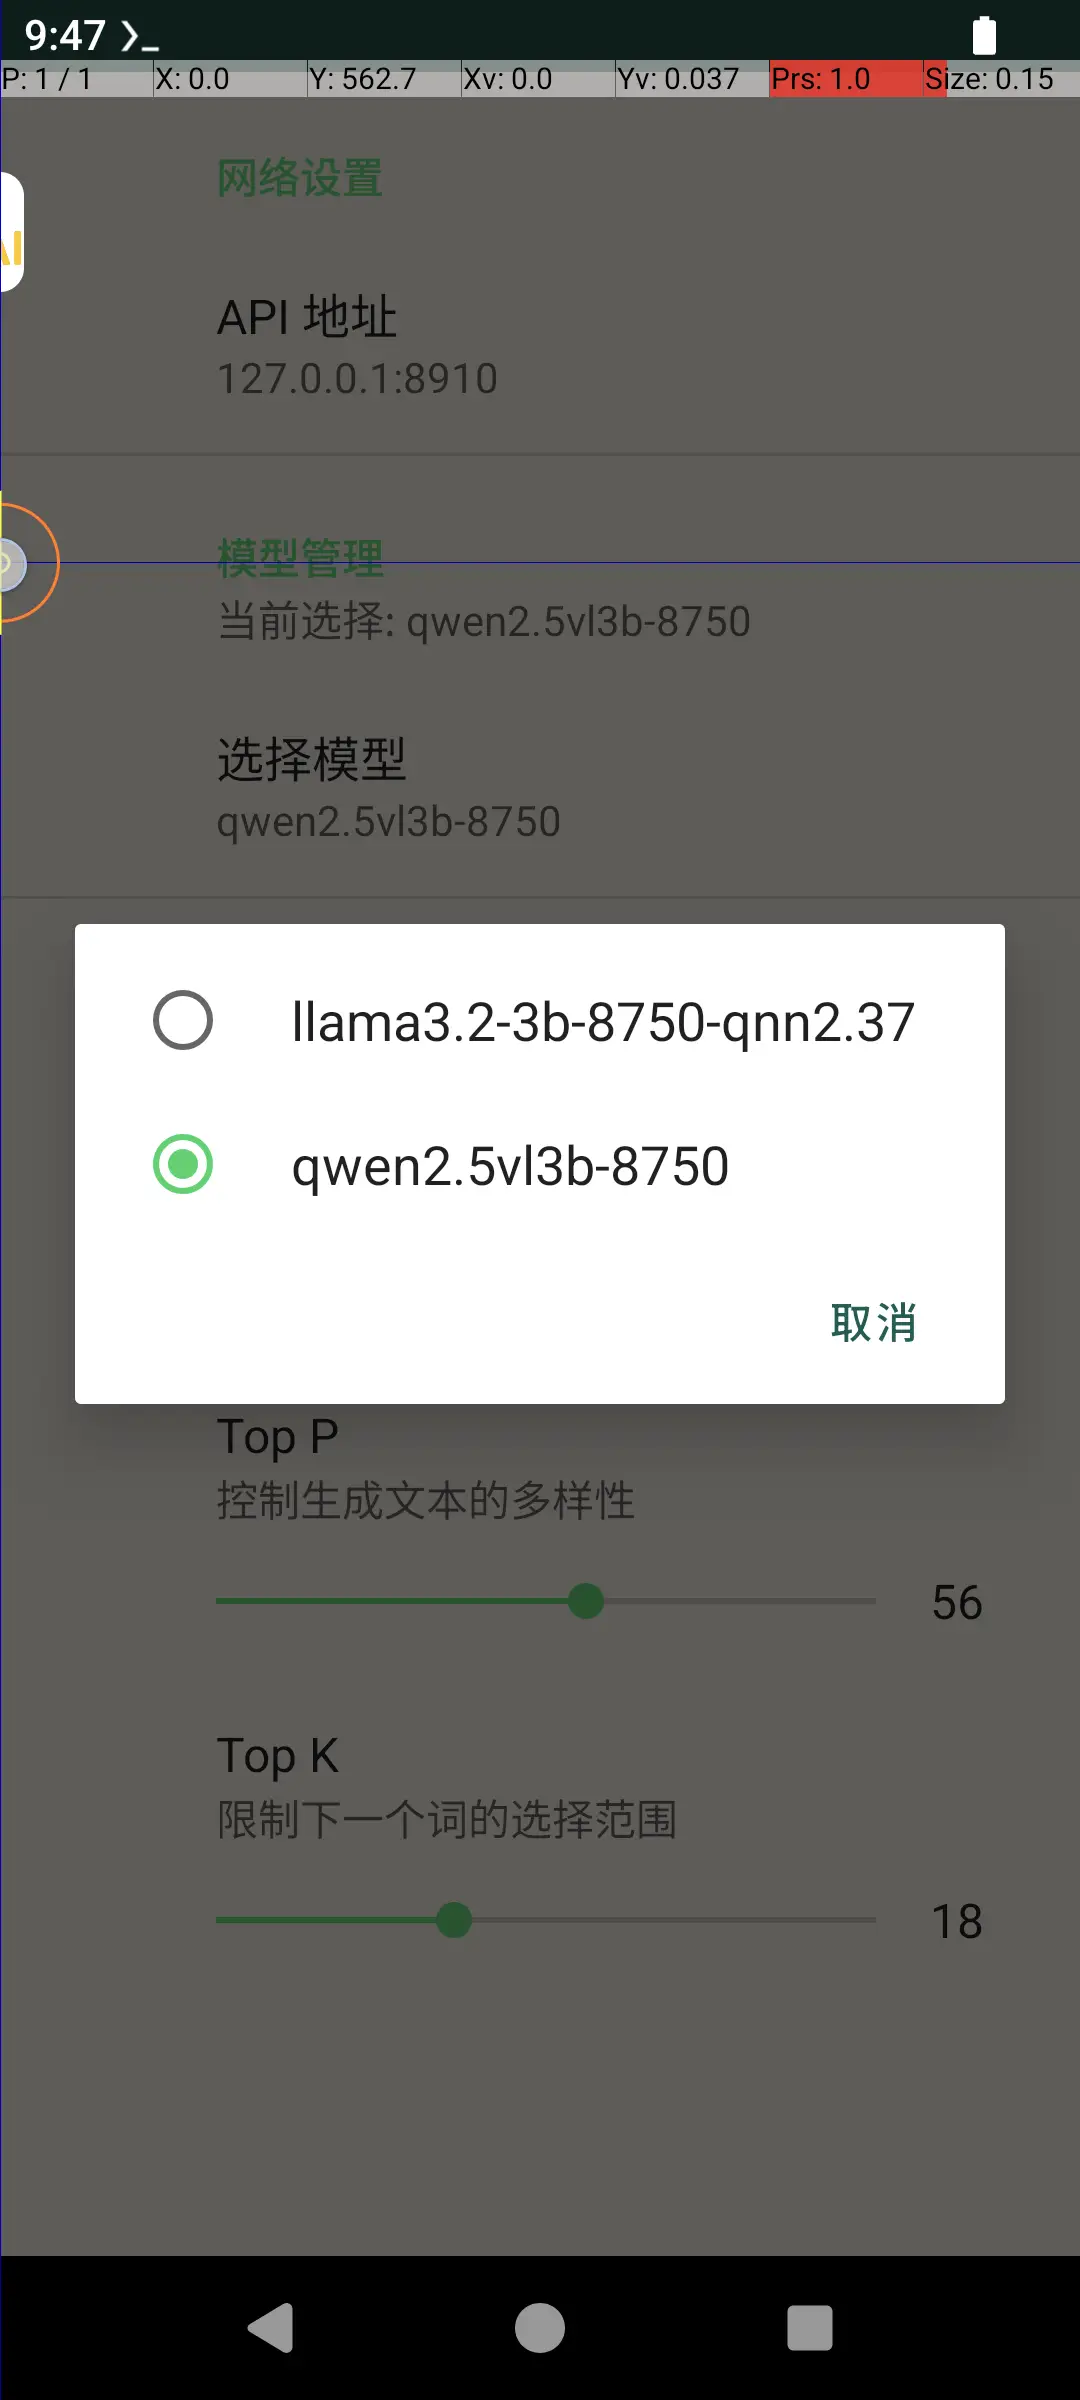
2.2 示例应用编译与运行
Android 平台的示例应用源码位于项目目录中,您需要自行编译。
-
源码路径:
samples\android\GenieChat -
使用说明: 请使用 Android Studio 打开该目录,进行编译并安装到设备上,配合已安装的 GenieAPIService 使用。
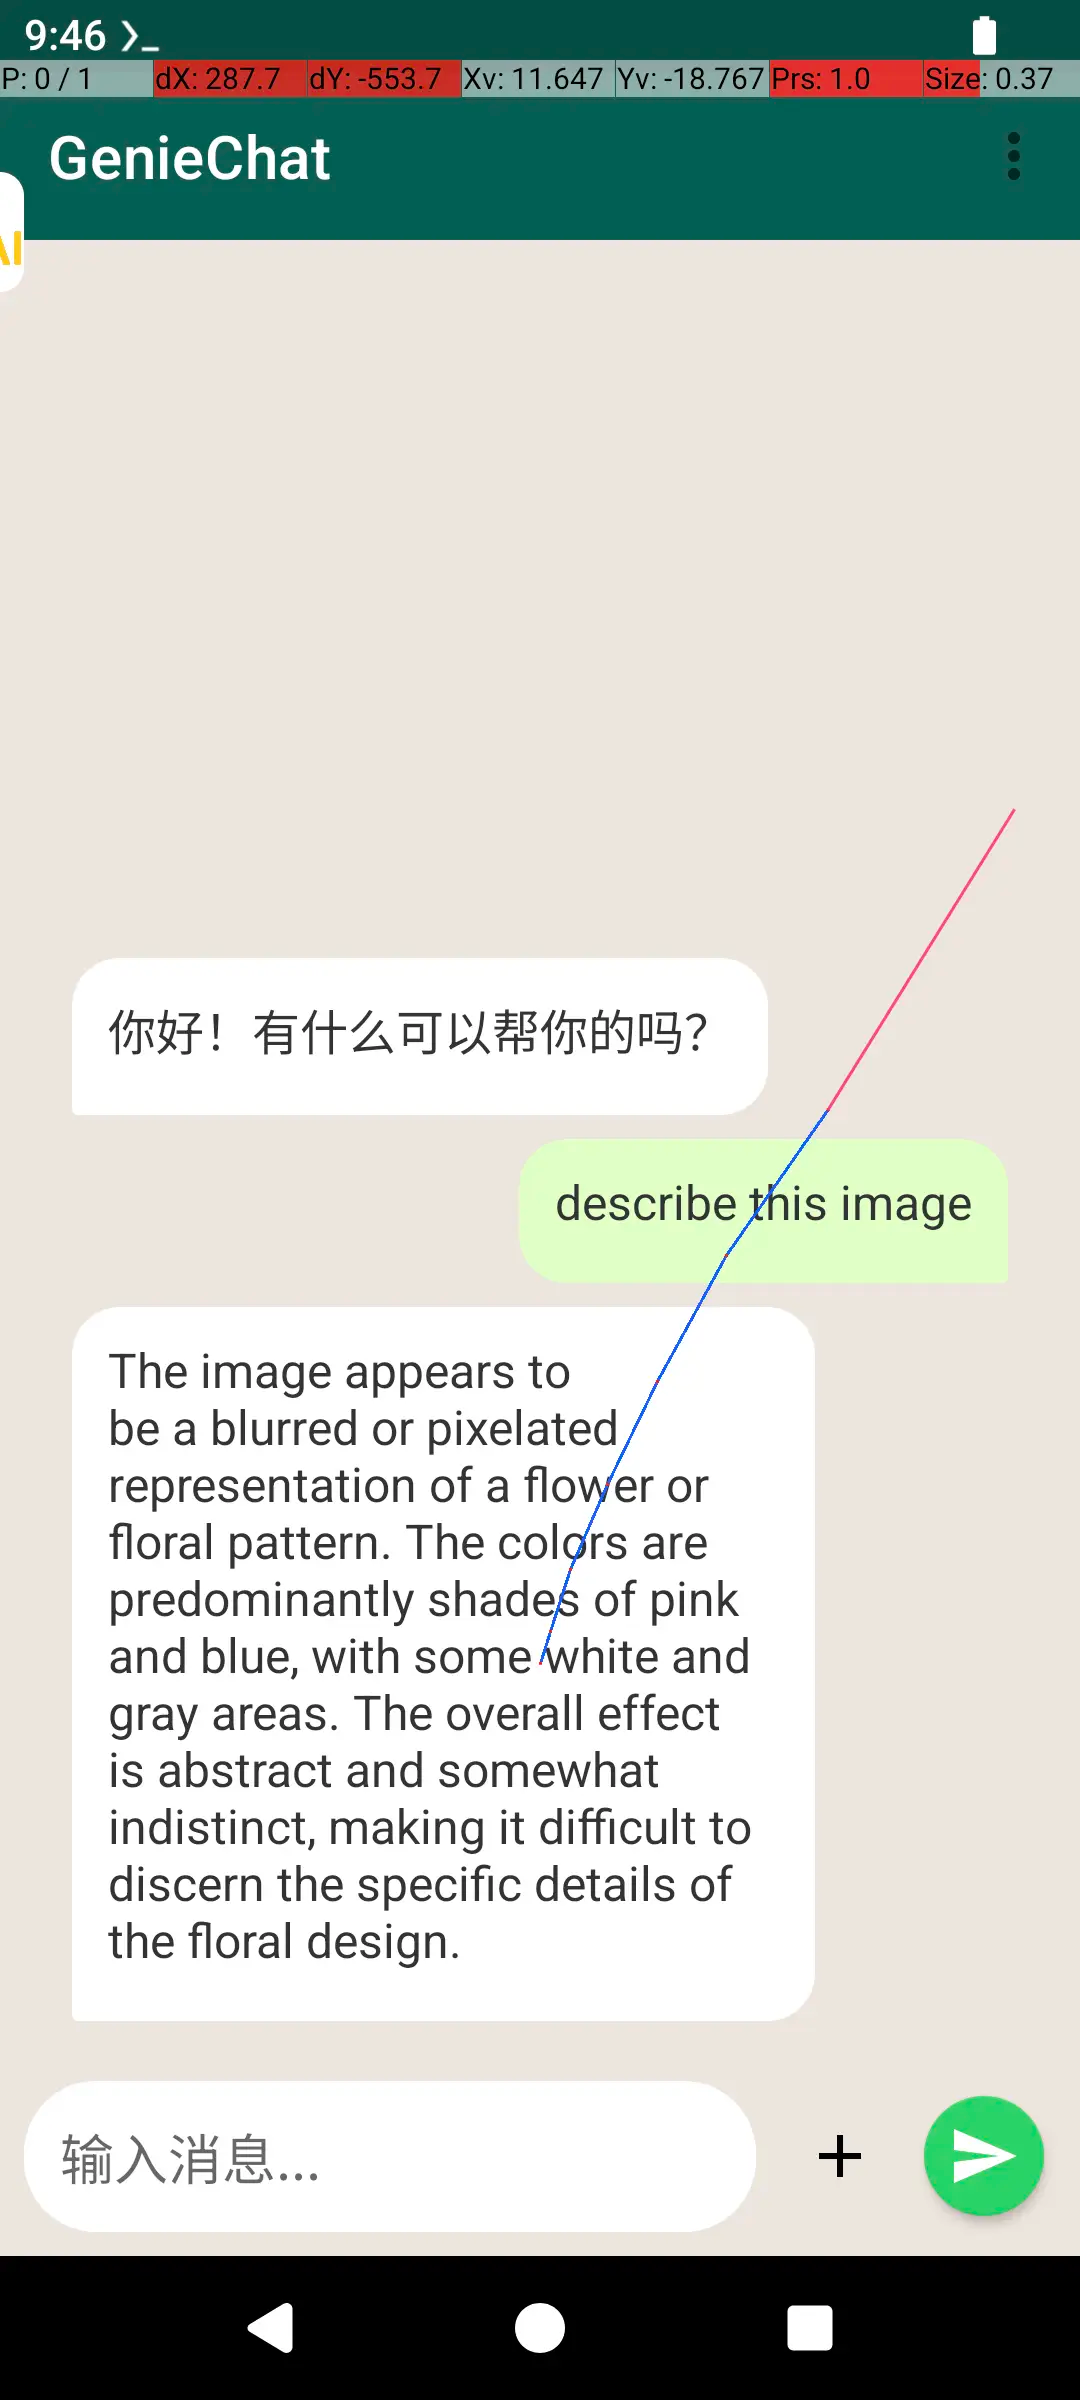
2.3 示例应用截图
Geniechat
第三部分:Python 调用指南
无论是在 Windows 运行 GenieAPIService.exe 还是在 Android 启动 GenieAPIService.apk,服务启动成功后都会显示一个 IP 地址和端口(例如 127.0.0.1:8910 或手机IP)。我们可以使用 Python 通过 OpenAI 兼容接口调用该服务。
3.1 环境准备
请确保已安装 openai 库。
pip install openai3.2 Python 调用代码 (vl_client.py)
创建一个 Python 脚本(例如 vl_client.py),并将以下代码复制进去。请注意根据实际情况修改 IP 地址。
import argparse
import base64
from openai import OpenAI

# 配置服务地址 (Windows本机运行通常为 127.0.0.1:8910,Android请填写手机实际IP)
IP_ADDR = "192.168.137.152:8910"

parser = argparse.ArgumentParser()
parser.add_argument("--stream", action="store_true")
parser.add_argument("--prompt", default="Describe this image", type=str)
parser.add_argument("--image", required=True, type=str, help="Path to the image file")
args = parser.parse_args()

# 1. 辅助函数:将图片转换为 Base64 字符串
def encode_image(image_path):
    with open(image_path, "rb") as image_file:
        return base64.b64encode(image_file.read()).decode('utf-8')

# 获取 Base64 编码的图片
try:
    base64_image = encode_image(args.image)
except Exception as e:
    print(f"Error loading image: {e}")
    exit(1)

client = OpenAI(base_url="http://" + IP_ADDR + "/v1", api_key="123")

# 打印可用模型列表
# model_lst = client.models.list()
# print(model_lst)

# 2. 构建符合 Genie Service (VL模型) 要求的特殊消息结构
# 服务端 ExtractPrompt 函数依赖 content 中的 "question" 和 "image" 字段
custom_messages = [
    {"role": "system", "content": "You are a helpful assistant."},
    {
        "role": "user",
        "content": {
            "question": args.prompt,  # 必须使用 question 字段
            "image": base64_image     # 必须使用 image 字段 (Base64)
        }
    }
]

extra_body = {
    "size": 4096,
    "temp": 1.5,
    "top_k": 13,
    "top_p": 0.6,
    # 3. 关键点:通过 extra_body 覆盖 messages 参数
    # 这样可以绕过 openai 客户端标准格式验证,直接发送自定义 JSON 结构
    "messages": custom_messages
}

# 模型名称 (需与 config.json 或启动参数中的名称一致)
model_name = "qwen2.5vl3b"

# 使用占位符通过 openai 客户端的必填项校验
placeholder_msgs = [{"role": "user", "content": "placeholder"}]

print(f"Requesting {model_name}...")

if args.stream:
    response = client.chat.completions.create(
        model=model_name,
        stream=True,
        messages=placeholder_msgs,
        extra_body=extra_body
    )

    for chunk in response:
        if chunk.choices:
            content = chunk.choices[0].delta.content
            if content is not None:
                print(content, end="", flush=True)
else:
    response = client.chat.completions.create(
        model=model_name,
        messages=placeholder_msgs,
        extra_body=extra_body
    )
    if response.choices:
        print(response.choices[0].message.content)
3.3 运行脚本
在命令行中运行脚本,指定图片路径和(可选)提示词:
python vl_client.py --image test.png --prompt "图片里有什么?" --stream