文章目录
- 前言
- 公共模块的实现
-
- [1. 创建 common 子工程](#1. 创建 common 子工程)
-
- [1.1 在 common 工程下创建基础通用包 common-core](#1.1 在 common 工程下创建基础通用包 common-core)
- [1.2 在 src/main/java 目录下添加包 com.my.commoncore](#1.2 在 src/main/java 目录下添加包 com.my.commoncore)
- [1.3 封装基础通用工具类](#1.3 封装基础通用工具类)
-
- [1.3.1 封装JSON基础工具类](#1.3.1 封装JSON基础工具类)
- [1.3.2 封装 Bean拷贝工具类](#1.3.2 封装 Bean拷贝工具类)
- [1.3.3 封装时间戳工具类](#1.3.3 封装时间戳工具类)
- [1.3.4 封装字符串校验工具类](#1.3.4 封装字符串校验工具类)
- [1.3.5 封装AES加密工具类](#1.3.5 封装AES加密工具类)
- [1.3.6 封装通用校验工具类和分页工具类](#1.3.6 封装通用校验工具类和分页工具类)
- [1.4 对线程池进行配置](#1.4 对线程池进行配置)
-
- [1.4.1 在 common-core 下创建包](#1.4.1 在 common-core 下创建包)
- [1.4.2 在 enums 包下实现线程池拒绝策略枚举类类](#1.4.2 在 enums 包下实现线程池拒绝策略枚举类类)
- [1.4.3 在 config 包下实现线程池配置类](#1.4.3 在 config 包下实现线程池配置类)
- [1.4.4 在 resources 下加入Spring 自动配置的目录](#1.4.4 在 resources 下加入Spring 自动配置的目录)
- END
鸡汤:
● 你今天的努力,也许暂时看不见成果,但请相信:种子破土前,也在黑暗里默默扎根。
● 遇到风雨时,记得你不是孤岛------云散后总有光,跌倒处也能长出翅膀。
前言
前面我们已经将所需的中间件的环境已经搭建好了,现在我们真正的进行代码的开发。
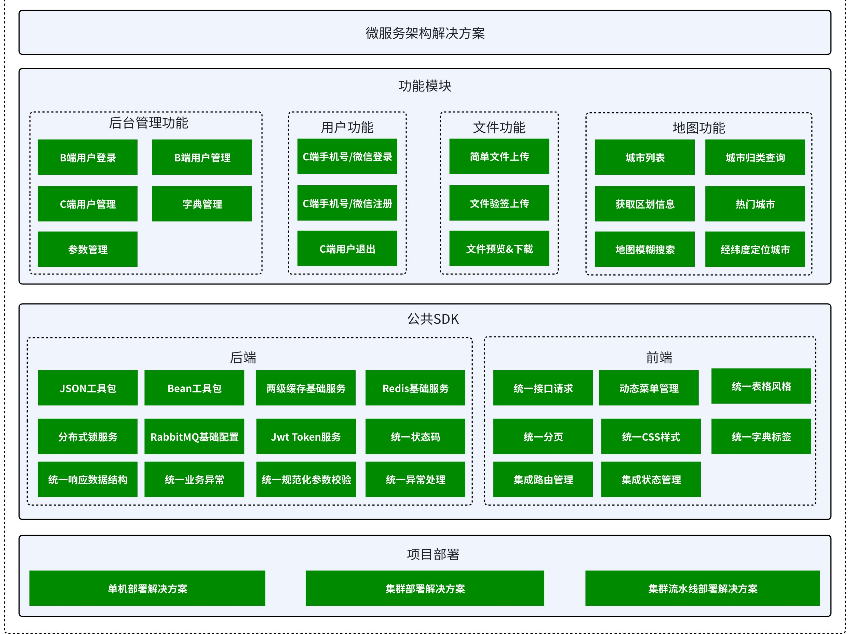
以上是我们要实现的模块,那我们应该从哪里开始写呢?
我们肯定是要在公共SDK开始写,因为只有公共SDK存在,才能给我们上层的功能模块提供更好的服务!
公共模块的实现
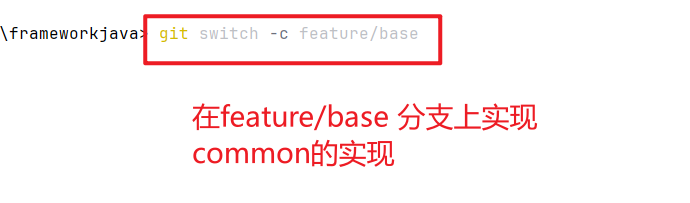
首先先在 develop 分支上先建一个分支 feature/base
1. 创建 common 子工程
1.1 在 common 工程下创建基础通用包 common-core
首先将 common 工程下的 src 目录删除,因为我们并不在他的下面进行代码实现。
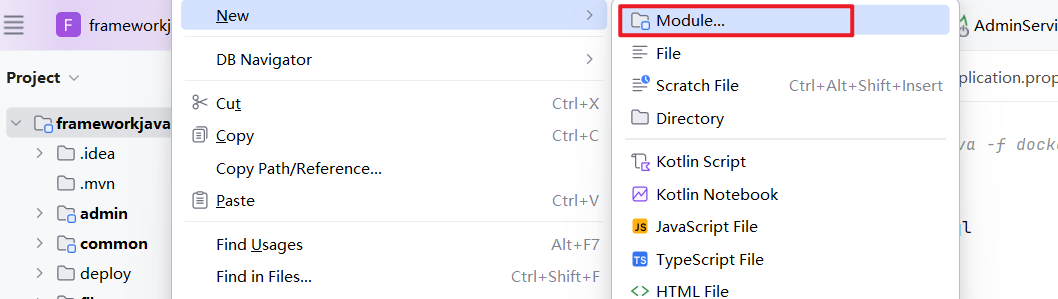
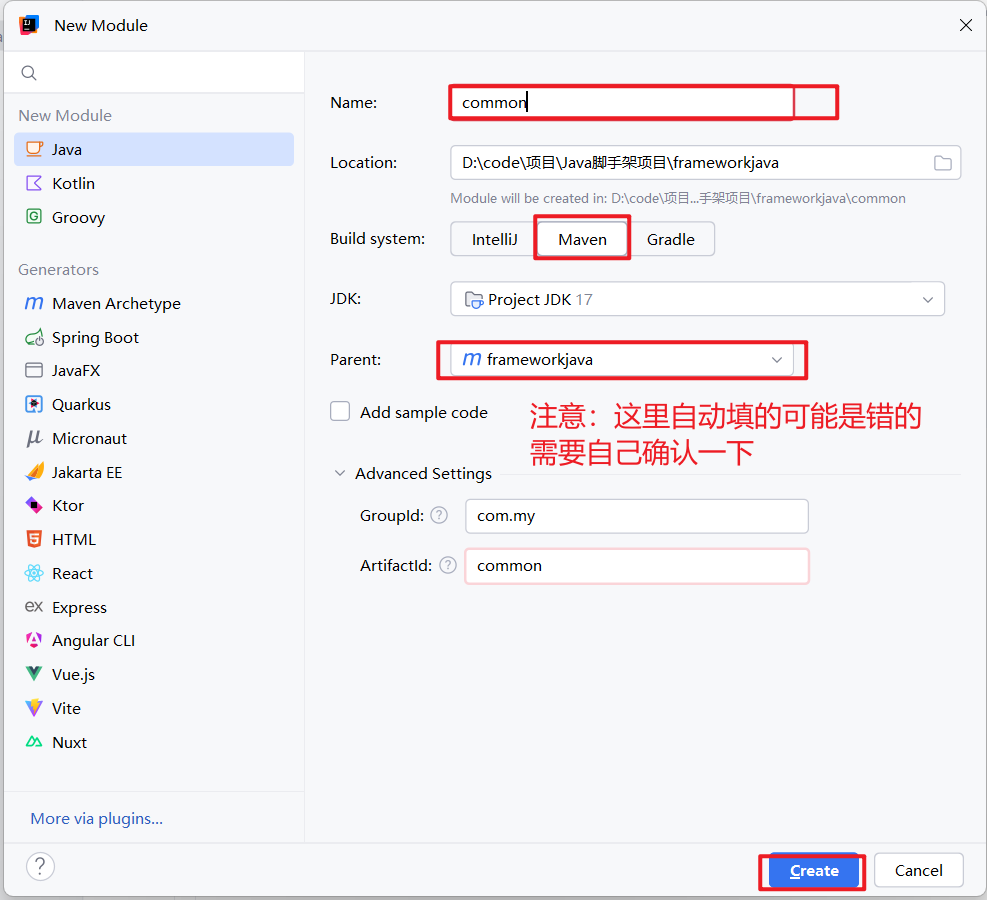
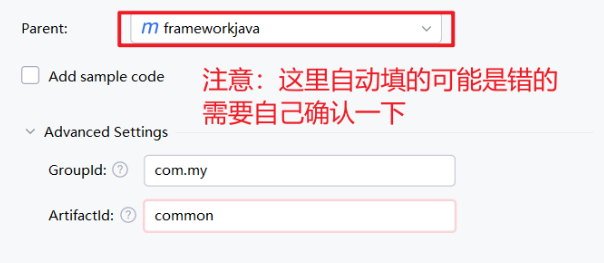
在 common 工程下创建 common-core 子工程

注:小心 idea 自动生成的 Parent 可能是错的,确定 common-core 的Parent 是common
先将 common-core 所需依赖引入,下面均不提及依赖
xml
<?xml version="1.0" encoding="UTF-8"?>
<project xmlns="http://maven.apache.org/POM/4.0.0"
xmlns:xsi="http://www.w3.org/2001/XMLSchema-instance"
xsi:schemaLocation="http://maven.apache.org/POM/4.0.0 http://maven.apache.org/xsd/maven-4.0.0.xsd">
<modelVersion>4.0.0</modelVersion>
<parent>
<groupId>com.my</groupId>
<artifactId>common</artifactId>
<version>1.0-SNAPSHOT</version>
</parent>
<groupId>com.my</groupId>
<artifactId>common-core</artifactId>
<version>1.0-SNAPSHOT</version>
<properties>
<maven.compiler.source>17</maven.compiler.source>
<maven.compiler.target>17</maven.compiler.target>
<project.build.sourceEncoding>UTF-8</project.build.sourceEncoding>
</properties>
<dependencies>
<dependency>
<groupId>org.projectlombok</groupId>
<artifactId>lombok</artifactId>
</dependency>
<!-- Spring Context Support -->
<dependency>
<groupId>org.springframework</groupId>
<artifactId>spring-context-support</artifactId>
</dependency>
<!-- Spring Web -->
<dependency>
<groupId>org.springframework</groupId>
<artifactId>spring-web</artifactId>
</dependency>
<dependency>
<groupId>org.springframework.boot</groupId>
<artifactId>spring-boot-starter-json</artifactId>
</dependency>
<!-- SpringCloud Loadbalancer -->
<dependency>
<groupId>org.springframework.cloud</groupId>
<artifactId>spring-cloud-starter-loadbalancer</artifactId>
</dependency>
<!-- https://mvnrepository.com/artifact/io.jsonwebtoken/jjwt-api -->
<dependency>
<groupId>io.jsonwebtoken</groupId>
<artifactId>jjwt-api</artifactId>
</dependency>
<!-- https://mvnrepository.com/artifact/io.jsonwebtoken/jjwt-impl -->
<dependency>
<groupId>io.jsonwebtoken</groupId>
<artifactId>jjwt-impl</artifactId>
<scope>runtime</scope>
</dependency>
<dependency>
<groupId>io.jsonwebtoken</groupId>
<artifactId>jjwt-jackson</artifactId> <!-- or jjwt-gson if Gson is preferred -->
<scope>runtime</scope>
</dependency>
<dependency>
<groupId>cn.hutool</groupId>
<artifactId>hutool-all</artifactId>
</dependency>
<dependency>
<groupId>org.apache.commons</groupId>
<artifactId>commons-collections4</artifactId>
</dependency>
<dependency>
<groupId>org.apache.commons</groupId>
<artifactId>commons-lang3</artifactId>
</dependency>
<dependency>
<groupId>jakarta.servlet</groupId>
<artifactId>jakarta.servlet-api</artifactId>
</dependency>
<dependency>
<groupId>javax.xml.bind</groupId>
<artifactId>jaxb-api</artifactId>
</dependency>
<dependency>
<groupId>org.springframework.boot</groupId>
<artifactId>spring-boot-starter-test</artifactId>
<scope>test</scope>
</dependency>
<dependency>
<groupId>com.my</groupId>
<artifactId>common-domain</artifactId>
<version>1.0-SNAPSHOT</version>
</dependency>
</dependencies>
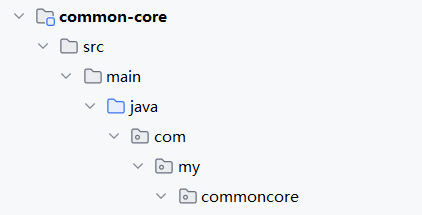
</project>1.2 在 src/main/java 目录下添加包 com.my.commoncore
根据规范 com(顶级域) + my(组织标识) + commoncore(模块)
1.3 封装基础通用工具类
在commoncore目录下创建一个package 为 util,这种工具类我们封装的策略就是,如果有成熟厂商的提供的 api 就选择在这些 api 的基础上封装出一些自己的方法
1.3.1 封装JSON基础工具类
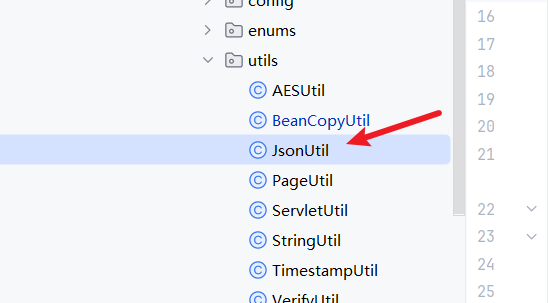
JSON(JavaScript Object Notation)是一种轻量级的数据交换格式。数据交换指的是客户端和服务器之间业务数据的传输格式。 JSON 是一种完全独立于语言的文本格式,开发者很容易阅读和编写,机器很容易解析和生成,能有效地提升网络传输效率。这些优点也使 JSON 成为一种理想的独立语言文本格式。很多语言都提供了对json的支持(包括C,C++,C#,Java,JavaScript、Perl、Python等)。
因为在项目的开发中JSON的使用频率非常高,比如网络传输、序列化存储等等。
JSON已经成为项目开发当中几乎是必不可少的工具,因此项目里提供通用的 json 工具类是十分必要的。
常见的JSON工具有 Jackson、Fastjson、Gson,我们这里就用Jackson
java
package com.my.commoncore.utils;


import com.fasterxml.jackson.annotation.JsonInclude;
import com.fasterxml.jackson.core.JsonProcessingException;
import com.fasterxml.jackson.core.type.TypeReference;
import com.fasterxml.jackson.databind.*;
import com.fasterxml.jackson.databind.json.JsonMapper;
import com.fasterxml.jackson.databind.module.SimpleModule;
import com.fasterxml.jackson.datatype.jsr310.JavaTimeModule;
import com.fasterxml.jackson.datatype.jsr310.deser.LocalDateTimeDeserializer;
import com.fasterxml.jackson.datatype.jsr310.ser.LocalDateTimeSerializer;
import com.my.commondomain.constants.CommonConstants;
import lombok.extern.slf4j.Slf4j;
import org.apache.commons.lang3.StringUtils;

import java.text.SimpleDateFormat;
import java.time.LocalDateTime;
import java.time.format.DateTimeFormatter;
import java.util.LinkedHashMap;
import java.util.List;
import java.util.Map;

/**
 * json 工具类
 */
@Slf4j
public class JsonUtil {

    private static ObjectMapper OBJECT_MAPPER;

	//私有化构造方法,实现单例模式
    private JsonUtil() {};

    static {
        OBJECT_MAPPER = JsonMapper.builder()
                //反序列化时,如果出现对应Java对象类没有定义的属性时,默认会抛出异常
                .configure(DeserializationFeature.FAIL_ON_UNKNOWN_PROPERTIES, false)
                //序列化时,将日期转化为时间戳,默认为 true
                .configure(SerializationFeature.WRITE_DATES_AS_TIMESTAMPS, false)
                //序列化时,如果序列化的类为 null,设为 true 会报错,false 不会报错,默认为 true
                .configure(SerializationFeature.FAIL_ON_EMPTY_BEANS, false)
                .configure(DeserializationFeature.FAIL_ON_INVALID_SUBTYPE, false)
                //不适用默认的dateTime进行序列化,使用JSR310的LocalDateTimeSerializer
                .configure(SerializationFeature.WRITE_DATE_KEYS_AS_TIMESTAMPS, false)
                //设置序列化类上的注解是否生效,默认为 true
                .configure(MapperFeature.USE_ANNOTATIONS, false)
                //重点,这是序列化LocalDateTIme和LocalDate的必要配置,由Jackson-data-JSR310实现
                .addModule(new JavaTimeModule())
                .addModule(new SimpleModule()
                        // 定义 LocalDateTime 序列化和反序列化的格式
                        .addSerializer(LocalDateTime.class, new LocalDateTimeSerializer(DateTimeFormatter.ofPattern(CommonConstants.STANDARD_FORMAT)))
                        .addDeserializer(LocalDateTime.class, new LocalDateTimeDeserializer(DateTimeFormatter.ofPattern(CommonConstants.STANDARD_FORMAT)))
                )
                //所有的日期格式都统一为以下的样式,即yyyy-MM-dd HH:mm:ss
                .defaultDateFormat(new SimpleDateFormat(CommonConstants.STANDARD_FORMAT))
                // 只针对非空的值进行序列化
                .serializationInclusion(JsonInclude.Include.NON_NULL)
                .build();
    }


    /**
     * 对象转Json格式字符串
     * @param obj 对象
     * @return Json格式字符串
     * @param <T> 对象类型
     */
    public static <T> String toJson(T obj) {
        if(obj == null) {
            return null;
        }
        try {
            return obj instanceof String ? (String) obj : OBJECT_MAPPER.writeValueAsString(obj);
        } catch (JsonProcessingException e) {
            log.warn("Parse Object to String error : {}", e.getMessage());
            return null;
        }
    }


    /**
     * 对象转Json格式字符串(格式化的Json字符串)
     * @param obj 对象
     * @return 美化的Json格式字符串
     * @param <T> 对象类型
     */
    public static <T> String toJsonPretty(T obj) {
        if(obj == null) {
            return null;
        }
        try {
            return obj instanceof String ? (String) obj : OBJECT_MAPPER
                    .writerWithDefaultPrettyPrinter()
                    .writeValueAsString(obj);
        } catch (JsonProcessingException e) {
            log.warn("Parse Object to String error : {}", e.getMessage());
            return null;
        }
    }

    /**
     * 字符串转换为自定义字段转为list,支持List嵌套简单对象
     * @param json json字符串
     * @param clazz 对象类
     * @return 对象列表
     * @param <T> 对象类型
     */
    public static <T> T fromJson(String json, Class<T> clazz) {
        if(StringUtils.isEmpty(json) || clazz == null) {
            return null;
        }
        try {
            return clazz.equals(String.class) ? (T) json : OBJECT_MAPPER.readValue(json,clazz);
        } catch (JsonProcessingException e) {
            log.warn("Parse String to Object error : {}", e.getMessage());
            return null;
        }
    }


    /**
     * 字符串转换为自定义对象,支持复杂的泛型嵌套
     *
     * @param json json字符串
     * @param valueTypeRef 对象模板信息
     * @return 对象类对应的对象
     * @param <T> 对象类
     */
    public static <T> T fromJson(String json, TypeReference<T> valueTypeRef) {
        if(StringUtils.isEmpty(json) || valueTypeRef == null) {
            return null;
        }
        try {
            return OBJECT_MAPPER.readValue(json,valueTypeRef);
        } catch (JsonProcessingException e) {
            log.warn("Parse String to Object error : {}", e.getMessage());
            return null;
        }
    }

    /**
     * 字符串转换为自定义字段转为list,支持List嵌套简单对象
     * @param json json字符串
     * @param valueClass 对象类
     * @return 对象列表
     * @param <T> 对象类型
     */
    public static <T> List<T> fromJsonToList(String json,Class<T> valueClass) {
        if(StringUtils.isEmpty(json) || valueClass == null) {
            return null;
        }
        JavaType javaType = OBJECT_MAPPER.getTypeFactory().constructParametricType(List.class, valueClass);
        try {
            return OBJECT_MAPPER.readValue(json,javaType);
        } catch (JsonProcessingException e) {
            log.warn("Parse String to Object error : {}", e.getMessage());
            return null;
        }
    }

    /**
     * 字符串转换为自定义字段转为map,支持Map嵌套简单对象
     * @param json  str 字符串信息
     * @param valueClass valueClass value的类别
     * @return   map对象
     * @param <T> value 的类型
     */
    public static <T> Map<String,T> fromJsonToMap(String json, Class<T> valueClass) {
        if(StringUtils.isEmpty(json) || valueClass == null) {
            return null;
        }
        JavaType javaType = OBJECT_MAPPER.getTypeFactory().constructMapType(LinkedHashMap.class,String.class,valueClass);
        try {
            return OBJECT_MAPPER.readValue(json,javaType);
        } catch (JsonProcessingException e) {
            log.warn("Parse String to Object error : {}", e.getMessage());
            return null;
        }
    }

    /**
     * 对象转 Map
     * @param object  待转换对象
     * @return  返回转换后的 Map
     */
    public static Map<String,Object> convertToMap(Object object) {
        if(object == null) {
            return null;
        }
        return OBJECT_MAPPER.convertValue(object, Map.class);
    }
1.3.2 封装 Bean拷贝工具类
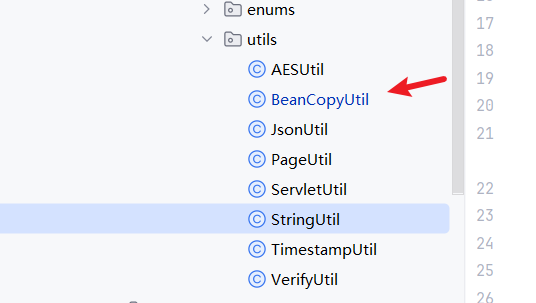
Bean 拷贝(Bean Copy)是指在面向对象编程中,将一个 Java 对象(通常称为源 Bean)的属性值复
制到另⼀个 Java 对象(目标 Bean)中的操作。
因为在Java web中我们项目通常为:控制层(controller)、业务逻辑层(service)、数据访问层(DAO),而每一层都有独属于这一层的数据模型,也就意味着我们要经常将数据模型进行转换
java
package com.my.commoncore.utils;

import org.springframework.beans.BeanUtils;

import java.util.ArrayList;
import java.util.List;
import java.util.function.Supplier;

/**
 * Bean属性拷贝工具类
 */
public class BeanCopyUtil extends BeanUtils{

    /**
     * 集合数据的拷贝
     * @param source 数据源类
     * @param supplier 目标类::new(eg: UserVO::new)
     * @return 拷贝结果
     * @param <S> 源目标类型
     * @param <T> 目标对象类型
     */
    public static <S,T> List<T> copyPropertiesToList(List<S> source, Supplier<T> supplier) {
        if(source == null) {
            return null;
        }
        List<T> list = new ArrayList<>(source.size());
        for(S s : source) {
            T target = supplier.get();
            copyProperties(s, target);
            list.add(target);
        }
        return list;
    }
}
这里我们直接继承 springboot 给我们提供的 Bean 拷贝工具类,自己添加一个集合数据的拷贝方法
1.3.3 封装时间戳工具类
提供方法:
● 获取当前时间戳
● 获取未来 x 秒的时间戳
● 获取未来 x 天的时间戳
● 获取未来 x 月的时间戳
● 获取未来 x 年的时间戳
● 计算两个时间戳之间的差异
● 所有方法都提供返回秒级时间和毫秒级时间两种实现
java
package com.my.commoncore.utils;


import java.time.Instant;
import java.time.ZoneId;
import java.time.ZonedDateTime;
import java.time.temporal.ChronoUnit;

/**
 * 时间戳工具类
 */
public class TimestampUtil {

    /**
     * 获取当前时间戳(秒级)
     *
     * @return 当前时间戳(秒级)
     */
    public static long getCurrentSeconds() {
        return Instant.now().getEpochSecond();
    }

    /**
     * 获取当前时间戳(毫秒级)
     *
     * @return 当前时间戳(毫秒级)
     */
    public static long getCurrentMillis() {
        return Instant.now().toEpochMilli();
    }

    /**
     * 获取未来x秒的时间戳(秒级)
     *
     * @param seconds 秒
     * @return 时间戳
     */
    public static long getSecondsLaterSeconds(long seconds) {
        ZonedDateTime now = ZonedDateTime.now(ZoneId.of("UTC"));
        ZonedDateTime secondsLater = now.plusSeconds(seconds);
        return secondsLater.toEpochSecond();
    }

    /**
     * 获取未来x秒的时间戳(毫秒级)
     *
     * @param seconds 秒
     * @return 时间戳
     */
    public static long getSecondsLaterMillis(long seconds) {
        ZonedDateTime now = ZonedDateTime.now(ZoneId.of("UTC"));
        ZonedDateTime secondsLater = now.plusSeconds(seconds);
        return secondsLater.toInstant().toEpochMilli();
    }

    /**
     * 获取未来x天的时间戳(秒级)
     * @param days 天
     * @return 时间戳
     */
    public static long getDaysLaterSeconds(long days) {
        ZonedDateTime now = ZonedDateTime.now(ZoneId.of("UTC"));
        ZonedDateTime secondsLater = now.plusDays(days);
        return secondsLater.toEpochSecond();
    }

    /**
     * 获取未来x天的时间戳(毫秒级)
     * @param days 天
     * @return 时间戳
     */
    public static long getDaysLaterMillis(long days) {
        ZonedDateTime now = ZonedDateTime.now(ZoneId.of("UTC"));
        ZonedDateTime monthsLater = now.plusDays(days);
        return monthsLater.toInstant().toEpochMilli();
    }


    /**
     * 获取未来x月的时间戳(秒级)
     * @param months 月
     * @return 时间戳
     */
    public static long getMonthsLaterSeconds(long months) {
        ZonedDateTime now = ZonedDateTime.now(ZoneId.of("UTC"));
        ZonedDateTime monthsLater = now.plusMonths(months);
        return monthsLater.toEpochSecond();
    }


    /**
     * 获取未来x月的时间戳(毫秒级)
     * @param months 月
     * @return 时间戳
     */
    public static long getMonthsLaterMillis(long months) {
        ZonedDateTime now = ZonedDateTime.now(ZoneId.of("UTC"));
        ZonedDateTime monthsLater = now.plusMonths(months);
        return monthsLater.toInstant().toEpochMilli();
    }


    /**
     * 获取未来x年的时间戳(秒级)
     * @param years 年
     * @return 时间戳
     */
    public static long getYearLaterSeconds(long years) {
        ZonedDateTime now = ZonedDateTime.now(ZoneId.of("UTC"));
        ZonedDateTime yearLater = now.plusYears(years);
        return yearLater.toEpochSecond();
    }

    /**
     * 获取未来x年的时间戳(毫秒级)
     * @param years 年
     * @return 时间戳
     */
    public static long getYearLaterMillis(long years) {
        ZonedDateTime now = ZonedDateTime.now(ZoneId.of("UTC"));
        ZonedDateTime yearLater = now.plusYears(years);
        return yearLater.toInstant().toEpochMilli();
    }


    /**
     * 计算两个时间戳之间的差异(毫秒)
     *
     * @param timestamp1 时间戳1
     * @param timestamp2 时间戳2
     * @return 时间戳差异(毫秒)
     */
    public static long calculateDifferenceMillis(long timestamp1, long timestamp2) {
        return ChronoUnit.MILLIS.between(
                Instant.ofEpochMilli(timestamp1),
                Instant.ofEpochMilli(timestamp2));
    }

    /**
     * 计算两个时间戳之间的差异(秒)
     *
     * @param timestamp1 时间戳1
     * @param timestamp2 时间戳2
     * @return 时间戳差异(秒)
     */
    public static long calculateDifferenceSeconds(long timestamp1, long timestamp2) {
        return ChronoUnit.SECONDS.between(
                Instant.ofEpochSecond(timestamp1),
                Instant.ofEpochSecond(timestamp2));
    }
1.3.4 封装字符串校验工具类
字符串的校验主要使用 apache 提供的 StringUtils,自己再添加两个字符串模式匹配的方法
java
package com.my.commoncore.utils;


import org.apache.commons.collections4.CollectionUtils;
import org.apache.commons.lang3.StringUtils;
import org.springframework.util.AntPathMatcher;

import java.util.List;

public class StringUtil {

    /**
     * 判断指定字符串是否与指定匹配规则链表中的任意一个匹配规则匹配
     *
     * @param str 指定字符串
     * @param patterns 匹配规则链表
     * @return 是否匹配
     */
    public static boolean matches(String str, List<String> patterns) {
        if(StringUtils.isEmpty(str) || CollectionUtils.isEmpty(patterns)) {
            return false;
        }
        for (String pattern : patterns) {
            if (isMatch(pattern, str)) {
                return true;
            }
        }
        return false;
    }

    /**
     * 判断url是否与规则匹配
     *
     * 匹配规则:
     * 精确匹配
     * 匹配规则中包含 ? 表示任意单个字符;
     * 匹配规则中包含 * 表示一层路径内的任意字符串,不可跨层级;
     * 匹配规则中包含 ** 表示任意层路径的任意字符,可跨层级
     *
     * @param pattern 匹配规则
     * @param url 需要匹配的url
     * @return 是否匹配
     */
    public static boolean isMatch(String pattern, String url) {
        if (StringUtils.isEmpty(pattern) || StringUtils.isEmpty(url)){
            return false;
        }
        AntPathMatcher matcher = new AntPathMatcher();
        return matcher.match(pattern, url);
    }
}
1.3.5 封装AES加密工具类
作为一个项目,以后肯定会有用户,有用户就一定有手机号等等一系列的敏感信息的存储,所以我们的AES加密工具类也是要有的
java
package com.my.commoncore.utils;

import cn.hutool.crypto.SecureUtil;
import org.apache.commons.lang3.StringUtils;

import java.nio.charset.StandardCharsets;

/**
 * AES加密工具类
 */
public class AESUtil {

    /**
     * 前后端规定的秘钥
     */
    private static final byte[] AES_KEY  = "12345678abcdefgh".getBytes(StandardCharsets.UTF_8);


    /**
     * aes加密
     * @param data 原始数据
     * @return 加密后的数据
     */
    public static String encryptHex(String data) {
        if (StringUtils.isNotBlank(data)) {
            return SecureUtil.aes(AES_KEY).encryptHex(data);
        }
        return null;
    }

    /**
     * aes解密
     * @param data 加密后的数据
     * @return 原始数据
     */
    public static String decryptHex(String data) {
        if (StringUtils.isNotBlank(data)) {
            return SecureUtil.aes(AES_KEY).decryptStr(data);
        }
        return null;
    }
}
1.3.6 封装通用校验工具类和分页工具类
VerifyUtil工具类提供手机号的校验和生成随机验证码的功能、PageUtil工具类提供计算总页数的功能。
VerifyUtil工具类:
java
package com.my.commoncore.utils;

import java.util.Random;
import java.util.regex.Matcher;
import java.util.regex.Pattern;

/**
 * 通用校验工具类
 */
public class VerifyUtil {

    /**
     * 手机号的正则校验
     */
    public static final Pattern PHONE_PATTERN = Pattern.compile("^1[2|3|4|5|6|7|8|9][0-9]\\d{8}$");


    /**
     * 验证码的取值范围
     */
    public static final String NUMBER_VERIFY_CODES = "1234567890";


    /**
     * 手机号校验
     *
     * @param phone 手机号
     * @return 11位,以1开头  第二位是2-9
     */
    public static boolean checkPhone(String phone) {
        Matcher matcher = PHONE_PATTERN.matcher(phone);
        return matcher.matches();
    }


    /**
     * 随机生成验证码
     * @param size 验证码长度
     * @return 验证码
     */
    public static String generateVerifyCode(int size) {
        String sources = NUMBER_VERIFY_CODES;
        Random rand = new Random(System.currentTimeMillis());
        StringBuilder verifyCode = new StringBuilder(size);
        for (int i = 0; i < size; i++) {
            verifyCode.append(sources.charAt(rand.nextInt(9)));
        }
        return verifyCode.toString();
    }
}
PageUtil工具类:
java
package com.my.commoncore.utils;

/**
 * 分页工具类
 */
public class PageUtil {

    /**
     * 计算总页数
     *
     * @param totals 总数量
     * @param pageSize 页大小
     * @return 页数
     */
    public static int getTotalPages(long totals, int pageSize){
        if (pageSize <= 0) {
            throw new IllegalArgumentException("Page size must be greater than 0.");
        }
        return (int) Math.ceil((double) totals / pageSize);
    }
}
1.4 对线程池进行配置
我们的 common-core 将来是要被引入到一个个具体的可启动的服务里去的,那一个具体的业务也一定离不开线程池的,索性我们就将线程池的的配置也写在我们的 common-core 里
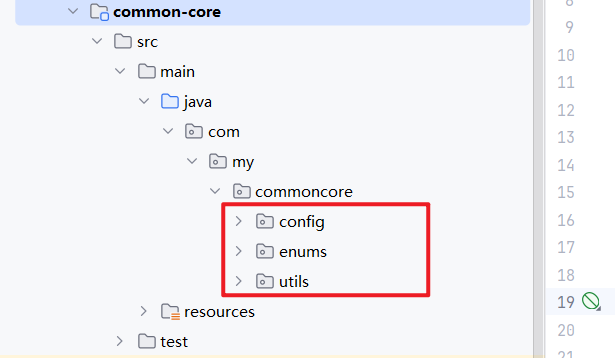
1.4.1 在 common-core 下创建包
1、创建 config 包,创建配置包,方便以后新增配置
2、创建 enums 包,创建枚举类包,里面先放线程池的拒绝策略的枚举
1.4.2 在 enums 包下实现线程池拒绝策略枚举类类
RejectType 类
java
package com.my.commoncore.enums;

import lombok.Getter;

@Getter
public enum RejectType {
    /**
     * AbortPolicy策略 枚举值:1
     */
    AbortPolicy(1),

    /**
     * CallerRunsPolicy策略 枚举值:2
     */
    CallerRunsPolicy(2),

    /**
     * DiscardOldestPolicy策略 枚举值:3
     */
    DiscardOldestPolicy(3),

    /**
     * DiscardPolicy策略 枚举值:4
     */
    DiscardPolicy(4);

    private Integer value;

    RejectType(Integer value) {
        this.value = value;
    }
}
1.4.3 在 config 包下实现线程池配置类
ThreadPoolConfig 类
java
package com.my.commoncore.config;
import com.my.commoncore.enums.RejectType;
import org.springframework.beans.factory.annotation.Value;
import org.springframework.context.annotation.Bean;
import org.springframework.context.annotation.Configuration;
import org.springframework.scheduling.annotation.EnableAsync;
import org.springframework.scheduling.concurrent.ThreadPoolTaskExecutor;
import java.util.concurrent.Executor;
import java.util.concurrent.RejectedExecutionHandler;
import java.util.concurrent.ThreadPoolExecutor;
/**
* 线程池配置
*/
@Configuration
@EnableAsync
public class ThreadPoolConfig {
/**
* 核心线程数
*/
@Value("${thread.pool-executor.corePoolSize:5}")
private Integer corePoolSize;
/**
* 最大线程数
*/
@Value("${thread.pool-executor.maxPoolSize:100}")
private Integer maxPoolSize;
/**
* 阻塞队列大小
*/
@Value("${thread.pool-executor.queueCapacity:100}")
private Integer queueCapacity;
/**
* 空闲存活时间
*/
@Value("${thread.pool-executor.keepAliveSeconds:60}")
private Integer keepAliveSeconds;
/**
* 线程名称
*/
@Value("${thread.pool-executor.prefixName:thread-service-}")
private String prefixName;
/**
* 拒绝策略
*/
@Value("${thread.pool-executor.rejectHandler:2}")
private Integer rejectHandler;
/**
* 注册和配置线程池执行器
*
* @return 线程池执行器
*/
@Bean("threadPoolTaskExecutor")
public Executor getThreadExecutor() {
ThreadPoolTaskExecutor executor = new ThreadPoolTaskExecutor();
executor.setCorePoolSize(corePoolSize);
executor.setMaxPoolSize(maxPoolSize);
executor.setQueueCapacity(queueCapacity);
executor.setKeepAliveSeconds(keepAliveSeconds);
executor.setThreadNamePrefix(prefixName);
//设置线程池关闭的时候 等待所有的任务完成后再继续销毁其他的bean
executor.setWaitForTasksToCompleteOnShutdown(true);
//策略
executor.setRejectedExecutionHandler(getRejectHandler());
return executor;
}
/**
* 拒绝策略
*
* @return 拒绝策略处理器
*/
public RejectedExecutionHandler getRejectHandler() {
if (RejectType.AbortPolicy.getValue().equals(rejectHandler)) {
return new ThreadPoolExecutor.AbortPolicy();
} else if (RejectType.CallerRunsPolicy.getValue().equals(rejectHandler)) {
return new ThreadPoolExecutor.CallerRunsPolicy();
} else if (RejectType.DiscardOldestPolicy.getValue().equals(rejectHandler)) {
return new ThreadPoolExecutor.DiscardOldestPolicy();
} else {
return new ThreadPoolExecutor.DiscardPolicy();
}
}
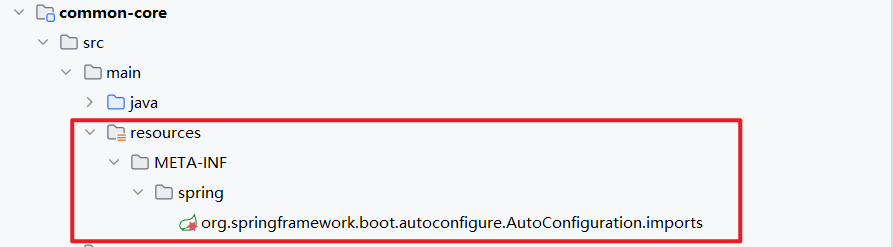
}1.4.4 在 resources 下加入Spring 自动配置的目录
因为我们的线程池配置是运行时的配置的 Bean,所以需要交给 Spring 来进行管理,如果我们没有配置线程池配置,服务会自动配置一个默认的线程池配置,但是默认的的线程池没有打开异步服务。
所以我们要将自己的线程池配置交给 Spring 容器来管理,那我们怎么让我们的服务发现我们的配置类呢?我们需要在 resources 下 加入自动配置的目录
目录为: META-INF.spring.org.springframework.boot.autoconfigure.AutoConfiguration.imports

END
封装了一些简单的工具类