代码:
https://blog.csdn.net/njsgcs/article/details/158235640
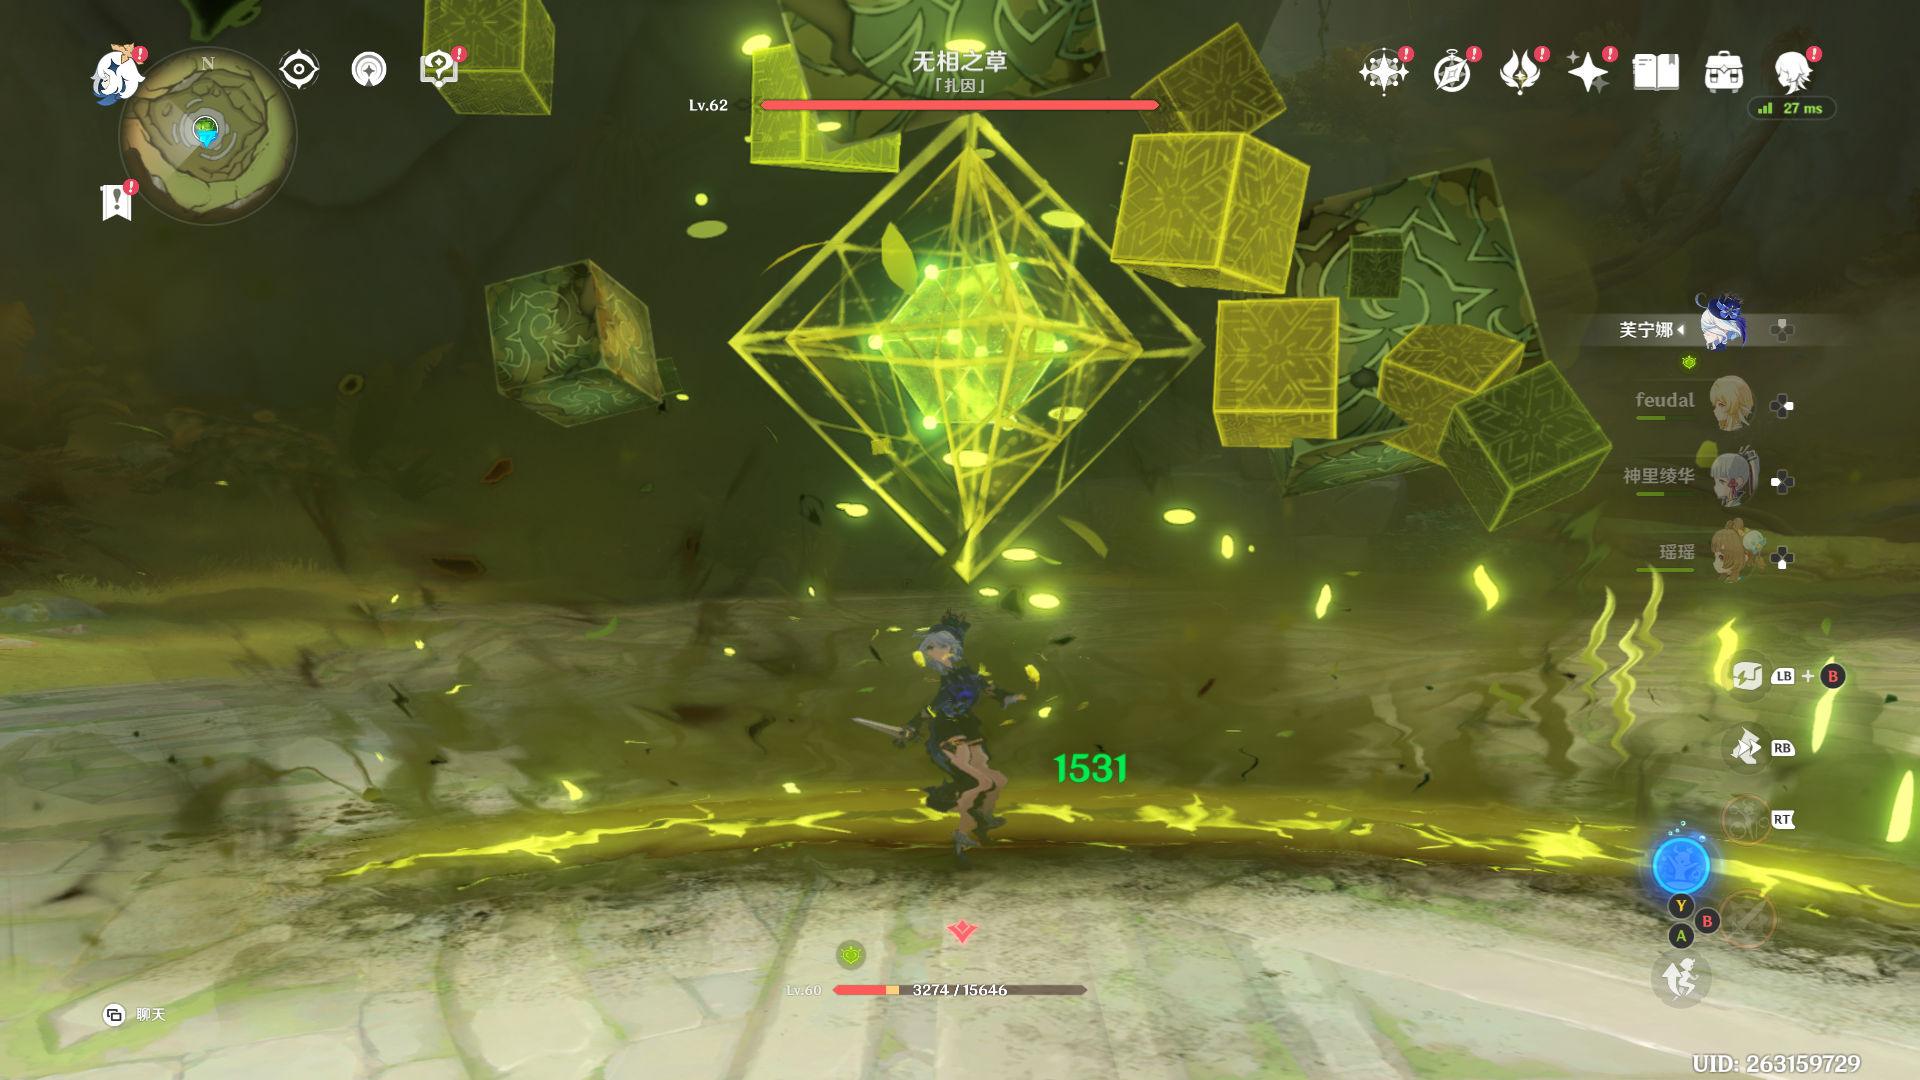
原图
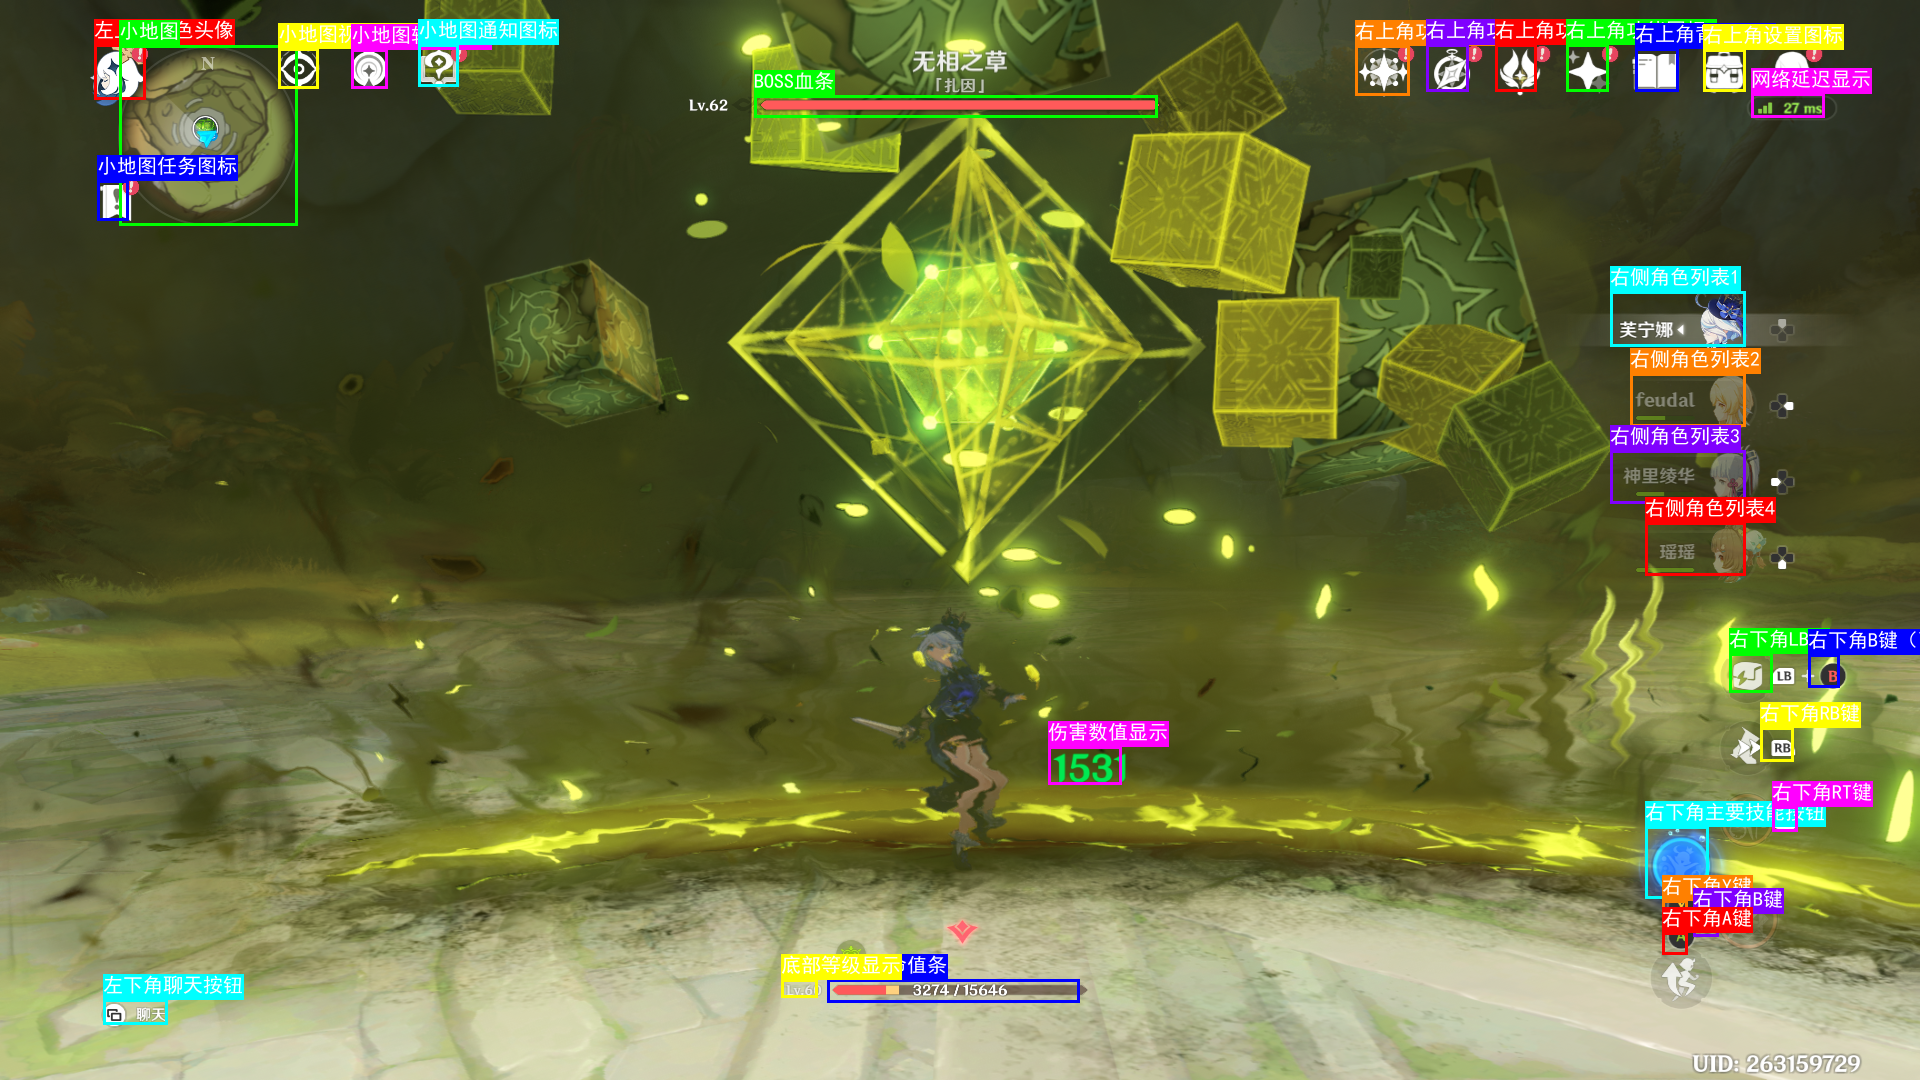
识别
python
import tkinter as tk
from tkinter import filedialog, messagebox,ttk
import dashscope
import base64
import json
import os
from PIL import Image, ImageDraw, ImageFont
from datetime import datetime
import sys
import os
sys.path.append(os.getcwd())
from shareconfig.api_key import DASHSCOPE_API_KEY
# ==================== 配置区域 ====================
# 请在这里填写你的 DashScope API Key
# 获取地址:https://dashscope.console.aliyun.com/

# 或者从环境变量读取
# DASHSCOPE_API_KEY = os.getenv("DASHSCOPE_API_KEY")

# 使用的模型(通义千问视觉模型)
# 可选:qwen-vl-max, qwen-vl-plus, qwen2-vl-max, qwen2-vl-plus
VL_MODEL = "qwen3.5-plus"

# 输出文件夹路径
OUTPUT_FOLDER = "output/gounding"

# 是否启用坐标处理
# True: 将 0-1000 范围的归一化坐标映射回原始图像像素坐标
# False: 直接使用原始坐标
ENABLE_COORD_NORMALIZATION = True

# ==================== 功能函数 ====================

def create_output_folder():
    """创建输出文件夹,如果不存在的话"""
    if not os.path.exists(OUTPUT_FOLDER):
        os.makedirs(OUTPUT_FOLDER)
        print(f"已创建输出文件夹: {OUTPUT_FOLDER}")
    return OUTPUT_FOLDER

def encode_image_to_base64(image_path):
    """将图片编码为 base64 字符串"""
    with open(image_path, "rb") as image_file:
        return base64.b64encode(image_file.read()).decode('utf-8')

def get_bounding_boxes_from_ai(image_path, prompt=None):
    """
    调用 DashScope 通义千问 VL 模型获取边界框信息
    """
    # 如果没有传入自定义 prompt,使用针对游戏 UI 优化的默认 prompt
    if prompt is None:
        prompt = (
            "请仔细分析这张游戏截图。重点检测屏幕上的所有用户界面(UI)元素,特别是位于屏幕四个角落和边缘的图标、按钮和小部件。"
            "具体包括:右上角的功能按钮(如地图、任务、角色、背包、设置等图标)、左上角的小地图区域、右侧的角色列表头像、底部的技能栏或状态条。"
            "即使这些图标很小或形状复杂,也请尝试标记出来。"
            "请返回每个检测到的 UI 元素或物体的名称和边界框坐标。"
            "格式必须为严格的 JSON 数组,不要包含任何 Markdown 标记(如 ```json)。"
            "每个元素包含:'object_name' (物体或图标的具体名称), 'bbox' ([x_min, y_min, x_max, y_max])。"
            "坐标必须是像素值,基于原图尺寸,从左上角 (0,0) 开始计数。"
            "只返回 JSON 数据。"
        )

    # ... (后续代码保持不变) ...

    # 设置 API Key
    dashscope.api_key = DASHSCOPE_API_KEY

    # 编码图片为 base64
    base64_image = encode_image_to_base64(image_path)

    # 构建消息内容
    messages = [
        {
            "role": "user",
            "content": [
                {
                    "image": f"data:image/jpeg;base64,{base64_image}"
                },
                {
                    "text": prompt
                }
            ]
        }
    ]

    try:
        # 调用 DashScope API
        response = dashscope.MultiModalConversation.call(
            model=VL_MODEL,
            messages=messages
        )

        # 检查响应状态
        if response.status_code == 200:
            result_content = response.output.choices[0].message.content
            print(f"AI 返回结果:\n{result_content}")

            # 处理不同的响应格式
            if isinstance(result_content, list):
                # 如果是列表格式 [{'text': '...'}]
                result_text = result_content[0]['text'] if result_content and 'text' in result_content[0] else str(result_content)
            else:
                # 如果是字符串格式
                result_text = str(result_content)

            # 解析返回结果
            bounding_boxes = extract_json_from_response(result_text)
            return bounding_boxes
        else:
            error_msg = f"API 调用失败: {response.code} - {response.message}"
            print(error_msg)
            raise Exception(error_msg)

    except Exception as e:
        print(f"调用 AI 失败: {e}")
        raise e

def extract_json_from_response(text):
    """
    从 AI 返回的文本中提取 JSON 数据

    Args:
        text: AI 返回的文本

    Returns:
        list: 解析后的边界框列表
    """
    import re

    # 先移除 Markdown 代码块标记
    # 移除 ```json 和 ``` 标记
    text = re.sub(r'```(?:json)?\s*', '', text)
    text = re.sub(r'```\s*', '', text)

    # 尝试查找 JSON 数组模式
    json_pattern = r'\[\s*\{.*?\}\s*\]'
    matches = re.findall(json_pattern, text, re.DOTALL)

    if matches:
        try:
            data = json.loads(matches[0])
            return data
        except json.JSONDecodeError as e:
            print(f"JSON 解析错误: {e}")
            print(f"原始文本: {matches[0]}")
            pass

    # 尝试直接解析整个文本
    try:
        start_idx = text.find('[')
        end_idx = text.rfind(']') + 1
        if start_idx != -1 and end_idx > start_idx:
            json_str = text[start_idx:end_idx]
            data = json.loads(json_str)
            return data
    except json.JSONDecodeError as e:
        print(f"JSON 解析错误: {e}")
        print(f"尝试解析的文本: {json_str}")
        pass
    except Exception as e:
        print(f"其他错误: {e}")
        pass

    # 返回空列表
    return []

def draw_bounding_boxes(image_path, bounding_boxes, output_path=None):
    """
    在图片上绘制边界框

    Args:
        image_path: 原图路径
        bounding_boxes: 边界框列表
        output_path: 输出路径

    Returns:
        str: 保存后的图片路径
    """
    # 打开图片
    img = Image.open(image_path)
    draw = ImageDraw.Draw(img)

    # 图片尺寸
    img_width, img_height = img.size
    print(f"图片尺寸: {img_width}x{img_height}")

    # 颜色列表(用于不同物体不同颜色)
    colors = [
        (255, 0, 0),      # 红色
        (0, 255, 0),      # 绿色
        (0, 0, 255),      # 蓝色
        (255, 255, 0),    # 黄色
        (255, 0, 255),    # 紫色
        (0, 255, 255),    # 青色
        (255, 128, 0),    # 橙色
        (128, 0, 255),    # 紫色
    ]

    # 尝试加载字体
    try:
        font = ImageFont.truetype("simhei.ttf", 20)  # 黑体
    except:
        try:
            font = ImageFont.truetype("arial.ttf", 20)
        except:
            font = ImageFont.load_default()

    # 绘制每个边界框
    for i, box in enumerate(bounding_boxes):
        try:
            # 获取边界框坐标
            if isinstance(box, dict):
                # 支持多种字段名称
                bbox = box.get('bbox', box.get('bbox_2d', box.get('bounding_box', [])))
                obj_name = box.get('object_name', box.get('name', box.get('label', f'object_{i}')))
            elif isinstance(box, list):
                bbox = box[:4] if len(box) >= 4 else box
                obj_name = box[4] if len(box) > 4 else f'object_{i}'
            else:
                continue

            # 确保 bbox 有 4 个值
            if len(bbox) < 4:
                print(f"跳过无效的 bbox: {bbox}")
                continue

            x_min, y_min, x_max, y_max = bbox[:4]

            # 根据配置决定坐标处理方式
            if ENABLE_COORD_NORMALIZATION:
                # 如果坐标已经在 0-1000 范围内,则映射回原始图像尺寸
                # 反向公式:x_pixel = (x_norm / 1000) * img_width
                x_min = int((x_min / 1000) * img_width)
                y_min = int((y_min / 1000) * img_height)
                x_max = int((x_max / 1000) * img_width)
                y_max = int((y_max / 1000) * img_height)

                # 确保坐标在图像边界内
                x_min = max(0, min(img_width - 1, x_min))
                y_min = max(0, min(img_height - 1, y_min))
                x_max = max(0, min(img_width - 1, x_max))
                y_max = max(0, min(img_height - 1, y_max))
            else:
                # 不进行特殊处理,直接使用原始坐标
                x_min, y_min, x_max, y_max = int(x_min), int(y_min), int(x_max), int(y_max)

            # 选择颜色
            color = colors[i % len(colors)]

            # 绘制矩形框(线宽 3)
            draw.rectangle([x_min, y_min, x_max, y_max], outline=color, width=3)

            # 绘制标签背景
            label = f"{obj_name}"
            text_bbox = draw.textbbox((x_min, y_min - 25), label, font=font)
            draw.rectangle([x_min, y_min - 25, text_bbox[2], y_min], fill=color)

            # 绘制标签文字
            draw.text((x_min, y_min - 25), label, fill=(255, 255, 255), font=font)

            print(f"绘制物体 {i+1}: {obj_name} - [{x_min}, {y_min}, {x_max}, {y_max}]")

        except Exception as e:
            print(f"绘制第 {i+1} 个框失败:{e}")
            continue

    # 生成输出文件名
    if output_path is None:
        timestamp = datetime.now().strftime("%Y%m%d_%H%M%S")
        original_name = os.path.basename(image_path)
        name, ext = os.path.splitext(original_name)
        output_path = os.path.join(OUTPUT_FOLDER, f"{name}_boxed_{timestamp}{ext}")

    # 保存图片
    img.save(output_path)
    print(f"图片已保存到:{output_path}")

    return output_path

# ==================== GUI 界面 ====================

class ImageDetectionApp:
    def __init__(self, root):
        self.root = root
        self.root.title("AI 目标检测 - 通义千问 VL")
        self.root.geometry("600x400")

        self.image_path = None

        # 创建界面元素
        self.create_widgets()

    def create_widgets(self):
        # 标题
        title_label = tk.Label(
            self.root,
            text="🔍 AI 目标检测工具",
            font=("Arial", 18, "bold")
        )
        title_label.pack(pady=20)

        # 选择图片按钮
        select_btn = tk.Button(
            self.root,
            text="📁 选择图片",
            command=self.select_image,
            font=("Arial", 12),
            width=20,
            height=2
        )
        select_btn.pack(pady=10)

        # 显示当前选择的图片路径
        self.path_label = tk.Label(
            self.root,
            text="未选择图片",
            font=("Arial", 10),
            fg="gray"
        )
        self.path_label.pack(pady=5)

        # 开始检测按钮
        self.detect_btn = tk.Button(
            self.root,
            text="🚀 开始检测",
            command=self.start_detection,
            font=("Arial", 12),
            width=20,
            height=2,
            state="disabled"
        )
        self.detect_btn.pack(pady=10)

        # 状态标签
        self.status_label = tk.Label(
            self.root,
            text="",
            font=("Arial", 10),
            fg="blue"
        )
        self.status_label.pack(pady=20)

        # 进度条
        self.progress = ttk.Progressbar(
            self.root,
            length=400,
            mode='indeterminate'
        )
        self.progress.pack(pady=10)

    def select_image(self):
        """选择图片文件"""
        file_path = filedialog.askopenfilename(
            title="选择图片",
            filetypes=[
                ("图片文件", "*.jpg *.jpeg *.png *.bmp *.webp"),
                ("所有文件", "*.*")
            ]
        )

        if file_path:
            self.image_path = file_path
            self.path_label.config(text=f"已选择:{os.path.basename(file_path)}", fg="green")
            self.detect_btn.config(state="normal")

    def start_detection(self):
        """开始检测"""
        if not self.image_path:
            messagebox.showerror("错误", "请先选择图片!")
            return

        # 禁用按钮
        self.detect_btn.config(state="disabled")
        self.progress.start()
        self.status_label.config(text="正在调用 AI 模型...", fg="blue")
        self.root.update()

        try:
            # 创建输出文件夹
            create_output_folder()

            # 调用 AI 获取边界框
            self.status_label.config(text="正在分析图片...", fg="blue")
            self.root.update()

            bounding_boxes = get_bounding_boxes_from_ai(self.image_path)

            if not bounding_boxes:
                messagebox.showwarning("警告", "AI 未检测到任何物体,请尝试更换图片或调整提示词")
                self.status_label.config(text="未检测到物体", fg="orange")
            else:
                # 绘制边界框
                self.status_label.config(text="正在绘制边界框...", fg="blue")
                self.root.update()

                output_path = draw_bounding_boxes(self.image_path, bounding_boxes)

                self.status_label.config(text=f"✓ 完成!检测到 {len(bounding_boxes)} 个物体", fg="green")
                messagebox.showinfo(
                    "完成",
                    f"检测完成!\n\n检测到 {len(bounding_boxes)} 个物体\n\n保存位置:\n{output_path}"
                )

        except Exception as e:
            error_msg = f"检测失败:{str(e)}"
            self.status_label.config(text=error_msg, fg="red")
            messagebox.showerror("错误", error_msg)

        finally:
            # 恢复按钮状态
            self.progress.stop()
            self.detect_btn.config(state="normal")

# ==================== 主程序 ====================

def main():

    # 创建输出文件夹
    create_output_folder()

    # 启动 GUI
    root = tk.Tk()
    app = ImageDetectionApp(root)
    root.mainloop()

if __name__ == "__main__":
    main()