一、模板匹配
python
result = cv2.matchTemplate(image, templ, method)在一张源图像 中查找与模板图像最相似的区域,返回每个位置的匹配度矩阵。
参数介绍:
image:
待搜索图像,即要在其中查找模板的源图像,必须是 8 位灰度图或彩色图(3 通道)。
templ:
模板图像,即要匹配的小图,尺寸必须小于等于源图像,且图像类型需与源图像一致(灰度 / 彩色对应)。
method:决定匹配度的计算方式
cv2.TM_CCOEFF_NORMED :归一化的相关系数匹配,结果范围 [-1,1],值越接近 1 匹配度越高
cv2.TM_CCOEFF:未归一化的相关系数,值越大匹配度越高
cv2.TM_CCORR_NORMED:归一化的相关匹配,结果范围 [0,1],值越接近 1 匹配度越高;
cv2.TM_SQDIFF_NORMED :归一化的平方差匹配,结果范围 [0,1],值越接近 0 匹配度越高
cv2.TM_SQDIFF 平方差匹配法:该方法采用平方差来进行匹配:匹配越好,值越小;匹配越差,值越大。取值范围:[0,+∞)
cv2.TM_CCORR相关匹配法:该方法采用乘法操作;数值越大表明匹配程度越好。取值范围:[0,+∞)
总结:
未归一化方法(TM_SQDIFF/TM_CCORR/TM_CCOEFF):取值范围无上限,结果受图像亮度、对比度绝对值影响大(比如源图像整体变亮,匹配值会大幅变化)
归一化方法 (带 _NORMED 后缀):结果被约束在固定区间(如 0-1 或 - 1-1),不受图像整体亮度 / 对比度缩放影响
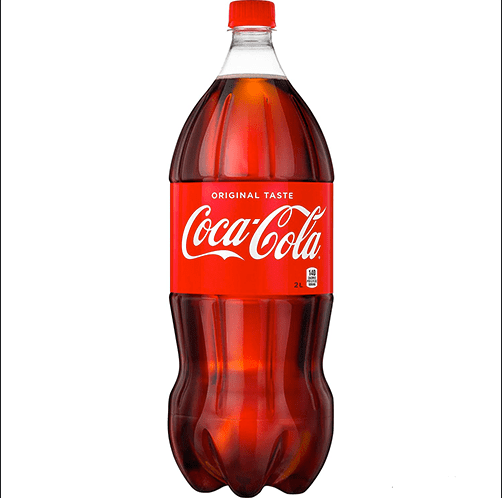
源图片:
模板图像;

完整代码:
python
import cv2


kele = cv2.imread('../data/kele.png')
template = cv2.imread('../data/kele_1.png')

cv2.imshow('kele',kele)
cv2.imshow('template',template)
cv2.waitKey(0)

print(template.shape)

h,w = template.shape[:2]
res = cv2.matchTemplate(kele,template,cv2.TM_CCOEFF_NORMED)    #返回匹配结果的矩阵,其中每个元素表示该位置与模板的匹配程度
#cV2.minMaxLoc可以获取矩阵中的最小值和最大值,以及最小值的索引号和最大值的索引号
min_val,max_val,min_loc,max_loc = cv2.minMaxLoc(res)
top_left = max_loc
bottom_right = (top_left[0] + w, top_left[1] + h)
kele_template = cv2.rectangle(kele,top_left,bottom_right,(0,255,0),2)
cv2.imshow('kele_template',kele_template)
cv2.waitKey(0)
代码解析:
template.shape即读取的图片的shape是(h,w,c)
python
h,w = template.shape[:2]此代码取前两个(h,w)
python
min_val,max_val,min_loc,max_loc = cv2.minMaxLoc(res)
top_left = max_locmax_loc的内容是模板匹配到的左上角坐标 ,格式为 (x坐标, y坐标)
补充:
openCV 的坐标体系 openCV 中图像的坐标遵循「笛卡尔坐标系变体」:
原点 (0,0) 在图像的左上角
水平向右为 x 轴正方向(对应 top_left0)
垂直向下为 y 轴正方向(对应 top_left1)
python
bottom_right = (top_left[0] + w, top_left[1] + h)最终矩形框的右下角坐标
python
kele_template = cv2.rectangle(kele,top_left,bottom_right,(0,255,0),2)函数介绍:
python
cv2.rectangle(img, pt1, pt2, color, thickness, lineType)是 OpenCV 中用于在图像上绘制矩形框 的函数,返回值:绘制了矩形的原图像副本
参数介绍:
img:
要绘制矩形的目标图像(模板图像)
pt1: 元组 (x1, y1)
矩形的左上角坐标(OpenCV 坐标体系:x 向右,y 向下)
pt2: 元组 (x2, y2)
矩形的右下角坐标
color :元组 (B, G, R)
矩形框的颜色:
彩色图:按 BGR 顺序(如绿色 (0,255,0));
灰度图:单数值(如 255 为白色)
thickness:
矩形框的线宽:
正数:线条宽度(如 2 表示 2 像素宽);
cv2.FILLED/ 负数(如 - 1):填充整个矩形。
lineType:
线条类型:
cv2.LINE_4(4 邻域连线);
cv2.LINE_8(8 邻域连线,默认);
cv2.LINE_AA(抗锯齿,线条更平滑)。
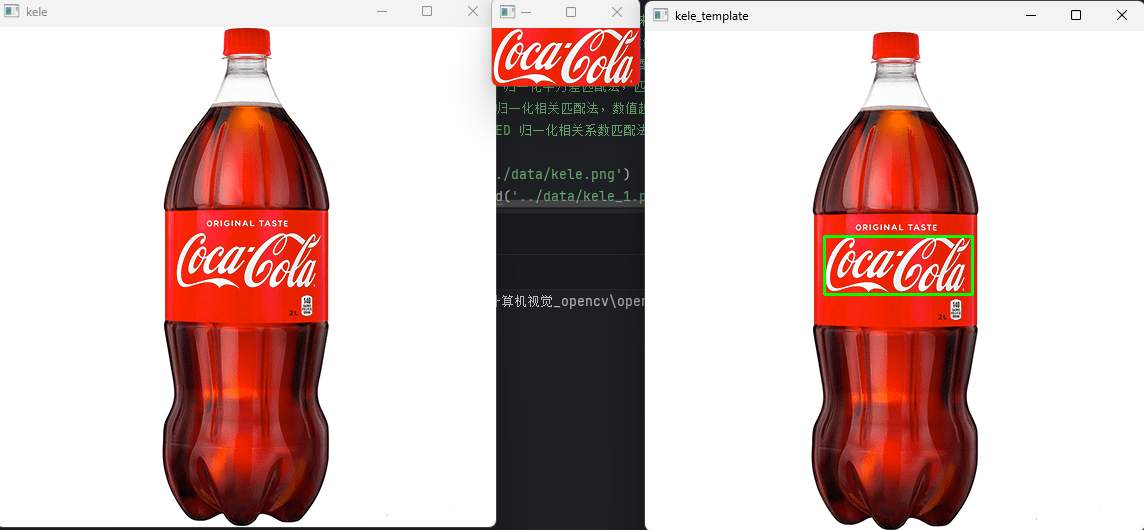
最终结果:
二、项目实战
任务:要为某家银行设计一套智能卡号识别的系统
要求:传入一张图片,就自动输出信用卡图片中的数字
数据预处理:
python
import numpy as np
import argparse
import cv2
import myutils

'''
-i card1.png
-t kahao.png
'''
#设置参数
ap = argparse.ArgumentParser()
ap.add_argument("-i", "--image", required=True, help="path to input image")
ap.add_argument("-t", "--template", required=True, help="path to input template image")
args = vars(ap.parse_args())     #vars()是Python中的一个内置函数,用于返回对象的属性和值的字典。

#指定信用卡类型
FIRST_NUMBER = {
    "3":"American Express",
    "4":"Visa",
    "5":"MasterCard",
    "6":"Discover Card"
}

def cv_show(name,img):
    cv2.imshow(name, img)
    cv2.waitKey(0)
模板图像中数字的定位处理
模板图像:

python
img = cv2.imread(args["template"])
cv_show('img',img)

ref = cv2.cvtColor(img,cv2.COLOR_BGR2GRAY)     #灰度图
cv_show('ref',ref)

ref =  cv2.threshold(ref, 10,255,cv2.THRESH_BINARY_INV)[1]   #二值图像 黑底白字,方便找轮廓
cv_show('ref',ref)

#计算轮廓:cV2.findContours()函数接受的参数为二值图,即黑白的(不是灰度图)
#CV2.RETR_EXTERNAL只检测外轮廓,CV2.CHAIN_APPROX_SIMPLE只保留终点坐标

_,refCnts,hierarchy = cv2.findContours(ref,cv2.RETR_EXTERNAL,cv2.CHAIN_APPROX_SIMPLE)     #refCnts表示轮廓上所有点的坐标对

cv2.drawContours(img,refCnts,-1,(0,0,255),3)
cv_show('refCnts',img)
refCnts = myutils.sort_contours(refCnts,method="left-to-right")[0]
digits = {}    #保存模板中每个数字对应的像素值

for (i,c) in enumerate(refCnts):
    (x,y,w,h) = cv2.boundingRect(c)   #计算外接矩形并且resize成合适大小
    roi = ref[y:y+h,x:x+w]
    roi = cv2.resize(roi,(57,88))     #缩放到指定的大小
    cv_show('ro',roi)
    digits[i] = roi       # 每一个数字对应每一个模板
print(digits)解析:
python
ref =  cv2.threshold(ref, 10,255,cv2.THRESH_BINARY_INV)[1]   #二值图像 黑底白字,方便找轮廓
cv_show('ref',ref)cv2.threshold()的返回属性有retval,dst,分别表示实际使用的阈值,二值化处理后的图像
ref = cv2.threshold(ref, 10,255,cv2.THRESH_BINARY_INV)[1]中[1]表示返回图像
结果:
python
_,refCnts,hierarchy = cv2.findContours(ref,cv2.RETR_EXTERNAL,cv2.CHAIN_APPROX_SIMPLE)     #refCnts表示轮廓上所有点的坐标对
cv2.drawContours(img,refCnts,-1,(0,0,255),3)
cv_show('refCnts',img)表示画出所有的外部轮廓(红色)
python
refCnts = myutils.sort_contours(refCnts,method="left-to-right")[0]目的是对检测到的数字轮廓进行从左到右排序,确保轮廓的顺序和模板图像中数字的视觉顺序(0→1→2→…→9)一致
boundingBoxes中的元组每一位分别表示(矩形左上角 x 坐标,矩形左上角 y 坐标,矩形宽度,矩形高度)
myutils.py文件:
python
import cv2

def sort_contours(cnts,method='left-to-right'):
    reverse=False
    i=0

    if method=='right-to-left' or method=='bottom-to-top':
        reverse=True
    if method=='top-to-bottom' or method=='bottom-to-top':
        i=1
    boundingBoxes=[cv2.boundingRect(c) for c in cnts]
    (cnts,boundingBoxes)=zip(*sorted(zip(cnts,boundingBoxes),
                                     key=lambda b:b[1][i],reverse=reverse))
    #zip(*...) 使用星号操作符解包排序后的元组列表,并将其重新组合成两个列表:一个包含所有轮廓,另一个包含所有边界框。
    return cnts,boundingBoxes


def resize(image,width=None,height=None,inter=cv2.INTER_AREA):
    dim=None
    (h,w)=image.shape[:2]
    if width is None and height is None:
        return image
    if width is None:
        r=height/float(h)
        dim=(int(w*r),height)
    else:
        r=width/float(w)
        dim=(width,int(h*r))
    resized=cv2.resize(image,dim,interpolation=inter)    #默认为cv2.INTER_AREA,即面积插值,适用于缩放图像。
    return resized
python
for (i,c) in enumerate(refCnts):
    (x,y,w,h) = cv2.boundingRect(c)   #计算外接矩形并且resize成合适大小
    roi = ref[y:y+h,x:x+w]
    roi = cv2.resize(roi,(57,88))     #缩放到指定的大小
    cv_show('ro',roi)
    digits[i] = roi       # 每一个数字对应每一个模板
print(digits)从排序后的数字模板轮廓列表中,截取每个数字的像素区域(ROI),缩放为固定尺寸后,按从左到右的索引存入字典,构建数字索引→数字模板的映射关系
python
enumerate(iterable, start)参数介绍:
iterable:
需要遍历的对象,枚举函数会按顺序读取其中的每个元素。
start:
索引的起始值 ,默认从 0 开始计数;可自定义起始值(如start=1则索引从 1 开始)。
信用卡的图像处理
python
#读取输入图像,预处理
image = cv2.imread(args["image"])
cv_show('image',image)
image = myutils.resize(image,width=300)  # 设置图像的大小
gray = cv2.cvtColor(image,cv2.COLOR_BGR2GRAY)
cv_show('gray',gray)
#顶帽操作,突出图像中的亮细节,清除背景图,原因是背景颜色变化小,不被腐蚀掉。
rectKernel = cv2.getStructuringElement(cv2.MORPH_RECT,  (9, 3)) # 初始化卷积核
sqKernel = cv2.getStructuringElement (cv2.MORPH_RECT, (5, 5))

tophat = cv2.morphologyEx(gray,cv2.MORPH_TOPHAT,rectKernel)  #顶帽=原始图像-开运某结果(先腐触后膨胀)
cv_show( 'tophat', tophat)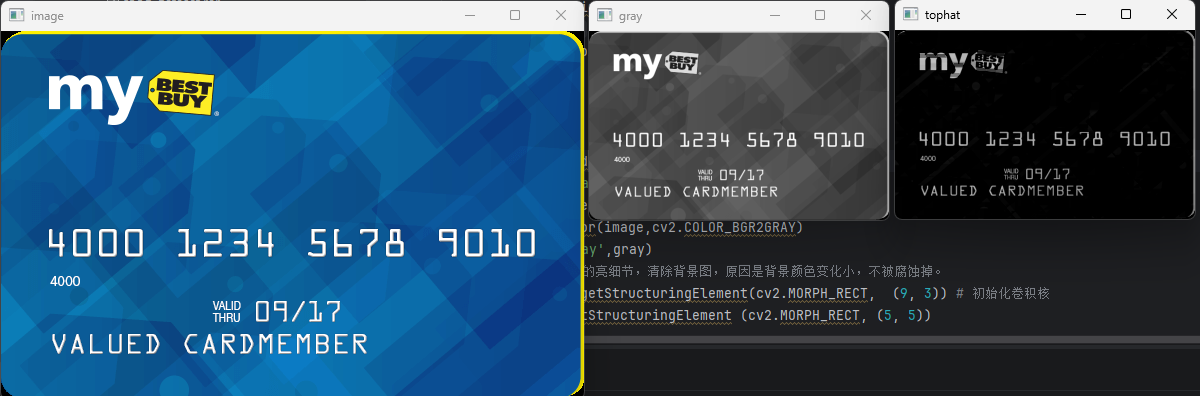
找到找到数字边框
python
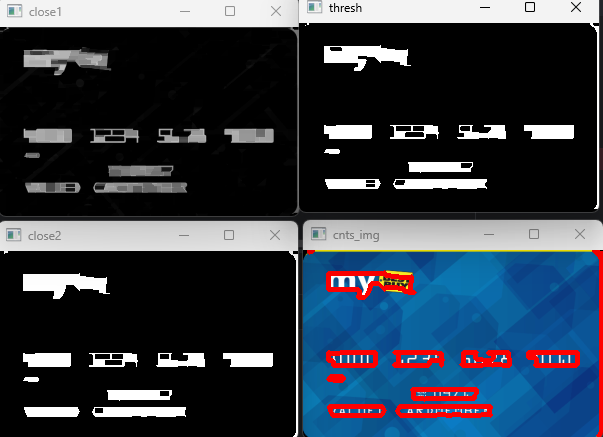
#1、通过闭操作(先膨胀,再腐蚀)将数字连在一起
closeX = cv2.morphologyEx(tophat, cv2.MORPH_CLOSE, rectKernel)
cv_show( 'close1', closeX)

# THRESH_0TSU会自动寻找合适的阈值,适合双峰,需把阈值参数设置为0
thresh = cv2.threshold(closeX, 0, 255, cv2.THRESH_BINARY | cv2.THRESH_OTSU)[1]
cv_show(  'thresh', thresh)

# 再来一个闭操作
thresh = cv2.morphologyEx(thresh, cv2.MORPH_CLOSE, sqKernel) # 再来个操作
cv_show( 'close2', thresh)
经过多次闭运算方便找到目标轮廓
计算轮廓并遍历轮廓,找到数字部分像素区域
python
# 计算轮廓
_,cnts, h = cv2.findContours(thresh, cv2.RETR_EXTERNAL, cv2.CHAIN_APPROX_SIMPLE)
cnts_img = image.copy()
cv2.drawContours(cnts_img, cnts,-1, (0, 0, 255),  3)
cv_show( 'cnts_img',cnts_img)

#遍历轮廓,找到数字部分像素区域
locs = []
for c in cnts:
    (x,y,w,h) = cv2.boundingRect(c)#计算外接矩形
    ar = w / float(h)
    # 选择合适的区域,根据实际任务来。
    if 2.5 < ar < 4.0:
        if (40 < w < 55) and (10 < h < 20):#符合的留下来
            locs.append((x, y, w, h))
将符合的轮廓从左到右排序
python
locs = sorted(locs, key=lambda x: x[0])
print(locs)
将筛选出的数字轮廓外接矩形列表 locs,按照外接矩形左上角的 x 坐标从小到大排序 ,最终实现数字轮廓「从左到右」的排列,locs内坐标表示为**(x, y, w, h )**