安装目录
为什么英伟达50系列显卡要安装cuda12.8
可以看文章(https://zhuanlan.zhihu.com/p/1970666740221450142)
安装cuda
bash
https://developer.nvidia.com/cuda-12-8-1-download-archive?target_os=Windows&target_arch=x86_64&target_version=11&target_type=exe_local下载到本地,双击安装。过程中需要注意:自定义安装,不勾选里面的 Visual Studio Integration 。
安装cuDNN
bash
https://developer.nvidia.com/rdp/cudnn-archive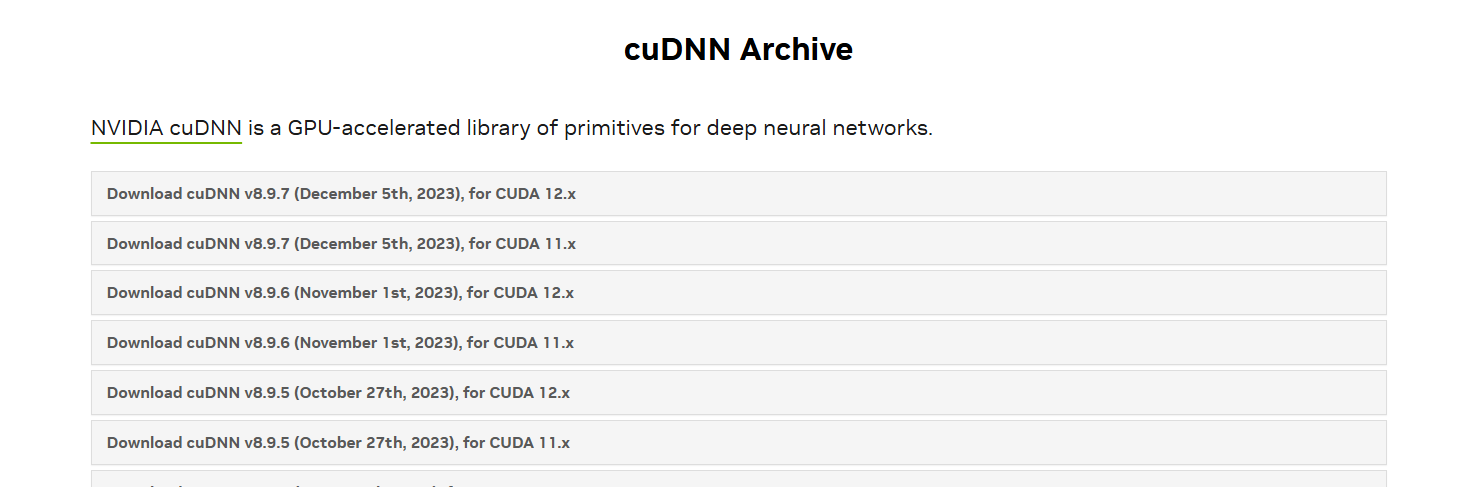
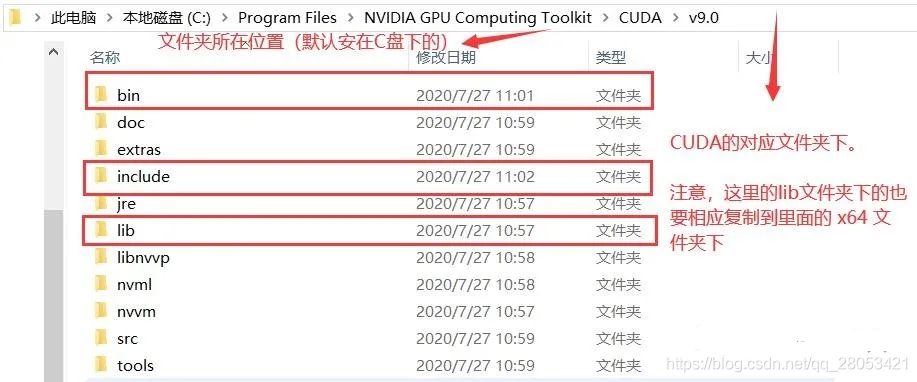
解压缩后会看到文件目录结构如下。

测试cuda+cuDNN是否成功
进入到上面的安装文件夹下的 extra/demo_suit 文件夹(如:C:\Program Files\NVIDIA GPU Computing Toolkit\CUDA\v12.8\extras\demo_suite)下,然后在地址栏输入 cmd,打开命名提示行。运行 bandwidthTest.exe 和 deviceQuery.exe ,结果如下,得到两个 PASS,就基本是安装成功了。
bash
PS C:\Program Files\NVIDIA GPU Computing Toolkit\CUDA\v12.8> cd .\extras\demo_suite\
PS C:\Program Files\NVIDIA GPU Computing Toolkit\CUDA\v12.8\extras\demo_suite> .\bandwidthTest.exe
[CUDA Bandwidth Test] - Starting...
Running on...

 Device 0: NVIDIA GeForce RTX 5060 Ti
 Quick Mode

 Host to Device Bandwidth, 1 Device(s)
 PINNED Memory Transfers
   Transfer Size (Bytes)        Bandwidth(MB/s)
   33554432                     12839.0

 Device to Host Bandwidth, 1 Device(s)
 PINNED Memory Transfers
   Transfer Size (Bytes)        Bandwidth(MB/s)
   33554432                     13858.9

 Device to Device Bandwidth, 1 Device(s)
 PINNED Memory Transfers
   Transfer Size (Bytes)        Bandwidth(MB/s)
   33554432                     370719.0

Result = PASS

NOTE: The CUDA Samples are not meant for performance measurements. Results may vary when GPU Boost is enabled.
bash
PS C:\Program Files\NVIDIA GPU Computing Toolkit\CUDA\v12.8\extras\demo_suite> .\deviceQuery.exe
C:\Program Files\NVIDIA GPU Computing Toolkit\CUDA\v12.8\extras\demo_suite\deviceQuery.exe Starting...

 CUDA Device Query (Runtime API)

Detected 1 CUDA Capable device(s)

Device 0: "NVIDIA GeForce RTX 5060 Ti"
  CUDA Driver Version / Runtime Version          13.0 / 12.8
  CUDA Capability Major/Minor version number:    12.0
  Total amount of global memory:                 8151 MBytes (8546484224 bytes)
MapSMtoCores for SM 12.0 is undefined.  Default to use 128 Cores/SM
MapSMtoCores for SM 12.0 is undefined.  Default to use 128 Cores/SM
  (36) Multiprocessors, (128) CUDA Cores/MP:     4608 CUDA Cores
  GPU Max Clock rate:                            2572 MHz (2.57 GHz)
  Memory Clock rate:                             14001 Mhz
  Memory Bus Width:                              128-bit
  L2 Cache Size:                                 33554432 bytes
  Maximum Texture Dimension Size (x,y,z)         1D=(131072), 2D=(131072, 65536), 3D=(16384, 16384, 16384)
  Maximum Layered 1D Texture Size, (num) layers  1D=(32768), 2048 layers
  Maximum Layered 2D Texture Size, (num) layers  2D=(32768, 32768), 2048 layers
  Total amount of constant memory:               zu bytes
  Total amount of shared memory per block:       zu bytes
  Total number of registers available per block: 65536
  Warp size:                                     32
  Maximum number of threads per multiprocessor:  1536
  Maximum number of threads per block:           1024
  Max dimension size of a thread block (x,y,z): (1024, 1024, 64)
  Max dimension size of a grid size    (x,y,z): (2147483647, 65535, 65535)
  Maximum memory pitch:                          zu bytes
  Texture alignment:                             zu bytes
  Concurrent copy and kernel execution:          Yes with 1 copy engine(s)
  Run time limit on kernels:                     Yes
  Integrated GPU sharing Host Memory:            No
  Support host page-locked memory mapping:       Yes
  Alignment requirement for Surfaces:            Yes
  Device has ECC support:                        Disabled
  CUDA Device Driver Mode (TCC or WDDM):         WDDM (Windows Display Driver Model)
  Device supports Unified Addressing (UVA):      Yes
  Device supports Compute Preemption:            Yes
  Supports Cooperative Kernel Launch:            Yes
  Supports MultiDevice Co-op Kernel Launch:      No
  Device PCI Domain ID / Bus ID / location ID:   0 / 1 / 0
  Compute Mode:
     < Default (multiple host threads can use ::cudaSetDevice() with device simultaneously) >

deviceQuery, CUDA Driver = CUDART, CUDA Driver Version = 13.0, CUDA Runtime Version = 12.8, NumDevs = 1, Device0 = NVIDIA GeForce RTX 5060 Ti
Result = PASS
PS C:\Program Files\NVIDIA GPU Computing Toolkit\CUDA\v12.8\extras\demo_suite>
安装pytorch
下载 Pytorch 之前,建议创建一个独立的虚拟环境,避免后续下载和更新包时发生冲突。
这里 python 版本根据自己本地的版本进行设置,可以通过 python --version 查看。需要特别注意:Pytorch 稳定版目前最高只支持 3.12,因此下载 Pytorch 稳定版时,创建虚拟环境时尽量设置 3.12 版本的 python。当然,下面就会提到 RTX 50 系列的 GPU 不用选择稳定版,具体是否能支持 3.13 不太清楚,但是 3.12 是完全没问题的。
bash
conda create -n cu28-py133 python=3.13cu28-py133 是我自己取的虚拟环境名。然后激活虚拟环境。
bash
conda activate cu28-py133接下来要在该环境下下载 Pytorch。在 Pytorch 官网上选择好要下载版本后,会在 Run this Command 一栏中显示下载命令。在已激活的虚拟环境中执行此命令即可下载 Pytorch。对于非 RTX 50 系列的伙伴们,可以选择下载稳定版 Stable (2.9.0),然后选择对应的 CUDA 版本。
如果使用的是 RTX 50 系列的 GPU,由于目前 Pytorch 的稳定版 Stable (2.9.0) 只支持到 RTX 40 系列,务必改为下载 Preview (Nightly),并选择 CUDA 12.8 版本以支持 GPU 的计算架构版本,否则后续使用 GPU 运行代码的时候会出现 Pytorch 编译与 GPU 计算能力不兼容的问题。因为像我的 RTX 5060 计算架构版本是 sm_120,但是 stable 版本只支持到 sm_90,所以会有冲突。

bash
(cu128-py133) C:\Users\HP>pip3 install --pre torch torchvision --index-url https://download.pytorch.org/whl/nightly/cu128
Looking in indexes: https://download.pytorch.org/whl/nightly/cu128
Requirement already satisfied: torch in .\AppData\Roaming\Python\Python313\site-packages (2.12.0.dev20260316+cu128)
Requirement already satisfied: torchvision in .\AppData\Roaming\Python\Python313\site-packages (0.26.0.dev20260316+cu128)
Collecting filelock (from torch)
  Downloading filelock-3.25.2-py3-none-any.whl.metadata (2.0 kB)
Collecting typing-extensions>=4.10.0 (from torch)
  Downloading https://download.pytorch.org/whl/nightly/typing_extensions-4.15.0-py3-none-any.whl.metadata (3.3 kB)
Requirement already satisfied: setuptools<82 in D:\anaconda3\envs\cu128-py133\Lib\site-packages (from torch) (80.10.2)
Collecting sympy>=1.13.3 (from torch)
  Downloading sympy-1.14.0-py3-none-any.whl.metadata (12 kB)
Collecting networkx>=2.5.1 (from torch)
  Downloading networkx-3.6.1-py3-none-any.whl.metadata (6.8 kB)
Collecting jinja2 (from torch)
  Downloading https://download.pytorch.org/whl/nightly/jinja2-3.1.6-py3-none-any.whl.metadata (2.9 kB)
Collecting fsspec>=0.8.5 (from torch)
  Downloading fsspec-2026.2.0-py3-none-any.whl.metadata (10 kB)
Collecting numpy (from torchvision)
  Downloading numpy-2.4.3-cp313-cp313-win_amd64.whl.metadata (6.6 kB)
Collecting pillow!=8.3.*,>=5.3.0 (from torchvision)
  Downloading pillow-12.1.1-cp313-cp313-win_amd64.whl.metadata (9.0 kB)
Collecting mpmath<1.4,>=1.1.0 (from sympy>=1.13.3->torch)
  Downloading mpmath-1.3.0-py3-none-any.whl.metadata (8.6 kB)
Collecting MarkupSafe>=2.0 (from jinja2->torch)
  Downloading https://download.pytorch.org/whl/nightly/MarkupSafe-3.0.2-cp313-cp313-win_amd64.whl.metadata (4.1 kB)
Downloading fsspec-2026.2.0-py3-none-any.whl (202 kB)
Downloading networkx-3.6.1-py3-none-any.whl (2.1 MB)
   ━━━━━━━━━━━━━━━━━━━━━━━━━━━━━━━━━━━━━━━━ 2.1/2.1 MB 172.1 kB/s  0:00:10
Downloading pillow-12.1.1-cp313-cp313-win_amd64.whl (7.0 MB)
   ━━━━━━━━━━━━━━━━━━━━━━━━━━━━━━━━━━━━━━━━ 7.0/7.0 MB 86.1 kB/s  0:01:21
Downloading sympy-1.14.0-py3-none-any.whl (6.3 MB)
   ━━━━━━━━━━━━━━━━━━━━━━━━━━━━━━━━━━━━━━━━ 6.3/6.3 MB 83.5 kB/s  0:01:30
Downloading mpmath-1.3.0-py3-none-any.whl (536 kB)
   ━━━━━━━━━━━━━━━━━━━━━━━━━━━━━━━━━━━━━━━━ 536.2/536.2 kB 83.8 kB/s  0:00:05
Downloading https://download.pytorch.org/whl/nightly/typing_extensions-4.15.0-py3-none-any.whl (44 kB)
Downloading filelock-3.25.2-py3-none-any.whl (26 kB)
Downloading https://download.pytorch.org/whl/nightly/jinja2-3.1.6-py3-none-any.whl (134 kB)
Downloading https://download.pytorch.org/whl/nightly/MarkupSafe-3.0.2-cp313-cp313-win_amd64.whl (15 kB)
Downloading numpy-2.4.3-cp313-cp313-win_amd64.whl (12.3 MB)
   ━━━━━━━━━━━━━━━━━━━━━━━━━━━━━━━━━━━━━━━━ 12.3/12.3 MB 95.4 kB/s  0:02:37
Installing collected packages: mpmath, typing-extensions, sympy, pillow, numpy, networkx, MarkupSafe, fsspec, filelock, jinja2
Successfully installed MarkupSafe-3.0.2 filelock-3.25.2 fsspec-2026.2.0 jinja2-3.1.6 mpmath-1.3.0 networkx-3.6.1 numpy-2.4.3 pillow-12.1.1 sympy-1.14.0 typing-extensions-4.15.0
验证torch是否下载成功
开启 python,在 python 中输入以下命令。
bash
(cu128-py133) C:\Users\HP>import torch
'import' 不是内部或外部命令,也不是可运行的程序
或批处理文件。

(cu128-py133) C:\Users\HP>python
Python 3.13.12 | packaged by Anaconda, Inc. | (main, Feb 24 2026, 16:05:56) [MSC v.1942 64 bit (AMD64)] on win32
Type "help", "copyright", "credits" or "license" for more information.
>>> import torch
>>> print(torch.cuda.is_available())
True
>>>
若显示 True 说明 CUDA 和 Pytorch 安装成功。
备注:如果之前 RTX 50 系列的伙伴没有选择 Preview (Nightly) CUDA 12.8,在这里也会显示 True,只有在实际运行代码的时候才会发现报错。