1使用硬件生成的xsa文件生成项目工程
petalinux-create --type project --template zynq --name ask_fx2
将工程xsa文件放到ask工程目录下然后运行
petalinux-config --get-hw-description=./
然后进入

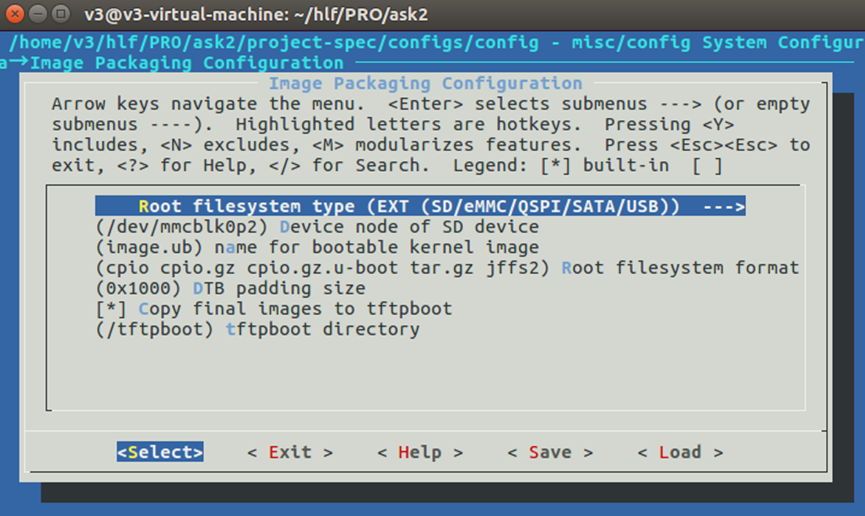
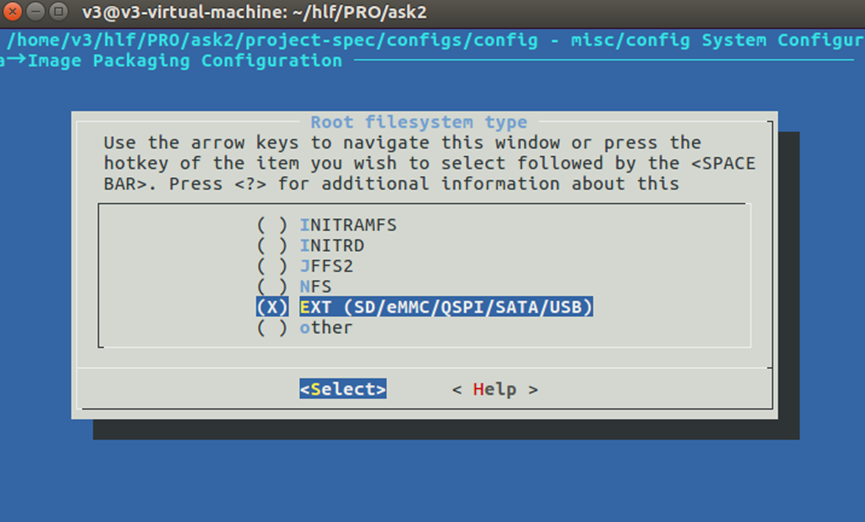
这样配置SD卡模式,选择后保存退出。
2编译u-boot
需要使用普通用户,在shell输入petalinux-config -c u-boot(依然要事先输入source /home/hlf/mnt/petalinux/settings.sh命令),然后等待GUI出来,这里暂时不改动啥,直接save(save为u-boot.config,名字随便取但不要留空)。
3编译kernel
命令petalinux-config -c kernel,操作同上(save为kernel.config)
4编译rootfs
命令petalinux-config -c rootfs,操作同上(save为默认即可)
5编译设备树
修改配置文件 注:这里需要用户进行自定义
工程/project-spec/meta-user/recipes-bsp/device-tree/files/ system-user.dtsi
添加下面的代码:
/include/ "system-conf.dtsi"
/ {
chosen {
bootargs = "console=ttyPS0,115200 earlyprintk root=/dev/mmcblk0p2 rw rootwait rootfstype=ext4";
};
vdmafb {
compatible = "xilinx,vdmafb";
dmas = <&axi_vdma_0 0>;
dma-names = "lcd_vdma";
};
};
&sdhci1 {
status = "okay";
disable-wp;
bus-width = <4>;
max-frequency = <50000000>;
no-1-8-v;
};
然后进入以下目录中修改pl.dtsi文件,
/home/v3/hlf/PRO/sig1000/components/plnx_workspace/device-tree/device-tree
主要添加vdmafb部分。
/*
- CAUTION: This file is automatically generated by Xilinx.
- Version:
- Today is: Wed Mar 18 06:42:09 2026
*/
/ {
amba_pl: amba_pl {
#address-cells = <1>;
#size-cells = <1>;
compatible = "simple-bus";
ranges ;
axi_vdma_0: dma@43000000 {
#dma-cells = <1>;
clock-names = "s_axi_lite_aclk", "m_axi_mm2s_aclk", "m_axis_mm2s_aclk";
clocks = <&clkc 15>, <&clkc 15>, <&clkc 15>;
compatible = "xlnx,axi-vdma-6.3", "xlnx,axi-vdma-1.00.a";
interrupt-names = "mm2s_introut";
interrupt-parent = <&intc>;
interrupts = <0 29 4>;
reg = <0x43000000 0x10000>;
xlnx,addrwidth = <0x20>;
xlnx,flush-fsync = <0x1>;
xlnx,num-fstores = <0x1>;
dma-channel@43000000 {
compatible = "xlnx,axi-vdma-mm2s-channel";
interrupts = <0 29 4>;
xlnx,datawidth = <0x10>;
xlnx,device-id = <0x0>;
xlnx,genlock-mode ;
};
};
};
vdmafb {
compatible = "xilinx,vdmafb";
dmas = <&axi_vdma_0 0>;
dma-names = "lcd_vdma";
};
};
编译设备树petalinux-config -c device-tree
5编译工程
输入命令petalinux-build,等待即可,最后生成的文件在 image/linux下
6生成boot.bin
定位到image/linux目录下运行petalinux-package --boot --fsbl zynq_fsbl.elf --fpga system.bit --u-boot u-boot.elf --force
7将文件考入sd卡
将BOOT.BIN与image.ub放入sd卡中启动。
本文章由威三学社出品
对课程感兴趣可以私信联系