目录
[(1)Zookeeper 集群启动](#(1)Zookeeper 集群启动)
[(7)查看 HBase 页面](#(7)查看 HBase 页面)
[3、MemStore Flush](#3、MemStore Flush)
[5、StoreFile Compaction](#5、StoreFile Compaction)
[6、Region Split](#6、Region Split)
[(2)与Hive 集成](#(2)与Hive 集成)
[3、RowKey 设计](#3、RowKey 设计)
一、简介
1、定义
HBase 是一种分布式、可扩展、支持海量数据存储的NoSQL数据库。
2、数据模型
逻辑上,HBase 的数据模型同关系型数据库很类似,数据存储在一张表中,有行有列。 但从HBase的底层物理存储结构(K-V)来看,HBase更像是一个multi-dimensional map。
(1)逻辑结构
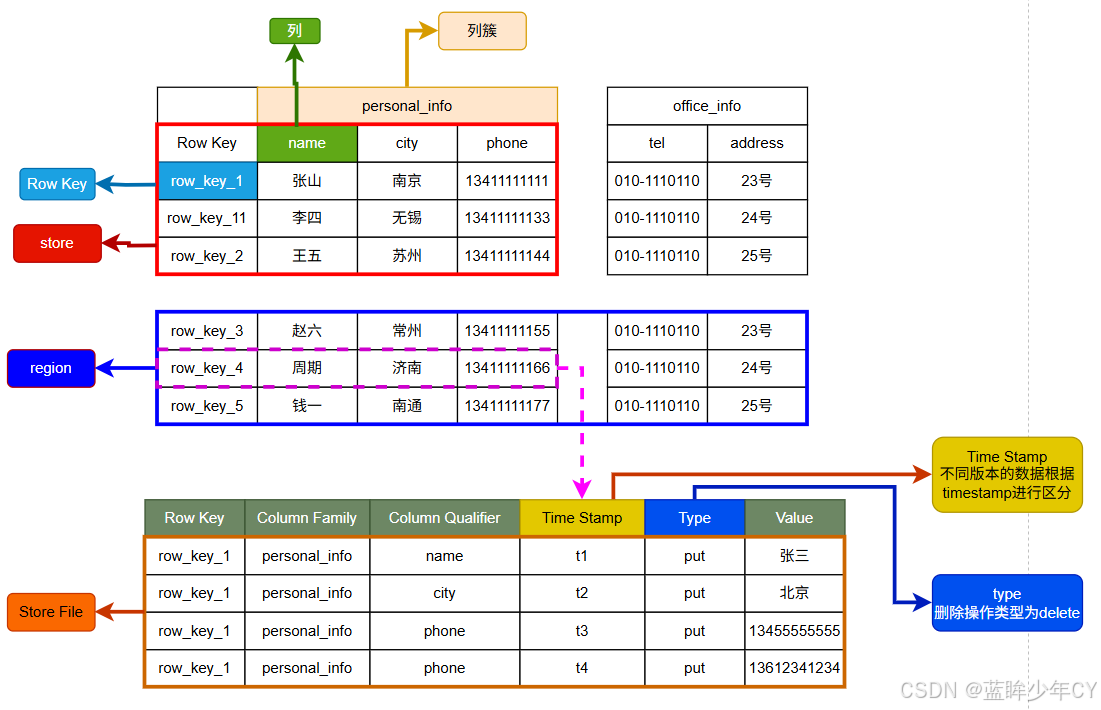
1)Name Space
命名空间,类似于关系型数据库的DatabBase概念,每个命名空间下有多个表。HBase 有两个自带的命名空间,分别是 hbase 和 default,hbase 中存放的是 HBase 内置的表, default 表是用户默认使用的命名空间。
2)Region
类似于关系型数据库的表概念。不同的是,HBase定义表时只需要声明列族即可,不需要声明具体的列。这意味着,往HBase写入数据时,字段可以动态、按需指定。因此,和关系型数据库相比,HBase能够轻松应对字段变更的场景。
3)Row
HBase 表中的每行数据都由一个RowKey和多个Column(列)组成,数据是按照RowKey 的字典顺序存储的,并且查询数据时只能根据RowKey进行检索,所以RowKey的设计十分重要。
4)Column
HBase 中的每个列都由Column Family(列族)和Column Qualifier(列限定符)进行限定,例如info:name,info:age。建表时,只需指明列族,而列限定符无需预先定义。
5)Time Stamp
用于标识数据的不同版本(version),每条数据写入时,如果不指定时间戳,系统会自动为其加上该字段,其值为写入HBase的时间。
6)Cell
由{rowkey, column Family、column Qualifier, time Stamp} 唯一确定的单元。cell 中的数据是没有类型的,全部是字节码形式存贮。
(2)基本架构
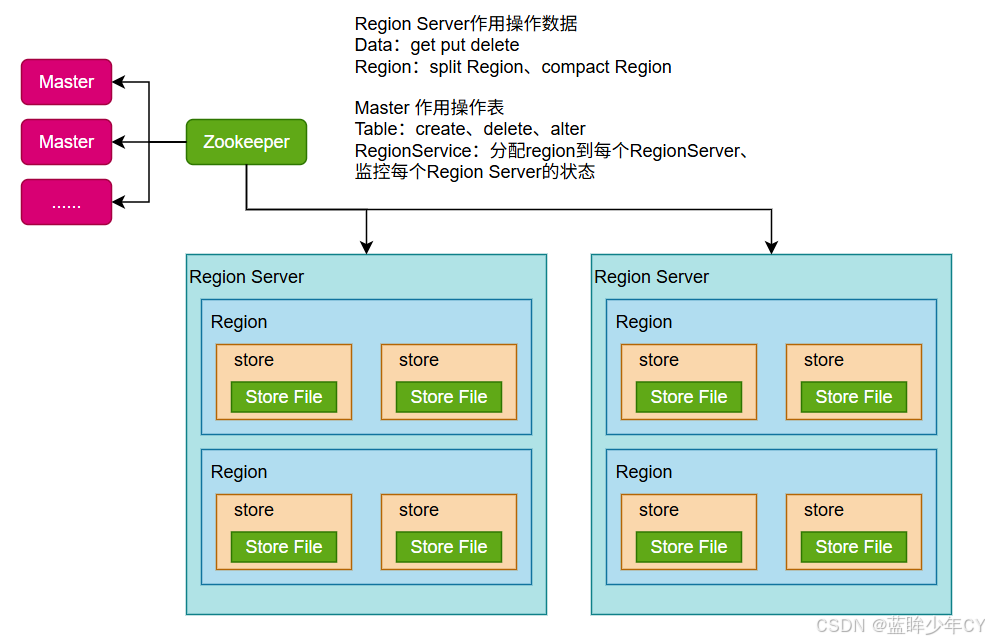
1)Region Server
Region Server 为 Region 的管理者,其实现类为HRegionServer,主要作用: 对于数据的操作:get, put, delete; 对于Region的操作:splitRegion、compactRegion。
2)Master
Master 是所有Region Server 的管理者,其实现类为HMaster,主要作用: 对于表的操作:create, delete, alter,对于RegionServer的操作:分配regions到每个RegionServer,监控每个RegionServer 的状态,负载均衡和故障转移。
3)Zookeeper
HBase 通过Zookeeper 来做 Master 的高可用、RegionServer的监控、元数据的入口以及集群配置的维护等工作。
4)HDFS
HDFS为HBase提供最终的底层数据存储服务,同时为HBase提供高可用的支持。
二、快速入门
1、安装部署
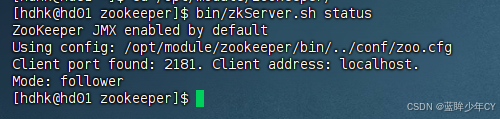
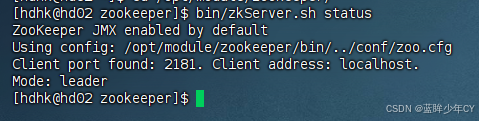
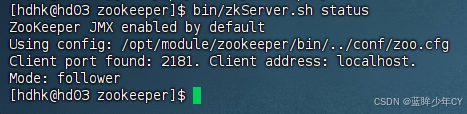
(1)Zookeeper 集群启动
首先保证Zookeeper集群的正常部署,并启动
每台机器分别启动
bin/zkServer.sh start
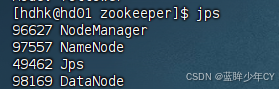
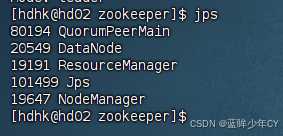
(2)Hadoop启动
sbin/start-dfs.sh
sbin/start-yarn.sh
(3)上传并解压
tar -zxvf hbase-1.3.1-bin.tar.gz -C /opt/module/
(4)配置文件
1)修改hbase-env.sh 内容
export JAVA_HOME=/opt/module/jdk1.8
export HBASE_MANAGES_ZK=false
2)修改hbase-site.xml 内容
XML
<configuration>
    <property>
        <name>hbase.rootdir</name>
        <value>hdfs://hd01:9000/HBase</value>
    </property>
    <property>
        <name>hbase.cluster.distributed</name>
        <value>true</value>
    </property>
    <!-- 0.98后的新变动,之前版本没有.port,默认端口为60000 -->
    <property>
        <name>hbase.master.port</name>
        <value>16000</value>
    </property>
    <property>
        <name>hbase.zookeeper.quorum</name>
        <value>hd01,hd02,hd03</value>
    </property>
    <property>
        <name>hbase.zookeeper.property.dataDir</name>
        <value>/opt/module/zookeeper/zkData</value>
    </property>
</configuration>
3)修改regionservers文件
hd01
hd02
hd03
4)软连接hadoop配置文件到HBase
ln -s /opt/module/hadoop-2.7.7/etc/hadoop/core-site.xml /opt/module/hbase-1.3.1/conf/core-site.xml
ln -s /opt/module/hadoop-2.7.7/etc/hadoop/hdfs-site.xml /opt/module/hbase-1.3.1/conf/hdfs-site.xml
(5)分发
将hbase分发到hd02和hd03
scp -r /opt/module/hbase-1.3.1/ hdhk@hd02:/opt/module/hbase-1.3.1
scp -r /opt/module/hbase-1.3.1/ hdhk@hd03:/opt/module/hbase-1.3.1
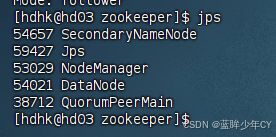
(6)启动服务
1)单个启动
bin/hbase-daemon.sh start master
bin/hbase-daemon.sh start regionserver
提示:如果集群之间时间不同步,会导致 regionserver 无法启动,抛出ClockOutOfSyncException 异常。
或者设置更大的值
属性:hbase.master.maxclockskew 设置更大的值
XML
<property>
    <name>hbase.master.maxclockskew</name>
    <value>180000</value>
    <description>Time difference of regionserver from master</description>
</property


2)群启动
bin/start-hbase.sh
停止
bin/stop-hbase.sh

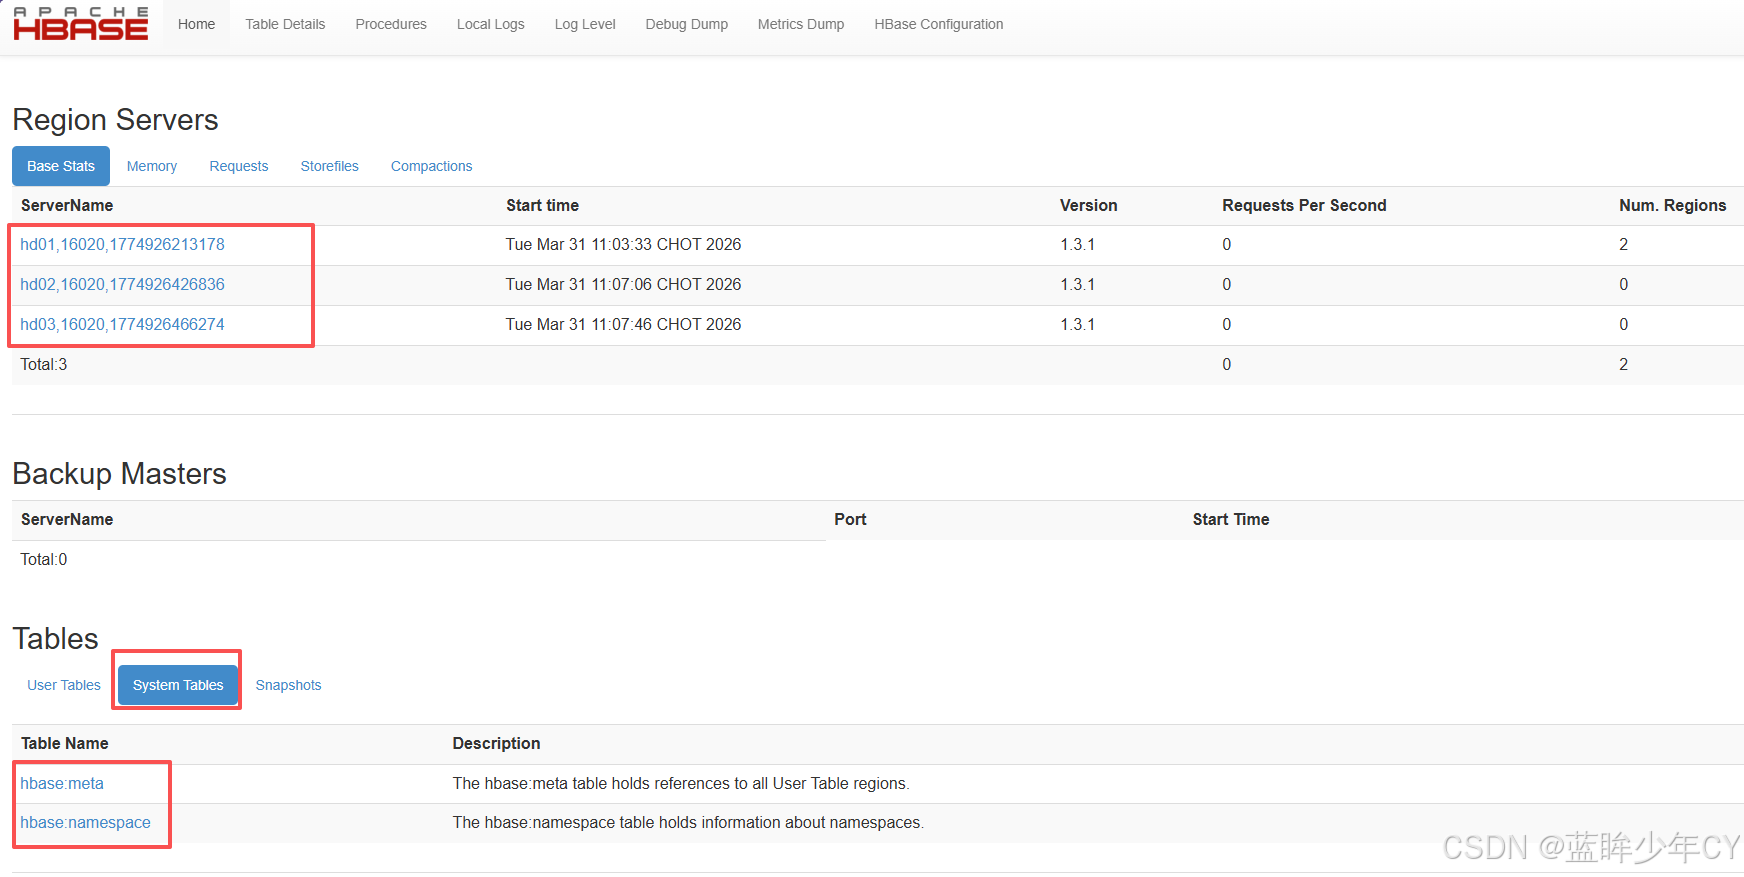
(7)查看 HBase 页面
2、Shell操作
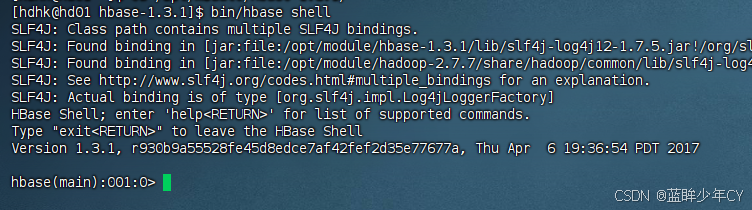
(1)进入客户端命令行
bin/hbase shell
(2)帮助命令
help
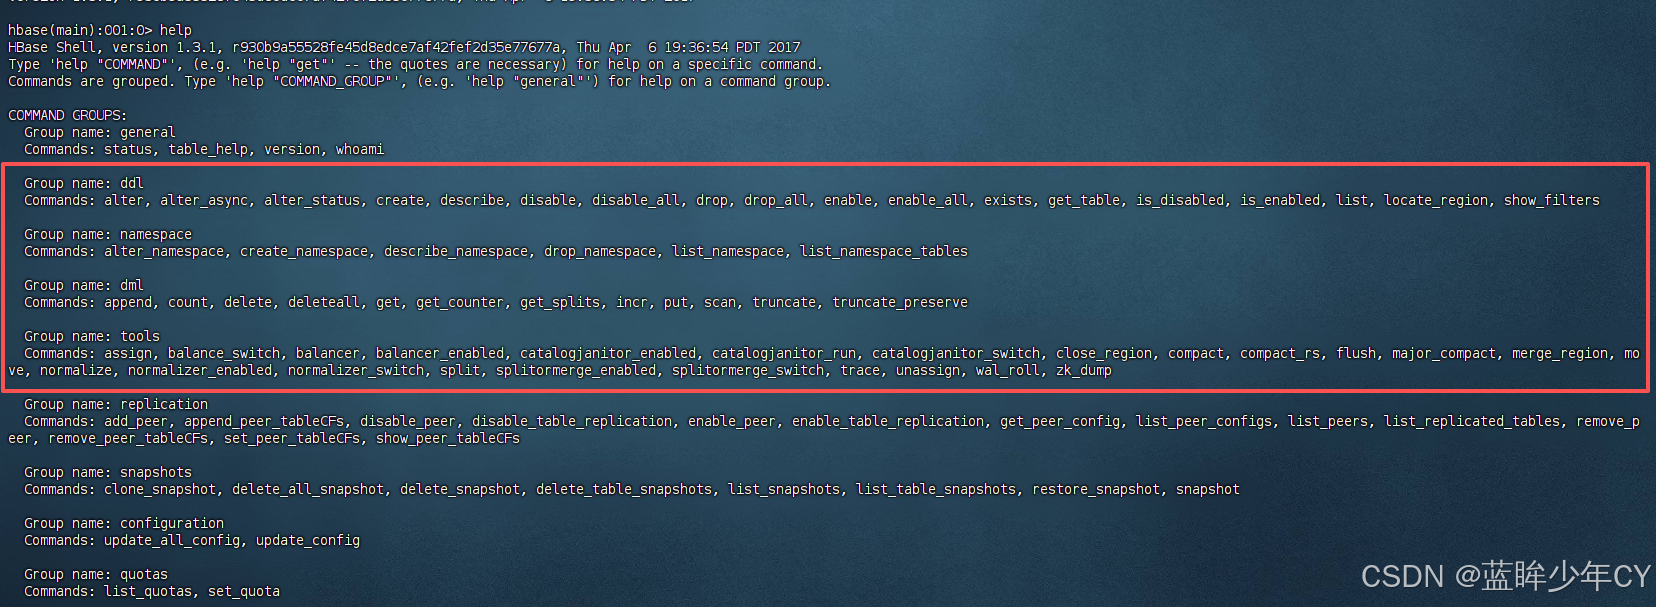
(3)常用命令
表操作命令
alter:修改表
alter_status:修改表状态
create:创建表
describe:查看表详情
disable / disable_all:禁用表 / 禁用多个表
drop / drop_all:删除表 / 删除多张表
enable / enable_all:启用 / 启用多张表
get_table:获取表,
list:获取表列表
命名空间命令
alter_namespace:修改命名空间
create_namespace:创建命名空间
describe_namespace:说明
drop_namespace:删除命名空间
list_namespace:空间列表
list_namespace_tables:空间下的所有表
数据操作命令
put:新增修改数据
get:获取数据
scan: 查看所有数据
delete:删除单个数据
deleteall:删除多个数据
truncate:清空表数据
count:统计行数
其他常用命令
compact:合并数据
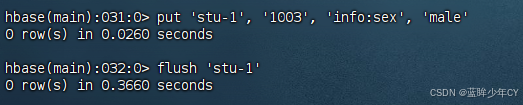
flush:刷写数据,将内存数据刷写到磁盘
major_compact:大合并数据
(4)操作
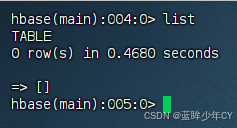
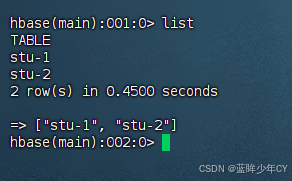
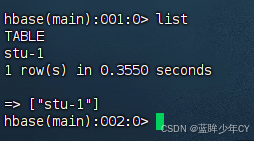
1)查看当前数据库中有哪些表
list
2)创建表
create '表名', '列族名'

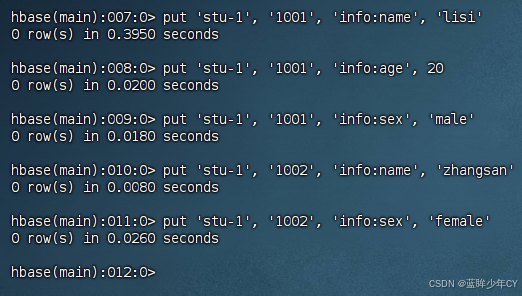
3)插入数据
put '表名', 'rowkey', '列族名:列名', '值'
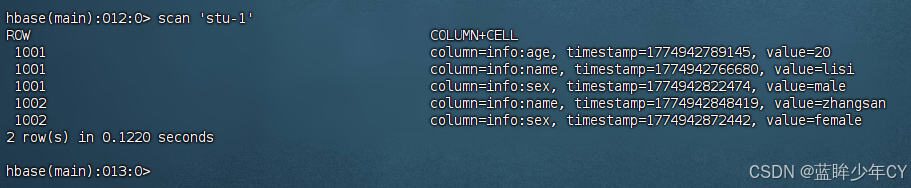
4)查看表数据
scan '表名'
scan '表名', {STARTROW=> '开始key', STOPROW => '结束key'}
scan '表名', {STARTROW=> '开始key'}
左闭右开

5)查看表结构
describe '表名'

6)更新数据
put '表名', 'rowkey', '列族:列名', '值'

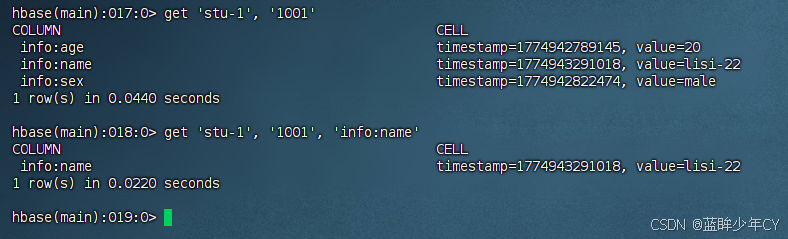
7)查看"指定行"或"指定列族:列"的数据
get '表名', 'rowkey'
get '表名', 'rowkey', '列族:列名'
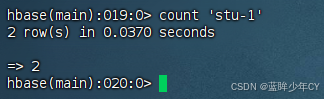
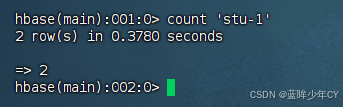
8)统计表数据行数
count '表名'
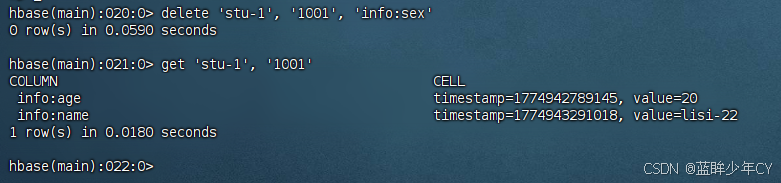
9)删除数据
删除某rowkey的某一列数据
delete '表名','rowkey','列族:列'
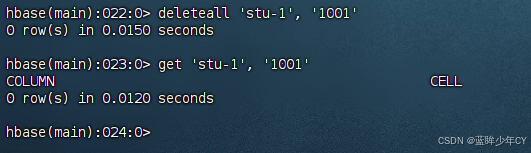
删除某rowkey的全部数据
deleteall '表名','rowkey'
10)清空表数据
truncate '表名'
提示:清空表的操作顺序为先disable,然后再truncate。
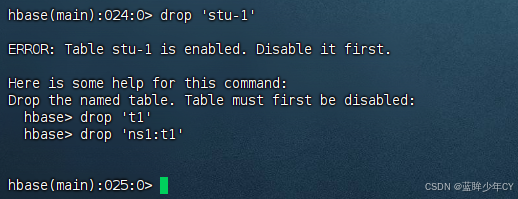
11)删除表
首先需要先让该表为disable状态
disable '表名'
然后才能drop这个表
drop '表名'
提示:如果直接drop表,会报错:ERROR: Table student is enabled. Disable it first.
12)变更表信息
将info 列族中的数据存放3个版本:
alter '表名',{NAME=>'info',VERSIONS=>3}
get 'student','1001',{COLUMN=>'info:name',VERSIONS=>3}
三、进阶
1、架构原理
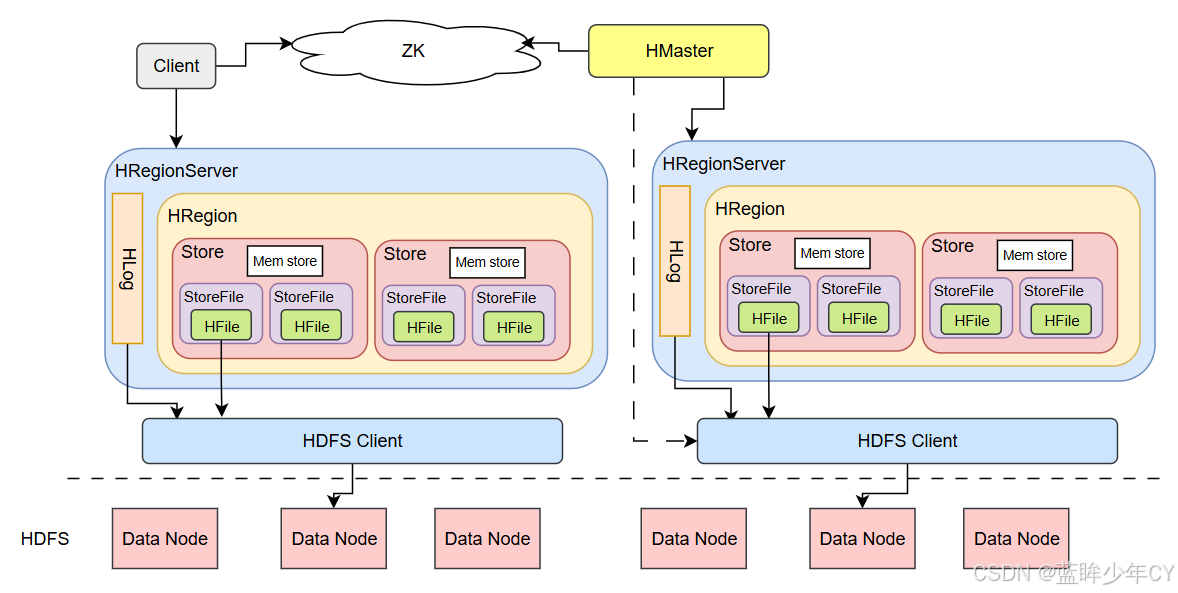
1)StoreFile
保存实际数据的物理文件,StoreFile以HFile的形式存储在HDFS上。每个Store会有 一个或多个StoreFile(HFile),数据在每个StoreFile中都是有序的。
2)MemStore
写缓存,由于HFile中的数据要求是有序的,所以数据是先存储在MemStore中,排好序后,等到达刷写时机才会刷写到HFile,每次刷写都会形成一个新的HFile。
3)WAL
由于数据要经MemStore 排序后才能刷写到HFile,但把数据保存在内存中会有很高的概率导致数据丢失,为了解决这个问题,数据会先写在一个叫做Write-Ahead logfile的文件中,然后再写入MemStore中。所以在系统出现故障的时候,数据可以通过这个日志文件重建。
2、写流程
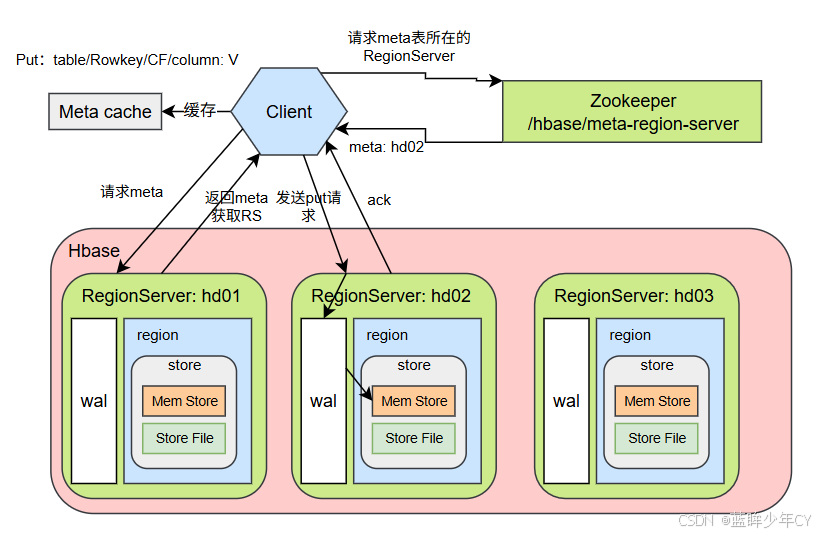
写流程:
1)Client 先访问 zookeeper,获取hbase:meta 表位于哪个Region Server。
2)访问对应的Region Server,获取 hbase:meta 表,根据读请求的 namespace:table/rowkey, 查询出目标数据位于哪个Region Server中的哪个Region中。并将该table的region信息以及meta表的位置信息缓存在客户端的meta cache,方便下次访问。
3)与目标Region Server 进行通讯;
4)将数据顺序写入(追加)到WAL;
5)将数据写入对应的MemStore,数据会在MemStore进行排序;
6)向客户端发送ack;
7)等达到MemStore的刷写时机后,将数据刷写到HFile。
3、MemStore Flush
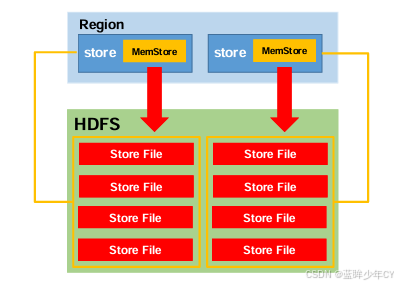
MemStore 刷写时机:
1)当某个 memstroe 的大小达到了 hbase.hregion.memstore.flush.size(默认值 128M), 其所在region的所有memstore都会刷写。
当memstore 的大小达到了
hbase.hregion.memstore.flush.size(默认值 128M)* hbase.hregion.memstore.block.multiplier(默认值 4)
时,会阻止继续往该memstore写数据。
2)当 region server 中 memstore 的总大小达到
java_heapsize * hbase.regionserver.global.memstore.size(默认值 0.4)* hbase.regionserver.global.memstore.size.lower.limit(默认值 0.95), region 会按照其所有memstore的大小顺序(由大到小)依次进行刷写。直到region server 中所有memstore的总大小减小到上述值以下。
当region server 中 memstore 的总大小达到java_heapsize * hbase.regionserver.global.memstore.size(默认值 0.4) 时,会阻止继续往所有的memstore写数据。
3)到达自动刷写的时间,也会触发memstore flush。自动刷新的时间间隔由该属性进行配置hbase.regionserver.optionalcacheflushinterval(默认 1 小时)。
4)当 WAL 文件的数量超过 hbase.regionserver.max.logs,region 会按照时间顺序依次进行刷写,直到WAL文件数量减小到hbase.regionserver.max.log 以下(该属性名已经废弃, 现无需手动设置,最大值为32)。
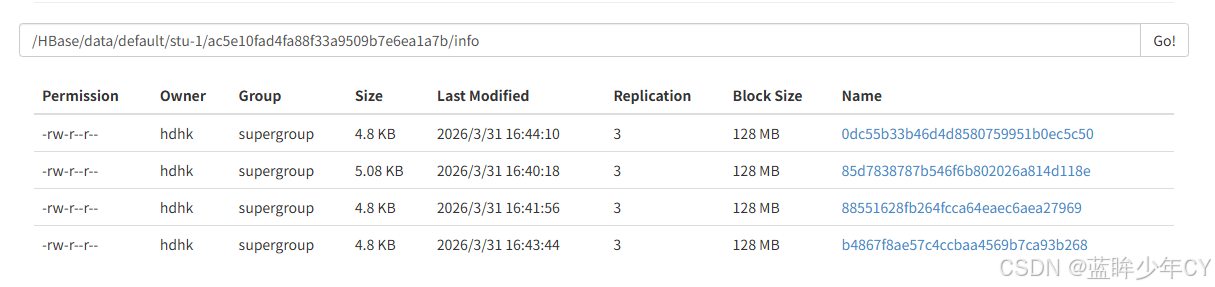
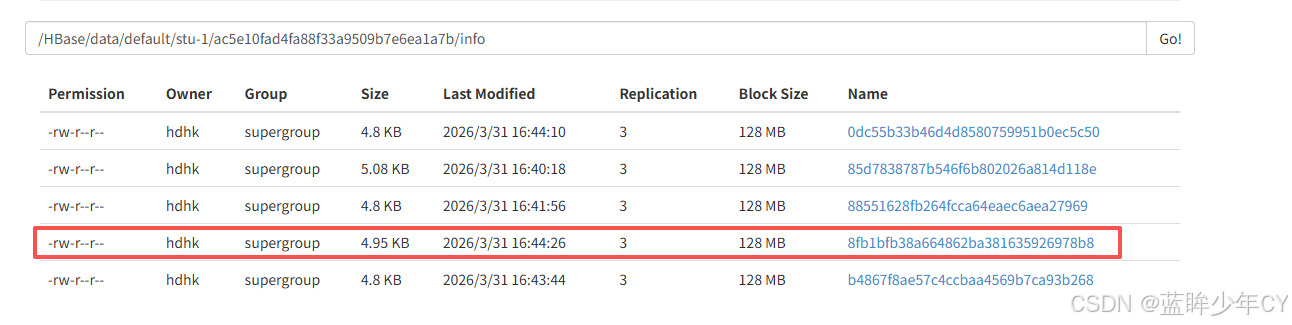
当put、flush多条数据生成4个文件的时候,此时compact合并数据会生成一个新的文件,隔段时间后,之后保留这一个文件。

4、读流程
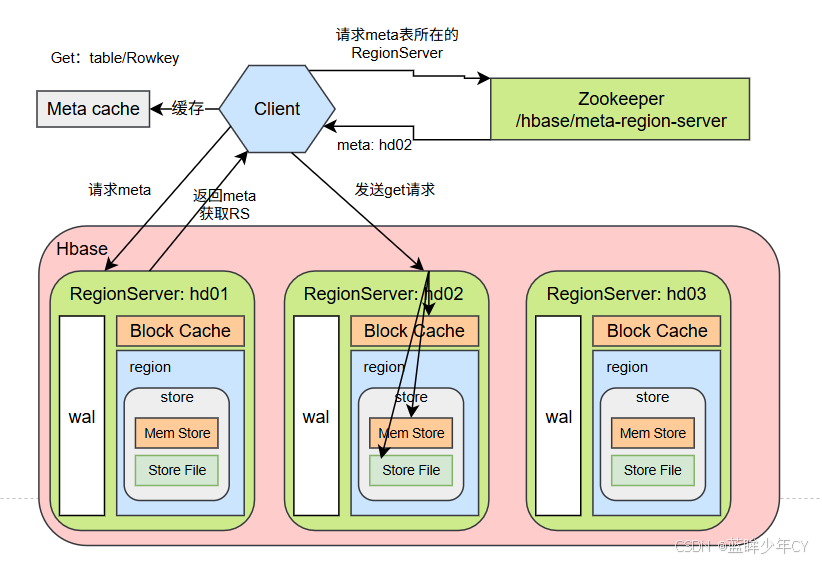
1)Client 先访问 zookeeper,获取hbase:meta 表位于哪个Region Server。
2)访问对应的Region Server,获取 hbase:meta 表,根据读请求的 namespace:table/rowkey, 查询出目标数据位于哪个Region Server中的哪个Region中。并将该table的region信息以及meta表的位置信息缓存在客户端的meta cache,方便下次访问。
3)与目标Region Server 进行通讯;
4)分别在Block Cache(读缓存),MemStore和Store File(HFile)中查询目标数据,并将查到的所有数据进行合并。此处所有数据是指同一条数据的不同版本(time stamp)或者不同的类型(Put/Delete)。
5) 将从文件中查询到的数据块(Block,HFile数据存储单元,默认大小为64KB)缓存到 Block Cache。
6)将合并后的最终结果返回给客户端。
5、StoreFile Compaction
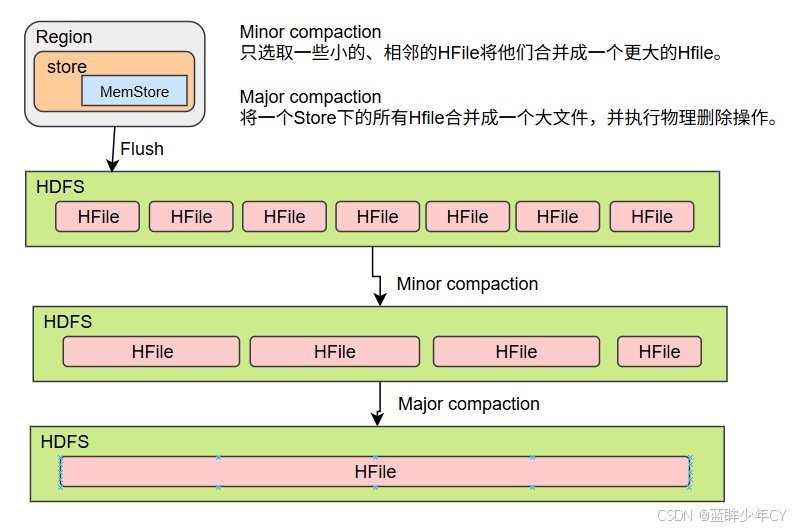
由于memstore每次刷写都会生成一个新的HFile,且同一个字段的不同版本(timestamp) 和不同类型(Put/Delete)有可能会分布在不同的HFile中,因此查询时需要遍历所有的HFile。为了减少HFile的个数,以及清理掉过期和删除的数据,会进行StoreFile Compaction。
Compaction 分为两种,分别是Minor Compaction 和Major Compaction。Minor Compaction 会将临近的若干个较小的 HFile 合并成一个较大的 HFile,但不会清理过期和删除的数据。 Major Compaction 会将一个 Store 下的所有的 HFile 合并成一个大HFile,并且会清理掉过期 和删除的数据。
6、Region Split
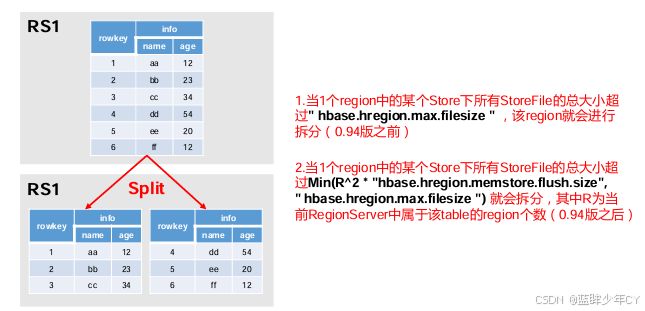
默认情况下,每个Table起初只有一个Region,随着数据的不断写入,Region会自动进行拆分。刚拆分时,两个子Region 都位于当前的Region Server,但处于负载均衡的考虑, HMaster 有可能会将某个Region转移给其他的Region Server。
Region Split 时机:
1、当1个region中的某个Store下所有StoreFile的总大小超过hbase.hregion.max.filesize, 该Region 就会进行拆分(0.94版本之前)。
2、当 1 个 region 中的某个 Store 下所有 StoreFile 的总大小超过 Min(R^2 * "hbase.hregion.memstore.flush.size",hbase.hregion.max.filesize"),该 Region 就会进行拆分,其中R为当前Region Server中属于该Table的个数(0.94版本之后)。
四、api操作
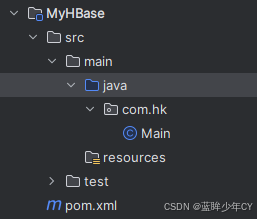
1、项目搭建
(1)创建项目
(2)添加maven
XML
    <dependencies>
        <dependency>
            <groupId>org.apache.hbase</groupId>
            <artifactId>hbase-server</artifactId>
            <version>1.3.1</version>
        </dependency>
        <dependency>
            <groupId>org.apache.hbase</groupId>
            <artifactId>hbase-client</artifactId>
            <version>1.3.1</version>
        </dependency>
    </dependencies>
2、Api操作
(1)创建连接
方式一:
java
    public static HBaseConfiguration configuration;
    static {
        try {
            // 获取配置文件信息
            HBaseConfiguration configuration = new HBaseConfiguration();
            configuration.set("hbase.zookeeper.quorum", "hd01,hd02,hd03");
            // 默认端口就是2181
//        configuration.set("hbase.zookeeper.property.clientPort", "2181");
        } catch (IOException e) {

        }
    }
方式二:
java
    private static Connection connection;
    static {

        try {
            // 设置配置信息
            Configuration configuration = HBaseConfiguration.create();
            configuration.set("hbase.zookeeper.quorum", "hd01,hd02,hd03");
            connection = ConnectionFactory.createConnection(configuration);
        } catch (IOException e) {
        }
    }
(2)获取admin对象
java
    public static Admin admin;
    public static void getAdmin() throws IOException {
        admin = connection.getAdmin();
    }
(3)关闭资源
java
public static void close() {
if (admin != null) {
try {
admin.close();
} catch (IOException e) {
e.printStackTrace();
}
}
if (connection != null) {
try {
connection.close();
} catch (IOException e) {
e.printStackTrace();
}
}
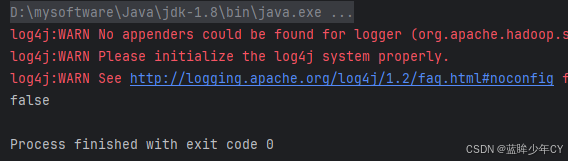
}(4)判断表是否存在
java
    public static void main(String[] args) throws IOException {

        System.out.println(tableIsExists("stu-2"));
        close();
    }

    // 判断表是否存在
    public static boolean tableIsExists(String tableName) throws IOException {
        getAdmin();
       return admin.tableExists(TableName.valueOf(tableName));
    }
(5)创建表
java
public static void main(String[] args) throws IOException {
        // 测试添加表
        createTable("stu-2", "info1", "info2");
        close();
    }

    // 创建表
    public static void createTable(String tableName, String... cfs) throws IOException {
        // 判断列族是否传入
        if (cfs.length == 0) {
            System.out.println("未传入列族信息");
            return;
        }

        // 判断表是否存在
        if (tableIsExists(tableName)) {
            System.out.println(tableName + "表已经存在!");
            return;
        }

        // 创建表描述器
        HTableDescriptor hTableDescriptor = new HTableDescriptor(TableName.valueOf(tableName));

        // 添加列族信息
        for (String cf : cfs) {
            // 创建列族描述器
            HColumnDescriptor hColumnDescriptor = new HColumnDescriptor(cf);

            hTableDescriptor.addFamily(hColumnDescriptor);
        }

        // 创建表
        admin.createTable(hTableDescriptor);
    }
(6)删除表
java
    public static void main(String[] args) throws IOException {
        // 测试删除表
        dopTable("stu-2");
        close();
    }

    // 删除表
    public static void dopTable(String tableName) throws IOException {
        // 判断表是否存在
        if (tableIsExists(tableName)) {
            // 下线表
            admin.disableTable(TableName.valueOf(tableName));

            // 删除表
            admin.deleteTable(TableName.valueOf(tableName));
        } else {
            System.out.println(tableName + "表不存在!");
        }
    }
(7)创建命名空间
java
    public static void main(String[] args) throws IOException {
        getAdmin();
        // 测试创建命名空间
        createNameSpace("student");
        close();
    }

    // 创建命名空间
    public static void  createNameSpace(String name) {
        // 创建命名空间描述器
        NamespaceDescriptor namespaceDescriptor = NamespaceDescriptor.create(name).build();
        try {
            // 创建命名空间
            admin.createNamespace(namespaceDescriptor);
        } catch (IOException e) {
            e.printStackTrace();
        }
    }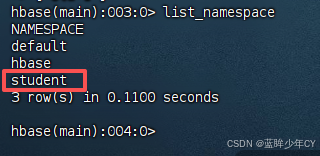
再次创建会报已经存在异常

(8)添加数据
java
    public static void main(String[] args) throws IOException {
        getAdmin();
        // 创建表
        createTable("student:stu-1", "info");
        // 插入数据
        putData("student:stu-1", "1001", "info", "name", "lisi");
        close();
    }

    // 添加数据
    public static void putData(String tableName, String rowKey, String cf, String cn, String value) throws IOException {
        // 获取表对象
        Table table = connection.getTable(TableName.valueOf(tableName));

        // 创建put对象
        Put put = new Put(Bytes.toBytes(rowKey));
        put.addColumn(Bytes.toBytes(cf), Bytes.toBytes(cn), Bytes.toBytes(value));

        // 插入数据
        table.put(put);

        // 关闭资源
        table.close();
    }
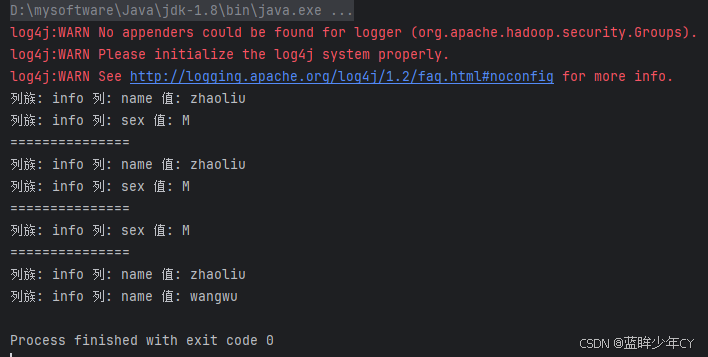
(9)获取数据
java
    public static void main(String[] args) throws IOException {
        // 测试获取数据
        getData("student:stu-1", "1001", null, null, false);
        System.out.println("===============");
        getData("student:stu-1", "1001", "info", null, false);
        System.out.println("===============");
        getData("student:stu-1", "1001", "info", "sex", false);
        System.out.println("===============");
        getData("student:stu-1", "1001", "info", "name", true);
        close();
    }

    // 获取数据
    public static void getData(String tableName, String rowKey, String cf, String cn, boolean isMax) throws IOException {
        // 获取表对象
        Table table = connection.getTable(TableName.valueOf(tableName));

        // 创建Get对象
        Get get = new Get(Bytes.toBytes(rowKey));

        // 根据列族查询
        if (StringUtils.isNotEmpty(cf) && StringUtils.isEmpty(cn)) {
            get.addFamily(Bytes.toBytes(cf));
        }

        // 根据字段查询
        if (StringUtils.isNotEmpty(cf) && StringUtils.isNotEmpty(cn)) {
            get.addColumn(Bytes.toBytes(cf), Bytes.toBytes(cn));
        }

        // 获取版本数
        if (isMax) {
            get.setMaxVersions();
        }

        // 获取数据
        Result result = table.get(get);

        // 输出
        for (Cell cell : result.rawCells()) {
            System.out.println("列族: " + Bytes.toString(CellUtil.cloneFamily(cell)) +
                    " 列: " + Bytes.toString(CellUtil.cloneQualifier(cell)) +
                    " 值: " + Bytes.toString(CellUtil.cloneValue(cell)));
        }

        // 关闭资源
        table.close();
    }
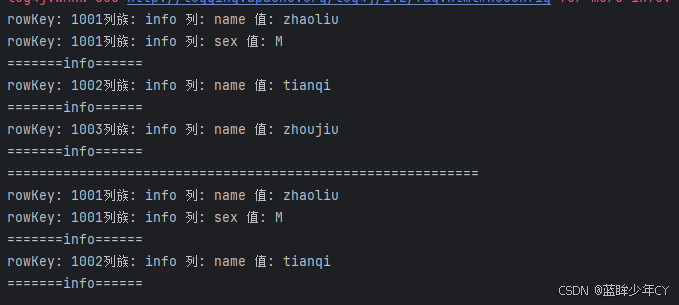
(10)获取数据scan
java
    public static void main(String[] args) throws IOException {

        // 测试获取数据
        scanTable("student:stu-1", null, null);
        System.out.println("===========================================================");
        scanTable("student:stu-1", "1001", "1003");
        close();
    }

    // 获取数据scan
    public static void scanTable(String tableName, String startRow, String endRow) throws IOException {
        // 获取表对象
        Table table = connection.getTable(TableName.valueOf(tableName));

        // 创建scan对象
        Scan scan;
        if (StringUtils.isNotEmpty(startRow) && StringUtils.isNotEmpty(endRow)) {
            scan = new Scan(Bytes.toBytes(startRow), Bytes.toBytes(endRow));
        } else {
            scan = new Scan();
        }

        // 获取数据
        ResultScanner scanner = table.getScanner(scan);

        // 输出数据
        for (Result result : scanner) {
            // 打印数据
            for (Cell cell : result.rawCells()) {
                System.out.println( "rowKey: " + Bytes.toString(CellUtil.cloneRow(cell)) +
                        "列族: " + Bytes.toString(CellUtil.cloneFamily(cell)) +
                        " 列: " + Bytes.toString(CellUtil.cloneQualifier(cell)) +
                        " 值: " + Bytes.toString(CellUtil.cloneValue(cell)));
            }
            System.out.println("=======info======");
        }

        // 关闭资源
        table.close();
    }
(11)删除数据
java
    public static void main(String[] args) throws IOException {
        // 插入数据
//        putData("student:stu-1", "1002", "info", "name", "tianqi");
//        putData("student:stu-1", "1002", "info", "name", "zhoujiu");
//        putData("student:stu-1", "1002", "info", "name", "zhoujiu222");
        // 测试删除数据
        delData("student:stu-1", "1002", "info", "name");
        close();
    }

    // 删除数据
    public static void delData(String tableName, String rowKey, String cf, String cn) throws IOException {
        // 获取表对象
        Table table = connection.getTable(TableName.valueOf(tableName));

        // 创建delete对象
        Delete delete = new Delete(Bytes.toBytes(rowKey));

        // 添加删除条件
        if (StringUtils.isNotEmpty(cf) && StringUtils.isEmpty(cn)) {
            delete.addFamily(Bytes.toBytes(cf));
        }

        if (StringUtils.isNotEmpty(cf) && StringUtils.isNotEmpty(cn)) {
            delete.addColumn(Bytes.toBytes(cf), Bytes.toBytes(cn));
        }

        // 删除数据
        table.delete(delete);

        // 关闭资源
        table.close();
    }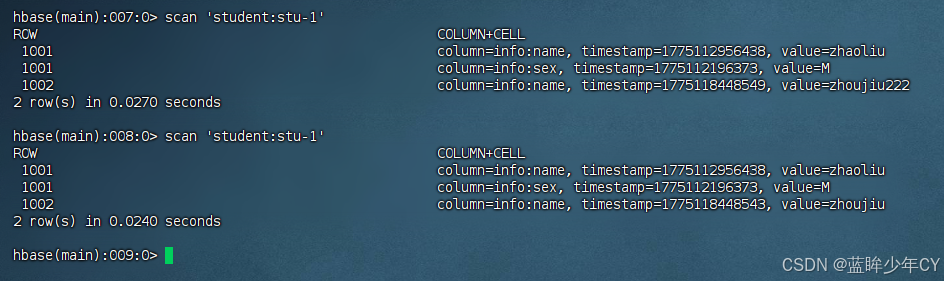
问题1:在使用delete.addColumn方式删除数据是,他是删除最近一次内存修改的数据,比如:将名称 李四 改为 田七 在改为 zhoujiu,那么在输出name后,是将zhoujiu删除,则田七会显示,这不符合实际应用中的清空。(在数据还在内存中,没有落盘的时候会出现)
需要将delete.addColumn改为delete.addColumns方法
java
        if (StringUtils.isNotEmpty(cf) && StringUtils.isNotEmpty(cn)) {
            delete.addColumns(Bytes.toBytes(cf), Bytes.toBytes(cn));
        }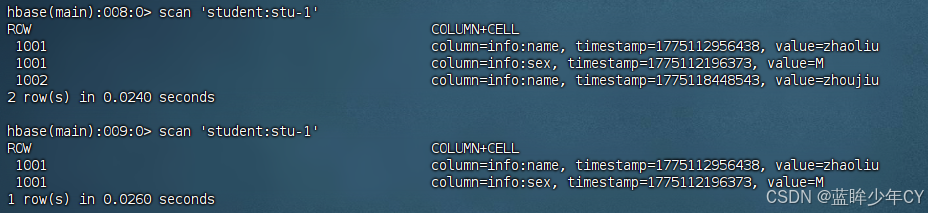
此时发现名称已经删除
问题2:delete.addColumn方法在删除时加上timestamp,只会删除这个时间的数据,如果这个时间没有数据,也不会删除这个时间点之前的数据
3、MapReduce结合HBase
通过HBase的相关JavaAPI,可以实现HBase操作的MapReduce过程,比如使用 MapReduce将数据从本地文件系统导入到HBase的表中,从HBase中读取一些原始数据后使用MapReduce做数据分析。
(1)官方案例
1)导入环境变量
a、临时生效
export HBASE_HOME=/opt/module/hbase
export HADOOP_HOME=/opt/module/hadoop-2.7.7
export HADOOP_CLASSPATH=`${HBASE_HOME}/bin/hbase mapredcp`
b、永久生效
修改/etc/profile配置
export HBASE_HOME=/opt/module/hbase-1.3.1
export HADOOP_HOME=/opt/module/hadoop-2.7.7
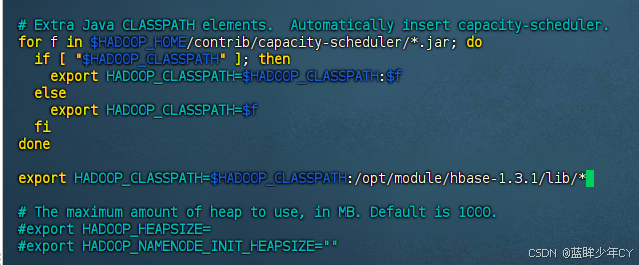
修改Hadoop的hadoop-env.sh文件,在for循环之后配export HADOOP_CLASSPATH=$HADOOP_CLASSPATH:/opt/module/hbase-1.3.1/lib/*
修改之后分发到其他节点
c、重启hadoop和HBase
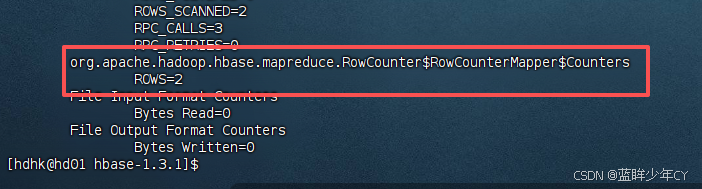
2)运行官方案例一
统计表中有多少行数据
/opt/module/hadoop-2.7.7/bin/yarn jar lib/hbase-server-1.3.1.jar rowcounter stu-1
3)运行官方案例二
使用MapReduce将本地数据导入到HBase
a、创建数据
新建文件:fruit.tsv
1001 Apple Red
1002 Pear Yellow
1003 Pineapple Yellow
b、将文件上传到hdfs
hdfs dfs -mkdir /input_fruit/
hdfs dfs -put fruit.tsv /input_fruit


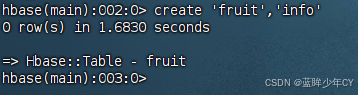
c、创建Hbase表
create 'fruit','info'
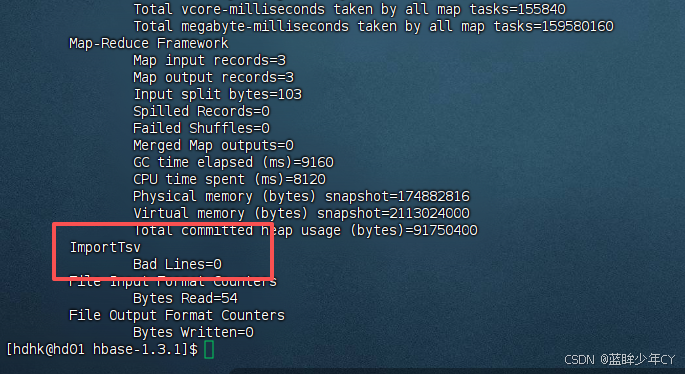
d、执行MapReduce到HBase的fruit表中
/opt/module/hadoop-2.7.7/bin/yarn jar lib/hbase-server-1.3.1.jar importtsv -Dimporttsv.columns=HBASE_ROW_KEY,info:name,info:color fruit hdfs://hd01:9000/input_fruit

(2)自定义HBase-MapReduce
1)自定义案例一
实现将HDFS中的数据写入到Hbase表中。
a、构建Mapper读取HDFS中的文件数据
java
package com.hk.mr_1;

import org.apache.hadoop.hbase.client.Put;
import org.apache.hadoop.hbase.io.ImmutableBytesWritable;
import org.apache.hadoop.hbase.util.Bytes;
import org.apache.hadoop.io.LongWritable;
import org.apache.hadoop.io.Text;
import org.apache.hadoop.mapreduce.Mapper;

import java.io.IOException;

public class ReadFruitFromHDFSMapper extends Mapper<LongWritable, Text, ImmutableBytesWritable, Put> {

    @Override
    protected void map(LongWritable key, Text value, Context context) throws IOException, InterruptedException {
        // 获取一行数据
        String line = value.toString();

        // 数据处理
        String[] split = line.split("\t");

        // 根据数据中值的含义取值
        String rowKey = split[0];
        String name = split[1];
        String color = split[2];

        //初始化rowKey
        ImmutableBytesWritable immutableBytesWritable = new ImmutableBytesWritable(Bytes.toBytes(rowKey));

        // 初始化put
        Put put = new Put(Bytes.toBytes(rowKey));
        // 添加参数
        put.addColumn(Bytes.toBytes("info"), Bytes.toBytes("name"), Bytes.toBytes(name));
        put.addColumn(Bytes.toBytes("info"), Bytes.toBytes("color"), Bytes.toBytes(color));

        // 输出
        context.write(immutableBytesWritable, put);
    }
}
b、构建Reducer类
java
package com.hk.mr_1;

import org.apache.hadoop.hbase.client.Put;
import org.apache.hadoop.hbase.io.ImmutableBytesWritable;
import org.apache.hadoop.hbase.mapreduce.TableReducer;
import org.apache.hadoop.io.NullWritable;

import java.io.IOException;

public class WriteFruitMRFromTxtReducer extends TableReducer<ImmutableBytesWritable, Put, NullWritable> {

    @Override
    protected void reduce(ImmutableBytesWritable key, Iterable<Put> values, Context context) throws IOException, InterruptedException {
        //读出来的每一行数据写入到fruit_hdfs表中
        for(Put put: values){
            context.write(NullWritable.get(), put);
        }
    }
}
c、创建Driver组装Job
java
package com.hk.mr_1;
import org.apache.hadoop.conf.Configuration;
import org.apache.hadoop.fs.Path;
import org.apache.hadoop.hbase.client.Put;
import org.apache.hadoop.hbase.io.ImmutableBytesWritable;
import org.apache.hadoop.hbase.mapreduce.TableMapReduceUtil;
import org.apache.hadoop.mapreduce.Job;
import org.apache.hadoop.mapreduce.lib.input.FileInputFormat;
import org.apache.hadoop.util.Tool;
import org.apache.hadoop.util.ToolRunner;
public class FruitDriver implements Tool {
// 定义一个configuration
private Configuration configuration = null;
@Override
public int run(String[] strings) throws Exception {
// 获取job对象
Job job = Job.getInstance(configuration);
// 设置类路径
job.setJarByClass(FruitDriver.class);
// 设置map和map的kv输出类型
job.setMapperClass(ReadFruitFromHDFSMapper.class);
job.setMapOutputKeyClass(ImmutableBytesWritable.class);
job.setMapOutputValueClass(Put.class);
// 设置Reduce类 strings[1]: 表名
TableMapReduceUtil.initTableReducerJob(
strings[1],
WriteFruitMRFromTxtReducer.class,
job
);
// 设置输入参数
FileInputFormat.setInputPaths(job, new Path(strings[0]));
// 提交
boolean b = job.waitForCompletion(true);
return b? 0:1;
}
@Override
public void setConf(Configuration configuration) {
this.configuration = configuration;
}
@Override
public Configuration getConf() {
return configuration;
}
public static void main(String[] args) {
try {
Configuration configuration1 = new Configuration();
int run = ToolRunner.run(configuration1, new FruitDriver(), args);
System.exit(run);
} catch (Exception e) {
throw new RuntimeException(e);
}
}
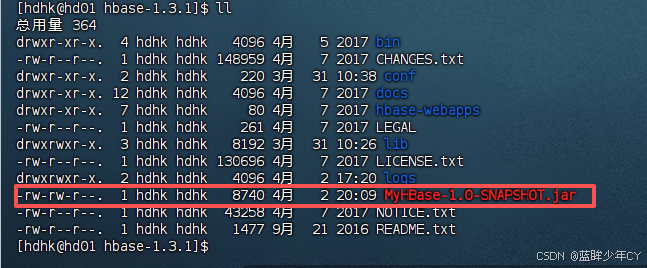
}d、打包上传
e、创建表
create 'fruit1', 'info'
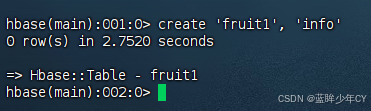
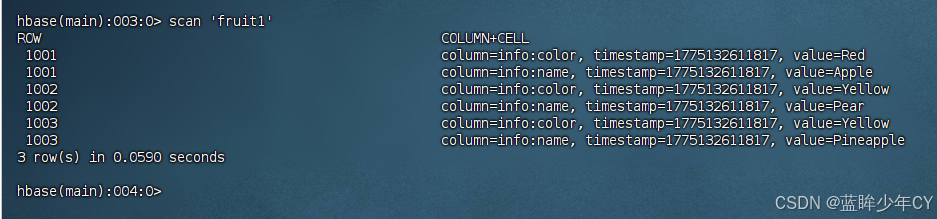
f、运行测试
yarn jar MyHBase-1.0-SNAPSHOT.jar com.hk.mr_1.FruitDriver /input_fruit/fruit.tsv fruit1

2)自定义案例二
将fruit表中的一部分数据,通过MR迁入到fruit_mr表中
a、构建Mapper 类,用于读取fruit表中的数据
java
package com.hk.mr_2;

import org.apache.hadoop.hbase.Cell;
import org.apache.hadoop.hbase.CellUtil;
import org.apache.hadoop.hbase.client.Put;
import org.apache.hadoop.hbase.client.Result;
import org.apache.hadoop.hbase.io.ImmutableBytesWritable;
import org.apache.hadoop.hbase.mapreduce.TableMapper;
import org.apache.hadoop.hbase.util.Bytes;
import java.io.IOException;

public class ReadFruitMapper extends TableMapper<ImmutableBytesWritable, Put> {
    @Override
    protected void map(ImmutableBytesWritable key, Result value, Context context) throws IOException, InterruptedException {
        //将fruit的name和color提取出来,相当于将每一行数据读取出来放入到Put对象中。
        Put put = new Put(key.get());

        //遍历添加column行
        for (Cell cell : value.rawCells()) {
            if ("name".equals(Bytes.toString(CellUtil.cloneQualifier(cell)))) {
                put.add(cell);
            }
        }

        // 写出
        context.write(key, put);
    }
}
b、构建Reducer类,用于将读取到的fruit表中的数据写入到fruit_mr表中
java
package com.hk.mr_2;

import org.apache.hadoop.hbase.client.Put;
import org.apache.hadoop.hbase.io.ImmutableBytesWritable;
import org.apache.hadoop.hbase.mapreduce.TableReducer;
import org.apache.hadoop.io.NullWritable;

import java.io.IOException;

public class WriteFruitMRReducer extends TableReducer<ImmutableBytesWritable, Put, NullWritable> {

    @Override
    protected void reduce(ImmutableBytesWritable key, Iterable<Put> values, Context context) throws IOException, InterruptedException {
        //读出来的每一行数据写入到fruit_hdfs表中
        for(Put put: values){
            context.write(NullWritable.get(), put);
        }
    }
}
c、构建Driver implements Tool用于组装运行Job
java
package com.hk.mr_2;

import org.apache.hadoop.conf.Configuration;
import org.apache.hadoop.fs.Path;
import org.apache.hadoop.hbase.client.Put;
import org.apache.hadoop.hbase.client.Scan;
import org.apache.hadoop.hbase.io.ImmutableBytesWritable;
import org.apache.hadoop.hbase.mapreduce.TableMapReduceUtil;
import org.apache.hadoop.mapreduce.Job;
import org.apache.hadoop.mapreduce.lib.input.FileInputFormat;
import org.apache.hadoop.util.Tool;
import org.apache.hadoop.util.ToolRunner;

public class FruitDriver implements Tool {

    // 定义一个configuration
    private Configuration configuration = null;

    @Override
    public int run(String[] strings) throws Exception {
        // 获取job对象
        Job job = Job.getInstance(configuration);

        // 设置类路径
        job.setJarByClass(FruitDriver.class);

        // 设置map和map的kv输出类型
        TableMapReduceUtil.initTableMapperJob(
                strings[0],
                new Scan(),
                ReadFruitMapper.class,
                ImmutableBytesWritable.class,
                Put.class,
                job
        );

        // 设置Reduce类 strings[1]: 表名
        TableMapReduceUtil.initTableReducerJob(
                strings[1],
                WriteFruitMRReducer.class,
                job
        );

        // 设置输入参数
        FileInputFormat.setInputPaths(job, new Path(strings[0]));

        // 提交
        boolean b = job.waitForCompletion(true);

        return b? 0:1;
    }

    @Override
    public void setConf(Configuration configuration) {
        this.configuration = configuration;
    }

    @Override
    public Configuration getConf() {
        return configuration;
    }

    public static void main(String[] args) {
        try {
            Configuration configuration1 = new Configuration();
            int run = ToolRunner.run(configuration1, new FruitDriver(), args);
            System.exit(run);

        } catch (Exception e) {
            throw new RuntimeException(e);
        }
    }
}
d、打包上传
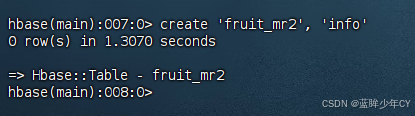
e、创建表
create 'fruit_mr', 'info'
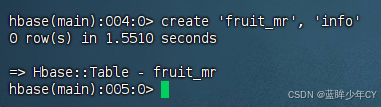
f、运行测试
yarn jar MyHBase-1.0-SNAPSHOT.jar com.hk.mr_2.FruitDriver fruit1 fruit_mr


g、也可以本地运行
在resource下面创建hbase-site.xml文件,将服务器上的文件内容复制到里面
运行main方法即可
java
package com.hk.mr_2;

import org.apache.hadoop.conf.Configuration;
import org.apache.hadoop.fs.Path;
import org.apache.hadoop.hbase.client.Put;
import org.apache.hadoop.hbase.client.Scan;
import org.apache.hadoop.hbase.io.ImmutableBytesWritable;
import org.apache.hadoop.hbase.mapreduce.TableMapReduceUtil;
import org.apache.hadoop.mapreduce.Job;
import org.apache.hadoop.mapreduce.lib.input.FileInputFormat;
import org.apache.hadoop.util.Tool;
import org.apache.hadoop.util.ToolRunner;

public class FruitDriver implements Tool {

    // 定义一个configuration
    private Configuration configuration = null;

    @Override
    public int run(String[] strings) throws Exception {
        // 获取job对象
        Job job = Job.getInstance(configuration);

        // 设置类路径
        job.setJarByClass(FruitDriver.class);

        // 设置map和map的kv输出类型
        TableMapReduceUtil.initTableMapperJob(
                "fruit1",
                new Scan(),
                ReadFruitMapper.class,
                ImmutableBytesWritable.class,
                Put.class,
                job
        );

        // 设置Reduce类 strings[1]: 表名
        TableMapReduceUtil.initTableReducerJob(
                "fruit_mr2",
                WriteFruitMRReducer.class,
                job
        );

        // 提交
        boolean b = job.waitForCompletion(true);

        return b? 0:1;
    }

    @Override
    public void setConf(Configuration configuration) {
        this.configuration = configuration;
    }

    @Override
    public Configuration getConf() {
        return configuration;
    }

    public static void main(String[] args) {
        try {
            Configuration configuration1 = new Configuration();
            int run = ToolRunner.run(configuration1, new FruitDriver(), args);
            System.exit(run);

        } catch (Exception e) {
            throw new RuntimeException(e);
        }
    }
}

4、与Hive的集成
(1)对比
1)Hive
- 数据仓库,Hive 的本质其实就相当于将HDFS中已经存储的文件在Mysql中做了一个双射关系,以 方便使用HQL去管理查询。
- 用于数据分析、清洗,Hive 适用于离线的数据分析和清洗,延迟较高。
- 基于HDFS、MapReduce, Hive 存储的数据依旧在DataNode上,编写的HQL语句终将是转换为MapReduce代码执行。
2)HBase
- 数据库,是一种面向列族存储的非关系型数据库。
- 用于存储结构化和非结构化的数据,适用于单表非关系型数据的存储,不适合做关联查询,类似JOIN等操作。
- 基于HDFS, 数据持久化存储的体现形式是HFile,存放于DataNode中,被ResionServer以region的形 式进行管理。
- 延迟较低,接入在线业务使用,面对大量的企业数据,HBase可以直线单表大量数据的存储,同时提供了高效的数据访问 速度。
(2)与Hive 集成
1)环境准备
Hive需要持有操作 HBase 的Jar,那么接下来拷贝Hive所依赖的Jar包(或者使用软连接的形式)。
a、配置环境变量
修改/etc/profile配置
export HBASE_HOME=/opt/module/hbase-1.3.1
export HIVE_HOME=/opt/module/hive
b、建立软链接
ln -s HBASE_HOME/lib/hbase-common-1.3.1.jar HIVE_HOME/lib/hbase-common-1.3.1.jar
ln -s HBASE_HOME/lib/hbase-server-1.3.1.jar HIVE_HOME/lib/hbase-server-1.3.1.jar
ln -s HBASE_HOME/lib/hbase-client-1.3.1.jar HIVE_HOME/lib/hbase-client-1.3.1.jar
ln -s HBASE_HOME/lib/hbase-protocol-1.3.1.jar HIVE_HOME/lib/hbase-protocol-1.3.1.jar
ln -s HBASE_HOME/lib/hbase-it-1.3.1.jar HIVE_HOME/lib/hbase-it-1.3.1.jar
ln -s HBASE_HOME/lib/htrace-core-3.1.0-incubating.jar HIVE_HOME/lib/htrace-core-3.1.0-incubating.jar
ln -s HBASE_HOME/lib/hbase-hadoop2-compat-1.3.1.jar HIVE_HOME/lib/hbase-hadoop2-compat-1.3.1.jar
ln -s HBASE_HOME/lib/hbase-hadoop-compat-1.3.1.jar HIVE_HOME/lib/hbase-hadoop-compat-1.3.1.jar
c、修改hive-site.xml中zookeeper的属性
<property>
<name>hive.zookeeper.quorum</name>
<value>hd01,hd02,hd03</value>
</property>
<property>
<name>hive.zookeeper.client.port</name>
<value>2181</value>
</property>
2)案例一
建立Hive表,关联HBase表,插入数据到Hive表的同时能够影响HBase表。
a、在Hive中创建表同时关联HBase
CREATE TABLE hive_hbase_emp_table(
empno int,
ename string,
job string,
mgr int,
hiredate string,
sal double,
comm double,
deptno int
)
STORED BY 'org.apache.hadoop.hive.hbase.HBaseStorageHandler'
WITH SERDEPROPERTIES ("hbase.columns.mapping" = ":key,info:ename,info:job,info:mgr,info:hiredate,info:sal,info:comm,info:deptno")
TBLPROPERTIES ("hbase.table.name" = "hbase_emp_table");
分别进入Hive和HBase查看,都生成了对应的表
报错:FAILED: Execution Error, return code 1 from org.apache.hadoop.hive.ql.exec.DDLTask. org.apache.hadoop.hbase.client.Admin.createTable(Lorg/apache/hadoop/hbase/client/TableDescriptor;)V
原因:HBase 与Hive 的集成在最新的两个版本中无法兼容。所以重新编译:hive-hbase-handler-1.2.2.jar!

b、创建临时中间表
在Hive中创建临时中间表,用于load文件中的数据 提示:不能将数据直接load进Hive所关联HBase的那张表中
CREATE TABLE emp(
empno int,
ename string,
job string,
mgr int,
hiredate string,
sal double,
comm double,
deptno int
)
row format delimited fields terminated by '\t';
c、向Hive 中间表中load数据
load data local inpath '/opt/data/emp.txt' into table emp;
d、通过insert 命令将中间表中的数据导入到Hive关联Hbase的那张表中
insert into table hive_hbase_emp_table select * from emp;
e、查看Hive以及关联的HBase表中是否已经成功的同步插入了数据
hive> select * from hive_hbase_emp_table;
Hbase> scan 'hbase_emp_table'
3)案例二
在案例一的基础上,在HBase中已经存储了某一张表hbase_emp_table,然后在Hive中创建一个外部表来 关联HBase 中的hbase_emp_table 这张表,使之可以借助Hive 来分析 HBase这张表中的数 据。
a、在Hive 中创建外部表
CREATE EXTERNAL TABLE relevance_hbase_emp(
empno int,
ename string,
job string,
mgr int,
hiredate string,
sal double,
comm double,
deptno int
)
STORED BY 'org.apache.hadoop.hive.hbase.HBaseStorageHandler'
WITH SERDEPROPERTIES ("hbase.columns.mapping" = ":key,info:ename,info:job,info:mgr,info:hiredate,info:sal,info:comm,info:deptno")
TBLPROPERTIES ("hbase.table.name" = "hbase_emp_table");
b、关联后就可以使用Hive函数进行一些分析操作了
hive (default)> select * from relevance_hbase_emp;
五、优化
1、高可用
在HBase中HMaster 负责监控HRegionServer 的生命周期,均衡RegionServer 的负载, 如果HMaster 挂掉了,那么整个HBase 集群将陷入不健康的状态,并且此时的工作状态并 不会维持太久。所以HBase支持对HMaster的高可用配置。
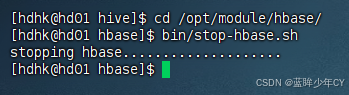
1)关闭HBase集群
bin/stop-hbase.sh
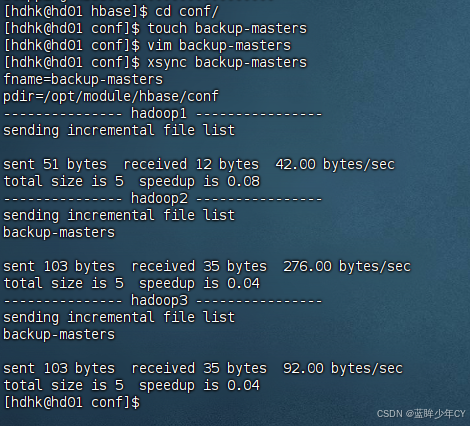
2)在conf目录下创建backup-masters文件
touch backup-masters

3)在backup-masters 文件中配置高可用HMaster节点
vim backup-masters
hd02
4)将整个conf目录分发到其他节点
xsync /opt/module/hbase/conf/backup-masters
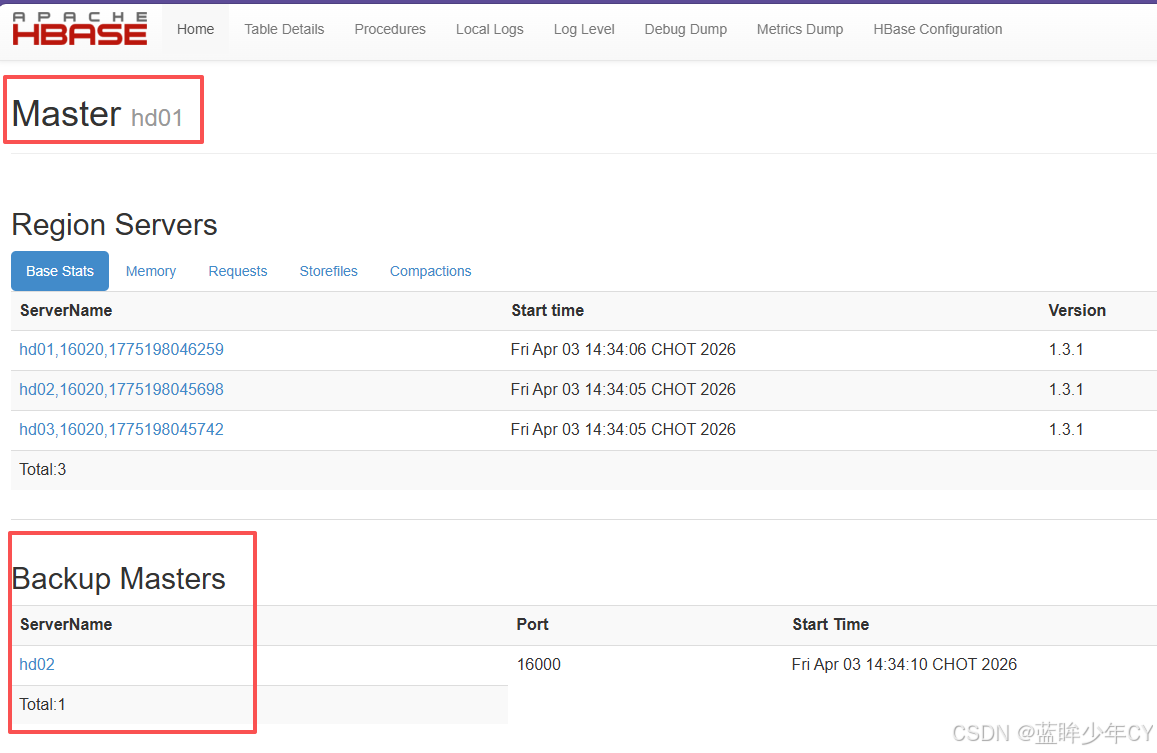
5.启动集群打开页面查看

2、预分区
每一个region 维护着 StartRow 与 EndRow,如果加入的数据符合某个 Region 维护的 RowKey 范围,则该数据交给这个 Region 维护。那么依照这个原则,可以将数据所要投放的分区提前大致的规划好,以提高HBase性能。
1)手动设定预分区
create 'staff1','info','partition1',SPLITS=>'1000','2000','3000','4000'


2)生成16进制序列预分区
create 'staff2','info', {NUMREGIONS =>15, SPLITALGO =>'HexStringSplit'}


3)按照文件中设置的规则预分区
创建splits.txt 文件内容如下
aaaa
bbbb
cccc
dddd
create 'staff3', SPLITS_FILE => 'splits.txt'
4)使用JavaAPI创建预分区
//自定义算法,产生一系列hash散列值存储在二维数组中
byte\[\]\[\] splitKeys = 某个散列值函数
//创建HbaseAdmin实例
HBaseAdmin hAdmin = new HBaseAdmin(HbaseConfiguration.create());
//创建HTableDescriptor实例
HTableDescriptor tableDesc = new HTableDescriptor(tableName);
//通过HTableDescriptor实例和散列值二维数组创建带有预分区的Hbase表
hAdmin.createTable(tableDesc, splitKeys);
3、RowKey 设计
一条数据的唯一标识就是RowKey,那么这条数据存储于哪个分区,取决于RowKey处于哪个一个预分区的区间内,设计RowKey的主要目的 ,就是让数据均匀的分布于所有的 region中,在一定程度上防止数据倾斜。
1)生成随机数、hash、散列值
比如:
原本rowKey 为 1001 的,SHA1 后 变 成 :dd01903921ea24941c26a48f2cec24e0bb0e8cc7
原本rowKey 为 3001 的,SHA1 后 变 成 : 49042c54de64a1e9bf0b33e00245660ef92dc7bd
原本rowKey 为 5001 的 , SHA1 后 变 成 : 7b61dec07e02c188790670af43e717f0f46e8913
在做此操作之前,一般会选择从数据集中抽取样本,来决定什么样的rowKey来Hash 后作为每个分区的临界值。
2)字符串反转
20170524000001 转成10000042507102
20170524000002 转成20000042507102
这样也可以在一定程度上散列逐步put进来的数据
3)字符串拼接
20170524000001_a12e
20170524000001_93i7
4、内存优化
HBase 操作过程中需要大量的内存开销,毕竟Table是可以缓存在内存中的,一般会分配整个可用内存的70%给HBase的Java堆。但是不建议分配非常大的堆内存,因为GC过程持续太久会导致RegionServer处于长期不可用状态,一般16~48G内存就可以了,如果因为框架占用内存过高导致系统内存不足,框架一样会被系统服务拖死。
5、基础优化
(1)允许在HDFS的文件中追加内容
hdfs-site.xml、hbase-site.xml
属性:dfs.support.append
解释:开启HDFS追加同步,可以优秀的配合HBase的数据同步和持久化。默认值为true。
(2)优化DataNode允许的最大文件打开数
hdfs-site.xml
属性:dfs.datanode.max.transfer.threads
解释:HBase 一般都会同一时间操作大量的文件,根据集群的数量和规模以及数据动作, 设置为4096或者更高。默认值:4096
(3)优化延迟高的数据操作的等待时间
hdfs-site.xml
属性:dfs.image.transfer.timeout
解释:如果对于某一次数据操作来讲,延迟非常高,socket需要等待更长的时间,建议把该值设置为更大的值(默认60000毫秒),以确保socket不会被timeout掉。
4.优化数据的写入效率
mapred-site.xml
属性:mapreduce.map.output.compress
mapreduce.map.output.compress.codec
解释:开启这两个数据可以大大提高文件的写入效率,减少写入时间。第一个属性值修改为 true,第二个属性值修改为:org.apache.hadoop.io.compress.GzipCodec或者其 他压缩方式。
5.设置RPC监听数量
hbase-site.xml
属性:Hbase.regionserver.handler.count
解释:默认值为30,用于指定RPC监听的数量,可以根据客户端的请求数进行调整,读写请求较多时,增加此值。
6.优化HStore文件大小
hbase-site.xml
属性:hbase.hregion.max.filesize
解释:默认值10737418240(10GB),如果需要运行HBase的MR任务,可以减小此值, 因为一个region对应一个map任务,如果单个region过大,会导致map任务执行时间 过长。该值的意思就是,如果HFile的大小达到这个数值,则这个region会被切分为两个Hfile。
7.优化HBase客户端缓存
hbase-site.xml
属性:hbase.client.write.buffer
解释:用于指定Hbase客户端缓存,增大该值可以减少RPC调用次数,但是会消耗更多内存,一般需要设定一定的缓存大小,以达到减少RPC次数的目的。
8.指定scan.next 扫描HBase所获取的行数
hbase-site.xml
属性:hbase.client.scanner.caching
解释:用于指定scan.next方法获取的默认行数,值越大,消耗内存越大。
9.flush、compact、split 机制
当MemStore 达到阈值,将Memstore中的数据Flush进Storefile;compact机制则是把flush出来的小文件合并成大的Storefile文件。split则是当Region达到阈值,会把过大的Region 一分为二。
涉及属性:
即:128M就是Memstore的默认阈值
hbase.hregion.memstore.flush.size:134217728
即:这个参数的作用是当单个HRegion内所有的Memstore大小总和超过指定值时,flush 该HRegion 的所有memstore。RegionServer 的 flush 是通过将请求添加一个队列,模拟生 产消费模型来异步处理的。那这里就有一个问题,当队列来不及消费,产生大量积压请求时,可能会导致内存陡增,最坏的情况是触发OOM。
hbase.regionserver.global.memstore.upperLimit:0.4 hbase.regionserver.global.memstore.lowerLimit:0.38
即:当MemStore使用内存总量达到hbase.regionserver.global.memstore.upperLimit指定值时,将会有多个MemStores flush到文件中,MemStore flush 顺序是按照大小降序执行的,直到刷新到MemStore使用内存略小于lowerLimit
六、案例
1、需求设计
(1)需求
-
微博内容的浏览,数据库表设计
-
用户社交体现:关注用户,取关用户
-
拉取关注的人的微博内容
(2)设计
创建命名空间以及表名的定义
创建微博内容表
创建用户关系表
创建用户微博内容接收邮件表
发布微博内容
添加关注用户
移除(取关)用户
获取关注的人的微博内容
测试
(3)表结构
微博表
|--------|---------------|
| 表名 | weibo:content |
| RowKey | 用户id_时间戳 |
| 列族 | info |
| 列 | 标题,内容,图片 |
| 版本 | 1个版本 |
用户关系表
|--------|-----------------|
| 表名 | weibo:relations |
| RowKey | 用户ID |
| 列族 | attends、fans |
| 列 | 关注用户ID,粉丝用户ID |
| 值 | 用户ID |
| 版本 | 1个版本 |
微博收件箱表
|--------|-------------|
| 表名 | weibo:inbox |
| RowKey | 用户ID |
| 列族 | info |
| 列 | 用户ID |
| 值 | 微博内容的RowKey |
| 版本 | 5个版本 |
2、代码实现
(1)创建工程
(2)添加依赖
XML
    <dependencies>
        <dependency>
            <groupId>org.apache.hbase</groupId>
            <artifactId>hbase-server</artifactId>
            <version>1.3.1</version>
        </dependency>
        <dependency>
            <groupId>org.apache.hbase</groupId>
            <artifactId>hbase-client</artifactId>
            <version>1.3.1</version>
        </dependency>
    </dependencies>
(3)常量类
将固定的一些属性设置为常量
java
package com.hk.constants;

import org.apache.hadoop.conf.Configuration;
import org.apache.hadoop.hbase.HBaseConfiguration;

public class Constants {

    // 配置信息
    public static Configuration CONFIGURATION = HBaseConfiguration.create();

    // 命名空间
    public static String NAME_SPACE = "weibo";

    // 微博内容表
    public static String CONTENT_TABLE = "weibo:content";
    public static String CONTENT_TABLE_CF = "info";
    public static int CONTENT_TABLE_VERSION = 1;

    // 用户关系表
    public static String RELATION_TABLE = "weibo:relation";
    public static String RELATION_TABLE_CF1 = "attends";
    public static String RELATION_TABLE_CF2 = "fans";
    public static int RELATION_TABLE_VERSION = 1;

    // 收件箱表
    public static String INBOX_TABLE = "weibo:inbox";
    public static String INBOX_TABLE_CF = "info";
    public static int INBOX_TABLE_VERSION = 3;
}
(4)工具表
获取连接,获取admin对象,创建表等设置为工具方法
java
package com.hk.utils;


import com.hk.constants.Constants;
import org.apache.hadoop.hbase.HColumnDescriptor;
import org.apache.hadoop.hbase.HTableDescriptor;
import org.apache.hadoop.hbase.NamespaceDescriptor;
import org.apache.hadoop.hbase.TableName;
import org.apache.hadoop.hbase.client.Admin;
import org.apache.hadoop.hbase.client.Connection;
import org.apache.hadoop.hbase.client.ConnectionFactory;

import java.io.IOException;

// 工具类
public class HBaseUtil {

    // 创建命名空间
    public static void createNameSpace(String namespace) throws IOException {
        // 获取Connection对象
        Connection connection = ConnectionFactory.createConnection(Constants.CONFIGURATION);

        // 获取admin对象
        Admin admin = connection.getAdmin();

        // 构建命名空间描述器
        NamespaceDescriptor namespaceDescriptor = NamespaceDescriptor.create(namespace).build();

        // 创建命名空间
        admin.createNamespace(namespaceDescriptor);

        // 关闭资源
        admin.close();
        connection.close();
    }

    // 判断表是否存在
    public static boolean isTableExist(String tableName) throws IOException {
        // 获取Connection对象
        Connection connection = ConnectionFactory.createConnection(Constants.CONFIGURATION);

        // 获取admin对象
        Admin admin = connection.getAdmin();

        // 判断表是否存在
        boolean tableExists = admin.tableExists(TableName.valueOf(tableName));

        // 关闭资源
        admin.close();
        connection.close();

        // 返回结果
        return tableExists;
    }

    // 创建表
    public static void createTable(String tableName, int version, String... cfs) throws IOException {
        // 判断是否传入列族信息
        if (cfs.length == 0) {
            System.out.println("没有传入列族信息...");
            return;
        }

        // 判断表是否存在
        if (isTableExist(tableName)) {
            System.out.println(tableName + "已经存在...");
            return;
        }

        // 获取Connection对象
        Connection connection = ConnectionFactory.createConnection(Constants.CONFIGURATION);

        // 获取admin对象
        Admin admin = connection.getAdmin();

        // 创建表描述器
        HTableDescriptor hTableDescriptor = new HTableDescriptor(TableName.valueOf(tableName));

        for (String cf : cfs) {
            // 创建列族描述器
            HColumnDescriptor hColumnDescriptor = new HColumnDescriptor(cf);

            // 设置版本
            hColumnDescriptor.setMaxVersions(version);

            // 添加列族信息
            hTableDescriptor.addFamily(hColumnDescriptor);
        }

        // 创建表
        admin.createTable(hTableDescriptor);

        // 关闭资源
        admin.close();
        connection.close();
    }
}
(5)核心业务
// 发布微博
// 关注用户
// 取关用户
// 获取用户微博详情
// 获取用户初始化页面
java
package com.hk.dao;

import com.hk.constants.Constants;
import org.apache.hadoop.hbase.Cell;
import org.apache.hadoop.hbase.CellUtil;
import org.apache.hadoop.hbase.TableName;
import org.apache.hadoop.hbase.client.*;
import org.apache.hadoop.hbase.filter.CompareFilter;
import org.apache.hadoop.hbase.filter.RowFilter;
import org.apache.hadoop.hbase.filter.SubstringComparator;
import org.apache.hadoop.hbase.util.Bytes;

import java.io.IOException;
import java.util.ArrayList;
import java.util.List;

// 发布微博
// 删除微博
// 关注用户
// 取关用户
// 获取用户微博详情
// 获取用户初始化页面
public class HBaseDao {

    // 发布微博
    public static void publishWeiBo(String uid, String content) throws IOException {
        // 获取Connection对象
        Connection connection = ConnectionFactory.createConnection(Constants.CONFIGURATION);

        // 1.操作微博内容表
        // 获取微博内容对象
        Table table = connection.getTable(TableName.valueOf(Constants.CONTENT_TABLE));

        // 获取当前时间戳
        long timeMillis = System.currentTimeMillis();

        // 拼接rowKey
        String rowKwy = uid + "_" + timeMillis;

        // 创建put对象
        Put conPut = new Put(Bytes.toBytes(rowKwy));

        // 给普通对象赋值
        conPut.addColumn(Bytes.toBytes(Constants.CONTENT_TABLE_CF), Bytes.toBytes("content"), Bytes.toBytes(content));

        // 插入数据
        table.put(conPut);

        // 2.操作微博收件箱表
        // 获取用户关系表对象
        Table relaTable = connection.getTable(TableName.valueOf(Constants.RELATION_TABLE));

        // 获取当前发微博人的粉丝列族信息
        Get get = new Get(Bytes.toBytes(uid));
        get.addFamily(Bytes.toBytes(Constants.RELATION_TABLE_CF2));
        Result result = relaTable.get(get);

        // 创建一个集合,用于存放内容表的put对象
        List<Put> inboxPutList = new ArrayList<>();

        // 遍历获取粉丝
        for (Cell cell : result.rawCells()) {
            // 构建微博收件箱表的put对象
            Put inboxPut = new Put(CellUtil.cloneQualifier(cell));

            // 赋值
            inboxPut.addColumn(Bytes.toBytes(Constants.INBOX_TABLE_CF), Bytes.toBytes(uid), Bytes.toBytes(rowKwy));
            inboxPutList.add(inboxPut);
        }

        // 判断是否有粉丝
        if (inboxPutList.size() > 0){
            // 获取收件箱对象
            Table inboxTable = connection.getTable(TableName.valueOf(Constants.INBOX_TABLE));

            // 执行插入操作
            inboxTable.put(inboxPutList);
            // 关闭收件箱资源
            inboxTable.close();
        }

        // 关闭资源
        relaTable.close();
        table.close();
        connection.close();
    }

    // 关注用户
    public static void addAttends(String uid, String... attends) throws IOException {
        // 检验是否添加了待关注的人
        if (attends.length == 0) {
            System.out.println("请选择关注的人...");
            return;
        }

        // 获取Connection对象
        Connection connection = ConnectionFactory.createConnection(Constants.CONFIGURATION);

        // 1.操作用户关系表
        // 获取用户关系对象
        Table relaTable = connection.getTable(TableName.valueOf(Constants.RELATION_TABLE));

        // 创建一个集合,用于存储用户关系表对象
        List<Put> relaPutList = new ArrayList<>();

        // 创建操作者的put对象
        Put uidPut = new Put(Bytes.toBytes(uid));

        // 循环创建被关注者的put对象
        for (String attend : attends) {
            // 给操作者的put对象赋值
            uidPut.addColumn(Bytes.toBytes(Constants.RELATION_TABLE_CF1), Bytes.toBytes(attend), Bytes.toBytes(attend));

            // 创建被关注者的put对象
            Put attendPut = new Put(Bytes.toBytes(attend));
            attendPut.addColumn(Bytes.toBytes(Constants.RELATION_TABLE_CF2), Bytes.toBytes(uid), Bytes.toBytes(uid));
            relaPutList.add(attendPut);
        }

        // 将操作者的put对象添加至集合
        relaPutList.add(uidPut);

        // 向用户关系表插入数据
        relaTable.put(relaPutList);

        // 2.操作收件箱表
        // 获取微博对象
        Table contTable = connection.getTable(TableName.valueOf(Constants.CONTENT_TABLE));

        // 创建收件箱put对象
        Put inboxPut = new Put(Bytes.toBytes(uid));

        // 获取被关注者最近发的微博
        for (String attend : attends) {
            Scan scan = new Scan(Bytes.toBytes(attend + "_"), Bytes.toBytes(attend + "|"));

            ResultScanner scanner = contTable.getScanner(scan);

            // 对获取的值进行遍历
            for (Result result : scanner) {
                // 给收件箱表put对象赋值
                inboxPut.addColumn(Bytes.toBytes(Constants.INBOX_TABLE_CF), Bytes.toBytes(attend), result.getRow());
            }
        }

        // 判断put对象是否为空
        if (!inboxPut.isEmpty()) {
            // 获取收件箱表对象
            Table inboxTable = connection.getTable(TableName.valueOf(Constants.INBOX_TABLE));

            // 插入数据
            inboxTable.put(inboxPut);

            // 关闭资源
            inboxTable.close();
        }

        // 关闭资源
        relaTable.close();
        contTable.close();
        connection.close();
    }

    // 取关用户
    public static void deleteAttends(String uid, String... dels) throws IOException {
        // 获取Connection对象
        Connection connection = ConnectionFactory.createConnection(Constants.CONFIGURATION);

        // 1.操作用户关系表
        // 获取用户关系表对象
        Table relaTable = connection.getTable(TableName.valueOf(Constants.RELATION_TABLE));

        // 使用集合存放用户关系表的delete对象
        List<Delete> relaDeletes = new ArrayList<>();

        // 创建操作者的delete对象
        Delete uidDelete = new Delete(Bytes.toBytes(uid));

        // 循环创建被取关者的delete对象
        for (String del : dels) {
            uidDelete.addColumn(Bytes.toBytes(Constants.RELATION_TABLE_CF1), Bytes.toBytes(del));

            // 创建取关者的delete对象
            Delete delDelete = new Delete(Bytes.toBytes(del));

            // 给取关者的对象赋值
            delDelete.addColumn(Bytes.toBytes(Constants.RELATION_TABLE_CF2), Bytes.toBytes(uid));

            relaDeletes.add(delDelete);
        }

        // 将操作者的Delete对象添加至集合
        relaDeletes.add(uidDelete);

        // 执行关系表的删除操作
        relaTable.delete(relaDeletes);

        // 2.操作收件箱表
        // 获取收件箱表对象
        Table inboxTable = connection.getTable(TableName.valueOf(Constants.INBOX_TABLE));

        // 创建操作者的Delete对象
        Delete inboxDelete = new Delete(Bytes.toBytes(uid));

        // 操作者的Delete对象赋值
        for (String del : dels) {
            inboxDelete.addColumn(Bytes.toBytes(Constants.INBOX_TABLE_CF), Bytes.toBytes(del));
        }

        // 执行删除操作
        inboxTable.delete(inboxDelete);

        // 关闭资源
        relaTable.close();
        inboxTable.close();
        connection.close();
    }

    // 获取初始化页面数据
    public static void getInit(String uid) throws IOException {
        // 获取Connection对象
        Connection connection = ConnectionFactory.createConnection(Constants.CONFIGURATION);

        // 获取收件箱对象表
        Table inboxTable = connection.getTable(TableName.valueOf(Constants.INBOX_TABLE));

        // 获取微博内容表对象
        Table contTable = connection.getTable(TableName.valueOf(Constants.CONTENT_TABLE));

        // 获取数据
        Get indoxGet = new Get(Bytes.toBytes(uid));
        indoxGet.setMaxVersions();
        Result result = inboxTable.get(indoxGet);

        // 遍历获取数据
        for (Cell cell : result.rawCells()) {
            // 构建微博内容get对象
            Get contGet = new Get(CellUtil.cloneValue(cell));

            // 获取get对象的数据内容
            Result contResult = contTable.get(contGet);

            // 输出
            System.out.println(
                    "行键: " + Bytes.toString(CellUtil.cloneRow(cell)) +
                    ", 列族: " + Bytes.toString(CellUtil.cloneFamily(cell)) +
                    ", 列: "+ Bytes.toString(CellUtil.cloneQualifier(cell)) +
                    ", 值: " + Bytes.toString(CellUtil.cloneValue(cell))
            );

        }

        // 关闭资源
        inboxTable.close();
        contTable.close();
        connection.close();
    }

    // 获取某个人的所有微博详情
    public static void getWeibo(String uid) throws IOException {
        // 获取Connection对象
        Connection connection = ConnectionFactory.createConnection(Constants.CONFIGURATION);

        // 获取微博内容表对象
        Table contTable = connection.getTable(TableName.valueOf(Constants.CONTENT_TABLE));

        // 构建get对象
        Scan scan = new Scan();

        // 构建过滤器
        RowFilter rowFilter = new RowFilter(CompareFilter.CompareOp.EQUAL, new SubstringComparator(uid + "_"));
        scan.setFilter(rowFilter);

        // 获取数据
        ResultScanner scanner = contTable.getScanner(scan);

        // 输出
        for (Result result : scanner) {

            for (Cell cell : result.rawCells()) {
                // 输出
                System.out.println(
                        "行键: " + Bytes.toString(CellUtil.cloneRow(cell)) +
                                ", 列族: " + Bytes.toString(CellUtil.cloneFamily(cell)) +
                                ", 列: "+ Bytes.toString(CellUtil.cloneQualifier(cell)) +
                                ", 值: " + Bytes.toString(CellUtil.cloneValue(cell))
                );
            }

        }

        // 关闭资源
        contTable.close();
        connection.close();
    }
}
(6)测试类
测试业务
java
package com.hk;
import com.hk.constants.Constants;
import com.hk.dao.HBaseDao;
import com.hk.utils.HBaseUtil;
import java.io.IOException;
public class Main {
public static void main(String[] args) {
try {
// 初始化
init();
// 向1001发布微博
HBaseDao.publishWeiBo("1001", "hello 1001 java");
// 1002关注1001和1003
HBaseDao.addAttends("1002", "1001", "1003");
// 获取1002的初始话页面
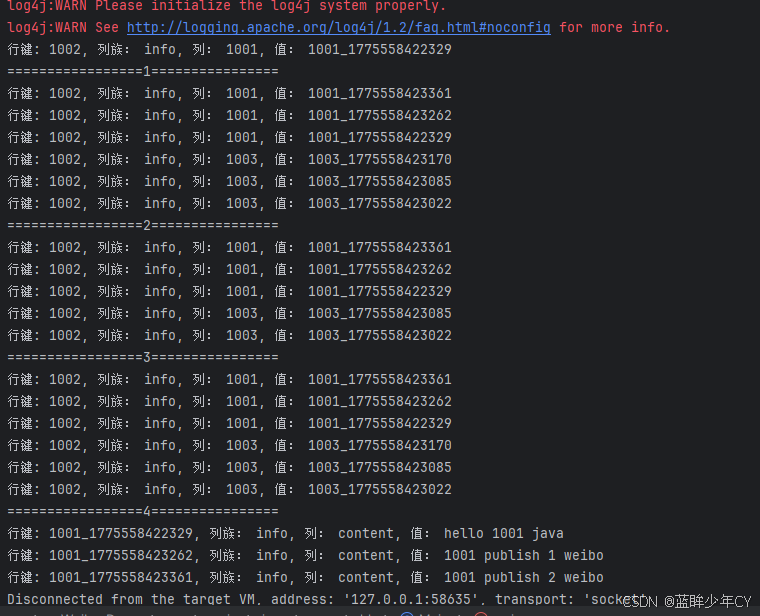
HBaseDao.getInit("1002");
System.out.println("=================1================");
// 1003发布3条微博,同时1001发布2条微博
HBaseDao.publishWeiBo("1003", "1003 publish 1 weibo");
HBaseDao.publishWeiBo("1003", "1003 publish 2 weibo");
HBaseDao.publishWeiBo("1003", "1003 publish 3 weibo");
HBaseDao.publishWeiBo("1001", "1001 publish 1 weibo");
HBaseDao.publishWeiBo("1001", "1001 publish 2 weibo");
// 获取1002的初始化页面
HBaseDao.getInit("1002");
System.out.println("=================2================");
// 1002取关1003
HBaseDao.deleteAttends("1002", "1003");
// 获取1002的初始化页面
HBaseDao.getInit("1002");
System.out.println("=================3================");
// 1002再次关注1003
HBaseDao.addAttends("1002", "1003");
// 获取1002的初始化页面
HBaseDao.getInit("1002");
System.out.println("=================4================");
// 获取1001微博详情
HBaseDao.getWeibo("1001");
} catch (IOException e) {
throw new RuntimeException(e);
}
}
public static void init() {
try {
// 创建命名空间
HBaseUtil.createNameSpace(Constants.NAME_SPACE);
// 创建微博内容表
HBaseUtil.createTable(Constants.CONTENT_TABLE, Constants.CONTENT_TABLE_VERSION, Constants.CONTENT_TABLE_CF);
// 创建用户关系表
HBaseUtil.createTable(Constants.RELATION_TABLE, Constants.RELATION_TABLE_VERSION, Constants.RELATION_TABLE_CF1, Constants.RELATION_TABLE_CF2);
// 创建收件箱表
HBaseUtil.createTable(Constants.INBOX_TABLE, Constants.INBOX_TABLE_VERSION, Constants.INBOX_TABLE_CF);
} catch (IOException e) {
throw new RuntimeException(e);
}
}
}(7)测试