HarmonyOS 6实战:AI Action富媒体卡片迭代------实现快照分享
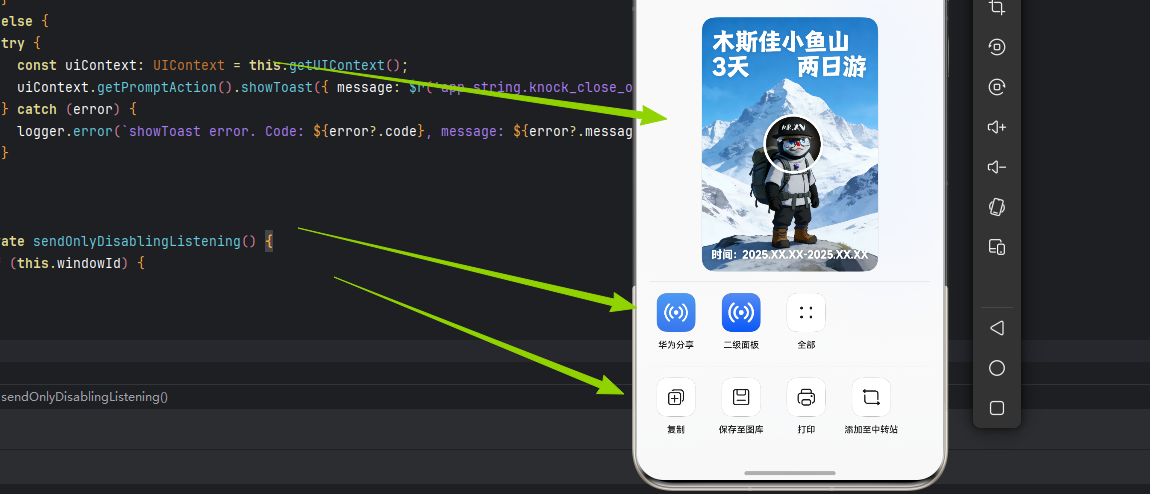
熟悉我们案例的老朋友一定记得,之前做的AI旅行助手,用户问"帮我规划一条北京三日游路线",AI能生成一份详细的攻略,包含景点、美食、交通建议,以及对应的富媒体卡片,然后问题来了:用户想把这份攻略分享给朋友,一截图,发现内容太长了,屏幕装不下。截三四张图发过去,对方看着也费劲。

有朋友会问,不对啊木木,我们之前不是实现过一版分享嘛,基于海报的图片分享,emmm,只能说理想很丰满现实很骨感,动态生成海报图太费token了,而且响应速度非常慢。。。。在资源有限的情况下,比较难带来好的用户体验,所以我们打算这里的海报变为截图进行分享发送。
功能分两种场景:一种是攻略列表的List组件,另一种是AI返回的富文本卡片、Web组件。这篇文章完整记录一下实现过程。
功能设计
先说说我的预期效果。
用户在AI对话页面,点击"分享"按钮,系统自动滚动截取整个对话内容或攻略页面,生成一张长截图。用户可以预览、保存到相册,或者直接分享给朋友。
整个过程是全自动的:滚动、截图、裁剪、合并、保存,一气呵成。
核心API:
| API | 说明 |
|---|---|
componentSnapshot.get() |
组件截图 |
PixelMap.crop() |
图片裁剪 |
PixelMap.writePixelsSync() |
写入像素数据 |
photoAccessHelper |
保存到相册 |
SaveButton |
安全控件 |
快照分享核心实现
图片处理(最关键的部分)
长截图的核心原理是:滚动一段距离,截一张图,只保留新增的部分,最后把所有截图按顺序拼成一张长图。
typescript
// common/ImageUtils.ets
import { image } from '@kit.ImageKit'

export class ImageUtils {

  // 获取截图区域(裁剪出新增部分)
  static async getSnapshotArea(
    uiContext: UIContext,
    pixelMap: PixelMap,
    scrollYOffsets: number[],
    listWidth: number,
    listHeight: number
  ): Promise<image.PositionArea> {
    let stride = pixelMap.getBytesNumberPerRow()
    let bytesNumber = pixelMap.getPixelBytesNumber()
    let buffer: ArrayBuffer = new ArrayBuffer(bytesNumber)

    let area: image.PositionArea = {
      pixels: buffer,
      offset: 0,
      stride: stride,
      region: { x: 0, y: 0, size: { width: 0, height: 0 } }
    }

    let len = scrollYOffsets.length
    if (len >= 2) {
      // 除第一张外,只保留新增滚动部分
      let realScrollHeight = scrollYOffsets[len-1] - scrollYOffsets[len-2]
      let cropRegion = {
        x: 0,
        y: Math.ceil(uiContext.vp2px(listHeight - realScrollHeight)),
        size: {
          height: uiContext.vp2px(realScrollHeight),
          width: uiContext.vp2px(listWidth)
        }
      }
      await pixelMap.crop(cropRegion)
      area.region = cropRegion
    } else {
      // 第一张截图,保留全部
      area.region = { x: 0, y: 0, size: { width: uiContext.vp2px(listWidth), height: uiContext.vp2px(listHeight) } }
    }

    pixelMap.readPixelsSync(area)
    return area
  }

  // 合并所有截图
  static async mergeImage(
    uiContext: UIContext,
    areaArray: image.PositionArea[],
    lastOffsetY: number,
    listHeight: number
  ): Promise<PixelMap> {
    let opts = {
      editable: true,
      pixelFormat: 4,
      size: {
        width: this.getMaxAreaWidth(areaArray),
        height: uiContext.vp2px(lastOffsetY + listHeight)
      }
    }
    let longPixelMap = image.createPixelMapSync(opts)

    let imgPosition = 0
    for (let i = 0; i < areaArray.length; i++) {
      let area = areaArray[i]
      area.offset = imgPosition
      longPixelMap.writePixelsSync(area)
      imgPosition += area.region.size.height
    }
    return longPixelMap
  }
}
为什么只保留新增部分?
如果每次都截全图再拼接,会有大量重复内容(上一张图的底部和下一张图的顶部是重叠的)。只保留新增的滚动部分,拼接出来的长图才不会有"重复"的视觉问题。
攻略列表实现快照
以聊天记录或攻略列表为例,用户点击"分享"后自动滚动截图。
typescript
// view/ScrollSnapshot.ets
@Component
export struct ScrollSnapshot {
  private scroller: Scroller = new Scroller()
  @State curYOffset: number = 0
  @State scrollYOffsets: number[] = []
  @State areaArray: image.PositionArea[] = []
  @State mergedImage: PixelMap | undefined
  @State isShowPreview: boolean = false
  private listId: string = 'snapshot_list'

  // 一键截图
  async onceSnapshot() {
    await this.beforeSnapshot()   // 截图前准备
    await this.snapAndMerge()     // 循环截图并合并
    await this.afterSnapshot()    // 截图后恢复
    this.isShowPreview = true     // 显示预览
  }

  // 截图前准备
  async beforeSnapshot() {
    // 保存当前位置
    this.yOffsetBefore = this.curYOffset
    // 滚动到顶部
    this.scroller.scrollTo({ yOffset: 0, animation: { duration: 200 } })
    await CommonUtils.sleep(200)
  }

  // 循环截图并合并
  async snapAndMerge() {
    this.scrollYOffsets.push(this.curYOffset)

    // 截图
    const pixelMap = await this.getUIContext().getComponentSnapshot().get(this.listId)

    // 裁剪出新增部分
    let area = await ImageUtils.getSnapshotArea(
      this.getUIContext(), pixelMap, this.scrollYOffsets,
      this.listWidth, this.listHeight
    )
    this.areaArray.push(area)

    // 判断是否到底
    if (!this.scroller.isAtEnd()) {
      // 继续滚动
      CommonUtils.scrollAnimation(this.scroller, 200, this.scrollHeight)
      await CommonUtils.sleep(200)
      await this.snapAndMerge()
    } else {
      // 合并所有截图
      this.mergedImage = await ImageUtils.mergeImage(
        this.getUIContext(), this.areaArray,
        this.scrollYOffsets[this.scrollYOffsets.length - 1],
        this.listHeight
      )
    }
  }

  // 截图后恢复
  async afterSnapshot() {
    this.scroller.scrollTo({ yOffset: this.yOffsetBefore, animation: { duration: 200 } })
    await CommonUtils.sleep(200)
    this.scrollYOffsets = []
    this.areaArray = []
  }

  build() {
    Column() {
      List({ scroller: this.scroller }) {
        ForEach(this.newsList, (item: NewsItem) => {
          ListItem() {
            NewsItem({ item: item })
          }
        })
      }
      .id(this.listId)
      .onScrollIndex((start, end) => {
        this.curYOffset = this.scroller.currentOffset().yOffset
      })

      Button('一键截图')
        .onClick(() => this.onceSnapshot())
    }

    // 预览弹窗
    if (this.isShowPreview && this.mergedImage) {
      SnapshotPreview({
        mergedImage: this.mergedImage,
        onClose: () => {
          this.isShowPreview = false
          this.mergedImage = undefined
        }
      })
    }
  }
}
富媒体卡片快照实现

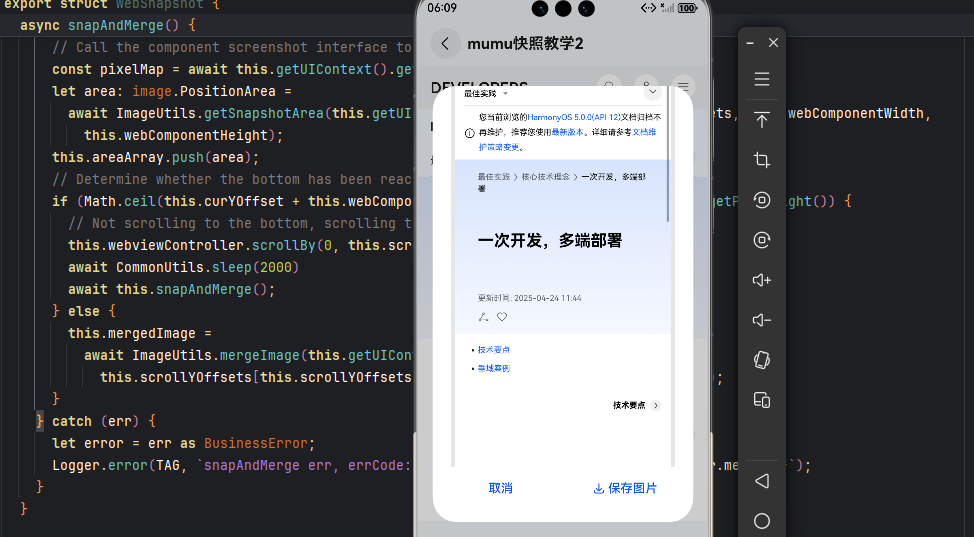
AI返回的富文本卡片通常是用Web组件渲染的,Web截图和List截图流程类似,但需要额外的配置。我们用官网来做个演示。
typescript
// view/WebSnapshot.ets
import { webview } from '@kit.ArkWeb'

@Component
export struct WebSnapshot {
  private webController: webview.WebviewController = new webview.WebviewController()
  @State curYOffset: number = 0
  @State scrollYOffsets: number[] = []
  @State areaArray: image.PositionArea[] = []
  @State mergedImage: PixelMap | undefined
  @State isShowPreview: boolean = false
  private webId: string = 'snapshot_web'

  aboutToAppear() {
    // 初始化Web引擎
    webview.WebviewController.initializeWebEngine()
    // 启用全网页绘制(关键!)
    webview.WebviewController.enableWholeWebPageDrawing()
    // 预连接,加速加载
    webview.WebviewController.prepareForPageLoad('https://example.com', true, 2)
  }

  async onceSnapshot() {
    // 滚动到顶部
    this.webController.scrollTo(0, 0)
    await CommonUtils.sleep(100)

    this.scrollYOffsets = []
    this.areaArray = []
    await this.snapAndMerge()
    this.isShowPreview = true
  }

  async snapAndMerge() {
    this.scrollYOffsets.push(this.curYOffset)

    const pixelMap = await this.getUIContext().getComponentSnapshot().get(this.webId)

    let area = await ImageUtils.getSnapshotArea(
      this.getUIContext(), pixelMap, this.scrollYOffsets,
      this.webWidth, this.webHeight
    )
    this.areaArray.push(area)

    // 判断是否到底(Web用getPageHeight)
    if (Math.ceil(this.curYOffset + this.webHeight) < this.webController.getPageHeight()) {
      this.webController.scrollBy(0, this.scrollHeight)
      await CommonUtils.sleep(500)
      await this.snapAndMerge()
    } else {
      this.mergedImage = await ImageUtils.mergeImage(
        this.getUIContext(), this.areaArray,
        this.scrollYOffsets[this.scrollYOffsets.length - 1],
        this.webHeight
      )
    }
  }

  build() {
    Column() {
      Web({ src: 'https://example.com/guide', controller: this.webController })
        .id(this.webId)
        .onPageEnd(() => {
          // 页面加载完成,获取总高度
          this.webTotalHeight = this.webController.getPageHeight()
        })
        .onScroll((event) => {
          this.curYOffset = event.scrollY
        })

      Button('一键截图')
        .onClick(() => this.onceSnapshot())
    }

    if (this.isShowPreview && this.mergedImage) {
      SnapshotPreview({
        mergedImage: this.mergedImage,
        onClose: () => {
          this.isShowPreview = false
          this.mergedImage = undefined
        }
      })
    }
  }
}Web截图的关键点:
enableWholeWebPageDrawing()必须调用,否则只能截到可视区域- 判断是否滚动到底部用的是
getPageHeight(),不是isAtEnd() - Web内容需要等
onPageEnd回调后才能开始截图
截图完成后,弹窗预览,用户确认后保存到相册。
typescript
// view/SnapshotPreview.ets
import { photoAccessHelper } from '@kit.MediaLibraryKit'
import { fileIo } from '@kit.CoreFileKit'
import { image } from '@kit.ImageKit'

@Component
export struct SnapshotPreview {
  @Prop mergedImage: PixelMap
  @Event onClose: () => void
  private context = this.getUIContext().getHostContext()!

  async saveSnapshot() {
    try {
      // 获取照片访问助手
      const helper = photoAccessHelper.getPhotoAccessHelper(this.context)

      // 创建图片资源
      const uri = await helper.createAsset(photoAccessHelper.PhotoType.IMAGE, 'png')

      // 打开文件
      const file = await fileIo.open(uri, fileIo.OpenMode.READ_WRITE | fileIo.OpenMode.CREATE)

      // 打包PNG
      const imagePacker = image.createImagePacker()
      const packOpts = { format: 'image/png', quality: 100 }
      const data = await imagePacker.packToData(this.mergedImage, packOpts)

      // 写入文件
      fileIo.writeSync(file.fd, data)
      fileIo.closeSync(file.fd)

      // 显示成功提示
      this.getUIContext().getPromptAction().showToast({ message: '已保存到相册' })
      this.onClose()
    } catch (err) {
      console.error(`保存失败: ${JSON.stringify(err)}`)
    }
  }

  build() {
    Column() {
      // 遮罩层
      Column()
        .width('100%')
        .layoutWeight(1)
        .onClick(() => this.onClose())

      // 预览区域
      Column() {
        Scroll() {
          Image(this.mergedImage)
            .width('100%')
            .objectFit(ImageFit.Contain)
        }
        .height('70%')

        Row({ space: 20 }) {
          Button('取消')
            .onClick(() => this.onClose())

          // 安全控件保存按钮
          SaveButton({
            icon: SaveIconStyle.FULL_FILLED,
            text: '保存',
            buttonType: ButtonType.NORMAL
          })
            .padding({ left: 16, right: 16 })
            .onClick((event, result) => {
              if (result === SaveButtonOnClickResult.SUCCESS) {
                this.saveSnapshot()
              }
            })
        }
        .padding(20)
      }
      .width('100%')
      .backgroundColor(Color.White)
      .borderRadius({ topLeft: 24, topRight: 24 })
    }
    .width('100%')
    .height('100%')
    .backgroundColor('rgba(0,0,0,0.5)')
  }
}
为什么要用SaveButton?
鸿蒙系统要求保存到相册必须使用SaveButton安全控件,普通按钮没有这个权限。SaveButton点击后会弹出系统授权框,用户确认后才能写入相册。
一开始调用componentSnapshot.get(),只截到屏幕显示的那部分,滚动后截的图也是空的。查了半天发现需要调用enableWholeWebPageDrawing()启用全网页绘制。
滚动动画是异步的,直接调用截图会截到中间状态。解决方案是在每次滚动后加sleep延时,等动画完成再截图。对应的,如果Web内容还没渲染完就开始截图,截出来是空白。解决方案是在onPageEnd回调里设置标志,加载完成才允许截图。
总结
快照分享的核心实现要点:
| 要点 | 实现方式 |
|---|---|
| 组件截图 | componentSnapshot.get(id) |
| 图片裁剪 | PixelMap.crop(region) |
| 图片合并 | createPixelMapSync + writePixelsSync |
| 滚动控制 | Scroller.scrollTo / WebController.scrollTo |
| 保存相册 | photoAccessHelper + SaveButton |
| Web全绘制 | enableWholeWebPageDrawing() |
改完之后,用户分享AI生成的旅行攻略就方便多了。一键生成快照,保存到相册,直接发给朋友,不用再一张一张地截。