文章目录
- [版本1:写死 PASS](#版本1:写死 PASS)
-
- [第 1 步:先在仓库里创建目录](#第 1 步:先在仓库里创建目录)
- [第 2 步:创建快速验证脚本](#第 2 步:创建快速验证脚本)
- [第 3 步:修改 master-pipeline.yml](#第 3 步:修改 master-pipeline.yml)
- [第 4 步:去流水线页面看结果](#第 4 步:去流水线页面看结果)
- [版本2:自动判断 PASS/FAIL](#版本2:自动判断 PASS/FAIL)
-
- [第 1 步:明确真实验证逻辑](#第 1 步:明确真实验证逻辑)
- [第 2 步:修改 scripts/run_fast_verify.py](#第 2 步:修改 scripts/run_fast_verify.py)
- [第 3 步:提交代码](#第 3 步:提交代码)
- [第 4 步:看流水线结果](#第 4 步:看流水线结果)
- [第 5 步:故意制造一次 FAIL](#第 5 步:故意制造一次 FAIL)
- [第 6 步:看流水线结果](#第 6 步:看流水线结果)
- [第 7 步:解决失败未输出日志和结果文件](#第 7 步:解决失败未输出日志和结果文件)
-
- 日志文件(fast_verify.log)
- 结果文件(fast_result.txt)
- 解决方法
-
- [第一步:修改 run_fast_verify.py](#第一步:修改 run_fast_verify.py)
- 第二步:新增一个检查脚本
- [第三步:修改流水线 YAML](#第三步:修改流水线 YAML)
push 到 master 后,自动运行算法验证脚本,并上传 logs/results 作为制品。
版本1:写死 PASS
第 1 步:先在仓库里创建目录
scripts/
results/
logs/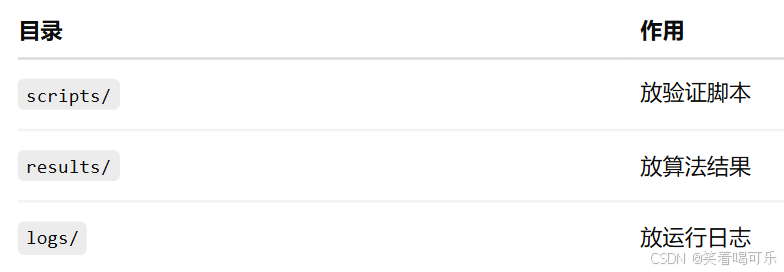
第 2 步:创建快速验证脚本
在仓库中新建文件:
scripts/run_fast_verify.py内容先写成最简单能跑通的版本:
py
import os
import time

os.makedirs("results", exist_ok=True)
os.makedirs("logs", exist_ok=True)

print("Start fast algorithm verification...")

# 模拟算法验证过程
result = {
    "status": "PASS",
    "case": "fast_verify_demo",
    "time": time.strftime("%Y-%m-%d %H:%M:%S")
}

with open("results/fast_result.txt", "w", encoding="utf-8") as f:
    f.write("Fast Algorithm Verification Result\n")
    f.write(f"Status: {result['status']}\n")
    f.write(f"Case: {result['case']}\n")
    f.write(f"Time: {result['time']}\n")

with open("logs/fast_verify.log", "w", encoding="utf-8") as f:
    f.write("Fast verification started.\n")
    f.write("Algorithm simulation finished.\n")
    f.write("Result: PASS\n")

print("Fast algorithm verification finished.")
print("Result: PASS")
提交信息写:
add fast algorithm verification script提交到 master。
第 3 步:修改 master-pipeline.yml
version: '1.0'
name: master-pipeline
displayName: 算法快速验证流水线

stages:
  - stage:
    name: compile
    displayName: 快速验证
    steps:
      - step: build@python
        name: build_python
        displayName: 运行快速算法验证
        pythonVersion: '3.9'
        artifacts:
          - name: FAST_VERIFY_ARTIFACT
            path:
              - ./results/
              - ./logs/
        commands:
          - python3 -m pip install --upgrade pip
          - pip3 config set global.index-url https://pypi.tuna.tsinghua.edu.cn/simple
          - pip3 install -r requirements.txt
          - mkdir -p results logs
          - python3 scripts/run_fast_verify.py

      - step: publish@general_artifacts
        name: publish_general_artifacts
        displayName: 上传验证结果
        dependArtifact: FAST_VERIFY_ARTIFACT
        artifactName: fast_verify_output
        dependsOn: build_python

  - stage:
    name: release
    displayName: 发布验证制品
    steps:
      - step: publish@release_artifacts
        name: publish_release_artifacts
        displayName: 发布
        dependArtifact: fast_verify_output
        version: '1.0.0.0'
        autoIncrement: true

triggers:
  push:
    branches:
      include:
        - master
提交信息写:
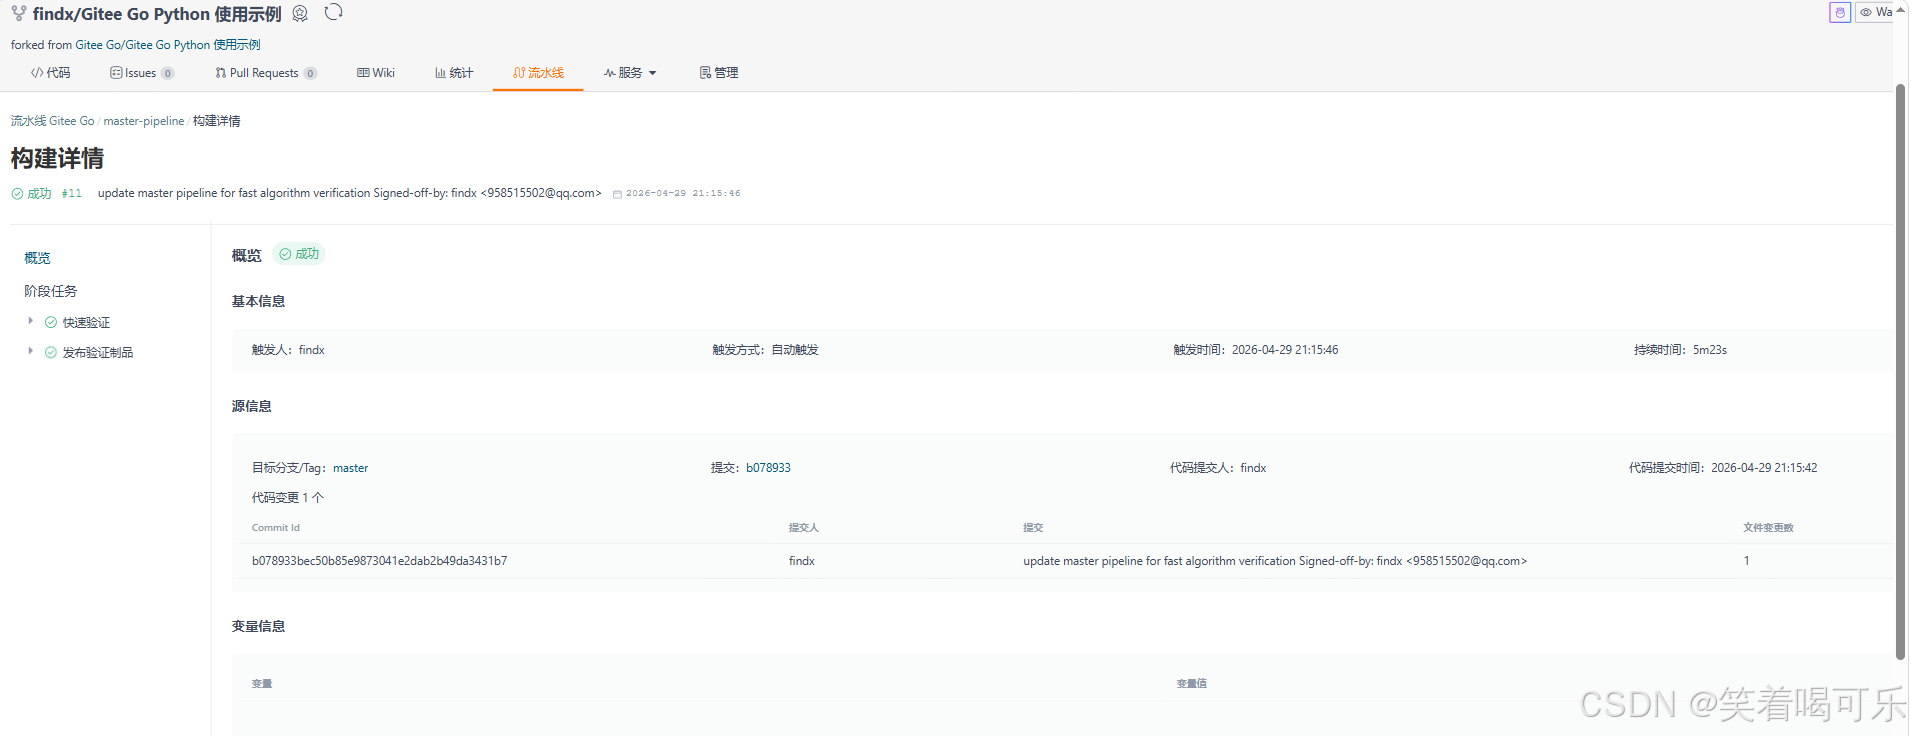
update master pipeline for fast algorithm verification第 4 步:去流水线页面看结果
日志文件(fast_verify.log)
Fast verification started.
Algorithm simulation finished.
Result: PASS
结果文件(fast_result.txt)
Fast Algorithm Verification Result
Status: PASS
Case: fast_verify_demo
Time: 2026-04-29 21:20:24
在本阶段,我基于 Gitee Go 实现了一个算法快速验证流水线。在代码提交后,流水线会自动触发,执行算法验证脚本,并生成日志和结果文件。其中日志记录算法执行过程,结果文件包含验证状态(PASS/FAIL)、测试用例及时间信息。生成的验证结果通过制品功能进行上传和版本化管理,支持下载和追溯,从而实现了从代码提交到算法验证结果输出的自动化闭环。
版本2:自动判断 PASS/FAIL
第 1 步:明确真实验证逻辑
真实算法验证一般有 3 个东西:
actual   实际算法输出
expected 期望正确结果
tolerance 允许误差
判断逻辑是:
|actual - expected| <= tolerance → PASS
|actual - expected| > tolerance  → FAIL
第 2 步:修改 scripts/run_fast_verify.py
py
import os
import time
import sys

os.makedirs("results", exist_ok=True)
os.makedirs("logs", exist_ok=True)

print("Start real fast algorithm verification...")

# =========================
# 1. 模拟算法输出
# 后续这里可以替换成你自己的真实算法函数
# =========================
def algorithm_under_test(x):
    return x * 2


# =========================
# 2. 测试用例
# =========================
test_cases = [
    {"case": "case_1", "input": 1, "expected": 2},
    {"case": "case_2", "input": 2, "expected": 4},
    {"case": "case_3", "input": 3, "expected": 6},
]

tolerance = 1e-6
all_passed = True
details = []

# =========================
# 3. 自动判断 PASS / FAIL
# =========================
for test in test_cases:
    actual = algorithm_under_test(test["input"])
    expected = test["expected"]
    error = abs(actual - expected)

    status = "PASS" if error <= tolerance else "FAIL"

    if status == "FAIL":
        all_passed = False

    details.append({
        "case": test["case"],
        "input": test["input"],
        "expected": expected,
        "actual": actual,
        "error": error,
        "status": status
    })

final_status = "PASS" if all_passed else "FAIL"
current_time = time.strftime("%Y-%m-%d %H:%M:%S")

# =========================
# 4. 写入结果文件
# =========================
with open("results/fast_result.txt", "w", encoding="utf-8") as f:
    f.write("Fast Algorithm Verification Result\n")
    f.write(f"Final Status: {final_status}\n")
    f.write(f"Time: {current_time}\n")
    f.write(f"Tolerance: {tolerance}\n")
    f.write("\nDetail Results:\n")

    for item in details:
        f.write(
            f"{item['case']} | "
            f"input={item['input']} | "
            f"expected={item['expected']} | "
            f"actual={item['actual']} | "
            f"error={item['error']} | "
            f"status={item['status']}\n"
        )

# =========================
# 5. 写入日志文件
# =========================
with open("logs/fast_verify.log", "w", encoding="utf-8") as f:
    f.write("Fast verification started.\n")
    f.write("Running algorithm test cases...\n")

    for item in details:
        f.write(
            f"[{item['status']}] {item['case']}: "
            f"input={item['input']}, "
            f"expected={item['expected']}, "
            f"actual={item['actual']}, "
            f"error={item['error']}\n"
        )

    f.write(f"Final Result: {final_status}\n")

print(f"Fast algorithm verification finished. Final Result: {final_status}")

# =========================
# 6. 关键:如果验证失败,让 CI 失败
# =========================
if not all_passed:
    sys.exit(1)
第 3 步:提交代码
提交信息写:
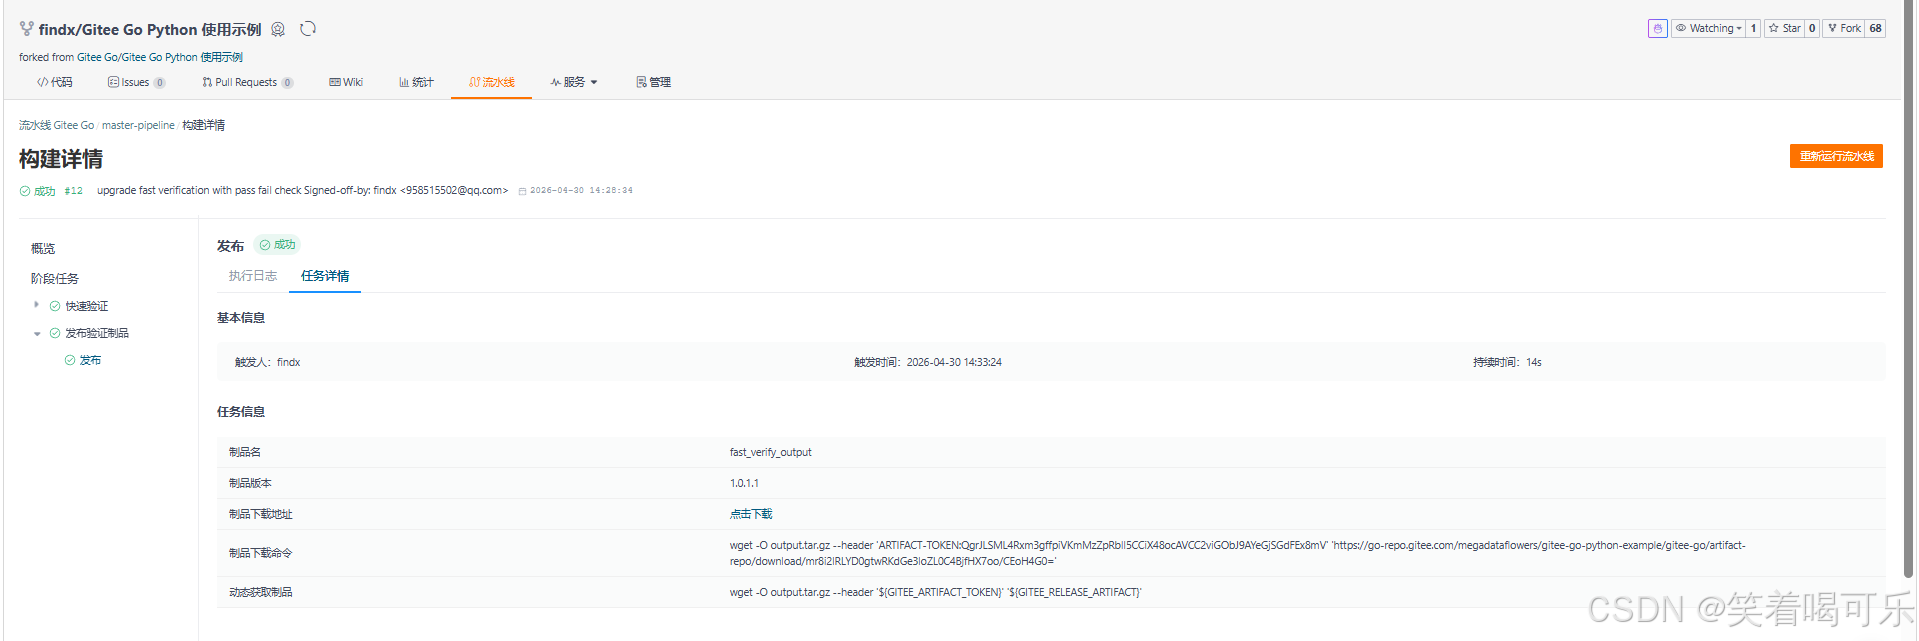
upgrade fast verification with pass fail check提交到 master。
第 4 步:看流水线结果
日志文件(fast_verify.log)
Fast verification started.
Running algorithm test cases...
[PASS] case_1: input=1, expected=2, actual=2, error=0
[PASS] case_2: input=2, expected=4, actual=4, error=0
[PASS] case_3: input=3, expected=6, actual=6, error=0
Final Result: PASS
结果文件(fast_result.txt)
Fast Algorithm Verification Result
Final Status: PASS
Time: 2026-04-30 14:33:01
Tolerance: 1e-06

Detail Results:
case_1 | input=1 | expected=2 | actual=2 | error=0 | status=PASS
case_2 | input=2 | expected=4 | actual=4 | error=0 | status=PASS
case_3 | input=3 | expected=6 | actual=6 | error=0 | status=PASS
第 5 步:故意制造一次 FAIL
为了证明我的 CI 真的会判断错误,我们故意改一个 expected。
{"case": "case_3", "input": 3, "expected": 6},改为
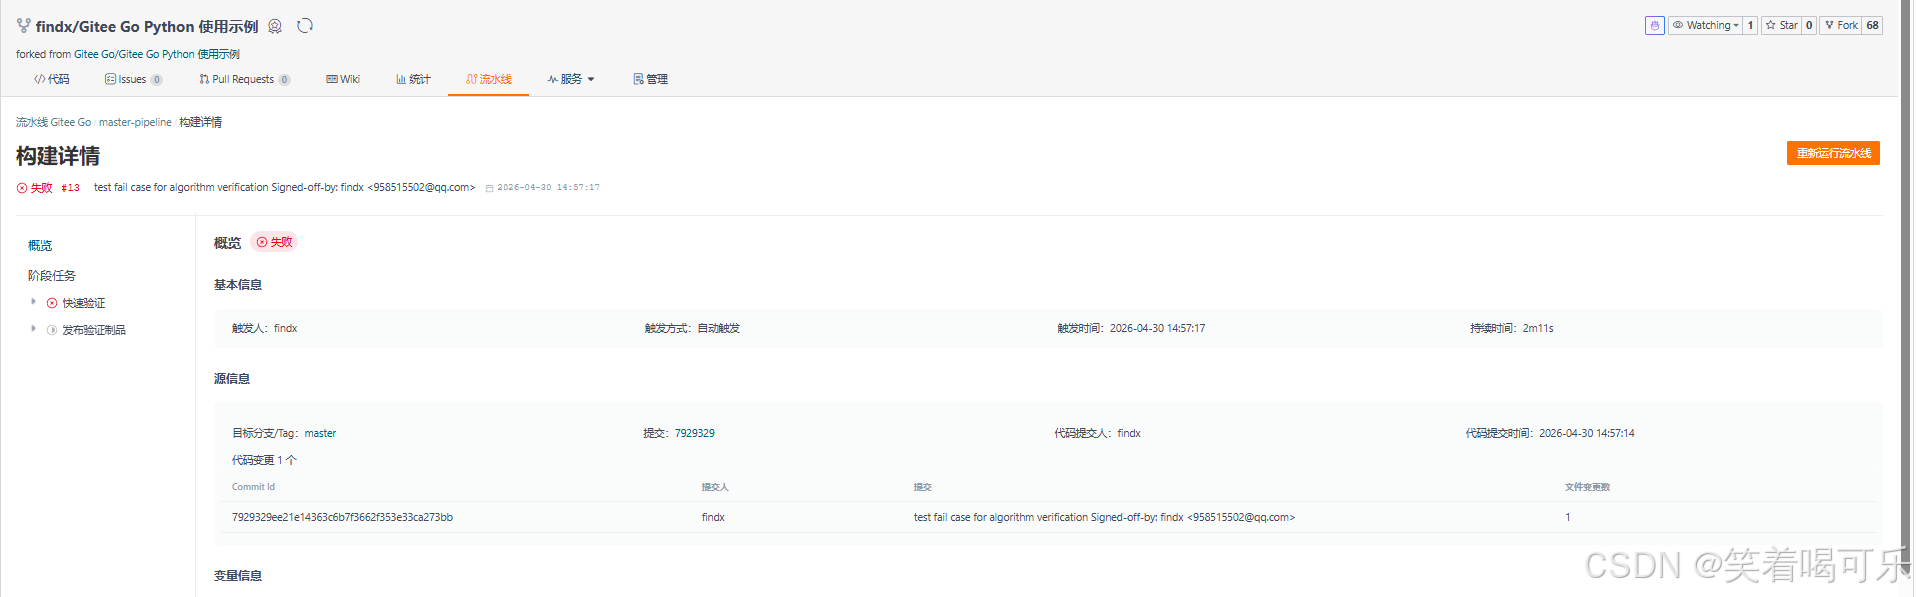
{"case": "case_3", "input": 3, "expected": 7},然后提交:
test fail case for algorithm verification第 6 步:看流水线结果
完整流程:
提交代码
   ↓
自动触发 CI
   ↓
运行算法验证
   ↓
逐个测试用例判断
   ↓
发现错误 case_3 FAIL
   ↓
Final Status = FAIL
   ↓
sys.exit(1)
   ↓
流水线失败(红色)
在算法验证流水线的基础上,我进一步实现了自动判错机制。当前流水线会对多个测试用例进行验证,并根据误差阈值判断结果是否正确。当出现错误时,流水线会自动失败,从而阻止错误结果通过。这使得 CI 从简单执行升级为具备质量门禁能力的算法验证系统。
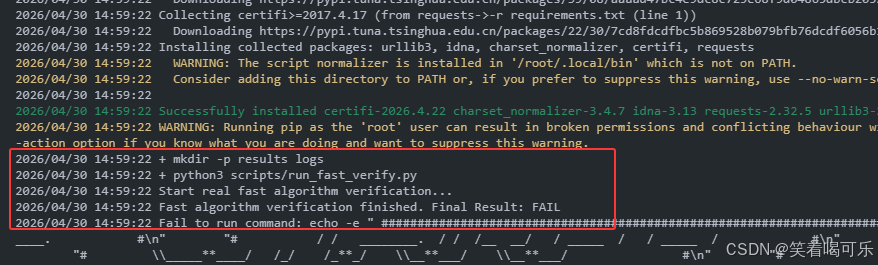
第 7 步:解决失败未输出日志和结果文件
日志文件(fast_verify.log)
Fast verification started.
Running algorithm test cases...
[PASS] case_1: input=1, expected=2, actual=2, error=0
[PASS] case_2: input=2, expected=4, actual=4, error=0
[FAIL] case_3: input=3, expected=7, actual=6, error=1
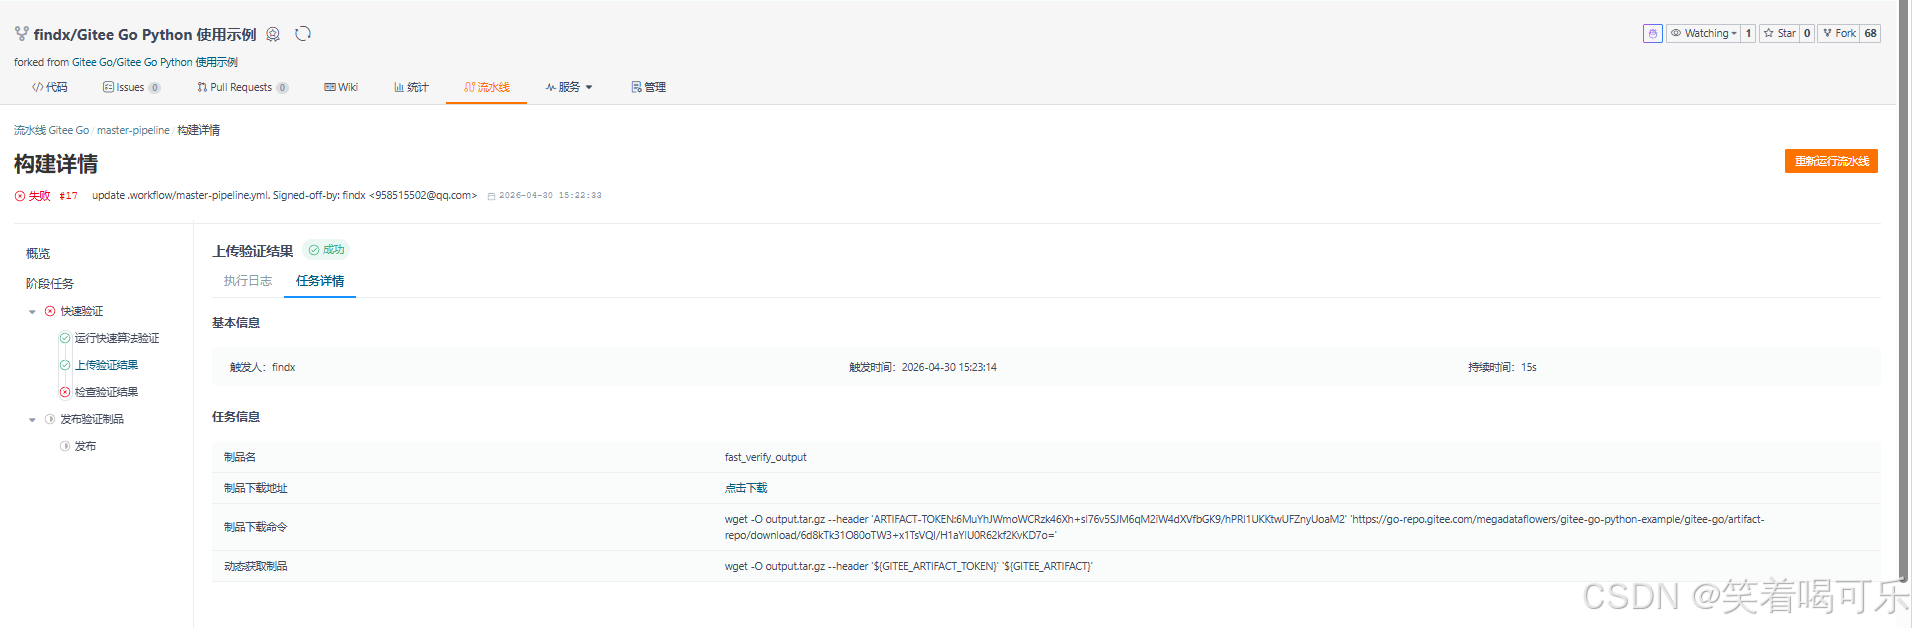
Final Result: FAIL结果文件(fast_result.txt)
Fast Algorithm Verification Result
Final Status: FAIL
Time: 2026-04-30 15:23:11
Tolerance: 1e-06

Detail Results:
case_1 | input=1 | expected=2 | actual=2 | error=0 | status=PASS
case_2 | input=2 | expected=4 | actual=4 | error=0 | status=PASS
case_3 | input=3 | expected=7 | actual=6 | error=1 | status=FAIL
流水线失败,但制品已经上传成功。
解决方法
第一步:修改 run_fast_verify.py
将
if not all_passed:
    sys.exit(1)
改为:
# 不在这里退出失败,先保证结果文件和日志能被上传
# 是否失败交给后面的 check_result.py 判断
第二步:新增一个检查脚本
新建文件
scripts/check_result.py
py
import sys

result_file = "results/fast_result.txt"

with open(result_file, "r", encoding="utf-8") as f:
    content = f.read()

print(content)

if "Final Status: FAIL" in content:
    print("Algorithm verification failed.")
    sys.exit(1)

print("Algorithm verification passed.")
第三步:修改流水线 YAML
yaml
version: '1.0'
name: master-pipeline
displayName: 算法快速验证流水线

stages:
  - stage:
    name: compile
    displayName: 快速验证
    steps:
      - step: build@python
        name: build_python
        displayName: 运行快速算法验证
        pythonVersion: '3.9'
        artifacts:
          - name: FAST_VERIFY_ARTIFACT
            path:
              - ./results/
              - ./logs/
        commands:
          - python3 -m pip install --upgrade pip
          - pip3 config set global.index-url https://pypi.tuna.tsinghua.edu.cn/simple
          - pip3 install -r requirements.txt
          - mkdir -p results logs
          - python3 scripts/run_fast_verify.py

      - step: publish@general_artifacts
        name: publish_general_artifacts
        displayName: 上传验证结果
        dependArtifact: FAST_VERIFY_ARTIFACT
        artifactName: fast_verify_output
        dependsOn: build_python

      - step: build@python
        name: check_result
        displayName: 检查验证结果
        pythonVersion: '3.9'
        dependsOn: publish_general_artifacts
        commands:
          - python3 scripts/check_result.py

  - stage:
    name: release
    displayName: 发布验证制品
    steps:
      - step: publish@release_artifacts
        name: publish_release_artifacts
        displayName: 发布
        dependArtifact: fast_verify_output
        version: '1.0.0.0'
        autoIncrement: true

triggers:
  push:
    branches:
      include:
        - master
执行流程:
验证失败 → 先写入 FAIL 文件
↓
上传 logs/results
↓
再检查结果
↓
最后让 CI 失败
流水线失败,但制品已经上传成功。