模块大致可以分为:
- Model(模型)
- View(自定义的组件,如UIView,UIControl等等)
- ViewController(页面)
- Public(公共模块)
一个ViewController至少对应一个Model
Block是界面之间传递事件用的,如传点击事件。这是最常用的
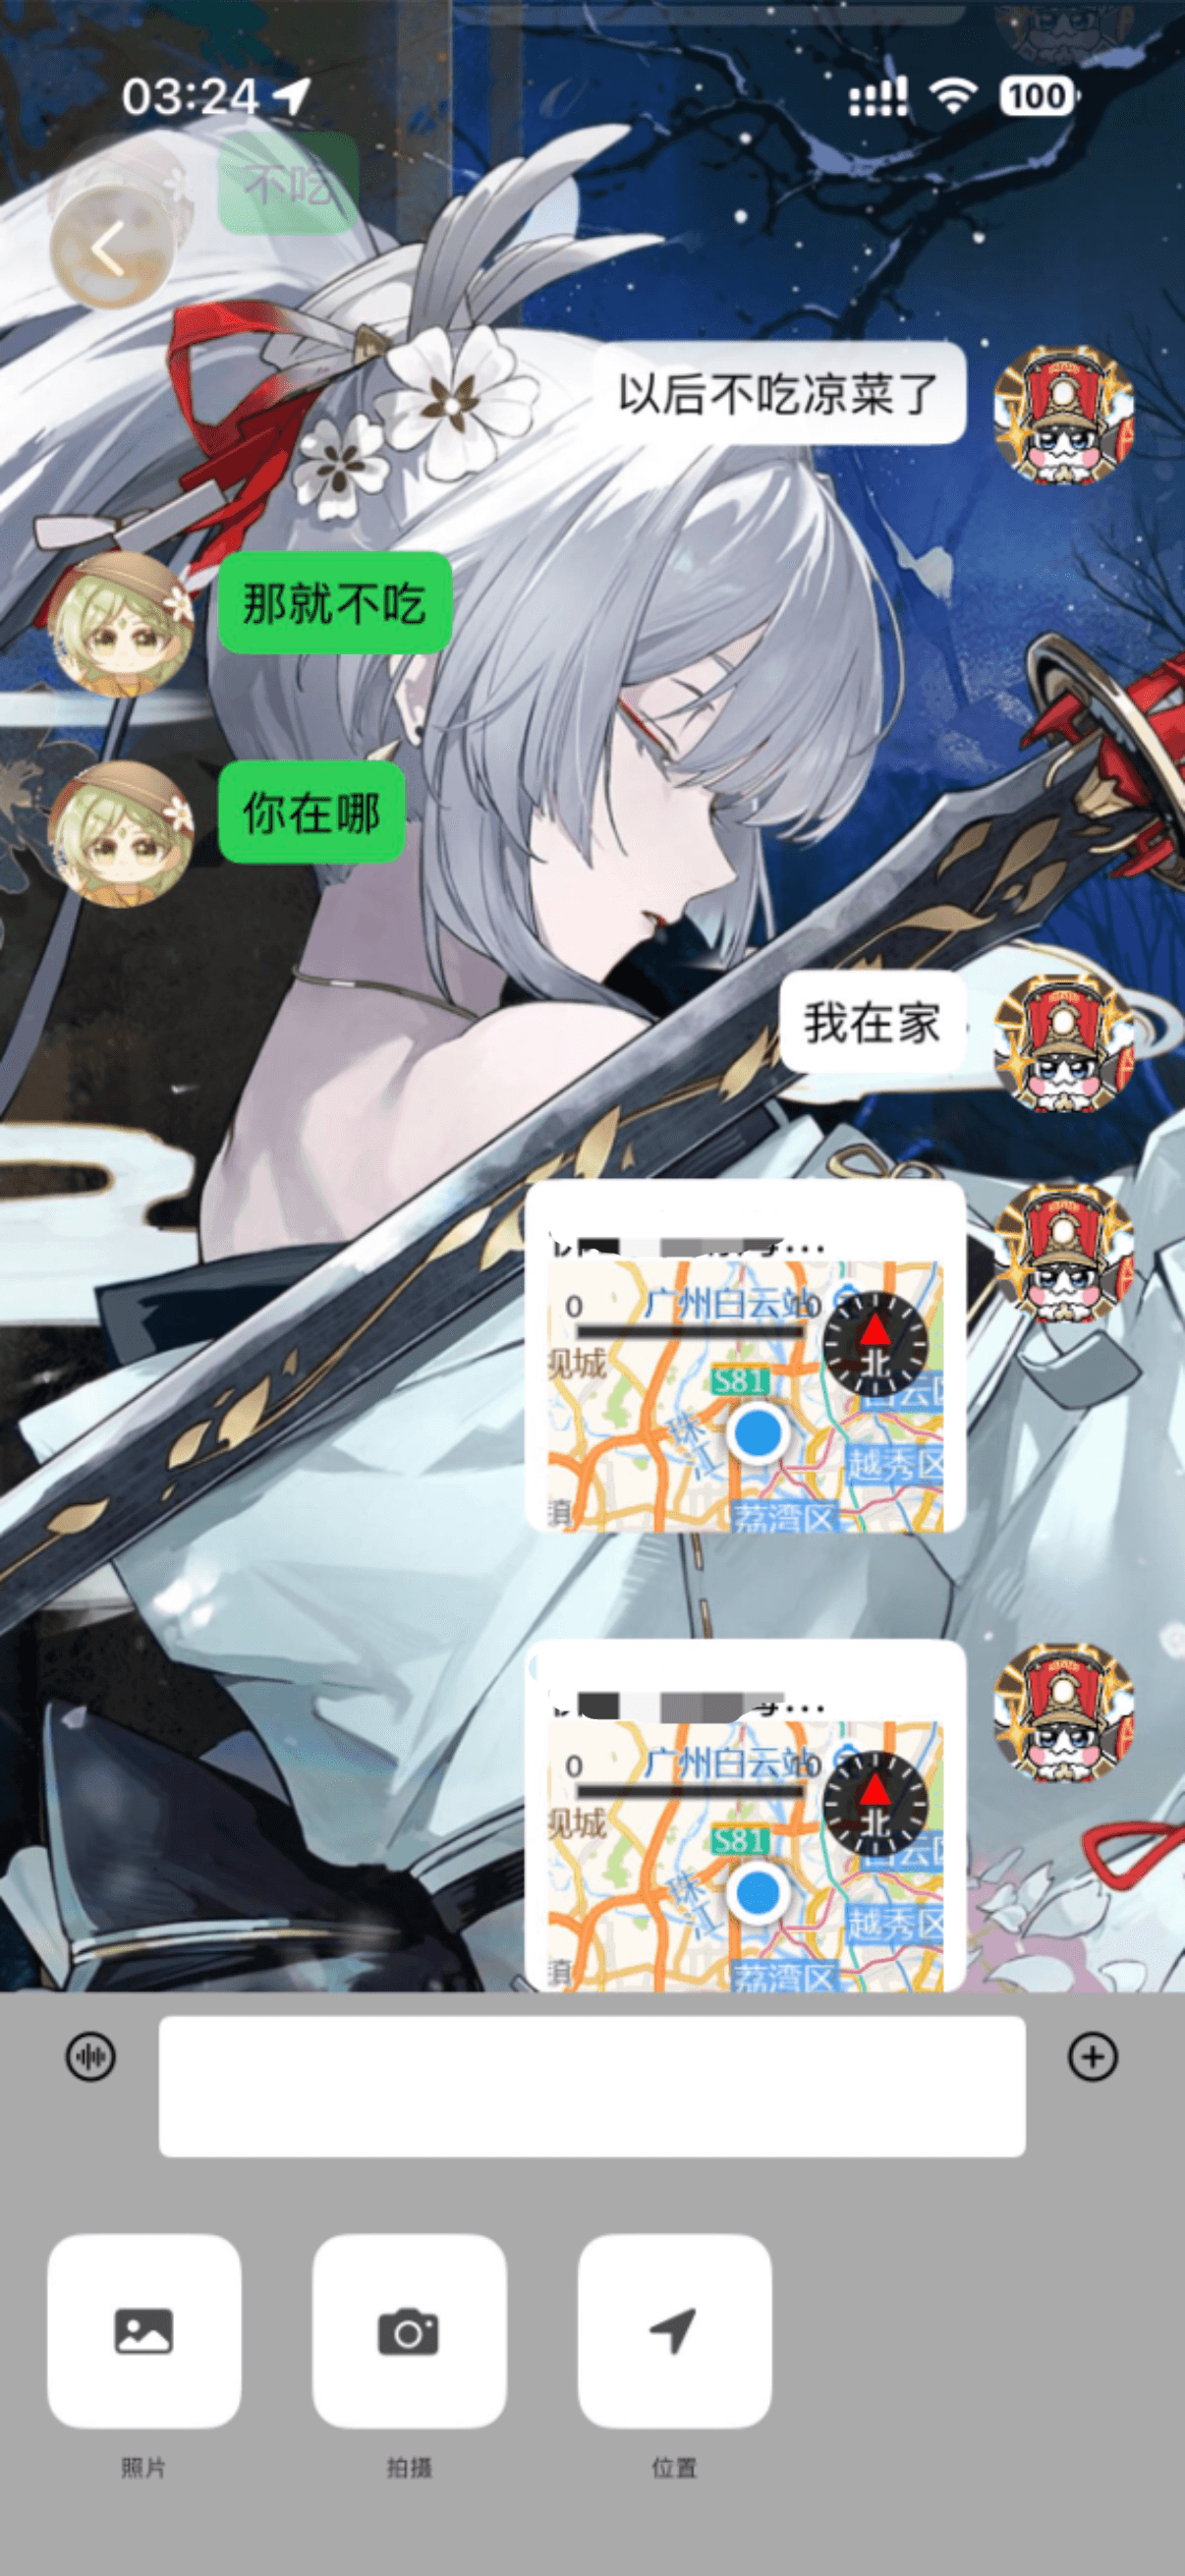
需求:在打开位置按钮时,跳转入地图页面,在点击发送时,发送一条当前定位的位置信息。
思路:
1.在聊天页面获取用户权限。
2.使用高德地图第三方库在这个界面的一部分创建一个小地图,并获取位置。
3.创建地图页面,并创建地图按钮。
4.创建定位管理页面,用定位获取用户当前经纬度,逆向编译地理数据并显示在消息中。
在聊天ViewController获取用户定位权限
加载位置需要的库,并创造位置管理器的实例。
使用CLLocationManager并设置代理的页面要继承这两个协议。
swift
CLLocationManagerDelegate,UINavigationControllerDelegate
swift
import CoreLocation
swift
let locationManager = CLLocationManager()在这里获取是因为如果没权限,也不用进下一页了。
swift
func openLocation(){
        let status = CLLocationManager.authorizationStatus()
        if status == .denied {
            showPermissionAlert()
        } else if status == .authorizedAlways || status == .authorizedWhenInUse {
            //有权限时,要干嘛
        } else {
            //没权限时,要权限
            locationManager.requestWhenInUseAuthorization()

        }

}locationManager(CLLocationManager的实例)中的.requestWhenInUseAuthorization方法是要权限的,记得查要权限的info,这里先省略了。这里的警告暂时用同一个。
把打开位置信息方法绑定到点击索引为2的图标中。
swift
lazy var moreView: MoreView = {
let moreView = MoreView(frame: .init(x: 0, y: SCREENHEIGHT - 98 - bottomSafeArea, width: SCREENWIDTH, height: 98 + bottomSafeArea))
moreView.backgroundColor = .lightGray
moreView.btnClick = { [weak self] idx in
print(idx)
if idx == 0 {
self?.openPhotoLib()
} else if idx == 1 {
self?.openCamera()
} else if idx == 2 {
self?.openLocation()
}
}
return moreView
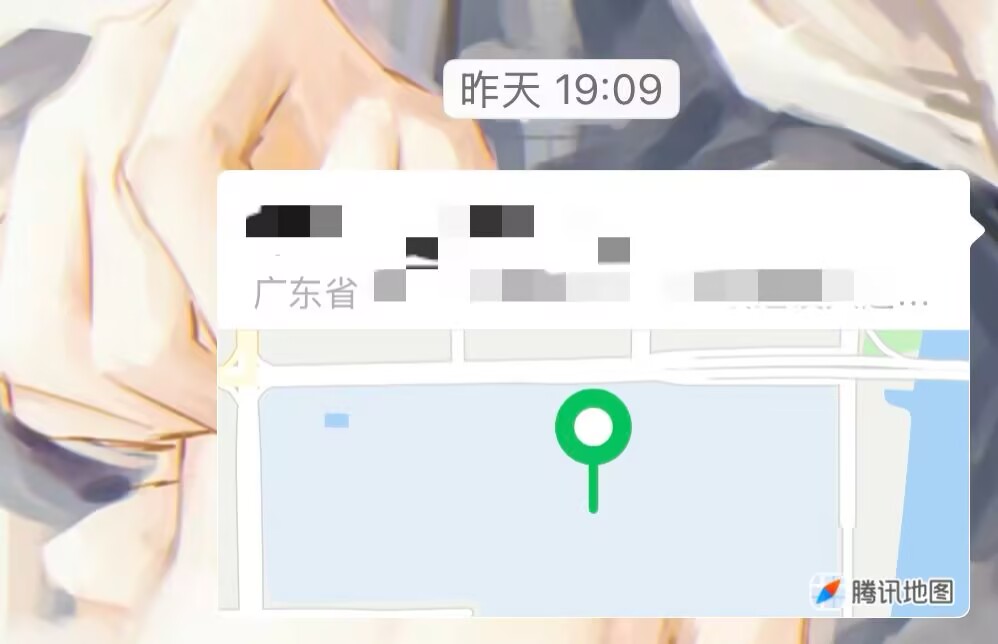
}()创建地图消息Cell
包括**user_head 头像,locationView 背景视图,addressLabel地址信息,addressreviewLabel地址信息预览,locationMap小地图。**
swift
//
//  ChatLoationCell.swift
//  lianxi2026_5_08
//
//  Created by sakiko on 2026/5/14.
//
import UIKit

class ChatLoationCell: UITableViewCell {
    override init(style: UITableViewCell.CellStyle, reuseIdentifier: String?) {
        super.init(style: style, reuseIdentifier: reuseIdentifier)
        setupUI()
    }

    required init?(coder: NSCoder) {
        fatalError("init(coder:) has not been implemented")
    }

    func setupUI(){
        addSubview(user_head)
        addSubview(locationView)
        locationView.addSubview(addressLabel)
        locationView.addSubview(addressreviewLabel)
        locationView.addSubview(locationMap)
    }
    lazy var user_head: UIImageView = {
        var user_head = UIImageView(frame: .init(origin: .init(x: SCREENWIDTH - 16 - 50, y: 0), size: .init(width: 50, height: 50)))
        user_head.layer.cornerRadius = 25
        user_head.layer.masksToBounds = true
        return user_head
    }()

    lazy var locationView: UIControl = {
        let locationView = UIControl(frame: .init(x: SCREENWIDTH - 16 - 50 - 8 - 150, y: 0, width: 150, height: 120))
        locationView.backgroundColor = .white
        locationView.layer.cornerRadius = 8
        locationView.layer.masksToBounds = true
        return locationView
    }()

    lazy var addressLabel: UILabel = {
        let addressLabel = UILabel(frame: .init(x: 8, y: 4, width: 100, height: 30))
        addressLabel.font = .systemFont(ofSize: 16)
        addressLabel.textColor = .black
        return addressLabel
    }()

    lazy var addressreviewLabel: UILabel = {
        let addressreviewLabel = UILabel(frame: .init(x: 8, y: 24, width: 150 - 8, height: 20))
        addressreviewLabel.font = .systemFont(ofSize: 8)
        addressreviewLabel.textColor = .gray
        return addressreviewLabel
    }()

    lazy var locationMap: MAMapView = {
        let locationMap = MAMapView(frame: .init(origin: .init(x: 8, y: 24 + 4), size: .init(width: 150 - 8 - 8, height: 120 - 8)))
        return locationMap
    }()
}
创建显示地图的页面MapViewController
1.地图本身
2.地图下方的留空栏
3.发送按钮
创建地图页面,加载地图。
swift
class MapViewController: UIViewController {
    var sendAdressBlock: SendAdressBlock?
    override func viewDidLoad() {
        super.viewDidLoad()
        view.addSubview(mapView)
        self.view.addSubview(selectLocation)
        self.view.addSubview(sendAddressBtn)
        LocationManager.shared.setupLocationManager()

    }

    override func viewDidDisappear(_ animated: Bool) {
        super.viewDidDisappear(animated)
        LocationManager.shared.stop()
    }

    lazy var mapView: MAMapView = {
        let mapView = MAMapView(frame: .init(origin: .zero, size: .init(width: SCREENWIDTH, height: SCREENHEIGHT - 200)))
        mapView.isShowsUserLocation = true
        mapView.userTrackingMode = .follow
        return mapView
    }()

    lazy var selectLocation: UIView = {
        let selectLocation = UIView(frame: .init(x: 0, y: SCREENHEIGHT - 200, width: SCREENWIDTH, height: 200))
        selectLocation.backgroundColor = .white
        return selectLocation
    }()
然后为发送按钮添加一个点击事件。
swift
 lazy var sendAddressBtn: UIButton = {
        let sendAddressBtn = UIButton(frame: .init(x: SCREENWIDTH - 16 - 50, y: SCREENHEIGHT - 80, width: 50, height: 30))
        sendAddressBtn.setTitle("发送", for: .normal)
        sendAddressBtn.layer.cornerRadius = 8
        sendAddressBtn.layer.masksToBounds = true
        sendAddressBtn.backgroundColor = .systemGreen
        sendAddressBtn.addTarget(self, action: #selector(sendAddress), for: .touchUpInside)
        return sendAddressBtn
    }()

    @objc func sendAddress() {

    }
这个点击事件要处理两个操作:
1.跳转回前一个页面
2.执行发送地址的操作,要传递很多参数,肯定不能直接在这一页写完。所以我们用一个回调去传递闭包内容。但是现在还不清楚要传递什么参数,因为具体的操作还没写,先留空。
当该页面退出时,执行停止获取位置的操作。这个函数是diddisappear
swift
override func viewDidDisappear(_ animated: Bool) {
        super.viewDidDisappear(animated)
        LocationManager.shared.stopLocation()
    }
在LocationManager中创建的获取地址方法还没有被调用,在这页面被调用,进到这个页面就开始获取地址
swift
override func viewDidLoad() {
        super.viewDidLoad()
        view.addSubview(mapView)
        self.view.addSubview(selectLocation)
        self.view.addSubview(sendAddressBtn)
        LocationManager.shared.setupLocationManager()

}点击时的操作:新开一个页面LocationManager管理
初始化位置管理器,需要设置代理为它自己,还需要开始更新地址。因为定位很耗电,所以不能一直开着,只能需要的时候打开。
既然设置代理,这个类必须继承**CLLocationManagerDelegate协议。**
然后会跳出这个提示:
Cannot declare conformance to 'NSObjectProtocol' in Swift; 'LocationManager' should inherit 'NSObject' instead表示这个类不支持Swift直接继承,要从NSObject继承。
需要处理以下变量:经度、纬度、地址信息。
需要通过位置信息获取用户的经纬度,然后逆向获取用户的定位。
既然要使用CLLocation的方法获取定位,创建它的实例再使用。
获取逆地理编码的类叫CLGeocoder,创建它的实例。
swift
class LocationManager: NSObject, CLLocationManagerDelegate {
    var locationManager = CLLocationManager()
    let geocoder = CLGeocoder()
    var lat: CGFloat = 0.0
    var lon: CGFloat = 0.0
    var address: String = ""
}
当我们要调用一个类中的方法的时候,且一次传递的只有一个实例的时候,我们可以使用单例模式。这里的方法必须要被上一个具体的地图页面调用。
swift
static let shared = LocationManager()开始更新位置信息才能获取当前地址信息。
这是初始化的部分setupLocationManager
swift
func setupLocationManager() {
        locationManager.delegate = self
        locationManager.startUpdatingLocation()
    }
输入didUpdateLocations,当位置更新时调用该函数。
swift
func locationManager(_ manager: CLLocationManager, didUpdateLocations locations: [CLLocation]) {
        guard let location = locations.last else { return }

    }
使用 guard 语句安全地获取 locations 数组的最后一个元素(即最新的位置)
使用反地理编码方法
swift
geocoder.reverseGeocodeLocation(location){ placemarks, error in调用 CLGeocoder 的 reverseGeocodeLocation(_:completionHandler:) 方法,传入刚才获取的 location。
这个方法是异步的,它会开始反地理编码操作,并在完成时调用提供的闭包(closure),该闭包接收两个参数:placemarks 和 error。
错误Contextual type for closure argument list expects 2 arguments, which cannot be implicitly ignored闭包期待接受两个参数,点击apply。处理错误信息,确保地址存在的时候才继续进行。
swift
geocoder.reverseGeocodeLocation(location) { placemarks ,error in
            if let error = error {
                print("Error during reverse geocoding: \(error.localizedDescription)")
                return
            }
            guard let placemark = placemarks?.first else {
                print("No placemarks found.")
                return
guard let placemark = placemarks?.first else- 作用 : 尝试从
placemarks数组中获取第一个元素,指的是解析出的地址信息。 - 处理 : 如果
placemarks数组为空(即没有找到可用的地址),则打印出 "No placemarks found." 并返回。
分别获取地址的部分,把地址部分拼接起来。然后再把获取到的经纬度赋值给对应的变量。
swift
let locality = placemark.locality
            let subLocality = placemark.subLocality
            let thoroughfare = placemark.thoroughfare
            self.address = "\(locality ?? "")\(subLocality ?? "")\(thoroughfare ?? "")"
            self.lat = location.coordinate.latitude
            self.lon = location.coordinate.longitude
在获取地址后停止更新定位:避免过度耗电
swift
func stopLocation() {
        locationManager.stopUpdatingLocation()
    }
页面管理,参数传递。回调的使用:思路
烧烤一下,现在我们要把地址和经纬度作为参数传出去,在获取地址的时候使用。
↓
而获取地址是在MapViewController里进行的,一次传多个参数,考虑用Model来处理。
↓
在MapViewController里,我们获取了用户的地址,现在要接收来自LocationManager的参数。
↓
因为在LocationManager里不好将对应的地址信息添加ChatModel中并通过Cell来渲染(这个操作一直都是在聊天的主页面进行的)。
↓
所以我们在MapViewController里添加一个回调,参数为LocationManager传过来的包含多个参数的Model。在主页面ChatViewController再为闭包填充内容
(其实回调就是不停把东西用闭包的形式抛给别人负责)
先在LocationManager里创建一个小型的Model,包含需要传递的参数。命名就和需要传递的参数一样。
swift
 struct AddressBase {
    var lat: CGFloat = 0.0
    var lon: CGFloat = 0.0
    var address: String = ""
}
再在MapViewController里创建一个接收这个参数的Block
swift
typealias SendAddressBlock = ((AddressBase) -> ())
var sendAddressBlock: SendAddressBlock?
便于阅读
并设为发送按钮的点击事件,将LocationManager的地址及经纬度作为参数传过来。
swift
 @objc func sendAddress() {
        sendAddressBlock?(AddressBase(lat: LocationManager.shared.lat, lon: LocationManager.shared.lon, address: LocationManager.shared.address))
    }
确保点击发送之后,回退到上一页面。返回到上一个视图控制器,并将当前视图控制器从导航堆栈中移除。
swift
self.navigationController?.popViewController(animated: true)再烧烤,现在已经把参数传到MapViewController了,现在要在ChatViewController接收并处理这个回调。
在成功获取到定位权限的时候直接处理,就在openLocation方法里处理。
创建MapViewController的实例,调用回调Block,在闭包里传参数进去,这个参数的类型是AddressBase(Model),名字随便取。
现在我们要把参数添加到ChatModel里,方便Cell渲染的时候用。于是在ChatModel中添加三个参数,address、latitude、longitude。
swift
else if status == .authorizedAlways || status == .authorizedWhenInUse {
            //有权限时,要干嘛
            let mapVC = MapViewController()
            mapVC.sendAddressBlock = { addressBase in
                let model = self.chatModels[0]
                let messageID = "\(self.chatModels.count + 1)"
                let newmodel = ChatModel(chatID: self.messCellmodel.chatID, messageID: messageID, content: "", target: "mine", mineHead: model.mineHead, otherHead: model.otherHead, type: "location", address: addressBase.address, latitude: addressBase.lat, longitude: addressBase.lon)
                self.chatModels.append(newmodel)
                self.chat_scrollView.reloadData()
                self.chat_scrollView.scrollToRow(at: .init(row: self.chatModels.count - 1, section: 0), at: .bottom, animated: true)
            }
        }
同时把点击跳转进地图页面的操作也添加进去。
swift
self.navigationController?.pushViewController(mapVC, animated: true)最后一步,用新Model去渲染ChatLocationCell
swift
else {
            let cell: ChatLoationCell = tableView.cellForRow(at: indexPath) as? ChatLoationCell ?? ChatLoationCell(style: .default, reuseIdentifier: "ChatLocationCell")
            cell.addressLabel.text = model.address
            cell.user_head.image = UIImage(named: model.mineHead)
            cell.selectionStyle = .none
            cell.backgroundColor = .clear
然后通过高德地图的API设置一下地图的蓝点, 其他部分和普通的cell一致。
swift
let cell: ChatLoationCell = tableView.cellForRow(at: indexPath) as? ChatLoationCell ?? ChatLoationCell(style: .default, reuseIdentifier: "ChatLocationCell")
            cell.addressLabel.text = model.address
            cell.user_head.image = UIImage(named: model.mineHead)
            cell.selectionStyle = .none
            cell.backgroundColor = .clear

            cell.locationMap.setCenter(.init(latitude: model.latitude, longitude: model.longitude), animated: true)
            cell.locationMap.isShowsUserLocation = true
            return cell
!