一、前言
在将Java后端的基本功打扎实后,我将学习目前更加前沿的Agent开发领域,Agent开发本质其实只是后端技术的延伸,需要和后端技术配合才能发挥真正的功效,所以在进行AI领域开发前,我已经完成了很多个纯后端的业务项目了。
本项目比较偏向于Agent更底层的实现,通过项目实战了解RAG、MCP等AI基本概念来为后续的项目打下基础。
二、环境搭建
这个部分的难点主要在于部署Ollama和DeepSeek 上,本项目需要用到redis、ollama、pgvector的镜像和容器。所以需要提前部署。
1.拉镜像创容器
拉镜像:
bash
docker pull ollama/ollama:0.5.10
docker pull redis:6.2
docker pull pgvector/pgvector:v0.5.0
注意,这里的pgvector可能无法拉取,可以使用下面镜像代替:
bash
docker pull registry.cn-hangzhou.aliyuncs.com/xfg-studio/pgvector:v0.5.0创建容器:
bash
docker run -d \
  --name ollama \
  --restart unless-stopped \
  -p 11434:11434 \
  --network my-network \
  ollama/ollama:0.5.10
bash
docker run -d \
  --name vector_db \
  --restart always \
  -e POSTGRES_USER=postgres \
  -e POSTGRES_PASSWORD=postgres \
  -e POSTGRES_DB=springai \
  -e PGPASSWORD=postgres \
  -v ./pgvector/sql/init.sql:/docker-entrypoint-initdb.d/init.sql \
  -p 5432:5432 \
  --network my-network \
  --health-cmd "pg_isready -U postgres -d vector_store" \
  --health-interval 2s \
  --health-timeout 20s \
  --health-retries 10 \
  --log-opt max-size=10m \
  --log-opt max-file=3 \
  pgvector/pgvector:v0.5.0
redis的容器其实可以将就以前的,所以这里不额外写了。
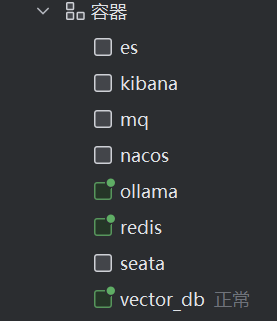
创建好后如下:
2.部署deepseek
进入ollama的终端,拉取deepseek模型(选用小一点的deepseek-r1:1.5b模型,否则会产生更大的内存消耗,导致虚拟机卡顿)
bash
# 拉取模型,推荐小一点,够做开发就可以
ollama pull deepseek-r1:1.5b
# (可选)运行模型,运行后关闭,继续安装模型。Ctrl/Command + D
ollama run deepseek-r1:1.5b
# 向量文本
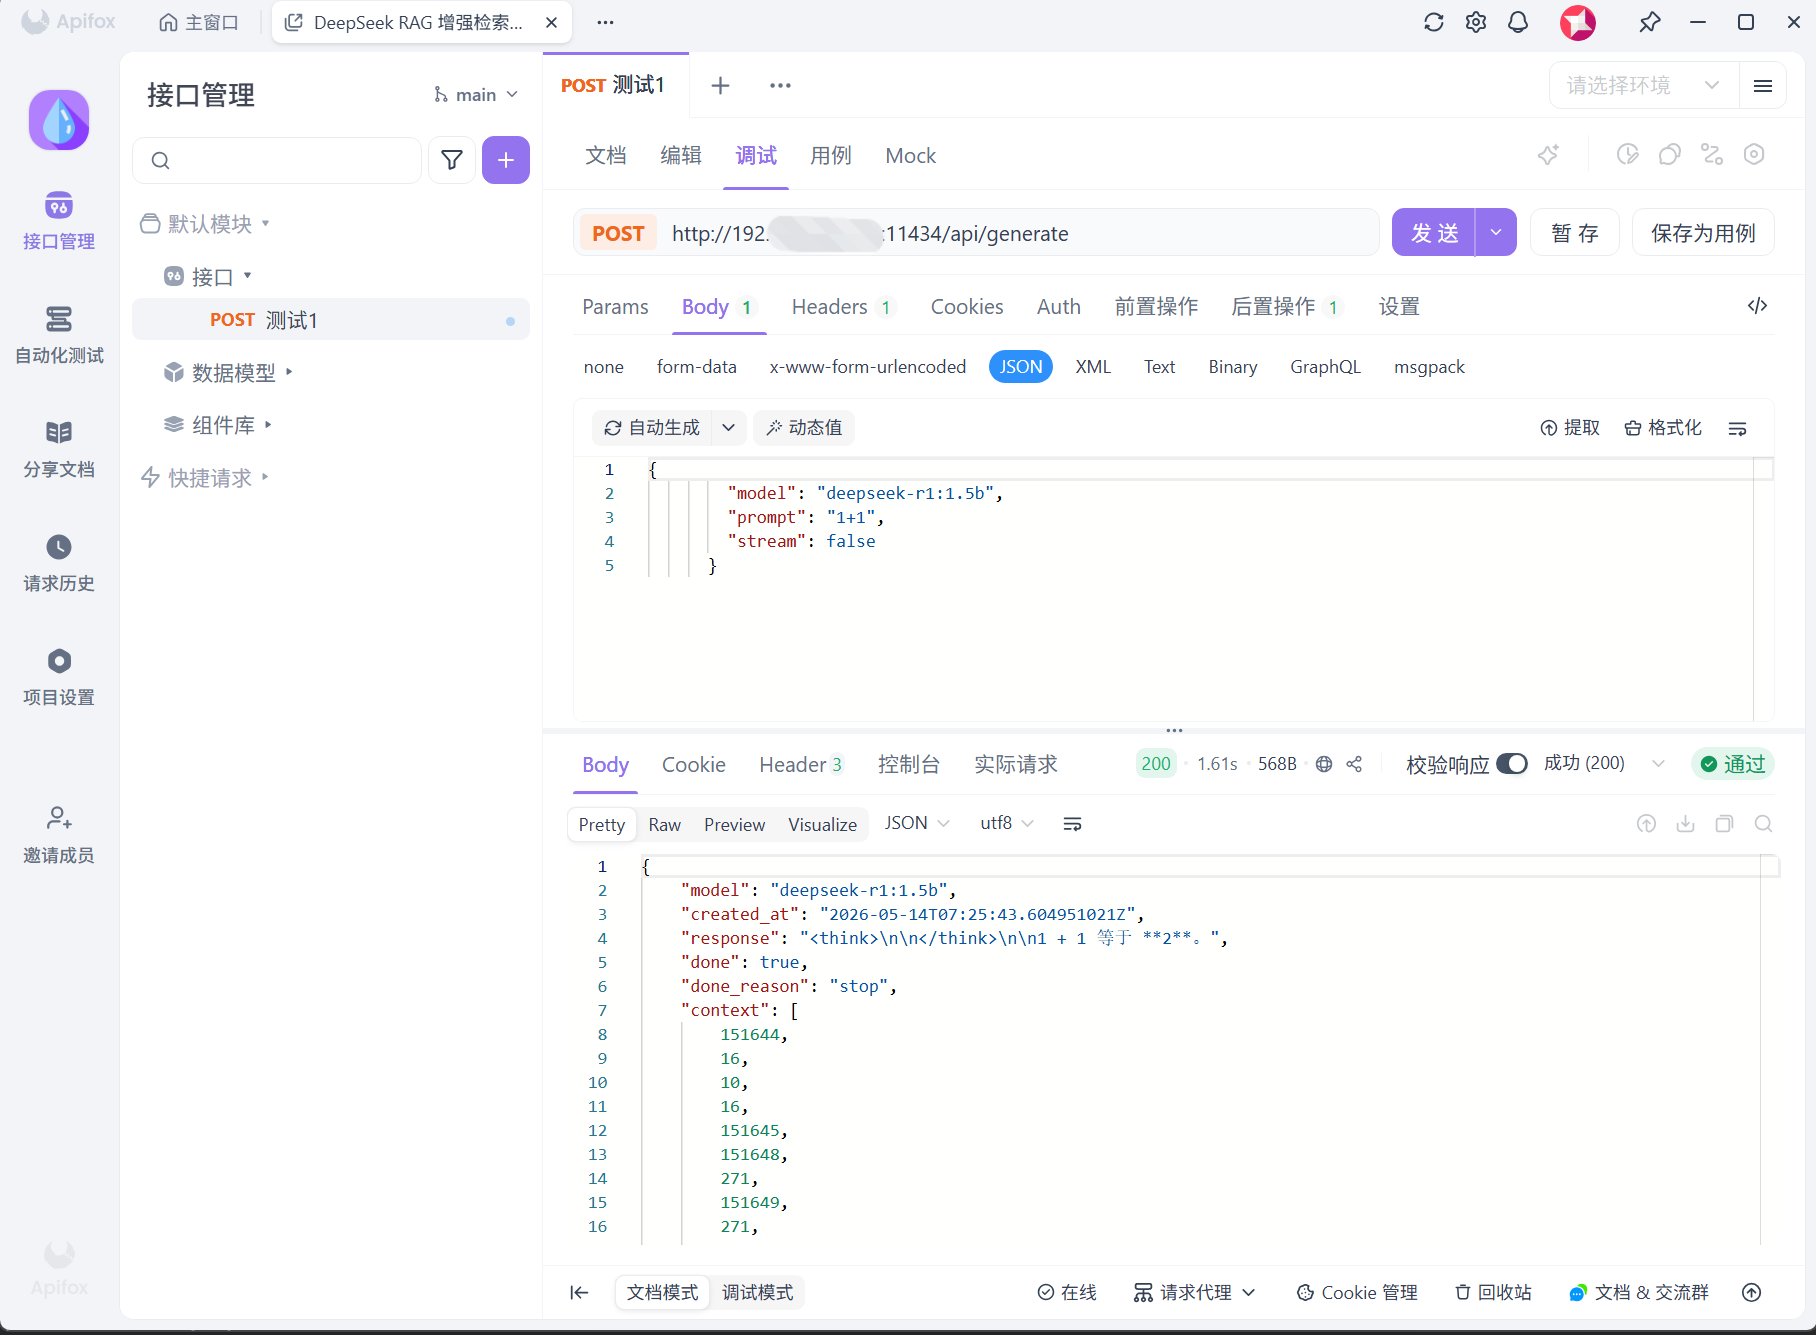
ollama pull nomic-embed-text3.测试大模型
通过这个接口在Apifox中尝试调用虚拟机中的deepseek,让它回答1+1等于几:
bash
curl http://192.168.xxx.xxx:11434/api/generate \
  -H "Content-Type: application/json" \
  -d '{
        "model": "deepseek-r1:1.5b",
        "prompt": "1+1",
        "stream": false
      }'
三、流式响应接口
1.基本配置
Redis的配置:
java
/**
 * Redis 客户端,使用 Redisson <a href="https://github.com/redisson/redisson">Redisson</a>
 *
 */
@Configuration
@EnableConfigurationProperties(RedisClientConfigProperties.class)
public class RedisClientConfig {

    @Bean("redissonClient")
    public RedissonClient redissonClient(ConfigurableApplicationContext applicationContext, RedisClientConfigProperties properties) {
        Config config = new Config();
        // 根据需要可以设定编解码器;https://github.com/redisson/redisson/wiki/4.-%E6%95%B0%E6%8D%AE%E5%BA%8F%E5%88%97%E5%8C%96
        config.setCodec(JsonJacksonCodec.INSTANCE);

        config.useSingleServer()
                .setAddress("redis://" + properties.getHost() + ":" + properties.getPort())
                .setPassword(properties.getPassword())
                .setConnectionPoolSize(properties.getPoolSize())
                .setConnectionMinimumIdleSize(properties.getMinIdleSize())
                .setIdleConnectionTimeout(properties.getIdleTimeout())
                .setConnectTimeout(properties.getConnectTimeout())
                .setRetryAttempts(properties.getRetryAttempts())
                .setRetryInterval(properties.getRetryInterval())
                .setPingConnectionInterval(properties.getPingInterval())
                .setKeepAlive(properties.isKeepAlive())
                .setDatabase(properties.getDatabase())
        ;

        return Redisson.create(config);
    }

}
java
@Data
@ConfigurationProperties(prefix = "redis.sdk.config", ignoreInvalidFields = true)
public class RedisClientConfigProperties {

    /** host:ip */
    private String host;
    /** 端口 */
    private int port;
    /** 账密 */
    private String password = "123";
    /** 设置连接池的大小,默认为64 */
    private int poolSize = 64;
    /** 设置连接池的最小空闲连接数,默认为10 */
    private int minIdleSize = 10;
    /** 设置连接的最大空闲时间(单位:毫秒),超过该时间的空闲连接将被关闭,默认为10000 */
    private int idleTimeout = 10000;
    /** 设置连接超时时间(单位:毫秒),默认为10000 */
    private int connectTimeout = 10000;
    /** 设置连接重试次数,默认为3 */
    private int retryAttempts = 3;
    /** 设置连接重试的间隔时间(单位:毫秒),默认为1000 */
    private int retryInterval = 1000;
    /** 设置定期检查连接是否可用的时间间隔(单位:毫秒),默认为0,表示不进行定期检查 */
    private int pingInterval = 0;
    /** 设置是否保持长连接,默认为true */
    private boolean keepAlive = true;
    /** 数据库索引,默认为0 */
    private int database = 1;

}
Ollama的配置:
java
@Configuration
public class OllamaConfig {

    @Bean
    public OllamaApi ollamaApi(@Value("${spring.ai.ollama.base-url}") String baseUrl) {
        return new OllamaApi(baseUrl);
    }

    @Bean
    public OllamaChatClient ollamaChatClient(OllamaApi ollamaApi) {
        return new OllamaChatClient(ollamaApi);
    }

}
2.响应接口
接口:调用SpringAI的API。
java
/**
 * @author 印东升
 * @description
 * @create 2026-05-14 15:47
 */
public interface IAiService {

    ChatResponse generate(String model, String message);

    Flux<ChatResponse> generateStream(String model, String message);

}
实现:这里我们为了突出功能编写,所以简化了结构,就选择只用两层架构去做了。
java
/**
* @author 印东升
* @description
* @create 2026-05-14 15:50
*/
@RestController
@CrossOrigin("*")
@RequestMapping("/api/v1/ollama/")
public class OllamaController implements IAiService {
@Resource
private OllamaChatClient chatClient;
/**
* http://localhost:8090/api/v1/ollama/generate?model=deepseek-r1:1.5b&message=1+1
*/
@RequestMapping(value = "generate",method = RequestMethod.GET)
@Override
public ChatResponse generate(@RequestParam String model, @RequestParam String message) {
return chatClient.call(new Prompt(message, OllamaOptions.create().withModel(model)));
}
/**
* http://localhost:8090/api/v1/ollama/generate_stream?model=deepseek-r1:1.5b&message=hi
*/
@RequestMapping(value = "generate_stream",method = RequestMethod.GET)
@Override
public Flux<ChatResponse> generateStream(@RequestParam String model, @RequestParam String message) {
return chatClient.stream(new Prompt(message, OllamaOptions.create().withModel(model)));
}
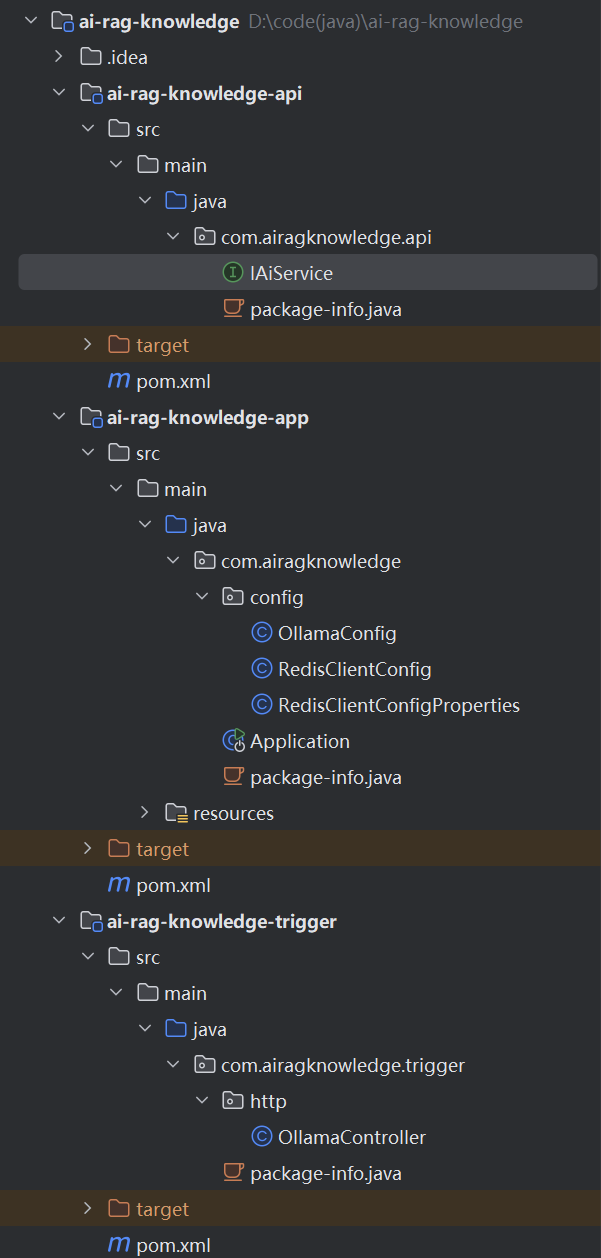
}项目整体结构如下:
3.流式响应和非流式响应的区别
java
    //非流式响应接口
    ChatResponse generate(String model, String message);
    //流式响应接口
    Flux<ChatResponse> generateStream(String model, String message);
**非流式:**后端等大模型把完整答案生成完,再一次性把完整结果返回给前端。用户体验上就是"等一会儿,然后整段出现"。
**流式:**大模型边生成,后端边把内容一小段一小段推给前端。用户体验上就是 ChatGPT 那种"字一点点冒出来"的效果。
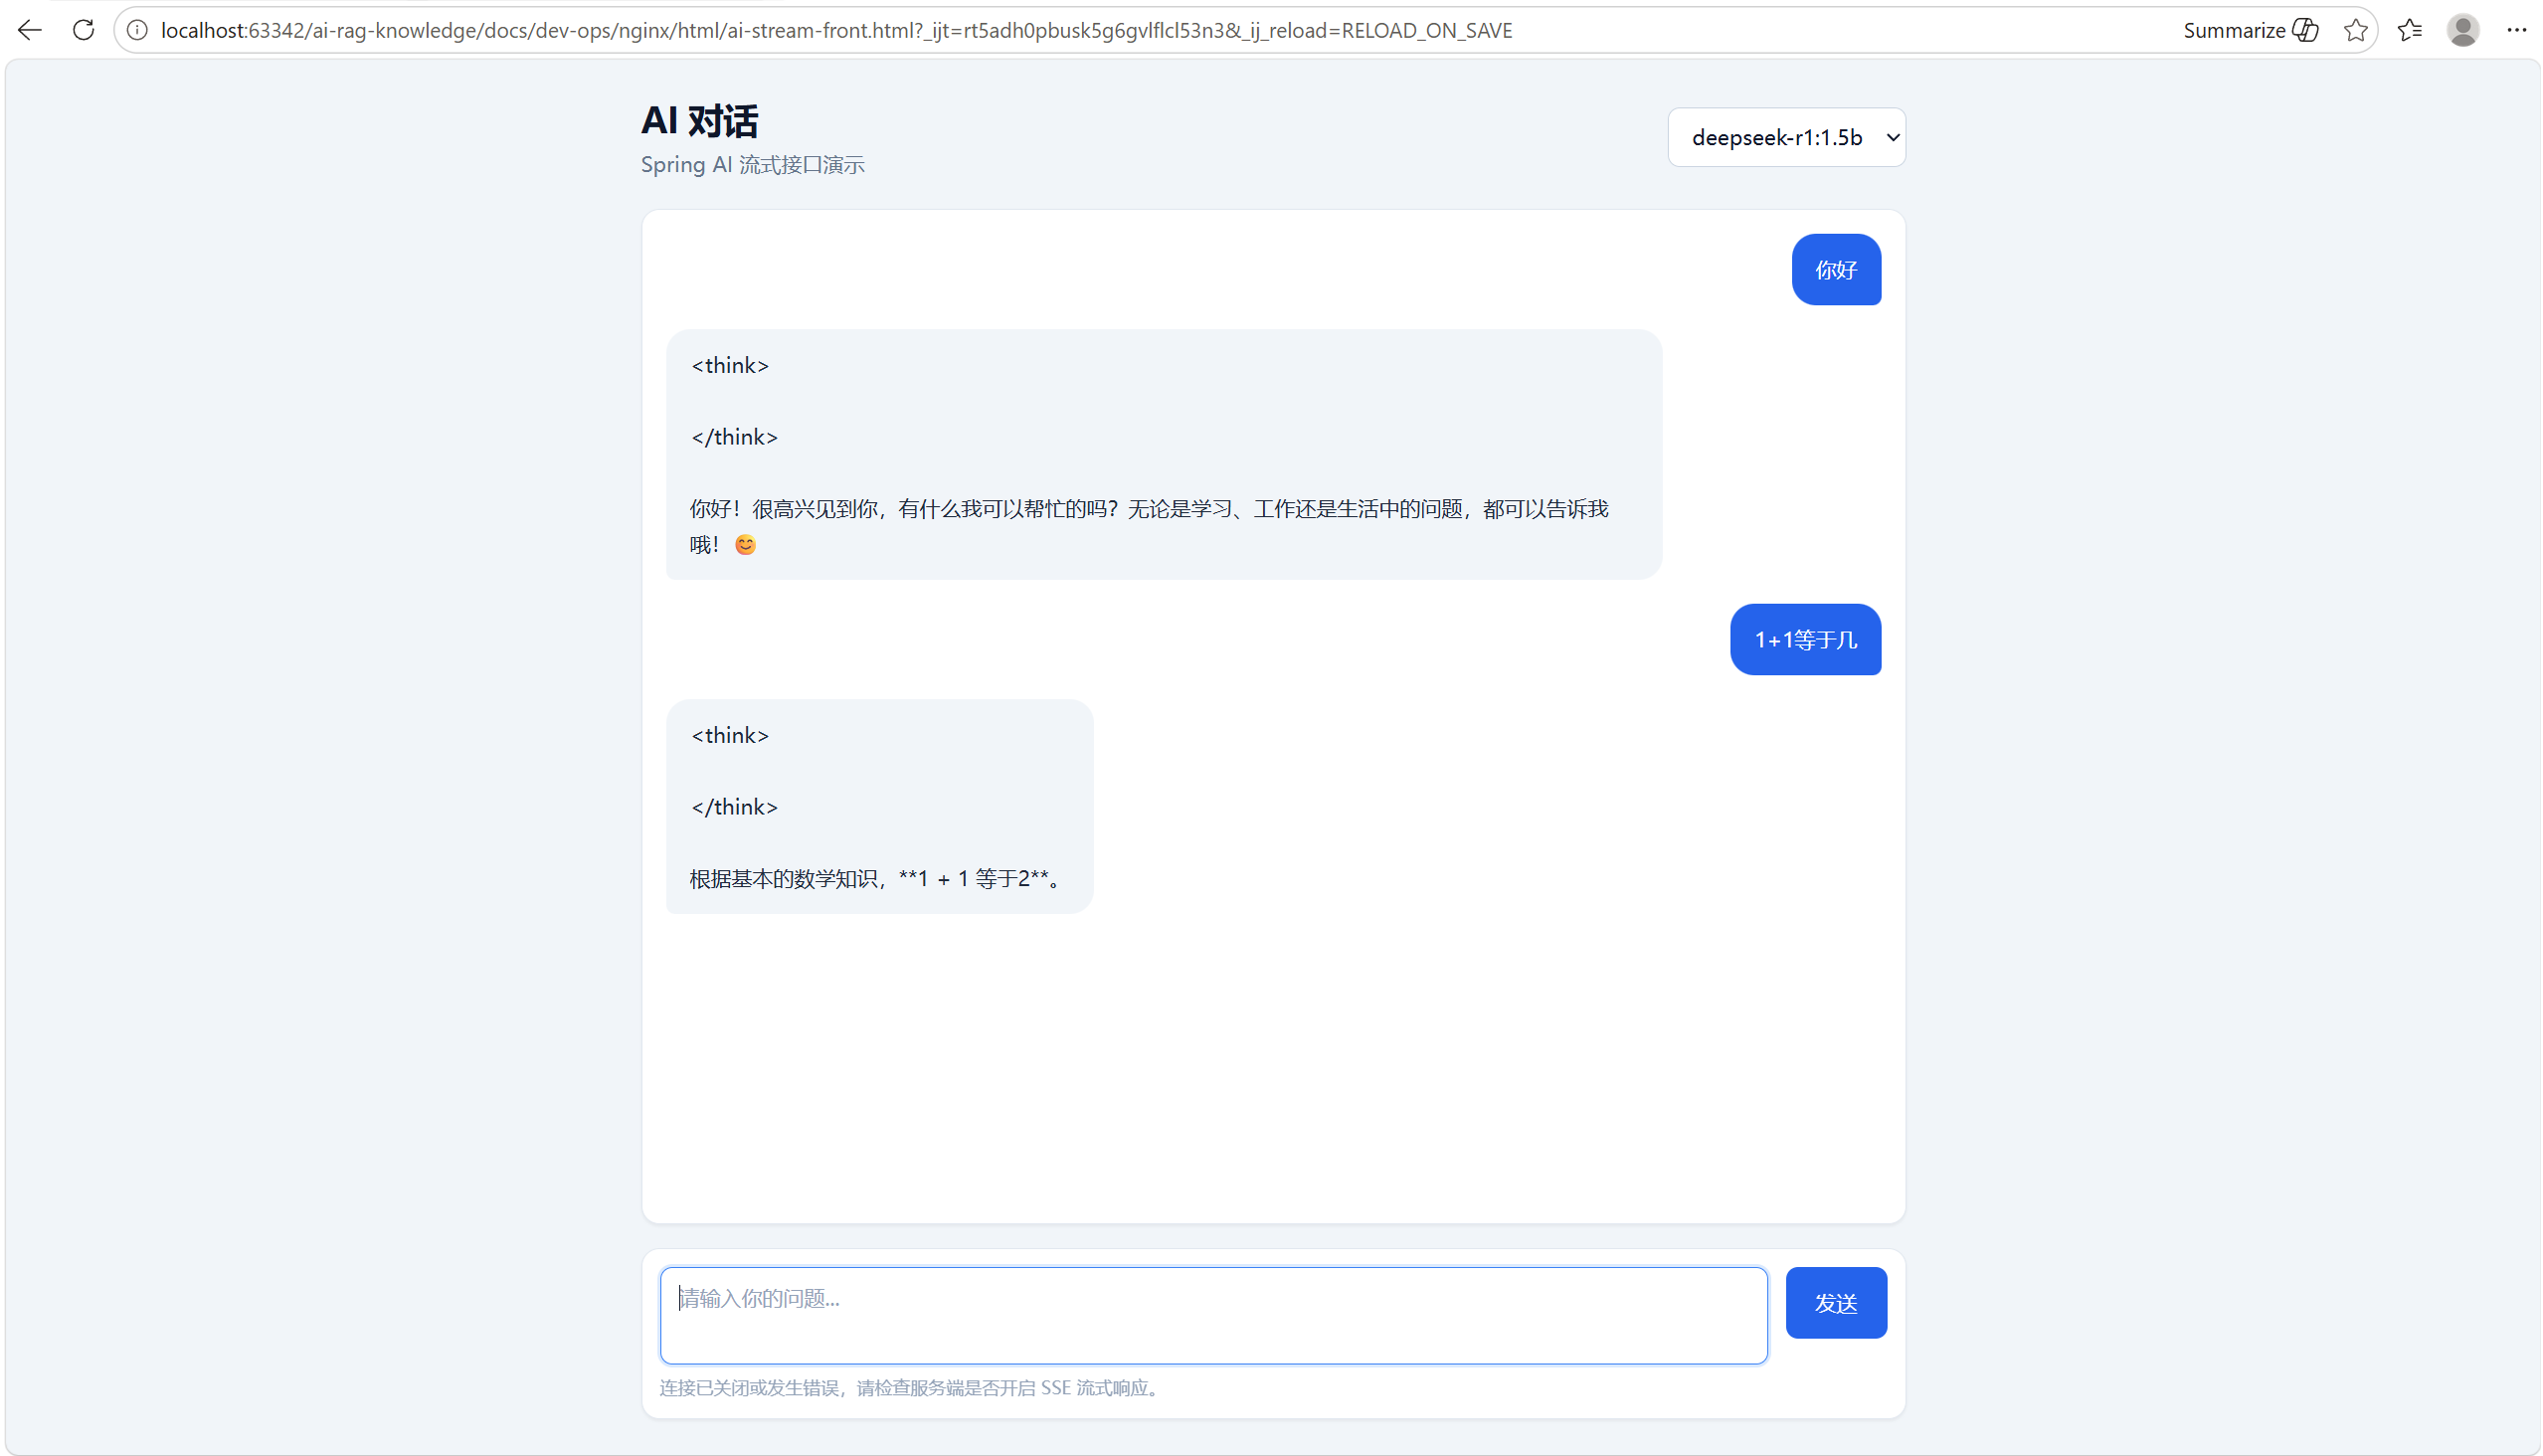
四、前端对接接口
这是我用AI生成的一个简单的前端页面:
html
<!doctype html>
<html lang="zh-CN">
<head>
  <meta charset="UTF-8" />
  <meta name="viewport" content="width=device-width, initial-scale=1.0" />
  <title>AI 对话</title>
  <script src="https://cdn.tailwindcss.com"></script>
</head>
<body class="min-h-screen bg-slate-100 text-slate-900">
<main class="mx-auto flex min-h-screen w-full max-w-4xl flex-col px-4 py-6 sm:px-6">
  <header class="mb-5 flex items-center justify-between">
    <div>
      <h1 class="text-2xl font-semibold tracking-tight">AI 对话</h1>
      <p class="mt-1 text-sm text-slate-500">Spring AI 流式接口演示</p>
    </div>
    <select
            id="modelInput"
            class="h-10 rounded-lg border border-slate-300 bg-white px-3 text-sm outline-none transition focus:border-blue-500 focus:ring-2 focus:ring-blue-100"
    >
      <option value="deepseek-r1:1.5b">deepseek-r1:1.5b</option>
      <option value="llama3.2">llama3.2</option>
      <option value="qwen2.5">qwen2.5</option>
    </select>
  </header>

  <section
          id="chatPanel"
          class="flex-1 overflow-y-auto rounded-xl border border-slate-200 bg-white p-4 shadow-sm"
  >
    <div class="flex h-full min-h-[420px] items-center justify-center text-center text-sm text-slate-400">
      输入问题后点击发送,AI 回复会实时显示在这里。
    </div>
  </section>

  <form id="chatForm" class="mt-4 rounded-xl border border-slate-200 bg-white p-3 shadow-sm">
    <div class="flex gap-3">
        <textarea
                id="messageInput"
                rows="2"
                class="max-h-36 min-h-12 flex-1 resize-none rounded-lg border border-slate-300 px-3 py-2 text-sm leading-6 outline-none transition placeholder:text-slate-400 focus:border-blue-500 focus:ring-2 focus:ring-blue-100"
                placeholder="请输入你的问题..."
        ></textarea>
      <button
              id="sendButton"
              type="submit"
              class="h-12 rounded-lg bg-blue-600 px-5 text-sm font-medium text-white transition hover:bg-blue-700 disabled:cursor-not-allowed disabled:bg-slate-300"
      >
        发送
      </button>
    </div>
    <div class="mt-2 flex items-center justify-between text-xs text-slate-400">
      <span id="statusText">接口地址:http://localhost:8090/api/v1/ollama/generate_stream</span>
      <button id="stopButton" type="button" class="hidden text-slate-500 hover:text-red-600">停止生成</button>
    </div>
  </form>
</main>

<script>
  const API_BASE_URL = 'http://localhost:8090/api/v1/ollama/generate_stream';

  const chatPanel = document.getElementById('chatPanel');
  const chatForm = document.getElementById('chatForm');
  const messageInput = document.getElementById('messageInput');
  const modelInput = document.getElementById('modelInput');
  const sendButton = document.getElementById('sendButton');
  const stopButton = document.getElementById('stopButton');
  const statusText = document.getElementById('statusText');

  let eventSource = null;
  let currentAnswer = null;
  let hasMessage = false;

  function createMessage(role, content = '') {
    if (!hasMessage) {
      chatPanel.innerHTML = '';
      hasMessage = true;
    }

    const wrapper = document.createElement('div');
    wrapper.className = role === 'user' ? 'mb-4 flex justify-end' : 'mb-4 flex justify-start';

    const bubble = document.createElement('div');
    bubble.className = role === 'user'
            ? 'max-w-[82%] whitespace-pre-wrap rounded-2xl rounded-br-md bg-blue-600 px-4 py-3 text-sm leading-6 text-white'
            : 'max-w-[82%] whitespace-pre-wrap rounded-2xl rounded-bl-md bg-slate-100 px-4 py-3 text-sm leading-6 text-slate-800';
    bubble.textContent = content;

    wrapper.appendChild(bubble);
    chatPanel.appendChild(wrapper);
    chatPanel.scrollTop = chatPanel.scrollHeight;

    return bubble;
  }

  function setGenerating(isGenerating) {
    sendButton.disabled = isGenerating;
    messageInput.disabled = isGenerating;
    modelInput.disabled = isGenerating;
    stopButton.classList.toggle('hidden', !isGenerating);
    statusText.textContent = isGenerating ? '正在生成回复...' : '接口地址:http://localhost:8090/api/v1/ollama/generate_stream';
  }

  function closeStream(message) {
    if (eventSource) {
      eventSource.close();
      eventSource = null;
    }
    setGenerating(false);
    if (message) {
      statusText.textContent = message;
    }
    currentAnswer = null;
    messageInput.focus();
  }

  function normalizePayload(rawData) {
    if (!rawData || rawData === '[DONE]') {
      return [];
    }

    try {
      const parsed = JSON.parse(rawData);
      return Array.isArray(parsed) ? parsed : [parsed];
    } catch (error) {
      console.warn('无法解析流式响应数据:', rawData, error);
      return [];
    }
  }

  function appendStreamContent(payloadItems) {
    for (const item of payloadItems) {
      const content = item?.result?.output?.content;
      const finishReason = item?.result?.metadata?.finishReason;

      if (typeof content === 'string' && content.length > 0 && currentAnswer) {
        currentAnswer.textContent += content;
        chatPanel.scrollTop = chatPanel.scrollHeight;
      }

      if (finishReason === 'STOP') {
        closeStream('回复完成');
        return;
      }
    }
  }

  chatForm.addEventListener('submit', (event) => {
    event.preventDefault();

    const message = messageInput.value.trim();
    const model = modelInput.value.trim();

    if (!message || eventSource) {
      return;
    }

    createMessage('user', message);
    currentAnswer = createMessage('assistant', '');
    messageInput.value = '';
    setGenerating(true);

    const params = new URLSearchParams({ model, message });
    const apiUrl = `${API_BASE_URL}?${params.toString()}`;
    eventSource = new EventSource(apiUrl);

    eventSource.onmessage = (event) => {
      const payloadItems = normalizePayload(event.data);
      appendStreamContent(payloadItems);
    };

    eventSource.onerror = () => {
      if (eventSource) {
        closeStream('连接已关闭或发生错误,请检查服务端是否开启 SSE 流式响应。');
      }
    };
  });

  stopButton.addEventListener('click', () => {
    closeStream('已停止生成');
  });

  messageInput.addEventListener('keydown', (event) => {
    if (event.key === 'Enter' && !event.shiftKey) {
      event.preventDefault();
      chatForm.requestSubmit();
    }
  });
</script>
</body>
</html>
提示词如下:
bash
请根据以下信息,编写UI对接服务端接口;

流式GET请求接口,由 SpringBoot Spring AI 框架实现,如下;

/**
 * curl http://localhost:8090/api/v1/ollama/generate_stream?model=deepseek-r1:1.5b&message=1+1
 */
@RequestMapping(value = "generate_stream", method = RequestMethod.GET)
@Override
public Flux<ChatResponse> generateStream(@RequestParam String model, @RequestParam String message) {
    return chatClient.stream(new Prompt(
            message,
            OllamaOptions.create()
                    .withModel(model)
    ));
}

流式GET应答数据,数组中的一条对象;

[
    {
        "result": {
            "output": {
            "messageType": "ASSISTANT",
            "properties": {
                "id": "chatcmpl-B3HPw95SsqmhoWeJ8azGLxK1Vf4At",
                "role": "ASSISTANT",
                "finishReason": ""
            },
            "content": "1",
            "media": []
            },
            "metadata": {
                "finishReason": null,
                "contentFilterMetadata": null
                }
        }
    }
]

如描述说明,帮我编写一款简单的AI对话页面。

1. 输入内容,点击发送按钮,调用服务端流式请求接口,前端渲染展示。
2. 以html、js代码方式实现,css样式使用 tailwind 编写。
3. 通过 const eventSource = new EventSource(apiUrl); 调用api接口。
4. 从 result.output.content 获取,应答的文本展示。注意 content 可能为空。
5. 从 result.metadata.finishReason = STOP 获取,结束标识。
6. 注意整体样式的简洁美观。
最终前后端联调如下: