想必各位看官老爷们都在Apple的官网上看过这样一种动效:滚到某个区域,再往下滚滚轮,这块区域会被"钉"在视口中央,开始播放动画------直到动效结束,页面才会继续往下翻。往上滚?动画会倒放回去。效果如下👇
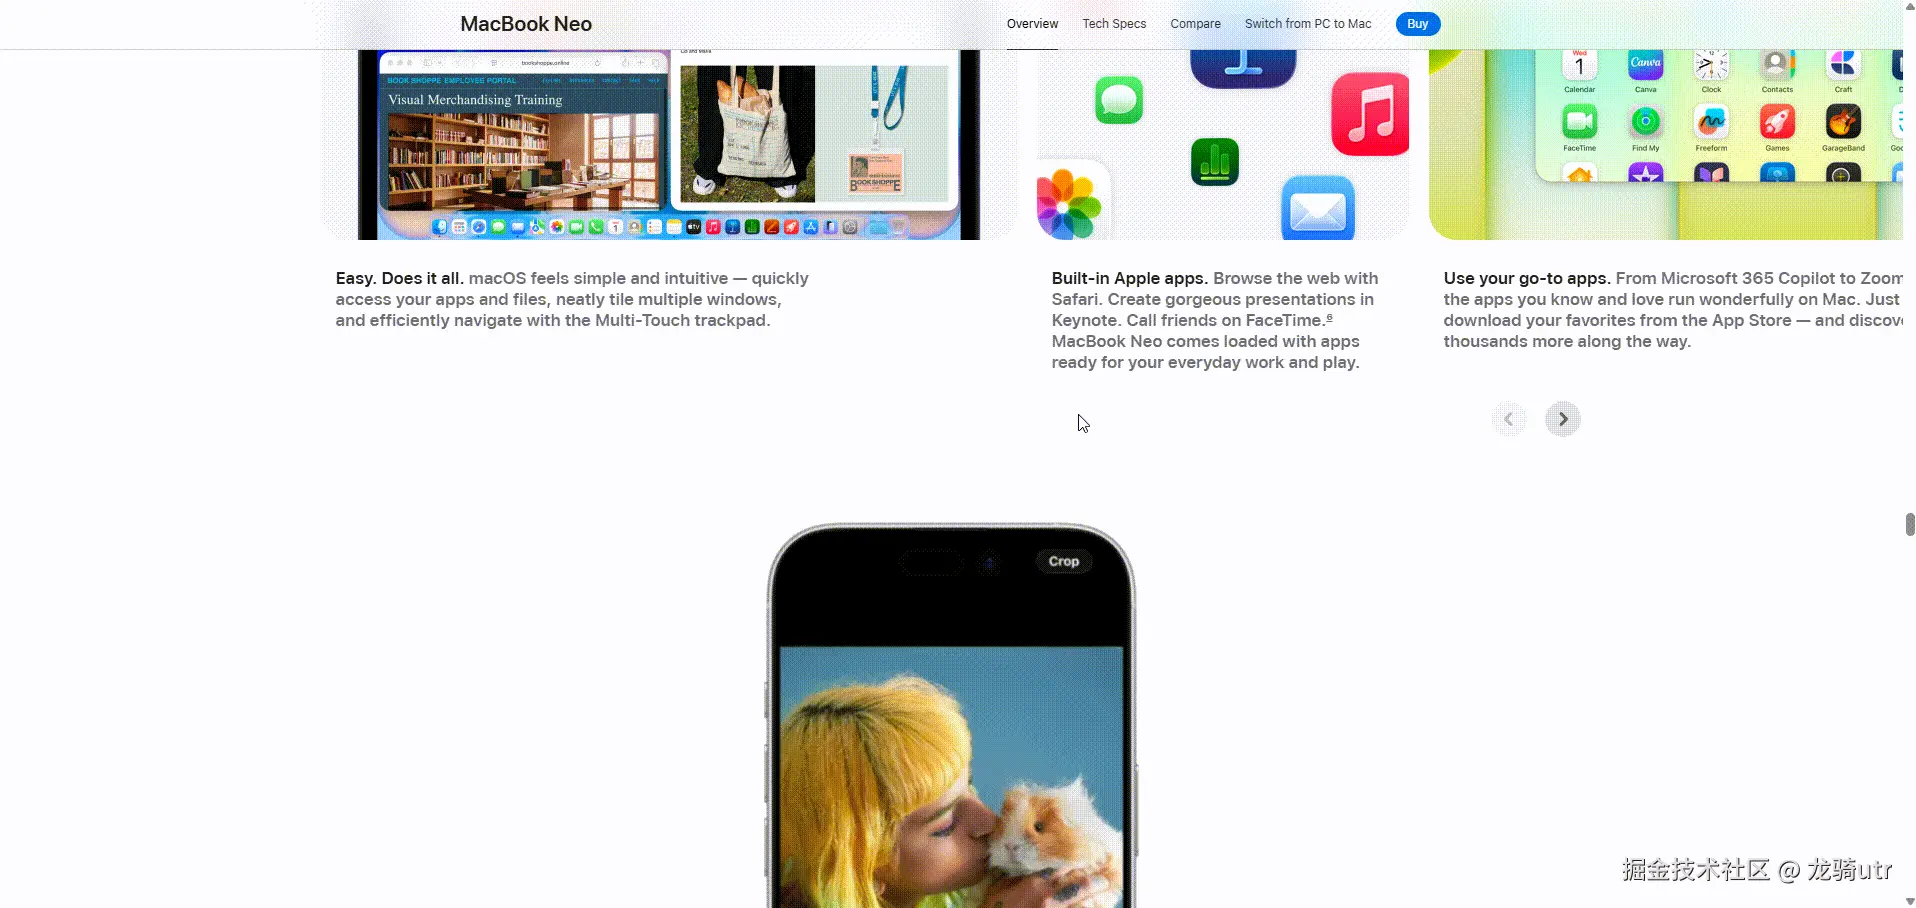
这也就是我们今天的主角:经典「Pin + 横向滚动」效果
为什么叫 Pin + 横向滚动
这个名字其实是两个动作的字面拼接,拆开看就懂了。
Pin = 钉住
Pin 是动词,本意是"用图钉把东西钉在板上"。在网页交互中特指:当页面滚动到某个区域的时候,把这个区域钉在视口里固定位置不动
横向滚动 = 在 Pin 的期间,内容横着移动
- 鼠标动作:竖向滚动滚轮
- 视觉反馈:画面横向切换
我知道这里有人就要问了:你不是说横向滚动吗,你的截图里明明是C3动画,大骗子。。。

话不多说,咱来做个简单的 Demo
我们先给到三个容器将页面分为上中下三个区域,先把骨架搭起来,这一步只能看到空白,内容下一步补,pin-section 是撑高的外壳,提供滚动距离
css
<style>
  * { margin: 0; padding: 0; box-sizing: border-box; }
  body { background: #0a0a0a; color: #fff; font-family: -apple-system, sans-serif; }

  .spacer { height: 100vh; }

  .pin-section { height: 400vh; position: relative; }
</style>
html
<body>
    <div class="spacer"></div>

    <section class="pin-section" id="pinSection">

    </section>

    <div class="spacer"></div>
</body>
接下来再在 pin-section 中塞入内容,pin-wrap 就是视口高度的"舞台",被钉住,内部四张卡片横向排成一长条,当滚动滚轮的时候通过 JS 拉它平移,效果如下
js
<style>
  .pin-wrap {
    position: sticky;
    top: 0;
    height: 100vh;
    overflow: hidden;
    display: flex;
    align-items: center;
  }
  .track {
    display: flex;
    gap: 32px;
    padding: 0 12vw;
    will-change: transform;
  }
  .card {
    flex-shrink: 0;
    width: 76vw;
    height: 70vh;
    border-radius: 20px;
    display: flex;
    align-items: center;
    justify-content: center;
    font-size: 120px;
    font-weight: 600;
  }
  .card:nth-child(1) { background: #e7f0ff; color: #1a2c5f; }
  .card:nth-child(2) { background: #5c8df0; }
  .card:nth-child(3) { background: #2e3da8; }
  .card:nth-child(4) { background: #0b1240; }
</style>

<section class="pin-section" id="pinSection">
  <div class="pin-wrap">
    <div class="track" id="track">
      <div class="card">01</div>
      <div class="card">02</div>
      <div class="card">03</div>
      <div class="card">04</div>
    </div>
  </div>
</section>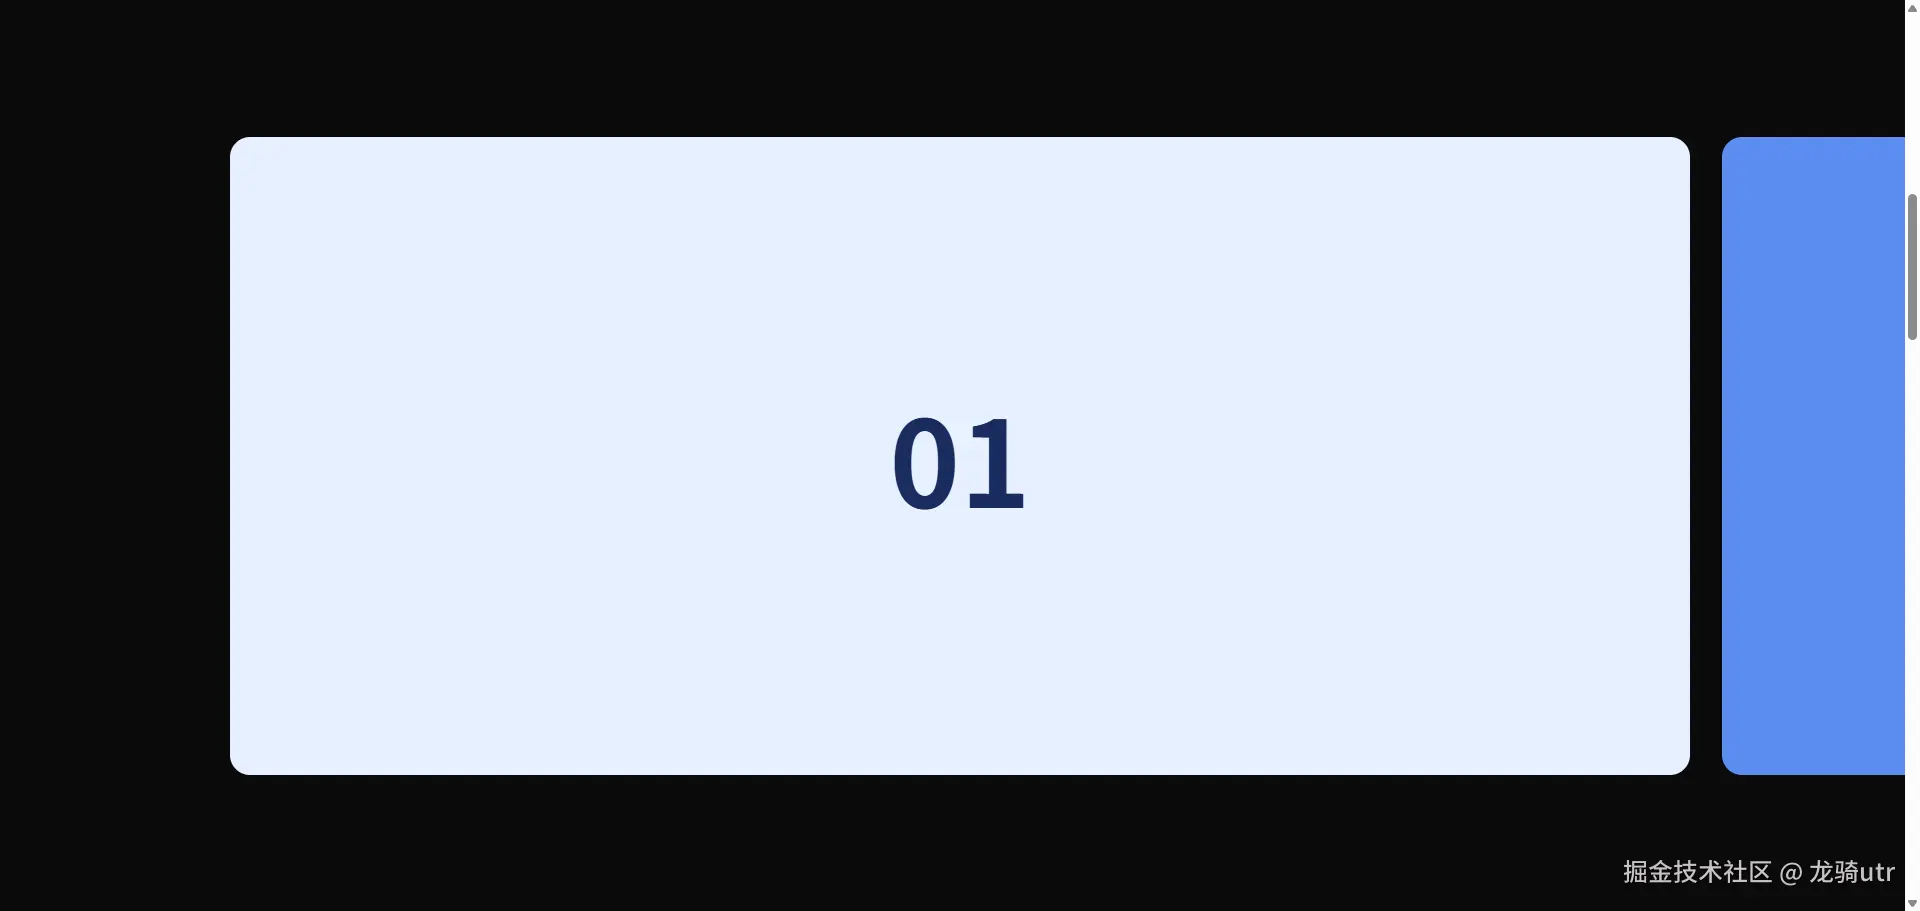
布局完成后,补上 js 代码,至此 demo 结束,效果如下
js
  const section = document.getElementById('pinSection');
  const track = document.getElementById('track');
  let distance = 0;

  function measure() {
    distance = track.scrollWidth - window.innerWidth;
  }

  function update() {
    const rect = section.getBoundingClientRect();
    const scrollable = section.offsetHeight - window.innerHeight;
    let progress = -rect.top / scrollable;
    progress = Math.max(0, Math.min(1, progress));
    const x = -progress * distance;
    track.style.transform = `translate3d(${x}px, 0, 0)`;
  }

  let raf = null;
  window.addEventListener('scroll', () => {
    if (raf) return;
    raf = requestAnimationFrame(() => { update(); raf = null; });
  }, { passive: true });
  window.addEventListener('resize', () => { measure(); update(); });

  measure();
  update();
看完上面的 demo,相信大家还是会有一些疑惑,下面针对一些关键点进行解析
-
pin-section 高度为什么是400vh?
提供滚动距离。你要横向划过四张卡片,就得有足够长的竖向滚动条来驱动这件事。规则很简单:
外壳高度 = 视口高度 + 你想要的横向动画时长
400vh = 100vh(自身视口) + 300vh(横向动画占用3个屏幕的滚动量)。卡片越多或者动画越慢,这个值就越大。
-
pin-wrap 上面的 position: sticky 样式的作用是什么?
是 Pin 的灵魂。
sticky 的行为分三段:
- pin-section 刚进入视口时,pin-wrap 还是普通文档流,跟着往上滑
- 当 pin-wrap top = 0 时,它被钉住,视觉上停在原地
- 等 pin-section 即将整体离开视口(下沿撞到 pin-wrap 的底),pin-wrap 解除钉住,跟着父容器一起滑走
钉住期间,用户依然在滚页面(滚动条还在动),但视口里看到的画面是"静止的舞台"。这段静止期就是给横向动画用的。
-
滚动进度
js
    const rect = section.getBoundingClientRect();
    const scrollable = section.offsetHeight - window.innerHeight;  // 300vh 那段

    // 关键公式:section 顶部从 0 滑到 -scrollable,progress 从 0 → 1
    let progress = -rect.top / scrollable;
    progress = Math.max(0, Math.min(1, progress));

    // 横向需要走的总路程:track 总长 - 视口宽
    const x = -progress * distance;
    track.style.transform = `translate3d(${x}px, 0, 0)`;
至此,相信大家对这个效果已经拿捏住了。不要再问什么"这个 demo 也是滚动呀,apple 官网那个可是动画"这种问题了哦,否则的话