iOS------抽屉视图详解
抽屉视图是什么
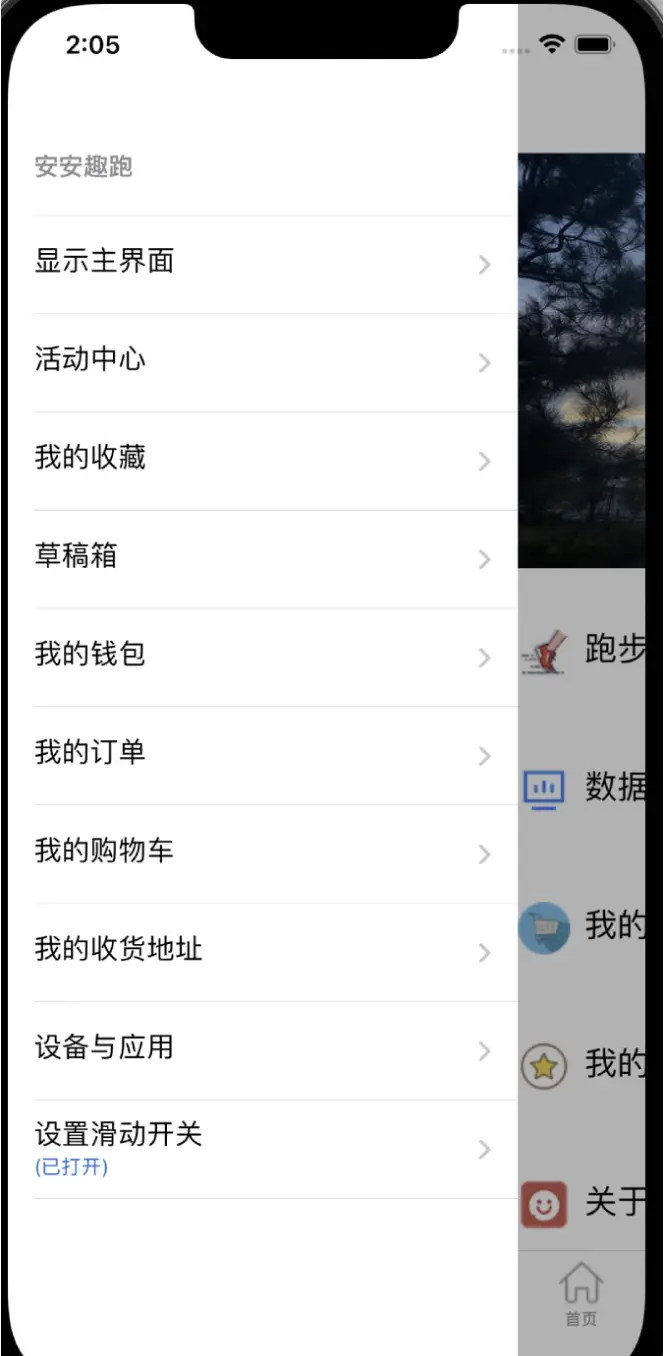
- 抽屉视图指的是在一个视图之上可以通过点击等方法从侧边拉出一个遮盖住原本视图一部分的菜单,效果类似于抽屉被拉开,可以再点击小菜单上内容进行跳转
图片演示
实现的原理
组成部分
- 首先我们需要知道,这样的抽屉视图需要两个基本界面,以及一个遮罩层
-
- 主界面,也就是下面那个本来正常显示的界面
- 上层界面覆盖一部分窗口
- 遮罩层渲染阴影以及处理点击手势
按我们直观的想法来说,直接给上方加一个UIView就好了,但是这样做有一个问题,那就是无法独立的处理菜单中的跳转,搭建UITablView等任务,如果让主视图去管,就破坏了MVC的结构,并且维护困难,逻辑复杂,所以我们不得不摒弃这种想法,使用单独的ViewControl来管理这个抽屉视图
视图层级
- 其次需要处理的就是视图层级,也就是"谁在谁的上面",以及,谁控制谁
- 原本的主界面的ViewController归原本的Navigation以及TabBarController管
- 此时我们需要一个更大的视图控制器,将原本作为根视图控制器的TabBarController囊括进去作为一个子视图,再将上方的抽屉视图也加进新控制器,我们命名为Container
这个逻辑过程就像是我们总Navigation控制VC转向TabBar控制Navigation再控制VC,简单来说就是找一个更大的箱子把原来的小箱子套起来
-
遮罩层直接添加到Container上
//原来
|--TabBar(root)
|--Navigation
|--原本VC//现在
|Container(root)
|--MenuVC
|--TabBar
|--Navigation
|--原本VC
Masonry约束下的写法
假设我们已经拥有了一个需要添加抽屉视图的项目,我们需要先新建一个ContainerViewControl,并声明以下三个属性
objc
@property (nonatomic, strong) MenuViewController *menuVC;//菜单界面
@property (nonatomic, strong) UIView *maskView;//遮罩层
@property (nonatomic, assign) BOOL isOpen;//是否展开菜单
注意我们的属性中并没有声明关于主界面的属性,这是因为主界面归它的Navigation管
两个VC写法
接着我们要写界面的初始化方法了,上面说过了,Container管理了两个VC,一个是TabBar,一个是menuVC,
先写他们的初始化方法:
- MainVC(TabBar)
objc
- (void)setupMainVC {
    UIViewController *mainVC = [self createMain];//这里createMain返回的是原本在sceneDelegate中搭建的控制器逻辑
    [self addChildViewController:mainVC];
    [self.view addSubview:mainVC.view];
    [mainVC didMoveToParentViewController:self];
    [mainVC.view mas_makeConstraints:^(MASConstraintMaker *make) {
        make.edges.equalTo(self.view);
    }];
}

- (UIViewController *)createMain {
    HomeViewController *home = [[HomeViewController alloc] init];
    UINavigationController *homeNav = [[UINavigationController alloc] initWithRootViewController:home];
    homeNav.tabBarItem = [[UITabBarItem alloc] initWithTitle:@"首页" image:[UIImage systemImageNamed:@"house"] tag:0];

    ProfileViewController *profile = [[ProfileViewController alloc] init];
    UINavigationController *profileNav = [[UINavigationController alloc] initWithRootViewController:profile];
    profileNav.tabBarItem = [[UITabBarItem alloc] initWithTitle:@"我的" image:[UIImage systemImageNamed:@"person.circle"] tag:0];

    SettingViewController *setting = [[SettingViewController alloc] init];
    UINavigationController *settingNav = [[UINavigationController alloc] initWithRootViewController:setting];
    settingNav.tabBarItem = [[UITabBarItem alloc] initWithTitle:@"乐馆" image:[UIImage systemImageNamed:@"globe.europe.africa.fill"] tag:0];

    UITabBarController *tabbar = [[UITabBarController alloc] init];
    tabbar.viewControllers = @[homeNav, settingNav, profileNav];
    return tabbar;
}- 这里的createMain方法看似很多,其实内容都是从原本的SceneDelegate中搬过来的,相当于在这里新建了一个TabBar
- menuVC
objc
- (void)setupMenuVC {
    self.menuVC = [[MenuViewController alloc] init];
    [self addChildViewController:self.menuVC];
    [self.view addSubview:self.menuVC.view];
    [self.menuVC didMoveToParentViewController:self];
    [self.menuVC.view mas_makeConstraints:^(MASConstraintMaker *make) {
        make.left.equalTo(self.view).offset(-VCWidth);//VCWidth是我们自己定好的常数
        make.top.bottom.equalTo(self.view);
        make.width.mas_equalTo(VCWidth);
    }];
}- 接下来,因为原本的TabBar被这里的Container包裹,我们需要在SceneDelegate中将window的rootViewController更换为我们新建的控制器Container
objc
- (void)scene:(UIScene *)scene willConnectToSession:(UISceneSession *)session options:(UISceneConnectionOptions *)connectionOptions {
    UIWindowScene *windowScene = (UIWindowScene *)scene;
    self.window = [[UIWindow alloc] initWithWindowScene:windowScene];
    self.window.rootViewController = [[ContainerViewController alloc] init];
    [self.window makeKeyAndVisible];
}- 我们再注意看每个setup中,有些写法有点陌生,比如
[self addChildViewController:mainVC];[mainVC didMoveToParentViewController:self];
这两个方法的作用是:第一个方法将后面的VC添加为前一个的子VC,注意并非子视图而是子VC,这样做的好处就是,新的VC的生命周期与前一个VC就能正常传递了;而第二个方法就是告诉子VC已经被完成添加了
- 一般情况下,menuVC就藏在屏幕左边看不见的地方,当点击出现的时候,我们更新masonry约束到它应该显示的界面
遮罩层写法
-
成功添加了VC之后,我们就需要在中间添加遮罩层了,以便我们处理阴影和点击手势,但是需要注意,遮罩层要在抽屉视图下面,主界面上面,被夹在中间,这样既能做到有半边遮罩层阴影覆盖,又能处理点击,又不遮挡抽屉视图
-
我们来看代码
objc
- (void)setupMask {
    self.maskView = [[UIView alloc] init];
    self.maskView.backgroundColor = [UIColor colorWithWhite:0 alpha:0.4];//颜色本身透明度设置
    self.maskView.alpha = 0;//view透明度设置
    self.maskView.userInteractionEnabled = NO;

    [self.view insertSubview:self.maskView belowSubview:self.menuVC.view];//******
    [self.maskView mas_makeConstraints:^(MASConstraintMaker *make) {
        make.edges.equalTo(self.view);
    }];

    UITapGestureRecognizer *tap = [[UITapGestureRecognizer alloc] initWithTarget:self action:@selector(closeMenu)];
    [self.maskView addGestureRecognizer:tap];
}- 先把视图初始化为半透明黑色,然后初始状态默认关闭,就把视图透明度设置为0,关闭交互
- 注意看打星行,这里的方法是把遮罩层添加到menuVC的下方,原因上面讲过
- 创建一个手势,处理点击遮罩层时,退出菜单,把手势添加到遮罩层上
开关方法
objc
- (void)closeMenu {
    [self.menuVC.view mas_updateConstraints:^(MASConstraintMaker *make) {
        make.left.equalTo(self.view).offset(-VCWidth);
    }];
    [UIView animateWithDuration:0.3 animations:^{
            self.maskView.alpha = 0;
            [self.view layoutIfNeeded];
        } completion:^(BOOL finished) {
            self.isOpen = NO;
        }];
}

- (void)openMenu {
    [self.menuVC.view mas_updateConstraints:^(MASConstraintMaker *make) {
        make.left.equalTo(self.view).offset(0);
    }];
    self.maskView.userInteractionEnabled = YES;
    [UIView animateWithDuration:0.3 animations:^{
            self.maskView.alpha = 1;
            [self.view layoutIfNeeded];
        } completion:^(BOOL finished) {
            self.isOpen = YES;
        }];
}- 由于开关方法类似,放在一起讲,先更新menuVC的masonry约束,开对应显示,关对应左移到屏幕外
外部交互
- 接着我们需要在.h文件里声明这样一个方法:
objc
.h
- (void)switchOpen;

.m
- (void)switchOpen {
    self.isOpen ? [self closeMenu] : [self openMenu];
}- 我们可以看到,调用这个方法,会自动根据isOpen判断调用开启/关闭方法
- 这样做的原因在于,正常情况不会显示menuVC,当Container的tabBar中的VC的某个按钮被触发后,我们给这个按钮关联一个开启抽屉视图的方法,比如
objc
- (void)pushMenu {
    UIViewController *parent = self.parentViewController;
    while (parent && ![parent isKindOfClass:[ContainerViewController class]]) {
        parent = parent.parentViewController;
    }
    [(ContainerViewController *)parent switchOpen];
}- 点下按钮后,我们要通知Container调用switchOpen方法,但是此时调用者是在Container->TabBar->Navigation->VC,为了拿到Container,就需要循环的向上寻找parentViewController属性,直到找到一开始的Container,然后强制转换调用switchOpen方法,再触发open或者close方法打开或者关闭菜单
完整代码
演示如下
