文章目录
- [配置 SSL/TLS](#配置 SSL/TLS)
配置 SSL/TLS
生成证书
https = http + ssl/tls
bash
#--1--生成私钥
[root@nginx-server ~ 09:16:58]# mkdir certs && cd certs
[root@nginx-server certs 09:37:16]# openssl genrsa -out www.key 2048
Generating RSA private key, 2048 bit long modulus
........................................+++
....................................................................................................+++
e is 65537 (0x10001)


#--2--生成请求文件csr
[root@nginx-server certs 09:39:47]# openssl req -new -key www.key -out www.csr -subj "/C=CN/ST=JS/L=NJ/O=LG/OU=DEVOPS/CN=www.ljw.cloud/emailAddress=webadmin@ljw.cloud"


#--3--使用自己的私钥对请求文件签名,以生成证书
[root@nginx-server certs 09:40:03]# openssl x509 -req -days 3650 -in www.csr -signkey www.key -out www.crt
Signature ok
subject=/C=CN/ST=JS/L=NJ/O=LG/OU=DEVOPS/CN=www.ljw.cloud/emailAddress=webadmin@ljw.cloud
Getting Private key
www.key私钥(必须保密)
www.csr 证书请求(中间文件)
www.crt 公钥证书(配置HTTPS用)
配置站点
bash
[root@nginx-server certs 09:41:04]# mkdir /etc/ssl/certs/www.ljw.cloud
[root@nginx-server certs 09:41:34]# mv www* /etc/ssl/certs/www.ljw.cloud/


# 参照默认配置修改
[root@nginx-server ~ 09:41:57]# cp /etc/nginx/nginx.conf /etc/nginx/conf.d/vhost-www.ljw.cloud-ssl.conf
[root@nginx-server ~ 09:42:35]# vim /etc/nginx/conf.d/vhost-www.ljw.cloud-ssl.conf
server {
    listen       443 ssl http2;
    listen       [::]:443 ssl http2;
    server_name  www.ljw.cloud;
    root         /usr/share/nginx/html;

	#证书
    ssl_certificate "/etc/ssl/certs/www.ljw.cloud/www.crt";
    #私钥
    ssl_certificate_key "/etc/ssl/certs/www.ljw.cloud/www.key";
}


[root@nginx-server ~ 09:46:55]# systemctl restart nginx

#防火墙
[root@nginx-server ~ 09:47:04]# firewall-cmd --add-service=https --permanent
[root@nginx-server ~ 09:47:08]# firewall-cmd --reload
测试:
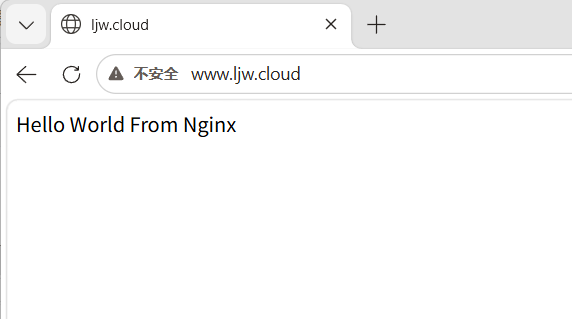
20260810094836302.png&pos_id=img-LuszMMwu-1786362023238)
配置HTTP重定向到https
bash
[root@nginx-server ~ 09:42:35]# vim /etc/nginx/conf.d/vhost-www.ljw.cloud-ssl.conf
#添加
server {
    listen       80;
    listen       [::]:80;
    server_name  www.ljw.cloud;
    root         /usr/share/nginx/html;
    #添加重定向
    return      301 https://$host$request_uri;
}
[root@nginx-server certs 09:53:10]# systemctl restart nginx

# 防火墙设置
[root@nginx-server certs 09:53:19]#  firewall-cmd --add-service=https --permanent
[root@nginx-server certs 09:53:24]# firewall-cmd --reload

#客户端测试
[root@nginx-client ~ 10:20:03]# curl http://www.ljw.cloud
<html>
<head><title>301 Moved Permanently</title></head>
<body>
<center><h1>301 Moved Permanently</h1></center>
<hr><center>nginx/1.20.1</center>
</body>
</html>

# 使用-k指明目标站点不是一个安全站点
[root@nginx-client ~ 10:20:52]# curl -k https://www.ljw.cloud
Hello World From Nginx

# 使用-L指明跟随重定向
[root@nginx-client ~ 10:21:24]# curl -Lk https://www.ljw.cloud
Hello World From Nginx
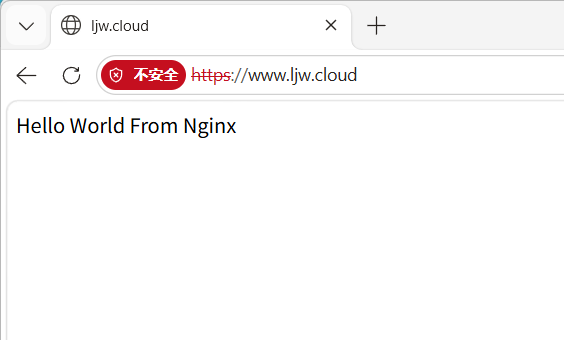
测试:
http://www.ljw.cloud访问直接跳转 https://www.ljw.cloud
配置基本认证
用户名和密码使用plain text发送,所以最好配置SSL/TLS。
bash
#安装工具
[root@nginx-server ~ 10:09:16]# yum install httpd-tools -y

#添加记录
[root@nginx-server ~ 10:34:24]# vim /etc/nginx/conf.d/vhost-www.ljw.cloud-ssl.conf

server {
   ....
    ssl_certificate "/etc/ssl/certs/www.ljw.cloud/www.crt";
    ssl_certificate_key "/etc/ssl/certs/www.ljw.cloud/www.key";

#添加
    location /auth-basic/ {
        auth_basic              "Basic Auth";
        auth_basic_user_file    "/etc/nginx/.htpasswd";
    }

}

[root@nginx-server ~ 10:37:11]# systemctl restart nginx


# 为 Nginx 基础认证 (Basic Auth) 添加用户
[root@nginx-server ~ 10:37:19]# htpasswd -b -c /etc/nginx/.htpasswd ljw 123456
Adding password for user ljw

#创建测试页面
[root@nginx-server ~ 10:37:51]# mkdir /usr/share/nginx/html/auth-basic

[root@nginx-server ~ 10:38:23]# vim /usr/share/nginx/html/auth-basic/index.html
<html>
<body>
<div style="width: 100%; font-size: 40px; font-weight: bold; text-align:
laogaoer;">
hhhhhhhhhhhhhhhhhhh
</div>
</body>
</html>


#测试,通过-u选项指定用户名和密码
[root@nginx-client ~ 10:48:27]#  curl -Lku ljw:123456 https://www.ljw.cloud/auth-basic
<html>
<body>
<div style="width: 100%; font-size: 40px; font-weight: bold; text-align:
laogaoer;">
hhhhhhhhhhhhhhhhhhh
</div>
</body>
</html>
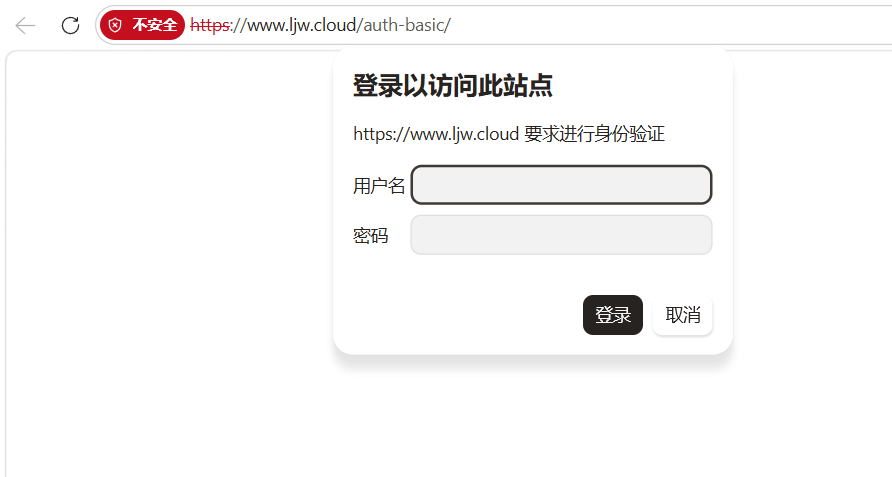
windows测试:

PHP 站点
网站分类:
- 静态网页
页面内容提前写好存在服务器,用户访问时直接下载,内容不会变。
后缀常见: .html 、 .htm
- 动态网页
页面不是现成文件 ,访问时服务器实时拼接数据生成,内容可随用户、时间、操作变化。
后缀常见: .php 、 .jsp 、 .asp 、 .aspx 、 .py 等
bash
# 安装PHP和php-fpm,建议把其他的扩展包一起安装
[root@nginx-server ~ 11:04:34]# yum install -y php php-fpm
[root@nginx-server ~ 11:22:26]# yum install -y php-gd php-common php-pear php-mbstring php-mcrypt
# php-fpm: 负责接收web程序发来的php代码
# php:负责解析和执行php代码,并将结果返回给php-fpm
# 当客户端访问 php 站点时,web站点接收用户请求
# 并转发 php 代码给php-fpm服务
# php-fpm 服务调用php解析php网页,然后将结果返回给web程序
# web 程序将结果返回给客户端


# 启用并启动php-fpm服务
[root@nginx-server ~ 11:21:46]# systemctl enable php-fpm --now

# 查看 php 版本
[root@nginx-server ~ 11:23:04]# php -v
PHP 5.4.16 (cli) (built: Apr  1 2020 04:07:17)
Copyright (c) 1997-2013 The PHP Group
Zend Engine v2.4.0, Copyright (c) 1998-2013 Zend Technologies


# 测试 php 是否正常
# 直接运行一段PHP代码
[root@nginx-server ~ 11:23:18]#  php -r "echo 'Hello PHP';"
Hello PHP

# 运行一个PHP文件
[root@nginx-server ~ 11:24:00]#  echo "<?php echo 'PHP Test Page'.\"\n\"; ?>" > php_test.php
[root@nginx-server ~ 11:24:21]# php php_test.php
PHP Test Page


# 准备测试页,使用phpinfo查看详细信息
[root@nginx-server ~ 11:24:37]#  echo "<?php phpinfo(); ?>" > /usr/share/nginx/html/info.php
配置虚拟机主机支持php
bash
# 修改配置文件
[root@nginx-server ~ 11:25:11]# vim /etc/nginx/conf.d/vhost-www.ljw.cloud-ssl.conf
server {
....
    ssl_certificate "/etc/ssl/certs/www.ljw.cloud/www.crt";
    ssl_certificate_key "/etc/ssl/certs/www.ljw.cloud/www.key";

	# 匹配所有以.php结尾的URL请求,验证PHP文件是否存在
	# 存在则转发给本地9000端口的PHP-FPM处理,不存在则返回404


     location ~ \.php$ {
     # try_files:检测请求的PHP文件($uri)是否存在,不存在直接返回404错误
     # 作用:防止伪造PHP路径的恶意请求(如/xxx.php/yyy.jpg)被PHP-FPM解析,是重要的安全防护
        try_files $uri =404;

        # fastcgi_pass:指定FastCGI服务地址,将PHP请求转发到本地9000端口的PHP-FPM进程
        fastcgi_pass 127.0.0.1:9000;

         # fastcgi_index:定义FastCGI默认索引文件,请求目录时默认使用index.php
        fastcgi_index index.php;

         # fastcgi_param:设置传递给PHP-FPM的核心环境变量
         # SCRIPT_FILENAME:指定要执行的PHP文件绝对路径
         # $document_root是网站根目录,$fastcgi_script_name是请求的脚本名
        fastcgi_param SCRIPT_FILENAME $document_root$fastcgi_script_name;

         # include:引入Nginx默认的FastCGI参数配置文件,包含QUERY_STRING、REQUEST_METHOD等PHP运行必需的环境变量
        include fastcgi_params;
    }
}
还可以将php的配置与虚拟主机配置分离配置(和上面方法二选一)
bash
[root@nginx-server ~ 12:24:04]# vim /etc/nginx/conf.d/vhost-www.laogao.cloud-ssl.conf
server {
....
    ssl_certificate "/etc/ssl/certs/www.ljw.cloud/www.crt";
    ssl_certificate_key "/etc/ssl/certs/www.ljw.cloud/www.key";

    # Load configuration files for the default server block.
    include /etc/nginx/default.d/*.conf;
}

[root@nginx-server ~ 12:24:08]# vim /etc/nginx/default.d/php.conf
location ~ \.php$ {
	try_files $uri =404;
    fastcgi_pass 127.0.0.1:9000;
	fastcgi_index index.php;
	fastcgi_param SCRIPT_FILENAME $document_root$fastcgi_script_name;
	include fastcgi_params;
}

[root@nginx-server ~ 12:28:08]# systemctl restart nginx
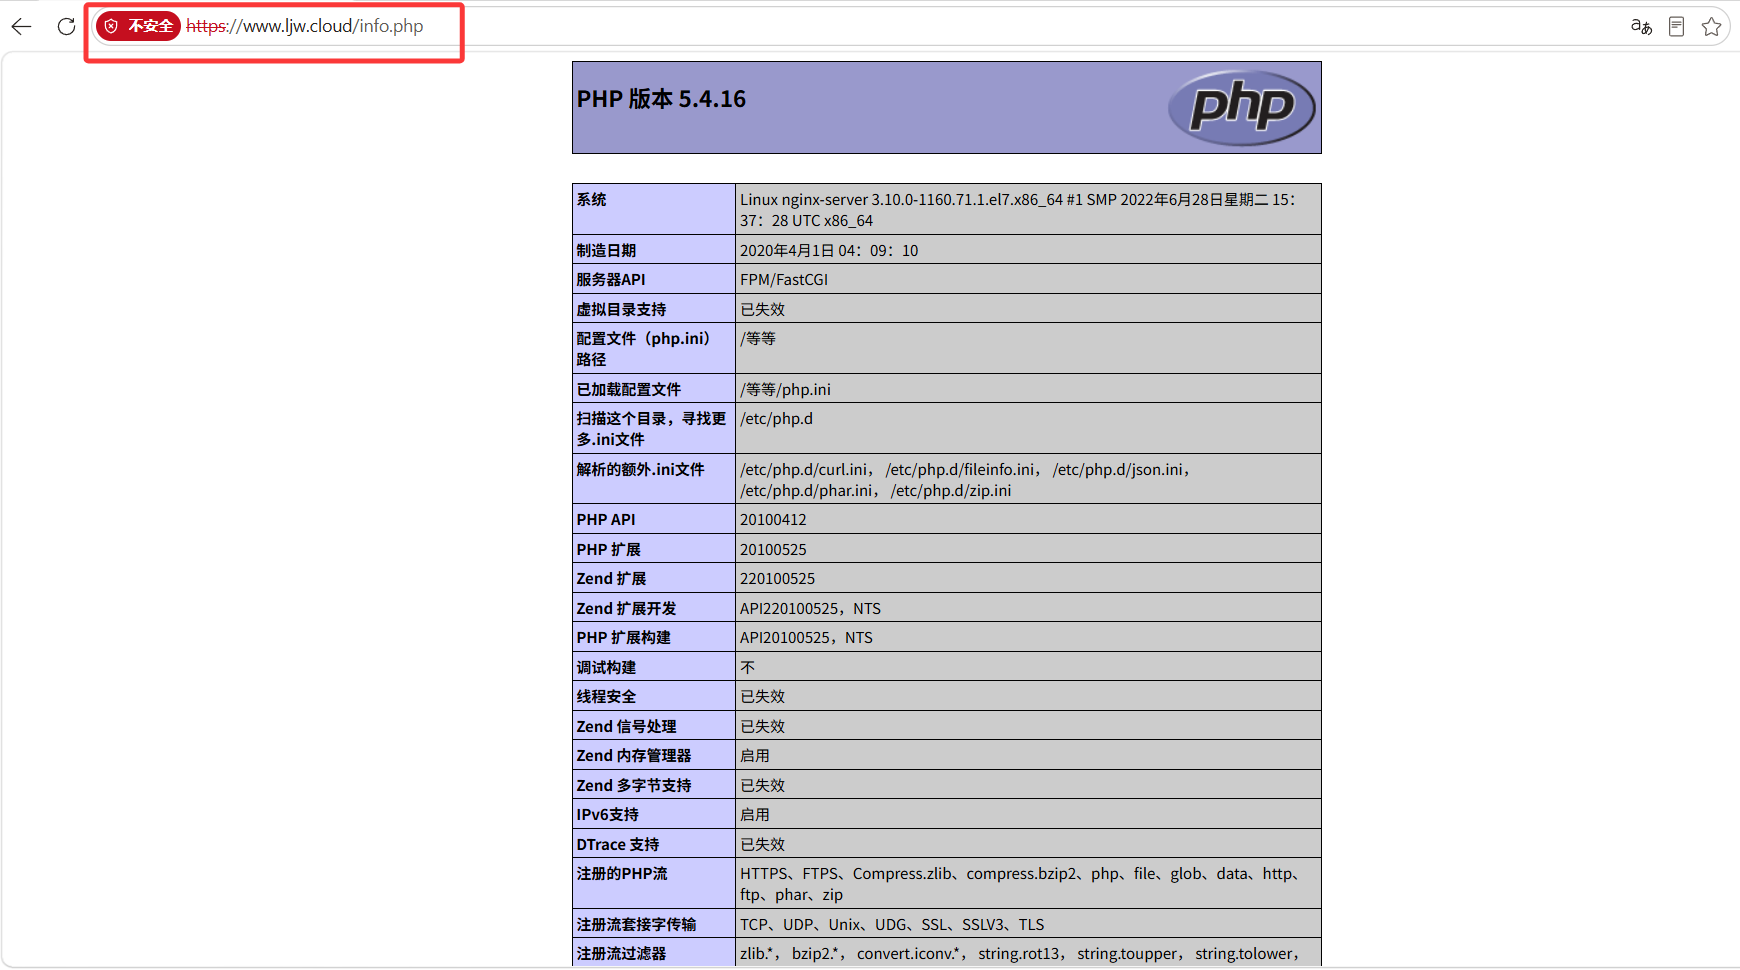
linux客户端测试:
bash
[root@nginx-client ~ 10:48:41]# curl -k https://www.ljw.cloud/info.phpwindows客户端测试:
反向代理
反向代理介绍
正向代理 :替客户端办事,隐藏客户端
反向代理 :替服务器办事,隐藏服务器
反向代理(reverse proxy),指的是代理外网用户的请求到内部的指定的服务器,并将数据返回给用 户。客户端不直接与后端服务器进行通信,而是与反向代理服务器进行通信,隐藏了后端服务器的 IP 地 址
反向代理的主要作用是提供负载均衡和高可用性:
- 负载均衡:Nginx可以将传入的请求分发给多个后端服务器,以平衡服务器的负载,提高系统性能和可靠性。
- 缓存功能:Nginx可以缓存静态文件或动态页面,减轻服务器的负载,提高响应速度。
- 动静分离:将动态生成的内容(如 PHP、Python、Node.js 等)和静态资源(如 HTML、CSS、JavaScript、图片、视频等)分别存放在不同的服务器或路径上。
- 多站点代理:Nginx可以代理多个域名或虚拟主机,将不同的请求转发到不同的后端服务器上,实 现多个站点的共享端口。
Location 配置
Location 配置语法
Nginx 使用 location``匹配规则 + proxy_pass`` 反向代理指令实现反向代理功能,匹配本质是 "URL 路 径匹配 → 命中对应规则 → 转发至指定后端地址"。
location定义匹配路径proxy_pass指定后端服务地址
bash
http {
    # 后端服务可配置 upstream 集群(推荐,支持负载均衡)
    upstream backend_nginx {
        nginx 192.168.1.100:8080;  # 后端服务1
        nginx 192.168.1.101:8080;  # 后端服务2(多节点自动轮询负载均衡)
    }
    server {
        listen 80;  # Nginx 监听端口
        server_name localhost;  # 访问域名/IP
        # 1. 匹配所有请求(兜底规则)
        location / {
            proxy_pass http://backend_nginx;  # 转发至 upstream 集群
            # 必加的反向代理核心参数(传递客户端真实信息、适配后端服务)
            proxy_set_header Host $host;                # 传递客户端访问的域名
            proxy_set_header X-Real-IP $remote_addr;    # 传递客户端真实IP
            proxy_set_header X-Forwarded-For $proxy_add_x_forwarded_for; #传递IP链
路
            proxy_set_header X-Forwarded-Proto $scheme; # 传递请求协议(http/https)
        }
        # 2. 匹配特定路径(如 /api 开头的请求,单独转发)
        location /api/ {
            proxy_pass http://192.168.1.102:9090/;  # 后端地址末尾带 /,会剔除匹配的
/api/
            proxy_set_header Host $host;
            proxy_set_header X-Real-IP $remote_addr;
}
}
}
Location 匹配规则
- 后端匹配逻辑:URL 路径 → 按 location 优先级命中规则 → 由规则内的 proxy_pass 转发至对应 后端;
- 优先级:精确匹配(=)> 前缀匹配(^~)> 正则匹配(/*)> 普通前缀 > 兜底(/);
- URL 重构关键: proxy_pass 末尾是否带 /,决定是否剔除 location 匹配的路径前缀。
1.精确匹配(=)
- 语法:
location = /path { ... } - 逻辑:仅当请求 URL 与 示例: /path 完全一致时命中,优先级最高。
- 示例:
bash
# 仅匹配 http://localhost/login,不匹配 /login?a=1、/login/
location = /login {
	proxy_pass http://backend_login:8080;
}
2.前缀配(^~)
- 语法:
location ^~ /path { ... } - 逻辑:URL 以 /path 开头即命中,优先级仅次于精确匹配,会跳过正则匹配。
- 用途:优先匹配静态资源(如 /static、/img)或特定业务路径,避免被正则规则拦截。
- 示例:
bash
# 匹配所有 /static 开头的请求(如 /static/css/main.css、/static/img/1.jpg)
location ^~ /static/ {
	proxy_pass http://backend_static:80;
}
3.正则匹配(~ / ~*)
- 语法:
- 区分大小写:
location ~ /regex { ... }(如 /API 不匹配 /api 规则) - 不区分大小写: location ~* /regex { ... }(如 /API、/api 均匹配)
- 区分大小写:
- 逻辑:URL 符合正则表达式即命中,优先级低于前缀匹配(^~),多个正则规则按定义顺序匹配, 先命中先生效。
- 示例:
bash
# 匹配所有 .jpg、.png、.gif 结尾的图片请求(不区分大小写)
location ~* \.(jpg|png|gif)$ {
	proxy_pass http://backend_img:80;
}
4.普通前缀匹配(无符号)
- 语法:
location /path { ... } - 逻辑:URL 以 /path 开头即命中,优先级低于正则匹配,多个普通前缀规则按 "路径最长" 优先命 中。
- 示例:
bash
# 规则1:匹配 /api/xxx(路径长度3)
location /api/ {
	proxy_pass http://backend_api:9090;
}
# 规则2:匹配 /api/user/xxx(路径长度7,比规则1长,优先命中)
location /api/user/ {
	proxy_pass http://backend_user:9090;
}
5.通用匹配(/)
- 语法:
location / { ... } - 逻辑:所有未被上述规则命中的请求,都会匹配此规则(兜底),优先级最低。
- 用途:通常作为全局反向代理,转发所有默认请求到主后端服务。
proxy_pass 后端地址细节
proxy_pass 末尾是否带 /,会直接改变转发到后端的 URL 路径,这是后端匹配后 "URL 重构" 的核 心,分 2 种场景:
场景 1:proxy_pass 末尾带 /
- 逻辑:转发时,会剔除 location 匹配的路径前缀,将剩余路径拼接在后端地址后。
- 示例:
bash
# location 匹配 /api/,proxy_pass 末尾带 /
location /api/ {
	proxy_pass http://192.168.1.102:9090/;
}
# 实际转发逻辑:
# 客户端请求 http://localhost/api/user/list → 后端接收 http://192.168.1.102:9090/user/list
场景 2:proxy_pass 末尾不带 /
- 逻辑:转发时,会保留 location 匹配的路径前缀,直接拼接在后端地址后。
- 示例:
bash
# location 匹配 /api/,proxy_pass 末尾不带 /
location /api/ {
    proxy_pass http://192.168.1.102:9090;
}
# 实际转发逻辑:
# 客户端请求 http://localhost/api/user/list → 后端接收 http://192.168.1.102:9090/api/user/list
综合示例
配置文件
ini
http {
    upstream backend_main { nginx 192.168.1.200:8080; }
    upstream backend_api { nginx 192.168.1.201:9090; }
    upstream backend_static { nginx 192.168.1.202:80; }
    upstream backend_login { nginx 192.168.1.203:8080; }

    server {
        listen 80;
        server_name localhost;

        # 1. 精确匹配:仅 /login → 后端 login 服务
        location = /login {
            proxy_pass http://backend_login;
            proxy_set_header Host $host;
        }

        # 2. 前缀匹配:/static/ 开头 → 后端静态服务(跳过正则)
        location ^~ /static/ {
            proxy_pass http://backend_static/;
            proxy_set_header Host $host;
        }

        # 3. 正则匹配:图片后缀 → 后端静态服务
        location ~* \.(jpg|png|gif)$ {
            proxy_pass http://backend_static;
            proxy_set_header Host $host;
        }

        # 4. 普通前缀:/api/ 开头 → 后端 api 服务
        location /api/ {
            proxy_pass http://backend_api/;
            proxy_set_header Host $host;
            proxy_set_header X-Real-IP $remote_addr;
        }

        # 5. 兜底匹配:所有未命中的请求 → 主后端服务
        location / {
            proxy_pass http://backend_main;
            proxy_set_header Host $host;
            proxy_set_header X-Real-IP $remote_addr;
        }
    }
}
匹配流程
| 客户端请求 URL | 命中的 location 规则 | 转发至后端的 URL | 对应后端服务 |
|---|---|---|---|
| http://localhost/login | = /login | http://192.168.1.203:8080/login | backend_login |
| http://localhost/static/css/main.css | ^~ /static/ | http://192.168.1.202:80/css/main.css | backend_static |
| http://localhost/img/1.jpg | ~* \ .(jpg|png|gif)$ | http://192.168.1.202:80/img/1.jpg | backend_static |
| http://localhost/api/user/info | /api/ | http://192.168.1.201:9090/user/info | backend_api |
| http://localhost/index | / | http://192.168.1.200:8080/index | backend_main |
反向代理实践环境
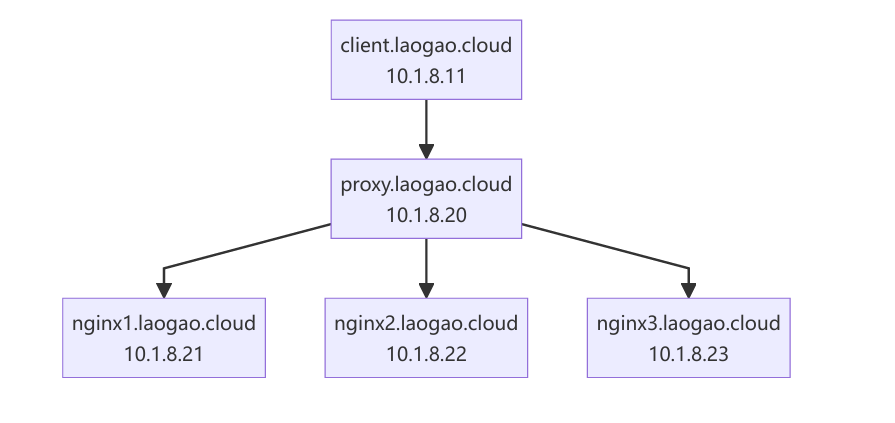
环境架构
节点规划
使用centos7模板克隆下面5台
| 主机名 | IP地址 | 服务器 | 服务器角色 |
|---|---|---|---|
| client.laogao.cloud | 10.1.8.11 | 客户端 | 测试服务器 |
| proxy.laogao.cloud | 10.1.8.20 | Nginx 服务器 | 代理服务器 |
| nginx1.laogao.cloud | 10.1.8.21 | Nginx 服务器 | Web 服务器 |
| nginx2.laogao.cloud | 10.1.8.22 | Nginx 服务器 | Web 服务器 |
| nginx3.laogao.cloud | 10.1.8.23 | Nginx 服务器 | Web 服务器 |
基础配置
bash
#celient
[root@centos7 ~ 14:33:53]# hostnamectl set-hostname client.ljw.cloud
[root@centos7 ~ 14:34:16]# bash
[root@client ~ 14:34:20]# nmcli connection modify ens33 ipv4.method manual ipv4.addresses 10.1.8.11/24 ipv4.gateway 10.1.8.2 ipv4.dns 10.1.8.2 autoconnect yes
[root@client ~ 14:35:26]# nmcli connection up ens33
[root@client ~ 14:39:58]# setenforce 0


#proxy
[root@centos7 ~ 14:36:12]# hostnamectl set-hostname proxy.ljw.cloud
[root@centos7 ~ 14:37:01]# bash
[root@proxy ~ 14:37:04]# nmcli connection modify ens33 ipv4.method manual ipv4.addresses 10.1.8.20/24 ipv4.gateway 10.1.8.2 ipv4.dns 10.1.8.2 autoconnect yes
[root@proxy ~ 14:37:28]# nmcli connection up ens33
[root@proxy ~ 14:37:34]# setenforce 0


#nginx1
[root@centos7 ~ 14:37:58]# hostnamectl set-hostname nginx1.ljw.cloud
[root@centos7 ~ 14:38:08]# nmcli connection modify ens33 ipv4.method manual ipv4.addresses 10.1.8.21/24 ipv4.gateway 10.1.8.2 ipv4.dns 10.1.8.2 autoconnect yes
[root@centos7 ~ 14:38:22]# nmcli connection up ens33
[root@nginx1 ~ 14:38:31]# setenforce 0


#nginx2
[root@centos7 ~ 14:38:33]# hostnamectl set-hostname nginx2.ljw.cloud
[root@centos7 ~ 14:38:45]# nmcli connection modify ens33 ipv4.method manual ipv4.addresses 10.1.8.22/24 ipv4.gateway 10.1.8.2 ipv4.dns 10.1.8.2 autoconnect yes
[root@centos7 ~ 14:38:58]# nmcli connection up ens33
[root@nginx2 ~ 14:39:09]# setenforce 0


#nginx3
[root@centos7 ~ 14:39:19]# hostnamectl set-hostname nginx3.ljw.cloud
[root@centos7 ~ 14:39:25]# nmcli connection modify ens33 ipv4.method manual ipv4.addresses 10.1.8.23/24 ipv4.gateway 10.1.8.2 ipv4.dns 10.1.8.2 autoconnect yes
[root@centos7 ~ 14:39:35]# nmcli connection up ens33
[root@centos7 ~ 14:39:42]# bash
[root@nginx3 ~ 14:39:44]# setenforce 0
配置/etc/hosts
bash
# 所有节点
[root@所有节点 ~]# vim /etc/hosts
127.0.0.1   localhost localhost.localdomain localhost4 localhost4.localdomain4
::1         localhost localhost.localdomain localhost6 localhost6.localdomain6
10.1.8.11 client.ljw.cloud client
10.1.8.20 www.ljw.cloud www
10.1.8.20 proxy.ljw.cloud proxy
10.1.8.21 nginx1.ljw.cloud nginx1
10.1.8.21 nginx2.ljw.cloud nginx2
10.1.8.21 nginx3.ljw.cloud nginx3
后端 nginx 服务器配置
bash
# 除了客户端,所有节点安装nginx并启动nginx服务。
[root@proxy,nginx1,nginx2,nginx3 ~]# wget -O /etc/yum.repos.d/epel.repo http://mirrors.aliyun.com/repo/epel-7.repo
[root@proxy,nginx1,nginx2,nginx3 ~]# yum -y install nginx


# 启动并启用服务
[root@proxy,nginx1,nginx2,nginx3 ~]# systemctl enable nginx --now
# 防火墙设置
[root@proxy,nginx1,nginx2,nginx3 ~]# firewall-cmd --add-service=http --permanent
[root@proxy,nginx1,nginx2,nginx3 ~]# firewall-cmd --add-service=http


# 准备主页-其他节点
[root@nginx1 ~ 15:31:34]#  echo Welcome to $(hostname) > /usr/share/nginx/html/index.html
[root@nginx2 ~ 15:31:34]#  echo Welcome to $(hostname) > /usr/share/nginx/html/index.html
[root@nginx3 ~ 15:31:34]#  echo Welcome to $(hostname) > /usr/share/nginx/html/index.html


# 客户端测试
[root@client ~ 15:37:22]# curl http://nginx1.ljw.cloud/
Welcome to nginx1.ljw.cloud
[root@client ~ 15:37:31]# curl http://nginx2.ljw.cloud/
Welcome to nginx1.ljw.cloud
[root@client ~ 15:37:38]# curl http://nginx3.ljw.cloud/
Welcome to nginx1.ljw.cloud
前端 proxy 服务器配置
bash
# 准备主页-代理节点
[root@proxy ~ 15:34:57]# echo welcome to www.ljw.cloud > /usr/share/nginx/html/index.html


[root@proxy ~ 15:38:26]# mkdir /var/nginx
[root@proxy ~ 15:38:34]# echo "Hello, Nginx" > /var/nginx/index.html
[root@proxy ~ 15:39:01]# echo "Hello, ljw" > /var/nginx/test.txt
[root@proxy ~ 15:39:25]# cp /usr/share/nginx/html/nginx-logo.png /var/nginx/
[root@proxy ~ 15:39:42]# ls /var/nginx/
index.html  nginx-logo.png  test.txt


[root@proxy ~ 15:39:47]# vim /etc/nginx/conf.d/proxy.conf
server {
	listen  80;
	server_name www.laogao.cloud;
	# 匹配根位置
	location / {
	root /var/nginx;
	index index.html;
  }
}


# 重新加载nginx配置
[root@proxy ~ 15:40:57]# nginx -s reload
测试
bash
[root@client ~ 16:13:03]# curl  http://www.ljw.cloud
Hello, Nginx

[root@client ~ 16:13:18]# curl  http://www.ljw.cloud/test.txt
Hello, ljw
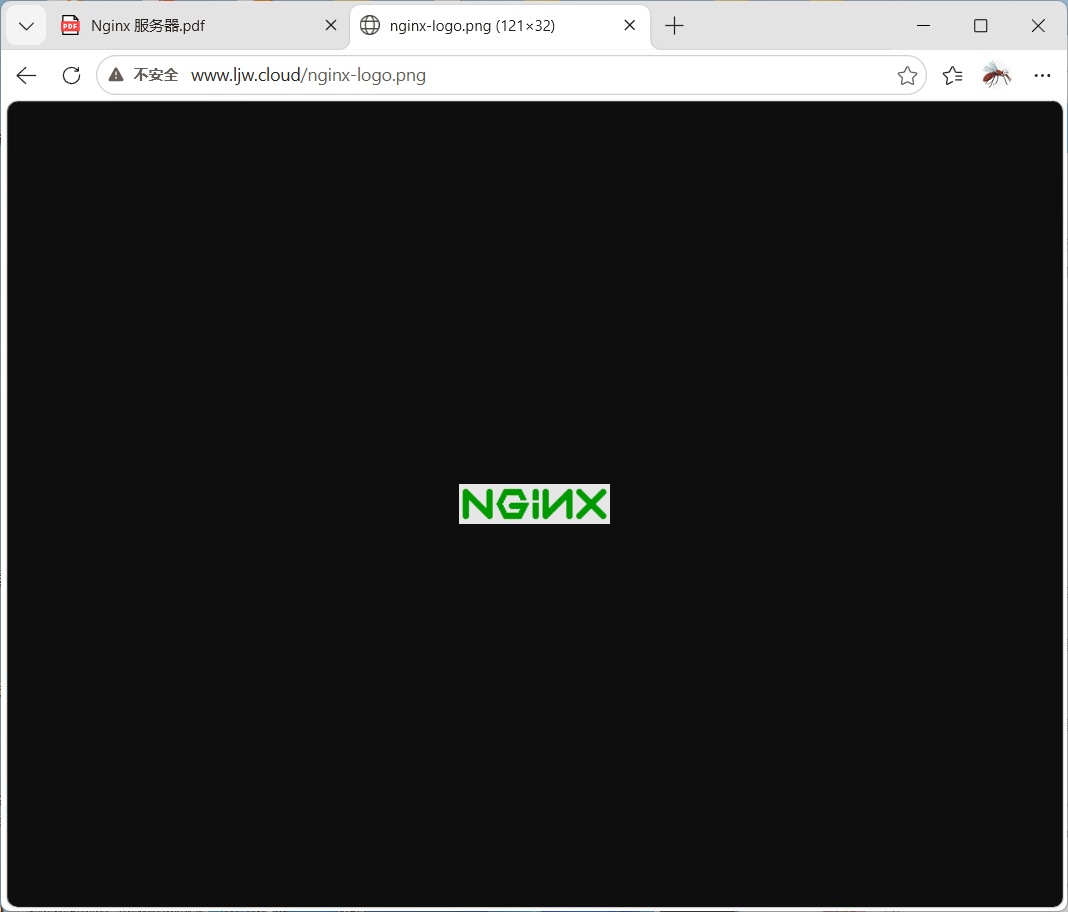
访问 www.laogao.cloud/nginx-logo.png,系统会返回以下页面:
反向代理基础实践-代理本地
环境准备
bash
[root@proxy ~ 15:45:56]# mkdir /var/nginx/nginx{1,2}
[root@proxy ~ 16:03:17]# echo "Hello, I'm here /var/nginx/nginx1" > /var/nginx/nginx1/index.html
[root@proxy ~ 16:03:32]# echo "Hello, I'm here /var/nginx/nginx2" > /var/nginx/nginx2/index.html


[root@proxy ~ 16:03:42]# mkdir /var/nginx{1,2}
[root@proxy ~ 16:03:53]# echo "Hello, Nginx1" > /var/nginx1/index.html
[root@proxy ~ 16:04:02]# echo "Hello, Nginx2" > /var/nginx2/index.html
[root@proxy ~ 16:04:09]# tree /var/nginx*
/var/nginx
├── index.html
├── nginx1
│   └── index.html
├── nginx2
│   └── index.html
├── nginx-logo.png
└── test.txt
/var/nginx1
└── index.html
/var/nginx2
└── index.html

2 directories, 7 files


[root@proxy ~ 16:04:19]#  \
> for path1 in www{1..2}
> do
> for path2 in nginx{1..2}
> do
> mkdir -p /var/$path1/$path2
> echo "Hello, I'm here /var/$path1/$path2" > /var/$path1/$path2/index.html
> done
> done


[root@proxy ~ 16:04:40]# tree /var/www*
/var/www
├── cgi-bin
└── html
/var/www1
├── nginx1
│   └── index.html
└── nginx2
    └── index.html
/var/www2
├── nginx1
│   └── index.html
└── nginx2
    └── index.html

6 directories, 4 files
基本测试
bash
[root@client ~ 15:41:29]# curl http://www.ljw.cloud
Hello, Nginx


# 显示结果是目录/var/nginx/nginx2中内容
[root@client ~ 16:07:19]# curl -L  http://www.ljw.cloud/nginx2
Hello, I'm here /var/nginx/nginx2


# 显示结果是目录/var/nginx/nginx1中内容
[root@client ~ 16:07:52]# curl -L  http://www.ljw.cloud/nginx1
Hello, I'm here /var/nginx/nginx1
实践1:无符号匹配
bash
[root@proxy ~ 16:14:22]# vim /etc/nginx/conf.d/proxy.conf
server {
        listen  80;
        server_name www.ljw.cloud;

        # 匹配根位置
        location / {
        root /var/nginx;
        index index.html;
      }
        # 匹配/nginx1时,/var目录下找nginx1,完整路径是/var/nginx1
        location /nginx1 {
            root /var;
            #等效于下面的 alias 语句,必须使用绝对路径
            #alias /var/nginx1;
            index index.html;
    }
}

[root@proxy ~ 16:35:46]# nginx -s reload
访问测试
bash
# nginx1 后面必须添加 / 符号
[root@client ~ 16:15:28]# curl -L http://www.ljw.cloud/nginx1/
Hello, Nginx1
# 显示结果是目录/var/nginx1中内容


# nginx2 后面必须添加 / 符号
[root@client ~ 16:36:21]# curl -L http://www.ljw.cloud/nginx2/
Hello, I'm here /var/nginx/nginx2
# 显示结果是目录/var/nginx/nginx2中内容实验结果:无符号匹配优先级高于默认的/。
实践2:正则表达式匹配
bash
[root@proxy ~ 16:38:07]# vim /etc/nginx/conf.d/proxy.conf
server {
        listen  80;
        server_name www.ljw.cloud;

        # 匹配根位置
        location / {
        root /var/nginx;
        index index.html;
      }
        # 匹配/nginx1时,/var目录下找nginx1,完整路径是/var/nginx1
        location /nginx1 {
            root /var;
            #
            #
            index index.html;
    }
        location ~ /nginx.* {
            root /var/www1;
            index index.html;
    }
}

[root@proxy ~ 16:41:01]# nginx -s reload
访问测试
bash
# nginx1 后面必须添加 / 符号
[root@client ~ 16:36:51]# curl -L http://www.ljw.cloud/nginx1/
Hello, I'm here /var/www1/nginx1
# 显示结果是目录/var/www1/nginx1中内容


# nginx2 后面必须添加 / 符号
[root@client ~ 16:41:25]# curl -L http://www.ljw.cloud/nginx2/
Hello, I'm here /var/www1/nginx2
# 显示结果是目录/var/www1/nginx2中内容实验结果:正则表达式匹配优先级高于无符号。
实践3:精确匹配
bash
[root@proxy ~ 16:41:06]# vim /etc/nginx/conf.d/proxy.conf
server {
        listen  80;
        server_name www.ljw.cloud;

        # 匹配根位置
        location / {
        root /var/nginx;
        index index.html;
      }
        # 匹配/nginx1时,/var目录下找nginx1,完整路径是/var/nginx1
        location /nginx1 {
            root /var;
            # 等效于下面的 alias 语句,必须使用绝对路径
            # alias /var/nginx1;
            index index.html;
    }

        # 正则表达式匹配 /nginx.*
        location ~ /nginx.* {
            root /var/www1;
            index index.html;
    }

        # 精确匹配
        location = /nginx2/index.html {
            root /var/www2;
            index index.html;
    }

}

[root@proxy ~ 16:46:54]# nginx -s reload
访问测试
bash
# nginx1 后面必须添加 / 符号
[root@client ~ 16:41:32]# curl -L http://www.ljw.cloud/nginx1/
Hello, I'm here /var/www1/nginx1
# 显示结果是目录/var/www1/nginx1中内容


# nginx2 后面必须添加 / 符号
[root@client ~ 16:47:18]# curl -L http://www.ljw.cloud/nginx2/
Hello, I'm here /var/www2/nginx2
# 显示结果是目录/var/www2/nginx2中内容实验结果:精确匹配优先级高于正则表达式。