一、使用 Ansible Vault 加密配置文件
什么是 Ansible Vault?
Ansible Vault 是 Ansible 提供的一种加密工具,允许用户对包含敏感数据的文件进行加密。它使用 AES-256 对称加密算法,确保只有拥有正确密码的用户才能解密和访问文件内容。Vault 加密的文件可以安全地存储在版本控制系统(如 Git)中,与普通 Playbook 和角色一起管理,而不会泄露敏感信息。
核心优势
-
无缝集成:与 Ansible 工作流完全集成,加密文件可以直接在 Playbook 中引用
-
版本控制友好:加密后的文件是文本格式,适合 Git 等版本控制系统跟踪变更
-
灵活的密码管理:支持单个密码、密码文件、密码脚本等多种认证方式
-
细粒度控制:可以对整个文件加密,也可以只加密文件中的特定变量
演示一:加密用户配置文件
下面通过一个完整的示例演示如何使用 Ansible Vault 保护包含用户密码的配置文件。
1. 准备环境与配置文件
首先创建 Ansible 项目目录并准备两个关键文件:包含敏感数据的变量文件和执行用户创建的 Playbook。
bash
[kyy@server1 ansible]$ cd /home/kyy/ansible/
[kyy@server1 ansible]$ vim userlist.yml
---
userlist:
-{user: user1,pass: pass1}
-{user: user2,pass: pass2}
-{user: user3,pass: pass3}
userlist.yml 文件包含三个用户的用户名和明文密码,这是需要保护的核心敏感数据。
bash
[kyy@server1 ansible]$ vim user.yml
---
- hosts: db
  gather_facts: no
  vars_files:
    - userlist.yml
  tasks:
    - name: Add the users
      ansible.builtin.user:
        name: "{{ item.user }}"
        password: "{{ item.pass | password_hash('sha512') }}"
        state: present
      loop: "{{ userlist }}"
user.yml Playbook 会读取加密后的变量文件,为每个用户创建账户并使用 password_hash 过滤器将明文密码转换为安全的哈希值。
2. 初始测试(未加密状态)
在加密前,我们先验证 Playbook 能正常执行:
bash
[kyy@server1 ansible]$ ansible-playbook user.yml
PLAY [db] **********************************************************************
TASK [Add the users] ***********************************************************
changed: [192.168.223.181] => (item={'user': 'user1', 'pass': 'pass1'})
changed: [192.168.223.181] => (item={'user': 'user2', 'pass': 'pass2'})
changed: [192.168.223.181] => (item={'user': 'user3', 'pass': 'pass3'})
PLAY RECAP *********************************************************************
192.168.223.181            : ok=1    changed=1    unreachable=0    failed=0    skipped=0    rescued=0    ignored=0
执行成功,三个用户已创建。但此时 userlist.yml 仍是明文,存在安全风险。
3. 使用 Vault 加密配置文件
现在使用 ansible-vault encrypt 命令加密敏感文件:
bash
[kyy@server1 ansible]$ ansible-vault encrypt userlist.yml
New Vault password:
Confirm New Vault password:
Encryption successful
加密后尝试直接运行 Playbook:
cpp
[kyy@server1 ansible]$ ansible-playbook user.yml
ERROR! Attempting to decrypt but no vault secrets found
Ansible 检测到文件已加密,但未提供解密密码,因此执行失败。
4. 提供 Vault 密码执行加密 Playbook
使用 --ask-vault-pass 参数在运行时提供密码:
bash
[kyy@server1 ansible]$ ansible-playbook user.yml --ask-vault-pass
Vault password:
PLAY [db] **********************************************************************
TASK [Add the users] ***********************************************************
changed: [192.168.223.181] => (item={'user': 'user1', 'pass': 'pass1'})
changed: [192.168.223.181] => (item={'user': 'user2', 'pass': 'pass2'})
changed: [192.168.223.181] => (item={'user': 'user3', 'pass': 'pass3'})
PLAY RECAP *********************************************************************
192.168.223.181            : ok=1    changed=1    unreachable=0    failed=0    skipped=0    rescued=0    ignored=0
成功!Ansible 使用提供的密码解密文件后正常执行了 Playbook。
5. 查看加密文件内容
加密后的文件内容已变为不可读的密文:
bash
[kyy@server1 ansible]$ cat userlist.yml
$ANSIBLE_VAULT;1.1;AES256
37616262316265326538376235643265393238623935333265383734383635376639306136656433
3730613336656263393936323135396135656361373639660a653033633064613039356231666266
35653139636264623631643432646563306337396666663736376438383331373236616436376538
3865396465303831640a656165633634363761373462303364326535656632386337633161366336
32356565376630646534363334663635623331666266323937393062393465643931343161613134
34653664333862626361353537346263666139393039373535373964623862346334636132323163
64326638346565383331353466353736303732393236643734366561393537346365653130386333
31336364656632663836623064303138383863623965353232363866313665663666323633663531
35343839616463343939376338393636353438316365373965653435363864386630
文件头部标识 $ANSIBLE_VAULT;1.1;AES256 表明这是一个使用 AES-256 加密的 Ansible Vault 文件。
高级用法与最佳实践
1. 密码管理策略
-
密码文件 :将 Vault 密码保存在文件中,使用
--vault-password-file参数 -
环境变量 :通过
ANSIBLE_VAULT_PASSWORD_FILE环境变量指定密码文件 -
脚本集成:使用密码脚本动态获取密码(如从密钥管理系统)
2. 常用 Vault 命令
ansible-vault create file.yml- 创建并直接编辑加密文件
ansible-vault edit file.yml- 编辑已加密的文件
ansible-vault view file.yml- 查看加密文件内容
ansible-vault decrypt file.yml- 解密文件(恢复为明文)
ansible-vault rekey file.yml- 更改加密密码
演示二:使用 group_vars 组变量 管理 webservers 组公用变量
只要主机属于清单里
webservers这个组,执行剧本时自动加载这个文件里的变量 ,不用在 playbook 里手动写vars_files。
ansible/
├─ hosts                # 被控主机清单
├─ test.yml             # 主剧本playbook
├─ group_vars/
│  └─ webservers/
│     └─ vars           # 【组变量文件】
cs
[kyy@server1 ansible]$ mkdir host_vars
[kyy@server1 ansible]$ cd host_vars/
[kyy@server1 host_vars]$ mkdir host1
[kyy@server1 host_vars]$ ls
host1
[kyy@server1 host_vars]$ cd host1
[kyy@server1 host1]$ cp ../../userlist.yml vault
[kyy@server1 host1]$ ls
vault
[kyy@server1 host1]$ cat vault
---
userlist:
- {user: user1, pass: pass1}
- {user: user2, pass: pass2}
- {user: user3, pass: pass3}
使用 ansible-vault 加密存放敏感信息的变量文件;
cpp
[kyy@server1 host1]$ ansible-vault encrypt vault
New Vault password:
Confirm New Vault password:
Encryption successful
[kyy@server1 host1]$ cat vault
$ANSIBLE_VAULT;1.1;AES256
32616161363262656465303165313766343234356336633432386562366262613235313537366231
6535366635306533396438356336663930303939313164350a306261663962353764333536613865
37303533633139363535663865663539353265313266366561366364636564616531356138383835
6134343265386231380a326438643839633438356634646331396437613863363364613364336638
33333837373161373661313364653532633333363737303937333566386265653739383830333938
35373132646135356561663066313261323561313562653839343163633064383438616363383037
63333362303030303064653965393038336433313566643337633938373238333933663763656562
63623434636135373439613036313262653439643032666231633534623939633833656663376466
34383566346231306130303934333436363238333439613534643630363139323734
演示三:利用 group_vars 定义 webservers 组共享变量,执行 Ansible 剧本给 webservers 组主机部署 httpd 网站并本地访问验证
cs
[kyy@server1 ansible]$ mkdir group_vars
[kyy@server1 ansible]$ cd group_vars/
[kyy@server1 group_vars]$ mkdir webservers
[kyy@server1 group_vars]$ cd webservers/
[kyy@server1 webservers]$ vim vars
---
http_potr:80
[kyy@server1 ansible]$ ansible-playbook test.yml
PLAY [webservers] *****************************************************************************************
TASK [Gathering Facts] *****************************************************************************************
ERROR! Attempting to decrypt but no vault secrets found
因存在 vault 加密文件运行剧本需提供解密密码。
cs
[kyy@server1 ansible]$ ansible-playbook test.yml --ask-vault-pass
Vault password:
PLAY [webservers] *****************************************************************************************
TASK [Gathering Facts] *****************************************************************************************
ok: [host1]
ok: [server2]
TASK [Install the Apache] *****************************************************************************************
ok: [host1]
ok: [server2]
TASK [Start service httpd, if not started] *****************************************************************************************
ok: [host1]
ok: [server2]
TASK [create index.html] *****************************************************************************************
ok: [host1]
ok: [server2]
PLAY [localhost] *****************************************************************************************
TASK [Check that you can connect (GET) to a page and it returns a status 200] ********************************************************************
ok: [localhost]
TASK [Print return information from the previous task] *******************************************************************************************
ok: [localhost] => {
"result.content": "server2\n"
}
PLAY RECAP *****************************************************************************************
host1                      : ok=4    changed=0    unreachable=0    failed=0    skipped=0    rescued=0    ignored=0
localhost                  : ok=2    changed=0    unreachable=0    failed=0    skipped=0    rescued=0    ignored=0
server2                    : ok=4    changed=0    unreachable=0    failed=0    skipped=0    rescued=0    ignored=0
二、使用ansible-playbook部署zabbix服务
Zabbix 是一款功能强大的企业级开源监控解决方案,能够监控网络、服务器、云服务、应用程序和数据库等各类 IT 基础设施。通过 Ansible 自动化部署 Zabbix,可以显著提升部署效率、确保环境一致性,并降低手动配置可能引入的错误。本节将详细介绍如何使用
ansible-playbook自动化完成 Zabbix 服务端、前端、数据库以及 Agent 的安装与配置。
部署zabbix前端
cs
[kyy@server1 ansible]$ vim hosts
添加模块
[zabbix_server]
server2
[kyy@server1 ansible]$ vim zabbix.yml
配置yum源
hosts: zabbix_server
tasks:
name: add zabbix repo
ansible.builtin.yum:
name: https://repo.zabbix.com/zabbix/6.0/rhel/9/x86_64/zabbix-release-6.0-4.el9.noarch.rpm
state: present
disable_gpg_check: yes
安装zabbix server、web前端、agent
name: install zabbix-server
ansible.builtin.yum:
name:
- zabbix-server-mysql
- zabbix-web-mysql
- zabbix-apache-conf
- zabbix-sql-scripts
- zabbix-selinux-policy
- zabbix-agent
state: present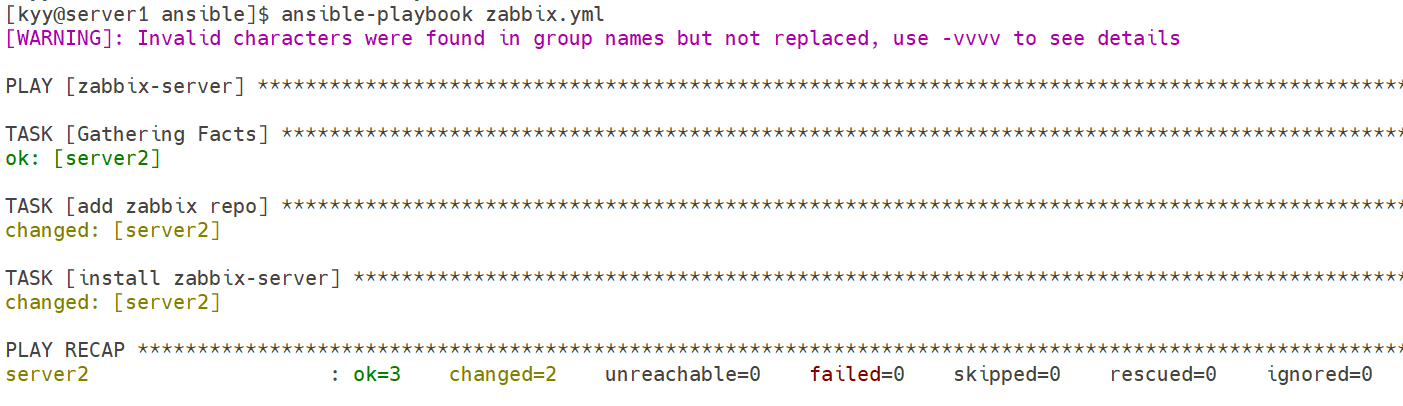
有这个警告就把zabbix-server改为zabbix_server即可
安装数据库服务并设置开机自启
cs
接上个代码段
```
# 安装mysql
     - name: install mysql-server
       ansible.builtin.yum:
         name:
           - mysql-server
           - python3-PyMySQL
         state: present
启动服务
 - name: enable service mysql
   ansible.builtin.service:
     name: mysqld
     state: started
     enabled: yes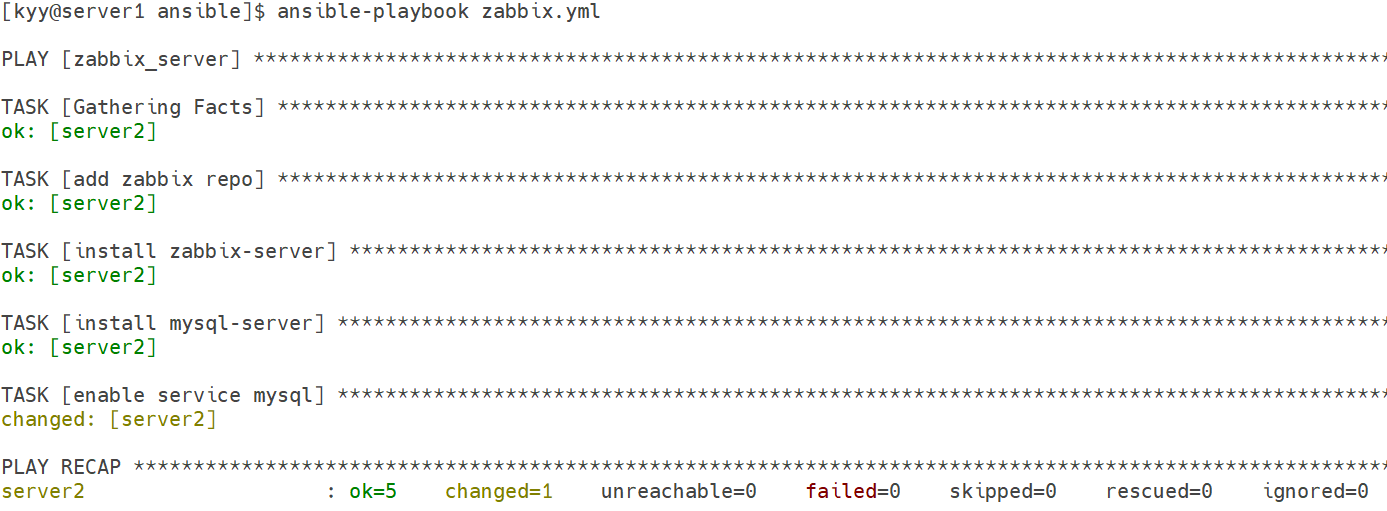
初始化数据库
cs
 - name: init zabbix_database
      ansible.mysql.mysql_db:
        name: zabbix
        state: present
        encoding: utf8mb4
        collation: utf8mb4_bin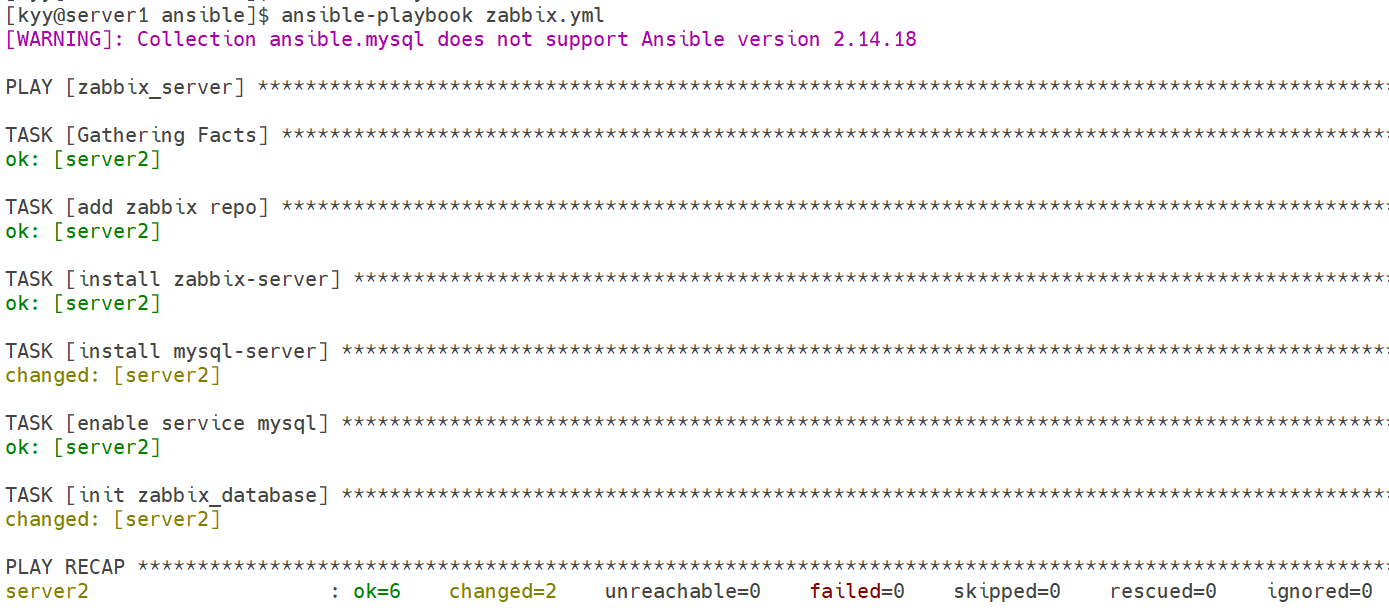
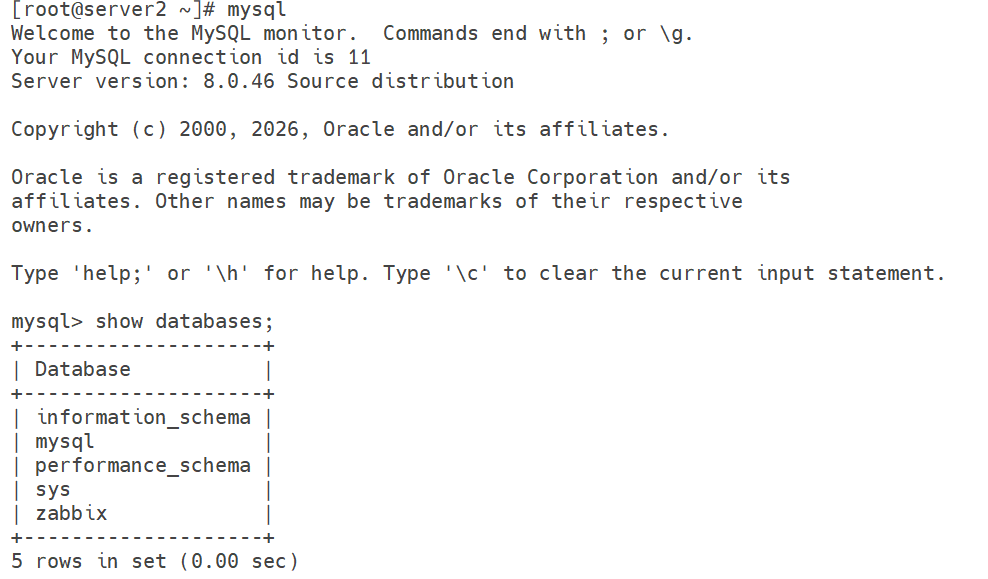
在部署zabbix服务的server2上登录mysql验证
导入初始化数据
cs
# 创建 zabbix 数据库账号并授权
- name: create zabbix user
      ansible.mysql.mysql_user:
        name: zabbix
        host: localhost
        password: zabbix
        priv: 'zabbix.*:ALL'
        state: present
临时开启 MySQL 存储函数创建权限
- name: set log_bin_trust_function_creators to 1
  ansible.mysql.mysql_variables:
    variable: log_bin_trust_function_creators
    value: 1
导入 zabbix 初始化数据库(仅运行一次)
- name: import zabbix sql script
  ansible.builtin.shell: zcat /usr/share/zabbix-sql-scripts/mysql/server.sql.gz | mysql --default-character-set=utf8mb4 -uzabbix -pzabbix zabbix && touch /etc/zabbix/.init_db_sql.lock
  args:
    creates: /etc/zabbix/.init_db_sql.lock
关闭临时开启的数据库参数
- name: set log_bin_trust_function_creators to 0
  ansible.mysql.mysql_variables:
    variable: log_bin_trust_function_creators
    value: 0
启动所有服务
cs
# 修改 zabbix_server 配置,填入数据库连接密码,让 zabbix 服务能够连上 MySQL
 - name: modify zabbix.conf
      ansible.builtin.lineinfile:
        path: /etc/zabbix/zabbix_server.conf
        regexp: '^DBPassword='
        insertafter: '^# DBPassword='
        line: DBPassword=zabbix
批量启动 zabbix-server、zabbix-agent、httpd、php-fpm,并且全部设置开机自启,整套 zabbix 监控平台正式运行
- name: enable service zabbix_server
  ansible.builtin.service:
    name: "{{ item }}"
    state: started
    enabled: yes
  loop:
    - zabbix-server
    - zabbix-agent
    - httpd
    - php-fpm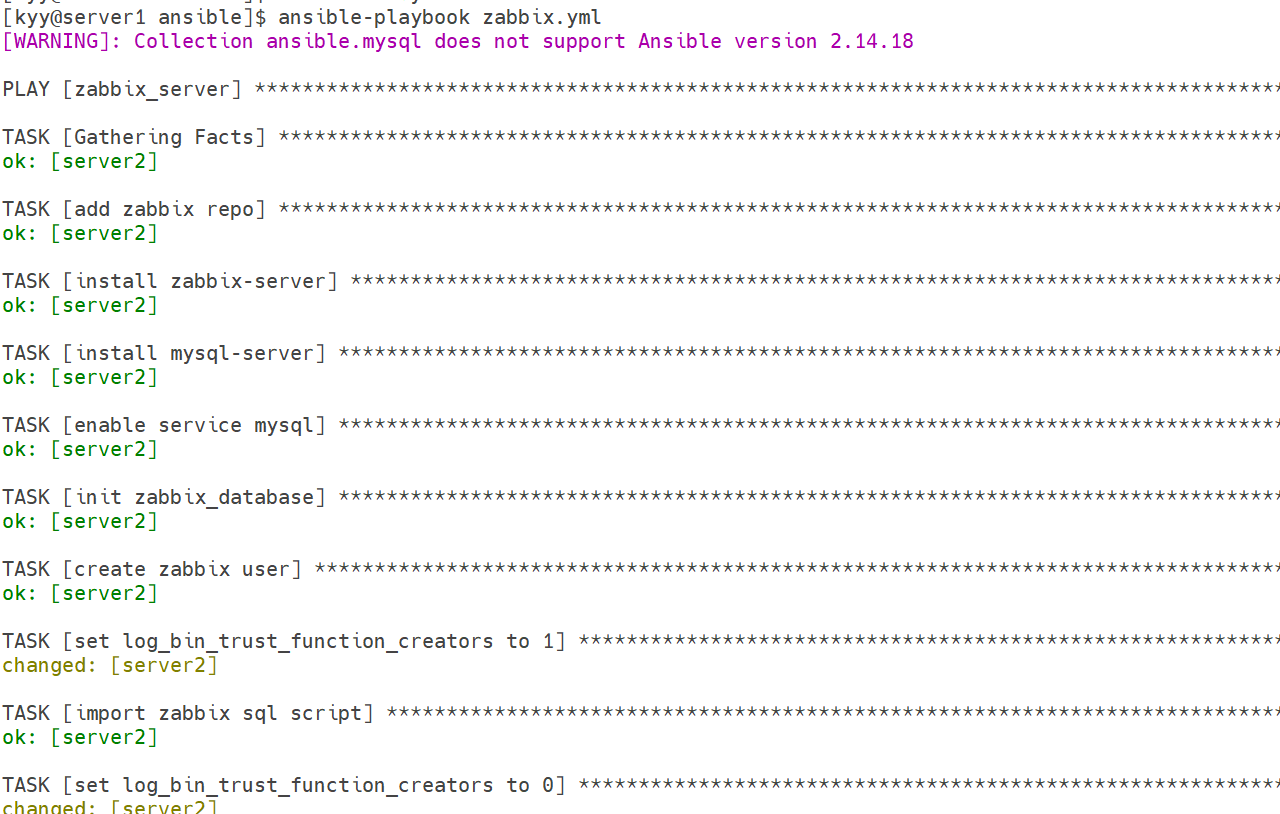
三、拓展练习:将mysq替换为tidb
TiDB 是 PingCAP 开发的分布式关系型数据库,兼容 MySQL 协议。语法、驱动、MySQL 客户端几乎可以直接复用;
底层由三大组件构成:
TiDB Server:SQL 计算层,接收客户端连接(等价 MySQL 的 sql 接口)
PD (Placement Driver):集群元数据管理、调度中心
TiKV:分布式存储引擎,保存数据
和 MySQL 的核心区别
MySQL:单机主从架构,扩容上限受单机磁盘 / 性能限制;
TiDB:原生分布式,可以横向扩容,支持海量数据、水平扩节点。
下载 TiDB 安装包
cs
[root@host1 ~]# echo "nameserver 114.114.114.114" >> /etc/resolv.conf
[root@host1 ~]# wget https://download.pingcap.com/tidb-community-server-v7.5.0-linux-amd64.tar.gz
[root@host1 ~]# ls
anaconda-ks.cfg  tidb-community-server-v7.5.0-linux-amd64.tar.gz
[root@host1 ~]# tar -zxf tidb-community-server-v7.5.0-linux-amd64.tar.gz
运行安装脚本
[root@host1 ~]# cd tidb-community-server-v7.5.0-linux-amd64
让系统识别新命令
[root@host1 tidb-community-server-v7.5.0-linux-amd64]# sh local_install.sh
Disable telemetry success
Successfully set mirror to /root/tidb-community-server-v7.5.0-linux-amd64
Detected shell: bash
Shell profile:  /root/.bash_profile
Installed path: /root/.tiup/bin/tiup
source /root/.bash_profile
Have a try:   tiup playground
===============================================
cpp
启动 TiDB 数据库
[root@host1 tidb-community-server-v7.5.0-linux-amd64]# tiup playground
tiup is checking updates for component playground ...
A new version of playground is available:
   The latest version:         v1.14.0
   Local installed version:
   Update current component:   tiup update playground
   Update all components:      tiup update --all

The component `playground` version  is not installed; downloading from repository.
Starting component `playground`: /root/.tiup/components/playground/v1.14.0/tiup-playground
Using the version v7.5.0 for version constraint "".

If you'd like to use a TiDB version other than v7.5.0, cancel and retry with the following arguments:
        Specify version manually:   tiup playground <version>
        Specify version range:      tiup playground ^5
        The nightly version:        tiup playground nightly

Start pd instance:v7.5.0
The component `pd` version v7.5.0 is not installed; downloading from repository.
Start tikv instance:v7.5.0
The component `tikv` version v7.5.0 is not installed; downloading from repository.
Start tidb instance:v7.5.0
The component `tidb` version v7.5.0 is not installed; downloading from repository.
Waiting for tidb instances ready
127.0.0.1:4000 ... Done
The component `prometheus` version v7.5.0 is not installed; downloading from repository.
Start tiflash instance:v7.5.0
The component `tiflash` version v7.5.0 is not installed; downloading from repository.
Waiting for tiflash instances ready
127.0.0.1:3930 ... Done

🎉 TiDB Playground Cluster is started, enjoy!

Connect TiDB:    mysql --comments --host 127.0.0.1 --port 4000 -u root
TiDB Dashboard:  http://127.0.0.1:2379/dashboard
Grafana:         http://127.0.0.1:3000
TiDB Playground Cluster is started, enjoy! 代表 TiDB 数据库已经全部启动完成
登录TIDB,创建初始化数据库
cpp
新开一个全新终端窗口,登录 TiDB:
[root@host1 ~]# yum  install -y mariadb
[root@host1 ~]# mysql -h 127.0.0.1 -P 4000 -u root
Welcome to the MariaDB monitor.  Commands end with ; or \g.
Your MySQL connection id is 576716806
Server version: 8.0.11-TiDB-v7.5.0 TiDB Server (Apache License 2.0) Community Edition, MySQL 8.0 compatible
Copyright (c) 2000, 2018, Oracle, MariaDB Corporation Ab and others.
Type 'help;' or '\h' for help. Type '\c' to clear the current input statement.
MySQL [(none)]> create database zabbix character set utf8mb4 collate utf8mb4_bin;
Query OK, 0 rows affected (0.42 sec)
MySQL [(none)]> create user zabbix@localhost identified by 'password';
Query OK, 0 rows affected (0.18 sec)
MySQL [(none)]> grant all privileges on zabbix.* to zabbix@localhost;
Query OK, 0 rows affected (0.12 sec)
MySQL [(none)]> quit;
Bye
验证zabbix 登录数据库
cpp
[root@host1 ~]# mysql -h 127.0.0.1 -P 4000 -u zabbix -p
Enter password:
Welcome to the MariaDB monitor.  Commands end with ; or \g.
Your MySQL connection id is 576716808
Server version: 8.0.11-TiDB-v7.5.0 TiDB Server (Apache License 2.0) Community Edition, MySQL 8.0 compatible
Copyright (c) 2000, 2018, Oracle, MariaDB Corporation Ab and others.
Type 'help;' or '\h' for help. Type '\c' to clear the current input statement.
MySQL [(none)]> show databases;
+--------------------+
| Database           |
+--------------------+
| INFORMATION_SCHEMA |
| zabbix             |
+--------------------+
2 rows in set (0.04 sec)