第10章:从零写一个 dsh 插件------实战指南
系列:DeepSeek Harness 源码实战
理解了 Cordis 的原理,接下来动手。这一章带你从零写一个完整的 dsh 插件:定义工具、加配置、注册事件监听器、打包成 bundle(插件包)、安装到 profile(配置文件)、用 HMR(Hot Module Replacement,热模块替换)调试。
不是概念演示------每一步都有真实代码和命令,跟着做就能跑起来。
我是怕浪猫,这是系列第 10 章。我们直接上代码。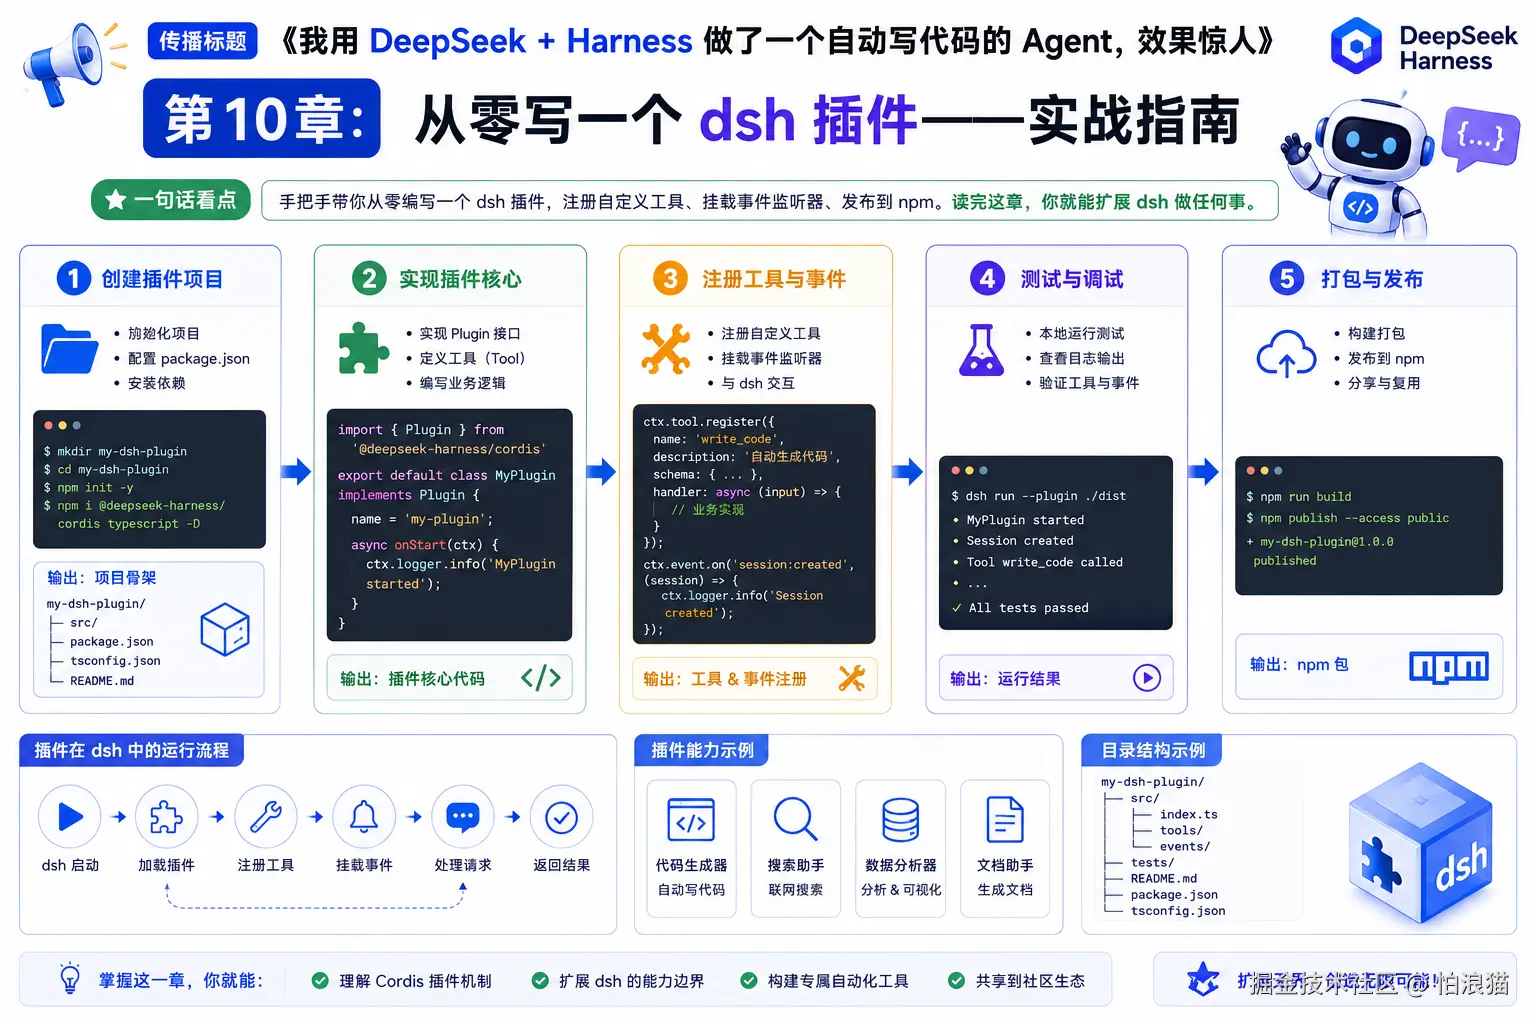
10.1 最简工具插件:greet
先写一个最简单的工具插件,让模型可以调用 greet 工具打招呼。
创建文件 greet-tool/src/index.ts(参考 docs/cordis-tutorial/07-into-the-harness.md 和 docs/user/develop/basic/tool.md):
ts
import type { Context } from '@deepseek-ai/cordis'
import { defineTool } from '@deepseek-ai/dsh-tools'

export const name = 'greet-tool'
export const inject = ['tools']

export function apply(ctx: Context) {
  ctx.tools.register(defineTool({
    name: 'greet',
    description: 'Greet someone by name.',
    parameters: {
      name: { type: 'string', required: true, description: 'The name to greet' },
    },
    output: {
      schema: { type: 'string' },
      render: (_args, value) => [{ type: 'text', text: value }],
    },
    async execute(args) {
      return `Hello, ${args.name}!`
    },
  }))
}
逐行拆解:
| 行 | 作用 |
|---|---|
export const name = 'greet-tool' |
诊断用的显示名称 |
export const inject = ['tools'] |
声明依赖 tools 服务,等 ctx.tools 就绪才加载 |
ctx.tools.register(...) |
注册工具,返回 disposer,自动绑到当前 Fiber |
defineTool(...) |
把 parameters spec 转成 JSON Schema,推断 args 类型,校验模型参数 |
parameters.name |
工具参数定义,type + required + description |
output.schema |
声明 execute 返回值的 JSON Schema |
output.render |
把返回值转成模型可见的 content blocks |
execute(args) |
工具体,args 已经过类型校验和推断 |
创建 greet-tool/cordis.yml(本地 patch 覆盖):
yaml
- insert:
    - id:
greet
      name:
'./src/index.ts'
用 --patch 加载到 dsh Web:
sh
pnpm dsh web --patch ./greet-tool/cordis.yml打开 http://127.0.0.1:3080,对模型说「Use the greet tool to greet Ada」,模型会调用 greet 工具,收到 Hello, Ada!。
10.2 给插件加配置
工具写好了,但打招呼的内容写死了。让用户通过配置自定义。
参考 docs/user/develop/basic/config.md 和 docs/cordis-tutorial/05-config.md:
ts
import type { Context } from '@deepseek-ai/cordis'
import Schema from '@deepseek-ai/schemastery'
import { defineTool } from '@deepseek-ai/dsh-tools'

export const name = 'greet-tool'
export const inject = ['tools']

export interface Config {
  greeting: string
  targets: string[]
}

export const Config: Schema<Config> = Schema.object({
  greeting: Schema.string().default('Hello'),
  targets: Schema.array(String).default(['world']),
})

export function apply(ctx: Context, config: Config) {
  ctx.tools.register(defineTool({
    name: 'greet',
    description: 'Greet someone by name.',
    parameters: {
      name: { type: 'string', required: true, description: 'The name to greet' },
    },
    output: {
      schema: { type: 'string' },
      render: (_args, value) => [{ type: 'text', text: value }],
    },
    async execute(args) {
      return `${config.greeting}, ${args.name}!`
    },
  }))
}
关键变化:
| 变化 | 说明 |
|---|---|
export interface Config |
TypeScript 类型,消费方拿类型 |
export const Config |
Schemastery schema,Cordis 拿校验器 |
apply(ctx, config) |
第二参数接收已校验的配置 |
config.greeting |
替代硬编码的 'Hello' |
在 cordis.yml 中传配置:
yaml
- insert:
    - id:
greet
      name:
'./src/index.ts'
      config:
        greeting:
'Hi there'配置校验失败时的报错(docs/cordis-tutorial/05-config.md):
bash
ValidationError: invalid config:
  - $.greeting expected string but got 42
插件进入 FAILED 状态,进程以退出码 1 终止。dsh 的设计原则是「fail loud(大声失败)」------宁可启动失败,不要带着错误配置静默运行。
金句:配置不是可选项,是必须项。dsh 要求任何两个部署可能想设不同的值都必须是配置字段------测试标准是「cordis.yml 能改这个值而不需要改代码」。
!!js 标签支持运行时计算配置值(docs/cordis-tutorial/05-config.md):
yaml
- insert:
    - id:
greet
      name:
'./src/index.ts'
      config:
        greeting:
!!js
process.env.GREETING
??
'Hello'
!!js 只在 config 和 disabled 字段中可用。disabled: !!js process.platform === 'win32' 可以按平台门控插件。
10.3 加事件监听器:工具调用日志
工具能用了,现在加一个独立的监听器插件,记录所有工具调用的结果。
参考 docs/cordis-tutorial/07-into-the-harness.md 的 observer 插件:
ts
// tool-logger/src/index.ts
import type { Context } from '@deepseek-ai/cordis'
import '@deepseek-ai/dsh-tools'  // 拉入事件类型声明

export const name = 'tool-logger'
export const inject = ['tools']

export function apply(ctx: Context) {
  ctx.on('tools/result', (exec, result) => {
    const text = result.content
      .map(block => (block.type === 'text' ? block.text : ''))
      .join('')
    console.log(`[tool-logger] ${exec.name} -> ${text}`)
  })
}
关键点:
| 要点 | 说明 |
|---|---|
import '@deepseek-ai/dsh-tools' |
拉入 declaration merge,让 'tools/result' 事件有类型 |
ctx.on('tools/result', ...) |
注册监听器,卸载时自动移除 |
exec |
工具执行上下文(name、arguments、callId 等) |
result |
工具执行结果(content blocks) |
tools/result 是 emit 事件------同步广播,返回值被忽略。监听器在结果物化时触发,早于 execute 的 Promise resolve。所以上面教程原文说:
The logger fired first:
tools/resultis emitted as part of result materialization, beforeexecute's promise resolves to the caller.
组合到一起:
yaml
- name:
'@deepseek-ai/dsh-system-prompt'
- name:
'@deepseek-ai/dsh-tools'
- name:
'./tool-logger/src/index.ts'
- name:
'./greet-tool/src/index.ts'
@deepseek-ai/dsh-tools 依赖 systemPrompt 服务(工具的 schema 会进系统提示),所以必须列出 dsh-system-prompt。不列的话,tools 插件会 PENDING。
运行结果:
bash
[tool-logger] greet -> Hello, Cordis!
tool replied: [{"type":"text","text":"Hello, Cordis!"}]
两个插件互不知道对方存在------registry 服务和事件把它们连起来。这就是松耦合扩展的威力。
10.4 打包成 Bundle
本地 --patch 够用了,但如果要分享插件或安装到不同环境,需要打包成 bundle。
参考 docs/user/develop/basic/publish.md,一个 bundle 的结构:
bash
greet-plugin/
├── package.json       # 声明 dsh.bundle
├── cordis.patch.yml   # 配置层
└── index.js # 插件代码package.json:
json
{
  "name": "dsh-greet-plugin",
  "version": "0.1.0",
  "type": "module",
  "main": "index.js",
  "files": ["index.js", "cordis.patch.yml"],
  "dsh": { "bundle": { "patch": "./cordis.patch.yml" } }
}
dsh.bundle 声明告诉 dsh 这是一个 bundle 包,patch 指向配置层文件。
index.js:
js
export const name = 'greet-plugin'

export function apply() {
  console.log('[greet-plugin] plugin loaded!')
}cordis.patch.yml:
yaml
- insert:
    - id:
greet
      name:
dsh-greet-plugin
注意 name 从相对路径变成了 npm 包名------Node 解析机制会在 node_modules 里找到已安装的包。
10.5 安装到 Profile
bundle 打好了,安装到 profile 里。profile 是 dsh 的可运行组合,由一组 bundle 组成。
安装命令(docs/user/develop/basic/publish.md):
sh
dsh plugin --profile demo add ./greet-plugin首次使用会初始化 profile,自动添加 @deepseek-ai/dsh-base 作为第一个 bundle。安装后 profile 的 package.json 长这样:
json
{
  "name": "dsh-profile-demo",
  "private": true,
  "dependencies": {
    "dsh-greet-plugin": "link:/path/to/greet-plugin"
  },
  "dsh": {
    "profile": {
      "bundles": [
        "@deepseek-ai/dsh-base",
        "dsh-greet-plugin"
      ]
    }
  }
}
验证配置:
sh
dsh --profile demo --dump-config
# 输出中会看到 "# == dsh-greet-plugin" 层
启动:
sh
dsh --profile demo10.6 配置层加载顺序
理解配置层的加载顺序至关重要(docs/user/develop/basic/publish.md):
bash
1. 每个 bundle 的 patch(按 dsh.profile.bundles 列表顺序)
   @deepseek-ai/dsh-base 先,然后每个安装的 bundle

2. profile 自己的 cordis.patch.yml
   (用户级配置)

3. $DSH_HOME/cordis.patch.yml
   (机器级偏好,所有 profile 共享)

4. 每个 --patch <path> overlay(按命令行顺序)
(临时叠加)关键规则:后层覆盖前层,按 id 匹配行,替换整个 config 值------不是深合并。
两层叠加的示例:
| 层 | id | config |
|---|---|---|
| bundle 层 | greet | { greeting: 'Hello' } |
| profile 层 | greet | { greeting: 'Hi' } |
| 最终结果 | greet | { greeting: 'Hi' }(整个 config 被替换) |
注意:profile 层替换了整个 config,不是把 greeting 改成 Hi 保留其他字段。如果你的 bundle 层 config 有多个字段,profile 层想改一个就必须把其他字段也写上。
金句:patch 不是深合并,是整行替换。改一个字段要把整行 config 重写------这是 dsh 的设计选择,宁可显式也不隐式。
10.7 从 GitHub 安装的构建陷阱
发布到 npm 之前,可能想从 GitHub 直接安装。有一个重要陷阱(docs/user/develop/basic/publish.md):
sh
dsh plugin --profile demo add github:you/greet-plugingit install 拉取的是源码,不是构建产物。pnpm 不会自动运行 build 脚本。TypeScript 包没有 lib/ 目录就跑不起来。
两方各需一步:
插件作者 :在 package.json 里加 prepare 脚本:
json
{
  "scripts": {
    "prepare": "tsdown src/index.ts --format esm --dts"
  }
}
pnpm 在 git install 后会运行 prepare。它必须自包含------不能假设有 monorepo 上下文。
插件用户 :pnpm >=10 默认拒绝运行 git 依赖的 prepare 脚本。需要在 profile 的 pnpm-workspace.yaml 里允许:
yaml
allowBuilds:
  dsh-greet-plugin:
true
教程明确警告:
Treat that allowance as what it is: permission to execute the package's code on your machine at install time, outside any sandbox the agent runs under.
不想让用户处理这个?发布到 npm 或发 tarball:
sh
# 发布到 npm(用户直接安装预构建代码)
npm publish

# 或发 tarball
pnpm pack
# 用户运行:dsh plugin --profile demo add ./greet-plugin-0.1.0.tgz
10.8 HMR 调试循环
开发时不需要每次改代码都重启。HMR 让你保存文件即热替换。
完整的开发循环:
| 步骤 | 命令/操作 |
|---|---|
| 1. 启动 dsh 带 patch | pnpm dsh web --patch ./greet-tool/cordis.yml |
| 2. 改代码 | 编辑 greet-tool/src/index.ts |
| 3. 保存 | HMR 自动卸载旧实例、加载新代码 |
| 4. 验证 | 浏览器里测试 |
| 5. 改配置 | 编辑 cordis.yml,HMR 也会检测 |
| 6. 诊断 PENDING | 如果插件没加载,检查 inject 的服务是否可用 |
HMR 的前提条件(docs/cordis-tutorial/06-composition-and-hmr.md):
| 条件 | 说明 |
|---|---|
| 显式 id | 没有显式 id 的条目每次读取生成新 id,被误判为删除+新增 |
| 依赖服务到位 | HMR 自身 inject 了 timer 和 logger,缺少它们 HMR 会 PENDING |
| tsx 运行 | node --import tsx 让 TypeScript 直接运行 |
10.9 完整插件检查清单
写一个 dsh 插件,检查这些项:
| 检查项 | 通过标准 |
|---|---|
| 导出 name | 诊断用的显示名称 |
| 导出 inject | 声明所有依赖的服务 |
| 导出 Config(如需配置) | Schemastery schema,不是普通对象 |
| apply(ctx, config) | 第二参数接收已校验配置 |
| 注册走 effect API | ctx.on / ctx.tools.register / ctx.plugin |
| 资源用 ctx.effect 包裹 | timer、connection、watcher 等非 Cordis 管理的资源 |
| 服务名加前缀 | 避免和 dsh 内置服务名冲突 |
| 声明合并加类型 | declare module '@deepseek-ai/cordis' |
| 不硬编码可调值 | 所有可调值都是 Config 字段 |
| 测试覆盖 | 按 docs/testing.md 的策略 |
金句:写插件不难,写对插件才难。检查清单不是形式,是血泪教训的浓缩。
本章小结
| 步骤 | 关键点 |
|---|---|
| 写工具 | defineTool + inject + apply,注册走 ctx.tools.register |
| 加配置 | 导出 Config schema(Schemastery),apply 第二参数 |
| 加监听器 | ctx.on('tools/result', ...) + import 类型声明 |
| 打包 bundle | package.json 声明 dsh.bundle + cordis.patch.yml |
| 安装 profile | dsh plugin --profile add |
| 配置层顺序 | bundle → profile → home → --patch,整行替换非深合并 |
| GitHub 安装 | 需要 prepare 脚本 + allowBuilds 允许 |
| HMR 调试 | 显式 id + 依赖服务到位 + tsx 运行 |
我是怕浪猫,第 10 章写完。从零到一个可安装的插件包,每一步都有代码和命令。照着做就能跑。
有问题评论区聊,有纠错欢迎指出。如果这篇对你有帮助,分享给也在写 dsh 插件的同事。
下一章我们深入 Cordis 的事件系统------五把钥匙怎么用,什么时候用哪种。