
🎬 个人主页 :MSTcheng · CSDN
🌱 代码仓库 :MSTcheng · Gitee
🔥 精选专栏 : 《C语言》
《数据结构》
《算法学习》
《C++由浅入深》
《Linux操作系统》
💬座右铭: 路虽远行则将至,事虽难做则必成!
上一篇文章中【Linux】Linux学习第三弹------Linux基本指令2我们给大家介绍了像
tree,rm,cp以及输入/输出相关的重定向等指令和概念,本篇文章我们就来介绍设计到文件操作的相关指令以及相关概念。
Linux指令相关联的文章:
【Linux学习】Linux学习第二弹------Linux基本指令1
【Linux学习】Linux学习第三弹------Linux基本指令2
文章目录
- [一、`file` 指令:识别文件真实类型](#一、
file指令:识别文件真实类型) -
- [1. 演示](#1. 演示)
- 2.解释:
- [3.也可使用 `cat` 查看文件内容](#3.也可使用
cat查看文件内容)
- [二、查看大文件:`head` / `tail` / `more` / `less`](#二、查看大文件:
head/tail/more/less) -
- [1. 为什么需要它们](#1. 为什么需要它们)
- [2. `head`:看文件开头](#2.
head:看文件开头) - [3. `tail`:看文件末尾](#3.
tail:看文件末尾) - [4. `more` / `less`:分页查看](#4.
more/less:分页查看) - [1. `which`:查找命令在哪](#1.
which:查找命令在哪) - [2. `whereis`:查找命令及相关文件](#2.
whereis:查找命令及相关文件) - [3. `find`:按条件查找文件](#3.
find:按条件查找文件) - [4. `grep`:按内容查找](#4.
grep:按内容查找) - [5. 管道 `|`:让命令串联起来](#5. 管道
|:让命令串联起来)
- [五、管道 `|`:一个命令的输出,喂给下一个命令 本节重点⭐⭐⭐](#五、管道
|:一个命令的输出,喂给下一个命令 本节重点⭐⭐⭐) -
- [1. 概念](#1. 概念)
- [2. 在上面一篇文章中我们介绍过`Linux一切皆文件`,那管道是文件吗?](#2. 在上面一篇文章中我们介绍过
Linux一切皆文件,那管道是文件吗?) - [3. 重定向 vs 管道(高频辨析)](#3. 重定向 vs 管道(高频辨析))
- [六、压缩与解压指令:`zip` / `unzip` / `tar`](#六、压缩与解压指令:
zip/unzip/tar) -
- [1. 为什么需要压缩](#1. 为什么需要压缩)
- [2. `zip`:压缩成 .zip 包](#2.
zip:压缩成 .zip 包) - [3. `unzip`:解压 .zip 包](#3.
unzip:解压 .zip 包) - [4. `tar`:打包 + 压缩(Linux 最常用)](#4.
tar:打包 + 压缩(Linux 最常用))
- [七、上传 / 下载文件:`rz` / `sz`(重点)](#七、上传 / 下载文件:
rz/sz(重点)) -
- [1. 为什么需要它们](#1. 为什么需要它们)
- [2. `rz`:把文件从 Windows 传到 Linux(上传)](#2.
rz:把文件从 Windows 传到 Linux(上传)) - [3. `sz`:把文件从 Linux 传到 Windows(下载)](#3.
sz:把文件从 Linux 传到 Windows(下载)) - [4. 重点总结:`rz` / `sz` 使用要点](#4. 重点总结:
rz/sz使用要点)
- [八、系统信息查看:`top` / `htop` / `uname` / `date`](#八、系统信息查看:
top/htop/uname/date) -
- [1. `top`:实时查看系统状态](#1.
top:实时查看系统状态) - [2. `htop`:`top` 的升级版(更友好)](#2.
htop:top的升级版(更友好)) - [3. `uname -r`:查看内核版本](#3.
uname -r:查看内核版本) - [4. `date`:查看 / 设置系统时间](#4.
date:查看 / 设置系统时间)
- [1. `top`:实时查看系统状态](#1.
- 九、总结
一、file 指令:识别文件真实类型
1. 演示
bash
mstcheng@ubuntu-dev:~/117/code$ ll
total 44
drwxrwxr-x  8 mstcheng mstcheng 4096 Sep  6 22:50 ./
drwxrwxr-x  5 mstcheng mstcheng 4096 Aug 28 15:02 ../
drwxrwxr-x  2 mstcheng mstcheng 4096 Oct 28  2025 cgdbtest/
-rw-rw-r--  1 mstcheng mstcheng   75 Sep  6 22:50 code.c
drwxrwxr-x 18 mstcheng mstcheng 4096 Jul 18 15:22 linux-code/
drwxrwxr-x  2 mstcheng mstcheng 4096 Oct 28  2025 list/
-rw-rw-r--  1 mstcheng mstcheng  533 Oct 17  2025 makefile
drwxrwxr-x  2 mstcheng mstcheng 4096 Oct 21  2025 procbar/
drwxrwxr-x  2 mstcheng mstcheng 4096 Aug 29 18:06 test1/
drwxrwxr-x  2 mstcheng mstcheng 4096 Nov 23  2025 testCode/
-rw-rw-r--  1 mstcheng mstcheng   30 Sep  1 18:25 tmp.txt

mstcheng@ubuntu-dev:~/117/code$ file code.c
code.c: C source, ASCII text

//将.c文件编译成可执行文件 注意Linux系统下可执行文件不是.exe后缀
//Linux系统下可以任意后缀!!后面会介绍!
mstcheng@ubuntu-dev:~/117/code$ gcc code.c -o code.exe

mstcheng@ubuntu-dev:~/117/code$ file code.exe
code.exe: ELF 64-bit LSB pie executable, x86-64, version 1 (SYSV), dynamically linked, interpreter /lib64/ld-linux-x86-64.so.2, BuildID[sha1]=a649fb372ce907f0e30dba78e795f88f3afada95, for GNU/Linux 3.2.0, not stripped

mstcheng@ubuntu-dev:~/117/code$ file tmp.txt
tmp.txt: ASCII text
2.解释:
file 文件名:不看后缀,通过读取文件内容的特征,告诉你这个文件真正是什么。code.c→C source, ASCII text:是一个C 语言源码文件(ASCII 文本)。my.exe→ELF 64-bit LSB executable, x86-64 ...:是一个 64 位 x86-64 架构的 ELF 可执行程序 (ELF就是 Linux 下可执行文件的格式,等价于 Windows 的 PE/.exe)。tmp.txt→ASCII text:是一个 纯文本文件 (虽然后缀是.txt,但file指令不看后缀,直接根据内容特征识别出它是 ASCII 文本)。
3.也可使用 cat 查看文件内容
bash
mstcheng@ubuntu-dev:~/117/code$ cat code.c
#include <stdio.h>
int main()
{
    printf("hello Linux\n");
     return 0;
}
cat 文件名:把文件内容原样打印到屏幕上(查看文件内容的命令)。- 这里
code.c里实际装的是一段 C 语言代码。
二、查看大文件:head / tail / more / less
1. 为什么需要它们
cat会把整个文件刷屏,大文件(如日志)必须"按需查看"。- 这一组指令归类为:"查看大文件 / 日志文件!"类指令
例如:
bash
//使用脚本往tmp.txt里面写了1000个hello Linux
mstcheng@ubuntu-dev:~/117/code$ ./write_hello.sh
write 1000 row done! you can search!
1000 tmp.txt

//如果使用cat命令 1000行hello Linux瞬间刷屏非常不方便看
mstcheng@ubuntu-dev:~/117/code$ cat tmp.txt
hello Linux
hello Linux
hello Linux
hello Linux
......因此下面的head / tail / more / less 这些命令才是我们查看大文件的正确姿势!
2. head:看文件开头
- 作用:作用:查看文件**前面(开头)**部分。
- 演示上面那个
tmp.txt文件:
bash
mstcheng@ubuntu-dev:~/117/code$ head tmp.txt
hello Linux
hello Linux
hello Linux
hello Linux
hello Linux
hello Linux
hello Linux
hello Linux
hello Linux
hello Linux
mstcheng@ubuntu-dev:~/117/code$

//上面默认是显示前10行 你也可以指定看前n行!
mstcheng@ubuntu-dev:~/117/code$ head -20 tmp.txt
hello Linux
hello Linux
hello Linux
hello Linux
hello Linux
hello Linux
hello Linux
hello Linux
hello Linux
hello Linux
hello Linux
hello Linux
hello Linux
hello Linux
hello Linux
hello Linux
hello Linux
hello Linux
hello Linux
hello Linux
mstcheng@ubuntu-dev:~/117/code$ - 常用写法:
head -n 文件(看前 n 行);默认看前 10 行。
3. tail:看文件末尾
- 作用 :查看文件末尾部分。
- 演示:
bash
//默认查的是倒数后10行
mstcheng@ubuntu-dev:~/117/code$ tail tmp.txt
990 hello Linux
991 hello Linux
992 hello Linux
993 hello Linux
994 hello Linux
995 hello Linux
996 hello Linux
997 hello Linux
998 hello Linux
999 hello Linux
mstcheng@ubuntu-dev:~/117/code$

mstcheng@ubuntu-dev:~/117/code$ tail -20 tmp.txt
980 hello Linux
981 hello Linux
982 hello Linux
983 hello Linux
984 hello Linux
985 hello Linux
986 hello Linux
987 hello Linux
988 hello Linux
989 hello Linux
990 hello Linux
991 hello Linux
992 hello Linux
993 hello Linux
994 hello Linux
995 hello Linux
996 hello Linux
997 hello Linux
998 hello Linux
999 hello Linux
mstcheng@ubuntu-dev:~/117/code$ - 常用写法:
tail -n 11 文件(看最后 11 行);默认看最后 10 行。 - 重点应用 :
tail -f 文件名可以实时跟踪文件末尾新增内容(查看正在不断增长的日志)------生产环境看日志神器。
4. more / less:分页查看
-
"more or less。"
-
less 文件名:分页显示,支持:- 上下方向键 翻页/滚动
/搜索关键字搜索并高亮- 回车,n :回车看下一行;按
n跳到下一个匹配 q退出
演示:
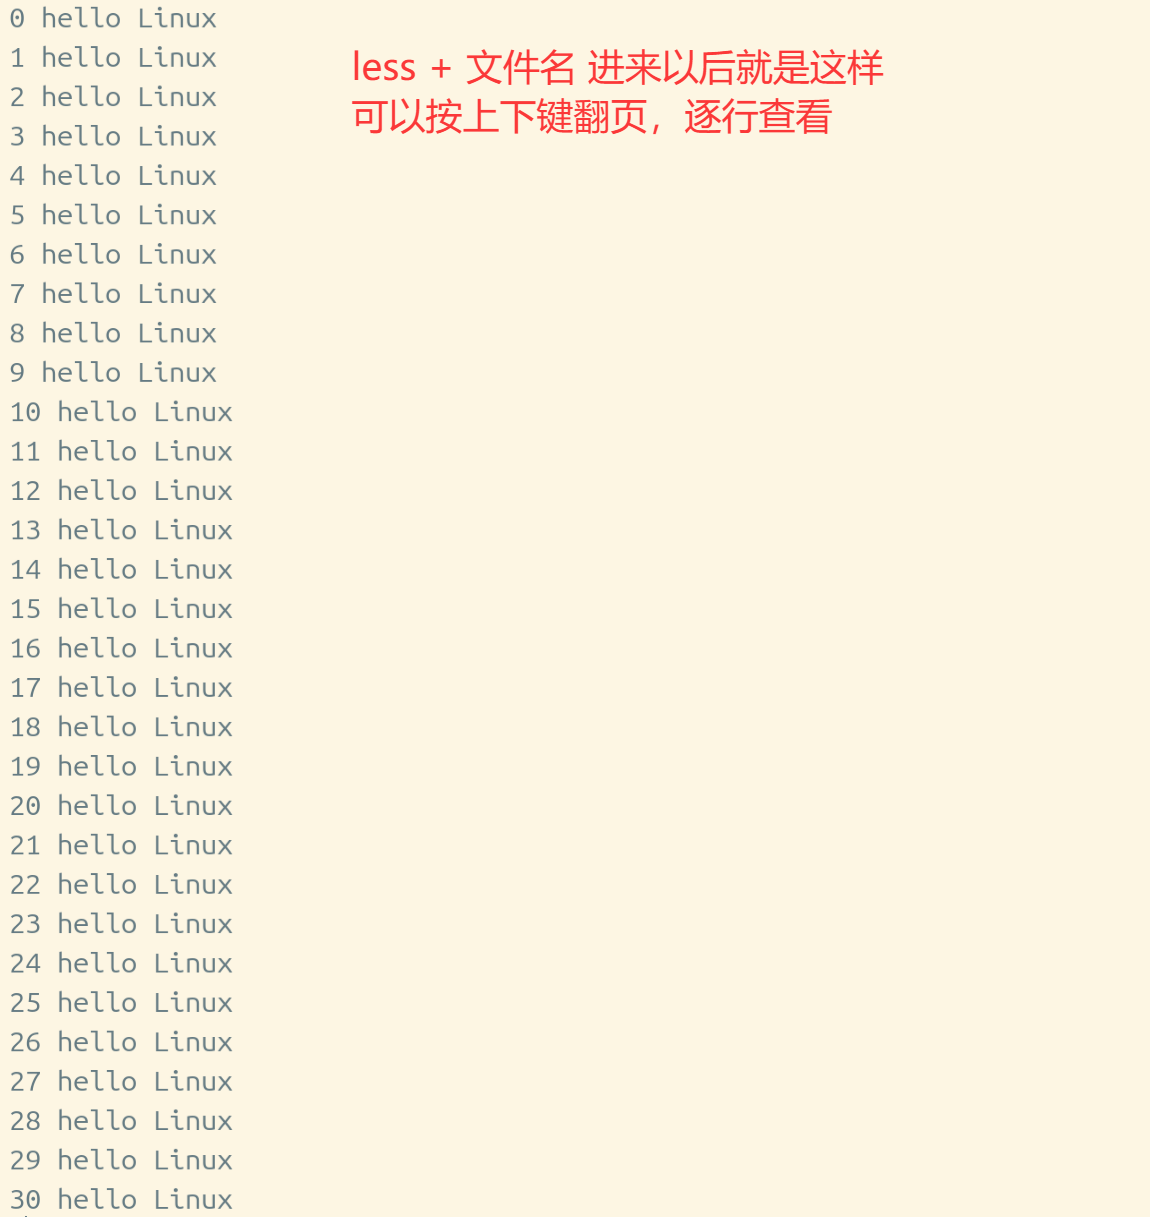
-
more是 less 的老大哥,功能更少(只能往下翻);more VS lessless更强大,支持回翻和搜索。
如果忘记了相关参数,可以直接使用
man来查看对应的手册! # 三、查找文件 / 内容:find/whereis/which/grep与管道ch`
1. which:查找命令在哪
- 作用:查看某个 命令(可执行程序) 所在的路径。
- 演示:
bash
mstcheng@ubuntu-dev:~/117/code$ which gcc
/usr/bin/gcc

mstcheng@ubuntu-dev:~/117/code$ which ls
/usr/bin/ls- 解释:
which 命令名会去环境变量PATH(后面会介绍到)对应的目录里,找到第一个匹配的可执行文件并返回路径。目前就记住这个命令能够查文件路径! - 常用写法:
which 命令名。
2. whereis:查找命令及相关文件
- 作用:查找命令的二进制文件、帮助手册等关联文件。
- 演示:
bash
mstcheng@ubuntu-dev:~/117/code$ whereis gcc
gcc: /usr/bin/gcc /usr/lib/gcc /usr/share/man/man1/gcc.1.gz

mstcheng@ubuntu-dev:~/117/code$ whereis find
find: /usr/bin/find /usr/share/man/man1/find.1.gz- 解释:
whereis除了找可执行文件,还会顺带找出手册页 等资料,适合快速定位一个命令的安装位置。 - 常用写法:
whereis 命令名。
3. find:按条件查找文件
- 作用:强大的文件查找命令,可以按文件名、类型、时间、大小等条件递归查找。
- 演示:
bash
//在当前目录下查找名为 code.c 的文件
mstcheng@ubuntu-dev:~/117/code$ find . -name "code.c"
./code.c

//查找所有 .txt 文件
mstcheng@ubuntu-dev:~/117/code$ find . -name "*.txt"
./tmp.txt- 常用写法:
find 路径 -name "文件名":按名字查找,支持通配符*。-type f:只查找普通文件。-type d:只查找目录。- 示例:
find . -type f -name "*.c"表示查找当前目录下所有.c文件。
- 区别记忆:
which/whereis主要用来找命令 ,而find用来找任意文件。
4. grep:按内容查找
- 作用 :前面
find主要按文件名、类型、时间、大小 等条件找文件;grep则是在文件内容 里查找包含某个关键字的行,属于"按内容查找"。 - 演示:继续拿刚才的
tmp.txt举例,查找包含hello的行:
bash
//在 tmp.txt 中查找包含 hello 的行
mstcheng@ubuntu-dev:~/117/code$ grep "hello" tmp.txt
hello Linux
hello Linux
hello Linux
hello Linux
......


- 常用写法:`grep "关键字" 文件名`。
- 解释:`grep` 会把文件中**包含关键字的每一行**打印出来;如果文件很大,匹配行很多,直接输出仍然会刷屏。
- 补充几个常用选项:

```bash

//先准备一个包含大小写、不同内容的测试文件
mstcheng@ubuntu-dev:~/117/code$ cat > hello.txt << EOF
Hello Linux
hello world
HELLO linux
hello Linux
goodbye Linux
EOF

//-i:忽略大小写,Hello / HELLO / hello 都算匹配
mstcheng@ubuntu-dev:~/117/code$ grep -i "hello" hello.txt
Hello Linux
hello world
HELLO linux
hello Linux

//-n:顺便输出行号
mstcheng@ubuntu-dev:~/117/code$ grep -n "hello" hello.txt
2:hello world
4:hello Linux

//-v:反向选择,只显示没有 "hello" 内容的那一行
mstcheng@ubuntu-dev:~/117/code$ grep -v "hello" hello.txt
Hello Linux
HELLO linux
goodbye Linux-i:忽略大小写,所以大小写视为相同。-n:顺便输出行号。-v:反向选择,显示出没有搜索字符串内容的那一行。
屏。
5. 管道 |:让命令串联起来
- 问题 :像上面的
grep "hello" tmp.txt,如果匹配了 1000 行,命令行还是会刷屏,怎么办? - 管道符
|:把左边命令的输出** ,作为**右边命令的输入****,这样就可以把grep和其他命令配合使用。
bash
//grep 查找后,只显示前 10 行
mstcheng@ubuntu-dev:~/117/code$ grep "hello" tmp.txt | head
hello Linux
hello Linux
hello Linux
hello Linux
hello Linux
hello Linux
hello Linux
hello Linux
hello Linux
hello Linux

//数一数 tmp.txt 里有多少行包含 hello
mstcheng@ubuntu-dev:~/117/code$ grep "hello" tmp.txt | wc -l
1000- 解释:
grep "hello" tmp.txt | head:grep输出的结果通过|交给head,所以只显示前 10 行,不再刷屏。grep "hello" tmp.txt | wc -l:grep的结果交给wc -l,统计一共有多少行。- 这里
wc -l表示"统计行数"。
- 总结 :管道
|把多个简单命令串联成一条"流水线":前一个命令的输出,自动成为后一个命令的输入。grep负责过滤内容,head、wc -l等命令负责进一步处理。
那么什么是管道呢?下面就来学习一下:
五、管道 |:一个命令的输出,喂给下一个命令 本节重点⭐⭐⭐
1. 概念
- "管道:既是入口 也是出口,它是传送资源的!
- 管道
|的作用 :把左边命令的输出 ,当作右边命令的输入。 - 形象理解:一根管子把两个命令"接"起来,左边的结果流进右边的入口。
2. 在上面一篇文章中我们介绍过Linux一切皆文件,那管道是文件吗?
- 答案:是,但也不是普通文件 。在 "一切皆文件" 的意义下,管道也是一种文件/文件接口;但它和普通文件有本质区别------
- 管道的特点:"内存级" 。管道是内存中的缓冲区,数据不落盘(不会写进磁盘),命令执行完就没了。
- 对比 :重定向
>是"写进 磁盘 上的文件", 管道|是"直接传给下一个命令(内存中转)"。
3. 重定向 vs 管道(高频辨析)
| | 重定向 >/>> | 管道 | |
|--------|--------------|-------------------|
| 连接对象 | 命令 与 文件 | 命令 与 命令 |
| 数据去向 | 写入磁盘文件 | 传给下一个命令(内存缓冲) |
| 数据是否落盘 | 落盘 | 不落盘(内存级) |
六、压缩与解压指令:zip / unzip / tar
1. 为什么需要压缩
- 前面我们学了
cp复制、mv移动,但 文件多了、大了,传输和备份都很麻烦。 - 压缩 :把多个文件/目录"打包"并压缩体积,方便传输、备份、归档。
- 所以这一组指令归类为:"压缩 / 解压!"类指令。
2. zip:压缩成 .zip 包
- 作用 :把文件或目录压缩 成一个
.zip压缩包(Windows 也能直接打开)。 - 演示:
bash
mstcheng@ubuntu-dev:~/117/code$ ll
total 76
drwxrwxr-x  8 mstcheng mstcheng  4096 Sep  6 23:24 ./
drwxrwxr-x  5 mstcheng mstcheng  4096 Aug 28 15:02 ../
drwxrwxr-x  2 mstcheng mstcheng  4096 Oct 28  2025 cgdbtest/
-rw-rw-r--  1 mstcheng mstcheng    75 Sep  6 22:50 code.c
-rwxrwxr-x  1 mstcheng mstcheng 15952 Sep  6 22:51 code.exe*
drwxrwxr-x 18 mstcheng mstcheng  4096 Jul 18 15:22 linux-code/
drwxrwxr-x  2 mstcheng mstcheng  4096 Oct 28  2025 list/
-rw-rw-r--  1 mstcheng mstcheng   533 Oct 17  2025 makefile
drwxrwxr-x  2 mstcheng mstcheng  4096 Oct 21  2025 procbar/
drwxrwxr-x  2 mstcheng mstcheng  4096 Aug 29 18:06 test1/
drwxrwxr-x  2 mstcheng mstcheng  4096 Nov 23  2025 testCode/
-rw-rw-r--  1 mstcheng mstcheng 15890 Sep  6 23:25 tmp.txt
-rwxrwxr-x  1 mstcheng mstcheng   174 Sep  6 23:24 write_hello.sh*


//把 code.c 和 tmp.txt 压缩成一个 code.zip
mstcheng@ubuntu-dev:~/117/code$ zip code.zip code.c tmp.txt
  adding: code.c (deflated 5%)
  adding: tmp.txt (deflated 86%)


//把整个目录递归压缩(-r 表示递归,把目录里的所有文件都打进去)
mstcheng@ubuntu-dev:~/117/code$ zip test.zip -r test1
  adding: test1/ (stored 0%)
  adding: test1/code.exe (deflated 86%)

......- 常用写法:
zip 压缩包名.zip 文件1 文件2:压缩多个文件。zip -r 压缩包名.zip 目录名:递归 压缩整个目录(-r必须加,否则目录是空的)。
- 解释 :
zip会生成一个.zip后缀的压缩包,原文件还在,不会消失。
其实就是相当于你在windows选中几个文件然后右键点击压缩。
3. unzip:解压 .zip 包
- 作用 :把
.zip压缩包解压出来,还原成原来的文件/目录。 - 演示:
bash
//把 code.zip 解压到当前目录
mstcheng@ubuntu-dev:~/117/code$ unzip code.zip
Archive:  code.zip
  inflating: code.c
  inflating: tmp.txt

//解压到指定目录(-d 指定解压路径)
mstcheng@ubuntu-dev:~/117/code$ unzip code.zip -d mydir/- 常用写法:
unzip 压缩包名.zip:解压到 当前目录。unzip 压缩包名.zip -d 目录名:解压到 指定目录(目录不存在会自动创建)。
- 解释 :
unzip会把压缩包里的文件还原 出来;如果解压时提示command not found,说明还没安装,用sudo apt install zip unzip安装即可。
4. tar:打包 + 压缩(Linux 最常用)
- 作用 :
tar是 Linux 下最常用 的打包/压缩工具,既能打包 (把多个文件合成一个),也能配合gzip实现压缩。 - 演示:
bash
//打包并压缩成 .tar.gz(-c 创建,-z 用 gzip 压缩,-v 显示过程,-f 指定文件名)
mstcheng@ubuntu-dev:~/117/code$ tar -czvf code.tar.gz code.c tmp.txt
code.c
tmp.txt

//解压 .tar.gz(-x 解压,-z 解压 gzip,-v 显示过程,-f 指定文件名)
mstcheng@ubuntu-dev:~/117/code$ tar -xzvf code.tar.gz
code.c
tmp.txt

//只打包不压缩(生成 .tar,体积不减小,只是把多个文件合成一个)
mstcheng@ubuntu-dev:~/117/code$ tar -cvf code.tar code.c tmp.txt
code.c
tmp.txt- 常用写法(记口诀:
czvf打包,xzvf解包 ):tar -czvf 包名.tar.gz 文件/目录:打包 + 压缩(最常用)。tar -xzvf 包名.tar.gz:解压。tar -cvf 包名.tar 文件/目录:只打包不压缩。
- 解释 :
tar本身只负责"打包",-z才调用gzip压缩;所以.tar.gz才是"打包 + 压缩"的完整形态。 - 区别记忆:
zip是"压缩 + 打包一步到位",tar是"先打包、再压缩",Linux 服务器上tar.gz更常见。
七、上传 / 下载文件:rz / sz(重点)
1. 为什么需要它们
- 前面学的都是在 Linux 内部 操作文件;但实际中,我们经常需要在 Windows 和 Linux 之间传文件。
rz/sz就是配合 Xshell / SecureCRT 等终端工具 ,在本地 Windows 和远程 Linux 之间互传文件的神器。- 这一组指令归类为:"本地 ↔ 远程 传文件!"类指令。
2. rz:把文件从 Windows 传到 Linux(上传)
- 作用 :
rz(receive Zmodem)接收 文件,把本地 Windows 上的文件上传到远程 Linux。 - 演示:
bash
//在 Linux 终端输入 rz,回车后会弹出 Windows 的文件选择框
mstcheng@ubuntu-dev:~/117/code$ rz

//选择 Windows 上的 test.txt,上传完成后 Linux 当前目录就多了一个 test.txt
mstcheng@ubuntu-dev:~/117/code$ ls
test.txt code.c tmp.txt- 常用写法:
rz(直接回车,会弹出文件选择框,选完自动上传)。 - 解释 :
rz上传的文件会 保存在当前目录;上传时 同名文件会覆盖,注意别传错。
3. sz:把文件从 Linux 传到 Windows(下载)
- 作用 :
sz(send Zmodem)发送 文件,把远程 Linux 上的文件下载到本地 Windows。 - 演示:
bash
//把 Linux 上的 code.c 下载到 Windows(会弹出保存位置选择框)
mstcheng@ubuntu-dev:~/117/code$ sz code.c

//也可以一次下载多个文件
mstcheng@ubuntu-dev:~/117/code$ sz code.c tmp.txt- 常用写法:
sz 文件名(可一次传多个文件,用空格隔开)。 - 解释:
sz下载的文件会保存到 Windows 上你选择的位置;下载目录可以在 Xshell 的"文件传输"设置里改。
4. 重点总结:rz / sz 使用要点
rz= 上传 (Receive,Windows → Linux);sz= 下载 (Send,Linux → Windows)。- 前提:必须使用 Xshell / SecureCRT 等支持 Zmodem 协议的终端工具,纯命令行(如直接 SSH)不支持。
- 如果提示
command not found,先安装:sudo apt install lrzsz。 - 对比记忆 :
rz/sz:图形化弹窗传文件,适合小文件、临时传。scp/ftp:命令行传文件,适合脚本、批量、大文件(后面会介绍)。
八、系统信息查看:top / htop / uname / date
1. top:实时查看系统状态
- 作用 :实时显示 CPU、内存、进程 等系统运行状态,相当于 Windows 的"任务管理器"。
- 演示:
bash
mstcheng@ubuntu-dev:~/117/code$ top

top - 23:26:01 up 1 day,  2:34,  1 user,  load average: 0.00, 0.01, 0.05
Tasks: 123 total,   1 running, 122 sleeping,   0 stopped,   0 zombie
%Cpu(s):  0.3 us,  0.3 sy,  0.0 ni, 99.3 id,  0.0 wa,  0.0 hi,  0.0 si,  0.0 st
MiB Mem :   1987.3 total,    523.1 free,    812.4 used,    651.8 buff/cache
MiB Swap:   2048.0 total,   2048.0 free,      0.0 used   2048.0 avail Mem

    PID USER      PR  NI    VIRT    RES    SHR S  %CPU  %MEM     TIME+ COMMAND
   1234 mstcheng  20   0  168432   9876   7654 S   0.3   0.5   0:01.23 bash
   5678 mstcheng  20   0  245678  12345   9876 S   0.0   0.6   0:02.45 top
......- 常用写法:
top(直接回车进入实时监控界面,按q退出)。 - 解释:
top会每隔几秒自动刷新 一次,展示当前系统最耗资源的进程排行;按q退出,按1可以查看每个 CPU 核心的使用情况。
2. htop:top 的升级版(更友好)
- 作用 :
htop是top的升级版 ,界面更美观、支持鼠标操作 和彩色显示,看起来更直观。 - 演示:
bash
mstcheng@ubuntu-dev:~/117/code$ htop

  1  [|                                     0.3%]     Tasks: 123, 122 thr; 1 running
  2  [|                                     0.3%]     Load average: 0.00 0.01 0.05
  Mem[|||||||||||||||||||||||||||||||||  812M/1987M]     Uptime: 1 day, 02:34:00
  Swp[                                       0K/2048M]

  PID USER      PRI  NI  VIRT   RES   SHR S CPU% MEM%   TIME+  Command
 1234 mstcheng   20   0 168M 9876 7654 S  0.3  0.5  0:01.23 bash
 5678 mstcheng   20   0 245M 12345 9876 S  0.0  0.6  0:02.45 htop
......- 常用写法:
htop(直接回车进入,按q退出,按F10也可以退出)。 - 解释:
htop顶部用彩色进度条 直观展示 CPU 和内存占用,下面进程列表支持上下键选择、F9 直接杀进程 ,比top更人性化。 - 如果提示
command not found,先安装:sudo apt install htop。
3. uname -r:查看内核版本
- 作用 :
uname用来查看系统信息 ,其中uname -r专门查看 Linux 内核版本号。 - 演示:
bash
mstcheng@ubuntu-dev:~/117/code$ uname -r
7.0.0-30-generic- 常用写法:
uname -r(查看内核版本);uname -a(查看全部系统信息,包括主机名、内核、架构等)。 - 解释:
uname -r输出的就是当前系统的内核版本 ,比如7.0.0-30-generic是 Ubuntu 常见的内核版本号;排查驱动、内核相关问题时经常用到。
4. date:查看 / 设置系统时间
- 作用 :查看当前系统日期和时间,也可以按指定格式输出。
- 演示:
bash
mstcheng@ubuntu-dev:~/117/code$ date
2026年 09月 07日 星期一 23:26:01 CST

//按指定格式输出(+ 后面跟格式符)
mstcheng@ubuntu-dev:~/117/code$ date "+%Y-%m-%d %H:%M:%S"
2026-09-07 23:26:01- 常用写法:
date(直接查看当前时间);date "+%Y-%m-%d %H:%M:%S"(按年-月-日 时:分:秒格式输出)。 - 解释:
date默认输出当前系统时间;配合+和格式符可以自定义输出格式 ,比如%Y表示年份、%m表示月份、%d表示日期,在写脚本生成带时间戳的文件名时非常常用。
九、总结
本篇文章围绕 Linux 文件操作,依次介绍了:
1、用
file识别文件真实类型、用head/tail/more/less查看大文件;2、用
find/whereis/which/grep查找文件与内容、用管道|串联命令3、用
zip/unzip/tar压缩解压;4、用
rz/sz跨系统传文件;5、用
top/htop/uname/date查看系统信息。这些指令覆盖了日常使用 Linux 最频繁的操作场景,是后续学习的基础。